
Option Group Presets (which pair nicely with Element Presets) and Design Variables are two exciting Divi 5 features that help you improve your efficiency. As you learn to work with Divi 5, you’ll experience how much quicker every website build becomes. A great way to improve efficiency is by setting Design Variables in the Global Design Variable Manager and then using those predefined values throughout your site using Presets. This is easily the most scalable way to design a website with Divi, and in this post, we’ll show you how to make the most of it.
👉 Divi 5 is ready for new websites and includes new features that Divi 4 lacks. However, we don’t recommend converting existing websites to Divi 5 just yet.
Combining Presets + Design Variables In Divi
Divi 5 introduces a new level of design modularity through Design Variables and Option Group Presets. Option Group Presets target specific style groups — like body text, spacing, borders, or filters — and can be applied across different modules. On the other hand, Element Presets store the full design configuration of a specific module or element (section/row/column/module group).
Both of these types of Presets work best when paired with Design Variables.
Design Variables live in the left-hand sidebar inside the Visual Builder (and can be docked for easy access). They allow you to define global values for fonts, colors, numbers, text strings, images, and links. Once created, these variables can be reused in any field that supports dynamic values, which now includes nearly every design field in Divi 5. Updating a Design Variable has the added benefit of updating every instance where that variable is used.
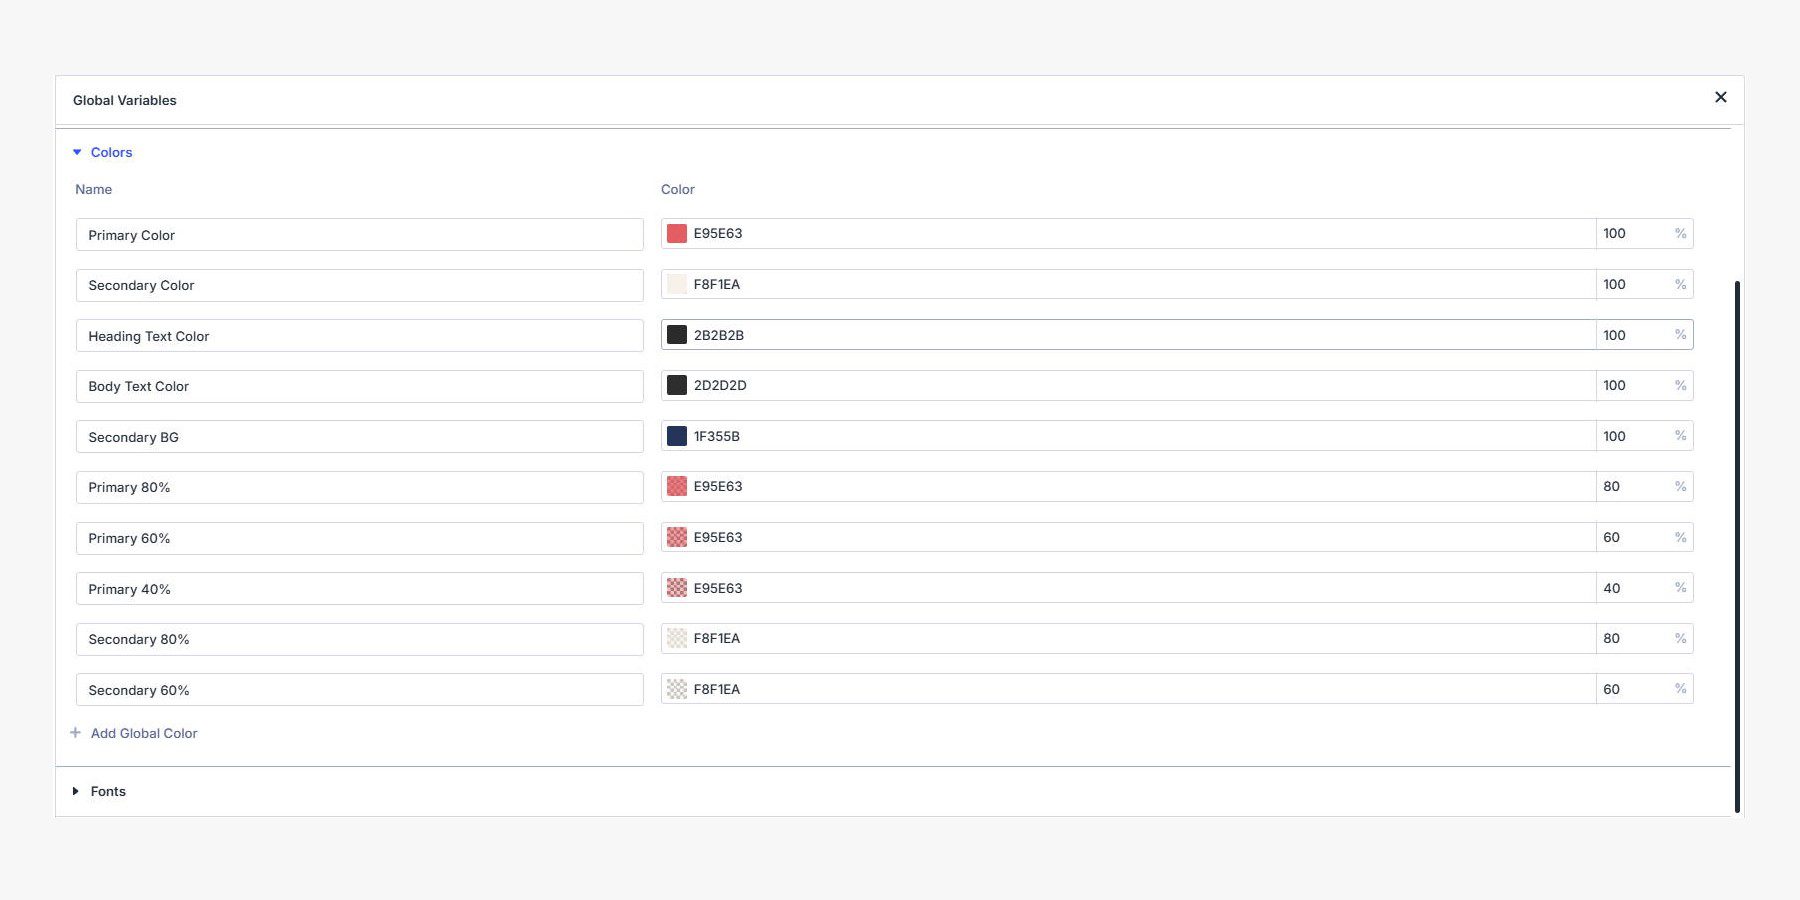
Set numbers, text, URLs, colors, fonts, and images as easily usable design variables
The most scalable workflow in Divi 5 follows a clear order of operations. First, define your global Design Variables using the new Variable Manager. Next, apply these values throughout Option Group Presets and Element Presets. You can override anything on an element level without breaking the system.
This approach gives you a stable design system that remains flexible as your content and needs evolve.
Why Combine Design Variables With Presets?
Think of Design Variables as the recurring base information & styles you’ll continually use throughout a build. Presets (Option Group or Element level) are larger groupings and can expand upon Design Variables.
Using both together can help you create a tight design system that is easy to maintain. Here’s why you use them together:
1. Rapidly Create Presets
To misquote Benjamin Franklin, “an ounce of planning is worth a pound of effort.” You can think of Design Variables as the things you create in your build’s planning and preparation phase.
It may take a little time to set up all your Variables, but when you create your Element Presets (and OG Presets), you’ll fly through them since your foundation is already in place.
2. Global Updates
Design Variables make it easy to update one repeatedly used Variable across an entire site. If you ever change your Primary Color, Heading Font, or want to change the sizing of something, you can do so from the Variable Manager. The same is true for all styles applied at the Preset level — update a single Preset and all other elements sharing the same Preset are changed.
So, whether you want to update an individual Variable or a whole Element/Option Group, both are ways of making a Global change in seconds. Between the two, that may account for over 70% of your styles (global styles = maintenance boon).
3. Forces You to Think Globally About Design
When you use these together, you force every design decision through your design grid first. This helps you be more disciplined and allows teams of designers/developers to work together better in Divi.
4. Less Page Bloat
This has productivity benefits, but it can also reduce the amount of CSS loaded on each page of your website. Presets especially reduce per-module styles that can make your stylesheets larger and larger.
Creating A Website With Design Variables & Presets
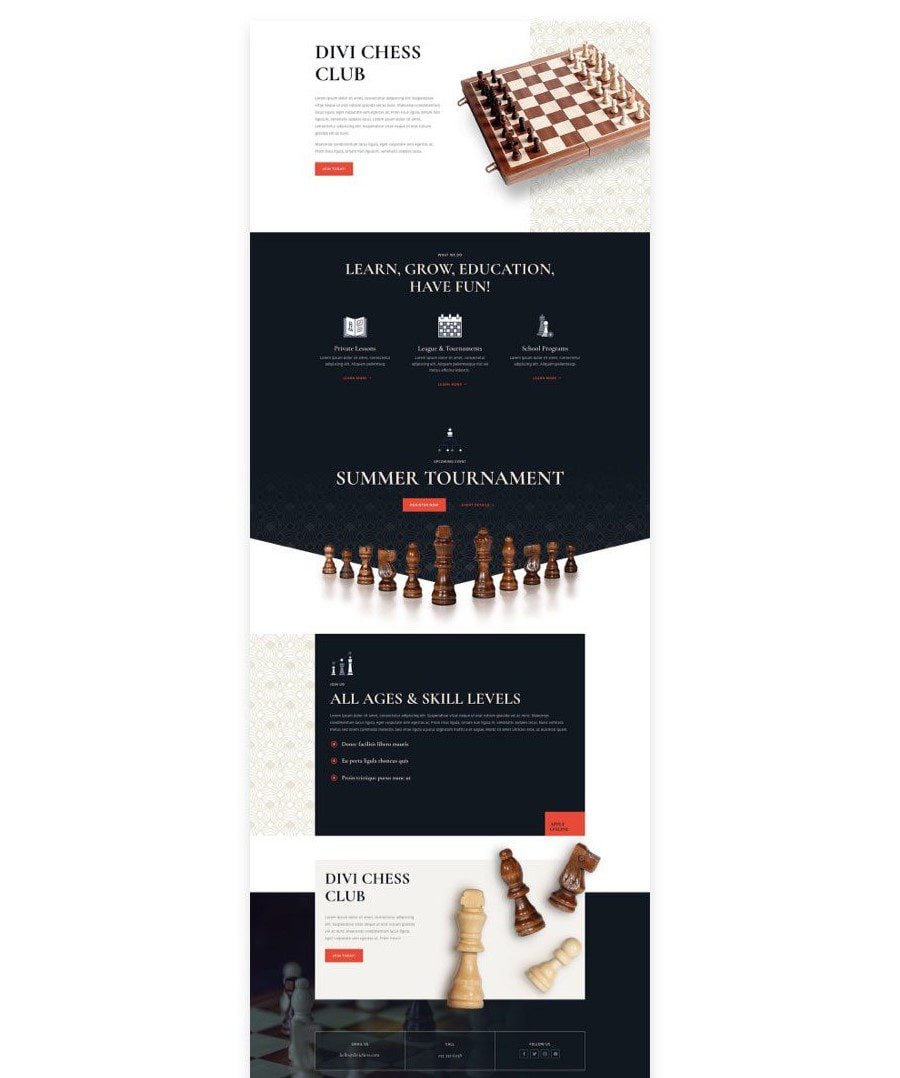
Let’s walk through a real-world example of how to use these tools to build a scalable page in Divi 5. We’ll use our Chess Club Layout Pack as inspiration and recreate it using Design Variables inside Presets.
Step 1: Define Your Design Variables
Start by opening the Design Variable Manager in the left-hand editing panel. Add your core brand colors. This usually includes a primary, a secondary, and a few supporting tones for accents, backgrounds, and text on light or dark sections.
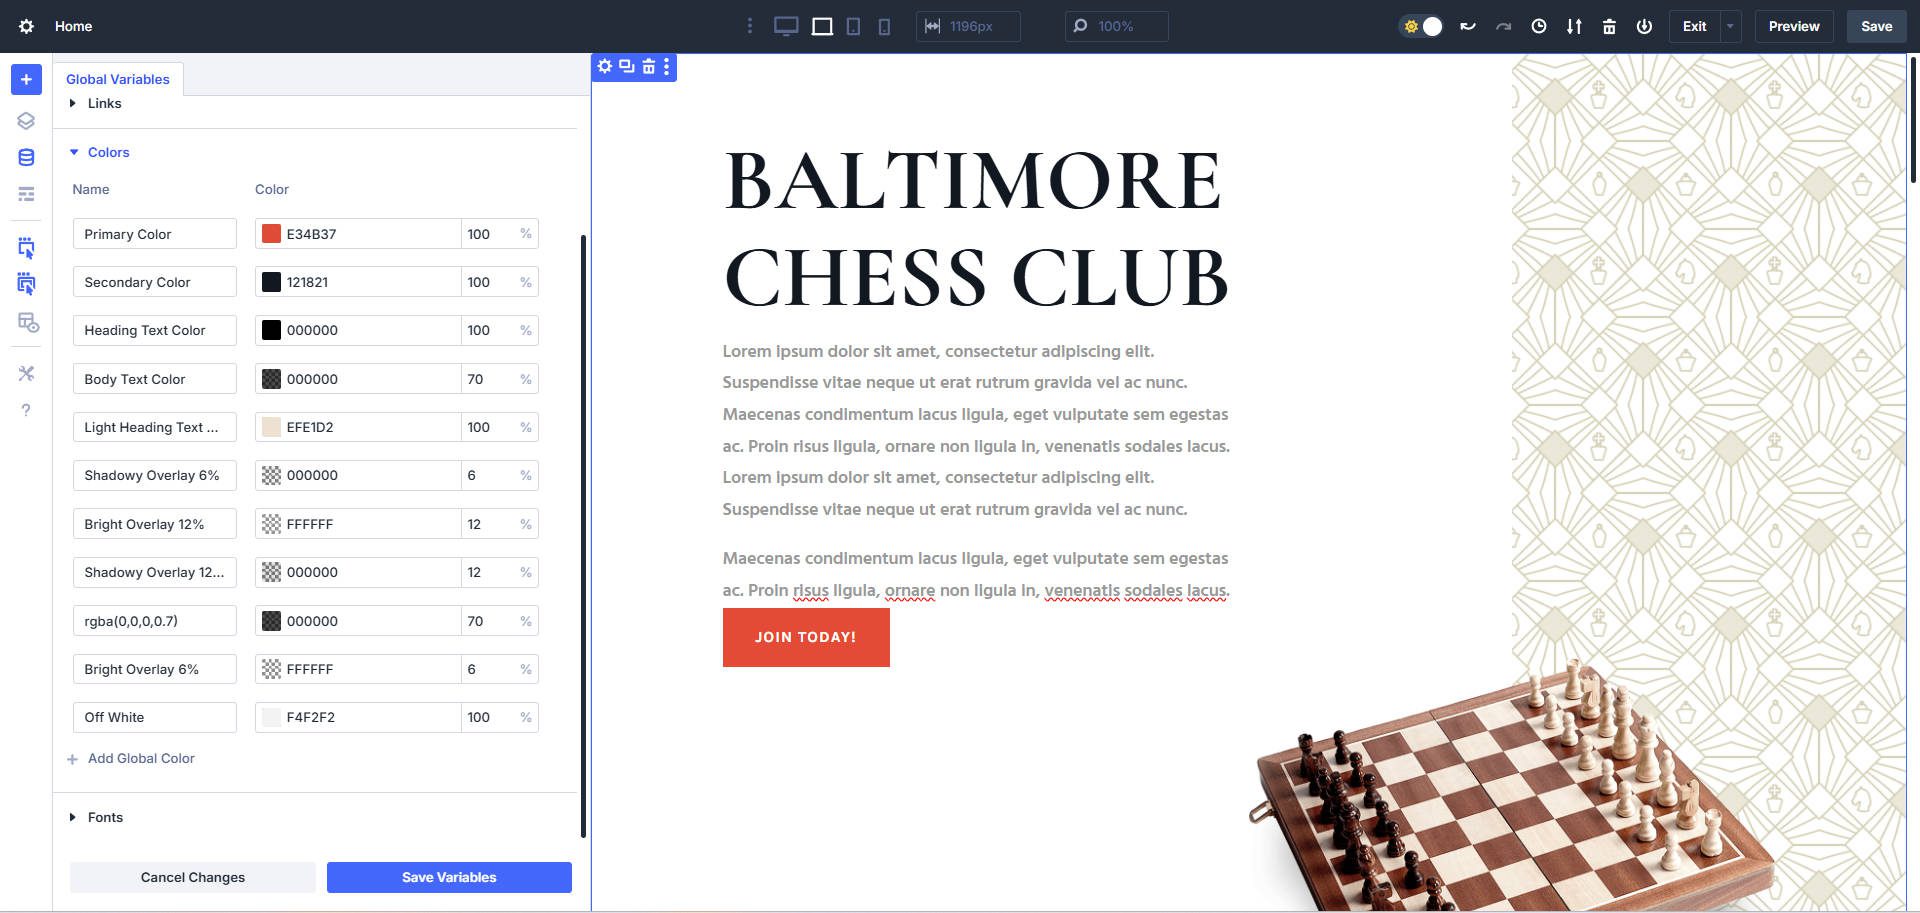
Next, set your font variables. Define at least two: one for headings and one for body text. If your brand uses a special typeface for buttons or accents, add that too.
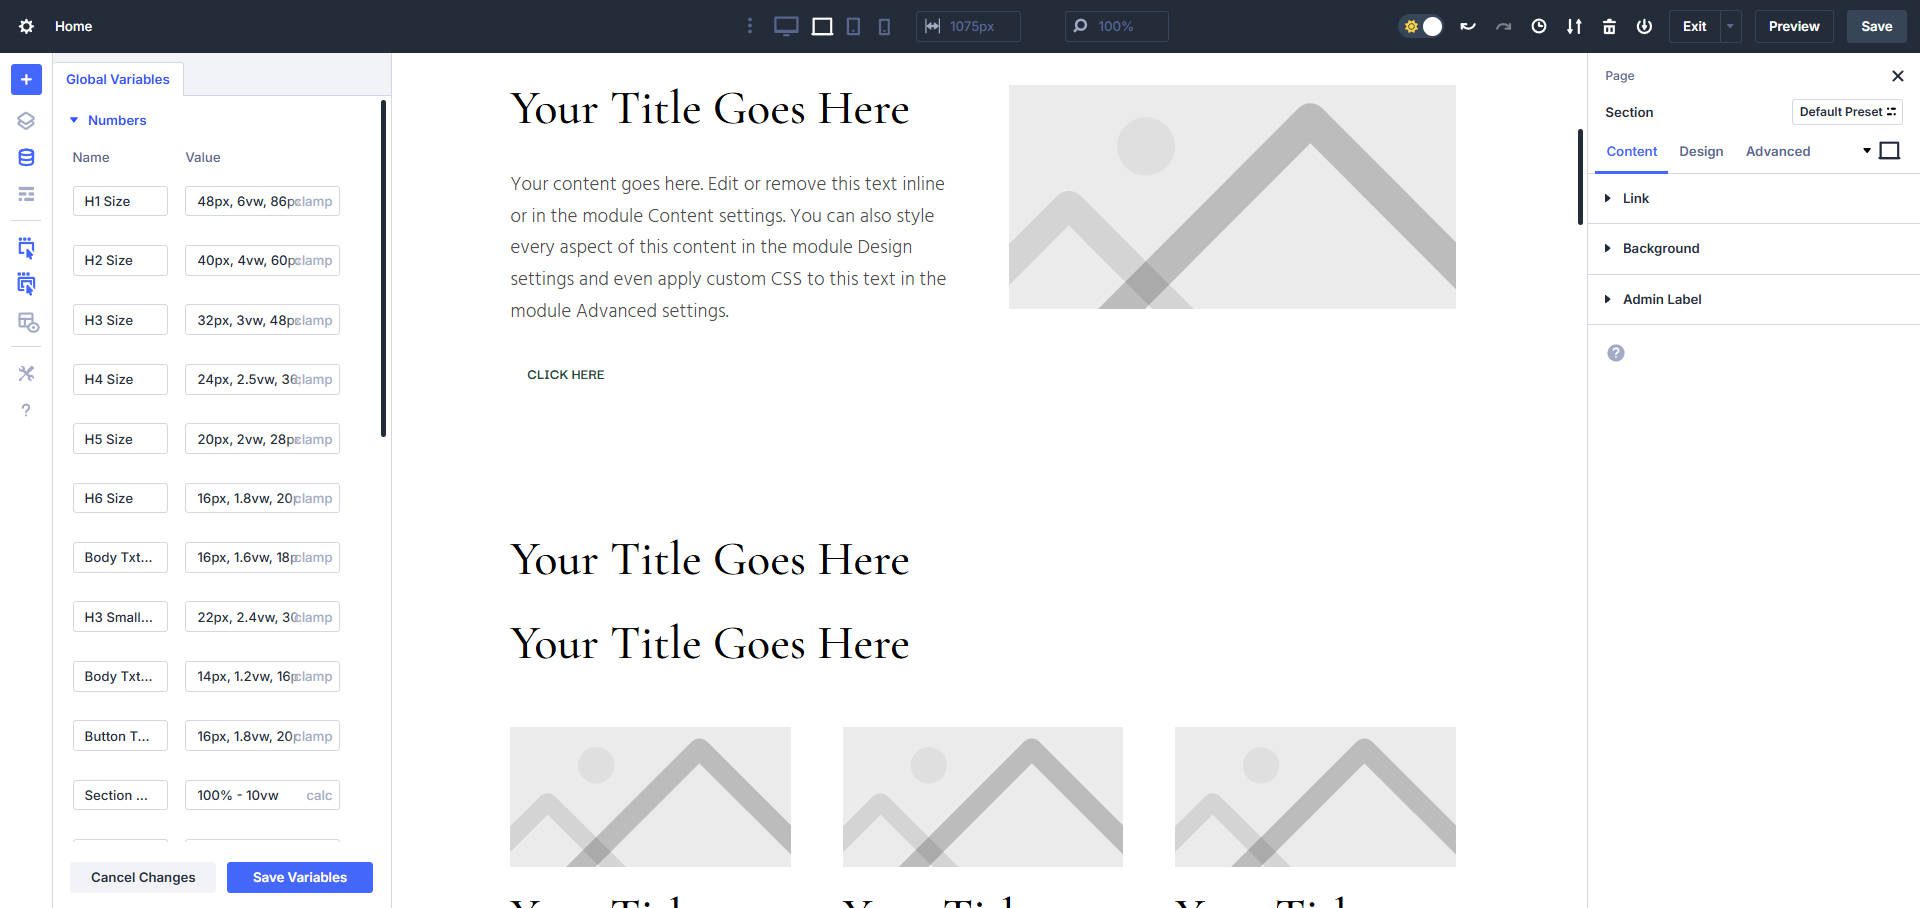
Then, create a series of number variables for your typography system. Define h1 through h6 using the clamp() function, so each one is fluid across screen sizes. You can also define a body text size and a button text size using clamp(). For smaller spaces like footers or blog cards, consider adding a compact set of font-size variables as well.
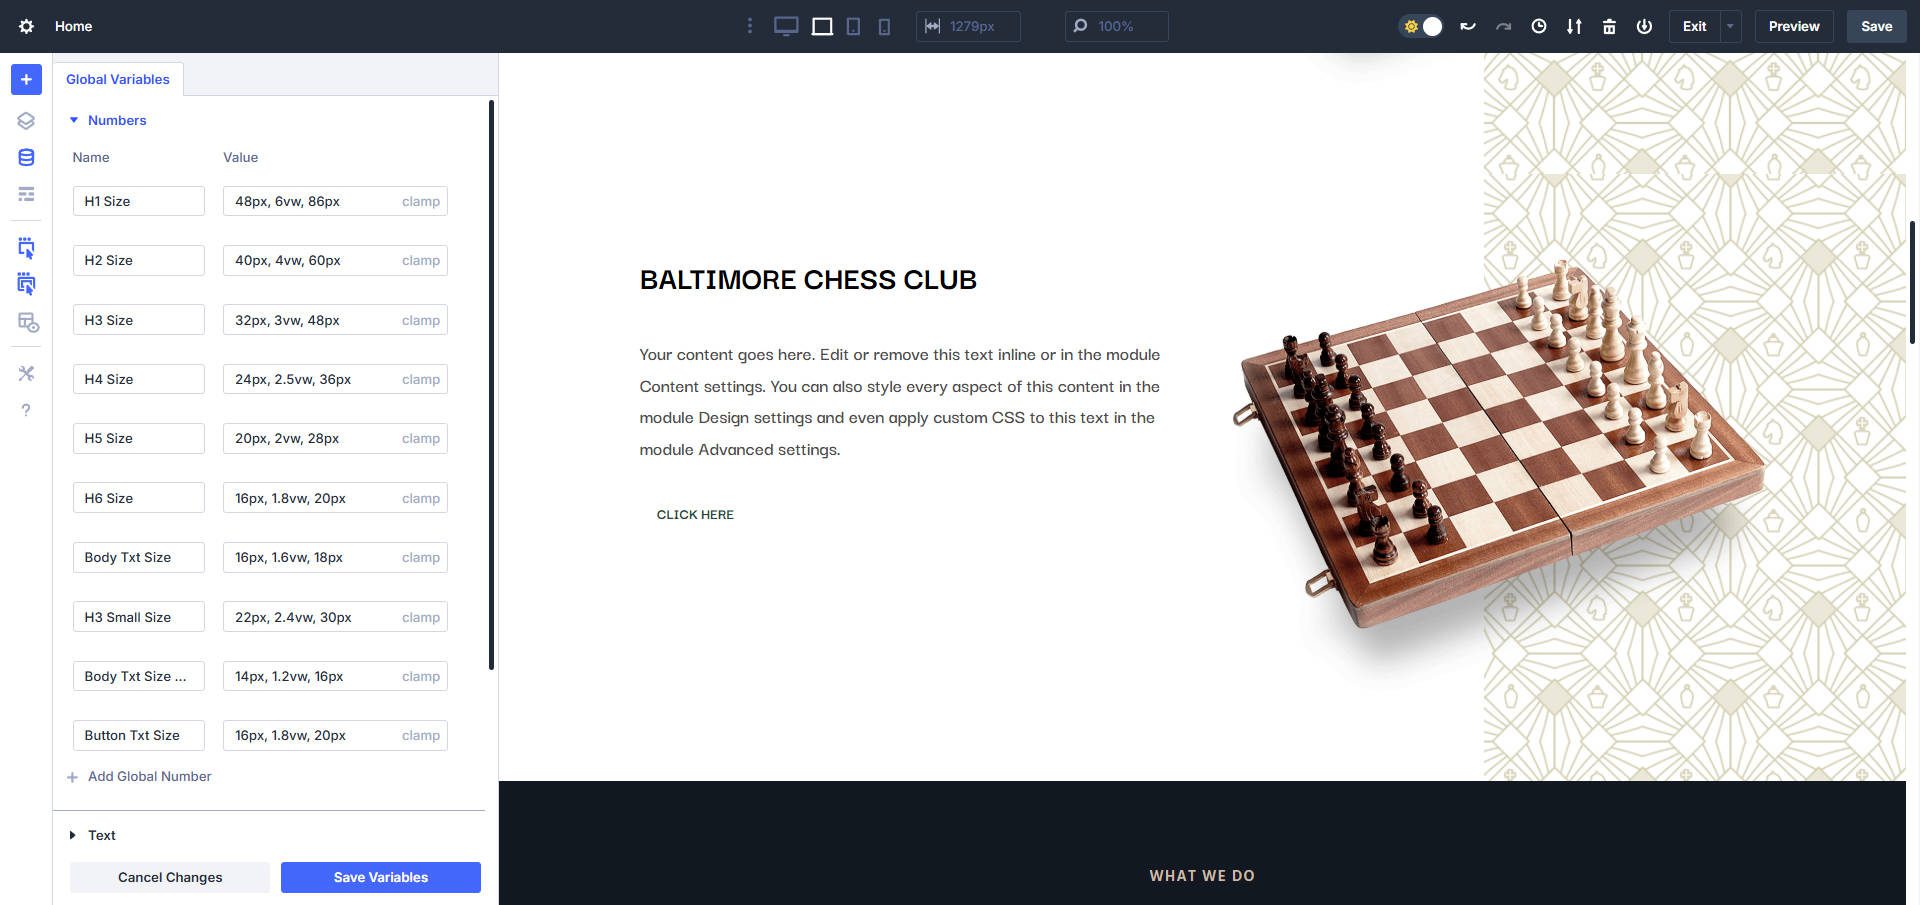
Continue by defining number variables for consistent spacing values like section width, padding, and border-radius. You might also add one or two text variables for common CTA phrases like “Book Now” or “See Membership Plans.” These are easy to manage and update later when reused throughout the site.
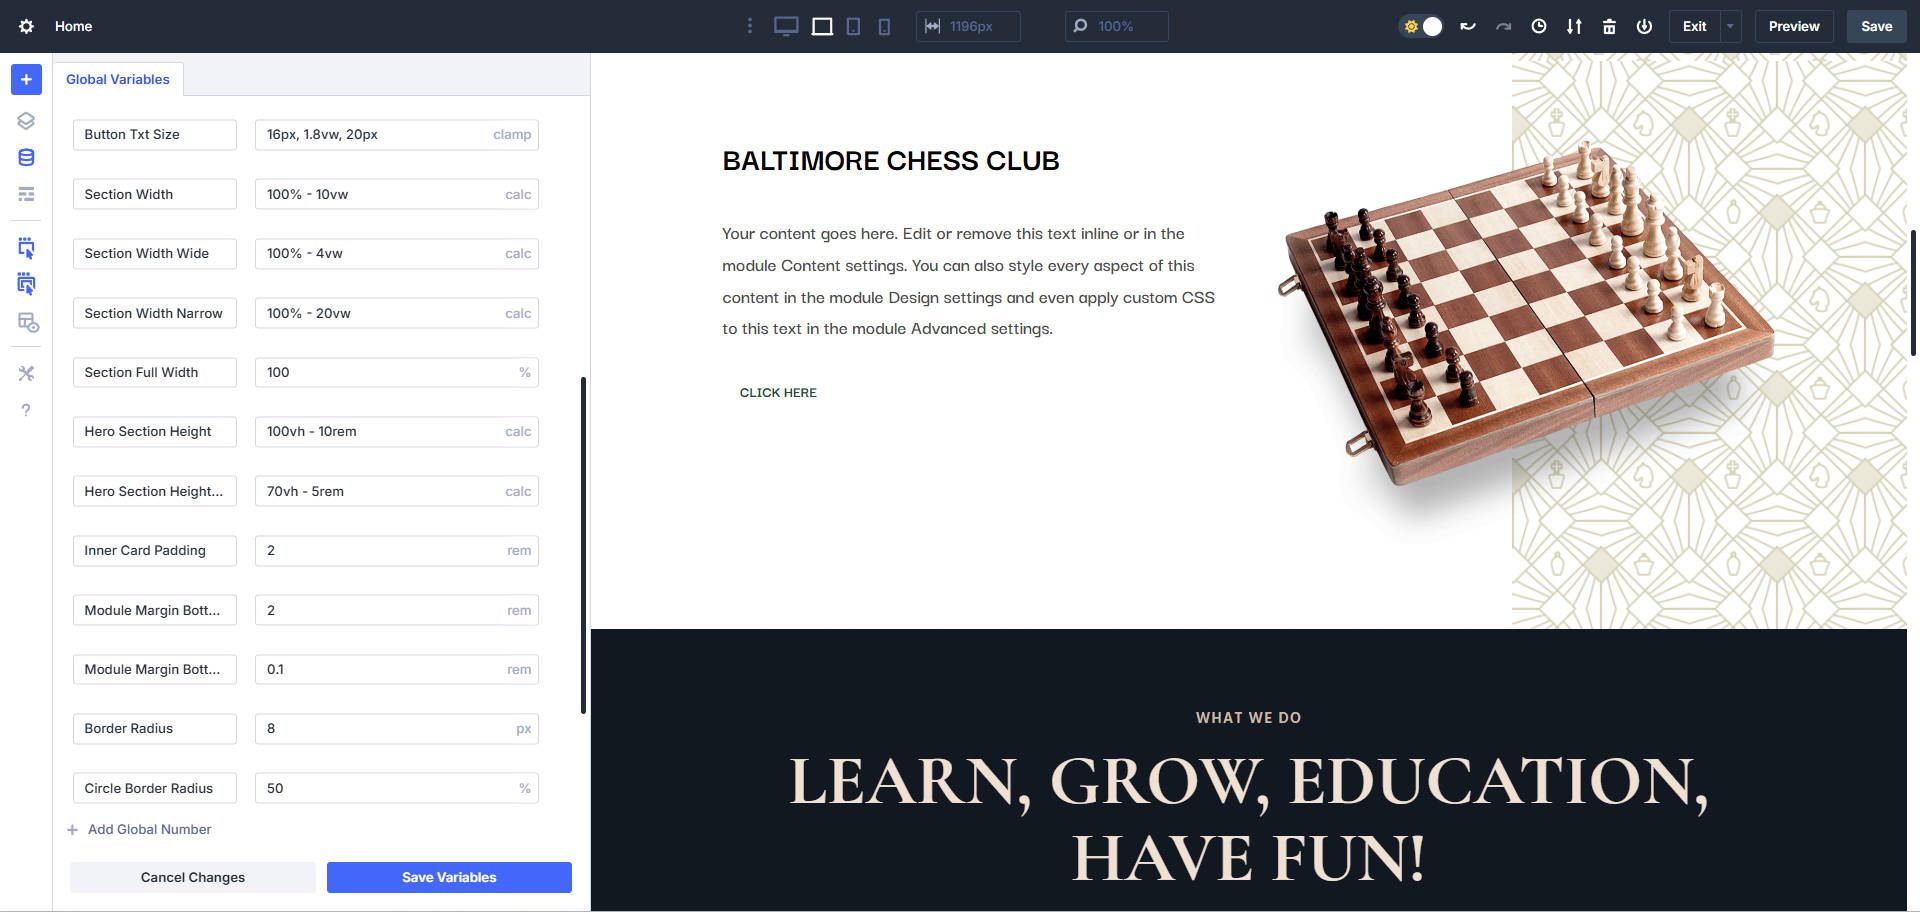
If you expect to reuse the same image multiple times — like a hero image, logo variation, or pattern image — go ahead and define it as an image variable.
Step 2: Create A Wireframe With Sections/Rows/Modules
Now that your design variables are set, begin by laying out your page structure. Add the necessary sections, rows, and modules to visualize the layout.
This step is strictly structural. You’re not styling yet, but preparing to apply Option Group Presets next. As you place content and other elements, you may discover areas where additional variables would be helpful. Jot those down so you can add them before proceeding.
Doesn’t look like much, but these are the building blocks that, when styled, will look like our layout goal
You’ll notice that we’re recreating the Homepage Layout from our Chess Club Layout Pack but using the new Design Variables and Option Group Presets (along with the tried and true Element Presets). This way, when we’re done with this page, we can create the other pages even faster.
Step 3: Apply Variables To Option Group Presets
Now that your wireframe is in place, it’s time to style the building blocks of your site using Option Group Presets. These Presets apply to individual style groups — like text, sizing, spacing, or backgrounds — and they work across all Modules that use the same Option Groups (OGs).
Let’s start with typography. Click into any module with a heading (like a Text or Blurb module), open the Design tab, and locate the Heading/Title option group. Hover over the group and click the Preset icon to begin editing the Default Preset for that group.
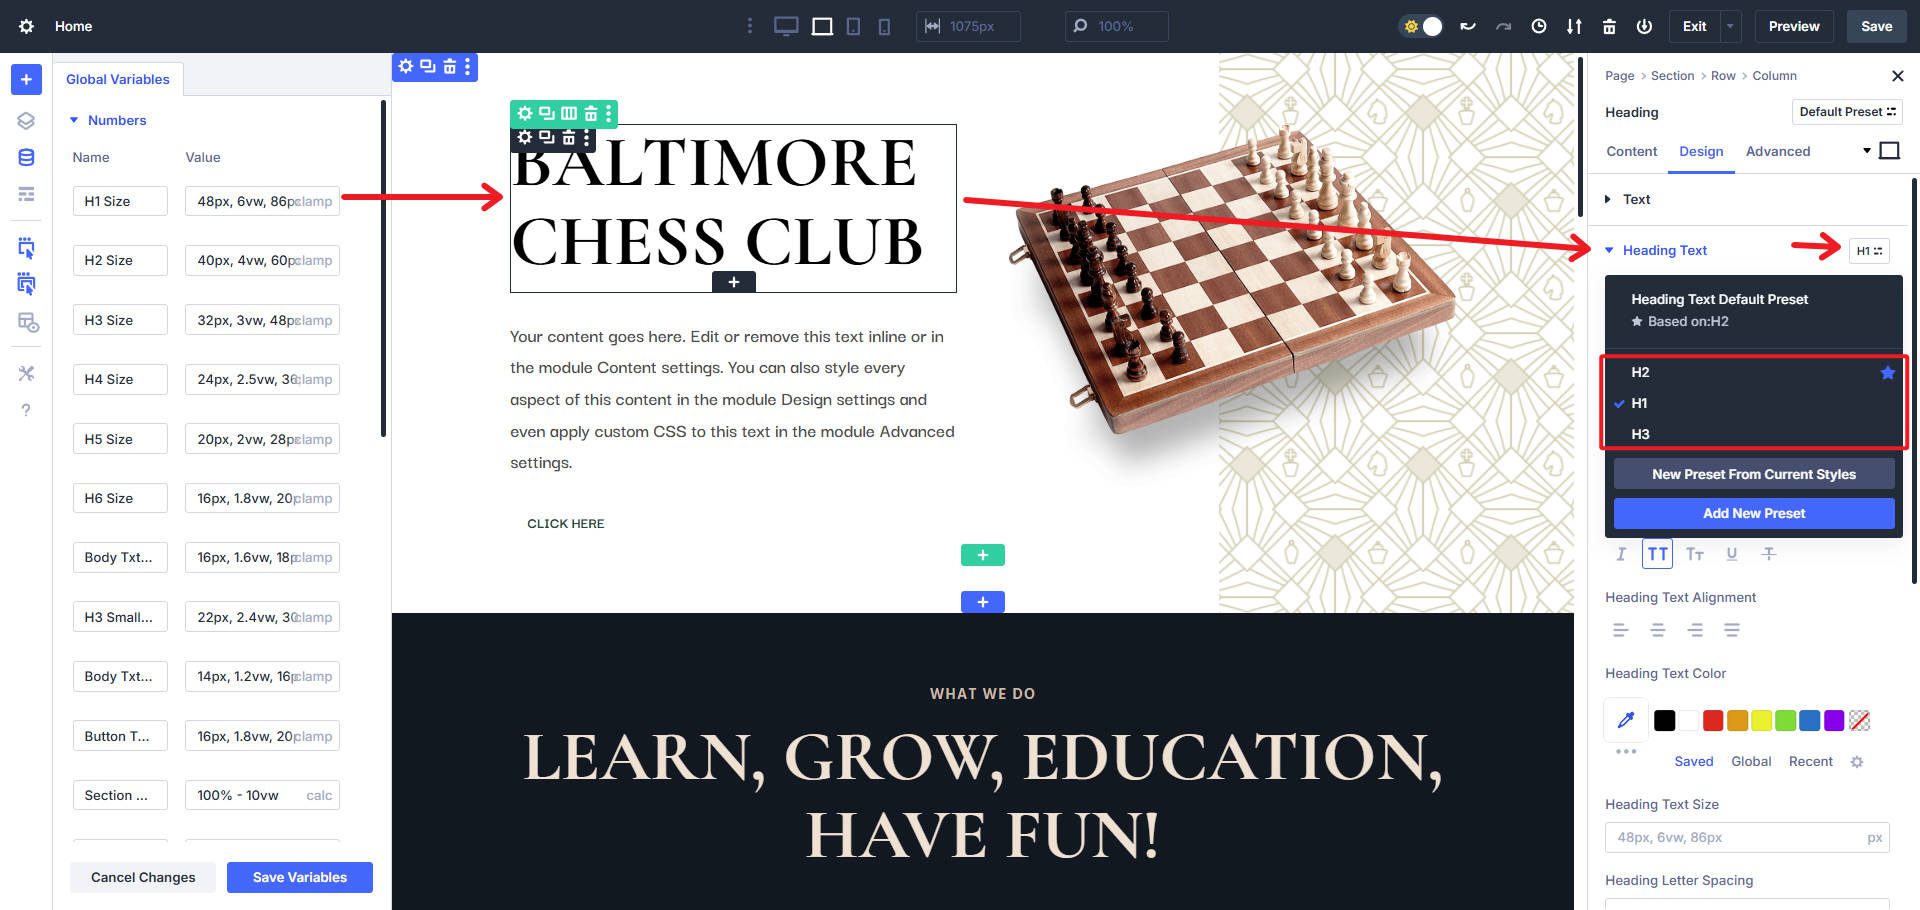
Use the Design Variables you created earlier to set your desired font family, size, and line height. You can create Custom OG presets for each heading level (H1–H6) and assign them consistent, clamp-based variables for responsive control. Remember to set the default level to H2 or H3 — a default of H1 rarely makes sense since you only want one H1 per page.
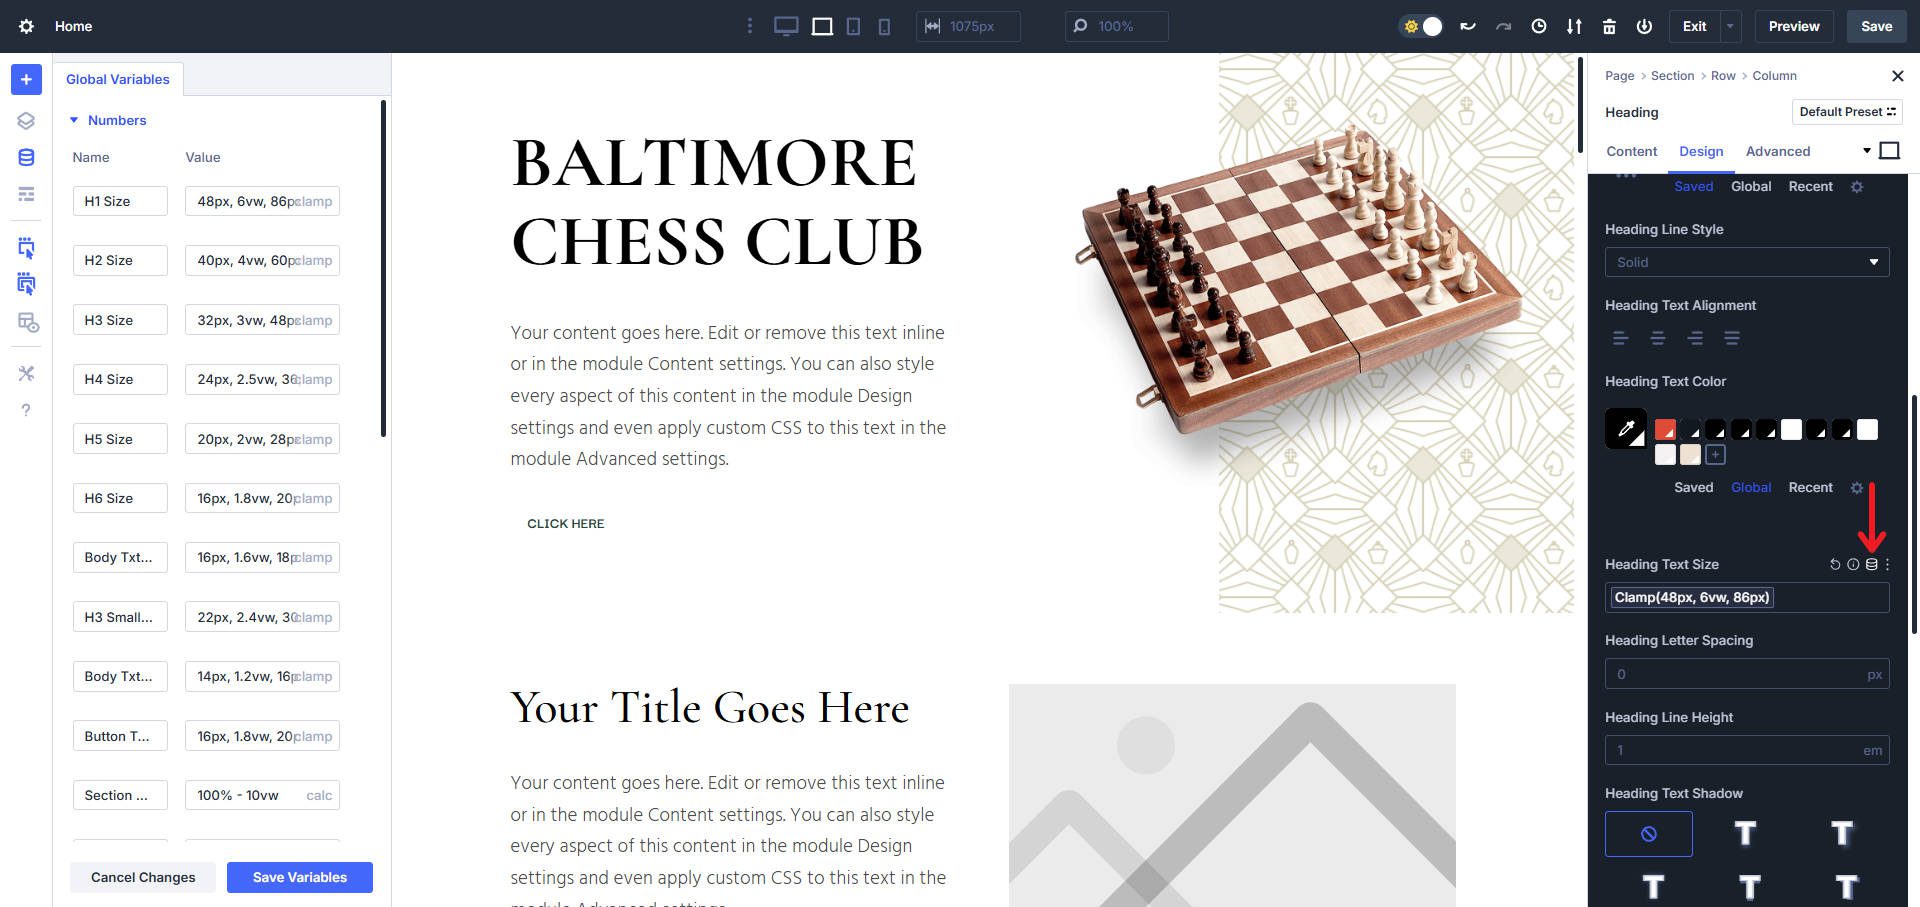
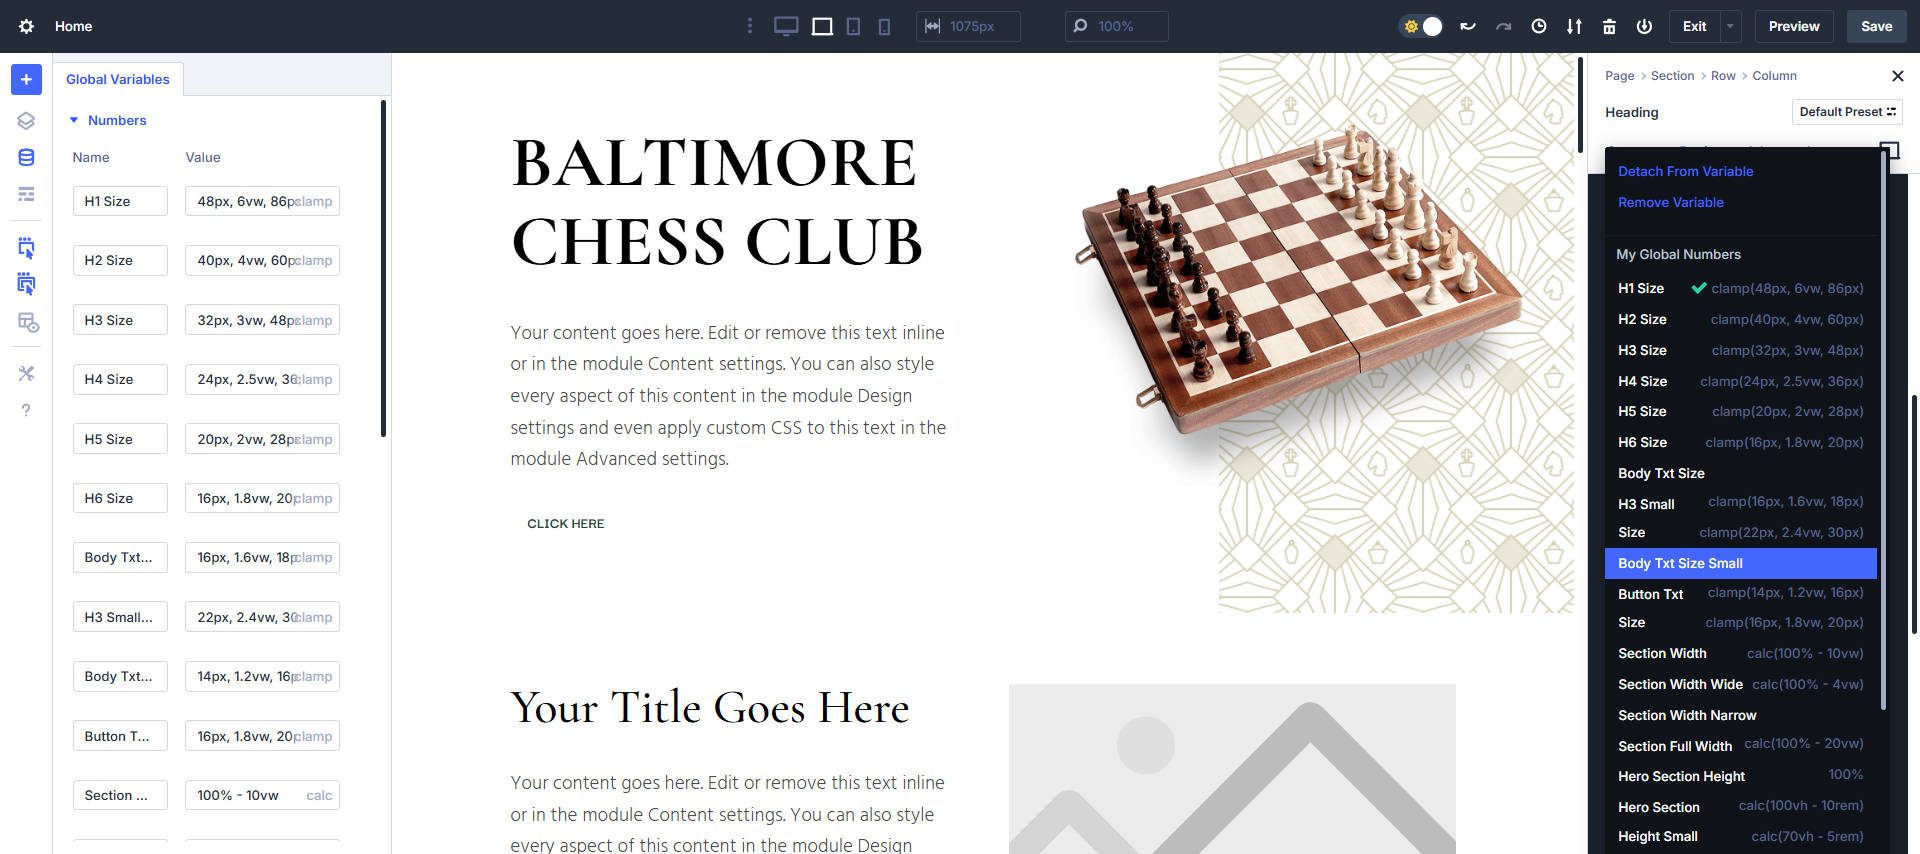
Find the Design Variable Icon by any supported field in Divi to apply one of your relevant variables
Once you’ve clicked the Design Variable icon, you’ll see a list of all the relevant Design Variables that you can apply to that field (works in most fields on the module/element, module/element preset, and OG preset levels).
Repeat this process for body text. If you created a compact text system for smaller UI spaces (like footers or blog loops), this is the time to define those, too.
Every design element that we’ll use in other places on the page or site, we’ll create using Option Group Presets. This is especially the case with section sizing (width/height), background color/pattern motifs, and on and on.
By the end of this step, most of your visual system — text styling, spacing, and backgrounds — will be modular, consistent, and powered entirely by Design Variables.
Step 4: Create Element Presets For Frequently Used Modules
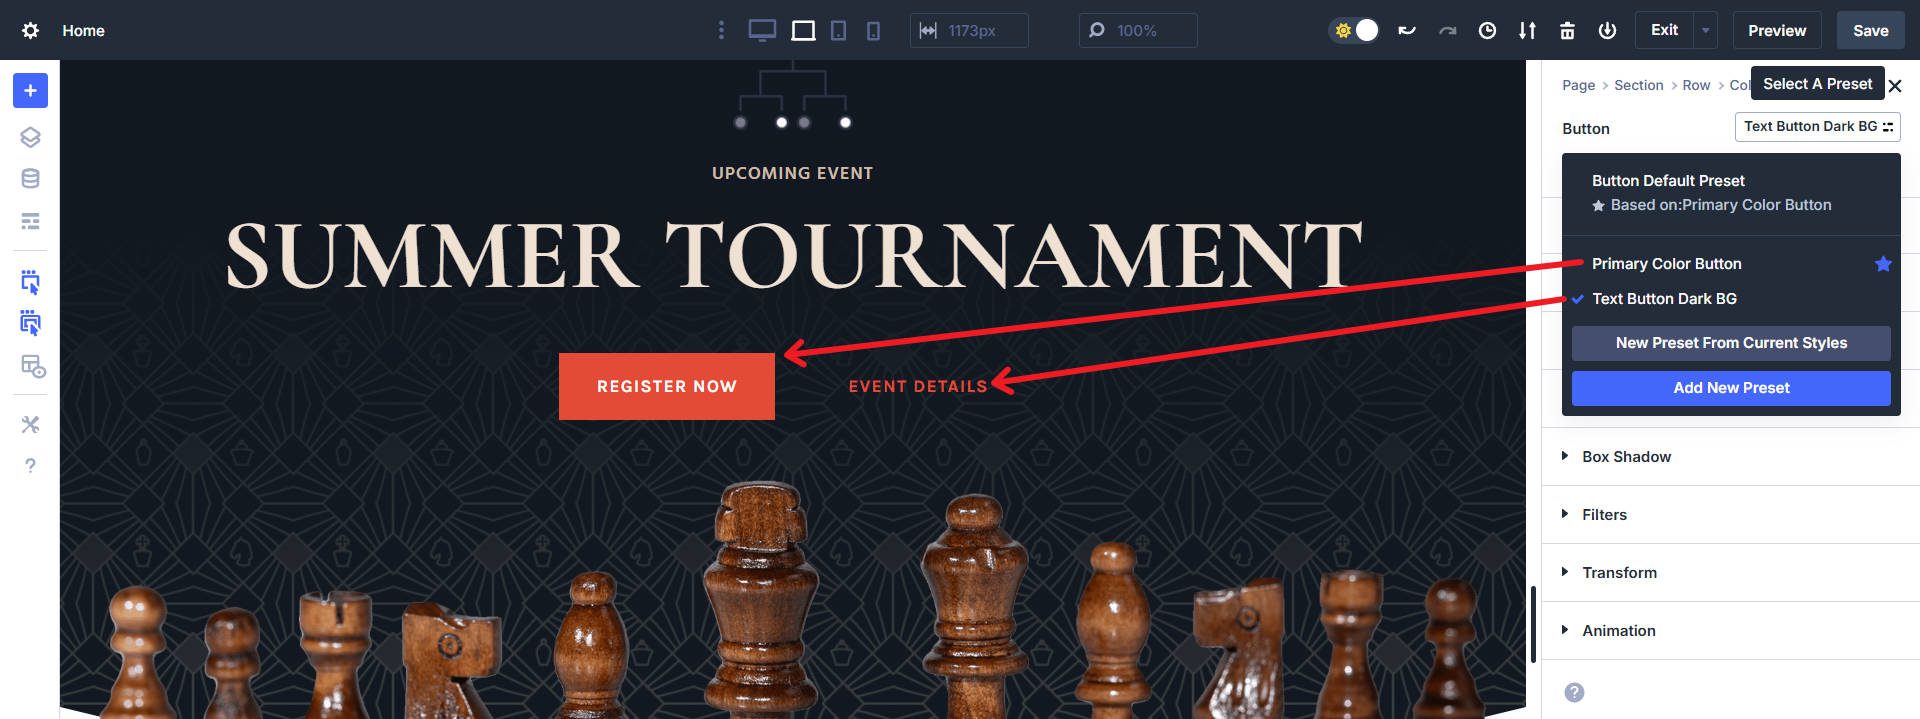
Some Modules are more complex and will require creating Element Presets. This is because many modules have Option Groups that aren’t used across other Modules. I want to create multiple Button variations for this example, so I’ll use Element Presets to achieve that.
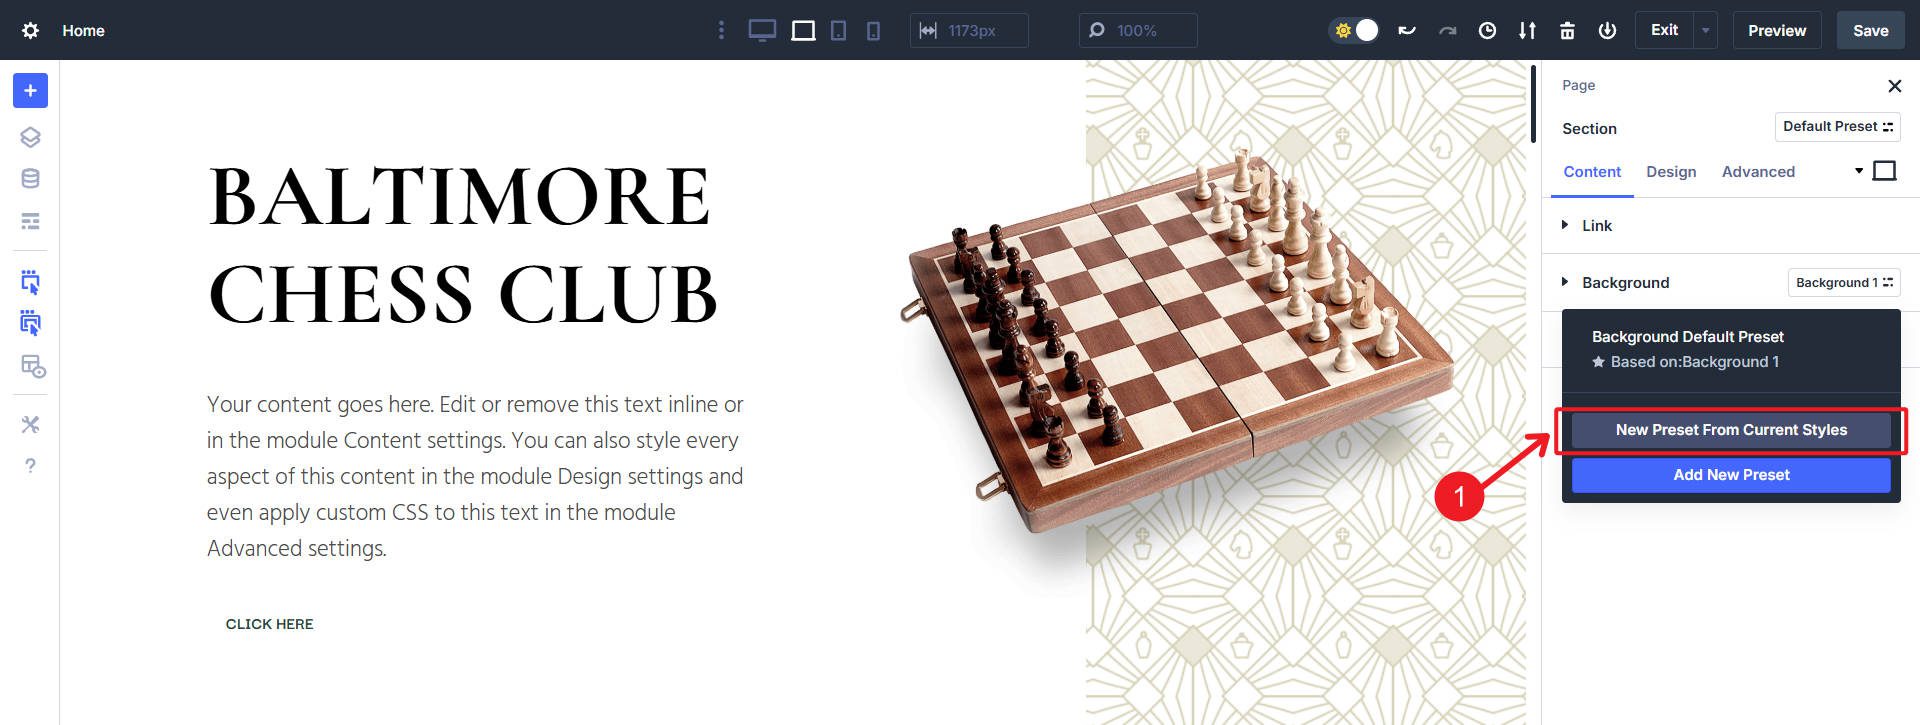
I’ll start with a Default Button Module Preset that pulls in a background color, text color, font, spacing, and link — all sourced from Design Variables. I am designing a button with an Element Preset instead of Option Group Presets because each of my variations will use a different mixture of Design Variables and Module settings. Text can be styled with a single OG, but things like Buttons have multiple OGs to style and design every part of them.
One of the easiest ways of doing this is to style your Button directly in the module. You can then apply those Design settings to a New Element Preset by clicking “New Preset From Current Styles.”
If I do that with my two Button Styles, I will have two Element Presets to apply to Button Modules across my website. I can also edit either of those Element Presets or the Design Variables to make changes to them in the future.
The same process applies to Testimonial modules, Blog Grids, or anything you reuse on a single site twice or more. The idea is to go through the trouble once with Presets (OG or Element) and reap the benefits when you reuse the Preset later on.
The Future Of Designing With Divi Is Here
The combination of Design Variables and Presets in Divi 5 isn’t just a new feature — it’s a whole new way of thinking about design scalability. You can create beautiful, consistent pages faster than ever by starting with Design Variables and cascading them down through Presets. And if anything ever needs to change, you only need to change it once.
👉 Divi 5 is ready to be used on new websites, but we don’t recommend converting existing websites to Divi 5 just yet.


Thank you for the explanation. It would also be very helpful if you could create a tutorial on setting the website width in Divi 5. It’s currently confusing because you can set it in several places, such as Customizing ▸ General Settings ▸ Layout Settings, now via Variables, and also in Global Settings under the row settings. This causes confusion. If I remember correctly, 1080px was the default in Divi, but I think this is outdated. It would be great to have a tutorial on the best website content width in 2025 for Divi 5, especially since the padding on the right and left is enormous on mobile.