
InVision Studio is a prototyping and animation tool that lets you create advanced, vector-based screen designs fast thanks to flexible layers and an infinite canvas. It’s considered one of the best high-fidelity prototyping tools out there. With InVision Studio, you can speed up your workflow; create interesting, interactive prototypes; communicate your designs to the team and clients; test your designs; and square away questions, concerns and design changes before the development stage.
InVision Studio is part of the InVision suite of tools, which also includes InVision Cloud, where you can connect, store and share your complete product design workflow, and InVision DSM, a design system manager and library where you can store and control all of your brand and UX components. InVision Studio can be used on Mac and Windows. You can import Sketch files, too.
-
1
Features of InVision Studio
- 1.1 Resize and crop images without masks.
- 1.2 Fix elements as you scroll.
- 1.3 Link several artboards into one animation.
- 1.4 Create swipe triggers for parallax animations.
- 1.5 Create responsive prototypes without writing code.
- 1.6 Mirror prototypes to your phone.
- 1.7 Use Sketch-like shortcuts.
- 1.8 Toggle between light and dark themes.
- 1.9 Collaborate with the team in real-time.
- 2 Designing with InVision Studio on a Browser
- 3 InVision Studio Pricing
- 4 Final Thoughts
Features of InVision Studio
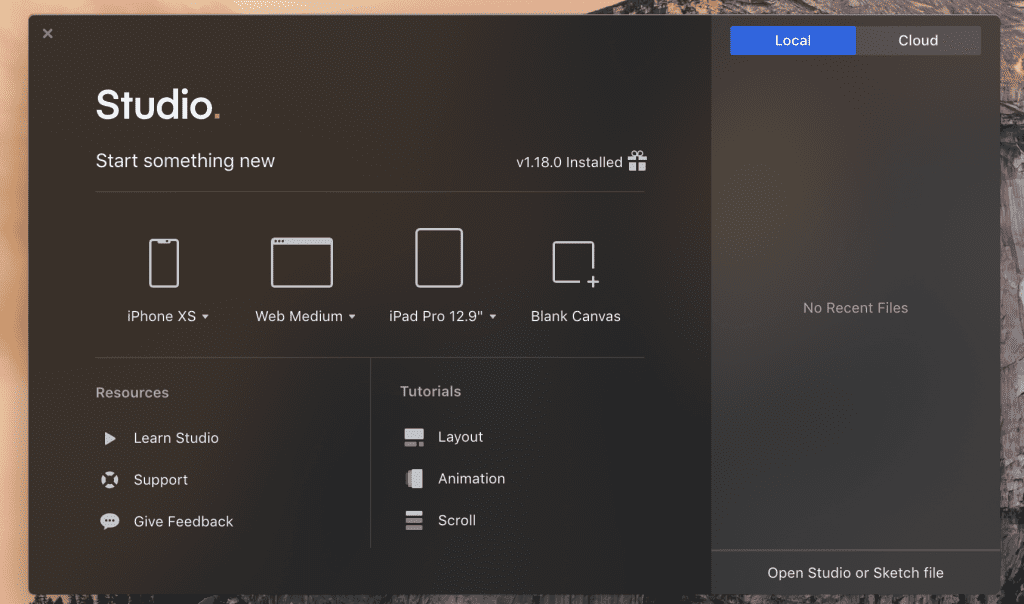
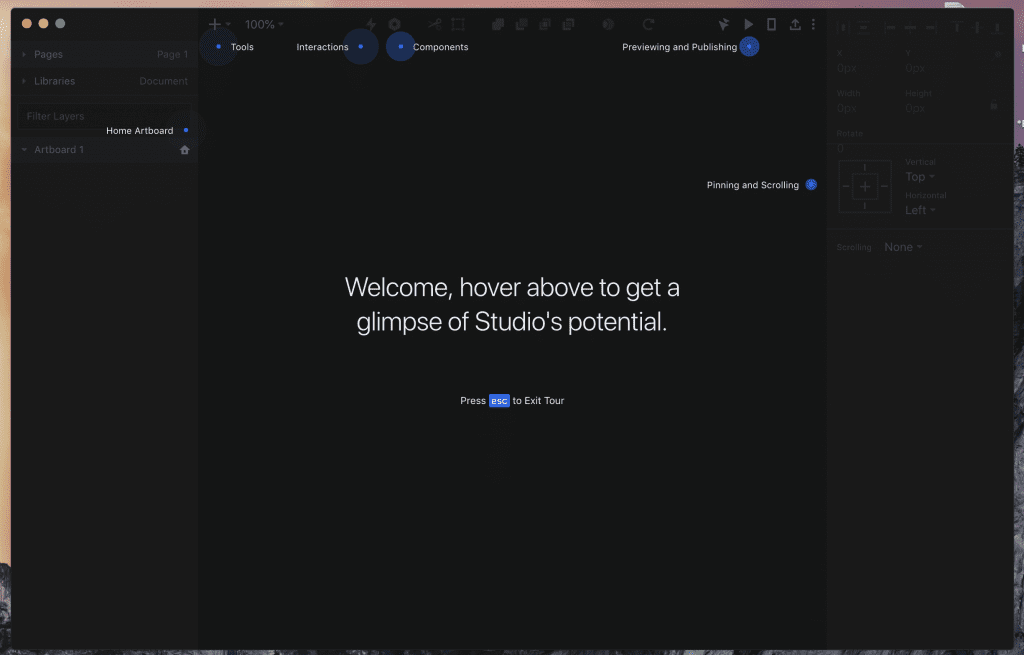
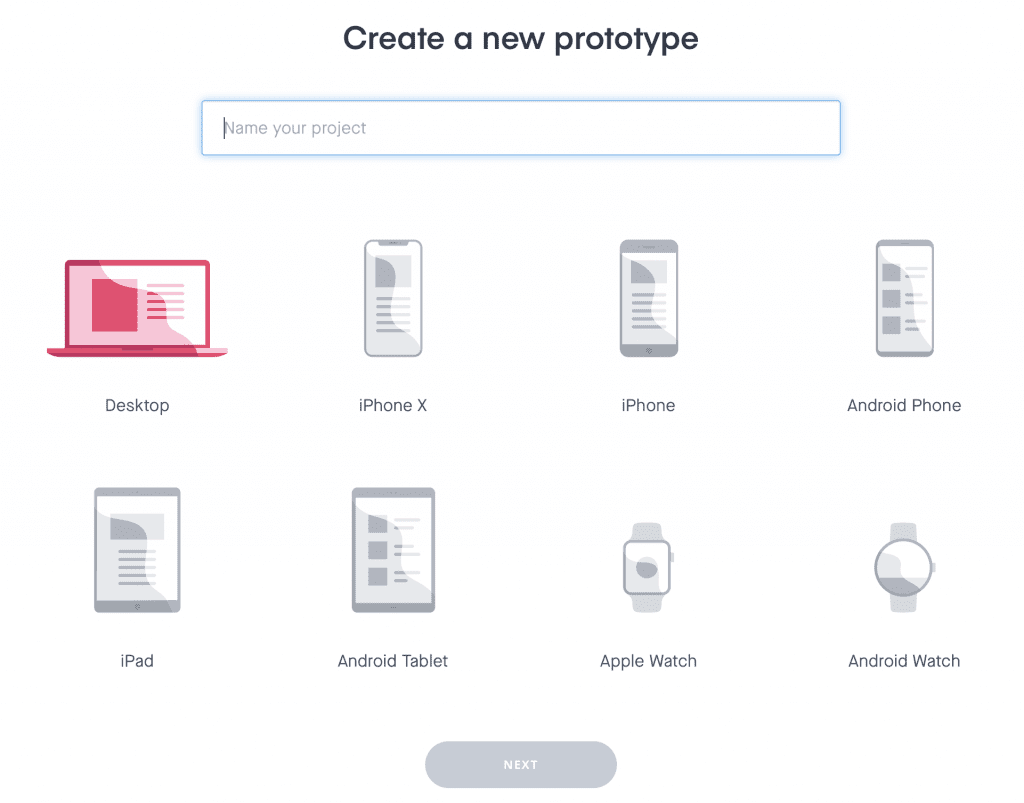
After downloading the InVision Studio app, you’ll get a choice of projects to create. After choosing what you want to design, you’ll get a tour of the interface.
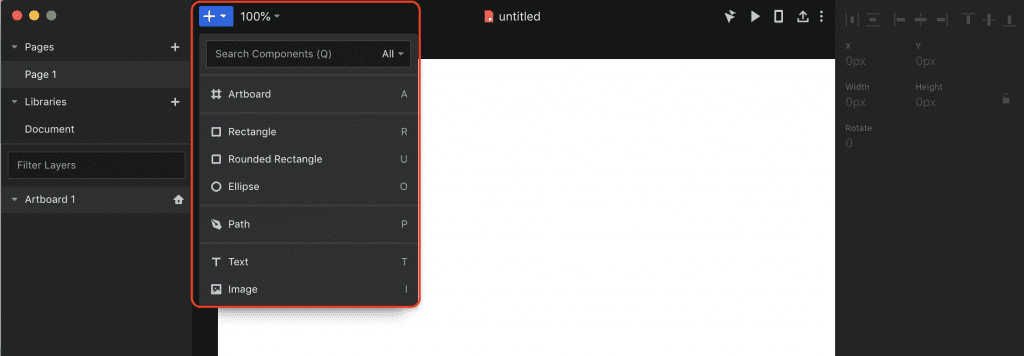
To add a layer or component, click the plus sign at the top. When you add a component, all of your options come up on the right.

Let’s go over some of InVision’s noteworthy features.
Resize and crop images without masks.
This feature, called intelligent image cropping, auto-crops images as you change size. It’s similar to creating an image fill in Sketch and then setting it to “fill,” but in fewer steps and a more intuitive way. Intelligent image cropping is for images with a focal point near the center. It’s also best if you want to crop into a circle, rectangle or rounded rectangle. For images that have a different focal point or a more interesting shape, you’ll want to create a mask to access more customization options.
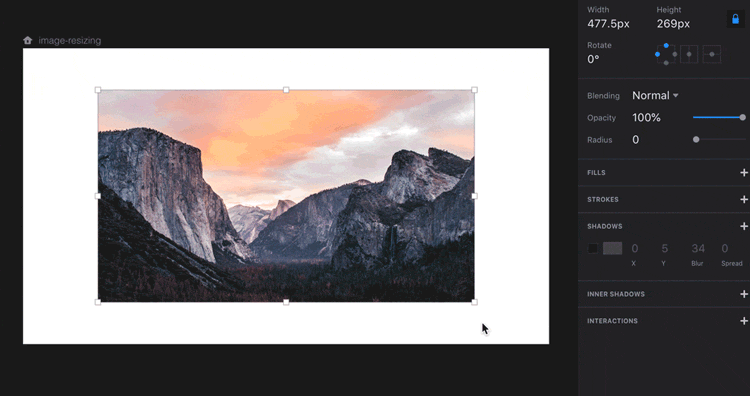
Source: LearnInVisionStudio.com
Fix elements as you scroll.
Fixing the header and footer isn’t new to InVision, but fixing other elements is. Set scrolling to horizontal, vertical or both, then choose the element that you want to fix by clicking the pin icon in the upper right.
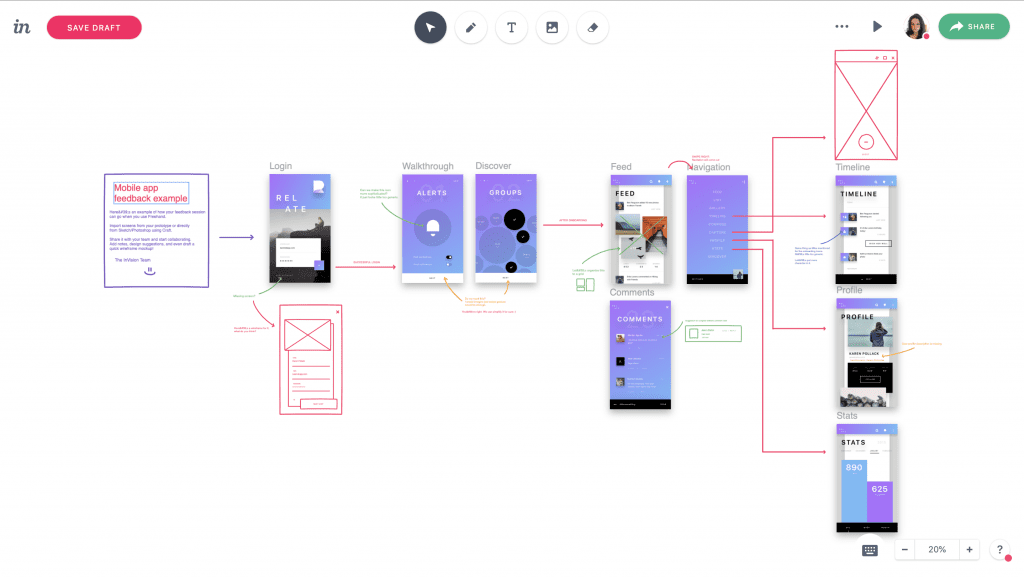
Link several artboards into one animation.
The timer gives you control over multiple artboards that you want to turn into one animation. You can also loop an animation to have the last artboard point to the first one. Or, you can have a multi-step animation direct to another part of your design. Complex animations like this are ideal for video intros and outros.
Create swipe triggers for parallax animations.
Swipe triggers can create parallax effects and other types of animations that occur on scroll.
Create responsive prototypes without writing code.
With responsive prototypes, you can make everything percentage-based and resize every element based on the artboard size. You can then create prototypes that are responsive to all sorts of screens. This makes it easier to create mockups of varying sizes. Also, setting a design as “resizable” in Studio will auto-resize it when viewed in the browser.
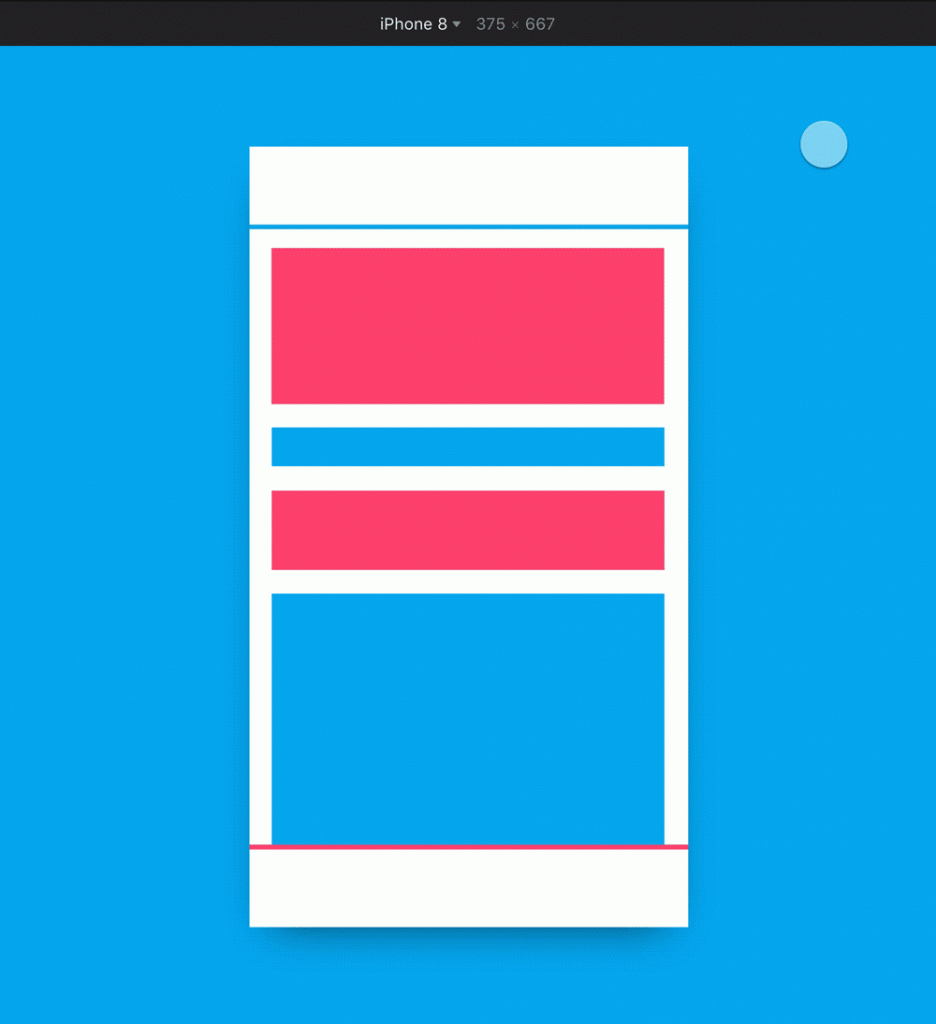
Source: LearnInVisionStudio.com
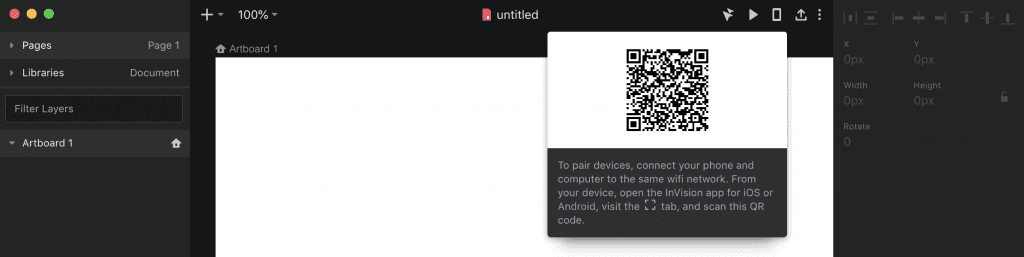
Mirror prototypes to your phone.
If you want to test an animation or prototype on your phone, you can share it, select “mirror” and then scan the QR code in the mobile app.
Use Sketch-like shortcuts.
If you currently use Sketch, then you’ll already be familiar with the shortcuts InVision Studio uses – just about all of them are the same, especially when it comes to the inspector, layers and toolbar.
Toggle between light and dark themes.
Non-designers may not realize how useful this feature is. When you’re designing a light interface, the added contrast of a dark theme can be helpful (and vice versa).
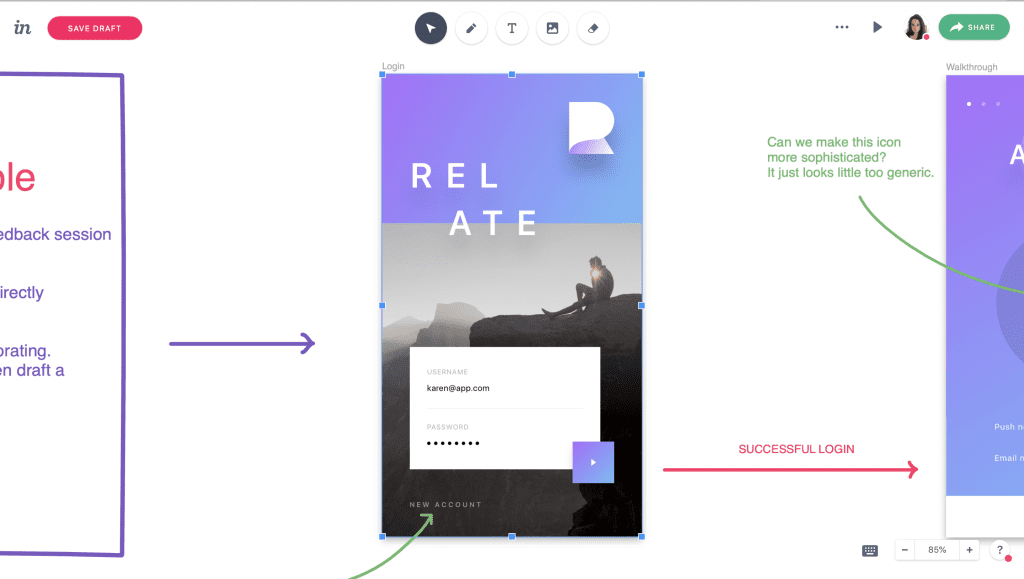
Collaborate with the team in real-time.
Collaboration and workflow are simplified, and team members can design and comment in real-time. With global syncing and real-time updates, nobody will be out of the loop.
Designing with InVision Studio on a Browser
I want to quickly show you what it’s like working with the browser version of InVision Studio. We’ll briefly go over designing a board, creating a prototype and using freehand mode.
Designing a Board
Your command center is on the top right of the screen. The five icons stand for:
- Edit header
- Set layout type
- Settings
- Comments
- Share

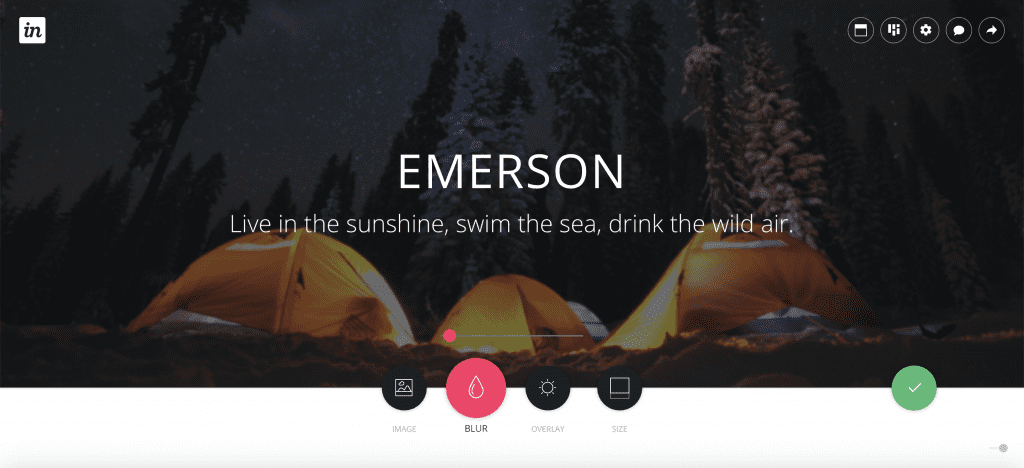
Edit Header
I played around with the header a bit. After clicking “Edit Header,” these options popped up:
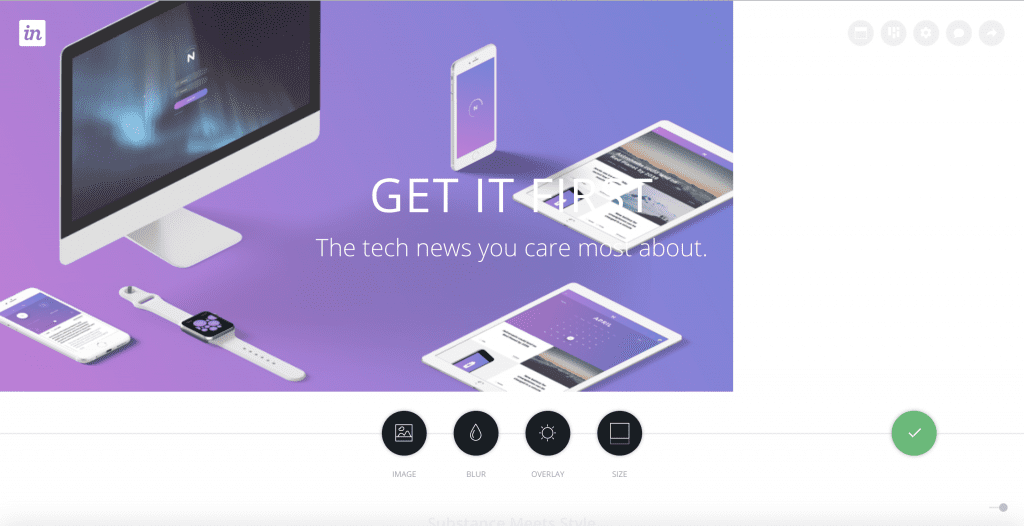
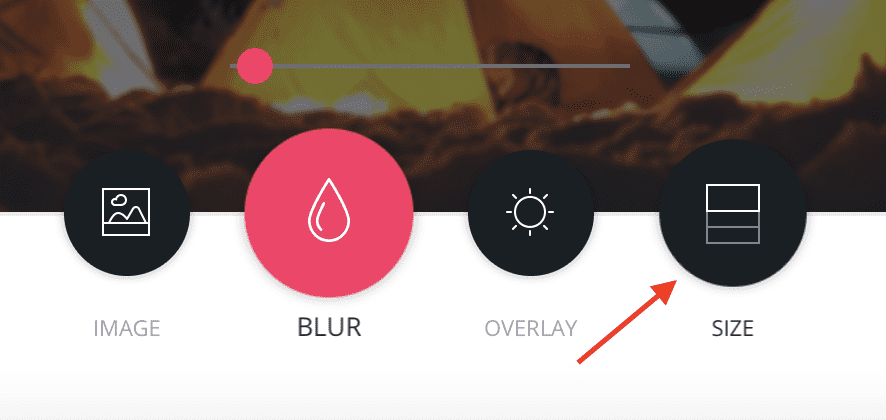
I replaced the image and text, blurred it slightly, and added a slight overlay to make the text stand out. I especially love the “Size” option – you just hover your mouse over it and select from three sizes.
Set Layout Type
I then changed the layout type to “Meticulous.” This is for the content blocks underneath the header, which will show up as you scroll down.

Editing Additional Sections
If you hover to the right of the section title, you’ll see three icons. The down arrow is “Move Section Down” and the “X” is “Remove Section Title.” If you delete it and then change your mind, you can just hover over the same area and you’ll have the option to add a new section title.
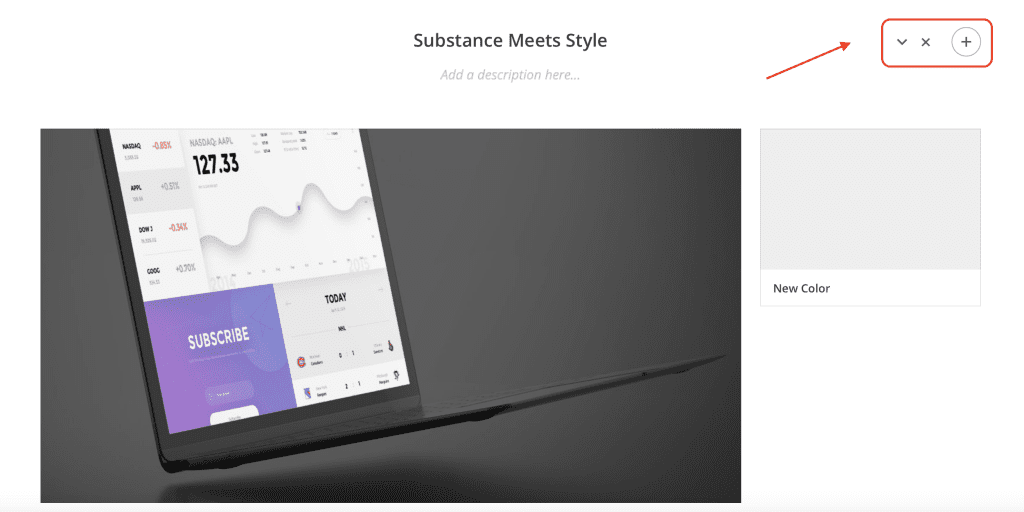
By clicking plus sign to the right of the arrow and “X,” you’ll get a new menu. From left to right, the icons stand for:
- Add a Color Swatch
- Add a Note
- Upload File

By hovering over a content block, you’ll see the resize options again, like with the header. Selecting a different size will automatically update the rest of the layout to refit the blocks. Clicking a content block opens up a window on the right.

Hovering over one of the colors in the bar will show its color code. This window is also where team members can leave a comment on this particular design block.
Creating a Prototype
I played around with the prototype demo, too, just to show you what the options are.
Here, your control center is along the bottom. Starting with the eye icon from left to right, the icons are as follows:
- Preview Mode
- Build Mode
- Comment Mode
- Inspect Mode
- History Mode
- Social Share
- Upload Screens
- Configuration
- Screen Status
Freehand Mode
Freehand mode starts with an interactive demo to quickly show you how to use it. Then, you work with an infinite canvas to put your project together. If you’re working in the app, you can send the “Collaborate live with Freehand” link to a team member and they can draw on and add text to the project in real-time.

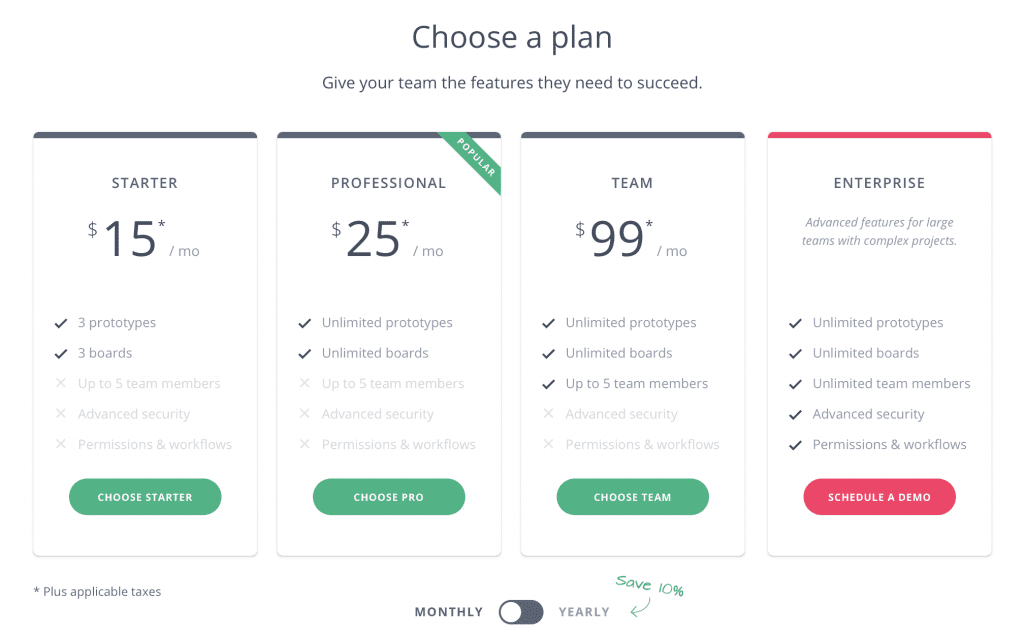
InVision Studio Pricing
The free plan includes one prototype with unlimited collaborators and screens. If that’s all you need, then you never have to pay. Demos don’t count toward the limit. If you design more than one prototype, you’ll get six days of free access to create unlimited prototypes. After that, you’ll have to upgrade to create and use additional prototypes. If you want to upgrade, here are their plans:
Final Thoughts
Compared to other design tools, you may find InVision Studio to be a little slow and sometimes buggy – that’s not to say it’s slow in general, just slower (sometimes) than other similar tools, like Adobe XD, Figma and Sketch. I didn’t personally experience that issue, but it pops up a lot in reviews. Also, InVision Studio doesn’t offer plugin support, so if that’s something that’s important to you, consider Sketch instead.
When it comes to prototyping, though, InVision Studio is hard to beat, especially if you have to collaborate with a team. It may not be as powerful as Adobe XD, but it’s still one of the best prototyping tools you’ll find.
InVision Studio’s interface is easy to learn and use, and the icons are sleek and modern. There’s a lot of help, too, with tutorials, tours and links to more guidance. (Now, that said, I’ve read reviews that say the opposite, so I suppose it’s a matter of taste.) There’s very little guesswork with InVision Studio, and you can get right to what you’re there to do: create.
When designing, a golden rule is to use the Golden Ratio. Check out my ultimate guide to using and understanding the Golden Ratio.
Featured image via Visual Generation / shutterstock.com


features are nice but the pricing is too high as compare to Figma professional pack.
Invision Studio is free to use, the only plan to be paid is the Invision prototype, DSM, etc and still use the free version that you can have 1 or 2 prototypes online.
+1