
We’ve talked about the Canva photo editor in the past. It’s a free-to-use graphics editor that enables you to create and tweak anything from logos to infographics, social media posts, and more.
Although Canva isn’t what we’d call a “professional” photo editor, it is very easy to pick up. Plus, the platform comes with a whole host of tools you can play with. In this article, we’ll show you the Canva photo editor in action.
Let’s get to it!
An Introduction to the Canva Photo Editor
When we got to know Canva a few years ago, it was mostly a design tool for creating images for the web. Back then, Canva already offered an impressive array of tools and features to help you design everything from logos to social media images and online magazines.
Since the last time we talked about Canva, the tool has also become a powerful photo editor in its own right. Using Canva, you can upload any photo that you want, apply filters, advanced effects, crop it, and more.
Those are all features that are common in photo-editing software. However, when you combine them with Canva’s array of design tools, you get a lot of freedom when it comes to transforming photos into web elements.
Using Canva, you can edit photos, add custom elements to them, modify their background, add text and music to them, and much more.
However, one thing to keep in mind is that Canva’s advanced photo effects are only available for premium accounts. If you use the free version of Canva, you can apply filters and edit photos, but not use their library of effects.
Key Features:
- Upload and edit photos using an online platform.
- Save photos to your online library and share them with anyone you want.
- Apply filters and edit images.
- Add pre-built and custom elements to your photos, including icons, text, music, and more.
Price: Free with premium plans available | More Information
How to Use Canva to Edit Photos (4 Steps)
If you want to follow along with this tutorial, go ahead and sign up for a free Canva account. All the tools that we’re going to show you are available with the free version of Canva.
Step 1: Upload a Photo to Canva
You can’t have an online photo editor without an upload feature. If you log into Canva, you’ll see a whole lot of templates and options that you can use to create your own designs:
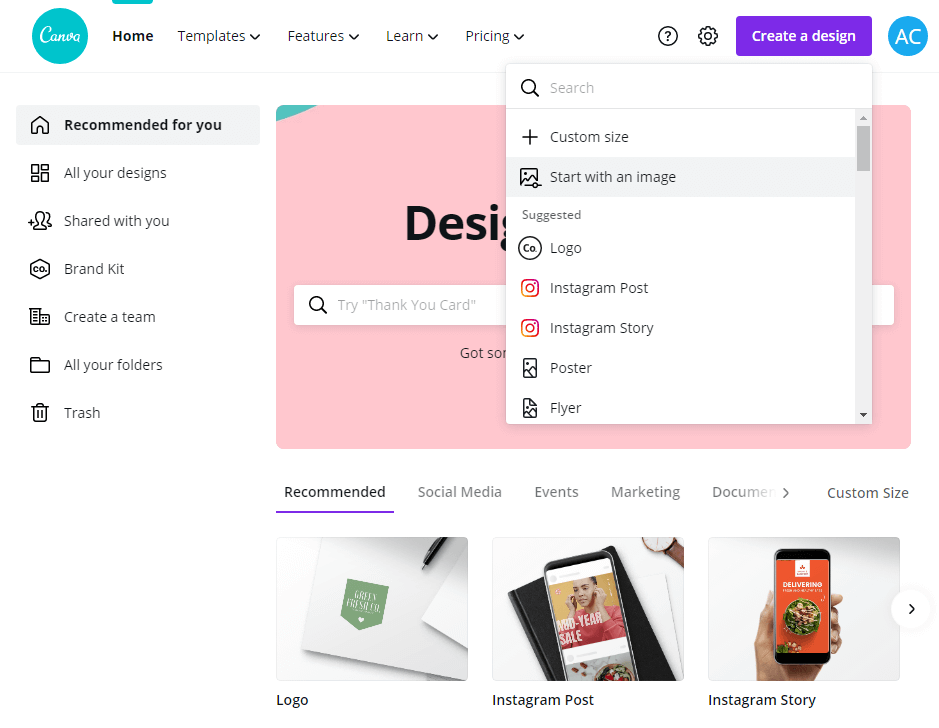
Instead of selecting any pre-configured options, you’ll want to click on Create a design and select the Start with an image button. Canva will ask you to choose an image to upload from your computer now.
Once you select an image, Canva will load it on its editor, which looks like this:
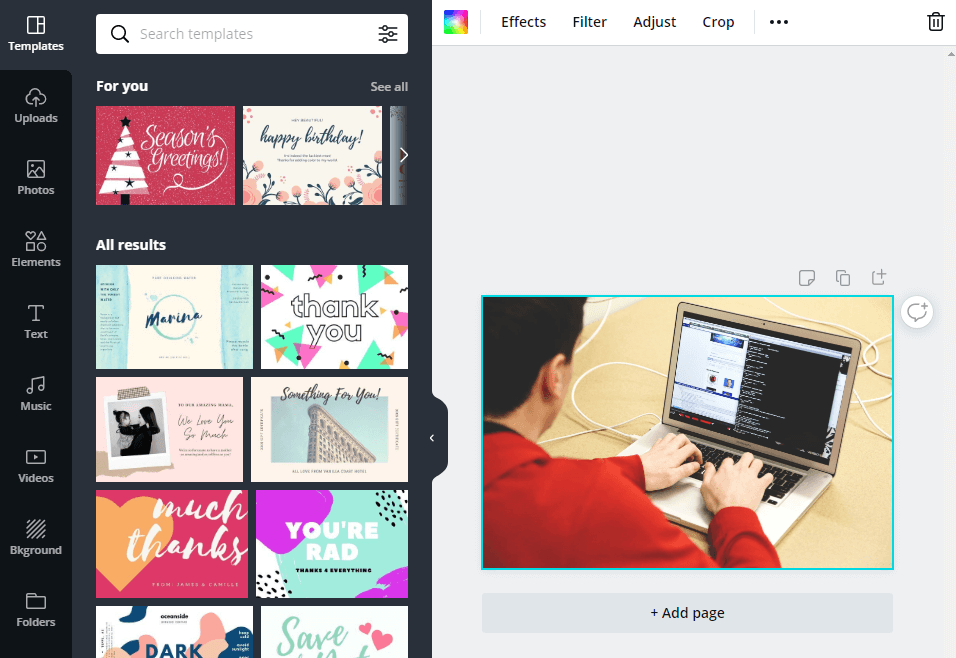
To the left, you have the editor’s menu, which includes all the tools at your disposal. To the right, you can see the image that we uploaded to Canva. Now let’s have some fun with it.
Step 2: Crop or Flip Your Photo
Cropping and flipping a photograph are two of the most basic tasks that you can do with editing software. Using Canva, you can do both by finding the corresponding options on the menu above the editor:
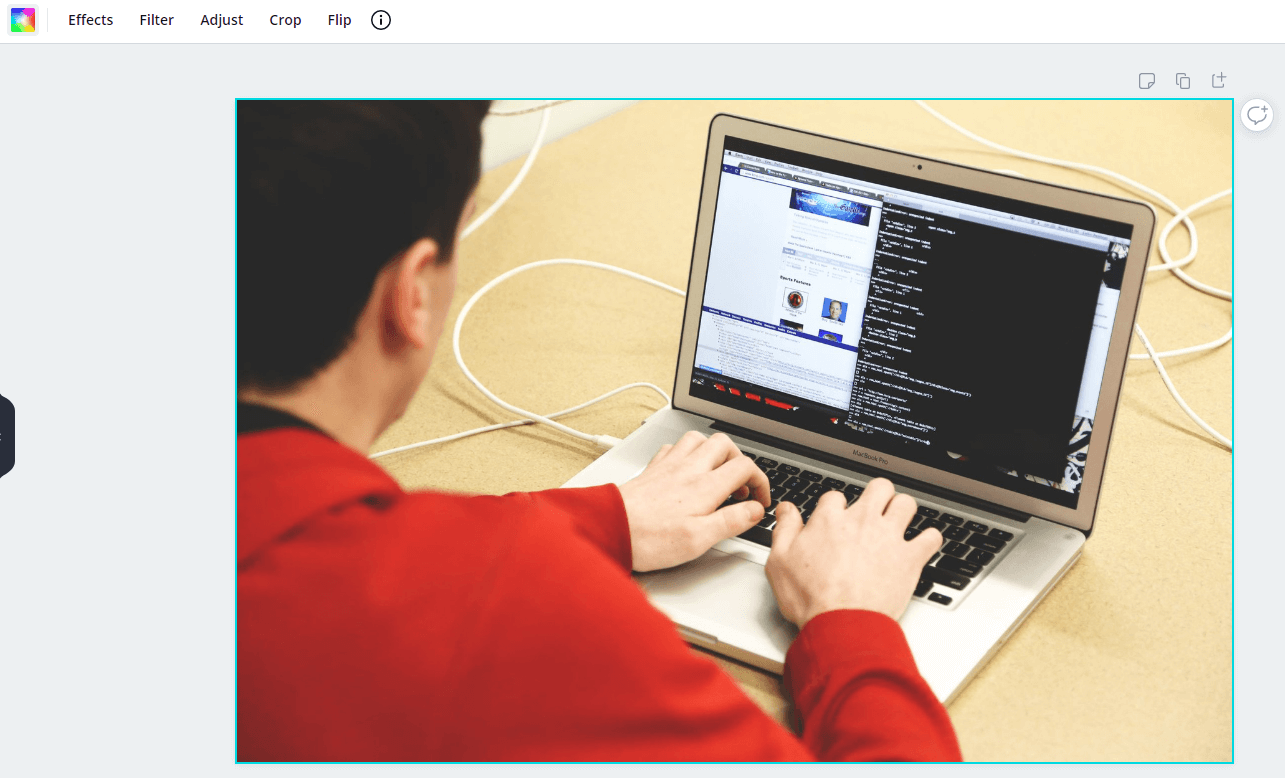
If you click on Crop, you can cut the photo parts that you don’t want to show. Selecting the Flip option will enable you to flip the photo horizontally or vertically.
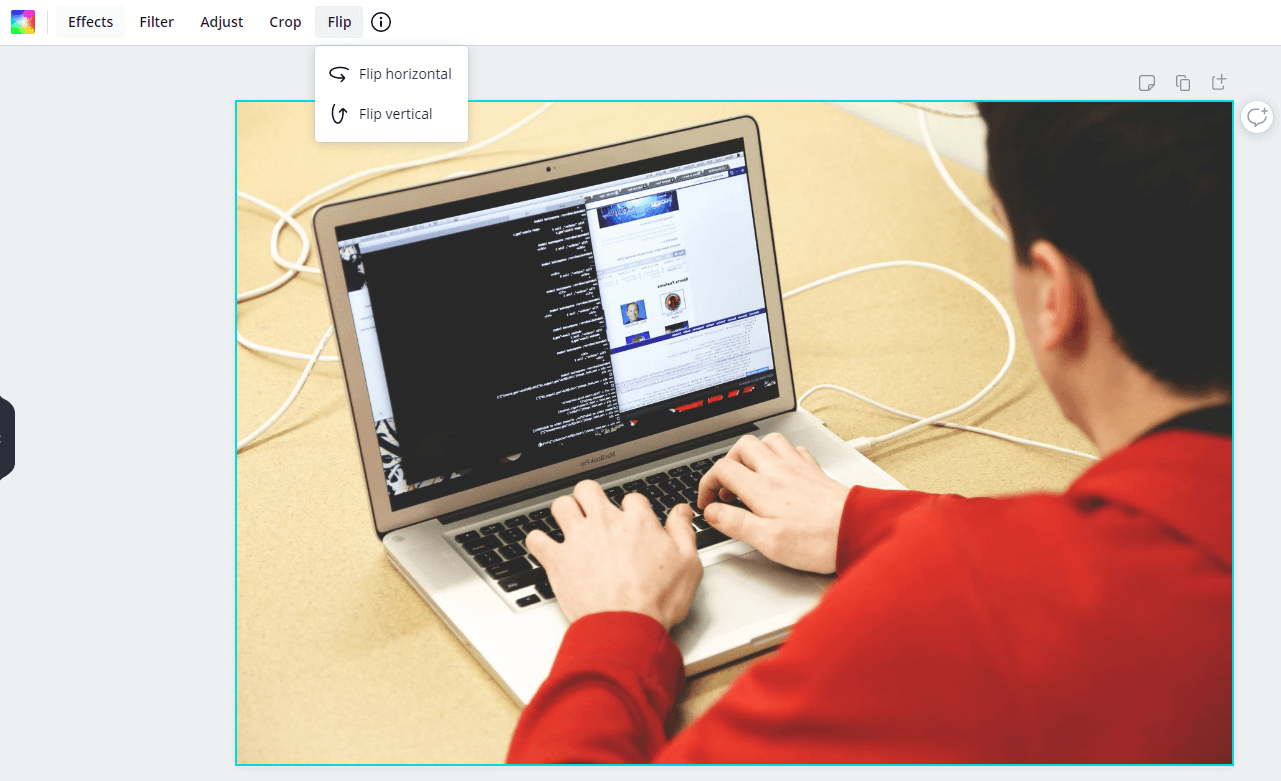
Both of these features are very intuitive, and the only thing that’s missing here is resizing functionality. With most other photo editors, you’d be able to change the resolution of your image on the fly, which is something that we’d love to see from Canva.
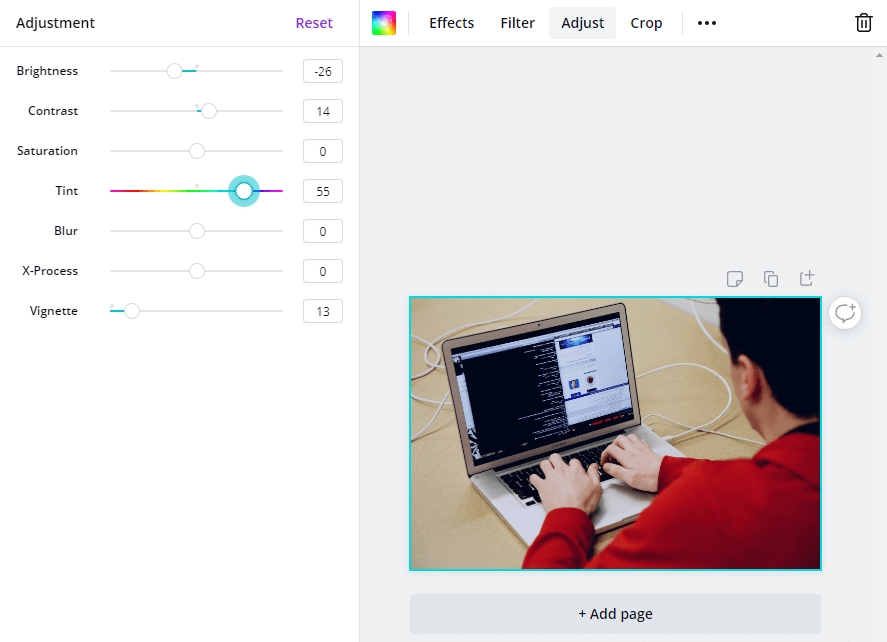
Step 3: Apply Filters and Effects to Your Photos
The same menu that houses the Crop and Flip tools also includes the Effects, Filter, and Adjust features. Using Adjust, you can tweak your photo’s coloration using simple sliders:
As far as Filters go, Canva includes 20 options that will look familiar if you’ve used any other photo editing tools. You have popular choices such as Greyscale, Retro, and many more to choose from. All you have to do is click on the filter that you want to use and adjust its intensity:

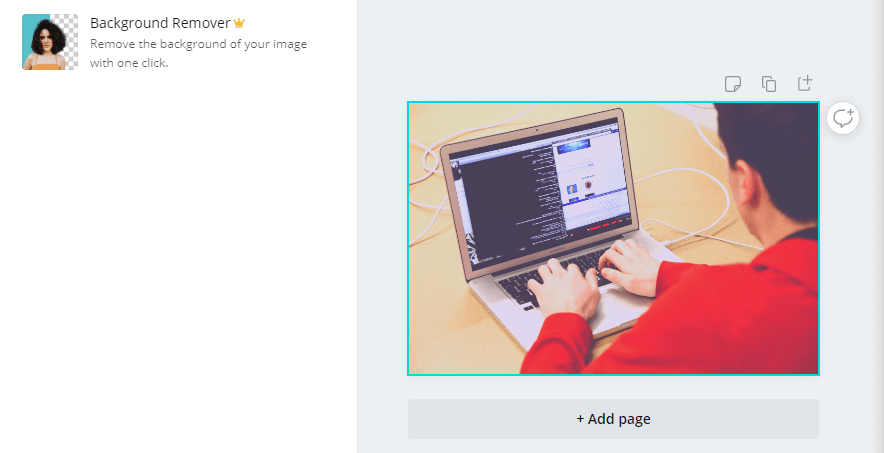
Moving on to effects, Canva doesn’t offer any options for free accounts. However, if you sign up for a premium plan, you can use Canva to help you remove the background from your images with only a few clicks:
As you can see, Canva’s photo editing tools are remarkably easy to pick up. If you’ve ever used similar software before, you should feel right at home using Canva.
Step 4: Add Custom Elements to Your Photos
Although Canva moonlights as a photo editor, it’s still a graphic design tool at heart. When you’re editing a photo, you still get access to the full suite of Canva design tools.
In practice, that means you can easily add elements from Canva’s library, place text over your photos, replace their backgrounds, and much more.
If you jump to the Elements tab, for example, you’ll see all of the custom icons and animations that Canva enables you to place on your images:
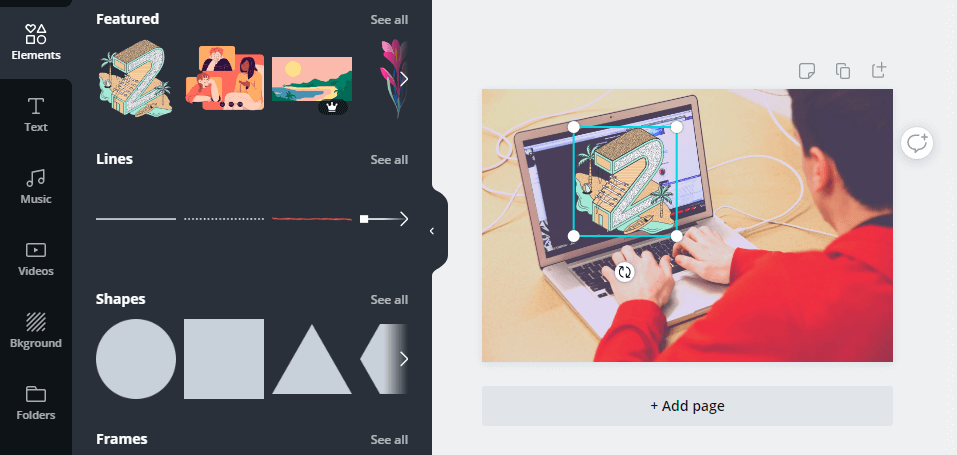
All you have to do is select the element that you want, drag it to its intended location, and resize if needed.
Adding text is just as simple. Clicking on the Text tab will show you all of the styles that you can use, as well as multiple heading sizes:
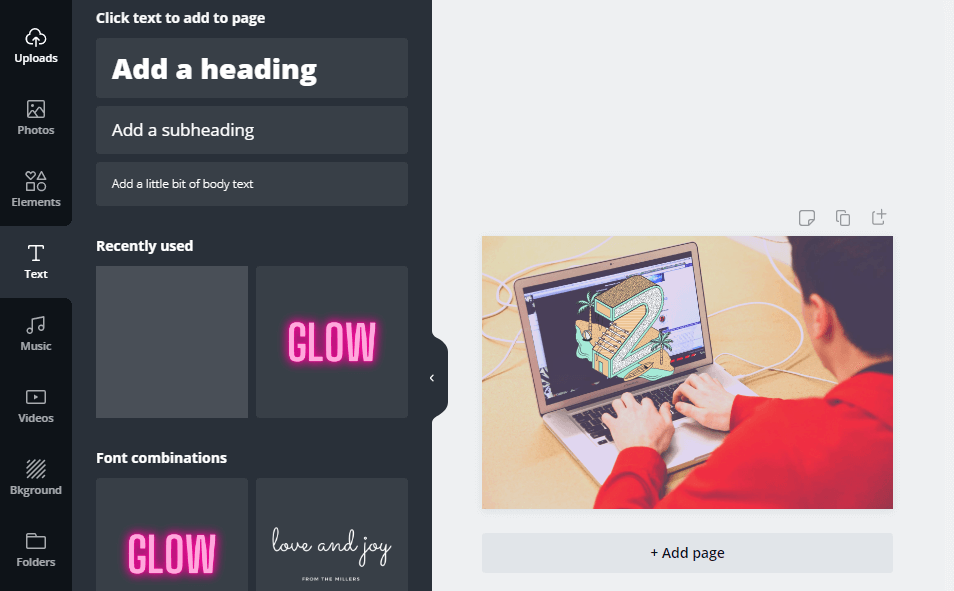
Combining those tools enables you to transform photos into elements that you can use as part of your website. If you want to stick to Canva’s photo editing features, though, you can also do so.
Conclusion
Although Canva isn’t a replacement for professional software such as Photoshop, it is a fantastic tool for photo editing and web design. Its templates, elements, and photo effects provide you with a variety of intuitive tools to create and edit graphics.
If you’re interested in creating designs for your website and you don’t want to pay for a premium photo editor, Canva is a fantastic choice (among many others). Plus, the platform is remarkably easy to use, even if you don’t have any web design experience.
Do you have any questions about how to use the Canva photo editor? Let’s talk about them in the comments section below!
Article thumbnail image by 200dgr / shutterstock.com


I’m enjoying watching the developer write right-to-left code.
😉
Ha! Good point, Bruce, it does look silly. Hopefully, it still gives you an idea of how the options work.