For a long time, Wunderlist was the de facto to-do app for many productivity enthusiasts. Since Microsoft bought the app, it’s unfortunately been discontinued. These days, its best features live on in Microsoft To Do, which adds a lot of new functionality of its own.
In this article, we’ll talk about how Wunderlist became Microsoft To Do. Then we’ll show you how the “new” productivity app works in action.
Let’s get to it!
The History of Microsoft To Do
As many Microsoft projects do, To Do began with an acquisition. In 2015, Microsoft bought out the developers behind Wunderlist for an undisclosed amount between $100–200 million.
By then, Wunderlist had been around for about four years and was one of the most polished and popular to-do apps on the market:
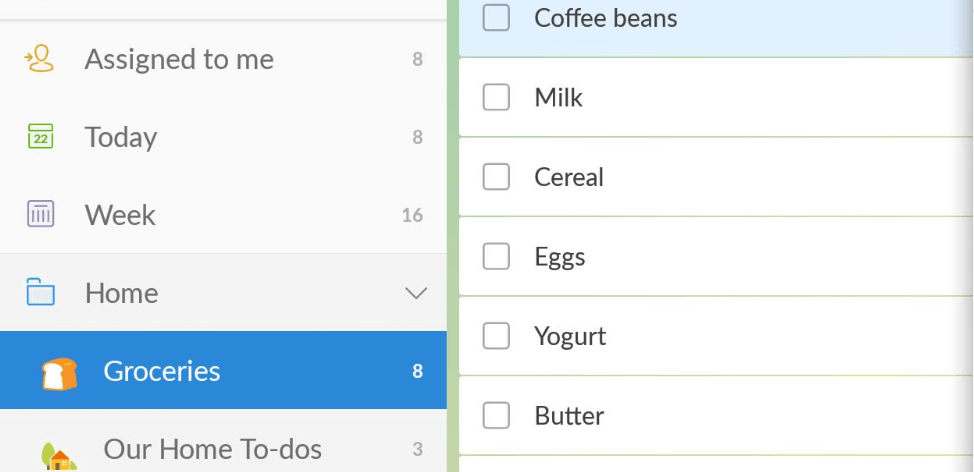
For a couple of years, Microsoft kept Wunderlist around, pushing out updates and maintaining service. Simultaneously, it began development on its own to-do platform around 2017.
About five years after its initial sale, Wunderlist finally shut down for good on May 6, 2020. If you’re still using the app, your to-do lists won’t sync anymore.
Fortunately, there’s no shortage of to-do apps to choose from if you’re in the market for a replacement, including Microsoft To Do. During its development, Microsoft actively sought to make the app feel like Wunderlist to entice its users to make the switch:
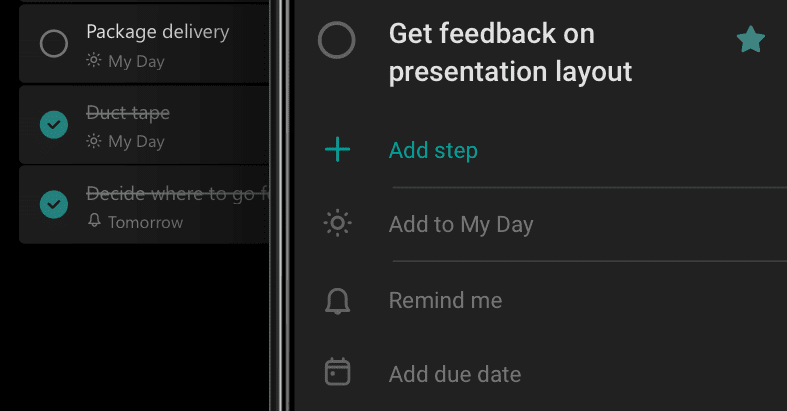
These days, Microsoft To Do is as polished as Wunderlist was, and includes many new features that may further streamline your productivity and project management.
How Microsoft To Do Can Help You Manage Your Days Better (In 5 Steps)
Microsoft To Do is available on Android, iOS, macOS, and Windows. The only thing you need to use the platform is a Microsoft account. For this tutorial, we’re going to use the desktop version.
Step 1: Add Tasks to Your Days
As soon as you log into To Do, the platform will display all the tasks you have in your planner. To keep things organized, To Do includes five default lists, which include My Day, Important, Planned, Assigned to you, and Tasks:
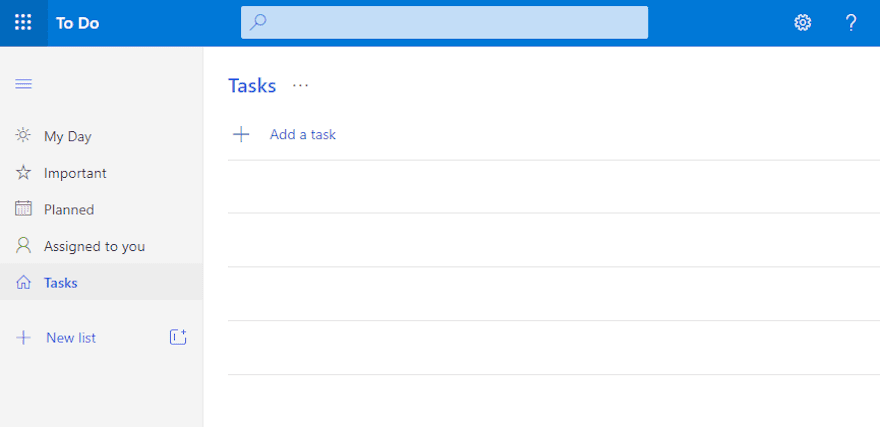
There’s a lot of overlap between these lists, so let’s start with Tasks. Here, you’ll see all the to-dos on your list, whether they’re long term or short term goals. To add an item to the list, click on Add a task and enter a name for it.
Let’s say, for example, that you want to schedule a Zoom meeting tomorrow:
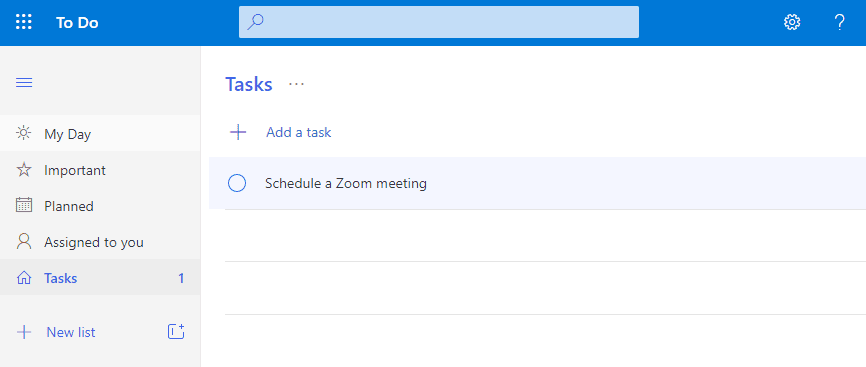
If you click on a task, you can add details to it. Options include breaking tasks down into steps, setting reminders, specifying due dates, making notes, and attaching files.
For our Zoom meeting example, we’ll add a due date of “Tomorrow” to the task:
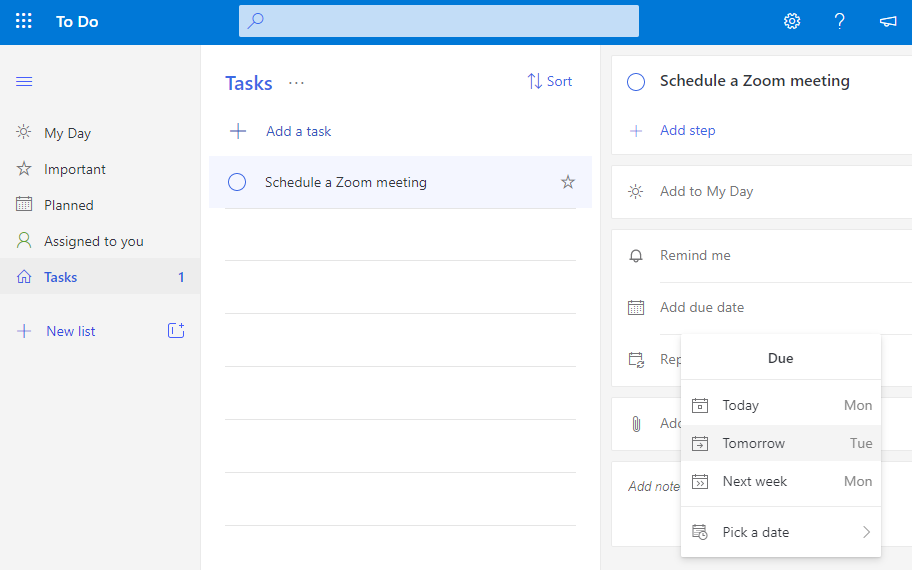
Breaking tasks down into steps can help you ensure your responsibilities are completed to their fullest extent. Step one in our example would be to schedule a call in Zoom, followed by sharing its link with all the attendees:
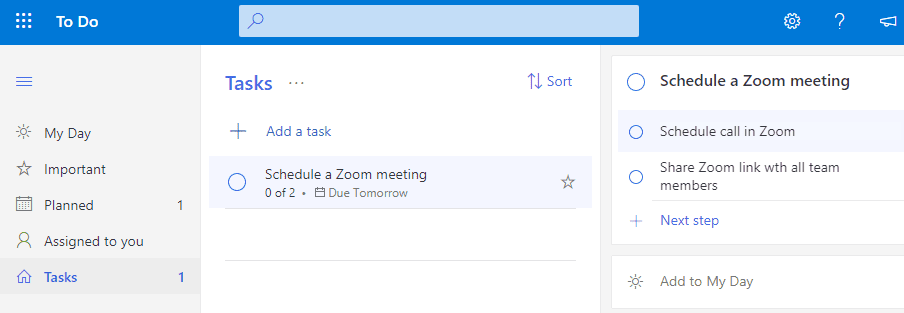
Since those steps are due today, you might also add the task to the My Day list:
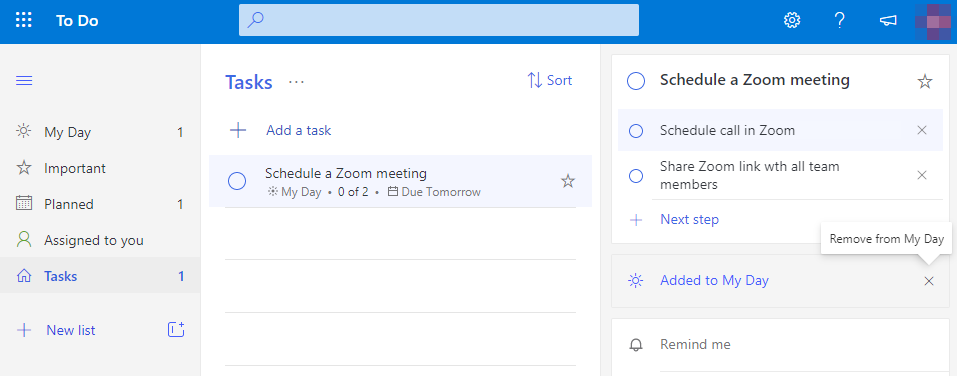
As its name implies, your My Day list helps you keep track of the things you have to do on a specific date. When you’re done with a task, you can click on the circle next to its name to mark it as complete:

You’ll likely spend a lot of time jumping between your Tasks and My Day lists to manage everything you need to do. If you like to schedule tasks well in advance, you can also use the Planned list to help you keep track of responsibilities that you don’t need to worry about for a while.
However, those are just the basic lists Microsoft To Do includes out of the box. If you want to organize your work even further, it may be helpful to create your own.
Step 2: Set Up New to To-Do Lists and Groups
With Microsoft To Do, you can set up as many lists as you want. For example, you may want to use To Do to help you manage your workload at your job as well as tasks that need to be completed around your home.
In that case, it’s a smart idea to also set up a list just for personal tasks. That way, you can stay on top of all aspects of your calendar using a single platform.
To create a list, click on the New List option under Tasks and enter a name for it, such as Personal Tasks:
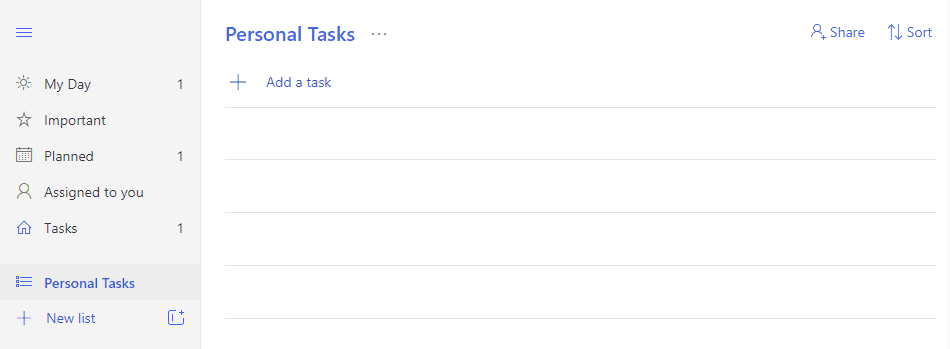
If you look closely, there’s a button right next to the option to create new lists, which enables you to set up groups. You can use groups to further organize lists. This feature is ideal if you’re juggling multiple projects at once, as in this example:

When you set the app up this way, you can look at your projects from three different angles. Groups will give you a big-picture overview of what needs to be accomplished, specific lists will help you keep track of individual steps you need to complete, and your My Day list will show you the most pressing items on your agenda.
Step 3: Tackle Your Most Important Tasks First
At this stage, you basically know everything you need to start using To Do. However, there are a couple of additional features you shouldn’t miss out on. One of them is marking critical tasks as “important” so they show up on the corresponding list:

You can add tasks directly to the Important list. Alternatively, you can click on the star icon next to any task in another list to add it to your critical to-dos:

As we mentioned before, there’s a lot of overlap between the default To Do task lists. The idea is that you should be switching back and forth between lists throughout the course of your day so that you don’t miss anything.
For example, you can kick off your day by reviewing your Tasks list. From there you can add items with upcoming due dates to My Day, and mark anything critical as important. By the end of the day, everything on your My Day list should be complete, and you can start the next day with a clean slate.
Step 4: Collaborate With Team Members
One of the main advantages of Wunderlist was that you could share lists with other users and sync tasks. Fortunately, this feature was carried over into Microsoft To Do.
You can add other users to your list by right-clicking on its name and selecting Share List:
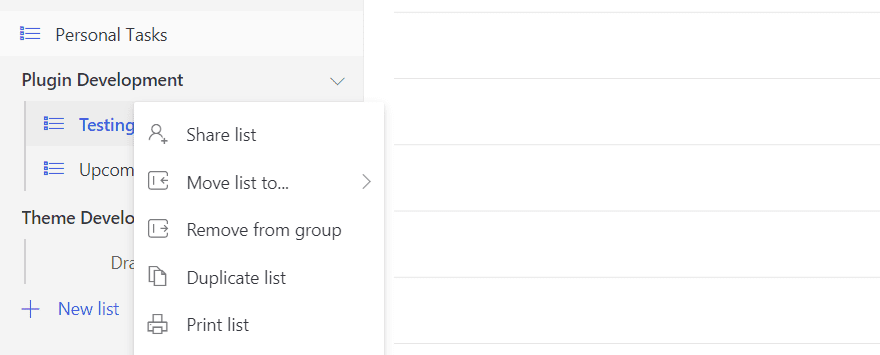
Enter your new list member’s email address and To Do will send them an invitation to your list. You’ll then see the option to assign tasks to list members when you open the details panel:

Tasks that others have assigned to you will appear in the default Assigned to you list, too:
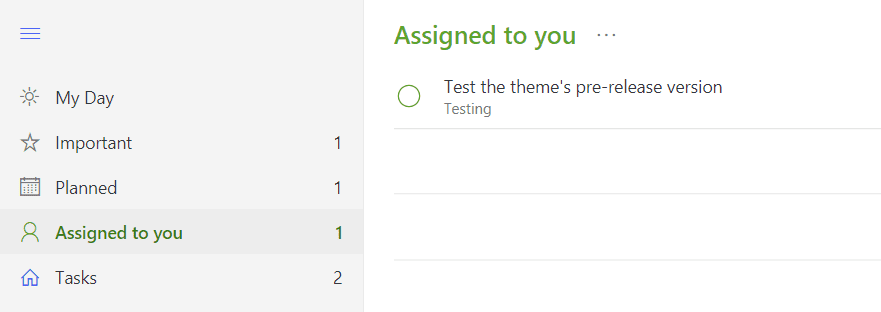
For some, this feature could make Microsoft To Do a viable alternative to project management plugins or apps such as Trello or Asana.
Step 5: Take Advantage of App Integrations
Perhaps the main advantage of To Do over Wunderlist is that it integrates seamlessly with several other Microsoft tools. These include Outlook, Cortana, Flow, and Planner.
For example, if you sign in to Outlook using the same account you use for Microsoft To Do, you will be able to review your tasks from within your email client:
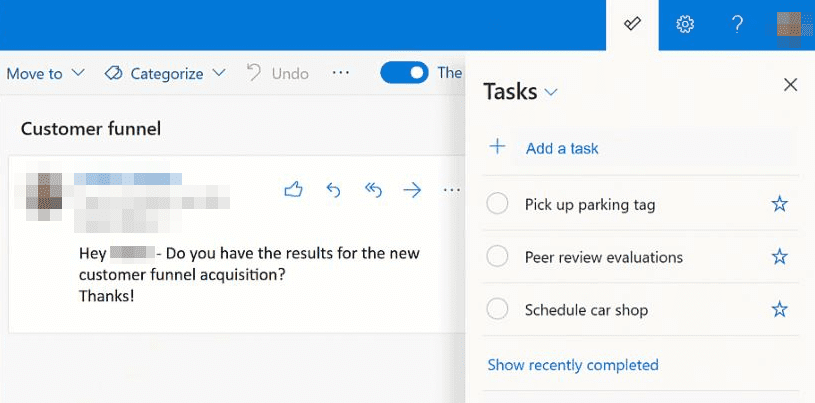
Although there’s a lot of synergy with other tools if you’re deep within the Microsoft ecosystem, To Do works well enough on its own. If you use other email clients or project management apps, To Do can still help you improve your workflow. Plus, it’s pretty easy to pick up.
Conclusion
Despite the controversy surrounding Wunderlist’s acquisition, Microsoft managed to build its To Do platform into a powerful project management solution. With To Do, you get an easy-to-use organizer that enables you to keep track of small tasks such as picking up milk as well as manage complex development projects.
Microsoft To Do is fairly easy to learn, and managing a project with it boils down to five steps:
- Add tasks to your days.
- Set up new to-do lists.
- Tackle your most important tasks first.
- Collaborate with team members.
- Take advantage of app integrations.
What is the one feature you can’t live without in to-do software? Share your thoughts with us in the comments section below!
Article thumbnail image by Liliia_A / shutterstock.com





Was a wanderlust user before now shifted to this.
Thank you so much for this instruction! And for all the screen shots! Much appreciated!
You’re welcome, Lindsey! Glad to be of help.