
The way you organize and arrange elements on your website can have a significant impact on its overall appearance, and even its User Experience (UX). The WordPress Spacer block is a simple tool that can help you do this more effectively. True to its name, it create space between blocks, which can make your pages and posts more appealing and easier to read.
In this article, we’ll explain how to add the Spacer block to your WordPress post or page and how to use it. We’ll explore the block’s various settings and options, and provide some best tips and best practices for using it effectively. Then we’ll wrap up by answering some frequently asked questions.
Let’s jump right in!
Subscribe To Our Youtube Channel
How to Add the Spacer Block to Your Post or Page
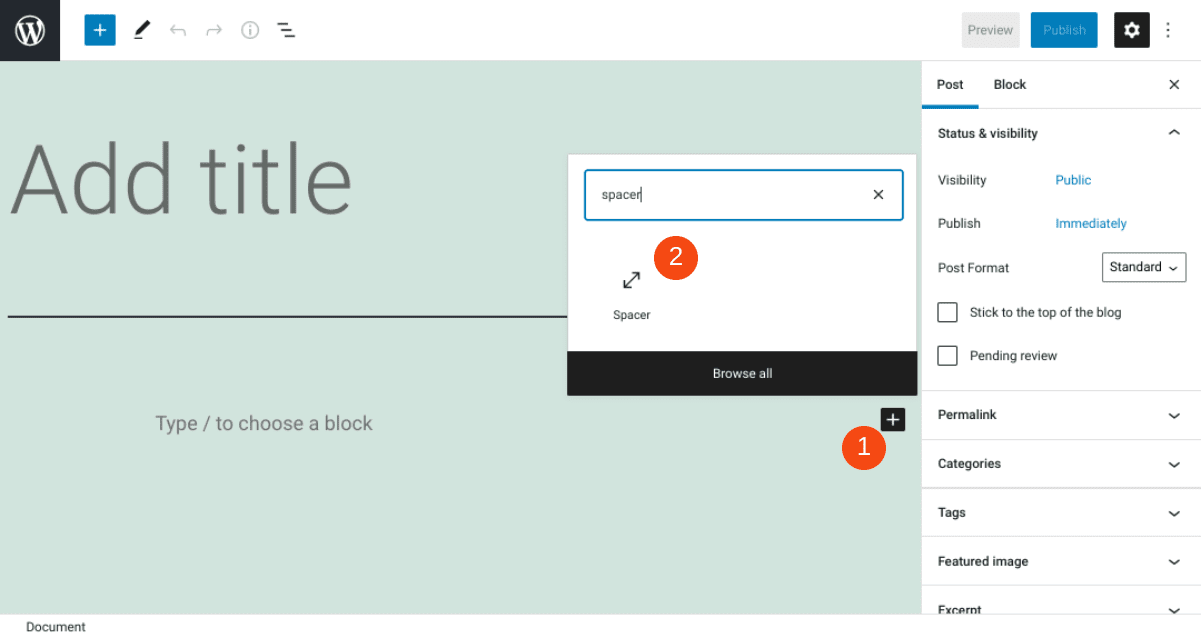
If you want to add some extra space to your WordPress content, you can start by navigating to any post or page. Next, click on the Add Block button in the editor, which is marked by a plus icon (1). There you can search for “spacer”, and select the first option (2):
Alternatively, you can add the block to your post or page by entering “/spacer” into the editor’s text field. Hit your Enter key, and the Spacer block will automatically be added.
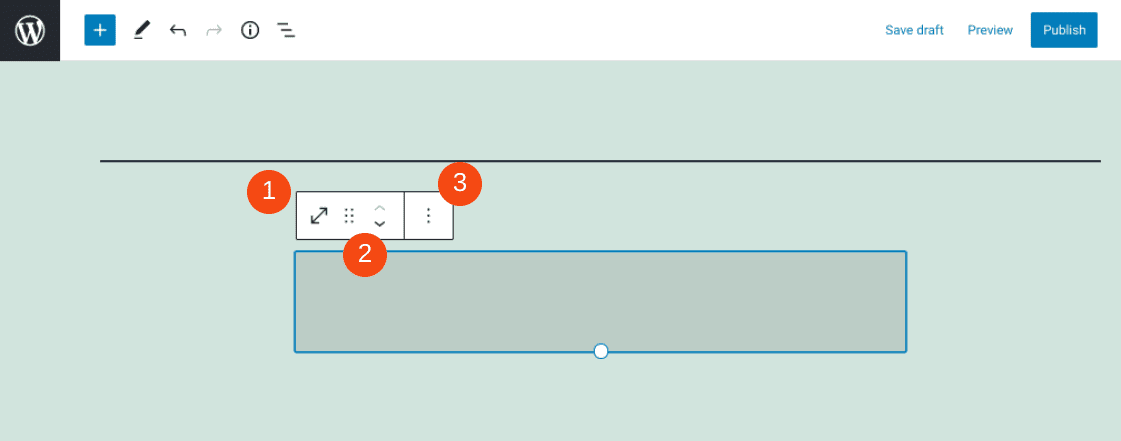
Once you insert the block, you’ll notice a new toolbar along the top. We’ll explore the various options it provides in the next section.
Spacer Block Settings and Options
If you’re familiar with using WordPress blocks, you probably already know that each one comes with its own set of controls you can use to configure it. The Spacer block is no different.
In block toolbar, there are three main options:
- The Transform button, which lets you convert the block into a Group or Columns
- Moving handles (and/or a Drag icon) that enable you to move the block up or down on the page or post
- More Options (the three vertical dots), which opens a menu with additional settings
Here’s where you can find those buttons:
Under the More Options menu, you can copy or duplicate the block:
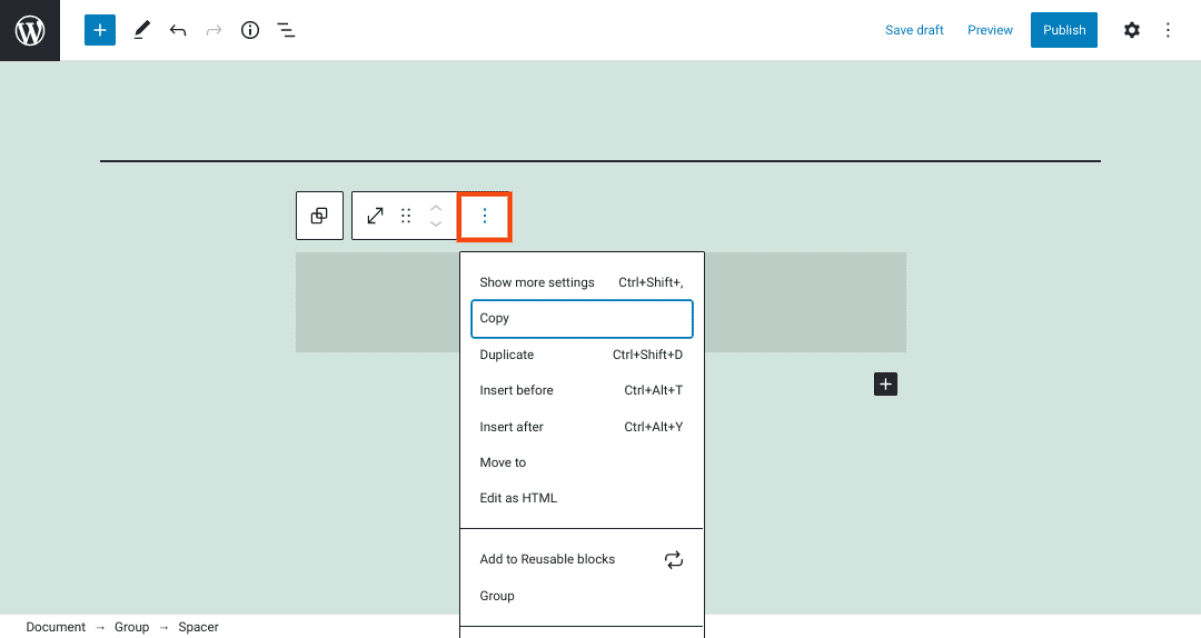
There are also settings for adding the Spacer to your Reusable Blocks, editing its HTML, and more.
One of the useful things about the WordPress Block Editor is that it also lets you resize blocks. For example, if you want to adjust the block’s height, you can do so within the right-hand menu:
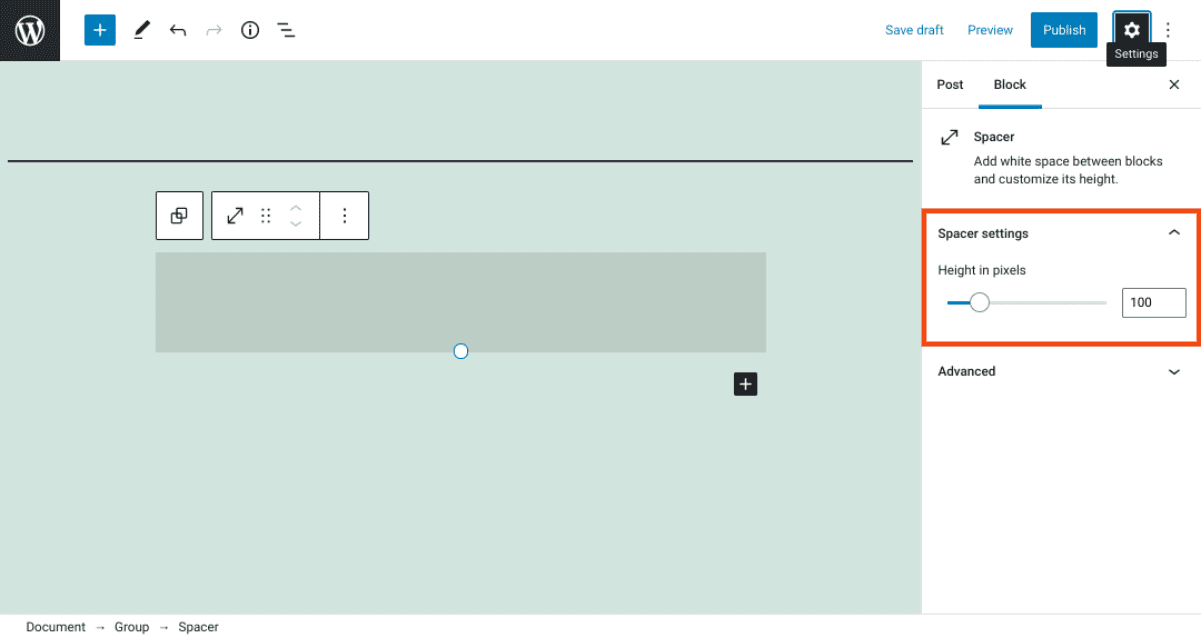
Under the Spacer settings section, you’ll find the option to adjust the block’s height in pixels. You can either use the slider or manually enter your desired value into the text field. Then you can check out the Advanced section to configure HTML anchors and additional CSS classes.
Tips and Best Practices for Using the Spacer Block Effectively
The Spacer is one of the easier WordPress blocks to use. It doesn’t come with an overwhelming amount of settings or configuration options.
However, there are some tips you may want to keep in mind while using it. For example, remember that the effective use of white space (also known as “negative space”) can go a long way in your web design. It can help make your pages look cleaner, and in turn more professional. Therefore, it’s smart to consider using the Spacer block in areas where your content seems overly crowded or hard to read.
Additionally, we also suggest that you only use this block when you want to add white space to a specific area on the page, instead of adding space between paragraphs. For the latter, we recommend using the Paragraph block instead.
Finally, to ensure that the appearance of your pages remains consistent, you might want to consider setting the same height for each Spacer block you use. By default it’s set to 100 pixels, but feel free to use whatever looks best with your site’s design.
Frequently Asked Questions About the Spacer Block
At this point, you should be feeling pretty familiar with this WordPress block and how to use it. However, let’s go over some popular and frequently asked questions about it, to make sure we’ve covered all the basics.
Where Do I Find the Spacer Block in WordPress?
To find this block in WordPress, you have a couple of options. The first step is to navigate to the post or page you want to add it to. Next, click on the Add Block button (or the plus icon), and then search for “spacer” in the text field. Alternatively, you can type “/spacer” directly within the text editor, and hit the Enter key.
What Do the Post and Page Spacer Blocks Do?
True to its name, this block adds space between the other blocks on your WordPress pages and posts. It can be an effective tool to use when you want to create more white space on the page, or simply want to enlarge the area set between blocks by default.
Can I Add Spacer Blocks Anywhere in WordPress?
You can use the Spacer block anywhere on your WordPress site that grants you access to the Block Editor. Of course, the most likely place you’ll use it is within your pages and posts. However, you can also add it when editing your WordPress widgets.
Conclusion
There are many ways to organize the pages and posts on your website to make them both functional and aesthetically pleasing. If you’re looking to create more white space between the blocks on your pages, the Spacer block is a vital tool.
As we’ve seen, this block is a simple way to separate elements in your WordPress content. You can easily insert it into your posts and pages as many times as you want, and then customize its height in pixels.
Do you have any questions about using white space to enhance your WordPress content? Let us know in the comments section below!
Featured Image via msr melooo1 / shutterstock


Leave A Reply