
There are many ways to make your website more engaging. One of them is to add music and playlists to your pages. Whether you’re looking to promote your own audio or someone else’s, the Mixcloud embed block can help you easily integrate your Mixcloud playlists and profile with your WordPress site.
In this post, we’ll explain how to add the Mixcloud embed block to your WordPress posts and pages, and discuss its settings. We’ll then provide tips and best practices for using this element and answer some frequently asked questions.
Let’s get started!
How to Add the Mixcloud Embed Block to Your Post or Page
Adding the Mixcloud embed block in WordPress is a quick and easy process. Note that you don’t need to have a Mixcloud account to use content from this site. However, the playlists or tracks you share need to be public.
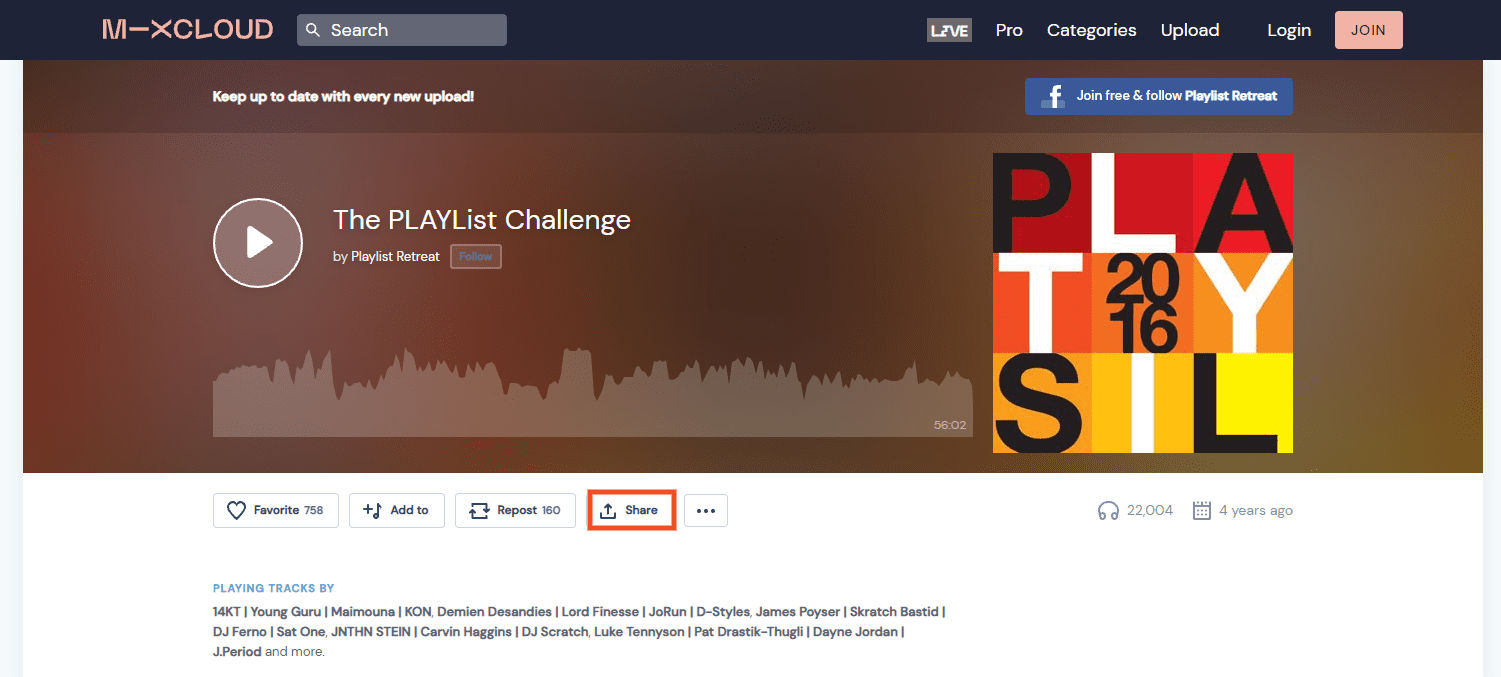
To get started, you can open the Mixcloud profile, playlist, or track that you want to embed. We’ll use a track as an example.
Under the web player, click on the Share button:
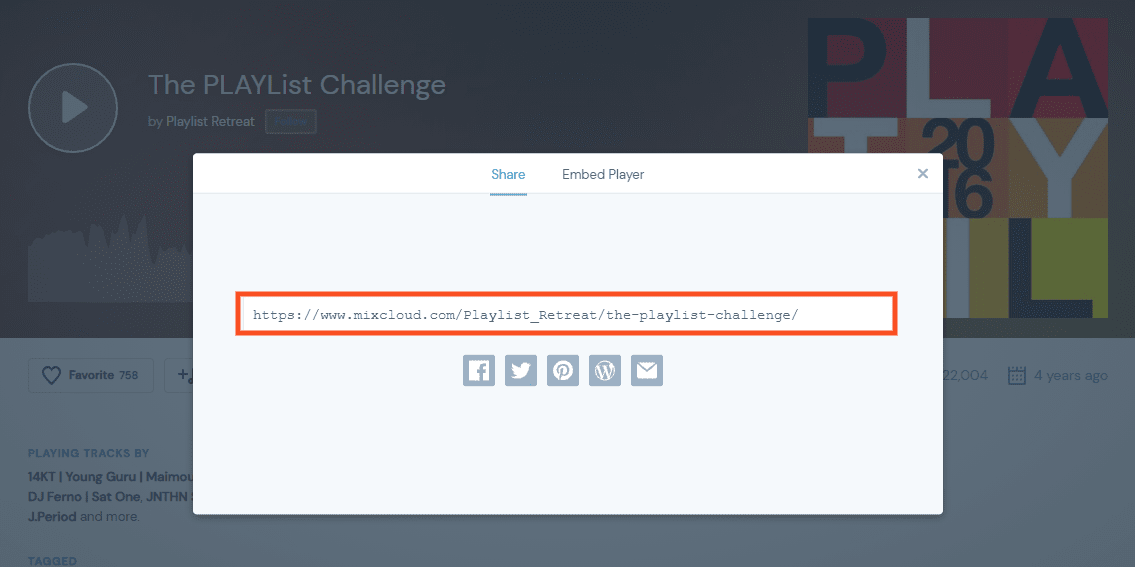
Once you click on Share, a pop-up window will appear. Copy the URL:
Now, you can navigate to the WordPress post or page where you want to insert it. Next, click on the Add Block (+) button and search for “Mixcloud”. Then, select the icon that appears:
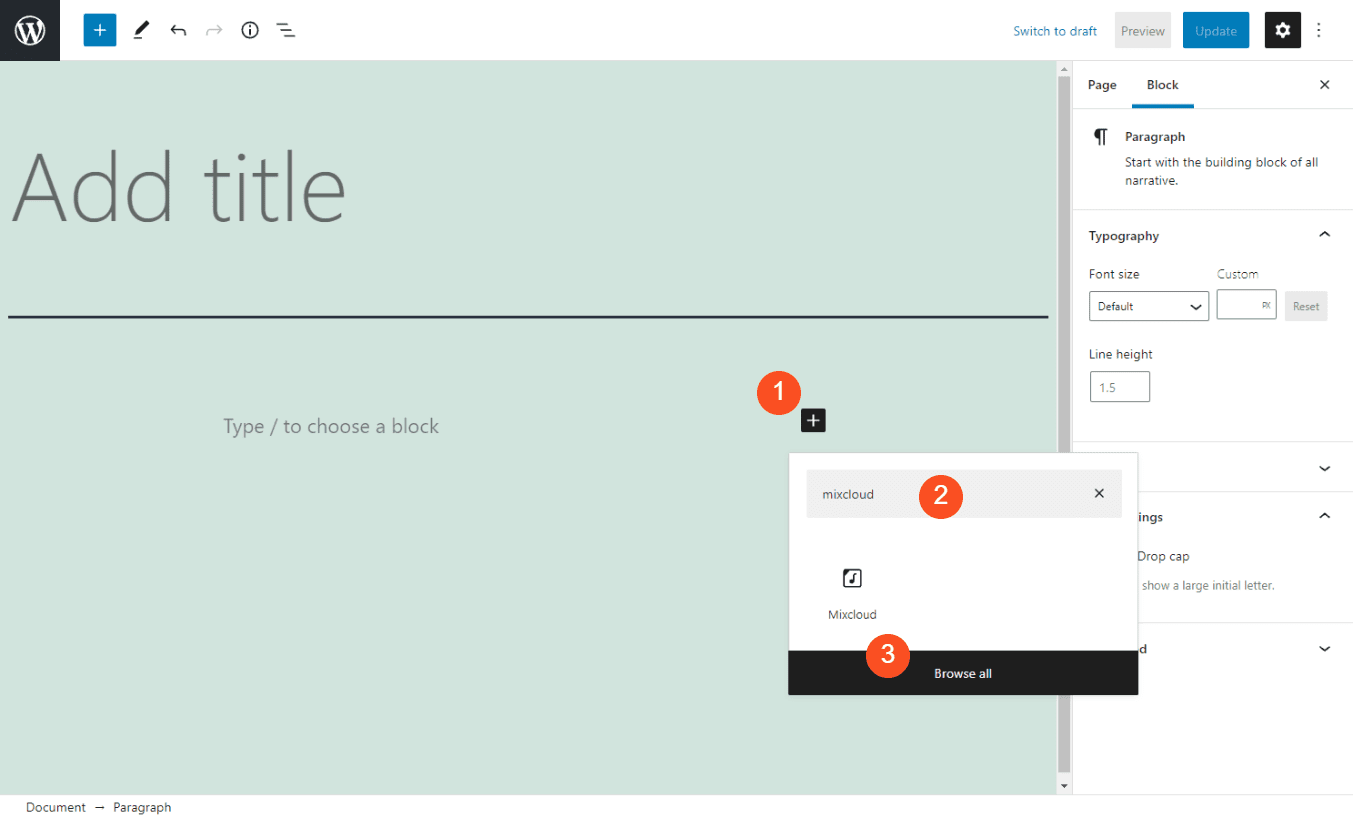
Another way you can add the block is by typing “/mixcloud” into the Paragraph block of the text editor. Then press your Enter key, and the element will automatically be inserted.
Once you insert the block, you can paste the URL within the text field and select Embed:
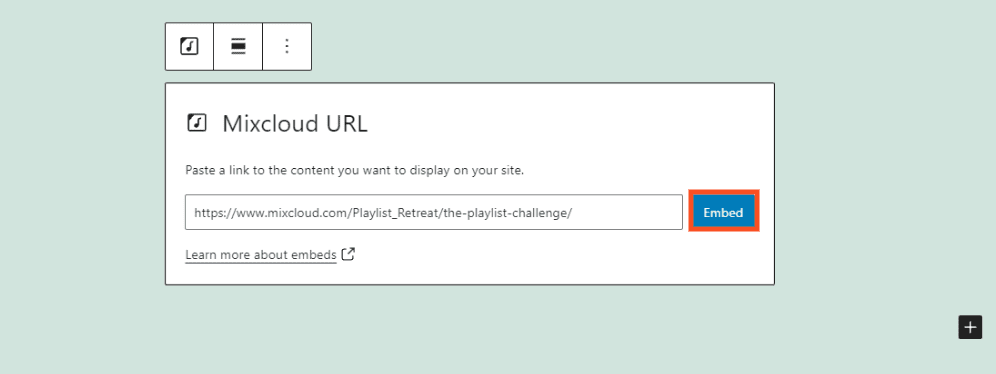
Then, a preview of the track will appear within the text editor. In the next section, we’ll look at the various settings and controls you can use for this block.
Mixcloud Embed Block Settings and Options
Each WordPress block comes with its own set of controls. Let’s take a closer look at what these are for the Mixcloud embed block.
Once you insert and embed the Mixcloud URL, a toolbar will appear along the top of the block with four icons:
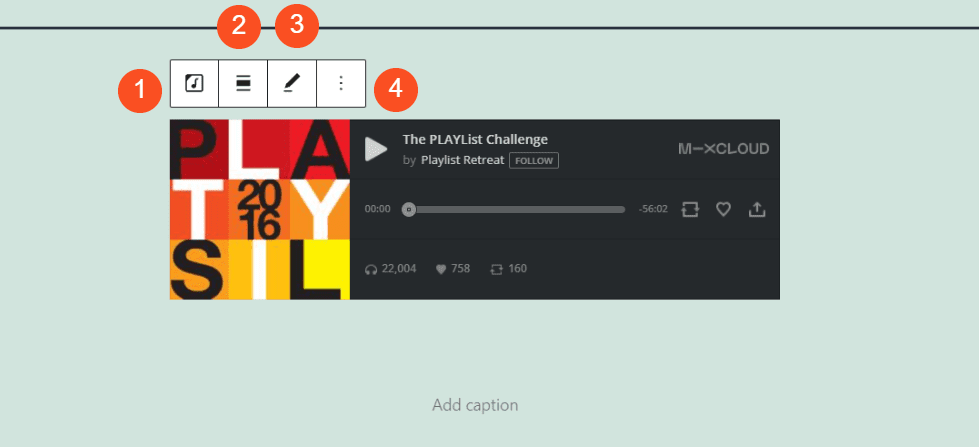
Here’s a breakdown of what each one means:
- Change block type: This lets you transform the element into a Group or Columns block.
- Alignment: You can use this to change the block’s position to right, center, or left, as well as full or wide width.
- Pencil icon: This lets you change the Mixcloud URL.
- More options: Here, you can find a handful of additional settings, such as adding a new block before or after the element or removing it.
As you can see in the above example, you can also add a caption below the track or playlist. You can simply click within the Add caption text field to write one.
To the right, you will find two more controls:
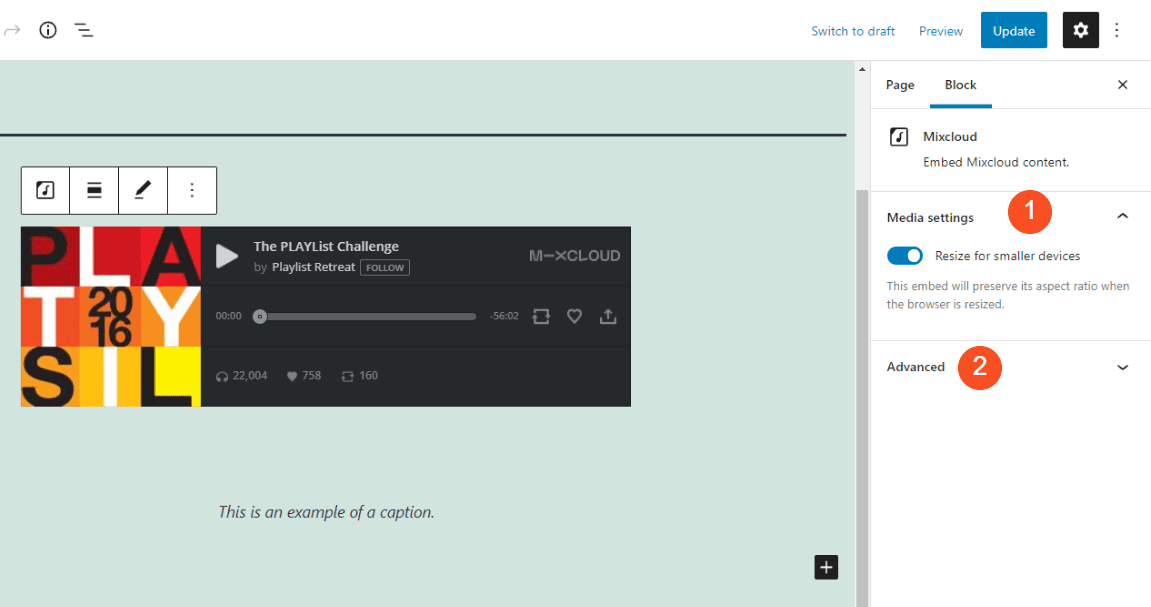
The Media settings option is enabled by default. It will ensure that the media player is automatically resized for smaller devices or when a browser size is adjusted. The Advanced panel is where you can add your custom CSS if you wish.
Tips and Best Practices for Using the Mixcloud Embed Block Effectively
This block is pretty easy to use. However, there are some tips and best practices to help you utilize it more effectively.
If you plan on using Mixcloud playlists or profiles again in the future or across multiple places on your site, you might want to add them to your Reusable Blocks. That way, any settings or changes you make to them now will be saved. You don’t have to repeat the entire process every time you want to use the elements.
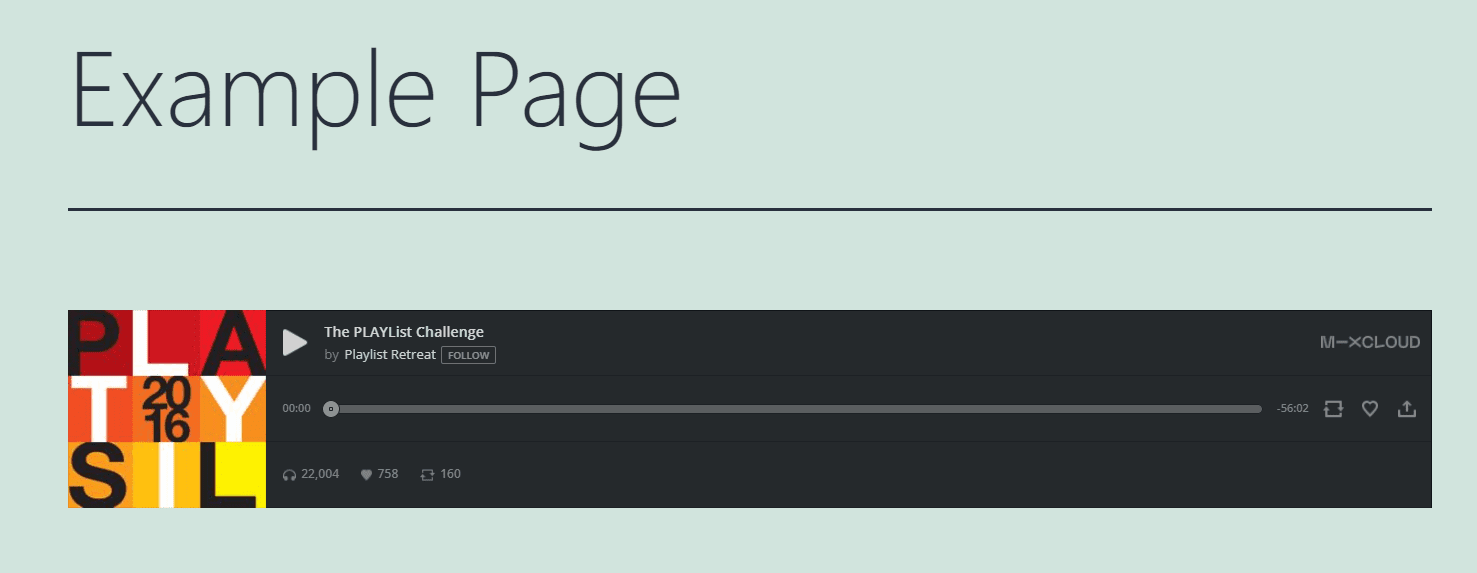
We also recommend previewing the block on the front end of your site to see how it looks and whether the default alignment is the best option. For example, if you want it to take up the width of the content area, we suggest changing the alignment to full width:
If you’re going to add color behind the block, you can do so by transforming it into a Group block and choosing a background color:

Keep in mind that you can also embed playlists and profiles. For example, you can insert them the same way you would a single track (by clicking on the name of the playlist or profile in Mixcloud, followed by the Share button).
Finally, it’s essential to consider the placement of your Mixcloud player on your site. For example, you may want to put it at the top so that your users can easily find it and turn it on/off as needed.
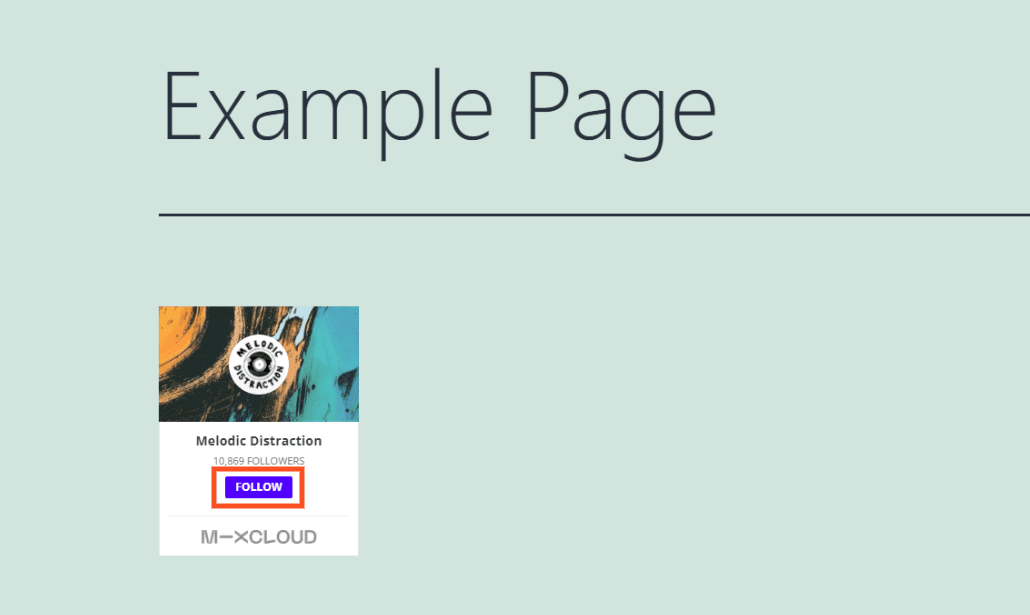
If you have a Mixcloud profile that you’re trying to promote, we recommend embedding it. That way, visitors can easily click on the Follow button directly from the page:
It could also be wise to add the element as a widget. Then you can use the block in your footer or sidebar across all your pages and posts, rather than individual ones.
Frequently Asked Questions About the Mixcloud Embed Block
By now, you should know nearly everything about the WordPress Mixcloud embed block and how to use it. However, let’s discuss some of the most frequently asked questions to ensure that we cover all of the essential information.
What Does the Mixcloud Embed Block Do?
The Mixcloud embed block lets you connect your Mixcloud profile with your WordPress site. Even if you don’t have an account, you can still use the element to share other playlists, tracks, and profiles (as long as they are set to public).
How Can I Find the Mixcloud Embed Block?
You can find the block by navigating to a WordPress post or page, clicking on the Add Block button, then searching for “Mixcloud”. It will be the first option that appears.
Alternatively, you can also click within the Paragraph block of the editor and type “/mixcloud”. Once you press your Enter key, the element will automatically be added to the post or page.
Where Can I Use the Mixcloud Embed?
You can use the Mixcloud embed block anywhere within WordPress that provides access to the Block Editor. This means you can insert it into any of your posts or pages. Additionally, you can also add it to the WordPress widgets to use in your footer or sidebar.
Conclusion
There are many different ways to make your WordPress site more exciting and engaging. An often overlooked method is to incorporate music. Whether you want to promote your own work or just share some that you enjoy with your users, Mixcloud can help you do that.
As we discussed in this post, the Mixcloud embed block makes it easy to integrate playlists, tracks, and profiles with your website. You can seamlessly insert the element into any page or post. Then, simply copy and paste the URL of the Mixcloud content you want to display and share.
Do you have any questions about using the Mixcloud embed block? Let us know in the comments section below!
Featured Image via PureSolution / shutterstock


I always get confused where Divi vs Block Editor are concerned. Can they co-exist and Divi page remain unchanged?
Thanks.
Hey Bruce, they can co-exist to a certain extent right now. We’re always working to tighten their integration, which means over time using Divi and WordPress’s native block editor will just become more and more seamless. Here is a link to our most recent major compatibility update: https://www.elegantthemes.com/blog/theme-releases/introducing-improved-compatibility-with-the-gutenberg-editor
So this only works if using the BLOCK editor?
We use Classic Only
Wht are the options?
Hi Chuck,
You’ll need to switch to the Block Editor in order to access this feature.