
Even the best blog content eventually runs out of steam. Facts grow outdated, instructions become obsolete, and in time, traffic stops coming in. The only way to weather the passage of time successfully is always to keep improving your blog, which includes revising its content.
Revisiting and updating your blog content periodically is perhaps the best way to make sure it never loses its value. In this article, we’ll explain why “evergreen” content is so important. Then we’ll teach you how to use the PublishPress Revisions plugin to keep your content library fresh.
Let’s get to work!
Subscribe To Our Youtube Channel
Why Your Blog Needs Evergreen Content
With the exception of some creative writing, most blog content becomes outdated over time. If you write a tutorial for a piece of software, for example, the instructions might no longer be relevant when it’s updated to a new version. Reviews can lose their accuracy as well, opinion articles often become outdated as the landscape shifts, and so on.
Ideally, you want your content to remain relevant for as long as possible. That way, it will keep showing up in Search Engine Results Pages (SERPs) and bringing in traffic during the entirety of its lifetime. This also provides you with the best possible Return on Investment (ROI) for the effort that went into producing that content.
To make that happen, you can’t simply write a blog article, forget about it, and hope that it remains “fresh”. To create real evergreen content, you’ll likely need to update or revise it from time to time. How often you do this will depend on what type of content you’re creating, and how valuable it is to your website.
This might sound like a lot of extra work, but revising content is still simpler than starting again from scratch. If you wait too long between revisions, however, the process becomes much more involved. That’s why the smart move is to schedule updates in advance, so that nothing slips through the cracks.
An Introduction to the PublishPress Revisions Plugin
WordPress already ships with a revisions system out of the box. This means that for a revisions-focused plugin to be worth your time, it needs to bring some new features to the table. WordPress also ships with the ability to schedule posts. There is no option to schedule post updates to published posts using post revisions, however,
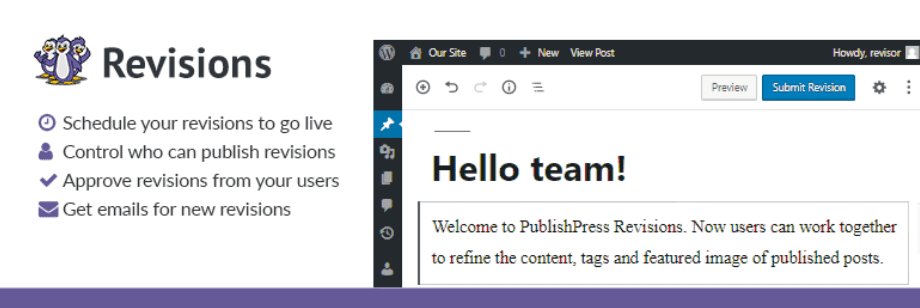
The Revisions plugin is offered by the PublishPress team, which is best known for its content calendar plugin. As you might expect, Revisions integrates seamlessly with PublishPress. However, it also works just fine on its own.
By using this plugin, authors and contributors can submit revisions for posts they have created. All of those revisions go into a queue, where editors, authors, and administrators can approve or reject the changes.
The result is a more collaborative approach to the editorial workflow, which can benefit large teams that are using WordPress to create content. If you run a blog and you intend to grow your content library as much as possible, Revisions can be a useful addition to your tool belt. That’s especially true if you’re working with multiple contributors and editors.
Price: The base Revisions plugin is free, but there’s also a premium version available that offers additional functionality.
How to Schedule Revisions in WordPress Using PublishPress Revisions (In 4 Steps)
At this point, we’re going to show you how the Revisions plugin works. We’ll also demonstrate how it can be integrated with PublishPress, in case you happen to use that plugin as well. Let’s get right to it!
Step 1: Revise a Published Post and Submit It for Approval
After installing the Revisions plugin, using it is simple. If you’re a contributor, an author, or a “revisor” (a unique role set up by the plugin), you’ll be able to add revisions to WordPress content. Authors and revisors can modify any posts they want. Contributors, on the other hand, only get access to their own content.
To create a revision, you need to open a post that’s already live using the Classic or Block Editor (the plugin works out of the box with both). Once you do, you’ll notice a new Pending Revision option in the top-right corner of the editor:
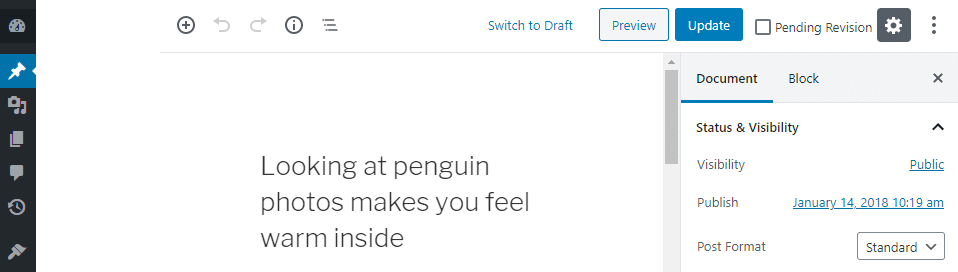
If you check that box, any changes you make to the post afterwards will go into a revision queue for approval. In order for the plugin to work, you need to remember to select that box. Otherwise, the changes you make will save normally, skipping the revisions queue.
Once you’ve selected the Pending Revision option, you can edit your blog post as usual. Then you’ll want to hit the Update button. After that, WordPress will let you know that your revision is in the queue.
Step 2: View Submitted Revisions in the Revisions Queue
If you’re an editor or an administrator, the plugin will also give you access to a revisions queue page. That page contains a list of revisions, in order of submission times:
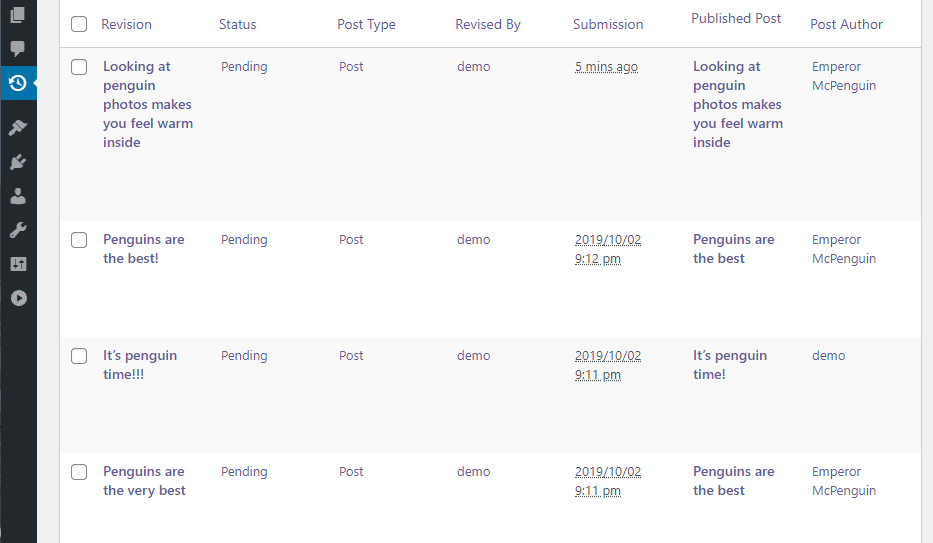
This queue lets you know what the status is for each submission. Plus, it tells you who made the changes, when it happened, and the name of the original post’s author. To check out each piece of content, you can click on the Preview button below its name.
Step 3: Approve and Schedule Revisions
When you preview a post that’s under revision, the plugin will let you know you’re looking at one or more changes that haven’t been approved yet:
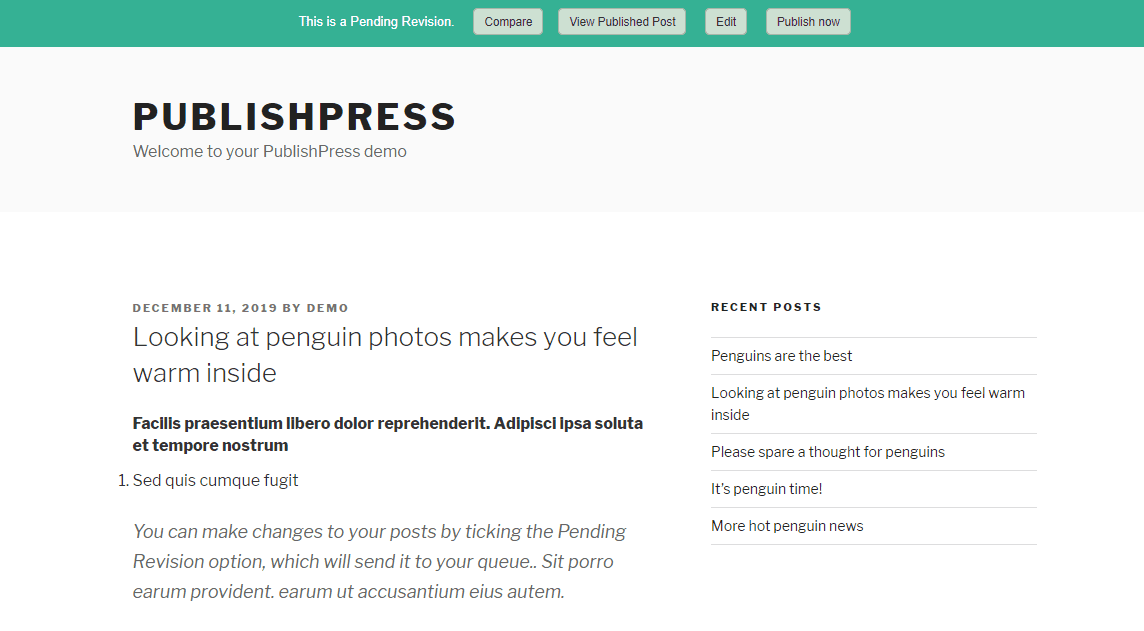
By using the menu at the top of the screen, you can authorize revisions right away, view the original post, or compare the differences between the latest versions. To do the latter, you can hit the Compare button:
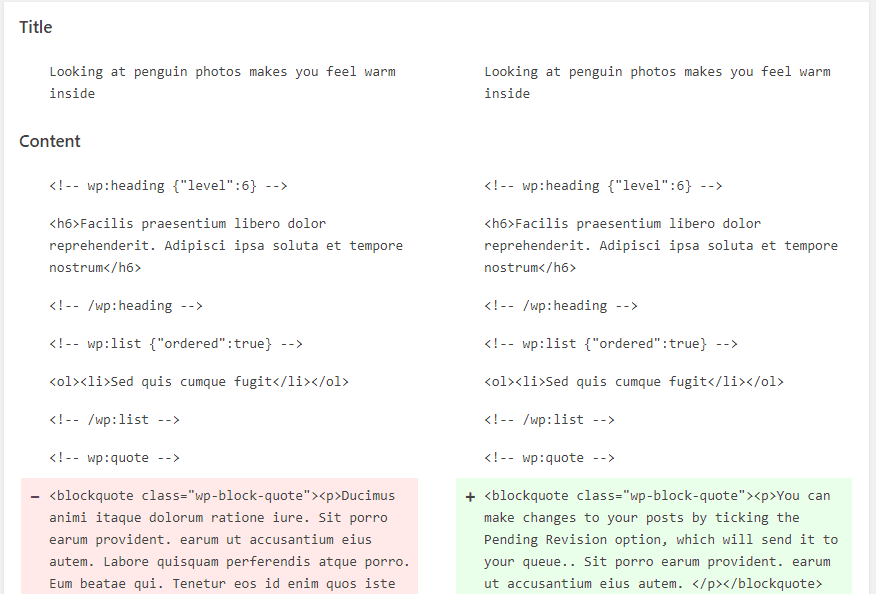
The comparison tab for revised posts works just like the default WordPress feature. In this case, however, the plugin displays the difference between the pending revisions and the original content.
Once you’ve checked out a revision, it’s up to you whether you’d like to approve it or not. If you do approve the revision, the plugin will let you publish it right away.
Another option is to schedule updates in advance, which you can do from within the editor. If you set a publishing date in the future for content that’s already live, the plugin won’t apply the changes until that day:
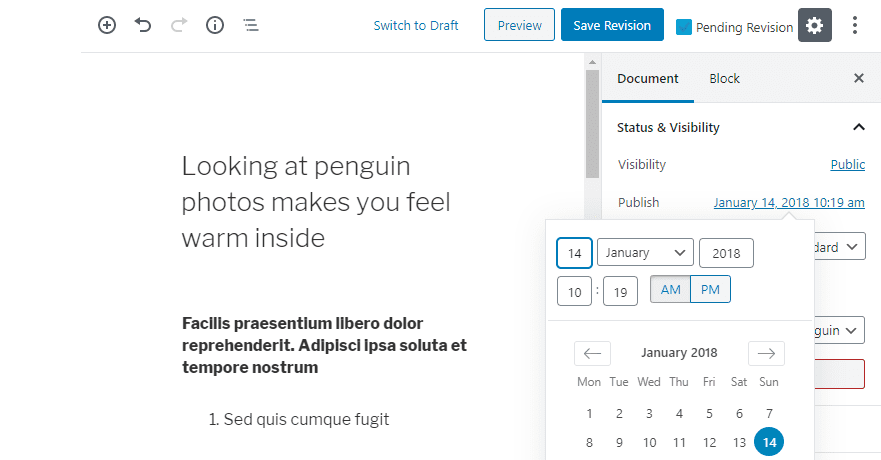
Scheduling revisions enables you to collaborate during the content creation process, until everything is perfect. The only problem is that keeping track of scheduled revisions can be tricky unless you have a content calendar. That’s where PublishPress comes in handy.
Step 4: Display Upcoming Revisions in the PublishPress Editorial Calendar (Optional)
If you’re new to PublishPress, you can check out our full review and tutorial to learn how to use its basic features. For now, let’s jump right in and discuss how this plugin works with the Revisions system.
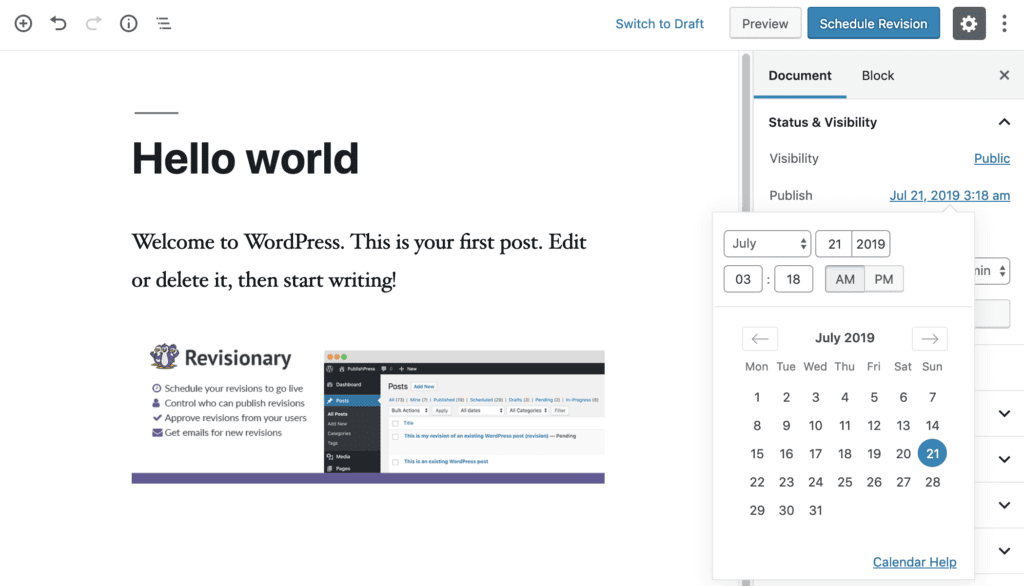
If your user role is “editor”, you can schedule revisions from within the Block Editor by setting a date in the document settings:
Scheduled revisions will show up on your PublishPress content calendar, so that authors and contributors can see and take care of them. Once they do, the revisions will go back into the queue, where it’s up to you or an administrator to approve them. So while you don’t need PublishPress for the Revisions plugin to work, it does make scheduling updates a lot easier.
Conclusion
Updating your blog’s content might sound like a lot of work. It can certainly take up valuable time, but the returns from maintaining quality evergreen content are well worth it. Plus, scheduling those revisions in advance takes a lot of the pressure away, and enables you to plan out your content calendar well in advance.
If you’re going to use PublishPress Revisions to schedule and process updates, here’s how to do it in just four steps:
- Revise a published post and submit it for approval.
- View submitted revisions in the revisions queue.
- Approve and schedule revisions.
- Optionally, display upcoming revisions in the PublishPress editorial calendar.
Do you have any questions about how to schedule content revisions? Let’s go over them in the comments section below!
Article thumbnail image by MicroOne / shutterstock.com


Thank You so much for this post. I really wanted this feature for my blog post revision. i will definitely use this plugin.
I’ve had my blog going for years with a bit over 300 articles. I started in 2019 going over old articles and instead of revising them I would make them a draft and then make edits to correct spelling, grammar, and info. Then I would republish the article and then it goes out fresh as a new article to all my subscribers. (I change the publish date to the current date. So it goes from 2011 to 2019.
I also do a 301 for the original article url and send it to the new url.
Am I doing any harm doing it this way? Or should I leave it published in the past? And just a revision?
Thank you so much Morris I always find your article very informative and educating. Keep up the good work