
Lead generation is a crucial component to consider when creating a WordPress website for your business. In addition to great design and SEO, you also have to consider what the visitor will do once they’ve arrived. Driving visitors to your website isn’t as valuable as converting those visitors into qualified leads. If you’re already using Salesforce as your Customer Relationship Management (CRM) Software there may be a better way of handling your leads. Salesforce’s lead generation forms are a great tool in their arsenal, so if you like the idea of using them in your business funnel, you’ll want to check out the Salesforce Web-to-Lead WordPress plugin. It couldn’t be easier to use and it works flawlessly.
Salesforce and Web-to-Lead Explained

Salesforce is a CRM (customer relationship management) service that uses cloud-based software to help businesses find and convert leads, as well as provide customer service. The entire suite of Salesforce products is called Customer 360, with tools for commerce, IT, marketing, sales, and service. Read our detailed overview of Salesforce here.
Web-to-Lead is Salesforce’s strategy for turning visiting users into leads (i.e. customers, subscribers, etc.). To do this, Salesforce helps you create forms where visitors will fill in information like their demographics and interests. Here is how it is defined on their website:
Web-to-Lead: The process of using a website form to capture visitor information and store that information as a new lead in Salesforce.
After the visitor fills out a form, you can take additional action, like auto-directing them to a relevant page on your site. Once you have the customer’s information, you can store it in Salesforce and notate it however you need, like by rating the lead based on how likely they are to make a purchase. You can then follow up with the lead via email, have your sales team reach out to them, or do whatever is part of your marketing funnel.
There’s also a dedicated plugin so that you can use this strategy on your WordPress website. The Brilliant Web-to-Lead for Salesforce plugin integrates Salesforce with WordPress. When someone fills out a form on your WordPress site, the information is stored in your Salesforce CRM account.
How to Use the Salesforce Web-to-Lead WordPress Plugin
Let’s go over how to set up the Web-to-Lead plugin, create forms, add them to your website, and sync entries with your CRM.
Installing the Web-to-Lead Plugin
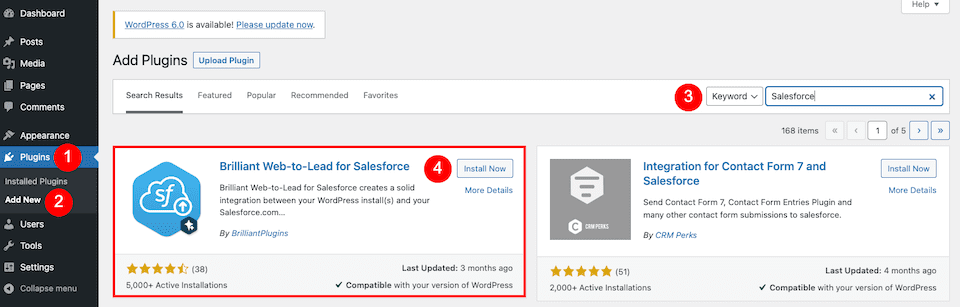
Log in to your WordPress account. In the lefthand sidebar, click Plugins > Add New. On the top-right of the page, type “Salesforce” into the search box. The correct plugin should be the first search result. Click Install Now. When it’s finished installing, that button will change to Activate. Click it.
Web-to-Lead Plugin Settings
Next, you’ll be brought to your plugins page. Under the new Salesforce plugin, click Settings.

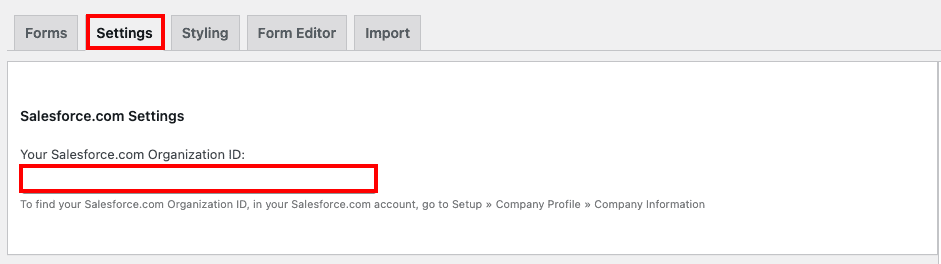
Salesforce Organization ID
To get started with the plugin, you have to add your Salesforce Organization ID. Start by clicking the Settings tab, which is where you’ll enter the ID (see instructions below).
Next, log in to your Salesforce account. Click the Gear icon on the top-right of the page, then choose Setup.
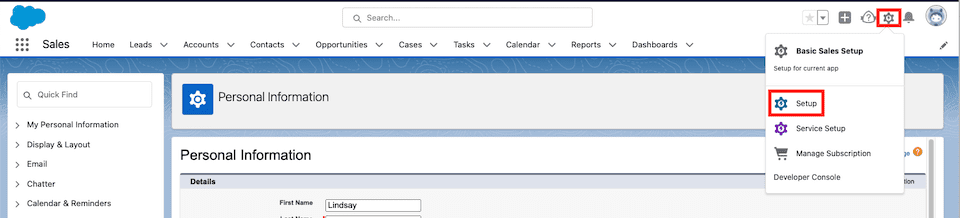
On the lefthand side, scroll down to the Settings section. Select Company Settings > Company Information. Your Salesforce.com Organization ID will be in the righthand column.
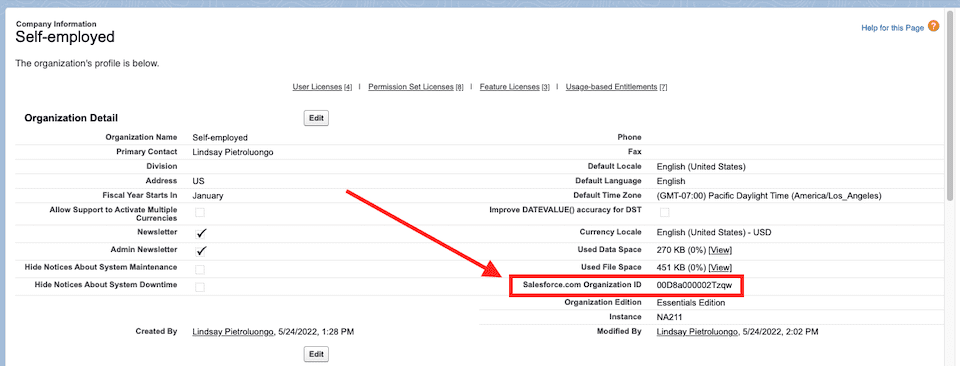
Copy and paste it into the designated space in WordPress, then scroll to the bottom of the WordPress page and click Save WordPress-to-Lead Settings.
Forms
Click the first tab, Forms. You’ll have a form auto-created for you, or you can choose Add a New Form.

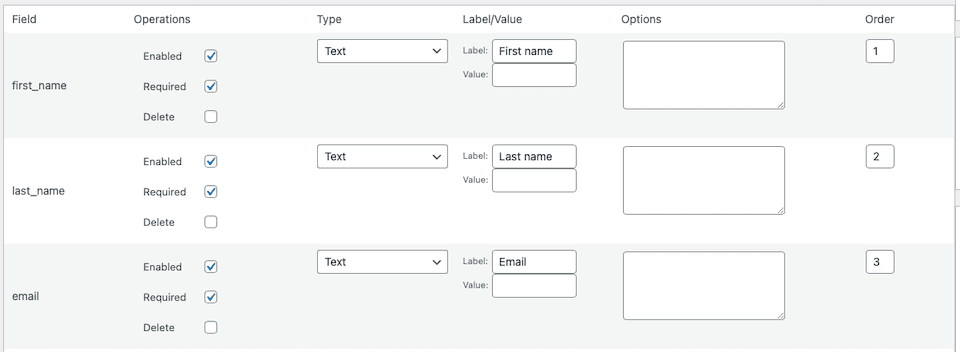
Clicking on an existing form to edit it will automatically bring you to the Form Editor tab, and the form editor will open for you. This is where you can select which form fields to enable, require or delete. You can select the form type, like checkbox, email or text, and set the label name, like Email or Phone. You can also add options and change the order of the form fields.
Scrolling down brings you to the Form Settings section. Here, you can name the lead source, write a success message, enable captcha and more. When you’re finished, click Save Form at the bottom. You can also opt to Duplicate This Form if you want to create more like it.
More Settings
There are two more tabs: Styling and Import. The Styling tab lets you add CSS to change the default form styling. The Import tab is where you can copy and paste the HTML for a lead form you generated with Salesforce instead of within the WordPress plugin.
Adding a Web-to-Lead Form to Your Website
Now that you’ve created a form, it’s time to add it to your website. There are two ways to do this. You can either add the shortcode to a post or page, or you can include the form in a widget. Let’s go over both options.
Adding a Form Using the Shortcode
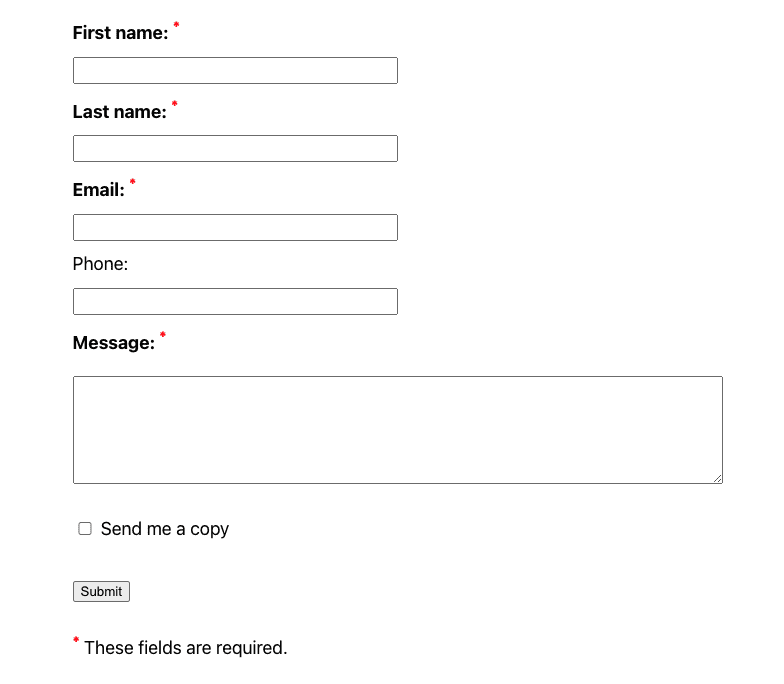
In WordPress, head back to Settings > Salesforce > Forms and click the form you want to use. On the right side of the page, copy the shortcode.

Go to the WordPress post or page you want to add the form to. Whether you’re using the classic editor or Gutenberg, you can simply paste the code wherever you want the form to go. The editor will continue to show the code, but if you preview the page, it will look something like this:
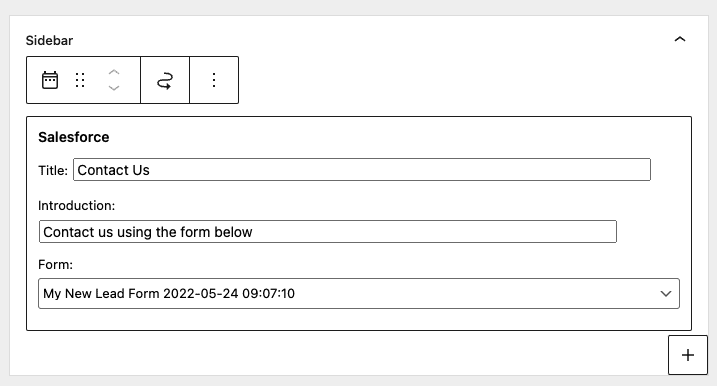
Adding a Form Using a Widget
If you’re using a theme that allows for widgets, you can add the form that way. In the WordPress dashboard’s lefthand sidebar, click Appearance > Widgets. Decide where you want to add the form and click to add a widget.
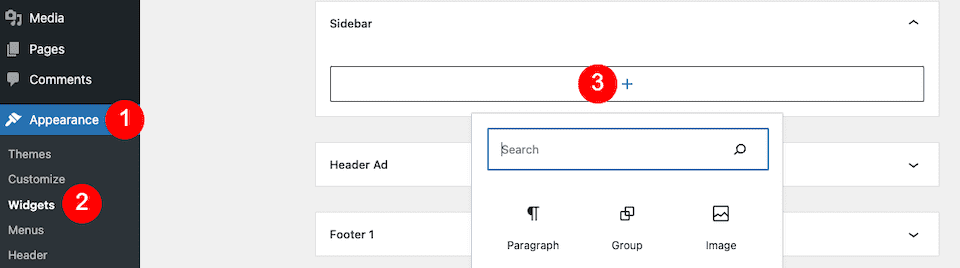
Start typing in “Salesforce” and choose the associated widget. You can then update the title and introduction of your form, and select the form you want to embed from the drop-down menu.
Syncing Form Submissions With Salesforce
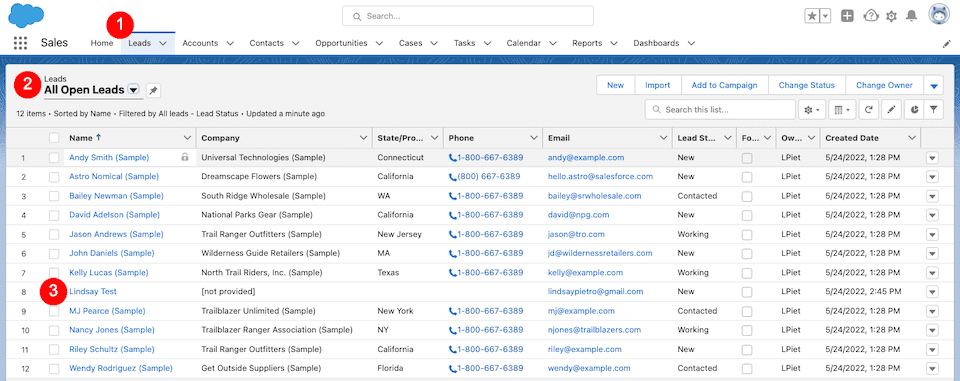
Now, when someone fills in a form on your website, the information will sync with your Salesforce account in seconds. You don’t actually have to do anything else to get this working; it’ll already be set up for you. I tried this by entering test info into my new form, and in just a few seconds, it was in my Leads section of Salesforce.
Final Thoughts About the Salesforce Web-to-Lead WordPress Plugin
Few plugins are as easy to use as Web-to-Lead, and we were also impressed that entries synced immediately and seamlessly with our Salesforce account. Rarely is any type of website update so straightforward. With some plugins, even seemingly simple changes can require several unexpected steps.
If you need a simple form, you can use the auto-created one pretty much out of the box, or at least in the interim while you spend some time designing a new one. Plus, embedding the form is foolproof, regardless of the method you choose. We can’t help but love tools that work this efficiently – they give creative types more time to focus on what really matters, like designing content that our brand-new (and existing) customers, fans, and subscribers will appreciate.
Since this integration takes so little of your time, how about exploring these lead magnet ideas and incentives to grow your email list?
And for you Divi users out there, don’t forget about the powerful lead form plugin, Bloom, which also integrates seamlessly with Salesforce.


Hi There,
Am not able to generate lead in Salesforce following all these steps.
Can you help where is the miss ?
We are getting this error. Any idea on what we need to do?
Subject: Salesforce Could Not Create This Lead
Salesforce could not create this lead because of the reason listed below.
For more information about this error or help with Web-to-Lead, please
contact Customer Support.
Reason: Lead needs the correct validation code to create a lead in
Salesforce.
Lead Capture Page: Not available.
Salesforce and Web-to-Lead Explained very well. It will be very helpful for us and surely that plugin will be very helpful to get real and accurate leads. just loved it.
Awesome! Great to hear and glad it was helpful.