
If you’re starting a new business, you’ll probably want to use a different email address (other than your personal one) for sending and receiving messages. However, having to manage multiple accounts can lead to mistakes and missed messages. This is where an email alias comes in handy.
In this post, we’ll discuss what an email alias is. We’ll then show you how to create one in Gmail, and how to send and receive emails as the alias. Let’s get started!
What is an Email Alias?
An email alias is an address that you can create for specific purposes, such as newsletter subscriptions or business correspondence. You can manage your alias from your existing email account.
It’s important to note that an alias works a little differently from a forwarding address. With a forwarding address, your emails are directed to an email address with its own inbox. For example, emails received in your Gmail account may be forwarded to your Microsoft 365 email address. Those emails then exist in two places.
With an alias, however, you won’t need to create or pay for an additional email service. An email alias is essentially a nickname for a single email inbox. For instance, you can use your Gmail address to create unlimited alias variations, without having to set up new accounts. One copy of the emails exist because there’s only one inbox.
Email aliases can be very useful if you run a small business. You can create an alias for internal email exchanges. You can even create several for different areas of your company, such as [email protected], [email protected], and [email protected]. This way, you can manage everything from one account, without having to switch between different inboxes to check your emails.
Additionally, you can set up an alias to subscribe to a particular service or for a temporary project. This will help you keep your inbox organized, and separate your personal correspondence from commercial or promotional emails.
How to Create an Email Alias
Most popular email services will allow you to create multiple aliases. In this tutorial, we’ll show you how to create one in Gmail.
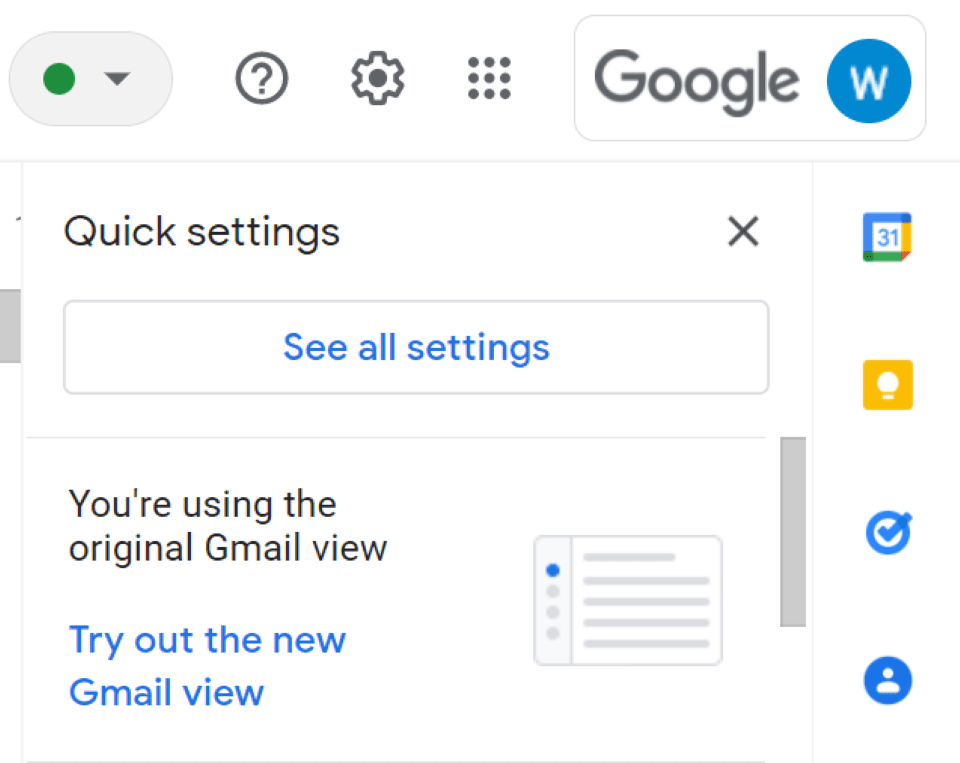
To start, open your Gmail account and click on the Settings icon in the top-right of the screen. Then select All Settings:
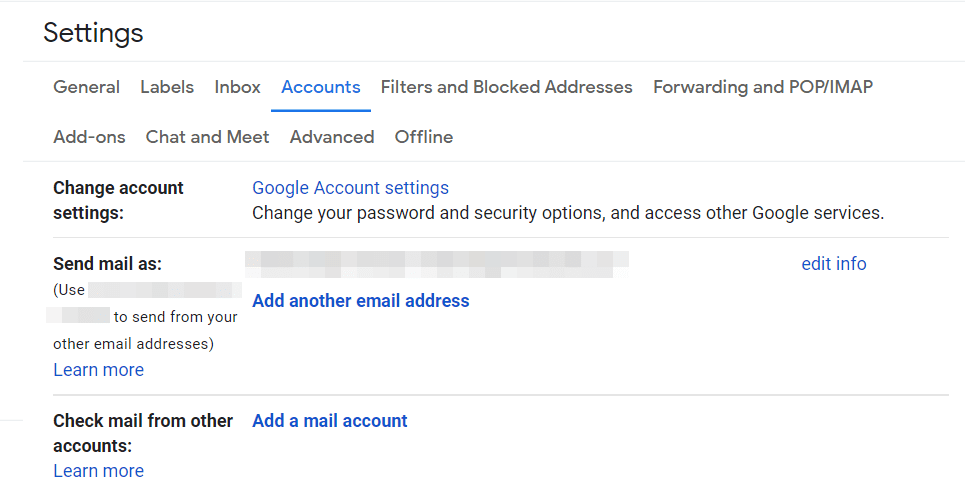
Next, navigate to the Accounts and Import tab. In the Send mail as section, click on Add another email address:
A new window will appear. Here, you’ll need to enter some information about the other email address that you own:
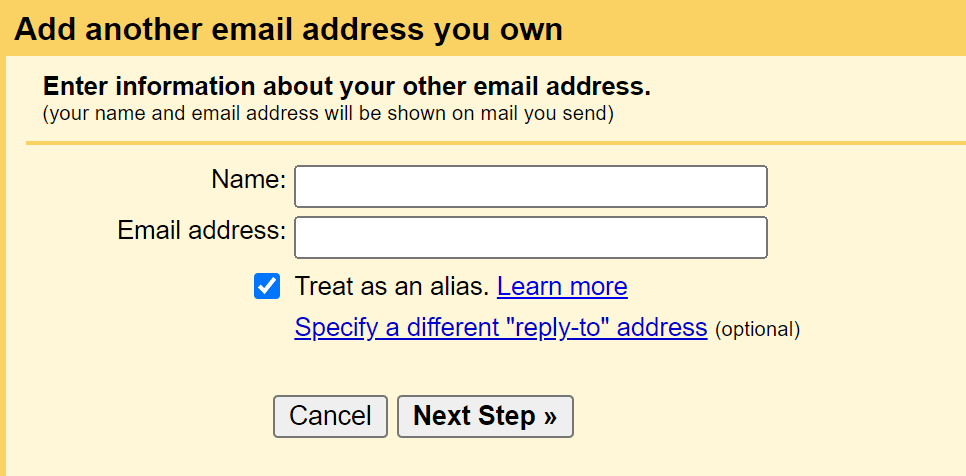
Make sure that the box for Treat as an alias is ticked. You also have the option to enter a different “reply to” address (that’s where when someone hits reply, they won’t see the base email, but the alias as the recipient). When you’re ready, click on Next Step and select Send Verification.
Gmail will now send an email to the address you’ve just entered. You’ll need to click on the link within that email to confirm the address. That’s it — your alias has been set up.
If you have a work or school account, you can also set up an alias for other users within your organization. First, you’ll need to sign into your Google Admin console. Note that you’ll need to use your Google Workspace account (not your personal one):
On the Admin Console home page, navigate to Users and select the one you want to add an alias for. Then select Add Alternative Emails and click on Alternate email.
Next, you’ll need to enter a name for the alias. This will appear before @ sign in the address. When you’re ready, click on Save.
You can repeat the above steps for every new alias that you want to create. Note that it might take up to two hours for you to start receiving emails at this address.
How to Use an Email Alias
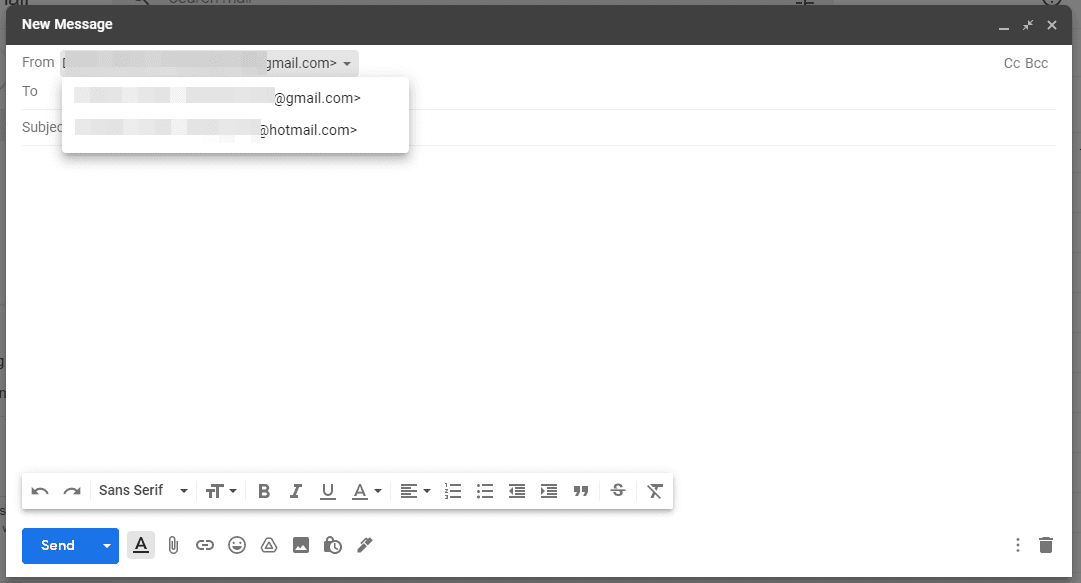
Once you’ve set up your email alias, you can start sending emails from this address. When you create a new message, you should now see a From line. All you need to do is select the email alias you want to use:
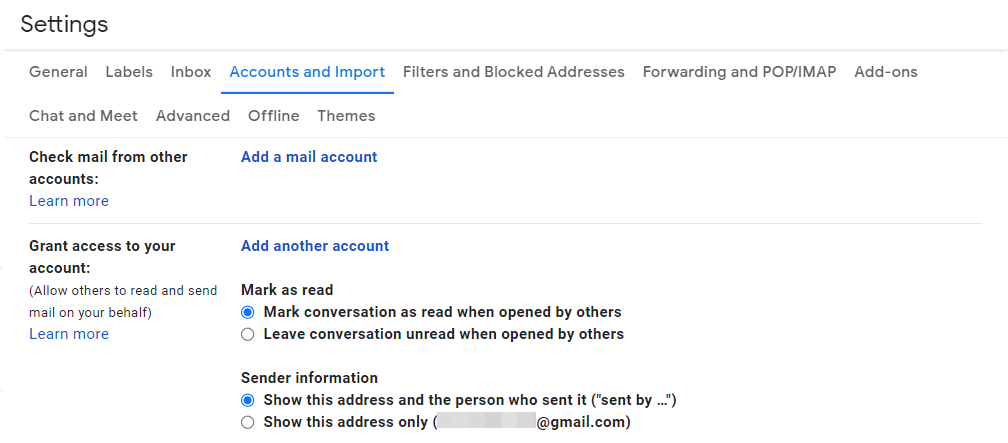
You can also check emails sent to your alias within your Gmail inbox. To set this up, navigate to Settings > All Settings, and click on Accounts and Import. In the Check mail from other accounts section, click on Add a mail account:
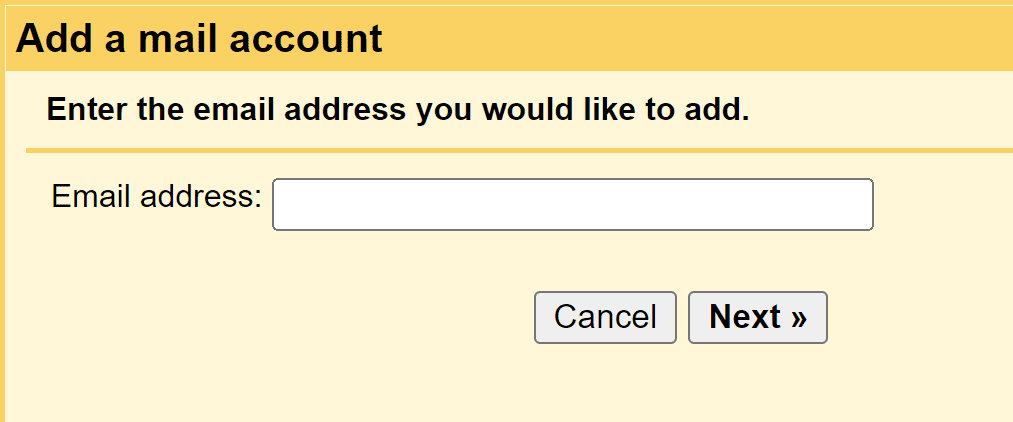
In the window that appears, enter your alias address:
Then, you can choose to either import emails from your alias, or link the two accounts with Gmailify:
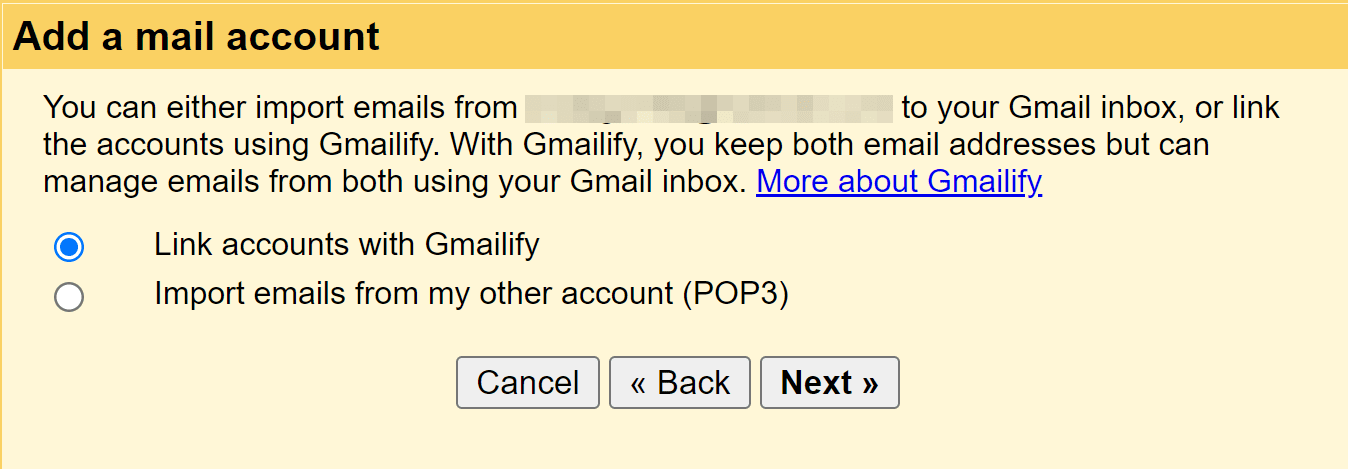
If you opt for the latter, you’ll be able to manage both email addresses from the same Gmail inbox. When you’re ready, click on Next and verify the connection.
That’s it – you’ll now receive emails sent to your alias in your Gmail inbox. You can unlink the accounts at any time by navigating to Settings > Accounts and Import.
You might also want to create a folder for your email alias. This way, you can keep your inbox more organized. To do this, navigate to the Search mail bar in Gmail and click on the Show search options icon:
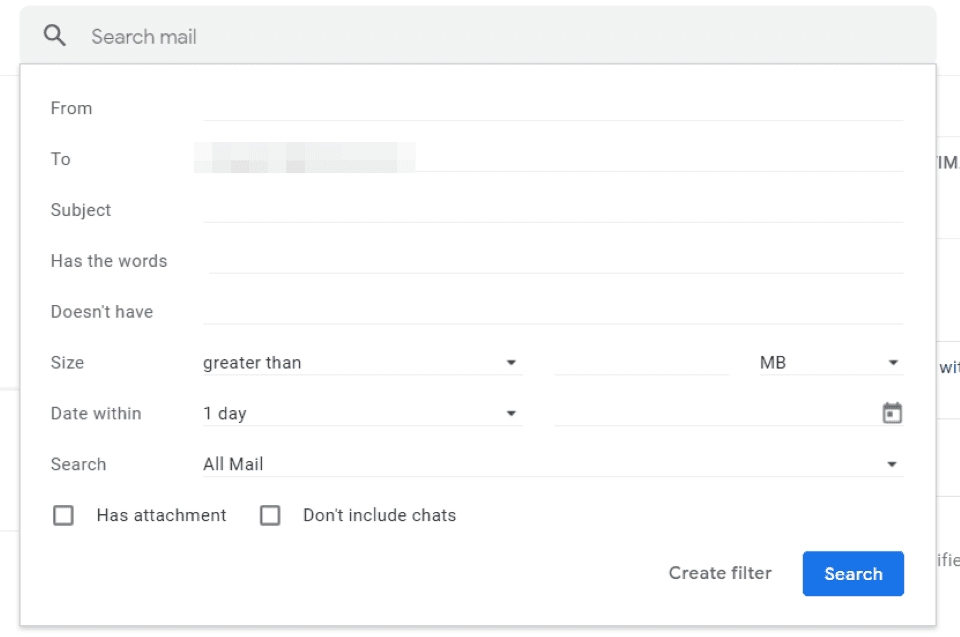
In the To field, enter your alias address. Then click on Create filter.
Next, you can select an action for emails sent to your alias:
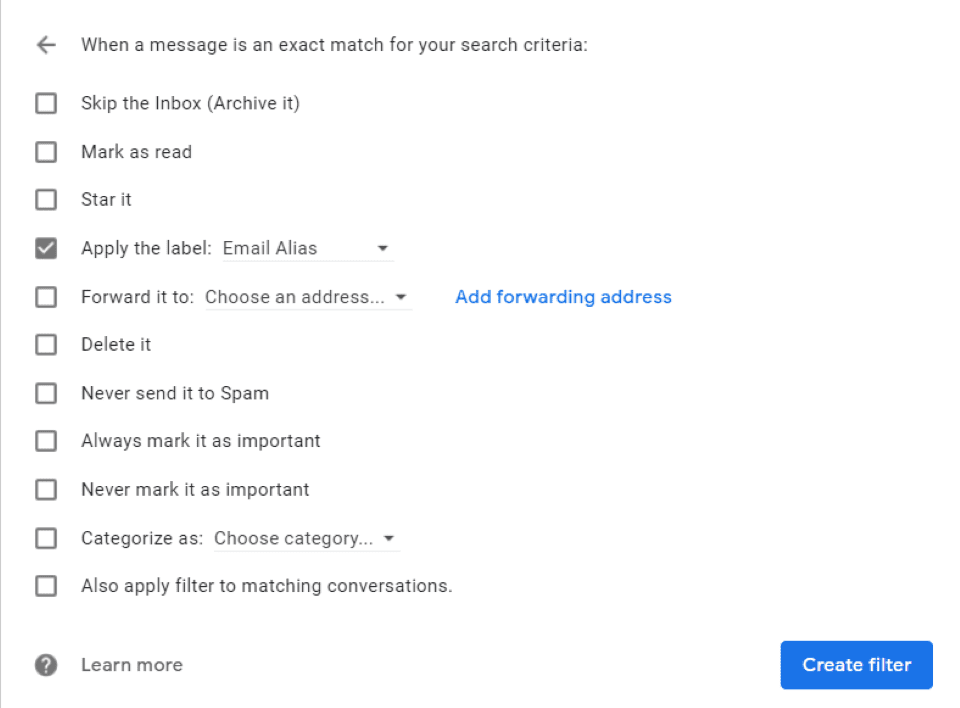
If you want to create a folder for it, select the Apply the label option and enter a title (e.g., “Email Alias”). When you’re done, click on Create filter again.
Conclusion
If you’re setting up a small business or a new project, you might consider creating an email alias. This will help you manage both your personal and professional emails from the same inbox, while keeping them separate and organized. It also saves space on your email server since it doesn’t forward from one account to another.
Google makes it super easy to set up email aliases for yourself and other users within your organization. All you need to do is log into your Google Workspace or Gmail account, add an alternative email address, and confirm ownership to start receiving and sending messages via your new alias. Other email services that aren’t Gmail work similarly.
Some hosts let you create email aliases within their dashboards, too, such as SiteGround. Plus, Cloudways collaborates with Rackspace to keep email as simple as can be, including aliases.
Do you have any questions about using an email alias? Let us know in the comments section below!
Featured Image via Eny Setiyowati / shutterstock.com


To set “send mail is” option in Gmail we need to provide SMTP details like SMTP.gmail.com and port number as well.We need to create App passwords to work this properly and you need to mention those details as well in this article
Hi Aja,
Thanks for your comment. These details weren’t required when we set up the “send mail as” option in Gmail.