")
Adding an author box to your WordPress posts is a simple yet effective way of increasing the legitimacy and appeal of your blog. Although WordPress lets you add an author’s name and bio to user profiles, some themes provide limited – if any – options for customizing and displaying the author box on posts. This is why we recommend using a WordPress author box plugin.
In this post, we’ll start by discussing the benefits of having an author box on your WordPress blog and provide you with three of the best plugins to consider. Then we’ll walk you through the process of setting one up and using it to create an author box for a WordPress blog.
Let’s get started!
Subscribe To Our Youtube Channel
A WordPress author box is a section you can add to blog posts (usually at the bottom) that contain details about the writer. This often includes (but is not limited to) the author’s name, picture, bio, and social/website links.
Similar to a comment section, a WordPress author box can be an effective tool for engaging your audience. Adding them to your blog posts is an easy way to introduce and connect your WordPress blog authors to your readers:

Some of the main uses and benefits of WordPress author boxes include:
- Demonstrate professionalism and credibility. An author box can help highlight credentials, qualifications, and other background information that establishes expertise. Appropriately crediting blog authors and contributors may even encourage other guest blogging inquiries.
- Posts look more legitimate and trustworthy. An author box that includes a name, profile picture, and quick bio can add a personal touch to your posts and make them feel friendlier.
- Content is more visually appealing. Many WordPress author box plugins come with options for customizing the text, colors, styles, etc. This makes it easy to create an aesthetically pleasing author box that complements your website.
- Promote social channels and content. Author boxes provide a clean and convenient place to add social icons that link to your social media profiles.
These are just a few ways a WordPress author box can benefit your blog. Now it’s time to get into your options for creating one via a plugin.
The best WordPress author box plugin for you depends on a few factors, such as which customizations you’re looking for, how many blog authors you have, and whether you’re using Divi.
Taking all of that into account, we’ve chosen three of the best WordPress author box plugins to consider. Below, we’ll introduce you to each one and their key features.

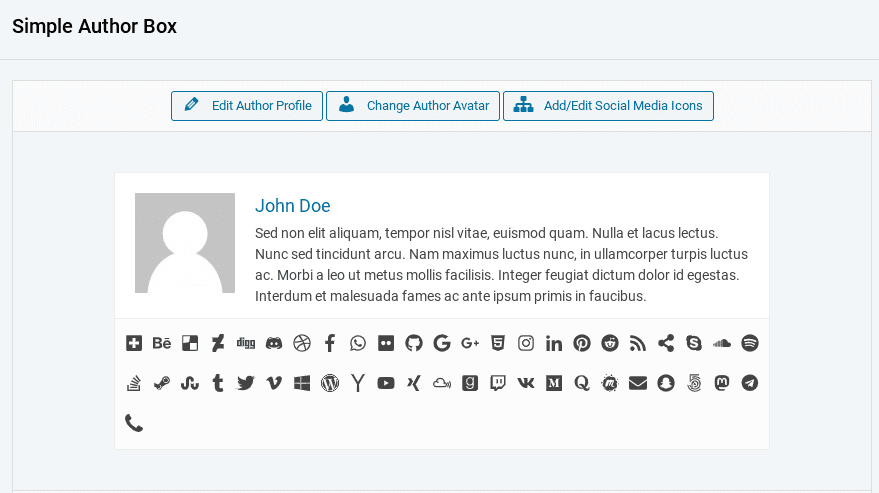
Leading off is the Simple Author Box plugin created by WebFactory Ltd. With over 50,000 active WordPress installations and an average star-rating of 4.5/5.0, this freemium plugin is a popular and powerful choice.
In addition to the author name and bio, you can add a Gravatar, website URL, and social icons from over 30 social channels to the author box. It includes a variety of styling options you can use to fully customize and match the appearance to your WordPress theme.
Key features
- Fully responsive and customizable
- Styling options for changing the text, colors, and size
- Rotating hover effects for social icons and avatars
- Ability to use it for guest posts and authors
- Option to automatically insert author box to posts or manually via template file
- RTL and AMP support
Aside from its ease of use and reliability, another benefit is you have two versions to choose from. The free, Lite version includes all the features and functionality needed to quickly create and add a WordPress author box to posts.
However, if you’re looking for a little more, Simple Author Box Pro lets you change the box positioning, assign author boxes to specific post types, and much more. A single license starts at $29 per year.
Molongui Author Box is another freemium WordPress author box plugin that has thousands of users and a five-star rating. This plugin ships with an impressive amount of features for extending and enhancing the default WordPress author bio box.
Molongui is a flexible, feature-rich plugin suitable for any type of WordPress site. However, it’s particularly useful for those with a lot of guest contributors and/or feature multiple authors and co-authors on posts.
Key features
- Easily assign multiple authors to a post
- Fully customizable author box
- WordPress Customizer author box live preview
- Over 90 social icons
- A ‘related posts’ option
- Ability to add guest author byline credit without needing to create a new WordPress user account
Most of the features needed to create a stunning, dynamic author box are included with the free version. However, if you want to utilize full functionality, plans for a premium license start at $35 per year.
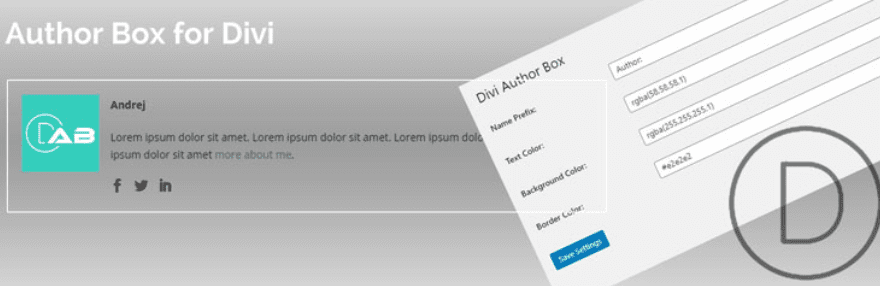
Technically, if you’re a Divi user, you don’t necessarily need an author box plugin. Divi comes with built-in options for designing dynamic author boxes to use across your site. However, if you’re looking for a different option, Author Box for Divi may be the ticket.
Once installed and activated on your site, this free plugin automatically displays an author box at the bottom of all your Divi posts. This includes posts created with both the Divi Builder and the WordPress Classic Editor.
Key features
- Text, background, and border color customizations
- Quick, easy setup
- Option to add author bio, profile picture, and social media links
- Works with the Divi Theme and Divi Builder
- Add the author box to Divi posts in bulk rather than individually
For more information, feel free to check out the recent Author Box for Divi highlight post on the Elegant Themes blog.
Once you decide on a plugin, you can start creating your WordPress author box. For this tutorial, we’ll use the Simple Author Box plugin, since it works with most WordPress themes, including Divi.
Although some steps may vary slightly if you’re using a different plugin, the concept will be largely the same. Let’s see how to create a WordPress author box in five steps.
Step 1: Install and Activate Your Plugin
First, install your WordPress author box plugin on your website. In case you’re unfamiliar with how to do so, simply:
- Navigate to Plugins > Add New from your WordPress dashboard.
- Search for the name of the plugin (in this case, “Simple Author Box”).
- Click on the Install Now button, followed by Activate.
This will add the author box plugin name as a dashboard menu item. Click on it to open the plugin settings page:
At the top of the settings page is a preview window showing you how the WordPress author box will display with the default settings. Before we start designing and customizing it, it’s important to make sure your author profile is up to date.
Click on the Edit Author Profile button. A new browser tab will open to your WordPress User Profile settings page.
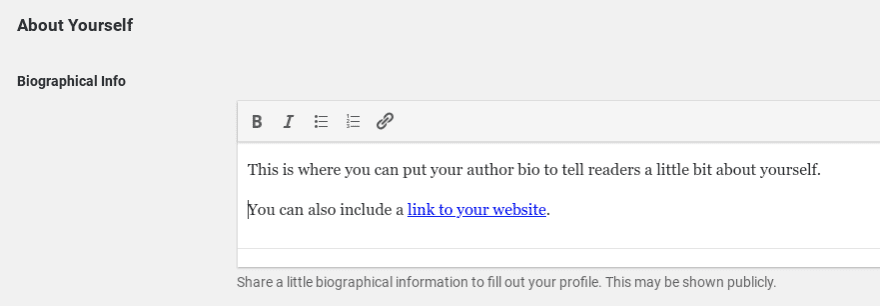
You can review your information and display name, as well as add or edit your author bio in the Biographical Info visual editor:
Next, browse to the ‘Custom User Profile Image (Simple Author Box)’ section at the bottom. This is where you can upload a new avatar and add links to social media platforms:

Click on the Add This drop-down to select a social media channel, then add the URL to your social profile next to it. Select the Add new social media platform button and continue this process until you’ve satisfied the social media networks you want to include in the author box. Note that the social icons will appear in the order you add them.
When you’re done, click on the Update Profile button. You can exit out of this browser tab and return to the Simple Author Box plugin settings.
Below the preview window of the Simple Author Box plugin page, there are a handful of settings and configuration options. Under the Settings tab, you can turn on certain features or keep them turned off, which they are by default:
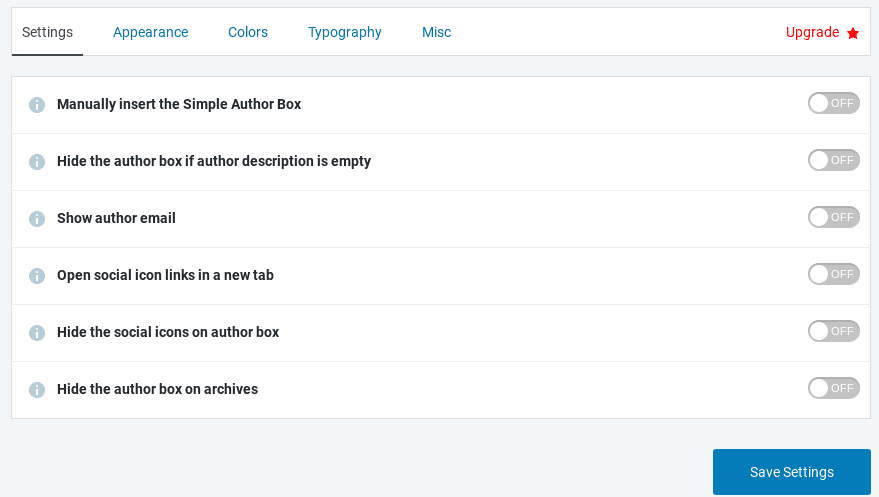
Toggle the ‘off’ switch to ‘on’ for any items you find important. For example, you may prefer that the social icon links open in a new tab. To update your changes, click on the Save Settings button.
To move on to designing and customizing part, click on the Appearance tab:
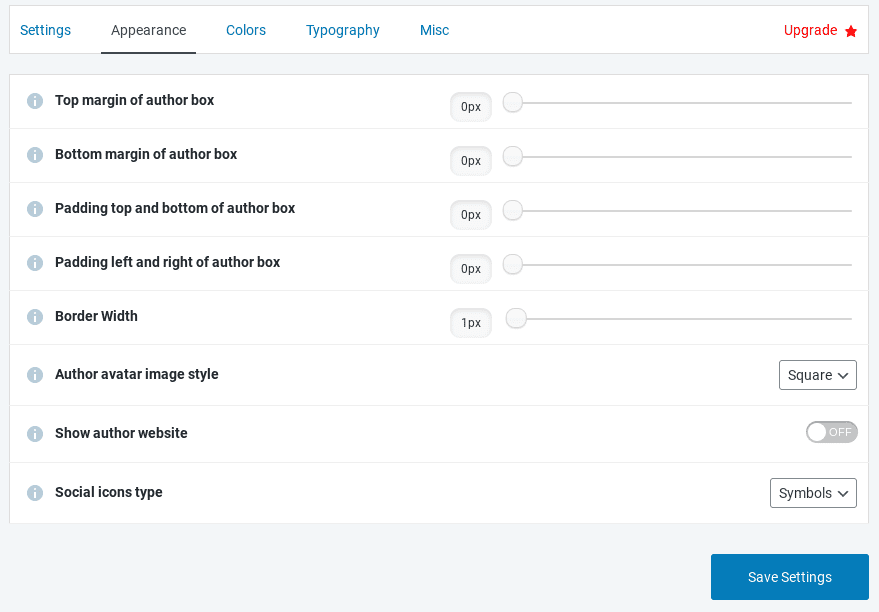
Here, you can adjust the margin, padding, and border width. For the avatar image, you can select Square or Circle. The circle option lets you add a rotating hover effect.
For ‘Social icons type’, you can choose Symbols or Colored. The Colored option also lets you turn on a rotating effect, as well as add a shadow and border:
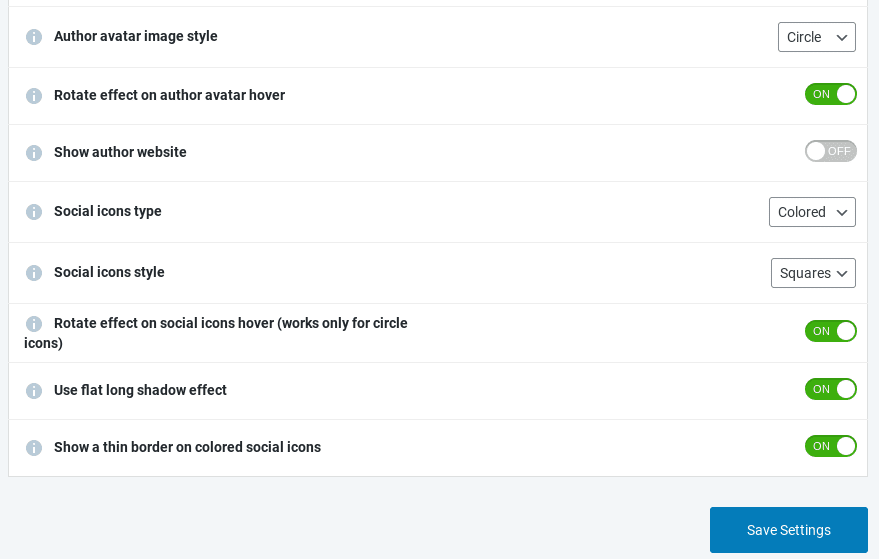
You can get an idea of how these styles will look and function in the preview window at the top. Next, under the Colors tab, you can customize the colors for nearly all aspects of the WordPress author box:
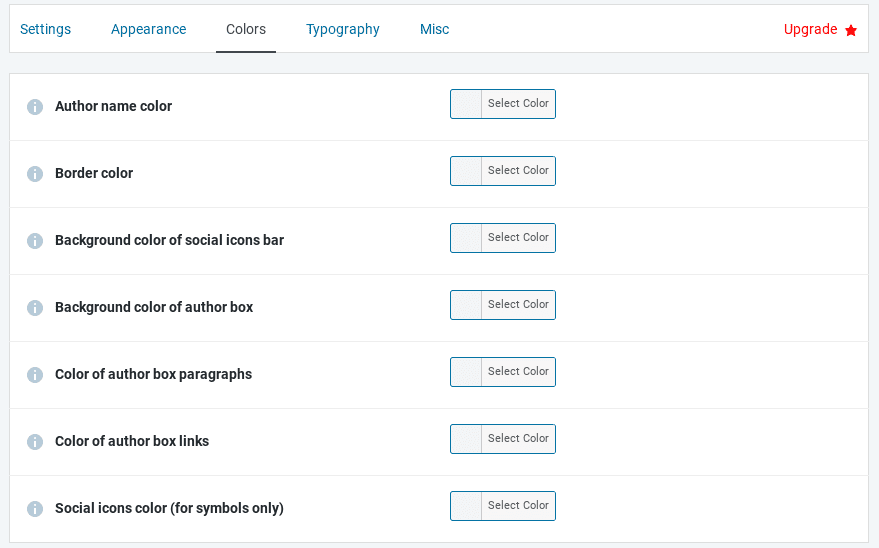
If you don’t choose your own colors, by default, the Simple Author Box plugin will use your theme’s colors. The same goes for fonts, which you can customize under the Typography tab:
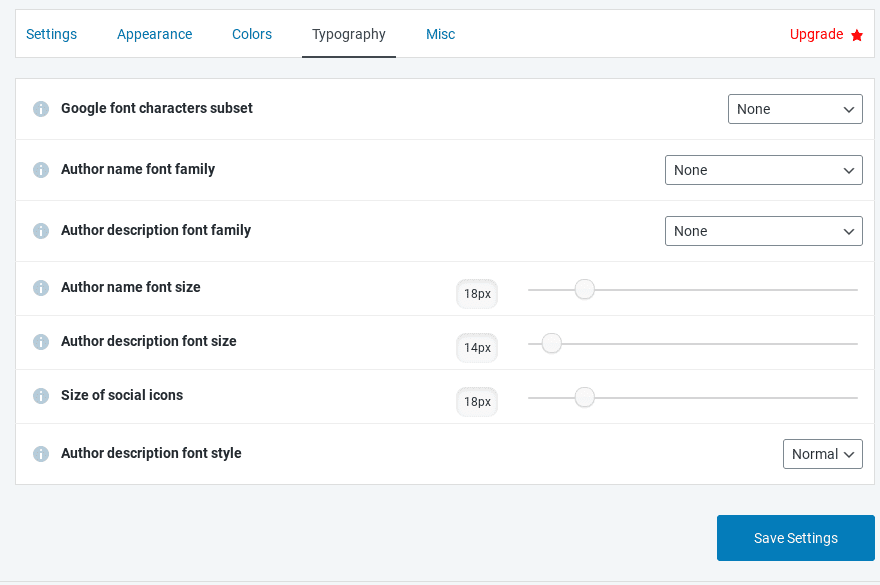
As you can see, you can adjust the font family and font sizes as needed. When you’re done, select the Save Settings button.
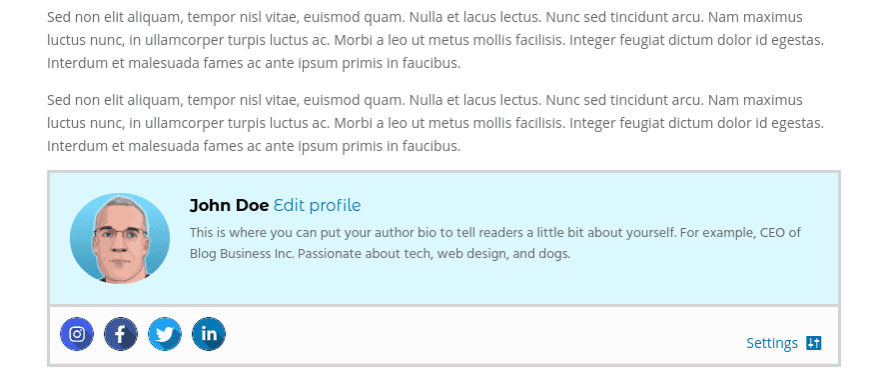
After you’re done creating your WordPress author box, the only thing left is to make sure it looks okay from the front end. Visit your WordPress site in your browser and navigate to a blog post that you’re the assigned author for.
At the bottom of the post, you should now see your new author box:
If there’s anything you want to adjust, you can do so by going back to the plugin settings in your dashboard. That’s it!
Summary
One of the easiest ways to improve the appearance and credibility of your blog posts is to add a WordPress author box. Depending on your specific needs and theme, there are a handful of plugins you can use, including Simple Author Box, Molongui Author Box, and Author Box for Divi.
In this post, using the Simple Author Box plugin, we showed you how you can create a WordPress author box in five steps:
- Install and activate your WordPress author box plugin.
- Update your user profile in WordPress.
- Configure the author box settings.
- Customize the appearance of your author box.
- Preview it on the front end to confirm it looks and works okay.
Do you have any questions about creating and adding a WordPress author box to your blog posts? Let us know in the comments section below!
Feature image by VectorMine/shutterstock.com.


All good plugins, look much better than the standard WordPress author box.
Good to hear, Marcin. Glad you like them!
Have to jump in here and HIGHLY recommend Molongui. I was looking for a way to do both guest authors and multiple authors, and Molongui not only does both, it does both with style. The options are extensive, it includes a ton of social networks, and you can customize it all over the place. Plus, the support has been top-notch.
Thanks for the recommendation, Bruce! We agree that it’s a great tool.
Thanks a lot. I will opt for Simple Author Box . Because reading above I could make out that Molongui Author Box is for those who have many guest authors. Thanks. I was exactly researching about this. Would have been great if I could get a similar type of blog talking on how to apply table of contents in WP.
Happy to hear the post was helpful, Sudip! Best of luck with Simple Author Box, hope it works well for your needs. Elegant Themes published an article about adding a table of content to WordPress posts and pages a while back. Check it out – https://www.elegantthemes.com/blog/tips-tricks/how-to-add-a-table-of-contents-to-your-wordpress-posts-pages
Thank you for mentioning my plugin!
Thanks for creating it, Andrej!