
Mentioning the post author in your blog posts is essential. Now, with Divi’s Theme Builder you can add a site-wide dynamic author box to your posts. You can also style the author box using Divi and its built-in options, this can leads to beautiful web design. In this tutorial, we’ll show you exactly how to design a beautiful dynamic author box inside your post template. You’ll be able to download the post template JSON file for free as well!
Let’s get to it.
- 1 Preview
- 2 Download The Post Template for FREE
- 3 Download For Free
- 4 1. Go to Divi Theme Builder & Add New Post Template
-
5
2. Build Blog Post Template Body
- 5.1 Section Settings
- 5.2 Add New Row
- 5.3 Add Post Title Module to Column
- 5.4 Add New Section
- 5.5 Add New Row
- 5.6 Column 1 Settings
- 5.7 Add Post Content Module to Column 1
- 5.8 Add Code Module to Column 1
- 5.9 Add Person Module to Column 2
- 5.10 Add New Section
- 5.11 Add New Row
- 5.12 Add Comments Module to Column
- 6 3. Save Theme Builder Changes & View Result
- 7 Preview
- 8 Final Thoughts
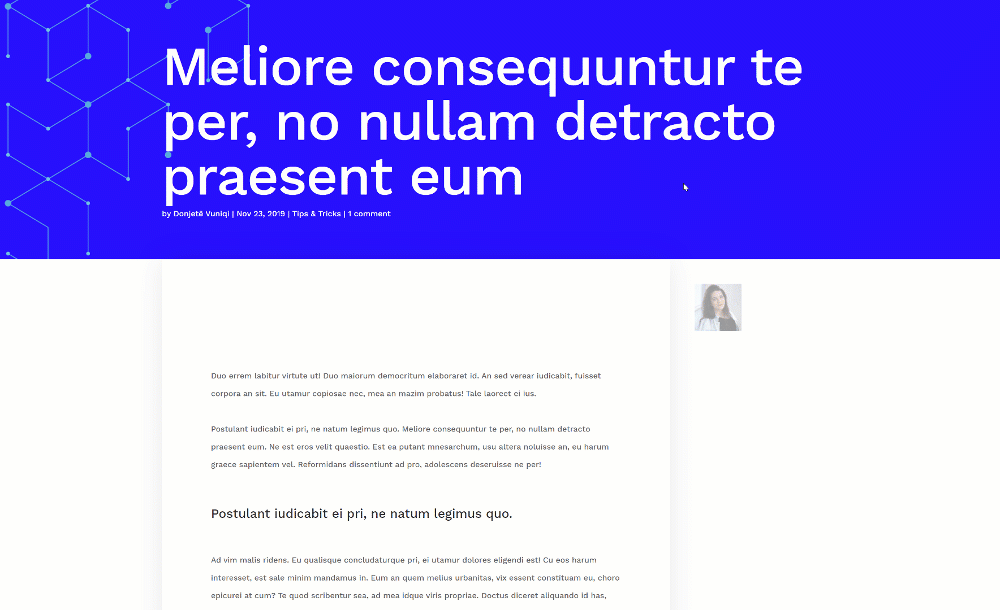
Preview
Before we dive into the tutorial, let’s take a quick look at the outcome across different screen sizes.
Desktop
Mobile

Download The Post Template for FREE
To lay your hands on the free post template, you will first need to download it using the button below. To gain access to the download you will need to subscribe to our newsletter by using the form below. As a new subscriber, you will receive even more Divi goodness and a free Divi Layout pack every Monday! If you’re already on the list, simply enter your email address below and click download. You will not be “resubscribed” or receive extra emails.

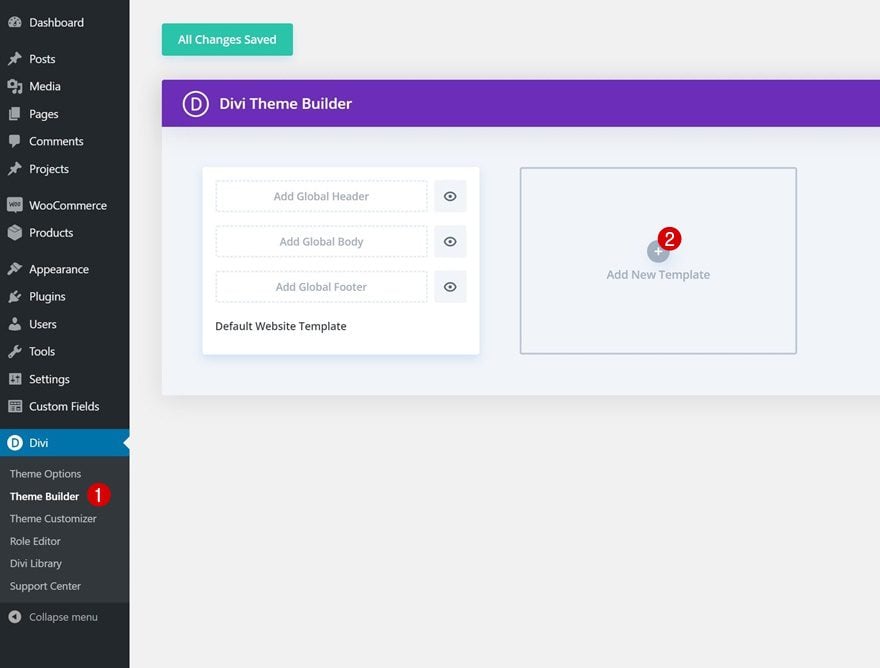
1. Go to Divi Theme Builder & Add New Post Template
Go to Divi Theme Builder & Add New Template
Start by going to the Divi Theme Builder. Once there, add a new template.
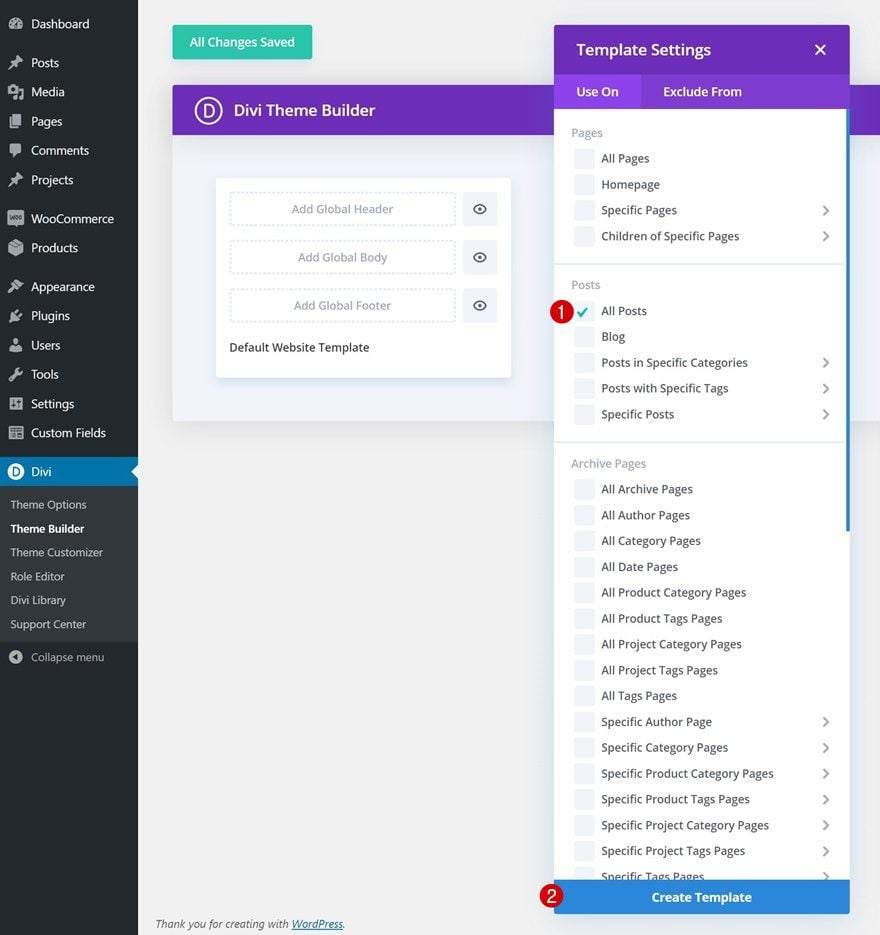
Use Template on All Posts
Use the new template on all your posts.
- Use On: All Posts
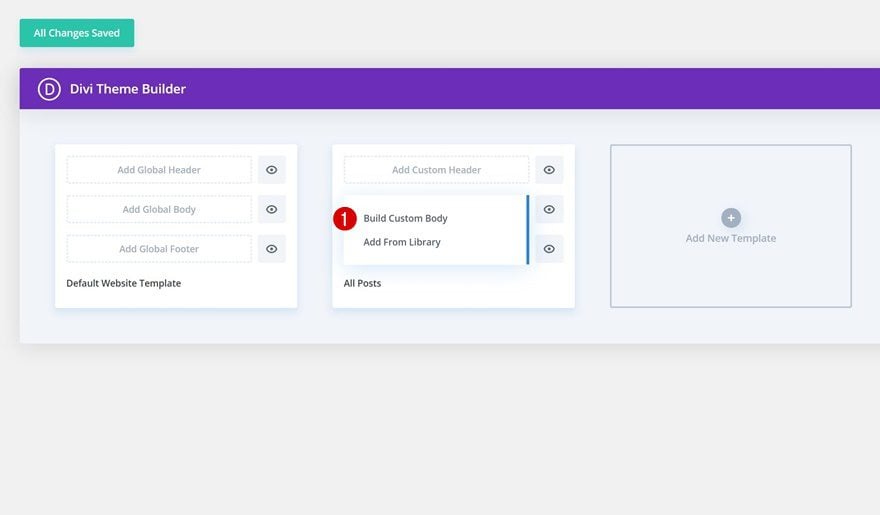
Start Building Template Body
And start building the template body.
2. Build Blog Post Template Body
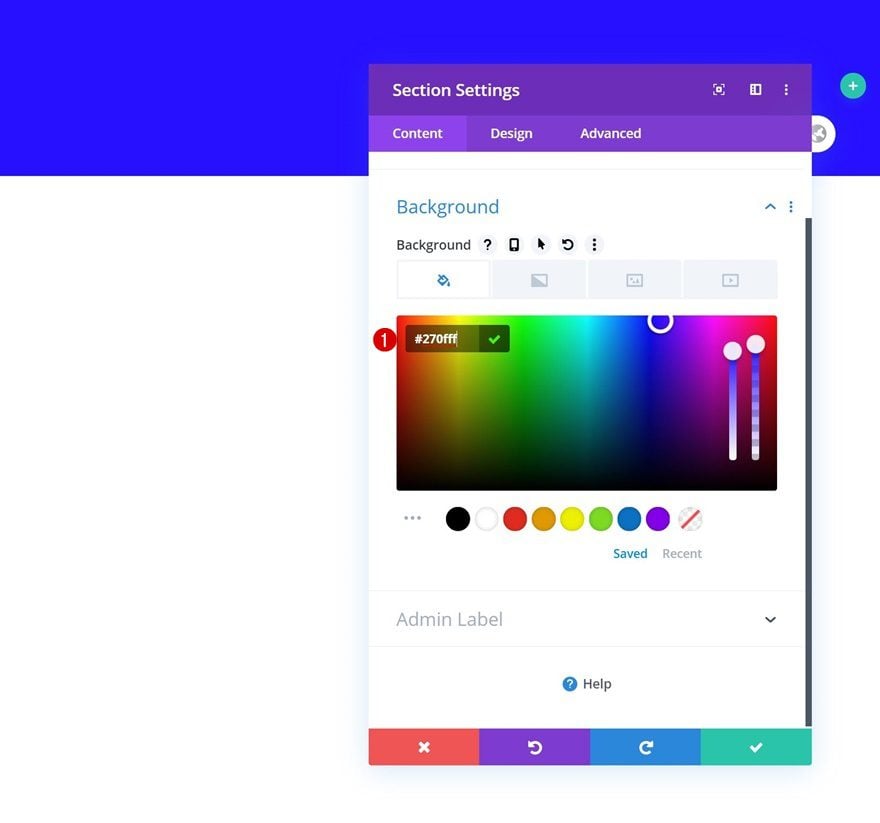
Section Settings
Background Color
Inside the template editor, you’ll notice a section. Open the section settings and add a background color.
- Background Color: #270fff
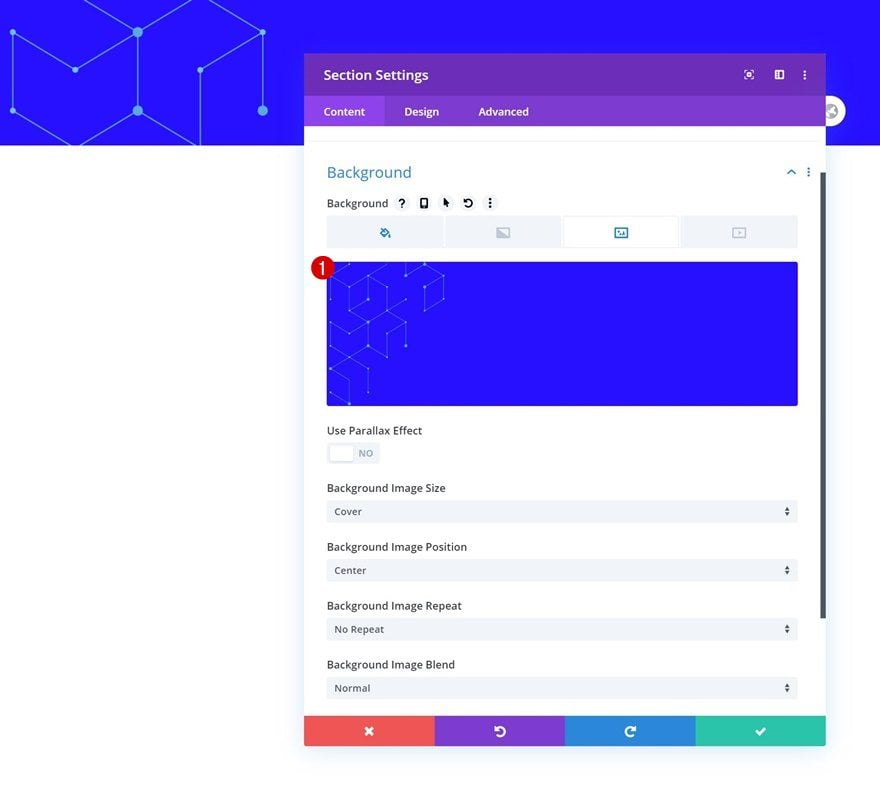
Background Image
Upload the background image you can find in the zipped folder you were able to download at the beginning of this post.
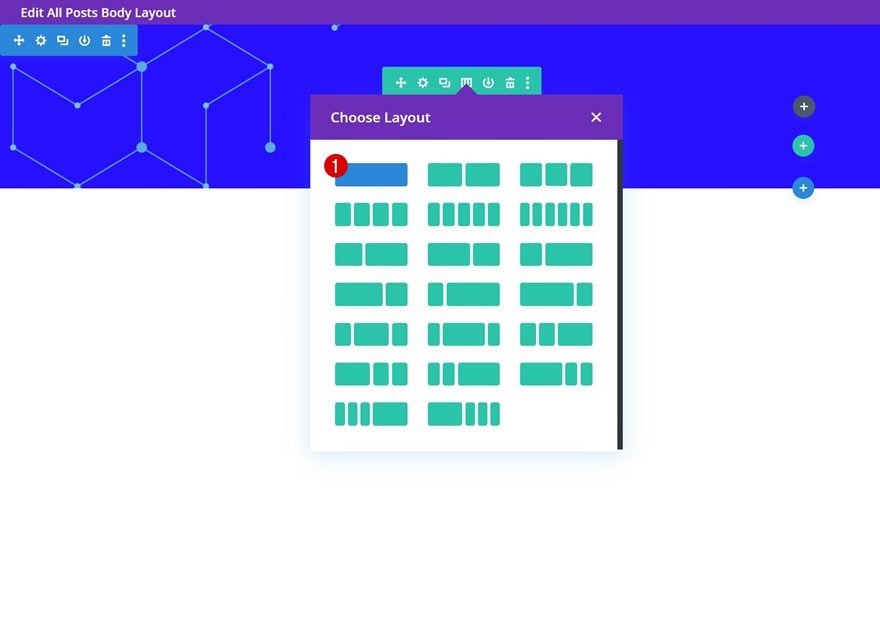
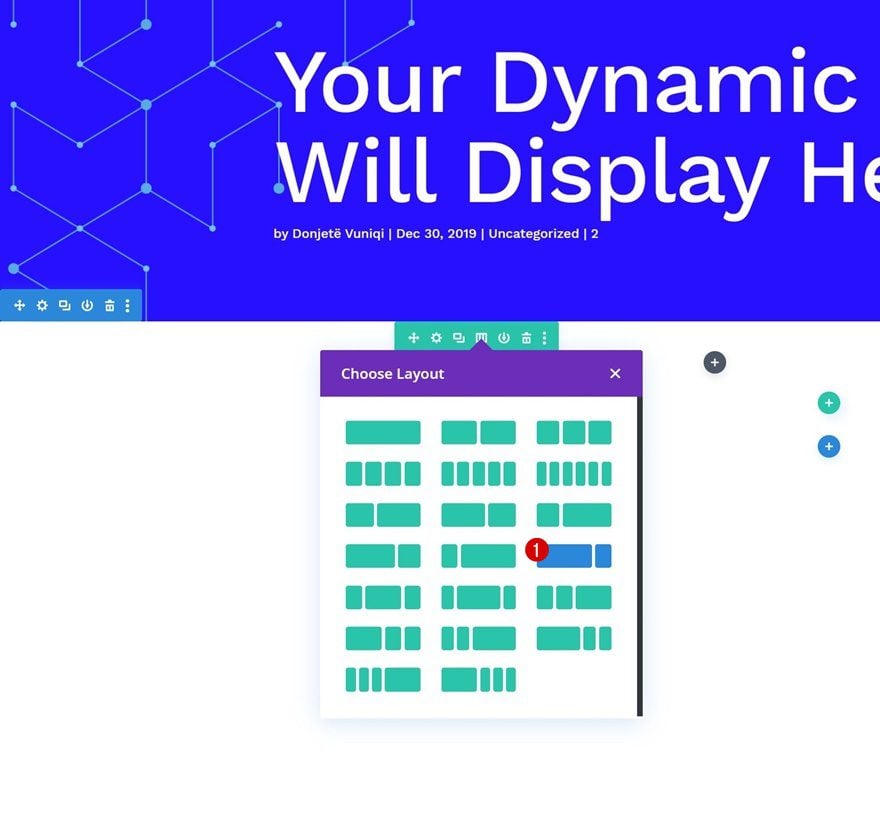
Add New Row
Column Structure
Continue by adding a new row to the section using the following column structure:
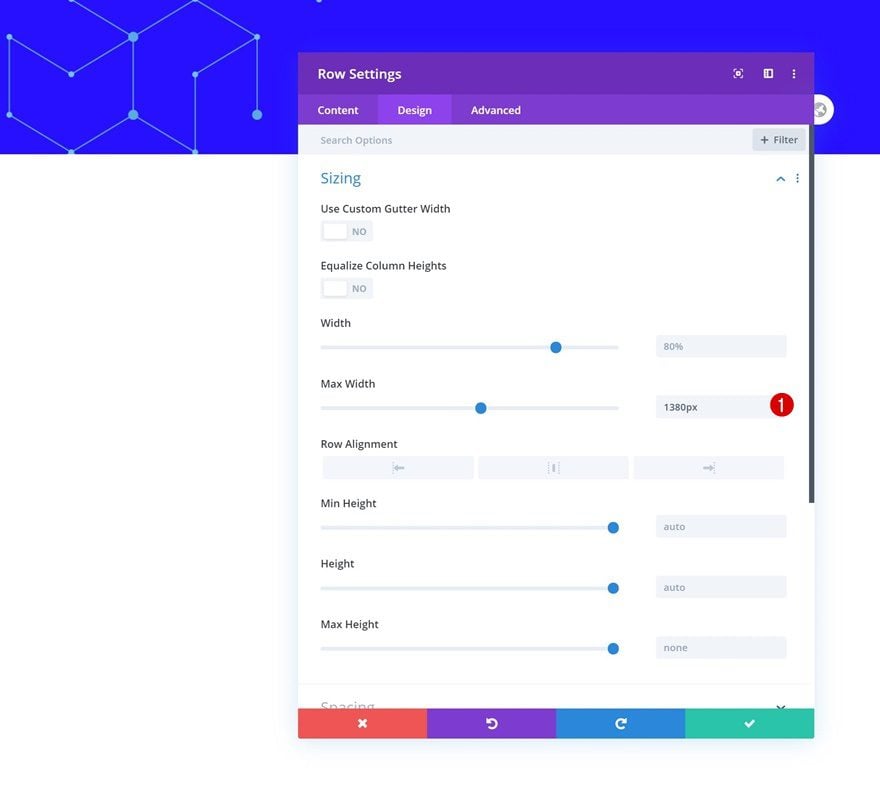
Sizing
Open the row’s settings and change the max width in the sizing settings.
- Max Width: 1380px
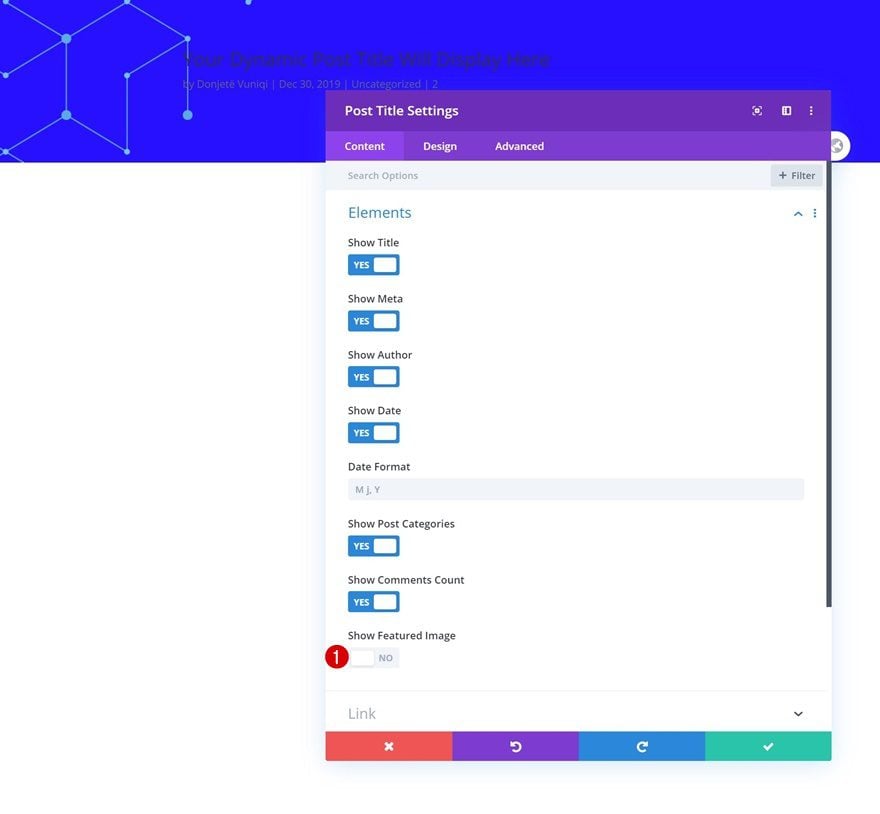
Add Post Title Module to Column
Elements
The only module we need in this row is a Post Title Module. We’re disabling the post’s featured image in the elements settings.
- Show Featured Image: No
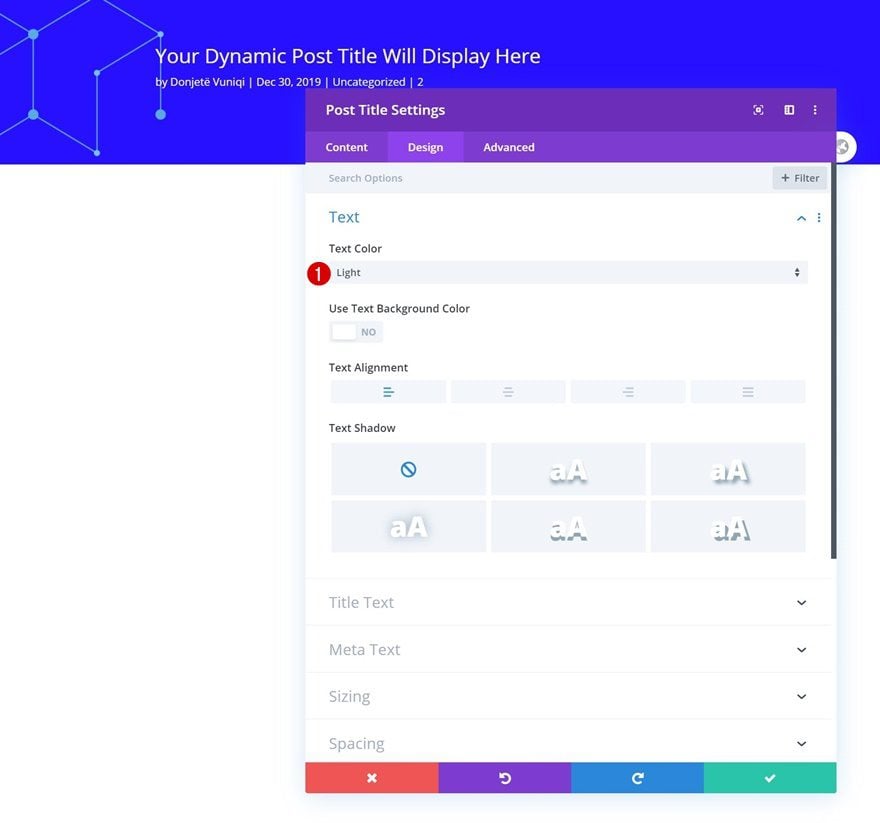
Text Settings
Move on to the module’s design tab and change the text color in the general text settings.
- Text Color: Light
Title Text Settings
Modify the title text settings next.
- Title Font: Work Sans
- Title Text Size: 7rem (Desktop), 4rem (Tablet), 2rem (Phone)
- Title Letter Spacing: -2px

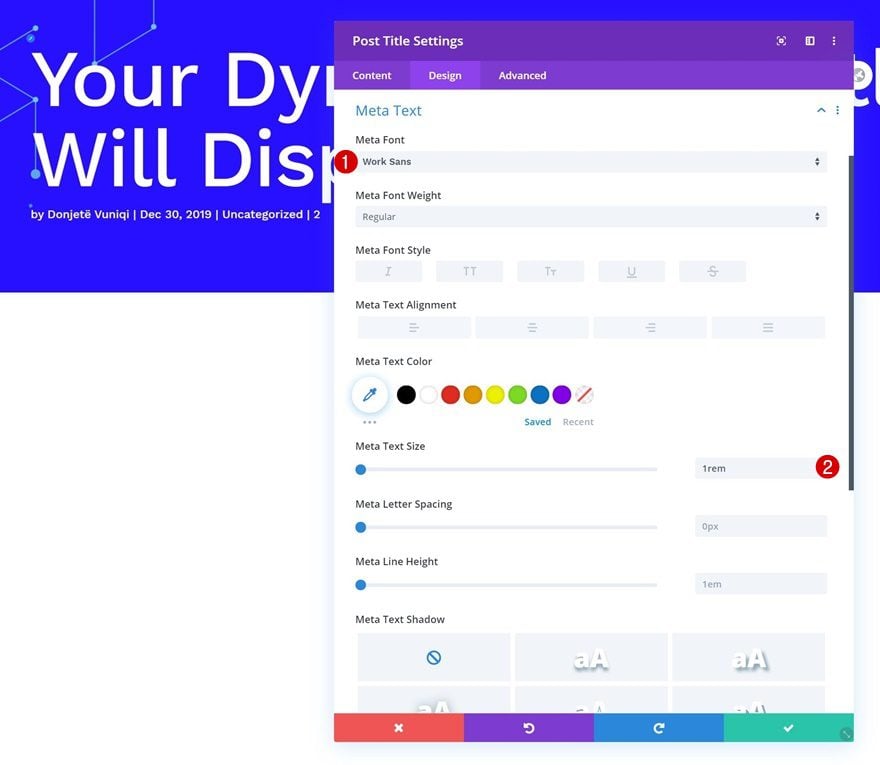
Meta Text Settings
Along with the meta text settings.
- Meta Font: Work Sans
- Meta Text Size: 1rem
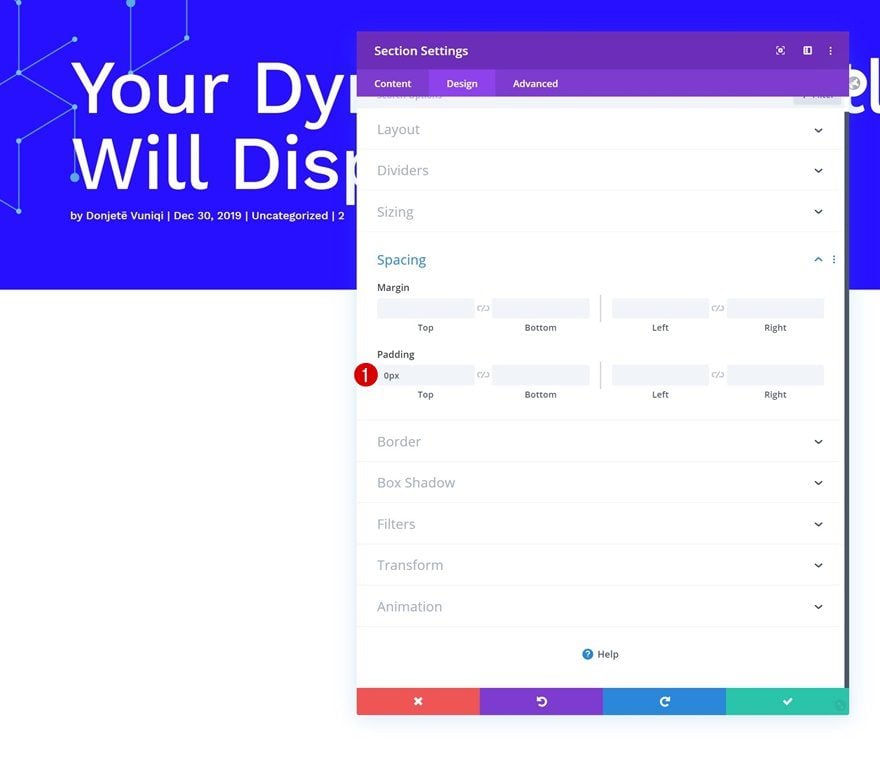
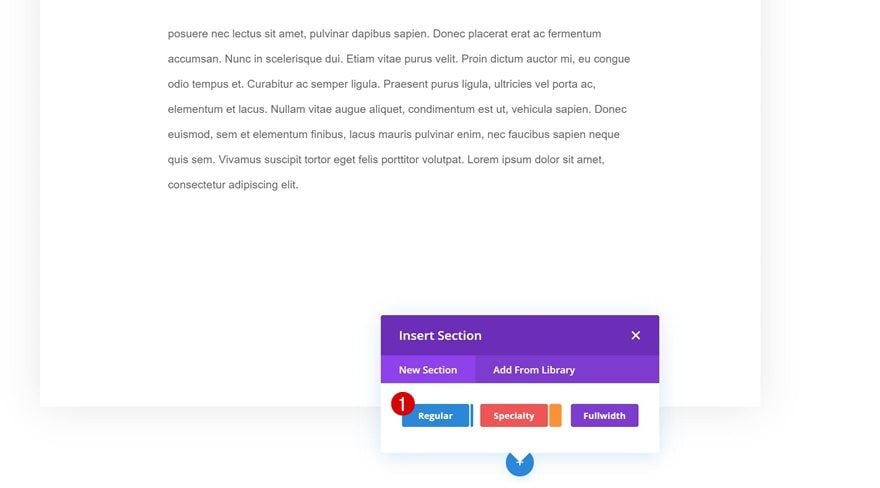
Add New Section
Spacing
Add a new regular section to your template body, open the section settings and remove all default top padding.
- Top Padding: 0px
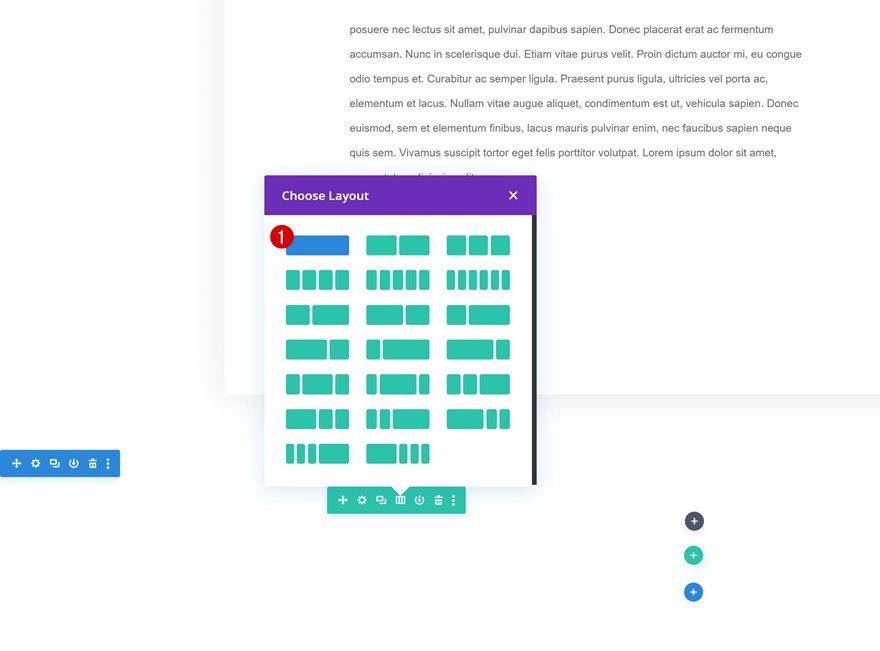
Add New Row
Column Structure
Continue by adding a new row to the section using the following column structure:
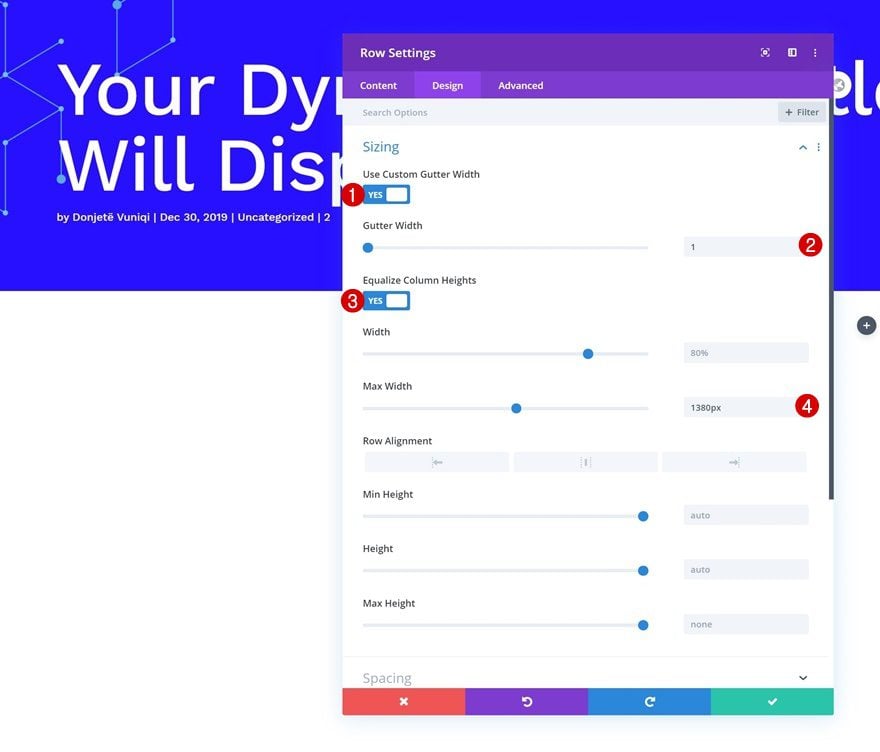
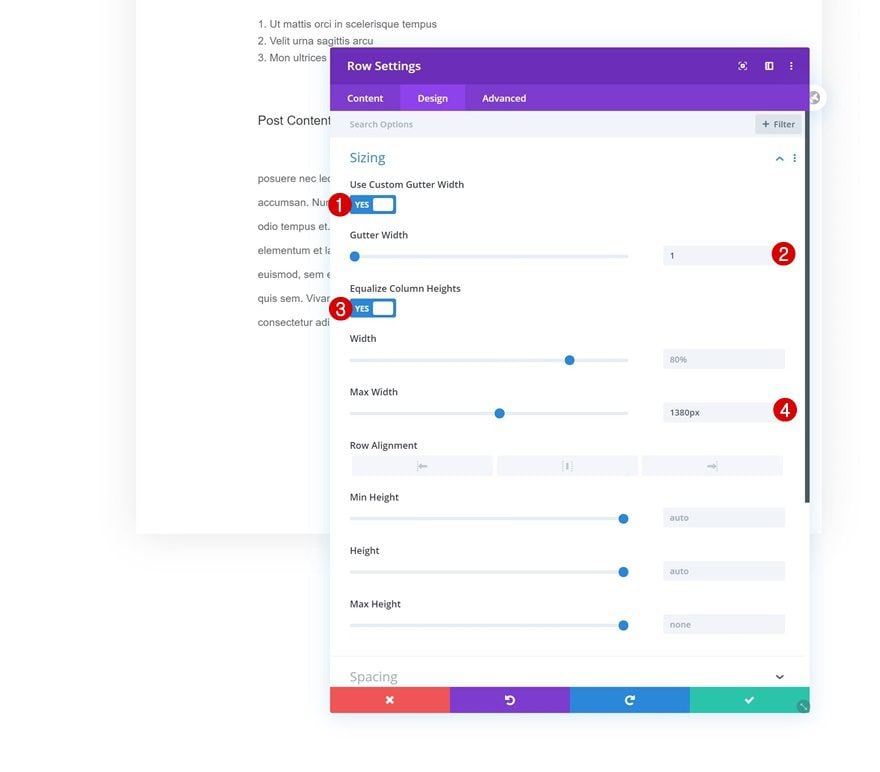
Sizing
Open the row settings and change the sizing settings as follows:
- Use Custom Gutter Width: Yes
- Gutter Width: 1
- Equalize Column Heights: Yes
- Max Width: 1380px
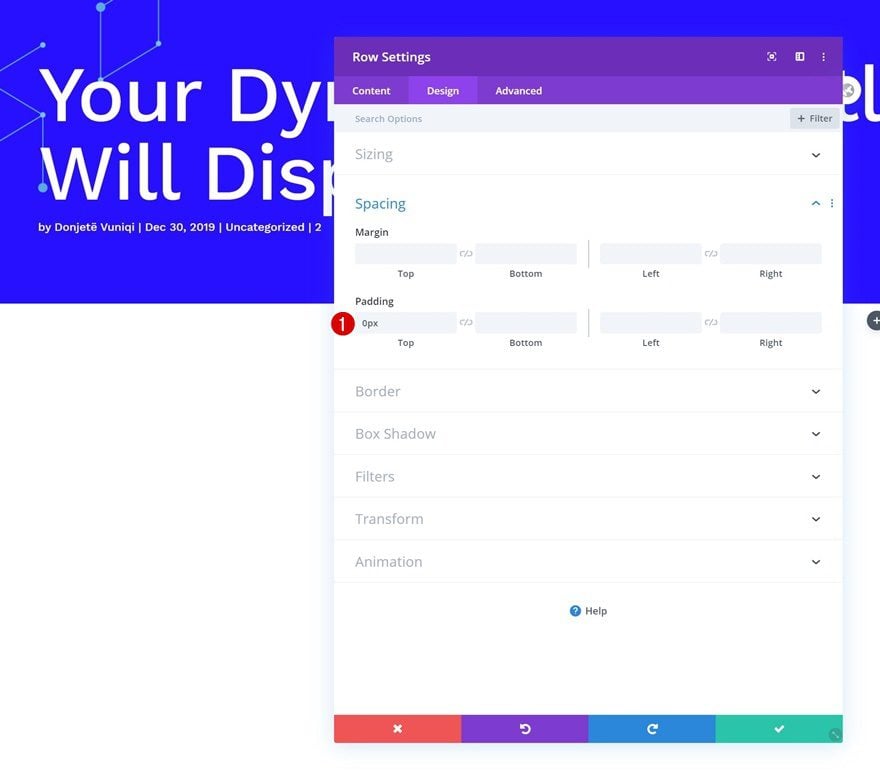
Spacing
Remove all default top padding as well.
- Top Padding: 0px
Column 1 Settings
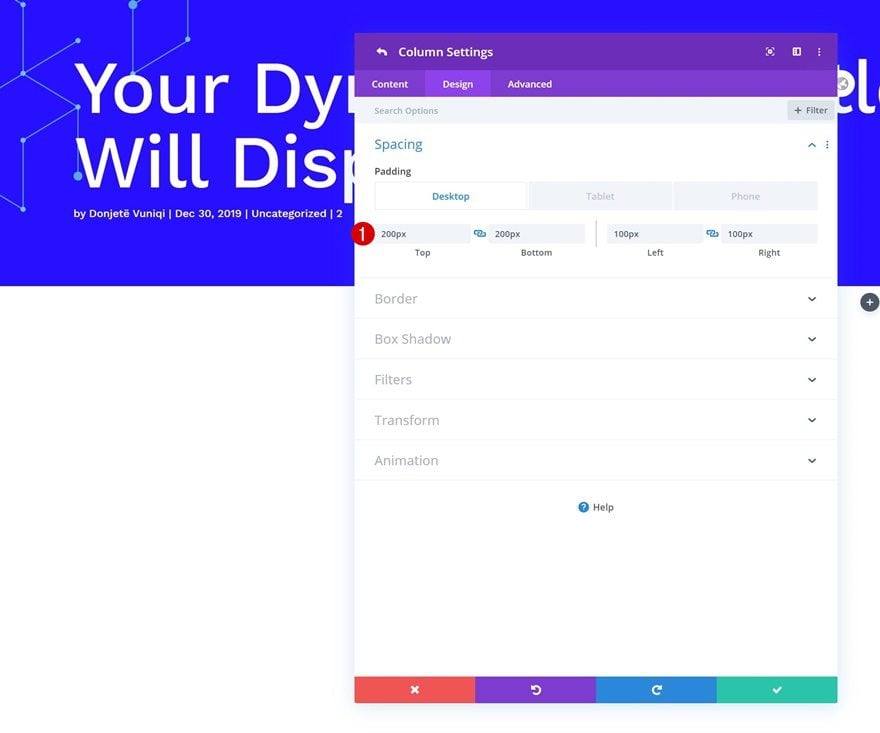
Spacing
Then, open the column 1 settings and add some custom padding values across different screen sizes.
- Top Padding: 200px (Desktop), 50px (Tablet), 20px (Phone)
- Bottom Padding: 200px (Desktop), 50px (Tablet), 20px (Phone)
- Left Padding: 100px (Desktop), 50px (Tablet), 20px (Phone)
- Right Padding: 100px (Desktop), 50px (Tablet), 20px (Phone)
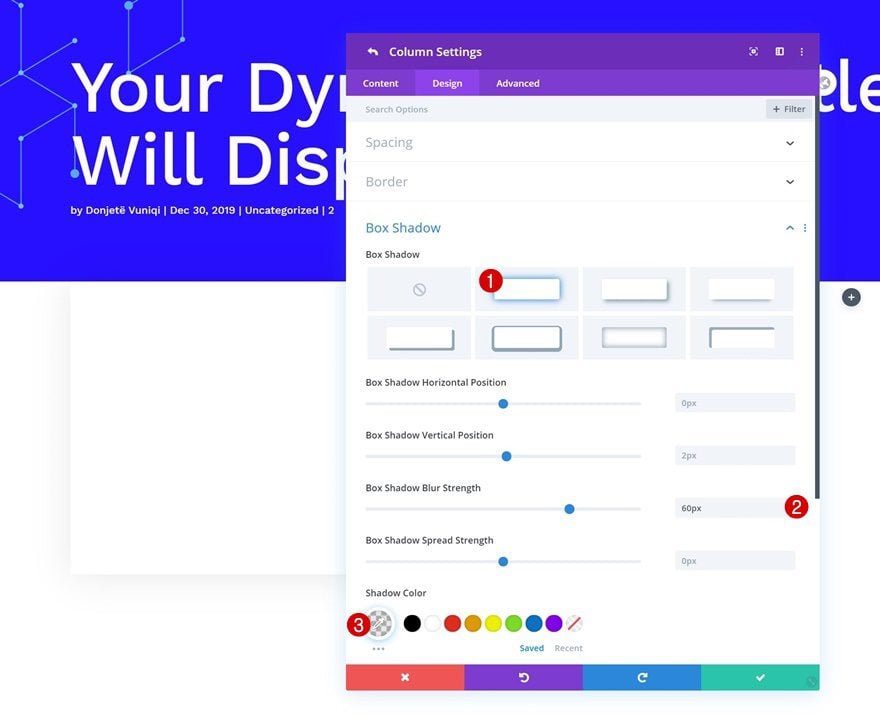
Box Shadow
Add a box shadow to the first column as well.
- Box Shadow Blur Strength: 60px
- Shadow Color: rgba(0,0,0,0.09)
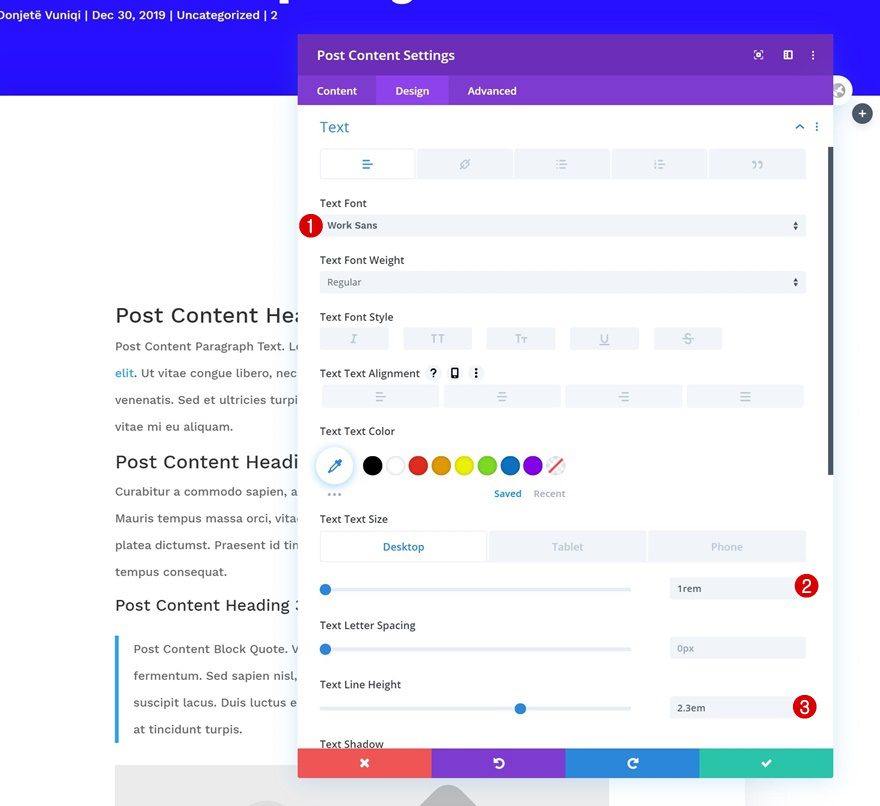
Add Post Content Module to Column 1
Text Settings
Time to start adding modules! Place the Post Content Module in column 1 and change the text settings accordingly:
- Text Font: Work Sans
- Text Size: 1rem (Desktop), 0.9rem (Tablet & Phone)
- Text Line Height: 2.3em
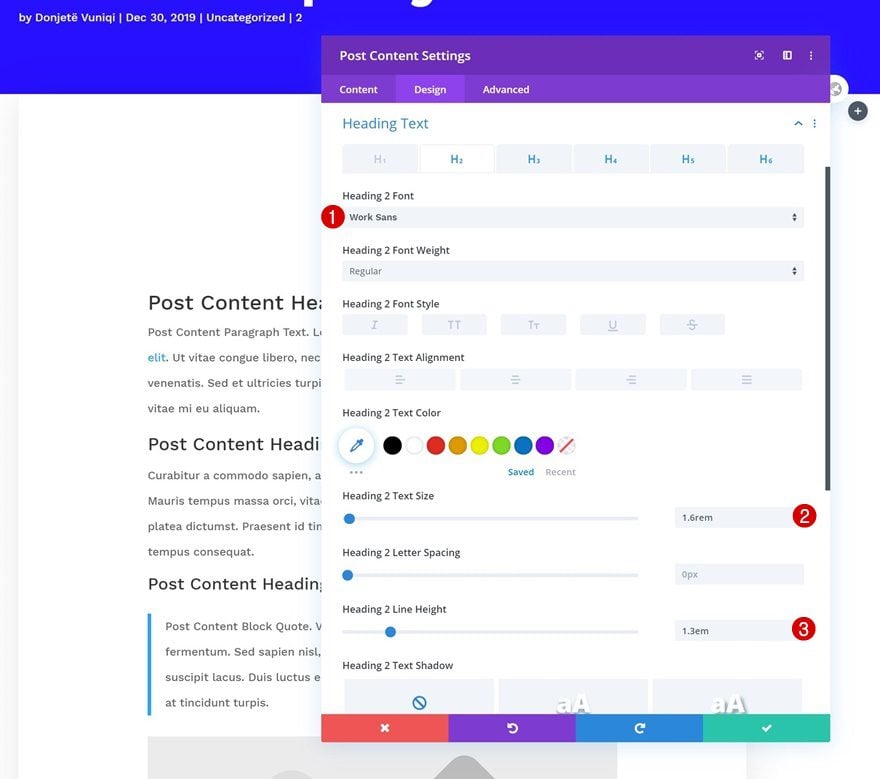
Heading Text Settings
Modify the different heading text settings as well.
- Heading Font: Work Sans
- Heading 2 Text Size: 1.6rem (H2), 1.5rem (H3), 1.4rem (H4), 1.3rem (H5), 1.2rem (H6)
- Heading Line Height: 1.3em
CSS ID
Complete the module’s settings by adding a CSS ID.
- CSS ID: blog-post-content

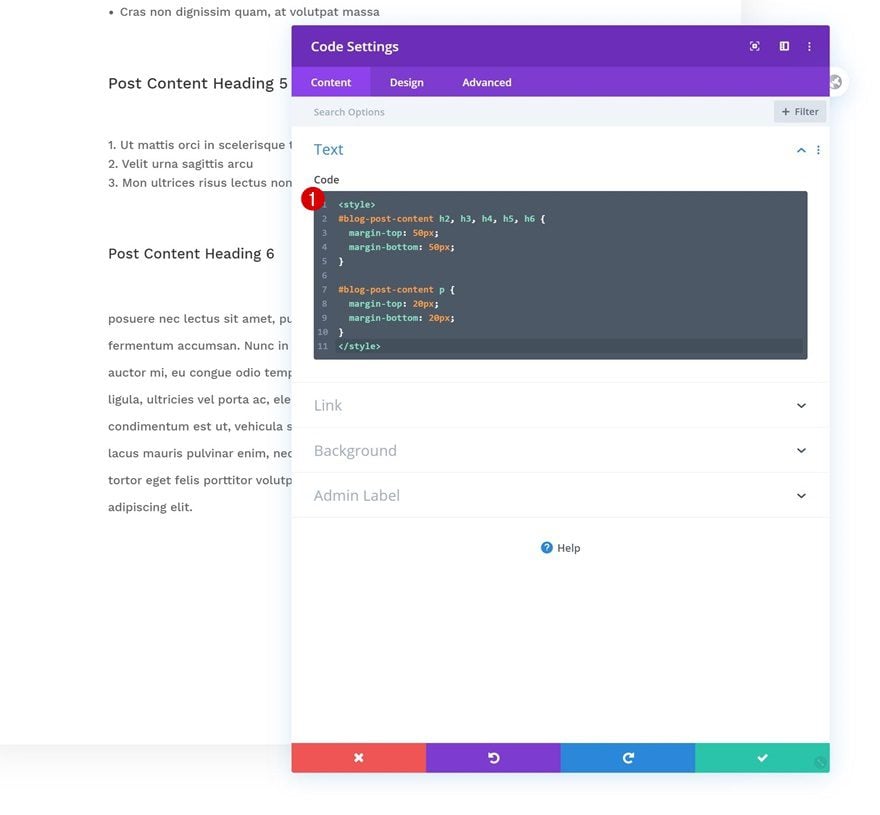
Add Code Module to Column 1
Insert Heading CSS Code
To add some space between the different post content elements, we’ll add a Code Module to column 1 and insert the following lines of CSS code:
<style>
#blog-post-content h2, h3, h4, h5, h6 {
margin-top: 50px;
margin-bottom: 50px;
}

#blog-post-content p {
margin-top: 20px;
margin-bottom: 20px;
}
</style>
Add Person Module to Column 2
Dynamic Content
In the second column, the only module we need is a Person Module. We’ll select the following dynamic content:
- Name: Post Author
- Position: Author
- Body: Author Bio
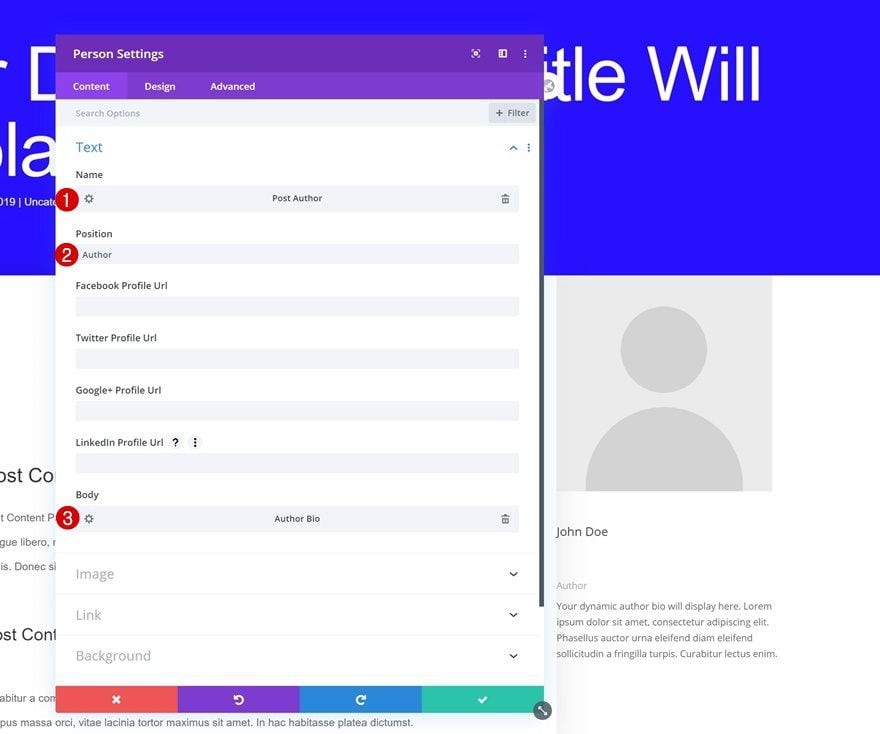
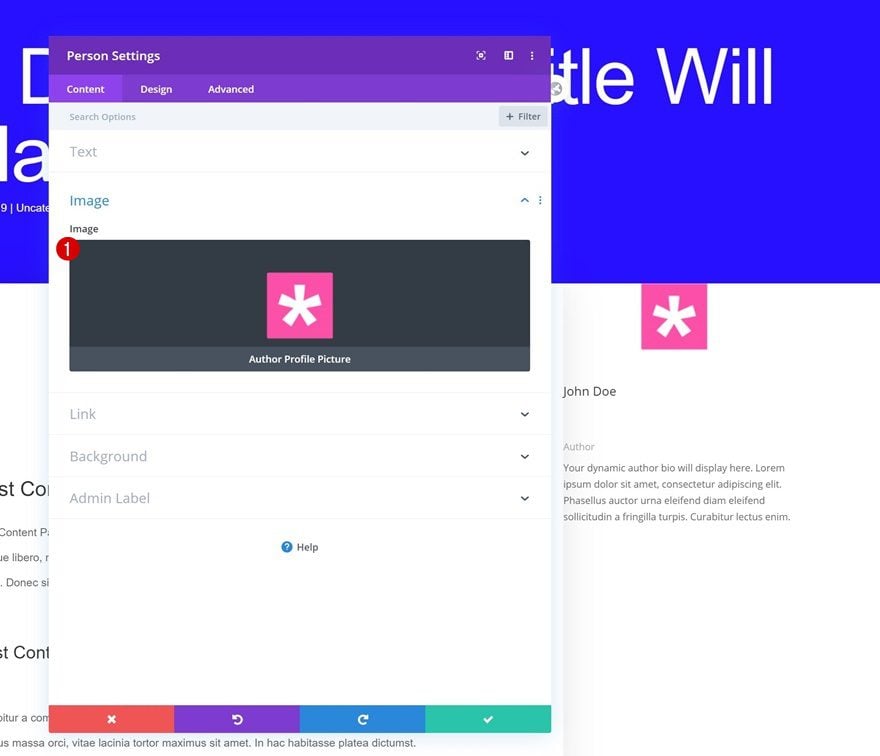
Image Dynamic Content
Add the author’s dynamic profile picture to the module too.
- Image: Author Profile Picture
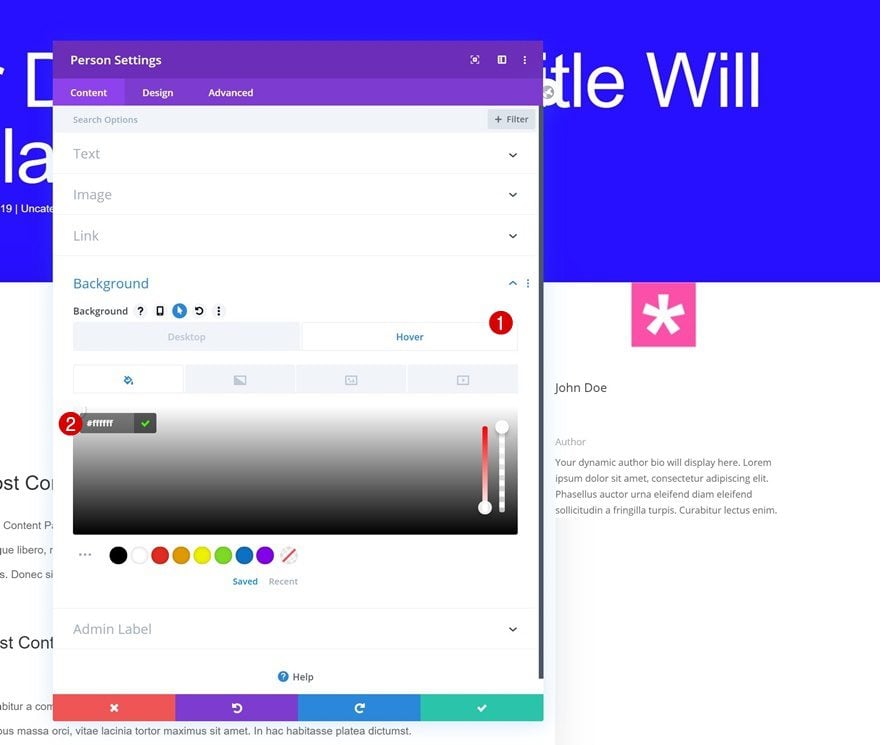
Hover Background Color
Then, add a white background color on hover.
- Background Color: #ffffff
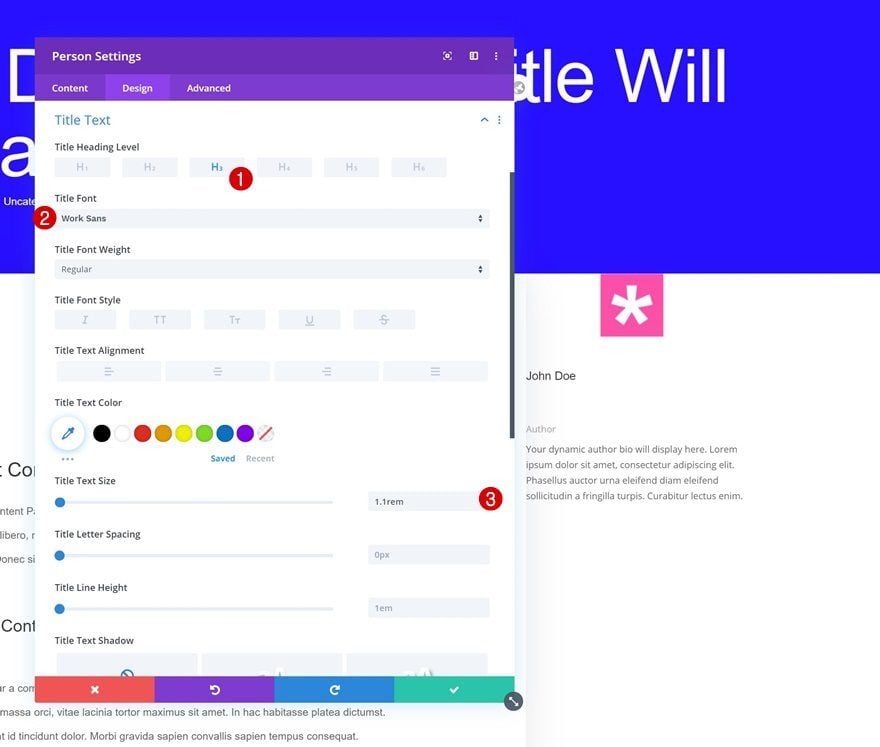
Title Text Settings
Move on to the module’s design tab and change the H3 text settings accordingly:
- Title Heading Level: H3
- Title Font: Work Sans
- Title Text Size: 1.1rem
Body Text Settings
Modify the body text settings too.
- Body Font: Work Sans
- Body Text Size: 0.9rem
- Body Line Height: 2em

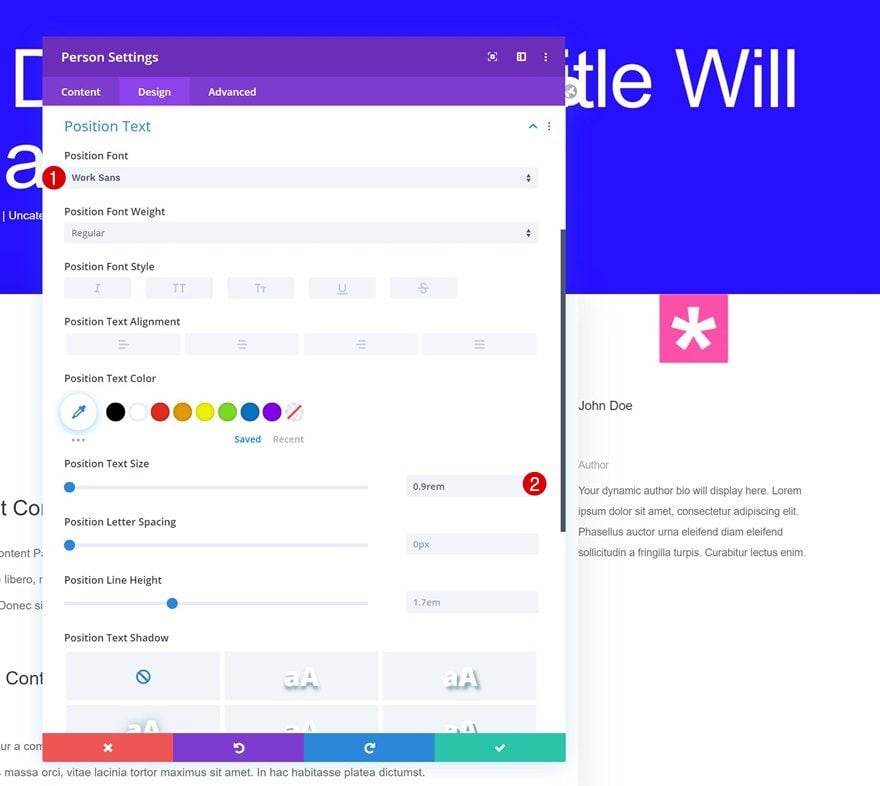
Position Text Settings
Then, change the position font text settings.
- Position Font: Work Sans
- Position Text Size: 0.9rem
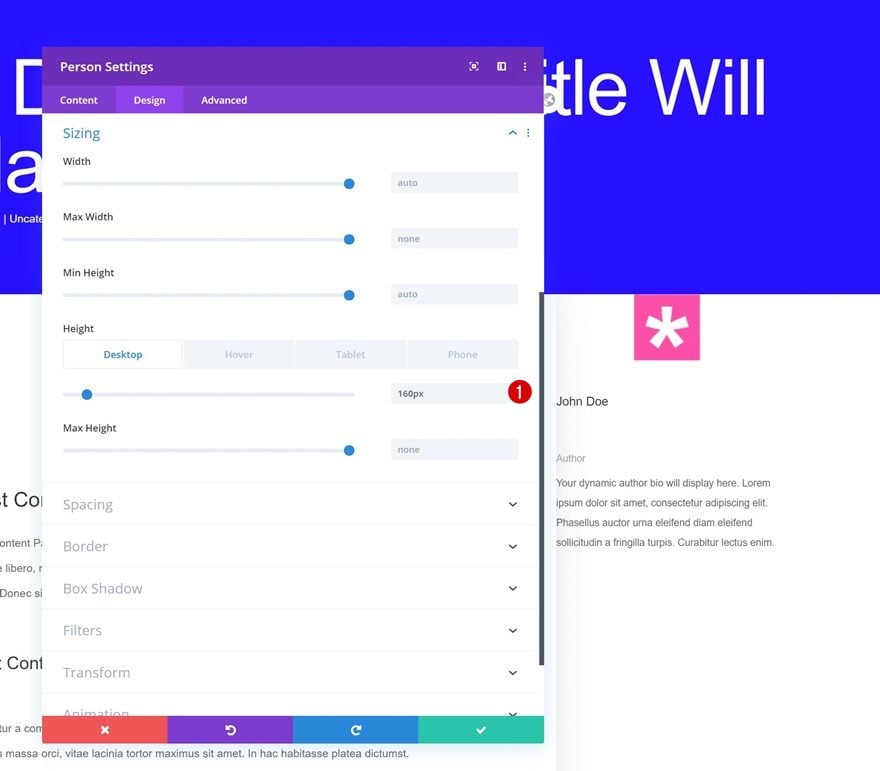
Default Sizing
Modify the height in the sizing settings.
- Height: 160px (Desktop), auto (Tablet & Phone)
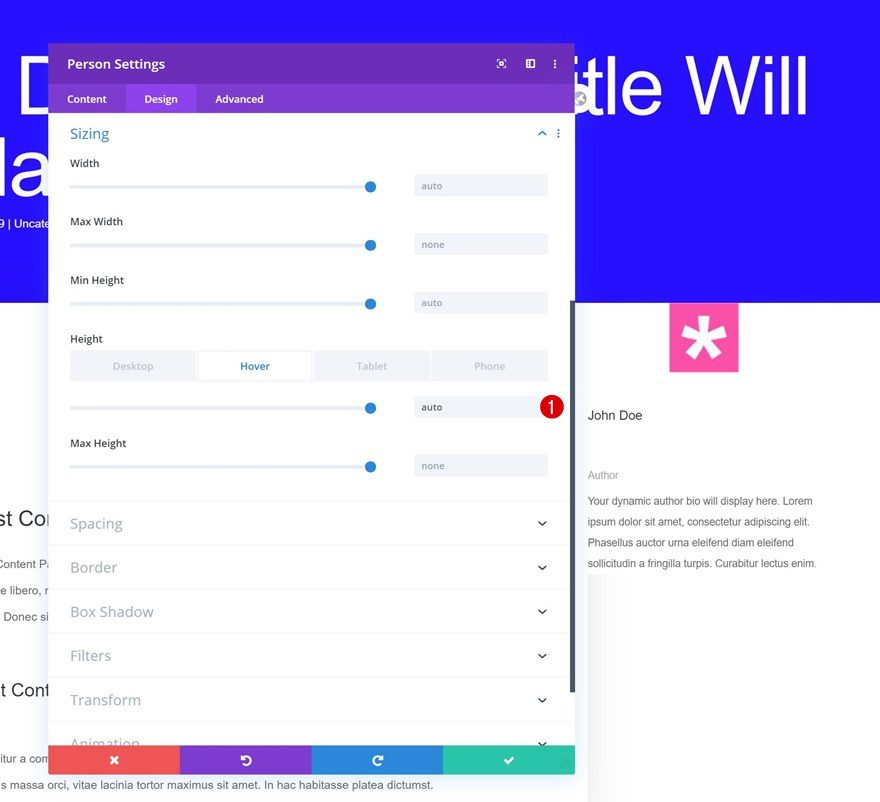
Hover Sizing
And bring back the height to auto on hover.
- Height: auto
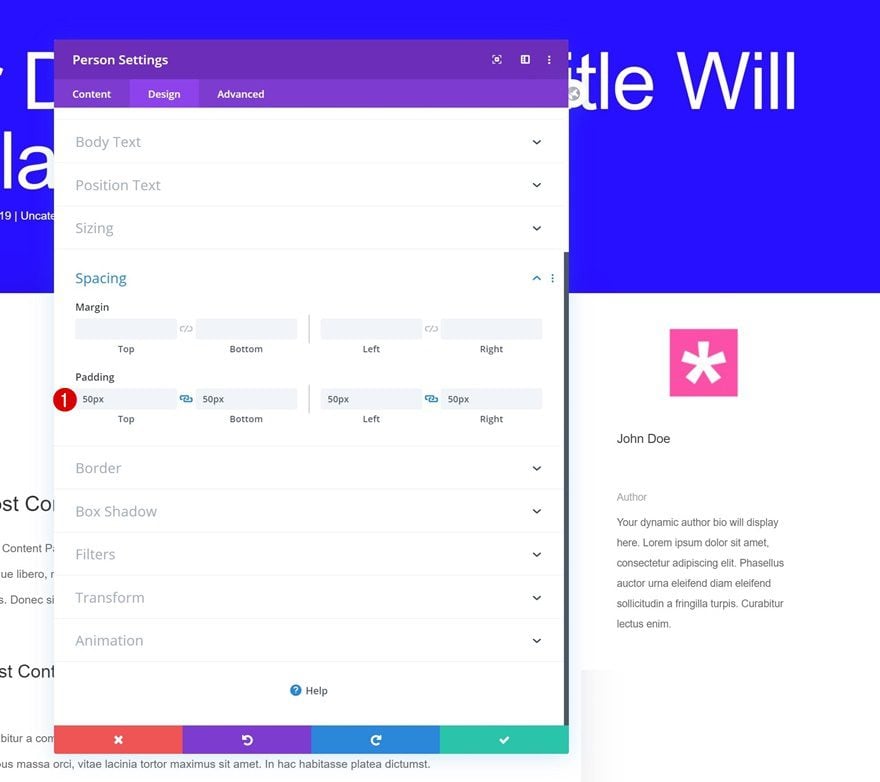
Spacing
Next, we’re adding some space around the module using custom padding.
- Top Padding: 50px
- Bottom Padding: 50px
- Left Padding: 50px
- Right Padding: 50px
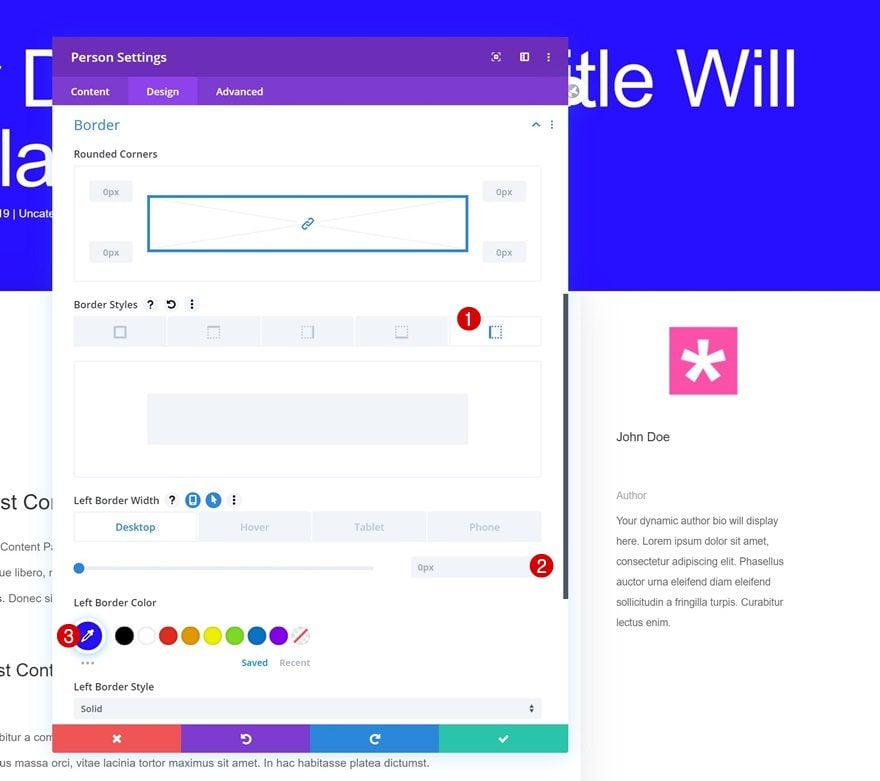
Default Border
And we’ll use a border too.
- Left Border Width: 0px (Desktop), 4px (Tablet & Phone)
- Left Border Color: #270fff
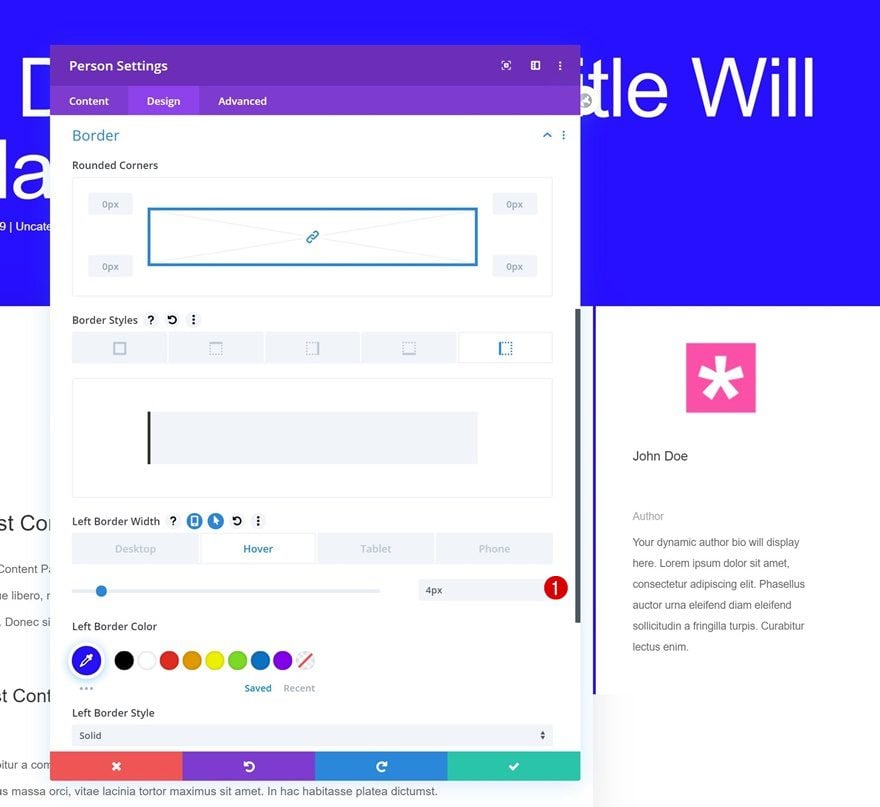
Hover Border
Modify the border width on hover.
- Left Border Width: 4px
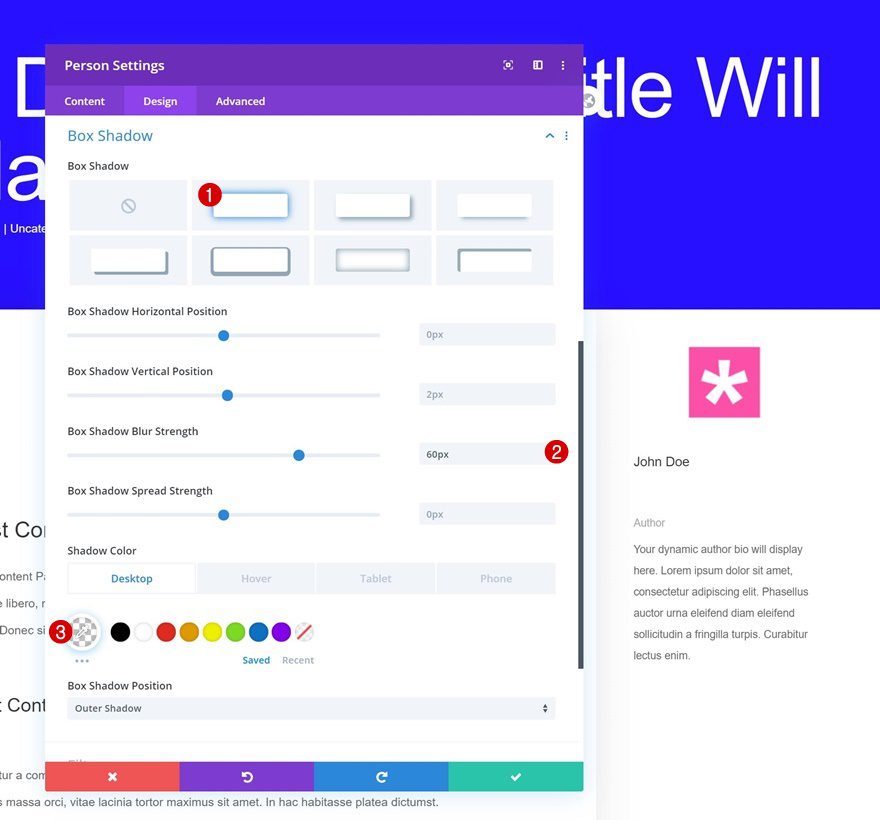
Default Box Shadow
Then, add a box shadow.
- Box Shadow Blur Strength: 60px
- Shadow Color: rgba(0,0,0,0) (Desktop), rgba(0,0,0,0.11) (Tablet & Phone)
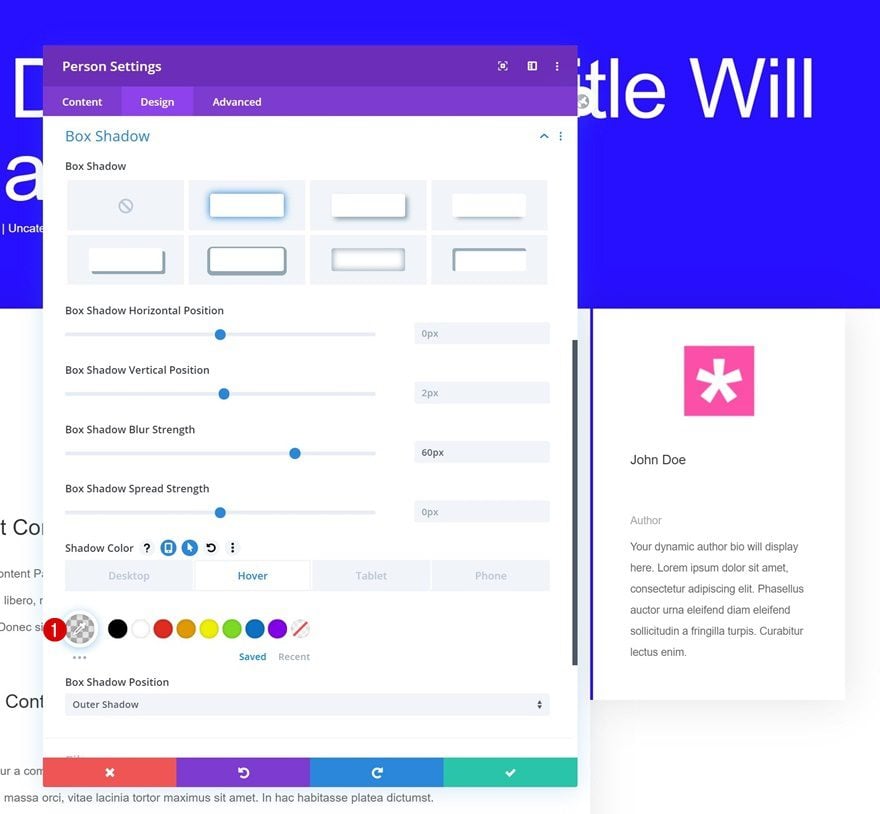
Hover Box Shadow
Change the shadow color on hover.
- Shadow Color: rgba(0,0,0,0.11)
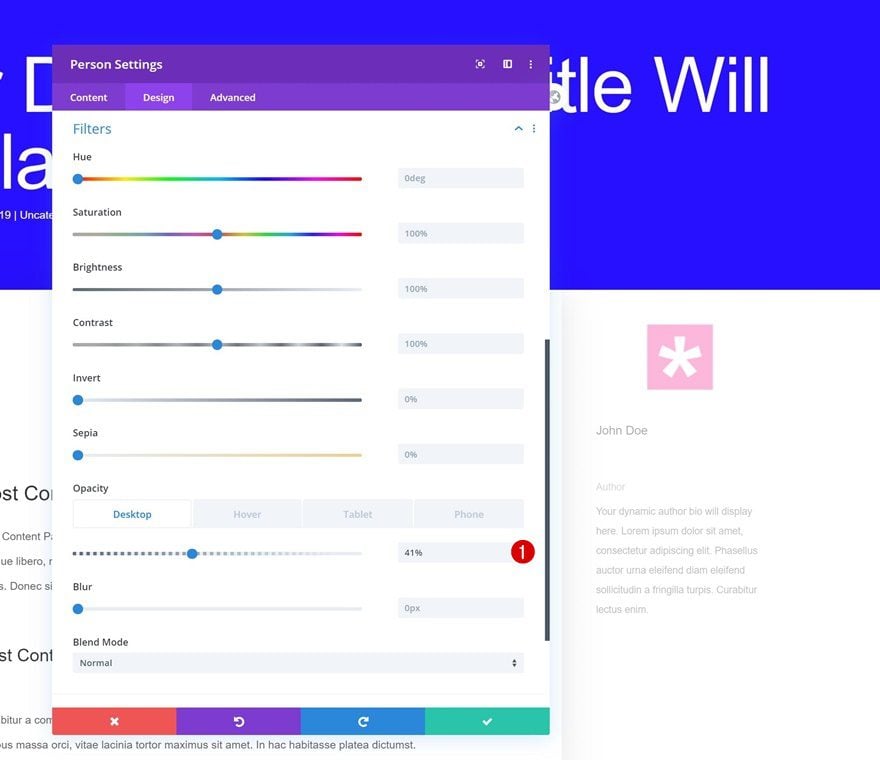
Default Filters
Moving on, we’ll change the opacity.
- Opacity: 41% (Desktop), 100% (Tablet & Phone)
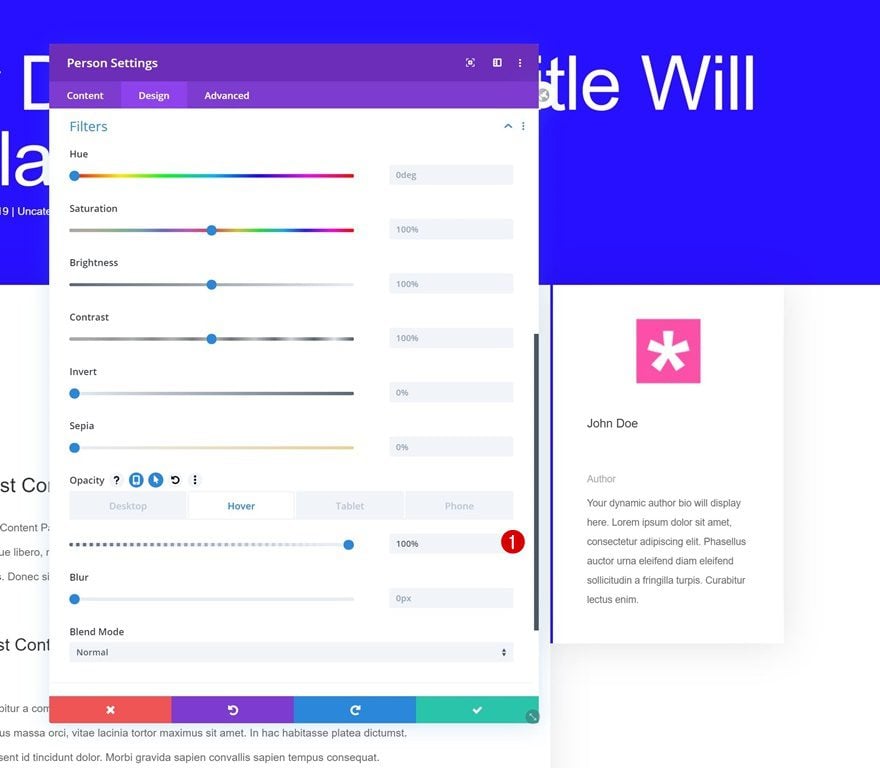
Hover Filters
Bring back the opacity to 100% on hover.
- Opacity: 100%
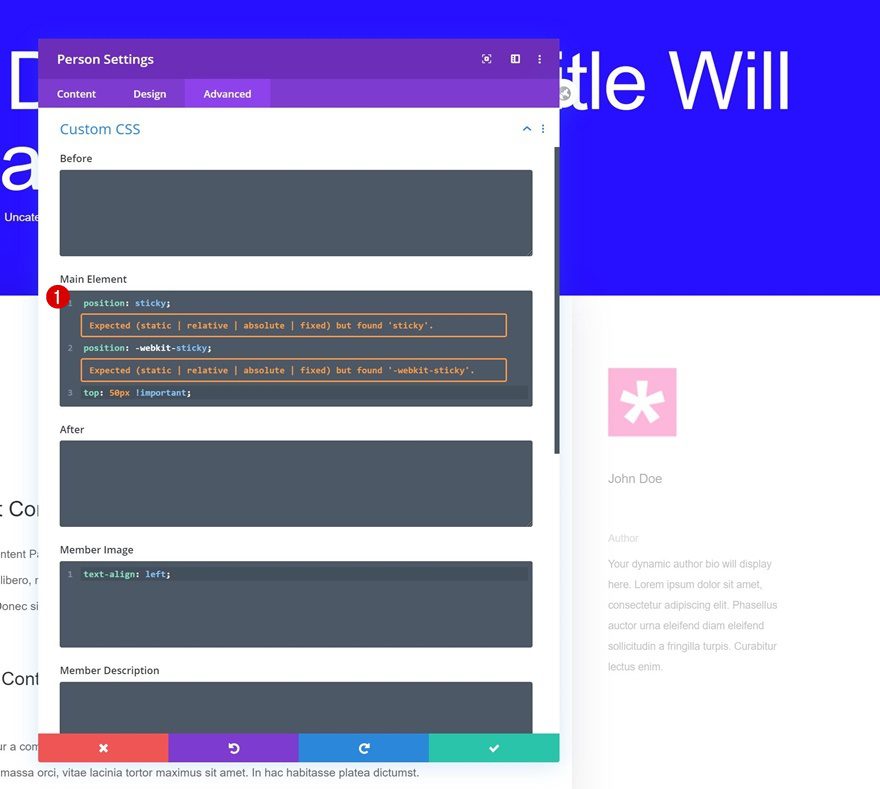
Main Element CSS
To add the sticky effect you were able to notice in the preview of this post, we’ll add a few lines of custom CSS to the module’s main element.
position: sticky;
position: -webkit-sticky;
top: 50px !important;
Member Image CSS
We’re making sure the author profile picture is left-aligned by adding one single line of CSS code to the module’s member image.
text-align: left;

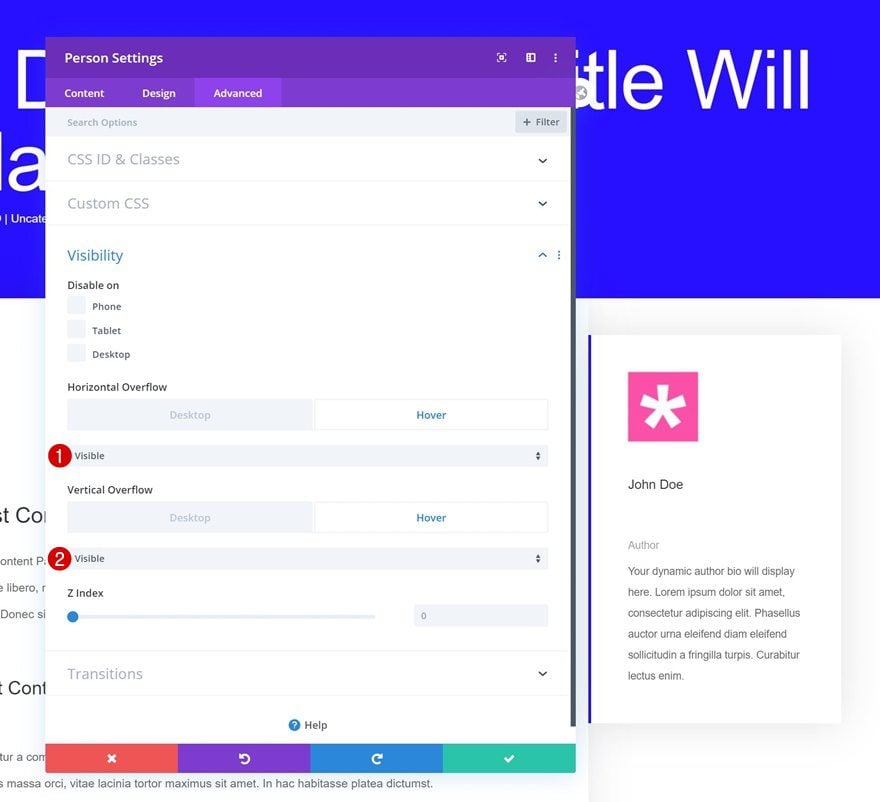
Default Visibility
To hide the module’s content on desktop, we’ll change the overflows in the advanced tab.
- Horizontal Overflow: Hidden
- Vertical Overflow: Hidden

Hover Visibility
We’ll make the content appear on hover by changing the overflows to visible.
- Horizontal Overflow: Visible
- Vertical Overflow: Visible
Add New Section
Add another section to your design.
Add New Row
Column Structure
Continue by adding a new row to the section using the following column structure:
Sizing
Open the row settings and change the sizing settings accordingly:
- Use Custom Gutter Width: Yes
- Gutter Width: 1
- Equalize Column Heights: Yes
- Max Width: 1380px
Add Comments Module to Column
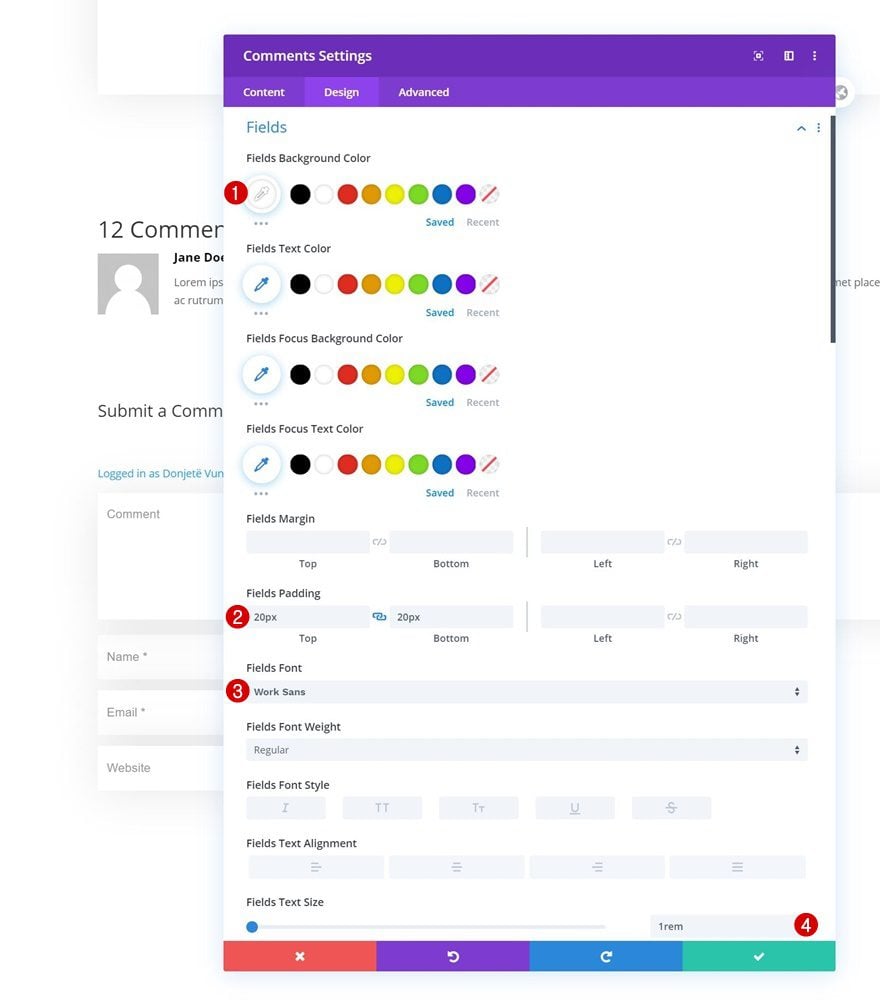
Fields Settings
The only module we need in this row is a Comments Module. Change the fields settings as follows:
- Fields Background Color: #ffffff
- Fields Top Padding: 20px
- Fields Bottom Padding: 20px
- Fields Font: Work Sans
- Fields Text Size: 1rem
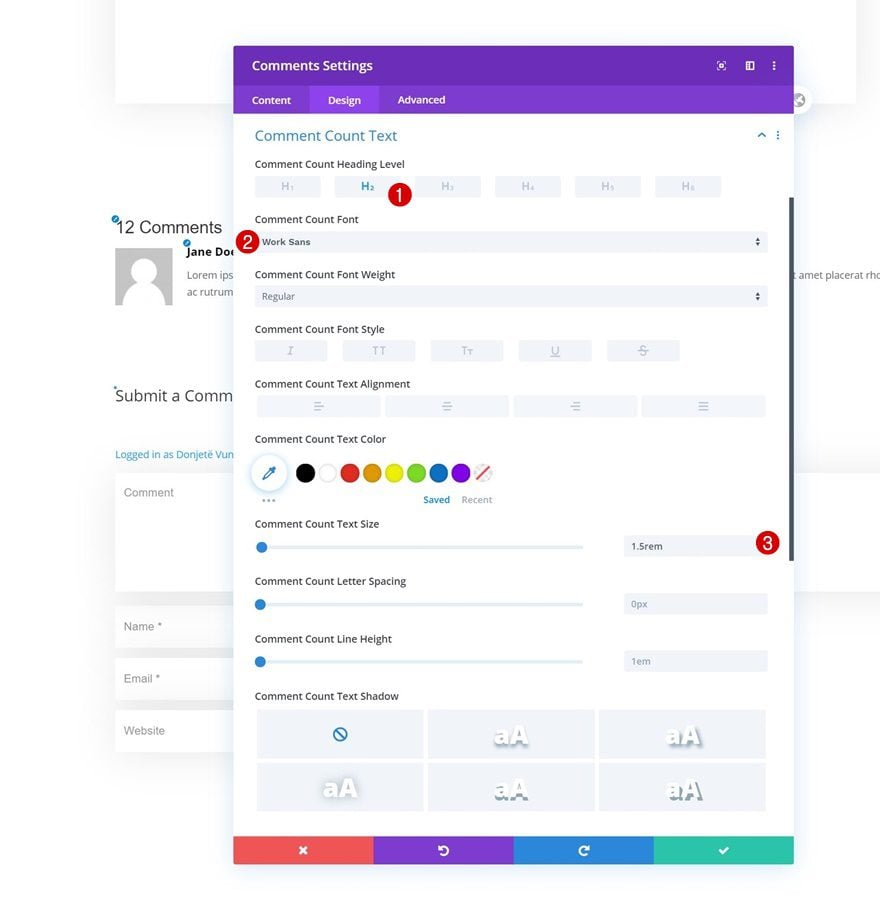
Comment Count Text Settings
Modify the comment count text settings as well.
- Comment Count Heading Level: H2
- Comment Count Font: Work Sans
- Comment Count Text Size: 1.5rem
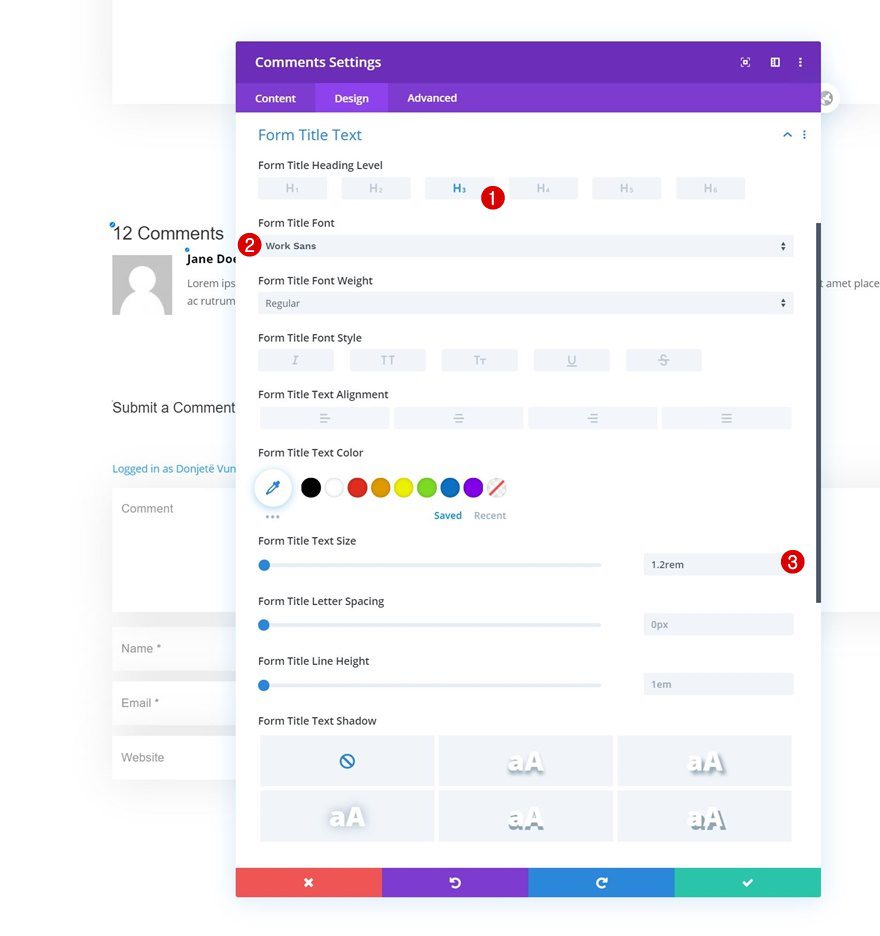
Form Title Text Settings
Then, change the form title text settings.
- Form Title Heading Level: H3
- Form Title Font: Work Sans
- Form Title Text Size: 1.2rem
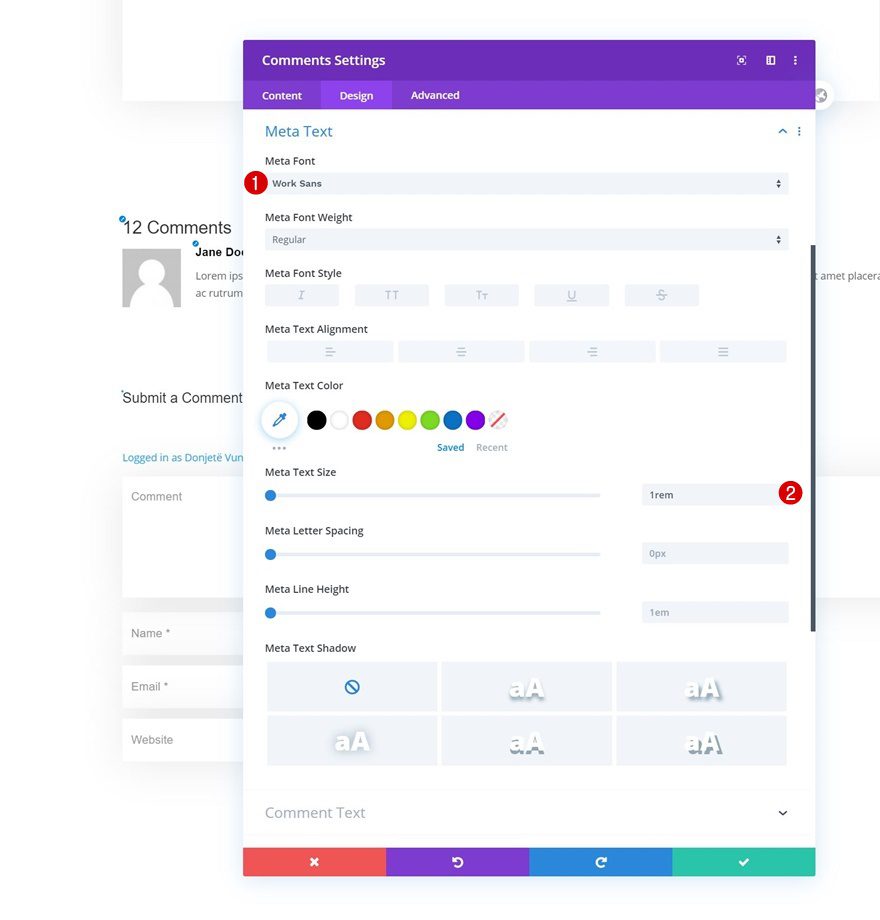
Meta Text Settings
Modify the meta text settings as well.
- Meta Font: Work Sans
- Meta Text Size: 1rem
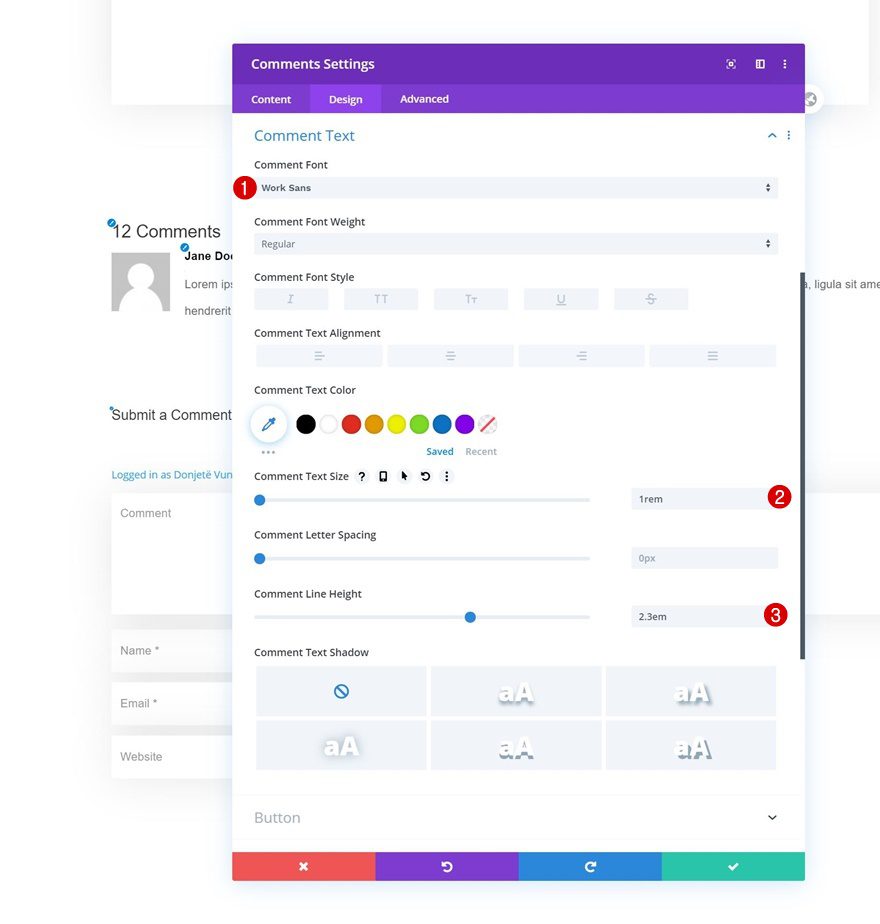
Comment Text Settings
We’re changing the comment text settings too.
- Comment Font: Work Sans
- Comment Text Size: 1rem
- Comment Line Height: 2.3em
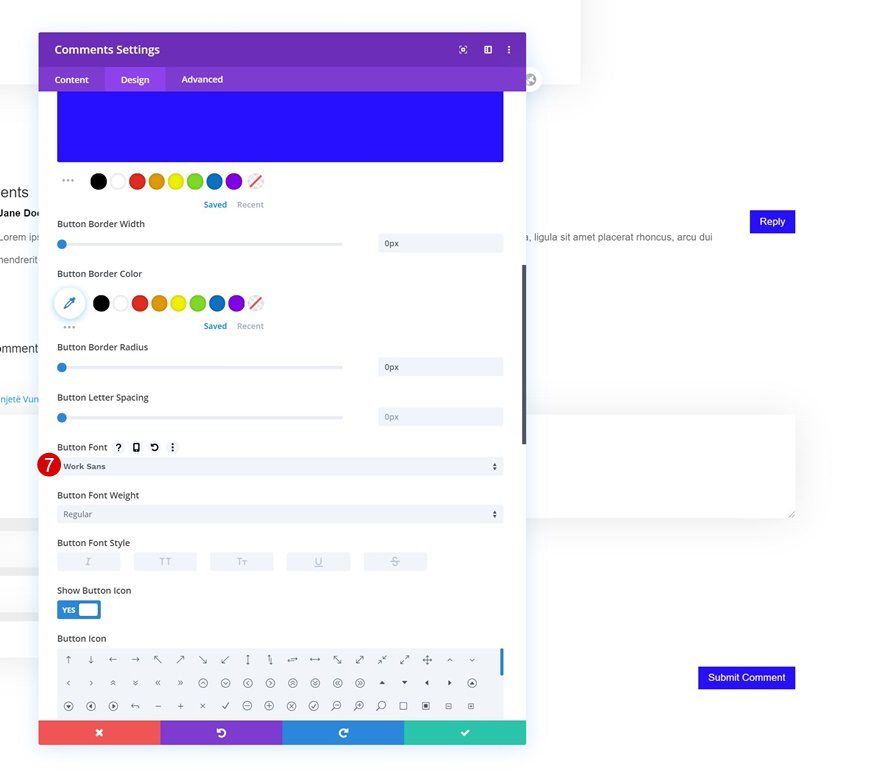
Button Settings
Complete the module’s settings by styling the button.
- Use Custom Styles For Button: Yes
- Button Text Size: 1rem
- Button Text Color: #ffffff
- Button Background Color: #270fff
- Button Border Width: 0px
- Button Border Radius: 0px
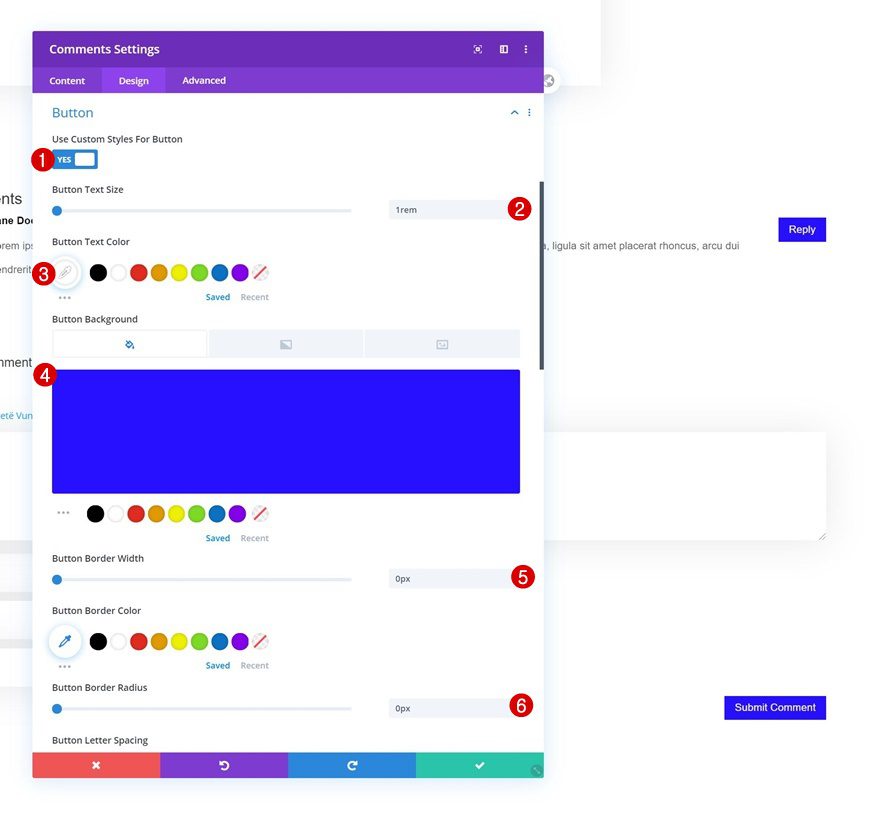
- Button Font: Work Sans
3. Save Theme Builder Changes & View Result
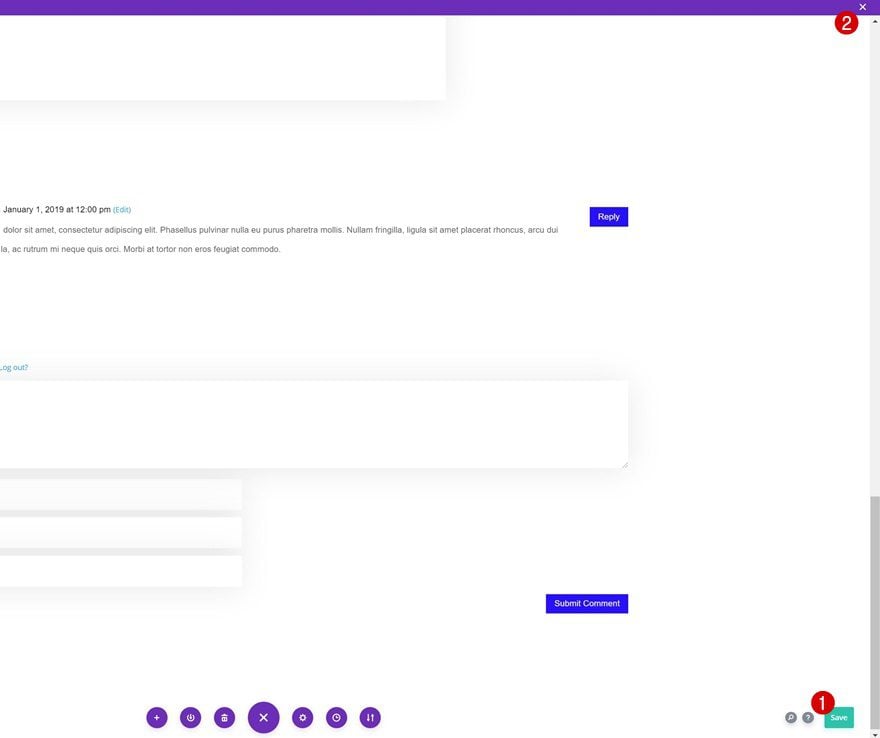
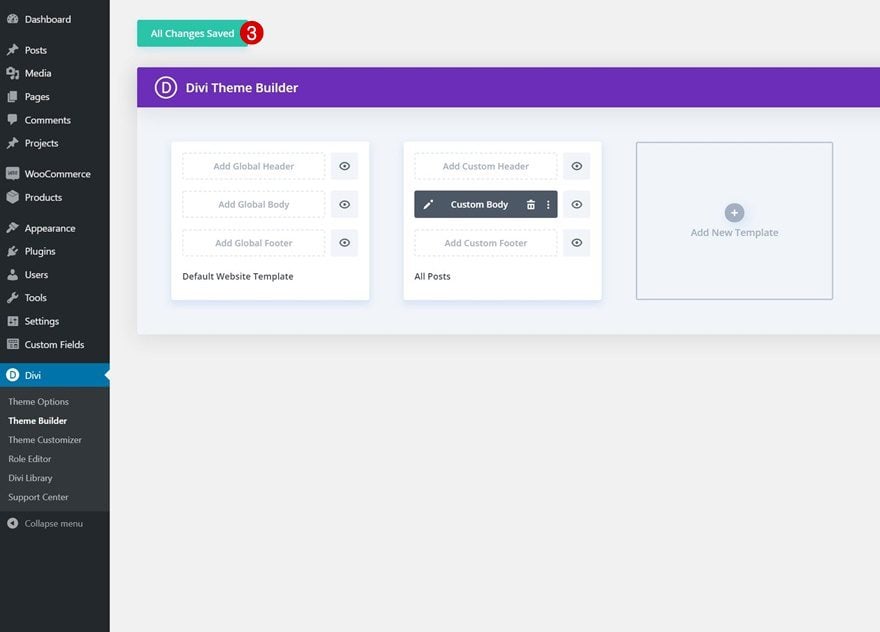
Once you’ve completed the template, make sure you save all changes, exit the Theme Builder and view the outcome on your posts!
Preview
Now that we’ve gone through all the steps, let’s take a final look at the outcome across different screen sizes.
Desktop
Mobile
Final Thoughts
In this post, we’ve shown you how to design a beautiful dynamic author box using Divi’s built-in options, the dynamic feature and the Theme Builder. With these three things combined, it’s now easier than ever to customize your blog post template and credit the post author in a creative way. You were able to download the JSON file for free as well! If you have any questions or suggestions, feel free to leave a comment in the comment section below.
If you’re eager to learn more about Divi and get more Divi freebies, make sure you subscribe to our email newsletter and YouTube channel so you’ll always be one of the first people to know and get benefits from this free content.


Please tell me how to make Social media URLs dynamic respective to the authors’ profiles.
The dynamic options are limited however. It’s strange that only name, position, picture and bio are available and not, for example, email (which is even required).
Hi There,
Thanks for these tips!
So, just to be certain.
I can use this even if I already have a current theme?