The Divi Theme Builder
Using the Theme Builder to customize your header, footer and post templates.
Introduction to the Theme Builder
The Divi Theme Builder is an interface within Divi that allows you to use the Divi Builder to construct theme templates and assign those custom templates to pages or posts across your theme (including custom post types like Divi Projects and WooCommerce Products and Pages). With the Theme Builder, you have complete control over every single element of your website. And because you have the power to use or exclude templates on any page or post throughout your site, there is really no longer any need to manually edit a theme template file ever again.
In short, the Divi Theme Builder takes the power of the Divi Builder and extends it to all areas of the Divi Theme, allowing you to build custom headers, footers, category pages, product templates, blog post templates, 404 pages and more.
Here are just a few things you can do with the Theme Builder:
- Design a global header/menu for you entire site from scratch using the Divi Builder.
- Design a global footer for your entire site from scratch using the Divi Builder.
- Build a custom 404 page template.
- Build a custom post template layout for all blog posts using the Divi Builder.
- Build a custom product page template for all products.
- Build a custom template for archive pages.
- Build a custom template for all posts (or products) with a certain category.
- Design complete theme builder packs (sort of like child themes) that you can export and import into other websites.
Table of Contents
Customizing Templates with the Divi Theme Builder
Default Website Template
Building a Global Header
Building a Global Body
Building a Global Footer
Custom Templates
Adding a New Template
Managing Template Assignments
How to Handle Global Items on New Templates
Custom Template Settings
Building a Custom or Global Header from Scratch
Building a Custom or Global Footer from Scratch
Saving Changes with the Theme Builder
Using Dynamic Content within the Theme Builder
Building a Site-Wide Blog Post Template
Building a Site-Wide Product Page
Building a Category Page Template for Blog Posts
Building a 404 Page Template
Building a Search Results Page Template
Portability Options for Theme Builder Templates
Accessing the Divi Theme Builder
The Divi Theme Builder can be accessed on the backend within your WordPress dashboard under the Divi category of menu items.
From the WordPress dashboard, navigate to Divi > Theme Builder.
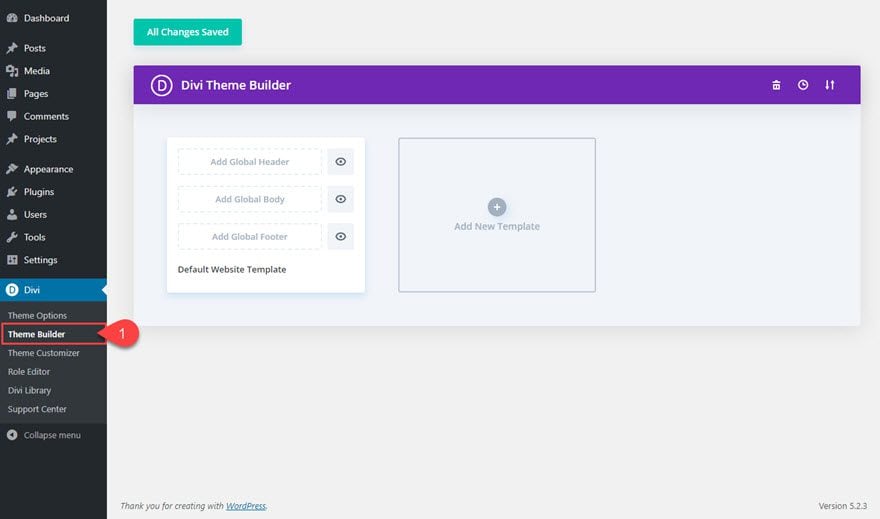
This will bring you to the main Divi Theme Builder interface where you will manage all of your templates.
Customizing Templates with the Divi Theme Builder
Default Website Template
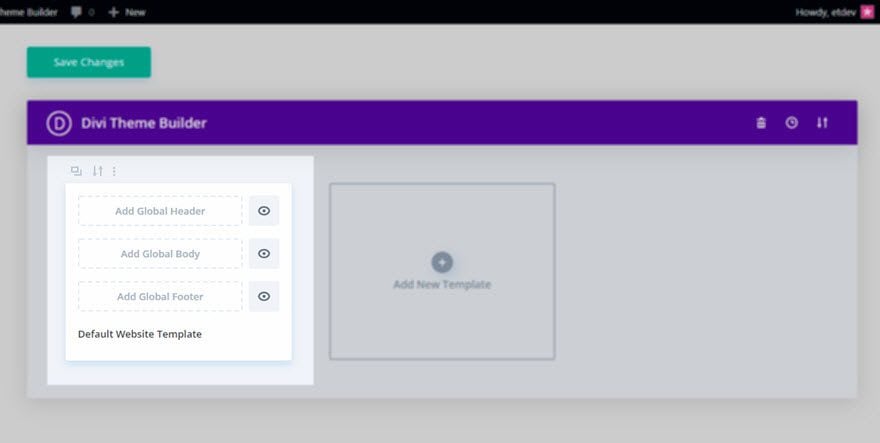
By default, there is a single template item called Default Website Template, which cannot be deleted, but it can be modified. This is the standard theme template, and if left unedited the three areas will use the standard Divi styles. If the Header Area of the Default Website Template is edited, the theme header is replaced across the entire site with the customized Divi Builder content. Same goes for the Body and Footer areas.
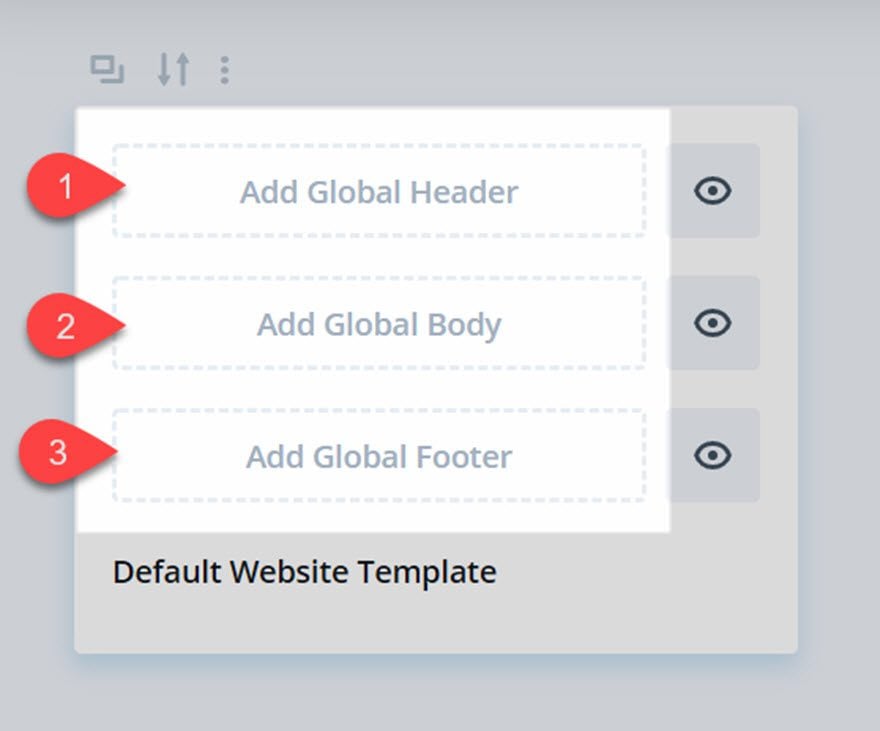
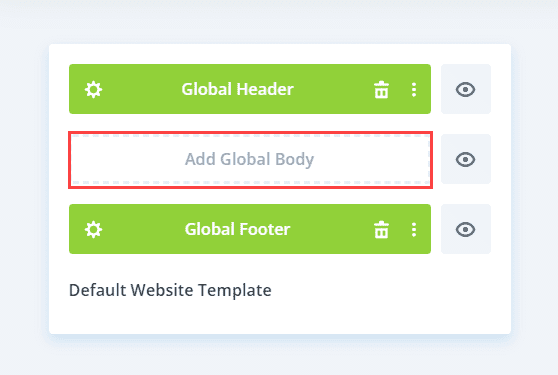
Default Website Template Global Areas
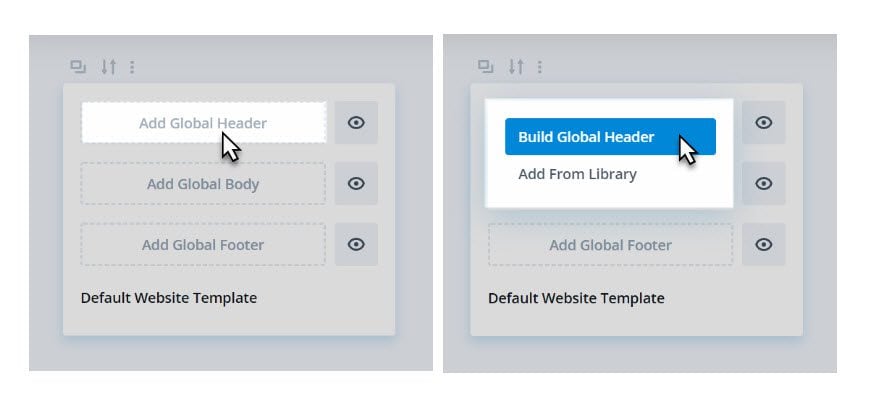
The default website template is made up of three areas: Global Header, Global Body, and Global Footer.
To start the process of creating a new template content area, all you need to do is click on one of the respective empty areas.
Building a Global Header
If you would like to add and build a new global header for your website, click the “Add Global Header” area and then select the option “Build Global Header”.
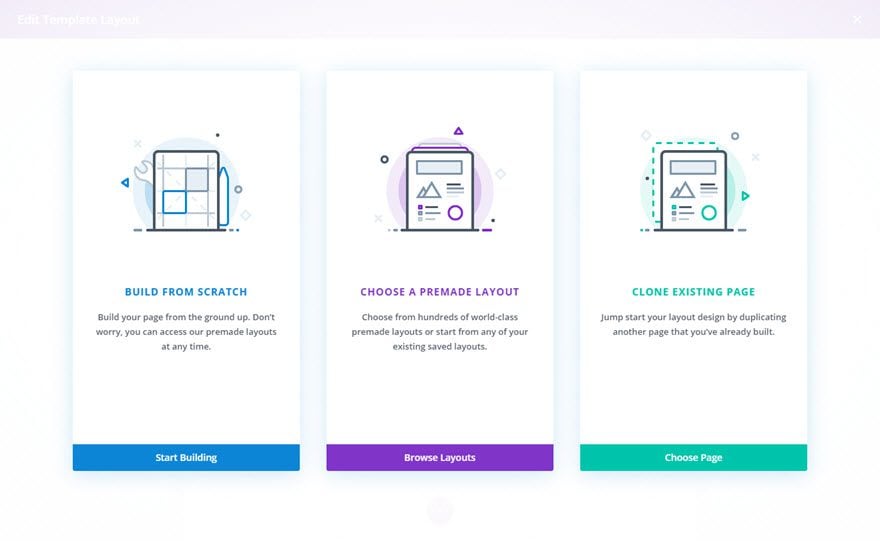
Much like you would when designing a page in Divi, you are prompted to choose how you would like to start building the layout. For example, you could jump start the design with a premade layout or a header layout you previously designed by selecting the option “Choose a Premade Layout”. However if you want to build the header from scratch, select “Build From Scratch”.
Once you have selected to build the layout from scratch, you will be brought to the Template Layout Editor. This is where you will use the Divi Builder to design your header layout just like you would design a normal page or post with the Divi Builder.
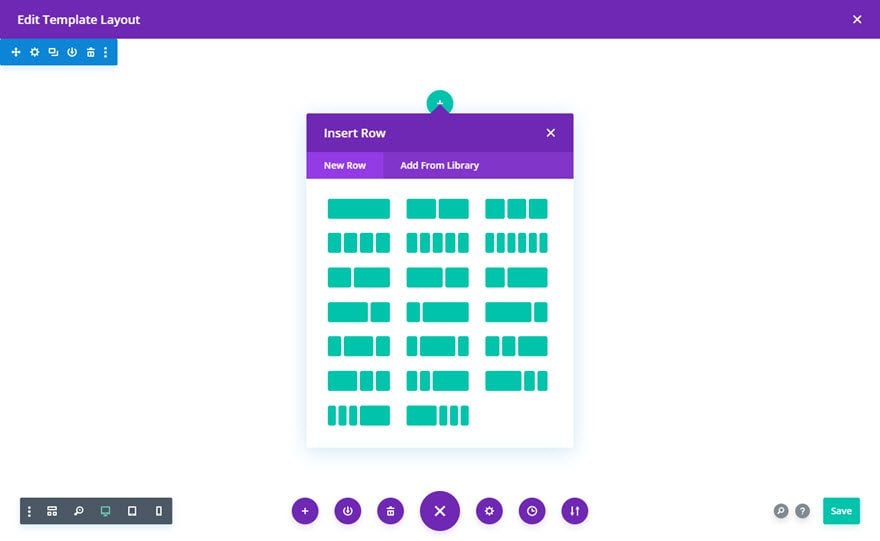
Keep in mind that whatever you see in this template layout editor will be what shows on the header of your page. And if this is a global header, it will show throughout your entire site by default, replacing the standard Divi header.
Once you have finished designing your header, make sure to save the layout before you exit the template layout editor.
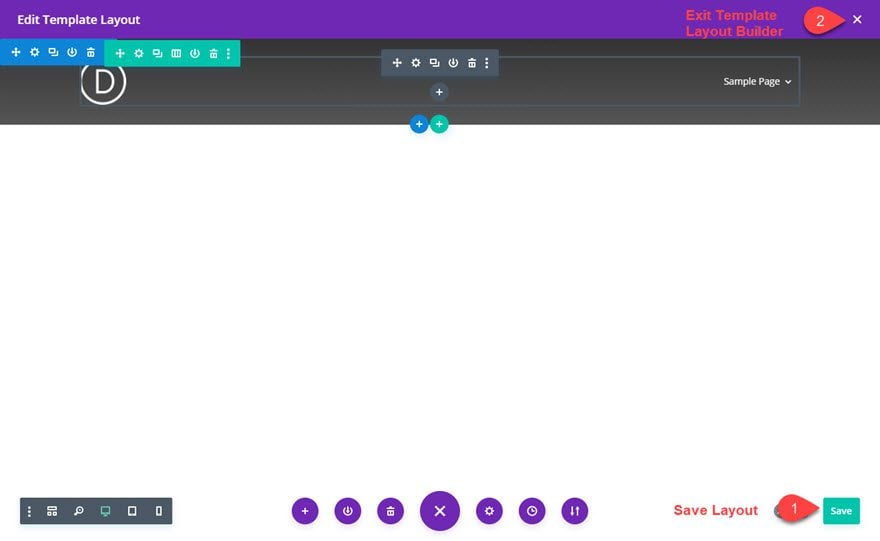
Now you should see a green Global Header populating the Global Header space of the default website template. The green color is to remind you that it is a global.
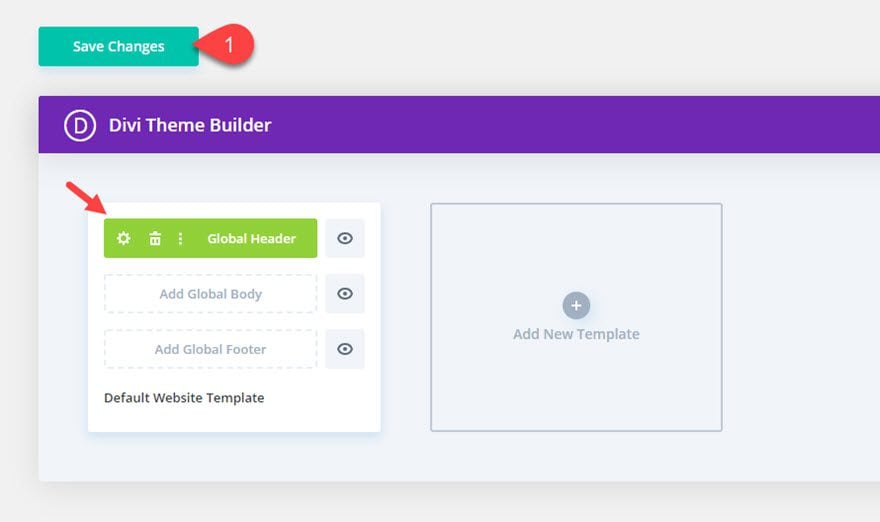
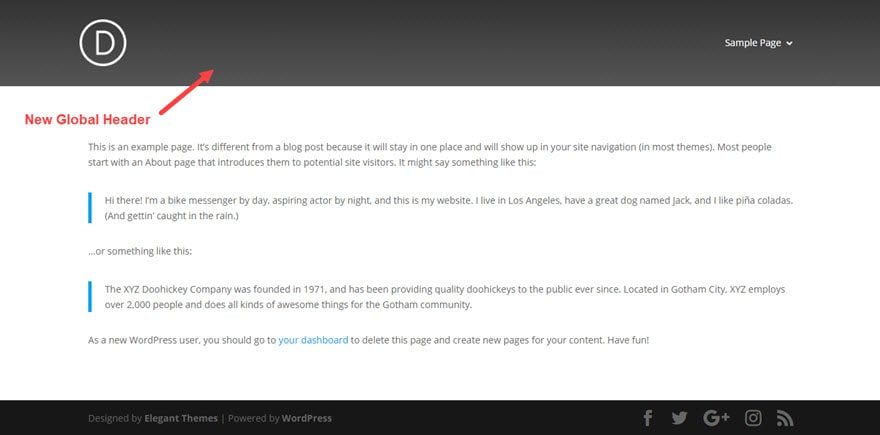
Your website will now have a new global header that replaces the standard Divi header.
Building a Global Body
In most cases, you will not want to design a global body area for your default theme template because you will most likely want to have more control over the body on a page by page basis.
For example, you may want to forego creating a global body area for your default website template (which will be applied to all pages/posts by default), but you may want to create a new template with a custom template body area for all of your blog posts. That way you don’t have to worry about the design of each new post. You only need to add new body content.
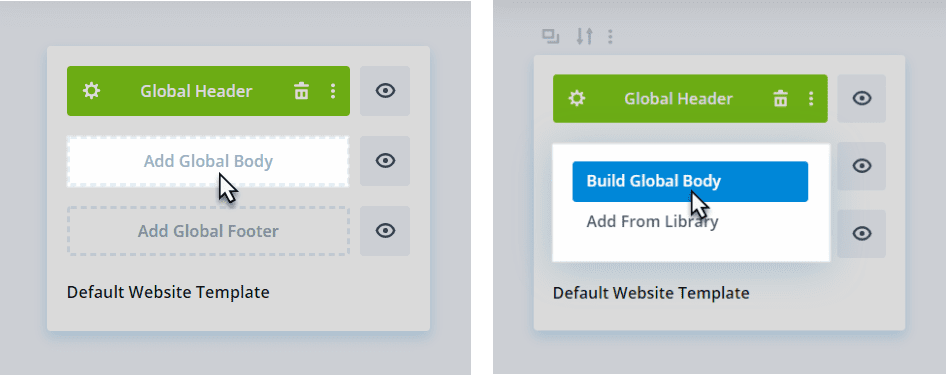
To add a Global Body to your default website template, simply click the “Add Global Body” area and then select the option “Build Global Body”.
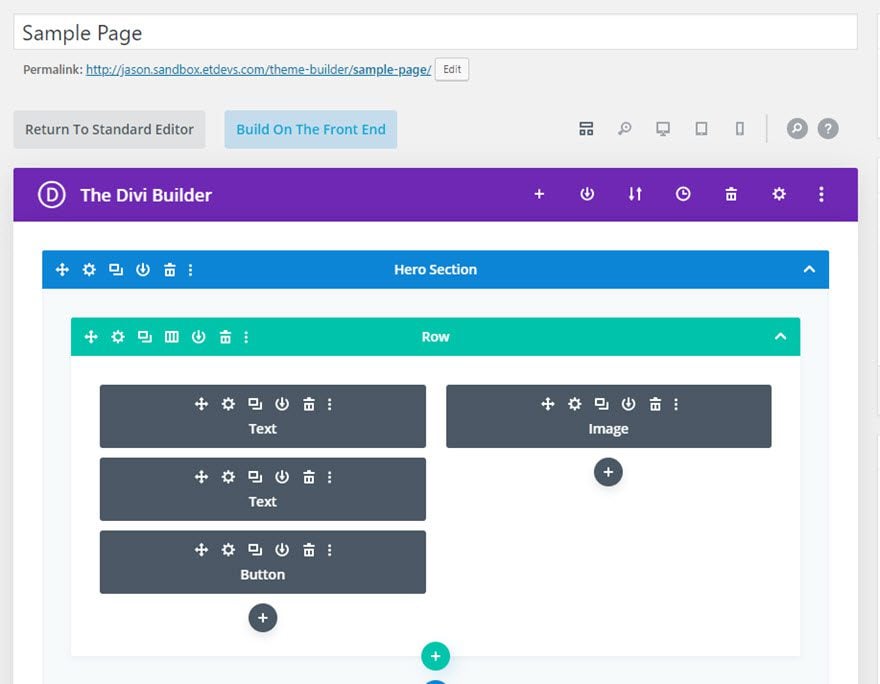
This will bring you to the Template Layout Editor where you can design the Global body area of your website.
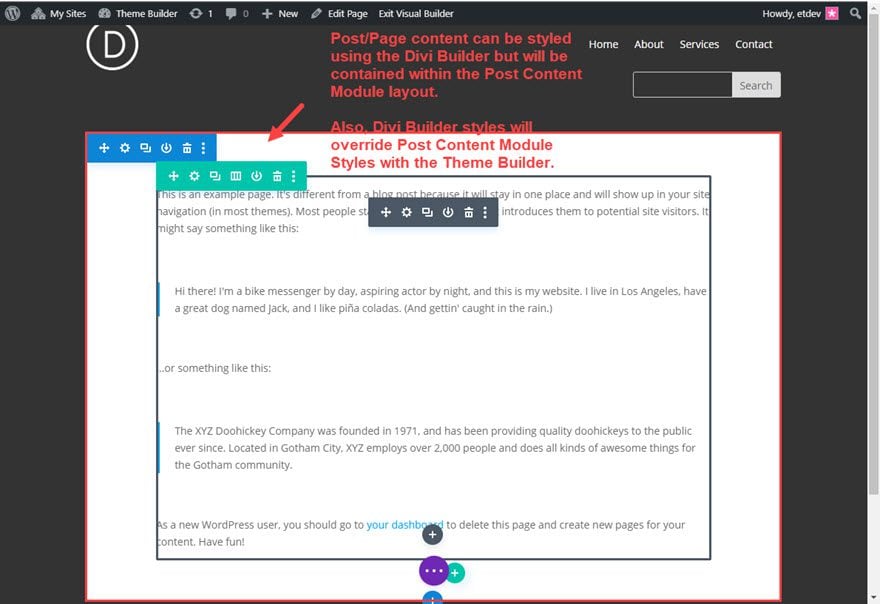
It is important to include the post content module whenever you design the body area of your template. The post content module is what allows Divi to populate the template with the actual page or post content.
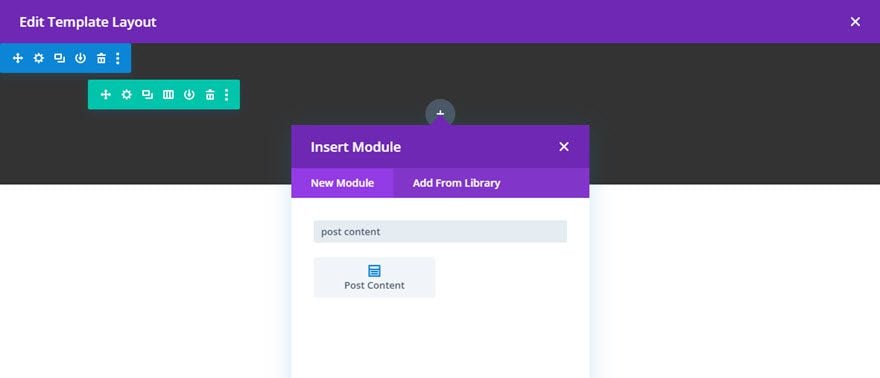
The post content module conveniently displays mock content to make it easy to add styling to the content in anticipation of the actual content for all pages and posts.
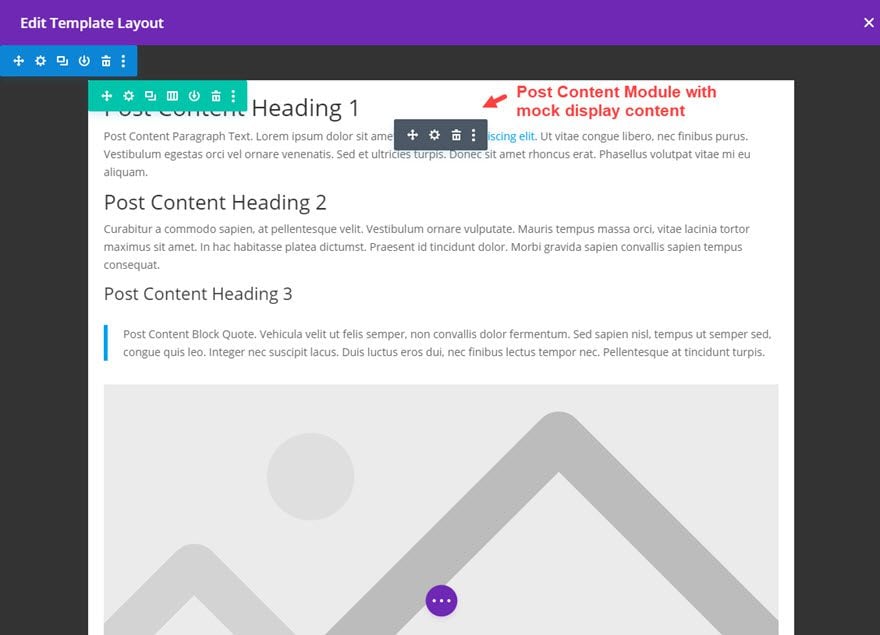
This post content module is essentially a placeholder for the content that is added to the content of a page in Divi. If you are not using Divi Builder on a page, the post content module will display the content within the WYSIWYG editor of a page or post on the backend.
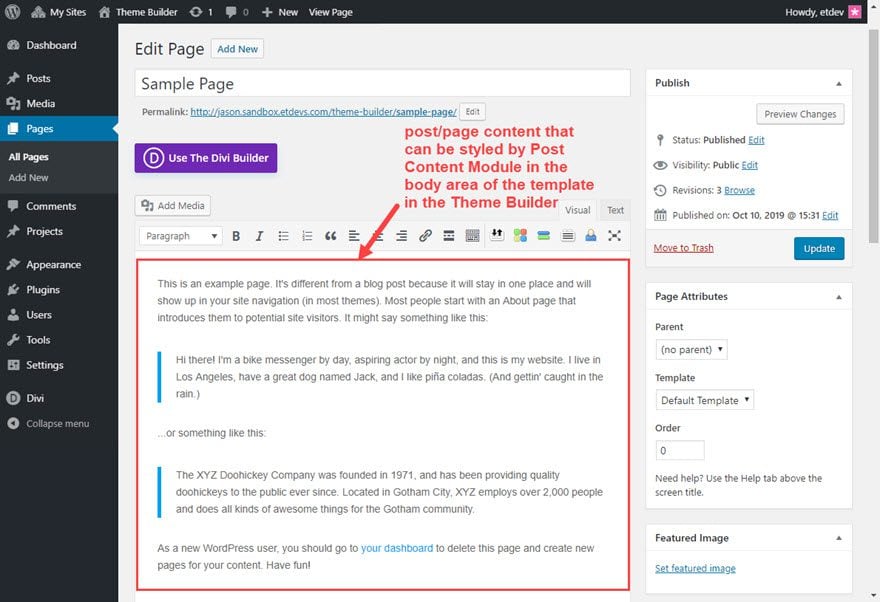
Here is an example of how that content would appear in the Global Body area of the template.
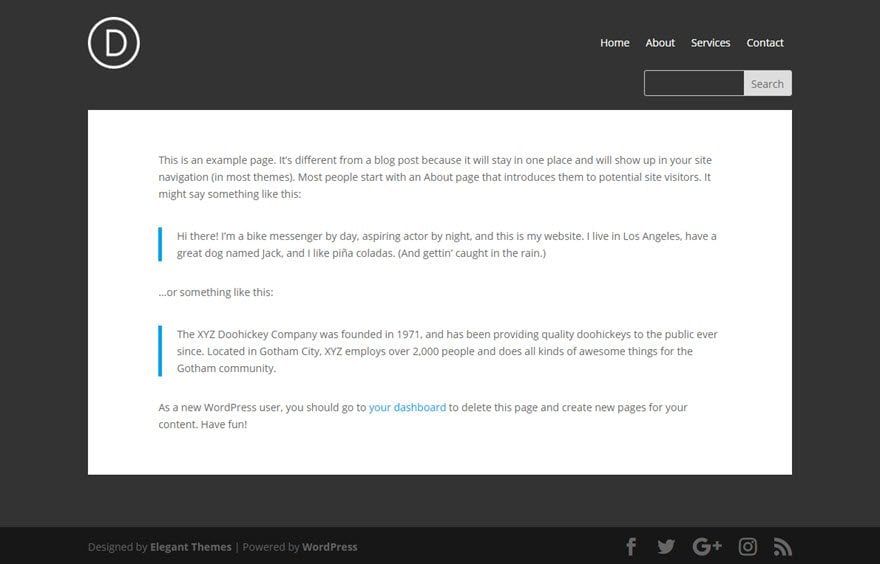
If you decide to use the Divi Builder to edit a page or post. The area available for the Divi Builder content will be contained within the designated area of the post content module in the body of the template.
That is why in most cases I wouldn’t suggest having a global body area for your website unless you have a specific reason. You might find creating a Global body will put unnecessary limitations on your ability to design page content in Divi.
If you do decide to go with a global body area for your default website template, I suggest making sure your post content module spans the fullwidth of the layout so that you aren’t limited in any way by spacing when designing pages with the Divi Builder.
Building a Global Footer
The Divi Theme Builder allows you to replace the standard Divi footer (and footer bar) with a new custom footer that you can design completely from scratch using the Divi Builder.
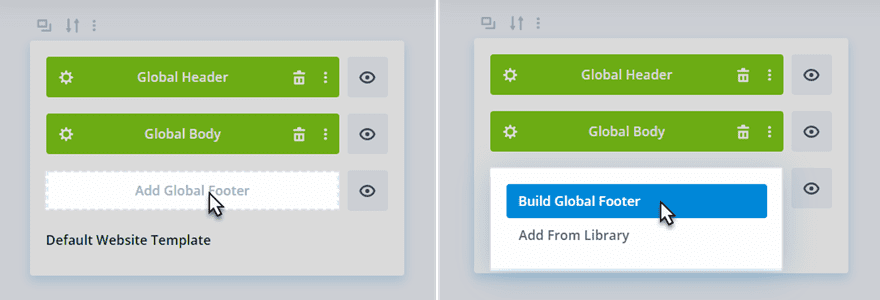
To build a global footer for your website, simply click the “Add Global Footer” area and select “Build Global Footer”.
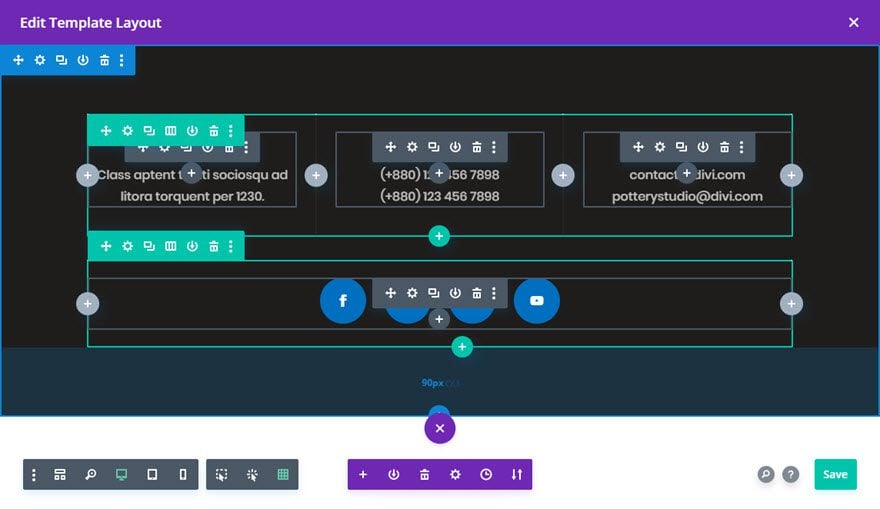
Then use the power of the Divi Builder to design the footer within the Template Layout Editor. Don’t forget to save the layout.
NOTE: You can also choose to add one of our premade layouts to the footer template editor to jumpstart the design of your footer. You can do this at any time by clicking the Add from Library plus icon in the settings menu at the bottom of the editor.
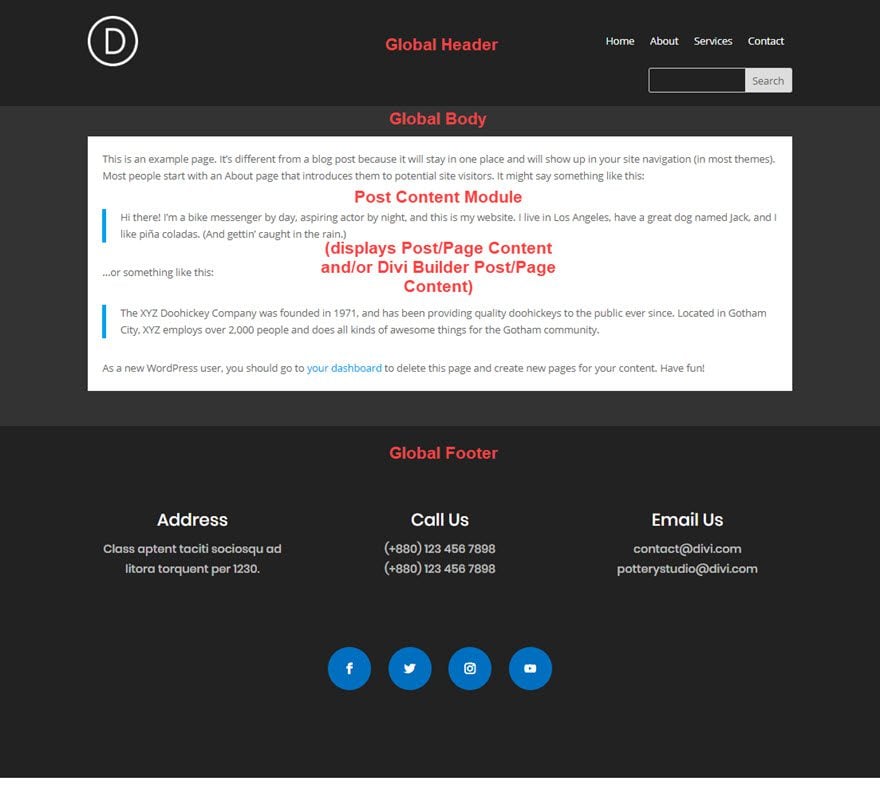
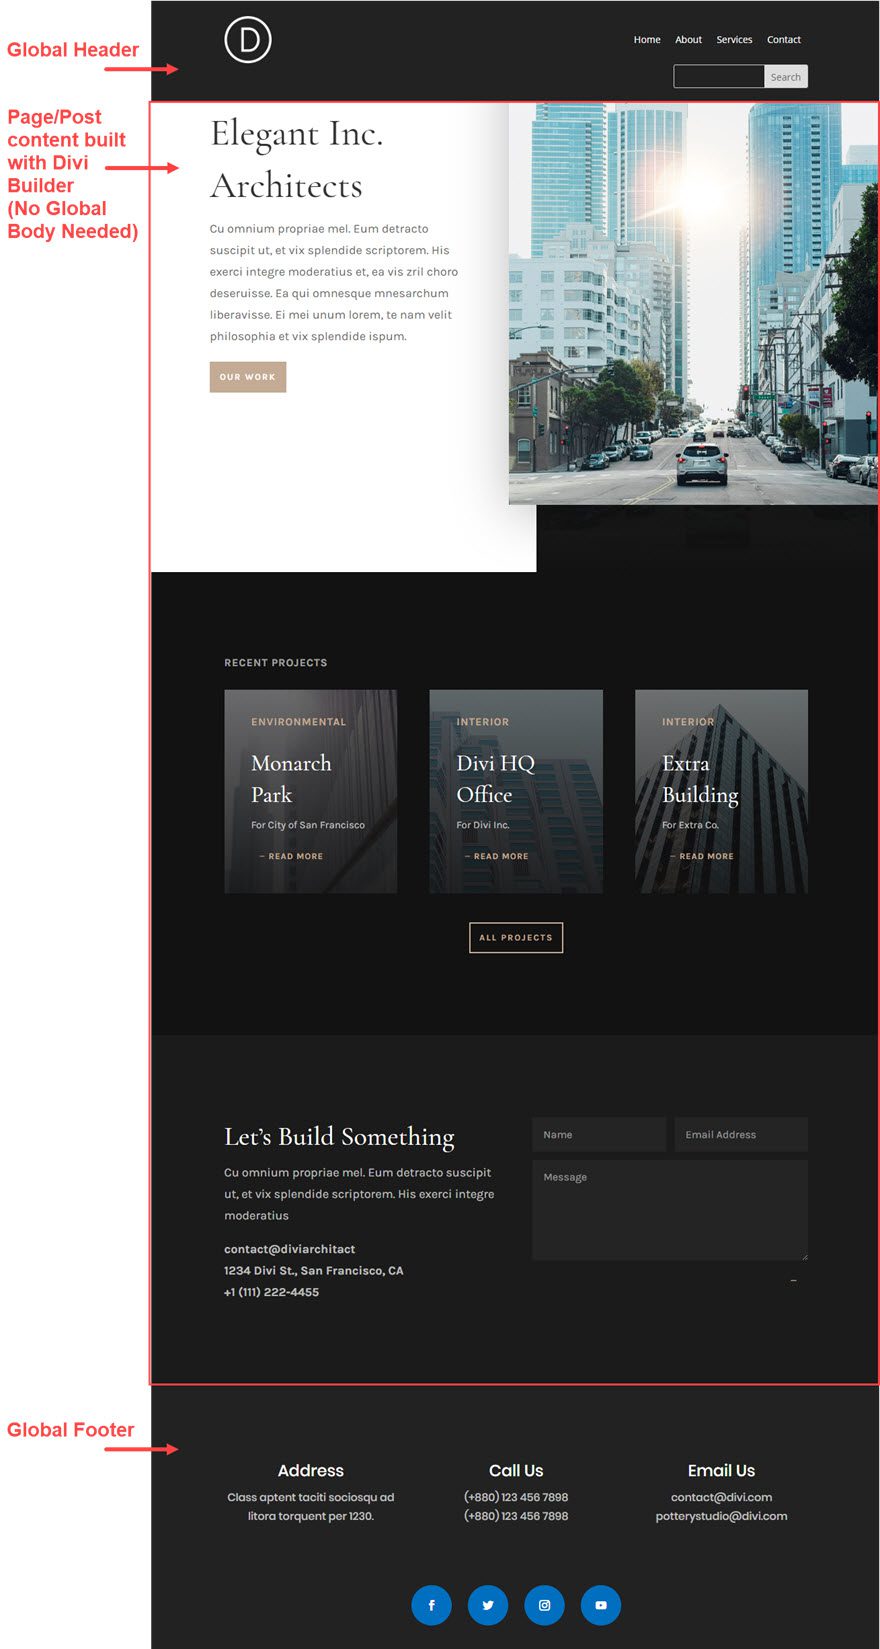
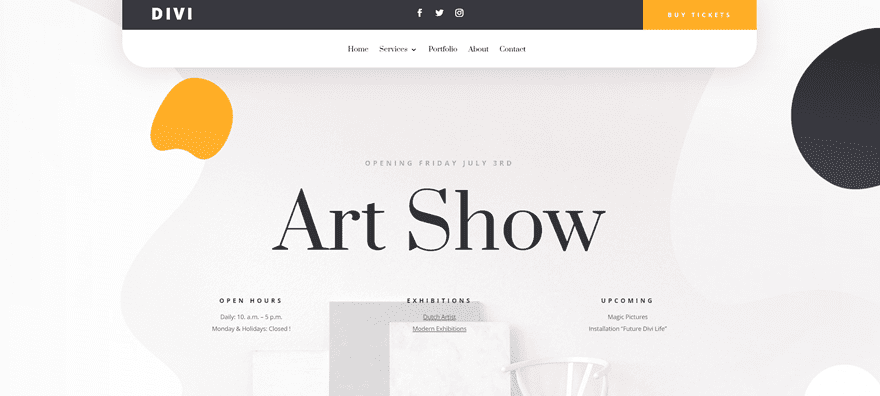
Once you have a Global Header, Body, and Footer in place, a sample page would look something like this.
Global Body Not Necessary
As mentioned earlier, the Global Body isn’t necessary. You can easily delete the Global Body by clicking the trash icon.
Without the Global Body, you have complete control over the design of your page using the Divi Builder.
Once you have finished designing your page, the Global Header and Global Footer will still remain while the page content is displayed beautifully as expected.
Custom Templates
The default website template controls the default template for the entire site. However, custom templates allow you to override the default template by giving a custom template to any page or post on your website. In other words, custom templates allow you to create templates for pages or posts that you don’t want to inherit the default template.
Adding a New Template
To create a new template, simply click the “Add New Template” box with the gray plus icon.
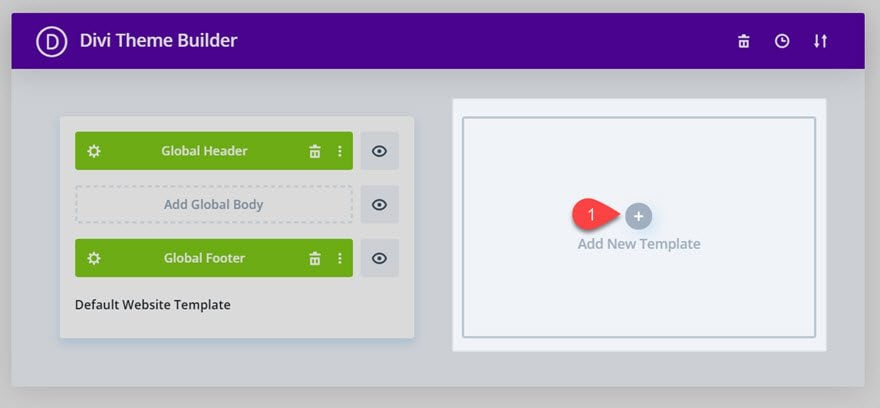
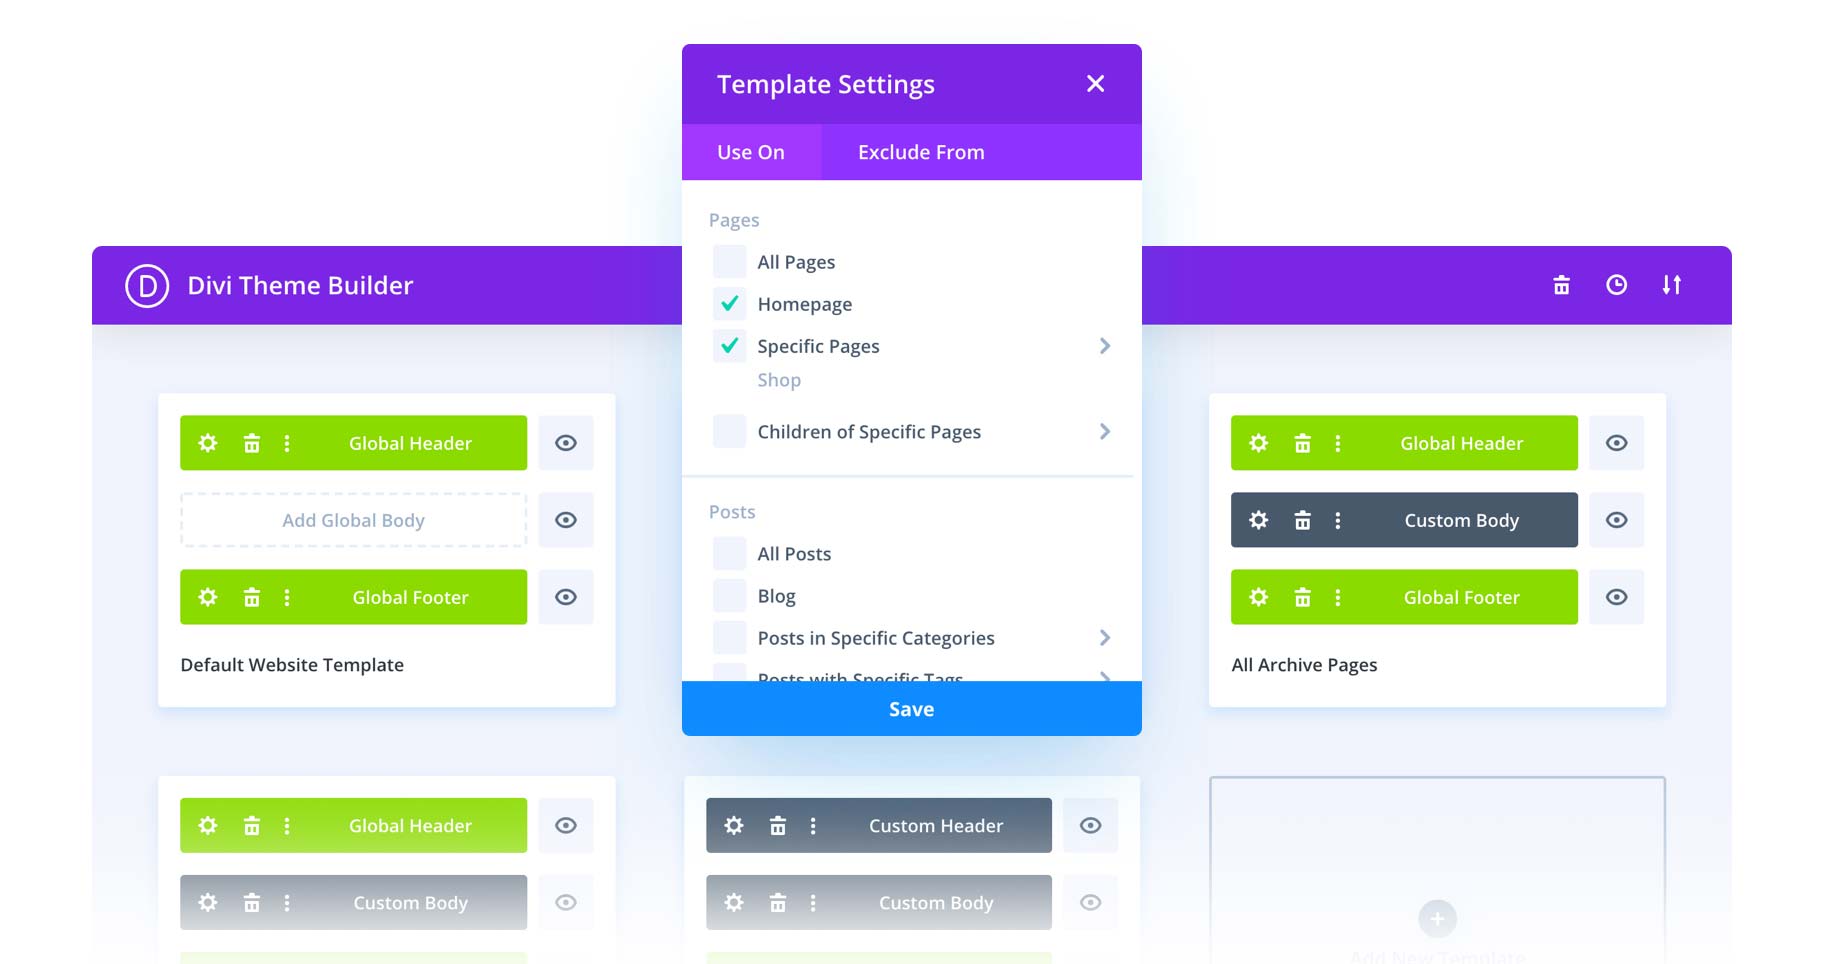
This will bring up the Template Settings modal that prompts you to manage the template assignments. In other words, you will need to designate on what pages or posts you want to assign the template. More on this below.
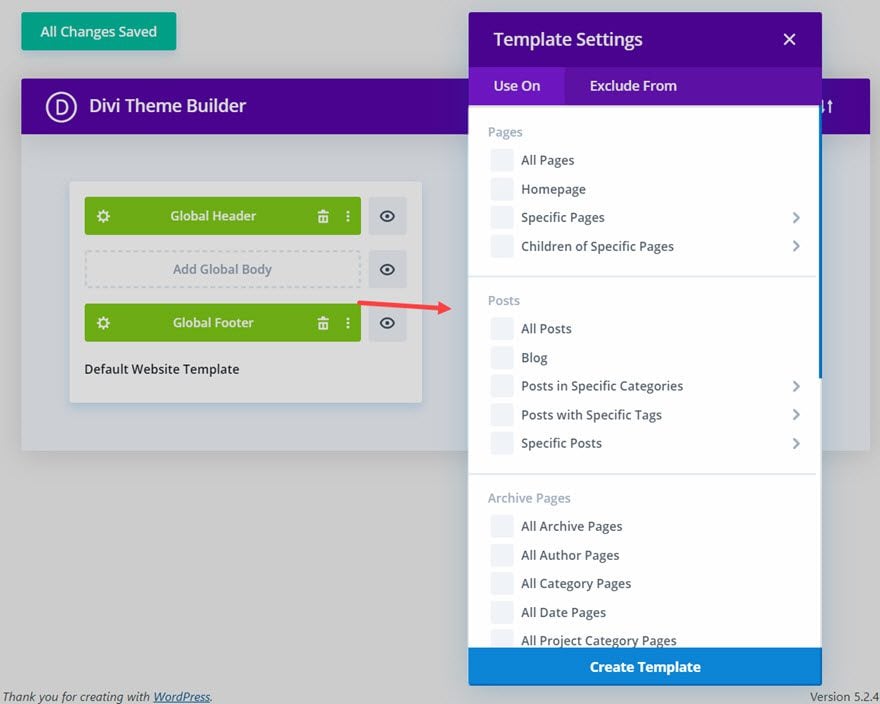
Managing Template Assignments
Use On vs. Exclude From
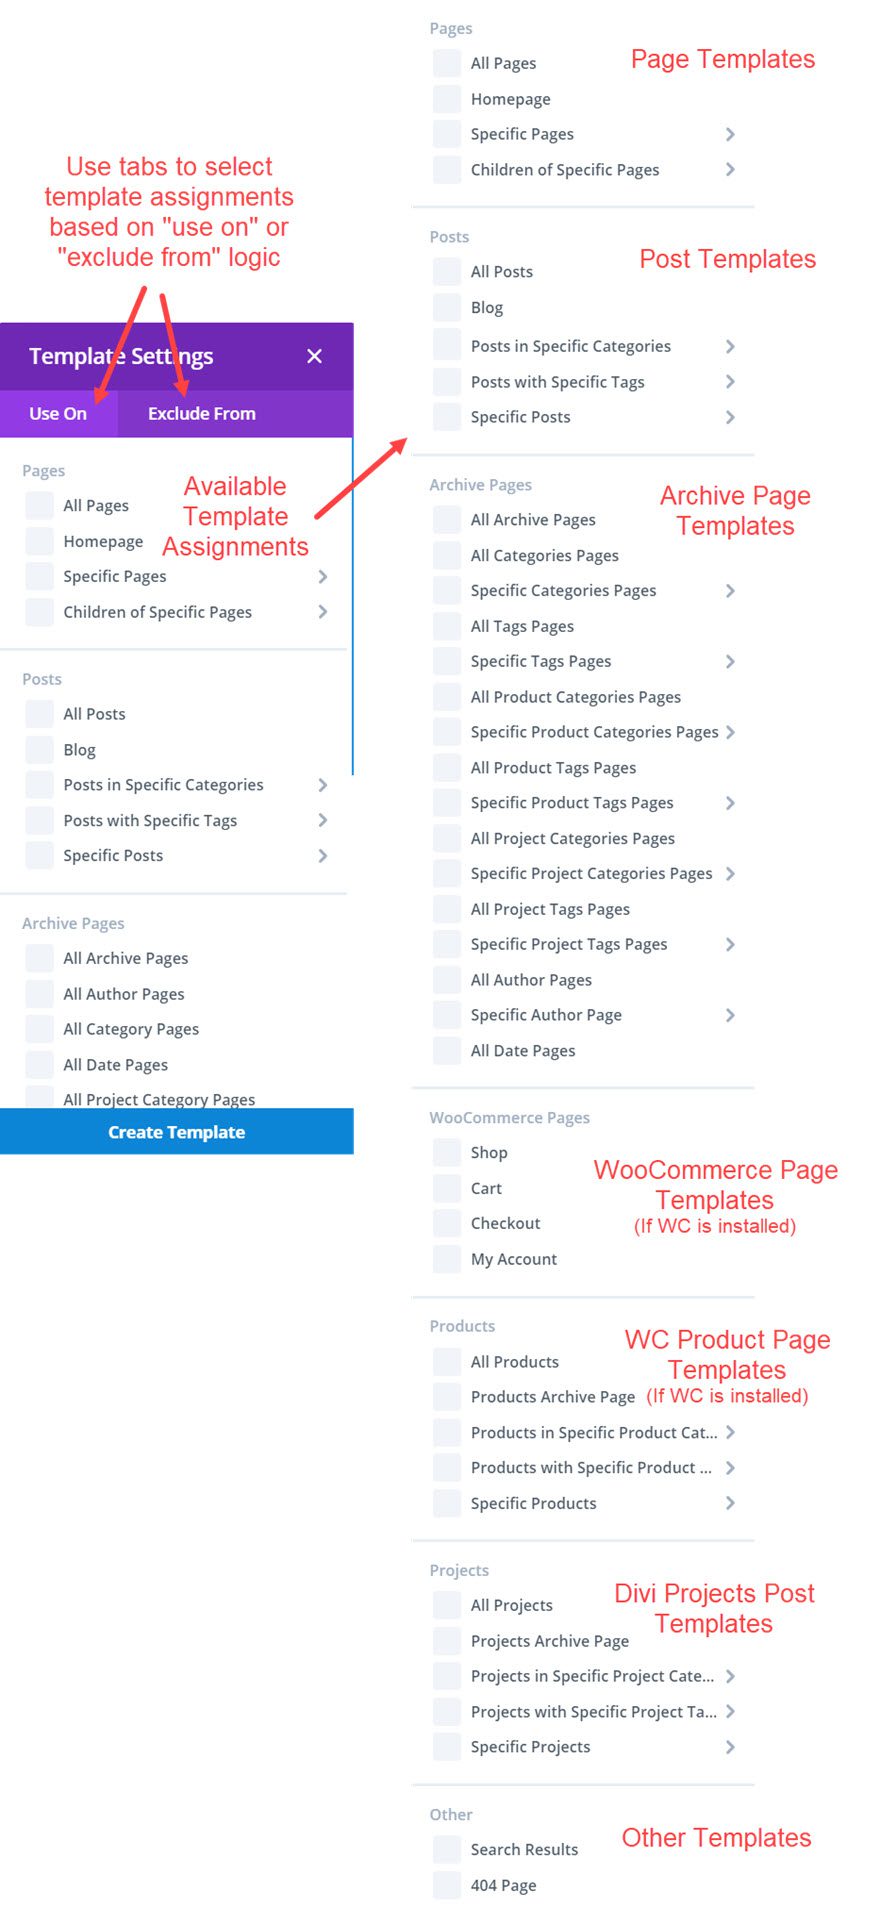
The template assignments can be selected under the “Use on” tab and the “Exclude From” tab. It is up to you whether or not you want to base your assignments on the “Use on” logic or the “Exclude From” logic. But feel free to use a combination of both if needed.
For example, you can choose to use it on all pages and posts, but also choose to exclude a specific page or post.
NOTE: If an include selection conflicts with an exclude selection, the exclude selection always overrides the include. For example, if you choose to “Include on Homepage” and “Exclude from Homepage”, this template will be excluded from the Homepage.
Pick from any theme template.
You will also find that there are templates for every page, post, and/or archive. You can even assign templates to WooCommerce Pages and Products if you have WooCommerce installed on your site.
Macro Assignments and Micro Assignments
Templates can be assigned on a macro level and/or micro level. For example, you may choose to assign the template to all pages throughout your site (macro level), or you may choose to assign the template to one specific post (micro level). Or both! You can even select multiple assignments, giving you complete control over where you would like your template assigned throughout you website.

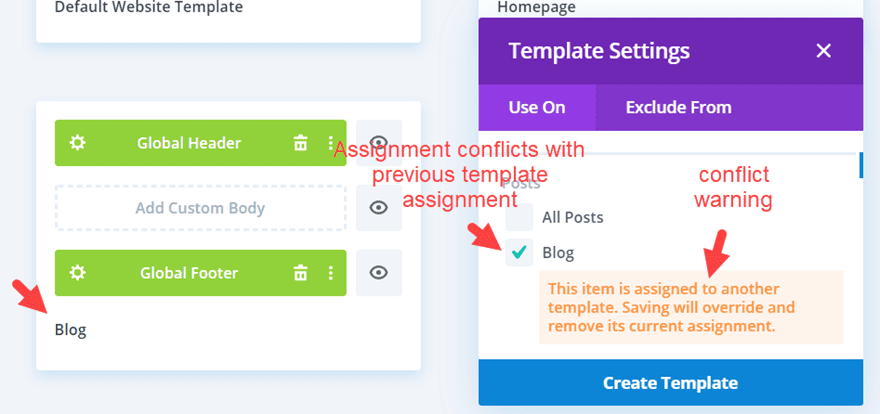
Conflicting Assignments
If the user assigns a template to a page that is already assigned to another template, the newly saved template will take precedence and the previous assignment on the other template will be removed. A warning message will appear notifying you of this before saving the template.
Renaming Custom Templates
Once all assignments have been selected, you will see a new template name that has been generated based on your selection(s). When hovering over the template card title area, a tooltip appears that shows the list of everything that the template is used on or excluded from. To rename the template, you can click on the template name to edit the title inline.

Unassigned Template Warning
If you do not select a template assignment, you will see warning text in place of the template name that reads “Unassigned”.

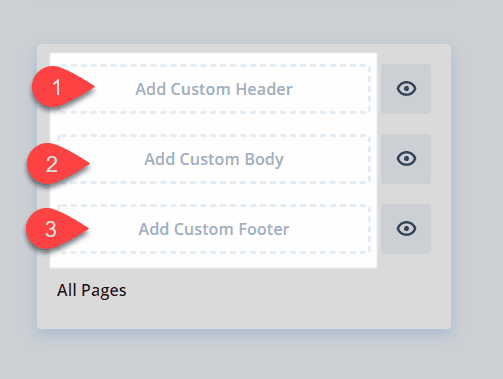
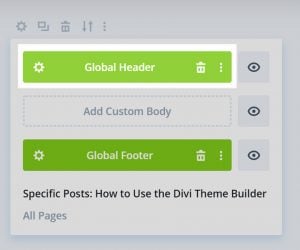
Custom Template Areas
Just like the default website template (or Global template), a custom template will also have the following areas: Header, Body, and Footer.
If the default website template has global template layouts added to any of the three areas, those global layouts will automatically be added to the new template.
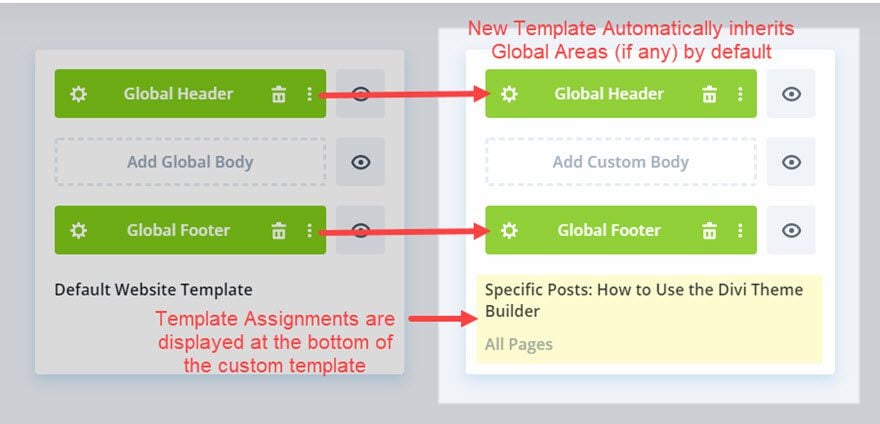
How to Handle Global Items on New Templates
However, you don’t have to keep that Global layout on your new template. You can use the Template area options to delete the layout and build a new one from scratch or disable global and tweak the layout for the specific needs of the layout.
For example, if you have a Global Header on the default website template, your new template will inherit that Global Header. You can choose to do one of the following:
- You can use the Global Header on your new template.
- You can disable Global so that you can tweak the design for the custom template.
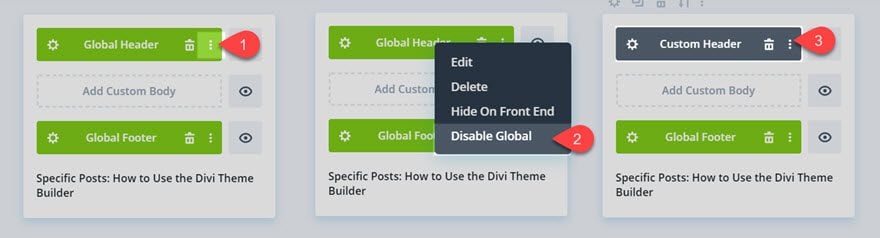
- You can delete the Global Header and build the Custom header from scratch for the template or add one from the Library.
- You can also choose to leave the Custom Header area empty which will inherit the standard Divi theme header.
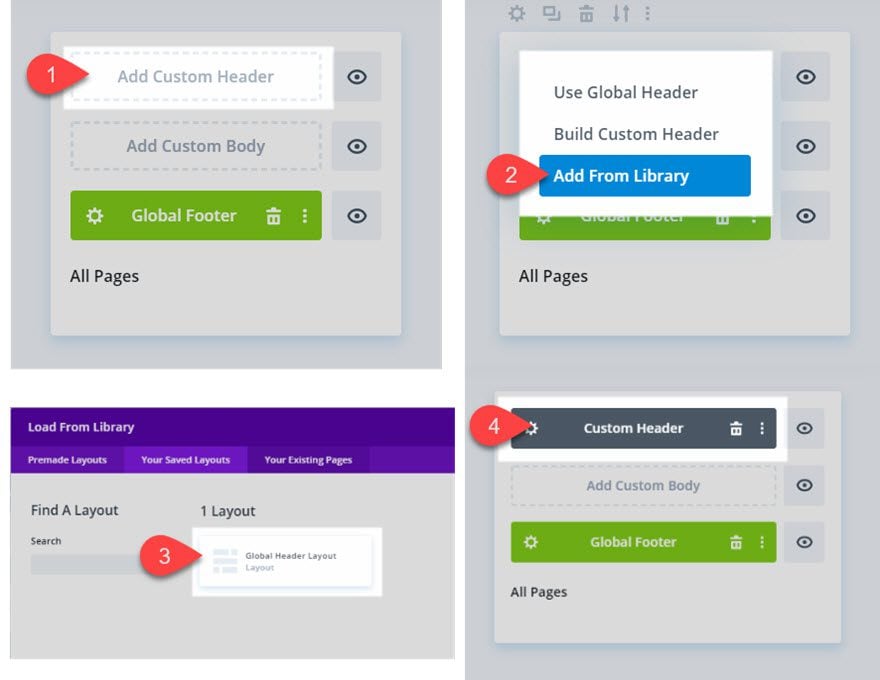
Adding a Template Area from Library
When adding a custom template area to your new template, you may choose to add a layout from your Divi library. This functionality mimics the process of adding a new layout to your page when using the Divi Builder. To add a layout to the template area from the library, click the template area and select Add from Library. The add from library popup will appear where you can choose any premade, saved, or existing page layouts. Once the layout has been added to the template area, you can select the gear icon to edit the layout using the Divi Builder within the Template Layout Editor.
Drag and Drop Template “Areas”
Template areas can be dragged and dropped to other template content areas. This is a quick and easy way to duplicate and place a template area in one drag and drop action. Dragging doesn’t remove it from the area its being dragged FROM— it only populates or replaces the area it’s dragged TO. Think of it as duplication rather than cut and paste.
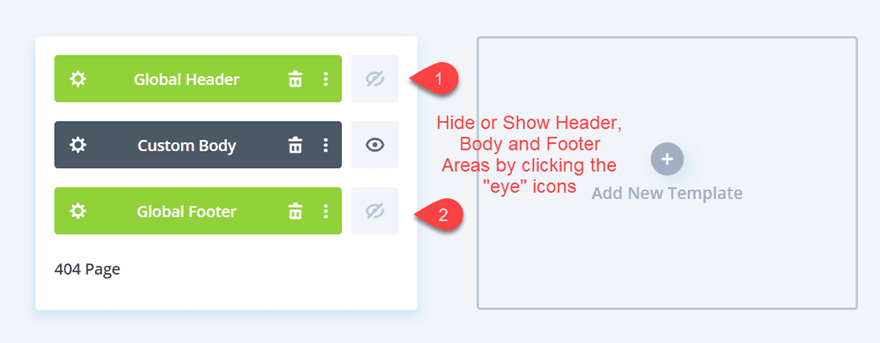
Template Area Visibility Options: Hiding/Showing Header, Body, and Footer areas.
In addition to being able to customize each area of a template, you can also toggle an area’s visibility to either show or hide it on the Front End by clicking the “eye” icon next to each area. For example, you could hide the Header Area and Footer Area of your 404 Page.
NOTE: Hiding a template area doesn’t return the area to the default, it completely hides the area altogether on the front end.
Custom Template Settings
Template Settings Menu
When hovering over a template within the theme builder, a template settings menu will appear at the top left of the template box. This menu is very similar to the menus you see when hovering over a section, row, or module within the Divi Builder.
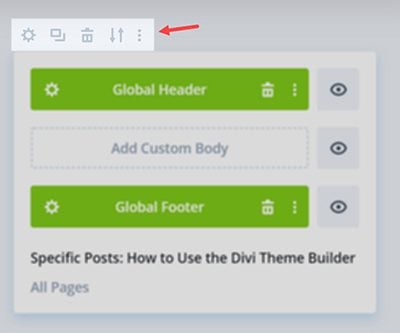
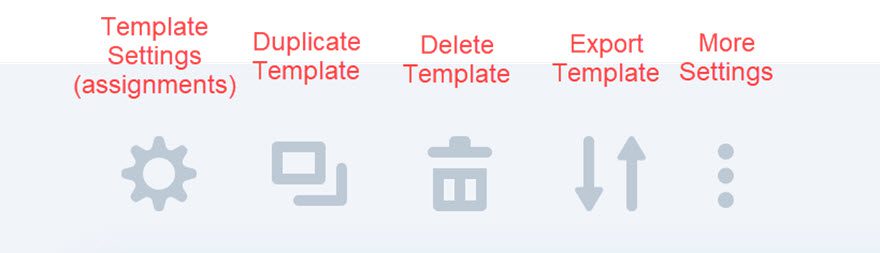
The menu includes icons for the following functions:
- Template Settings – This is where you can manage the template assignments
- Duplicate Template – This will duplicate the template in order to jumpstart another custom template. Duplicating a Template triggers the exact same thing that clicking the Add New Template card would do. The difference is that after defining the template settings, the generated template uses the same Header Area, Body Area, and Footer Area as the duplicated template.
- Delete Template – This will delete the template altogether. Any pages, posts, or archives that were assigned the deleted template will revert back to the default website template and/or the standard Divi theme layout for that page (if no default template is created).
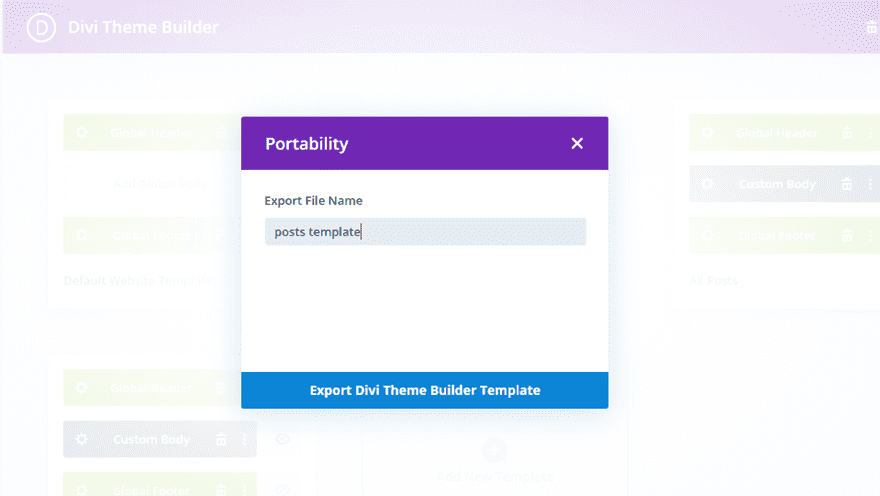
- Export Template – You can click the export template icon to export a .json file of that specific template. Once you click the export template icon, enter a name for the export file and click the “Export Divi Theme Builder Template” button.
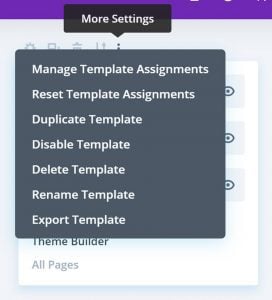
- More Settings Options – The more settings icon opens a convenient list of all available template settings all in one place.
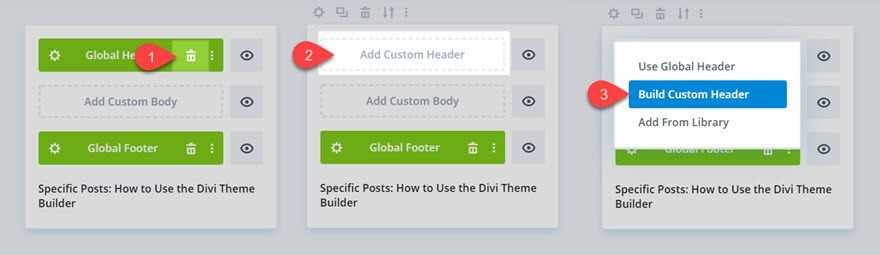
Building a Custom Header
Building a custom header will involve the same process as building a global header. The only difference is that a custom header is not global so it only gets displayed on post are pages that have been assigned to the template including the custom header. The header is where you will need to include your primary menu for your website, but you may also add countless elements and designs to your header as well.
For more info, check out this complete post on how to create a custom global header using Divi’s Theme Builder.
Building a Custom Body
Building a custom body area for your template involves the same process as building a global body and it can be a great way to add design and/or content to the body of a lot of pages or posts at once. And if you use dynamic content, you can really streamline the design and functionality of your blog posts or WooCommerce Products.
Building a Custom Footer

Building a custom footer involves the same process as building a global footer. It is important to remember that any custom footer added to a template will completely override Divi’s standard footer including the bottom footer bar.
For a comprehensive tutorial on how to build a custom footer from scratch, check out our post on how to create a custom footer with Divi’s Theme Builder.
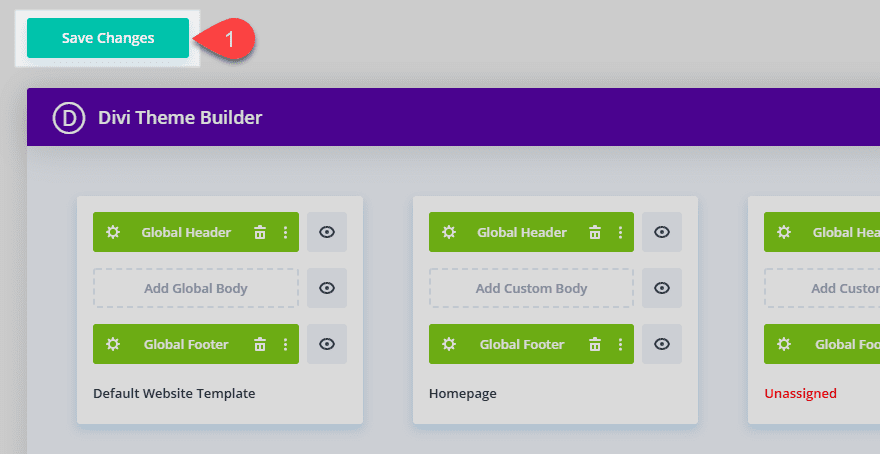
Saving Changes with the Theme Builder
Saving and Cancelling Template Layouts
When you are finished building your template, it is important that you save Template Settings changes. To do this you must click the Save button at the bottom of the modal. If you wish to cancel the changes made to the layout, simply click the X icon in the upper right.
Note: If you click the X icon during a creation flow (without saving), the template layout will not be created or saved.
Saving Theme Builder Changes
Just like with Divi Theme Options, you must save your changes to the Theme Builder in order for those changes to take effect. If you refresh the page or close the window, changes will be cancelled/lost.
Using Dynamic Content within the Theme Builder
Dynamic content (i.e. Title, Featured Image, Post Content, etc.) can be included in your Global or Custom Template layouts. This is a powerful tool that allows you to streamline the design and functionality of website, especially for blog posts and/or WooCommerce Products.
Building a Site-Wide Blog Post Template
Blog posts are a great example of where a custom template with dynamic content is needed. This will allow you to design a blog post template that will be applied to all blog posts site wide using the Divi Builder and dynamic content. Once done, all you would need to do is update the actual body content for all future posts. The new post content will inherit the design of the custom template!
Here is a quick example of how to do this:
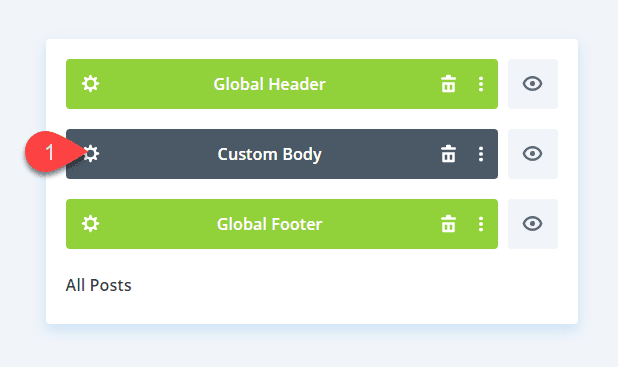
First, create a new template and assign the template to All Posts. Then add a custom body to the template.
Using the Template Layout Editor, design the entire layout using the Divi Builder combined with Divi’s built-in dynamic content modules and options.
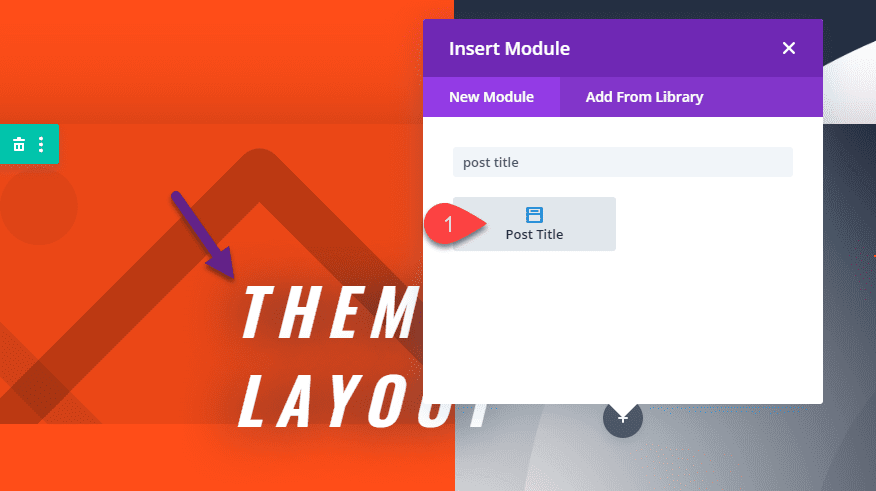
For example, you could use the Post Title Module to display the title of the post dynamically.
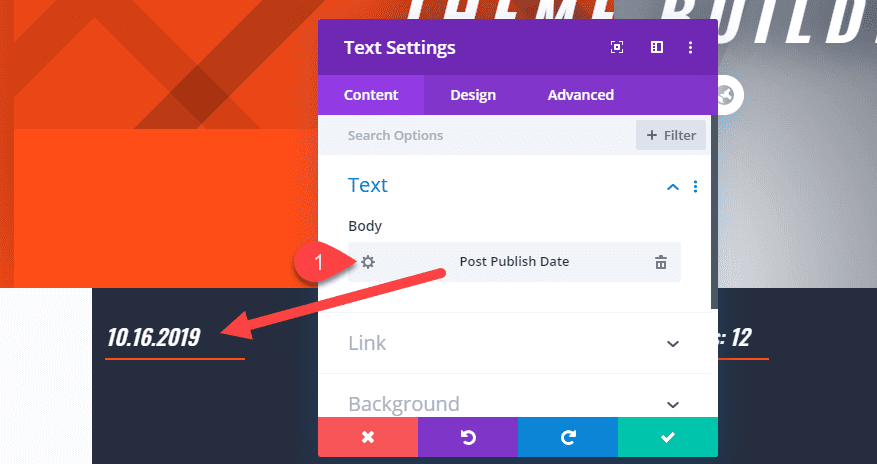
Or use a text module that pulls in the Post Publish Date.
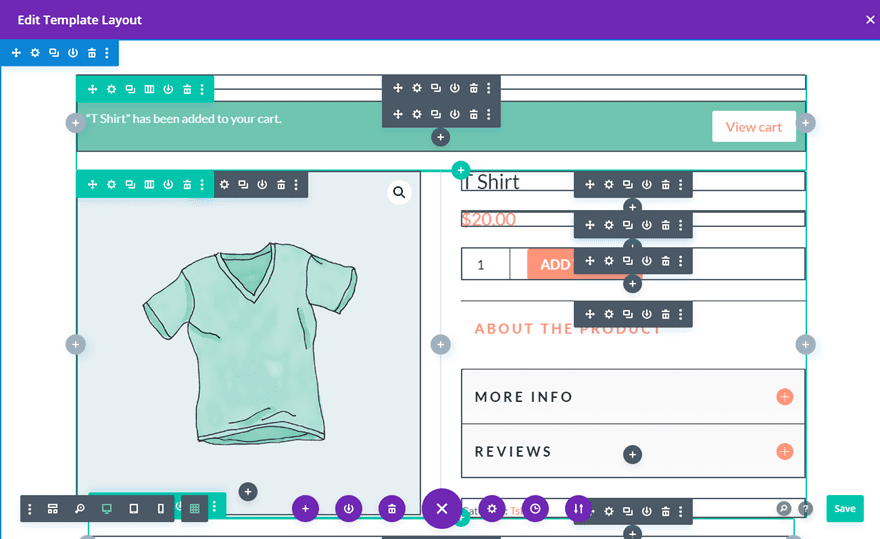
Most importantly, you must include the Post Content module when building any custom body layout for your template. The Post Content module includes the area for page or post content to be displayed within the Body Area of the template.
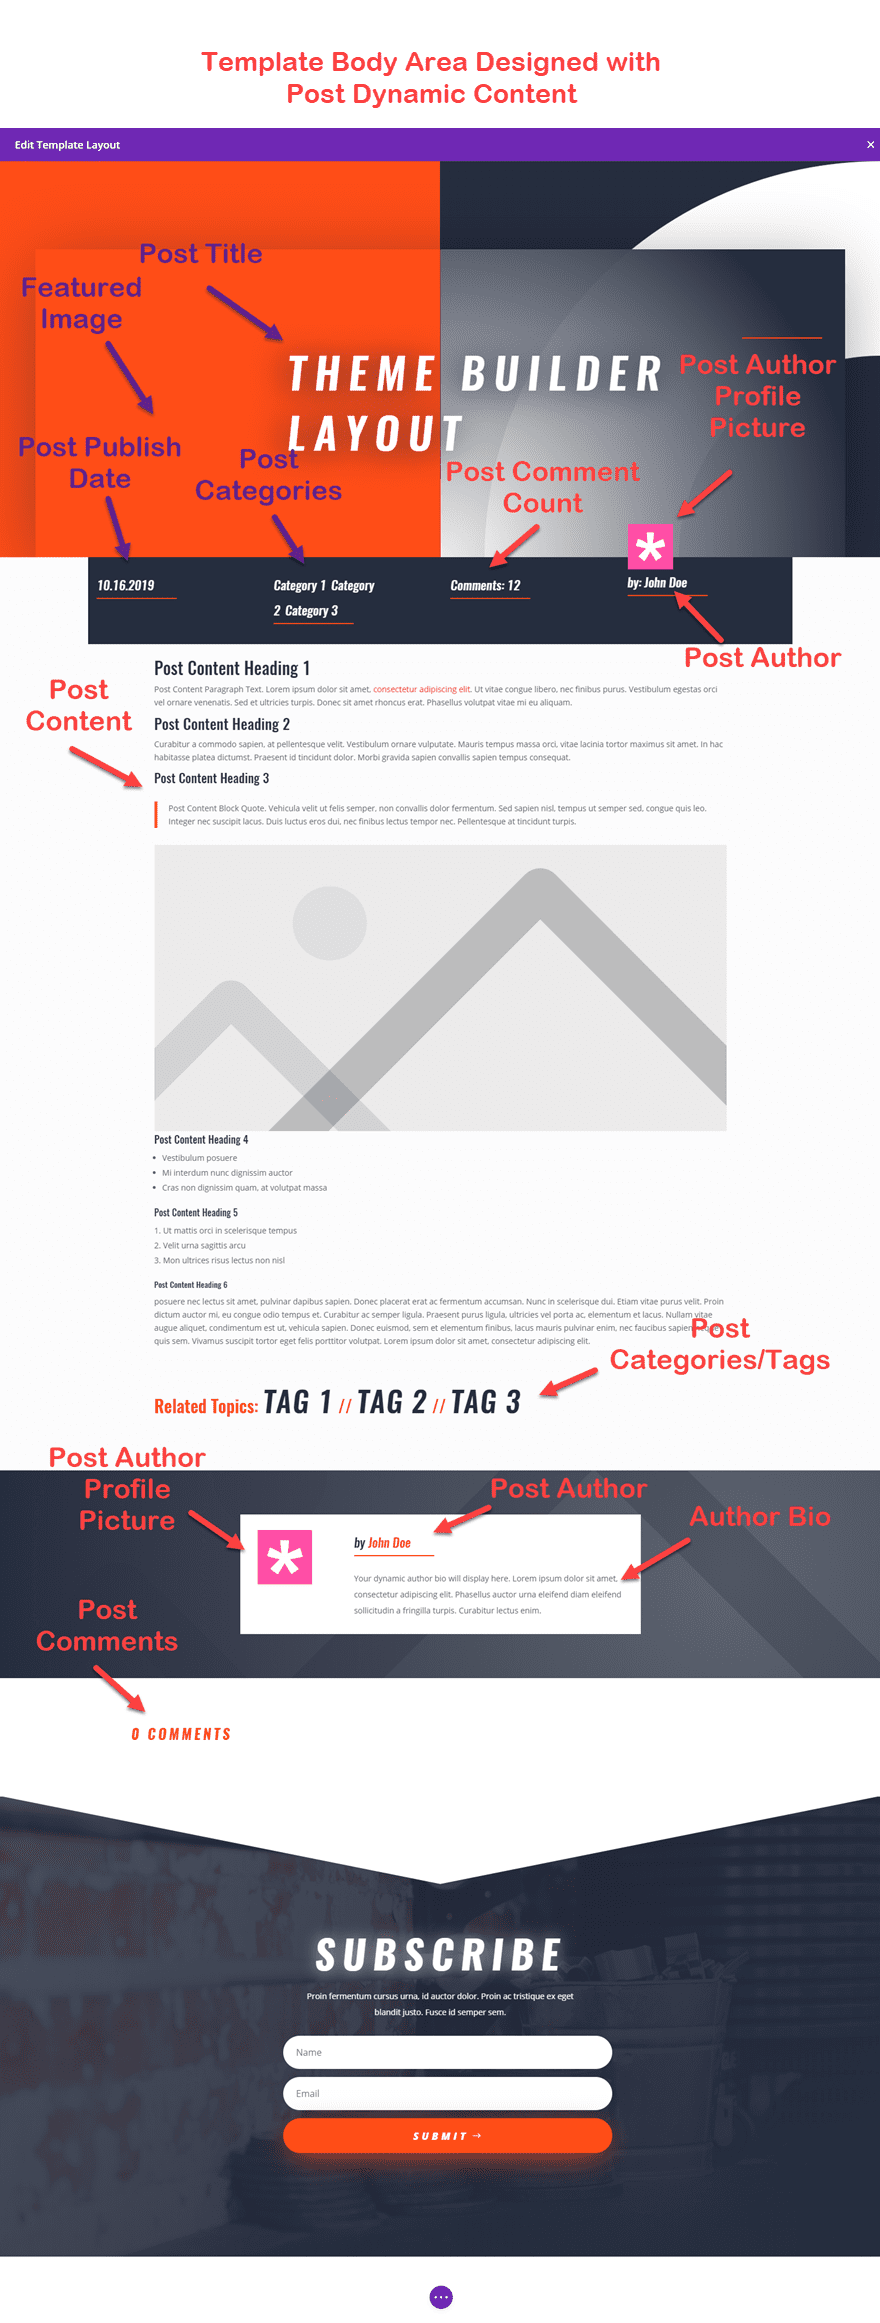
Here is an illustration of an entire layout for a blog post template using dynamic content:
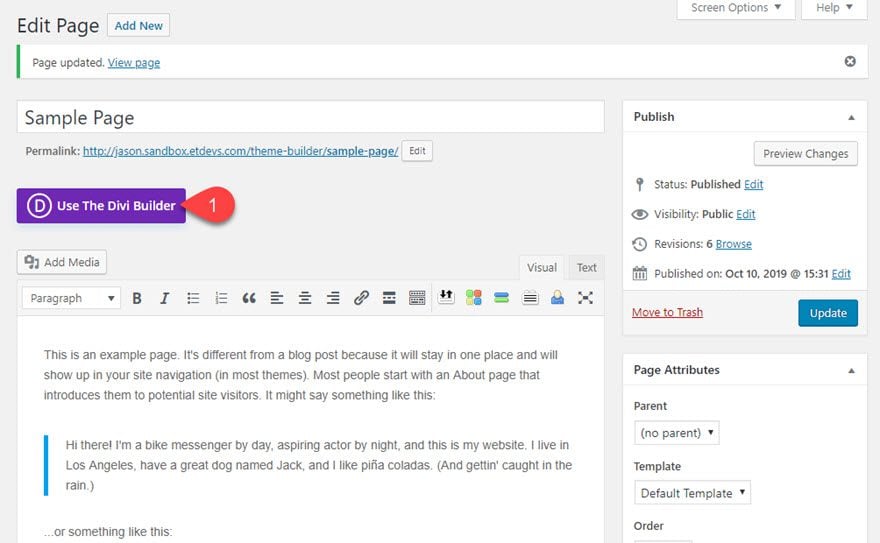
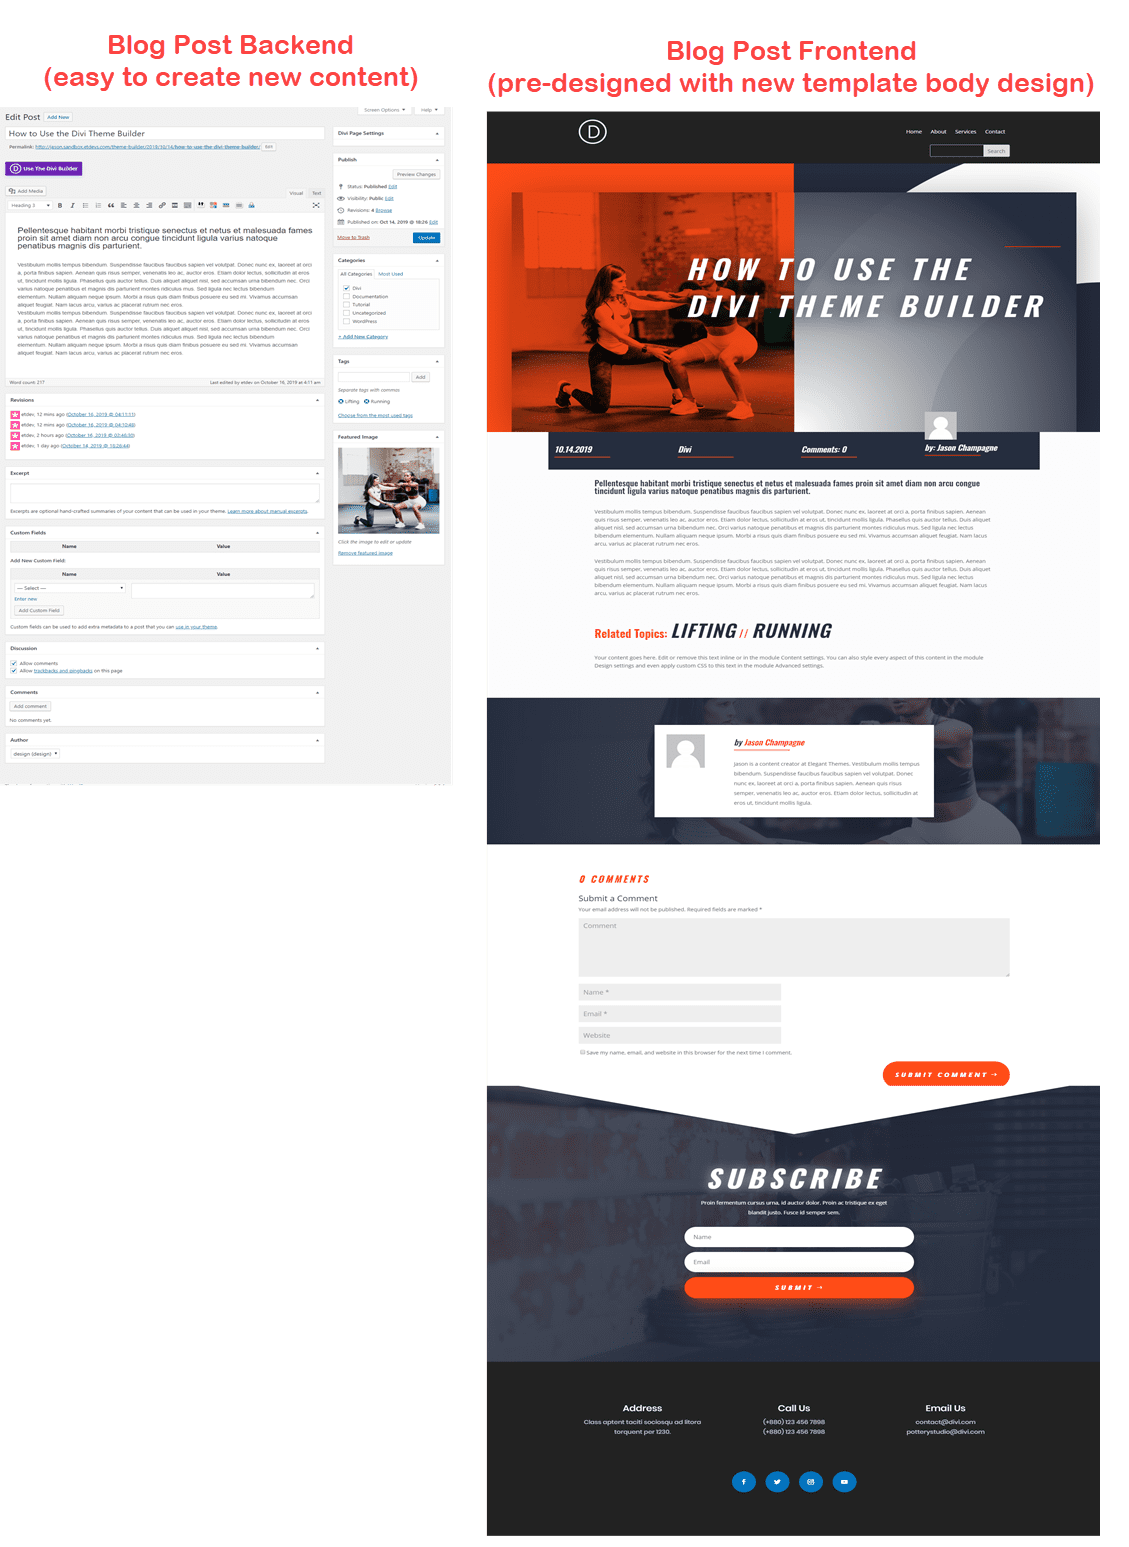
Once the template is created, you can easily create a new blog post using the default WordPress post editor and have that blog post inherit the design of the blog post template you created using the Divi Theme Builder.
You can also use the Divi Builder on blog posts with this custom template as well. It will work the same way. Whatever you build with the Divi Builder for your post will show inside the area designated by the Post Content Module on the template layout.
Building a Site-Wide Product Page
Dynamic content doesn’t just apply to blog post templates. You can also use Divi’s built-in WooCommerce (or Woo) Modules to build a custom site-wide Product Page Template.
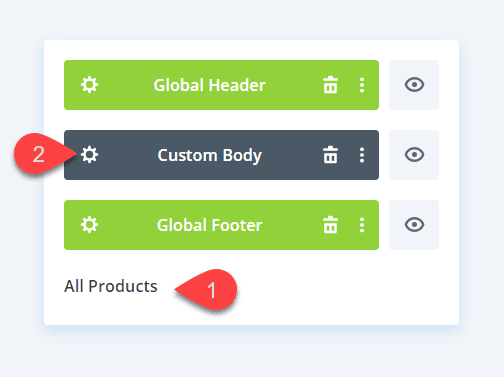
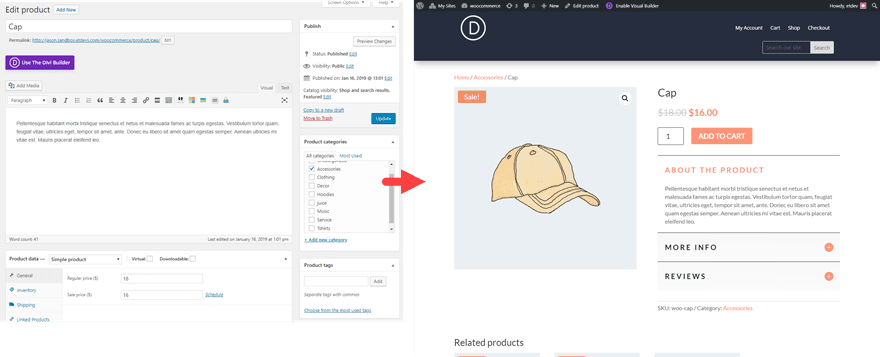
To do this, simply create a new template and assign the template to “All Products”. Then add a custom body to the template and click to build the body layout using the template editor.
Then use the Divi Builder and the Woo Modules to design the Product page template.
Now whenever, you create a new product on the backend using the standard product page editor, the product will automatically inherit the design of the assigned body template.
Building a Category Page Template for Blog Posts
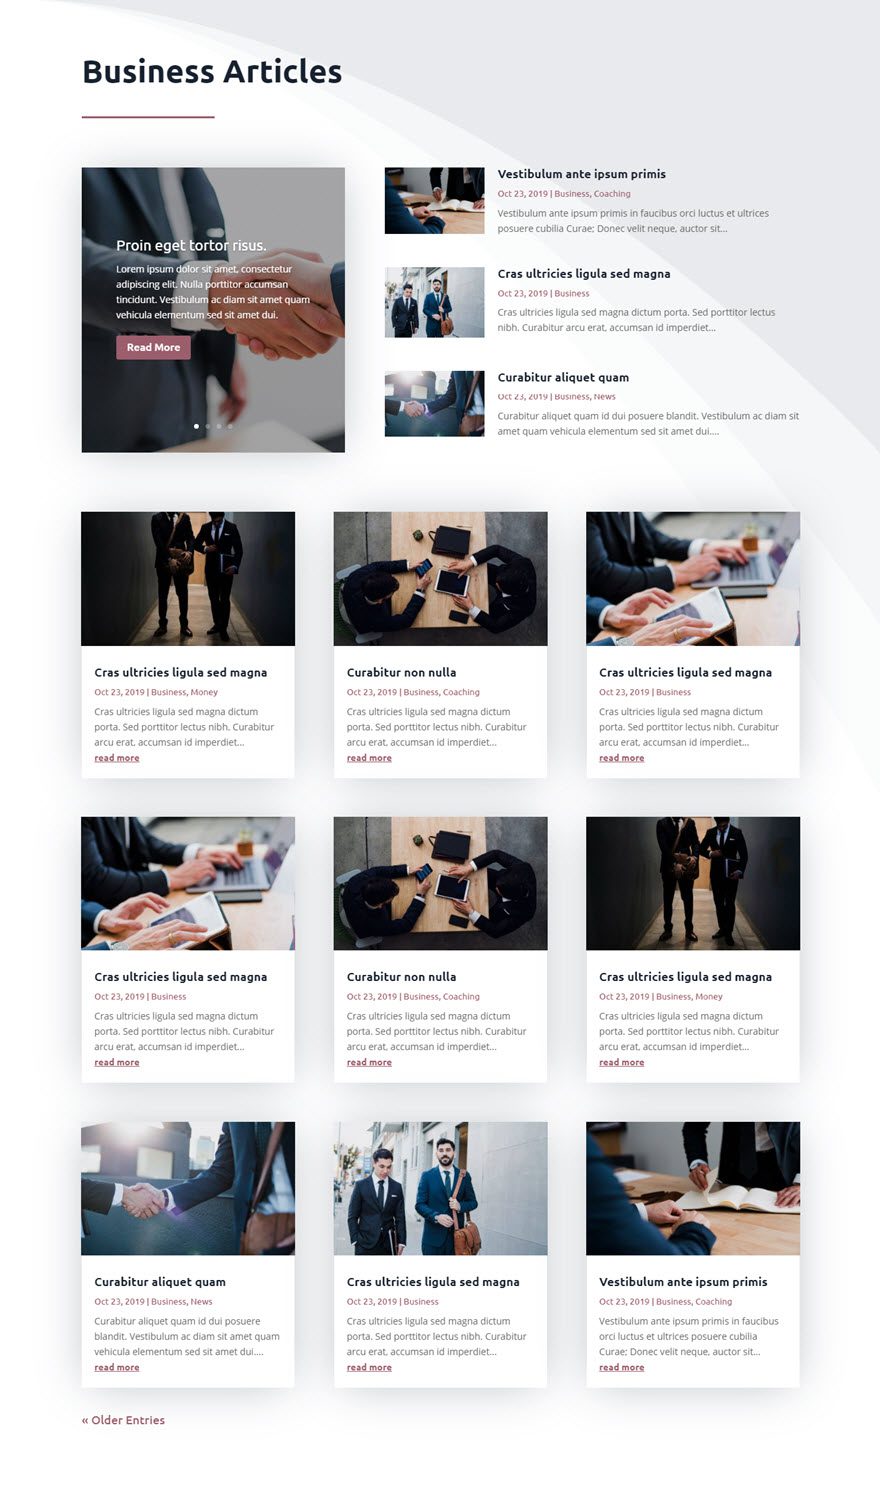
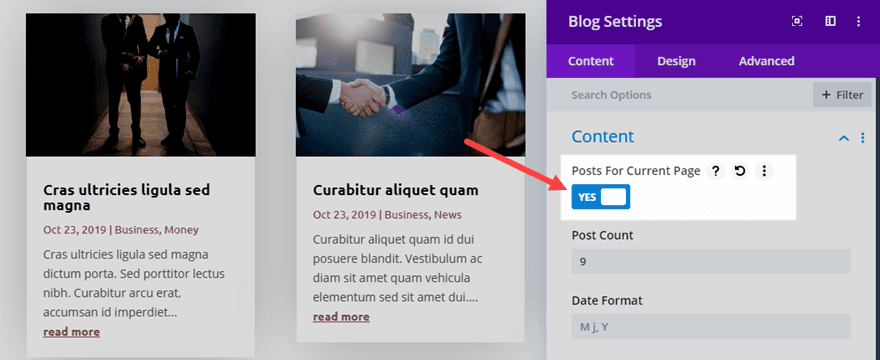
The Theme Builder also makes it easy to design complete Category Page templates. The key to creating a template for a category page is to create a custom body area and use the Blog Module to display the posts for the current page. This is easily done by a simple click when adding a blog module to the category page template layout.
If fact you can use a combination of blog modules with post offsets for unique category page layouts.
For a complete walk through, check out our post on how to build a category page template for your blog using the Divi Theme Builder.
Building a 404 Page Template
The Theme Builder also makes it easy to design a 404 Page template for your Divi website. For a complete walk through, check out our post on how to create a 404 page template using the Divi Theme Builder.
Building a Search Results Page Template
The Theme Builder also makes it easy to design a Search Results Page template for your Divi website. Like category page templates, the key to creating a template for search results is to create a custom body area and use the Blog Module to display the posts for the current page. This is easily done by a simple click when adding a blog module to the category page template layout.
For a complete walk through, check out our post on how to build a Search Results page template for your website using the Divi Theme Builder.
Portability Options for Theme Builder Templates
Exporting and Importing Templates
Using the Theme Builder Portability options, you can export all or some of the theme templates in one file. These export files will include all library layouts that are associated with every template and all template assignment data.
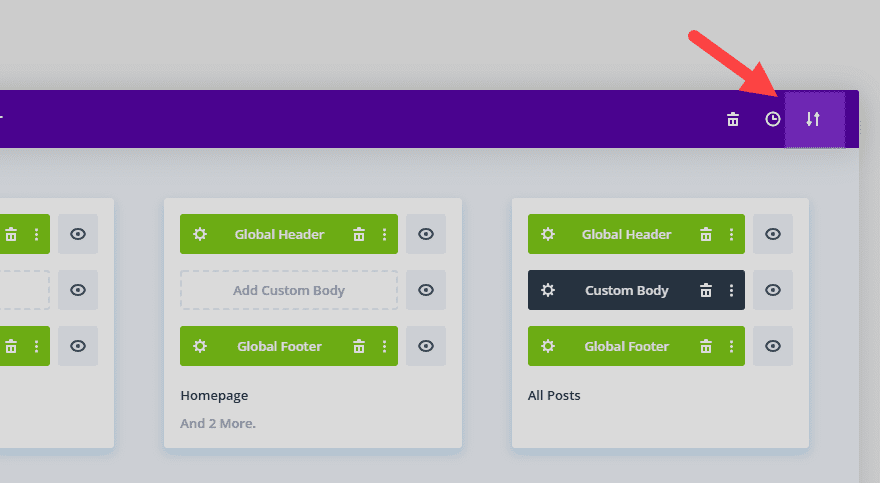
To access the Theme Builder Portability option, click the portability icon on the right of the purple bar at the top of the Theme Builder interface.
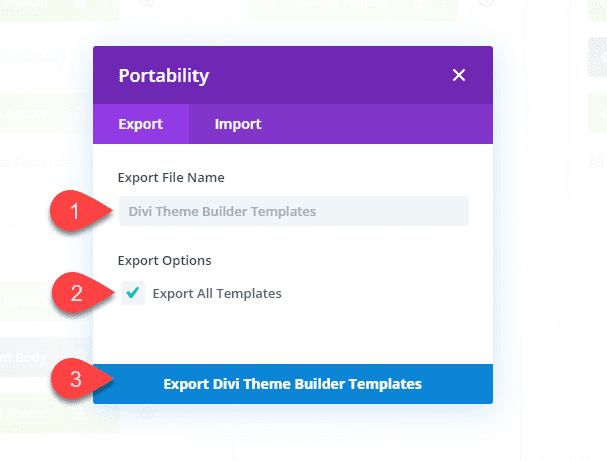
The portability modal will popup with the export tab open by default. Give the export file a name, update the export option (if needed), and click to export the file. If you leave the export option to export all templates, all the theme templates will be exported in the file.
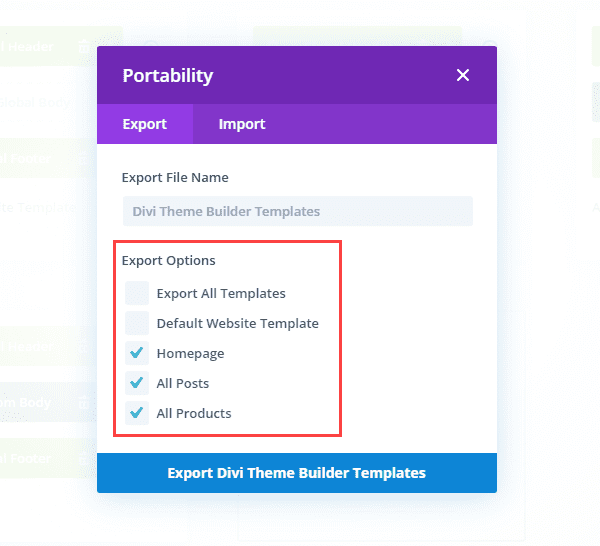
If you deselect the option to “Export All Templates”, you will see a list of options including specific template you can choose to include in the export file.
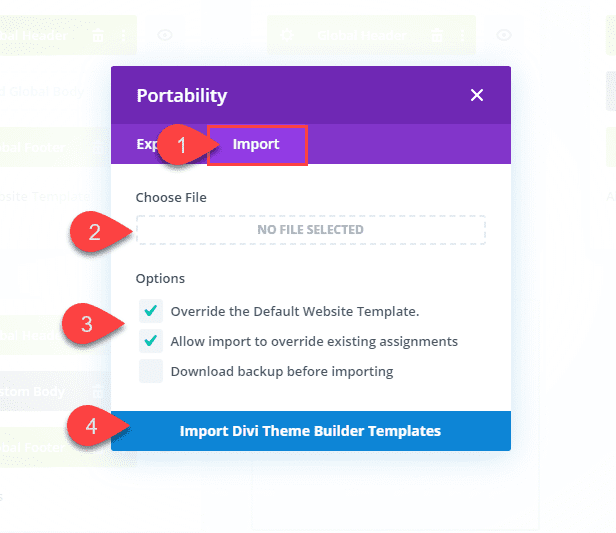
To import a theme builder template json file to your website, you will need to deploy the portability modal and select the import tab. Select the file you’d like to import, update the override options (if needed), and click to import the file.
IMPORTANT: Importing imports everything, even templates that are assigned to pages and posts that don’t exist in the current WP install. All conflicts are resolved by allowing the imported templates to override the existing templates on the website. This means that the Default Template is overridden, and all page or post assignments of the imported templates take precedence. For example, if you import a template that is assigned to the 404 page, it will remove the 404 page from the current template that is assigned to the 404 page.
Import & Export Entire Theme Builder Packs
Theme Builder exports are what we’re calling “Theme Builder Packs”. Think of them like Divi Layout Packs, except for your overall website structure instead of individual page designs. Theme Builder packs remove the need for child themes in many cases and allow you to create pre-built theme templates that can be used on any website.
For more, check out the complete post on how to use Divi’s Theme Builder portability features.