
One of our recent pieces covered how to track outbound links with Google Analytics. In that article, we used Google Tag Manager to set everything up. This is a powerful tool in any marketer’s arsenal, as it enables you to track multiple analytics and marketing statistics from one location.
In this article, we’re going to dig deeper into this tool and how it makes the process of tracking tags accessible to all users without needing to rely on developers. We’ll also discuss why this can be indispensable for your marketing efforts, and how to use it with WordPress.
Let’s get to it!
An Introduction to Google Tag Manager
For the uninitiated, a ‘tag’ in this context differs from standard WordPress tags, as it’s a piece of code provided by any service you integrate into your site. It’s usually used by analytics, support, and marketing services, and requires you to add a unique code snippet to your site. Google Tag Manager is a tool that enables you to manage all of the tags added to your site or app from one simple interface.
Your site most likely contains a few such tags already. A common example is the tag used to incorporate Google Analytics into your site. You’ll be provided with a unique code snippet, which you can use to track the service when added to your site. The normal process for doing this involves manually adding the code to your site, which may require the help of a developer.
Google Tag Manager makes this process much easier, by enabling you to implement new tags without needing to add code to your site. All that’s required is to implement Google Tag Manager on your site, after which you can add tags directly through its own interface. This way, you don’t need to rely on a developer when you want to incorporate a new service.
It also makes it much easier to track and manage your tags. You no longer need to keep up with each service individually, but can use the Google Tag Manager to control them all at once for a single interface.
How Google Tag Manager Works
One of the key features of Google Tag Manager is its extensive compatibility. It supports tags from a large number of services, including other Google products like AdWords and Analytics, as well as dozens of third-party services.
In order to track tags, you’ll need to create a ‘container’, which represents a site or app. For example, if you’re working with a WordPress site, you would create a single container and give it the same name as your site, in order to store all associated tags. Containers can themselves be organized using ‘folders’ and ‘workspaces’ if you’re working with multiple containers.
Tags are added by using ‘templates’, which you can select in the Google Tag Manager interface. However, you can also use custom HTML to add your own tag, or use one from an unlisted service. You’ll then need to create a ‘trigger’, which is an event that determines when the tag fires. What a trigger is depends on the service, but it can include actions such as clicking a button, to playing a video, or submitting a contact form.
We’ve talked a lot about how Google Tag Manager can be used for marketing and analytics, but it’s got a lot of other uses as well. For example, you can use it to implement schema markup to your site. For more information on the possibilities of working with Google Tag Manager, we recommend you dig into the official documentation.
How to Use Google Tag Manager With WordPress (In 3 Steps)
We’re now going to look at how you can get started with using Google Tag Manager. We’ll show you how to configure it, then how to implement it on your WordPress site (both manually or using a plugin). We’ll be using Google Analytics in this example, so if you don’t already have an account, sign up for one now.
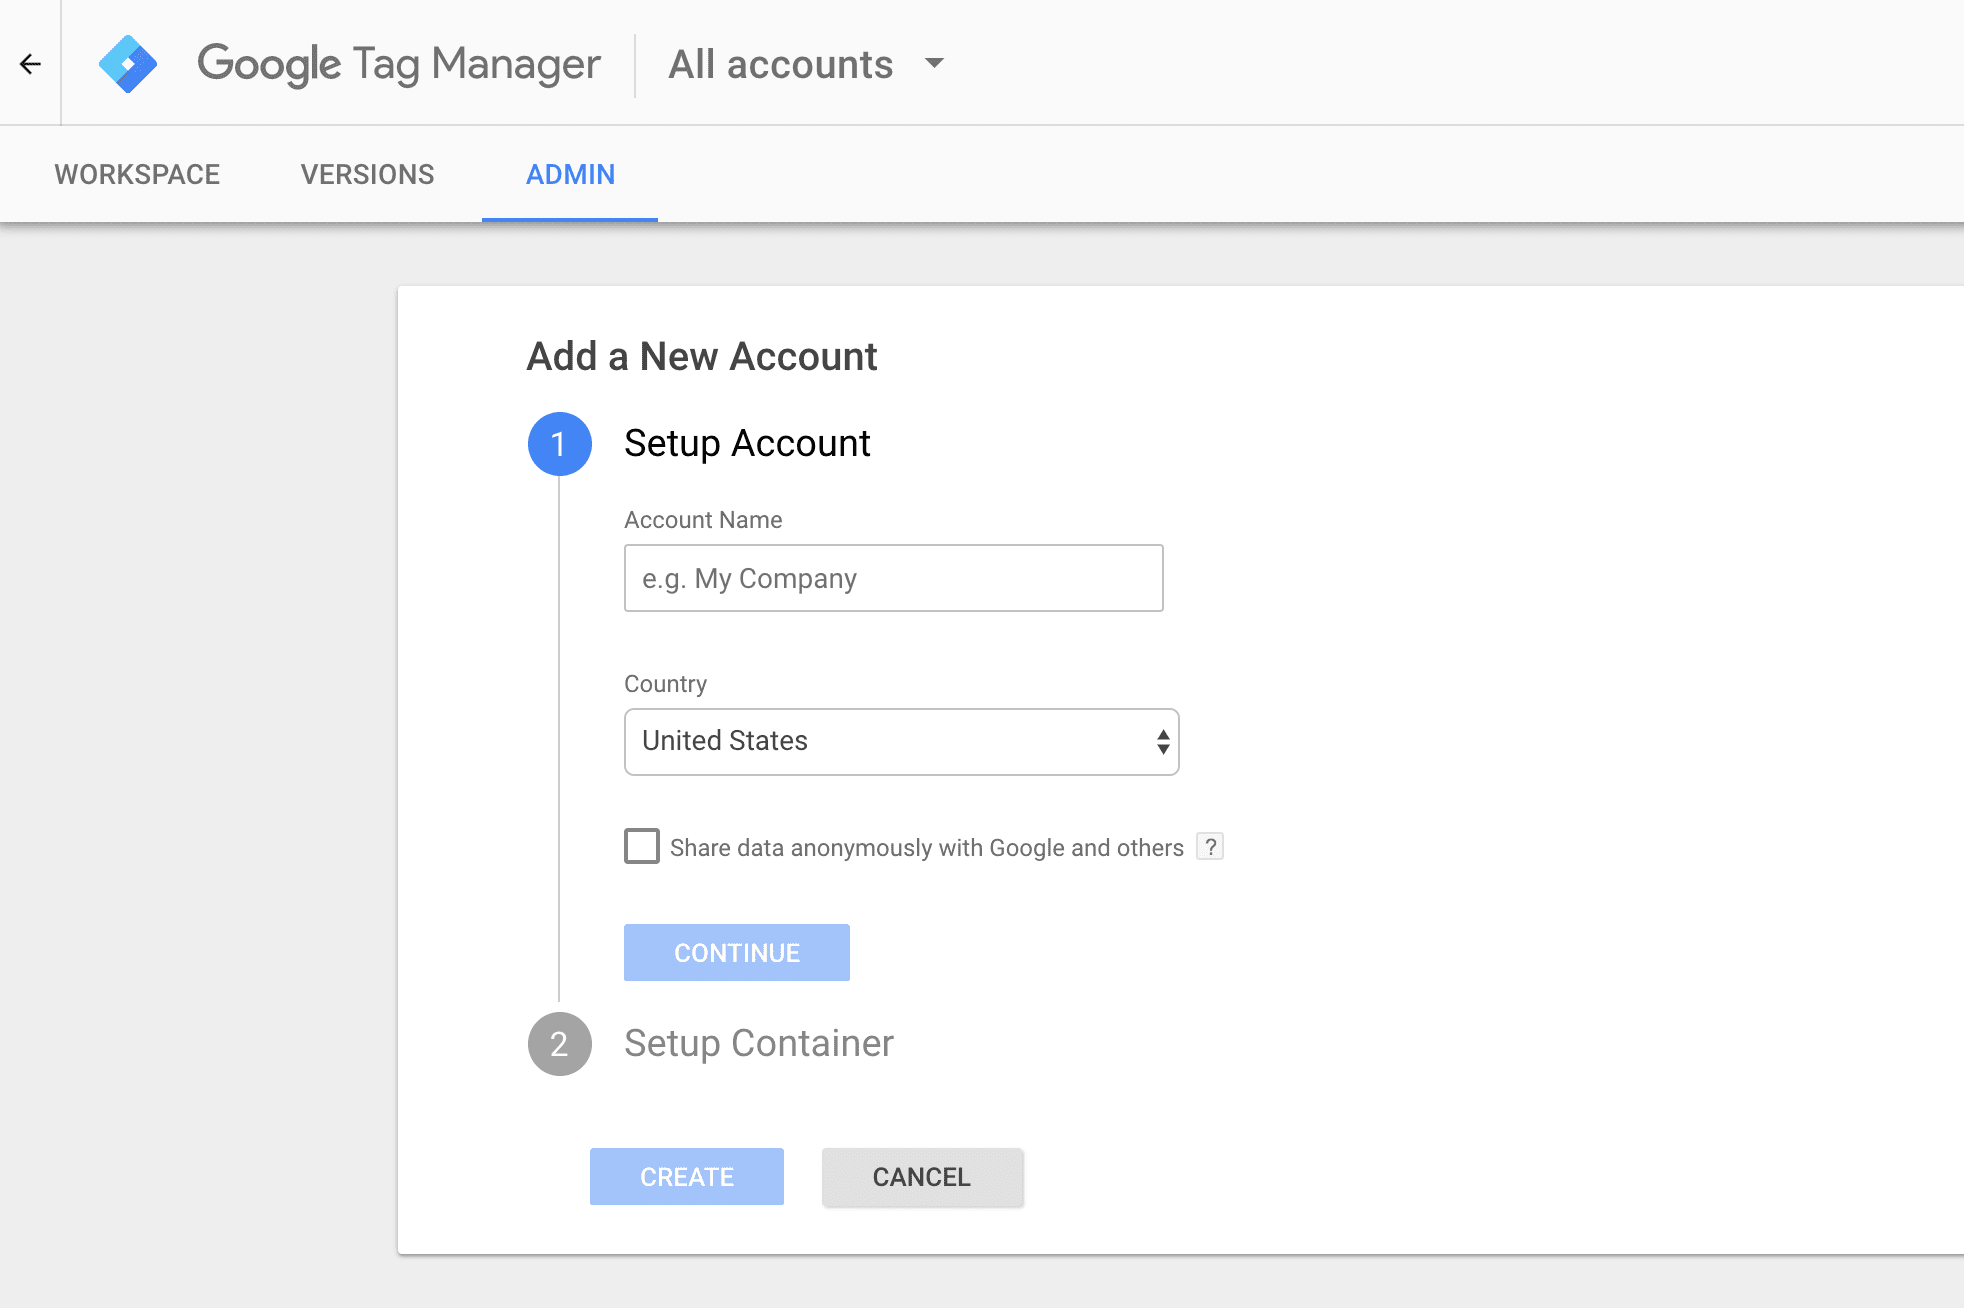
1. Set Up Google Tag Manager
First, you’ll need to create a free Google Tag Manager account. You can do this quickly with your standard Google account to do this. Access the Google Tag Manager home page and click Sign up for free:

To create an account, you’ll first need to set your Account Name and Country.
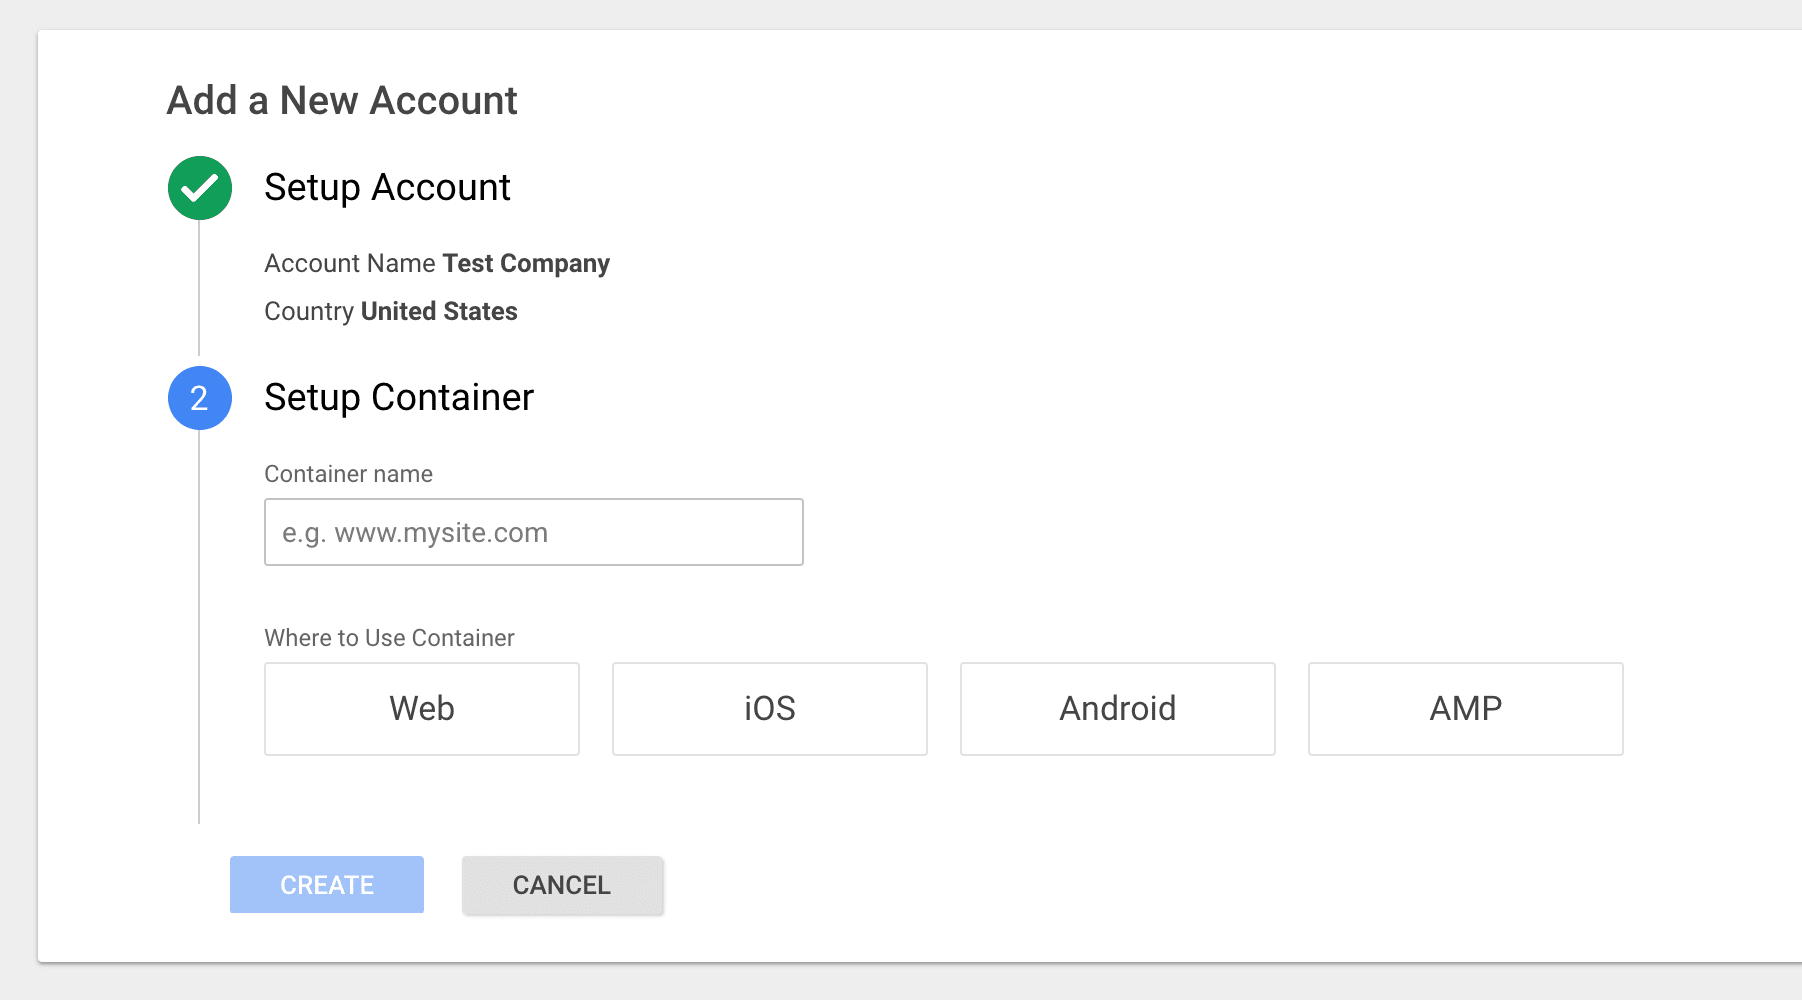
Next, you’ll create your first container. As it represents your site, so give it the same name, then choose Web.
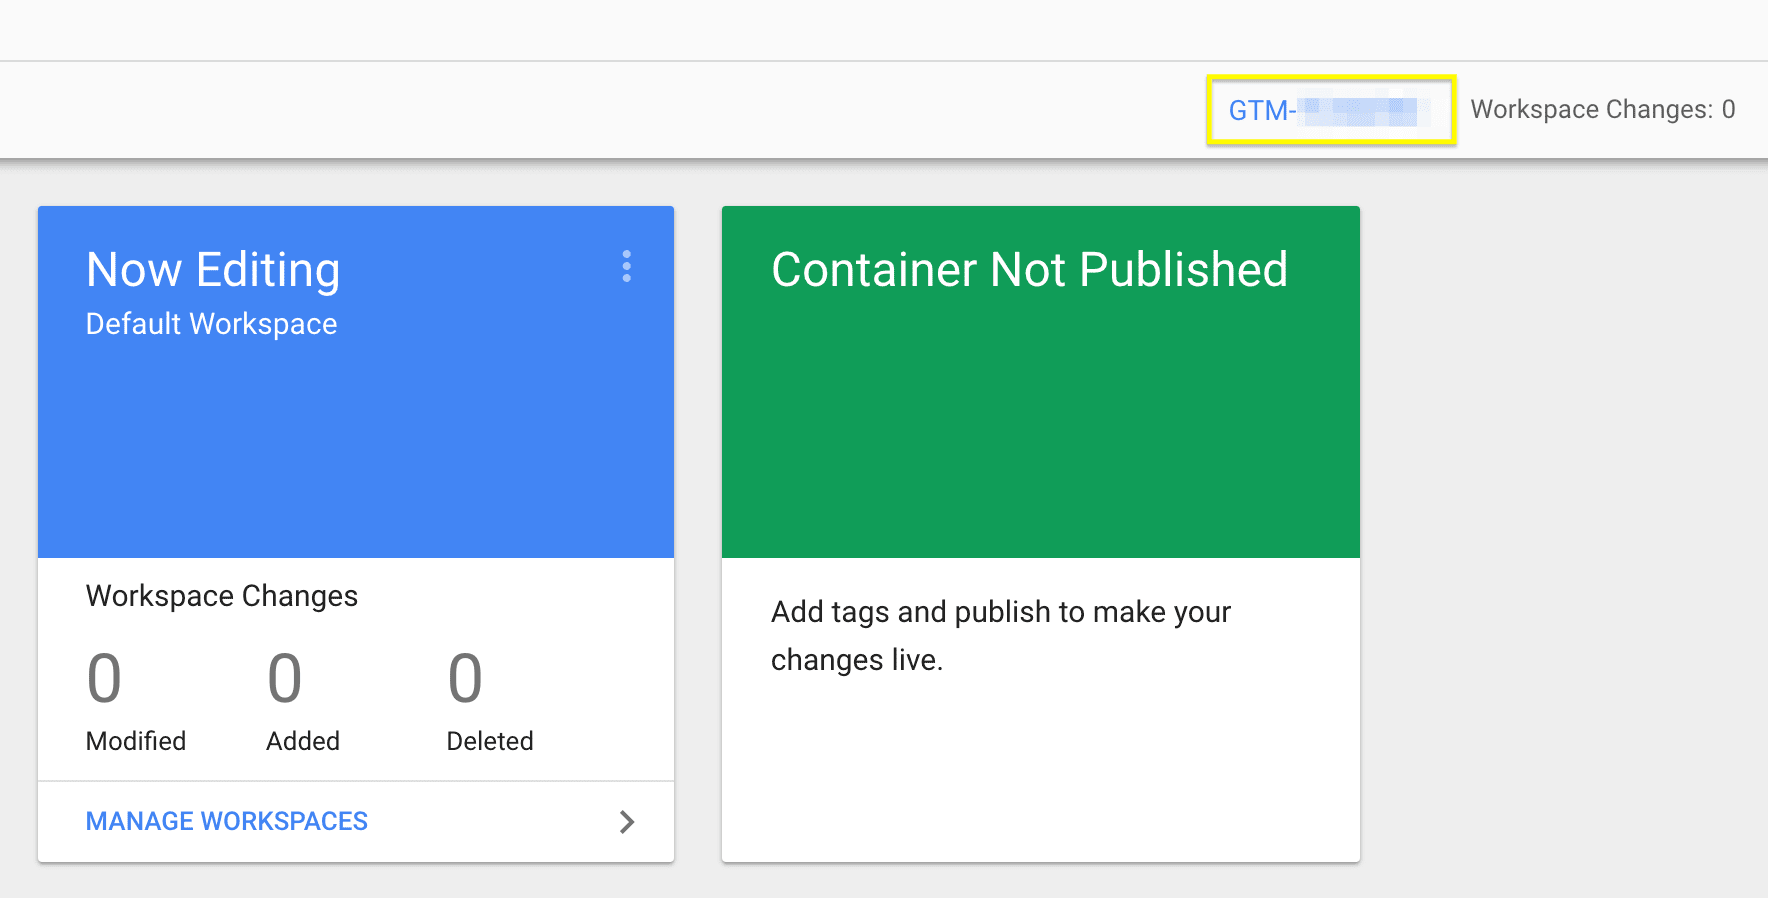
Your account is now ready, and you should be able to access the main interface. You’ll get a pair of Google Tag Manager code snippets, which you’ll need to implement on your site:
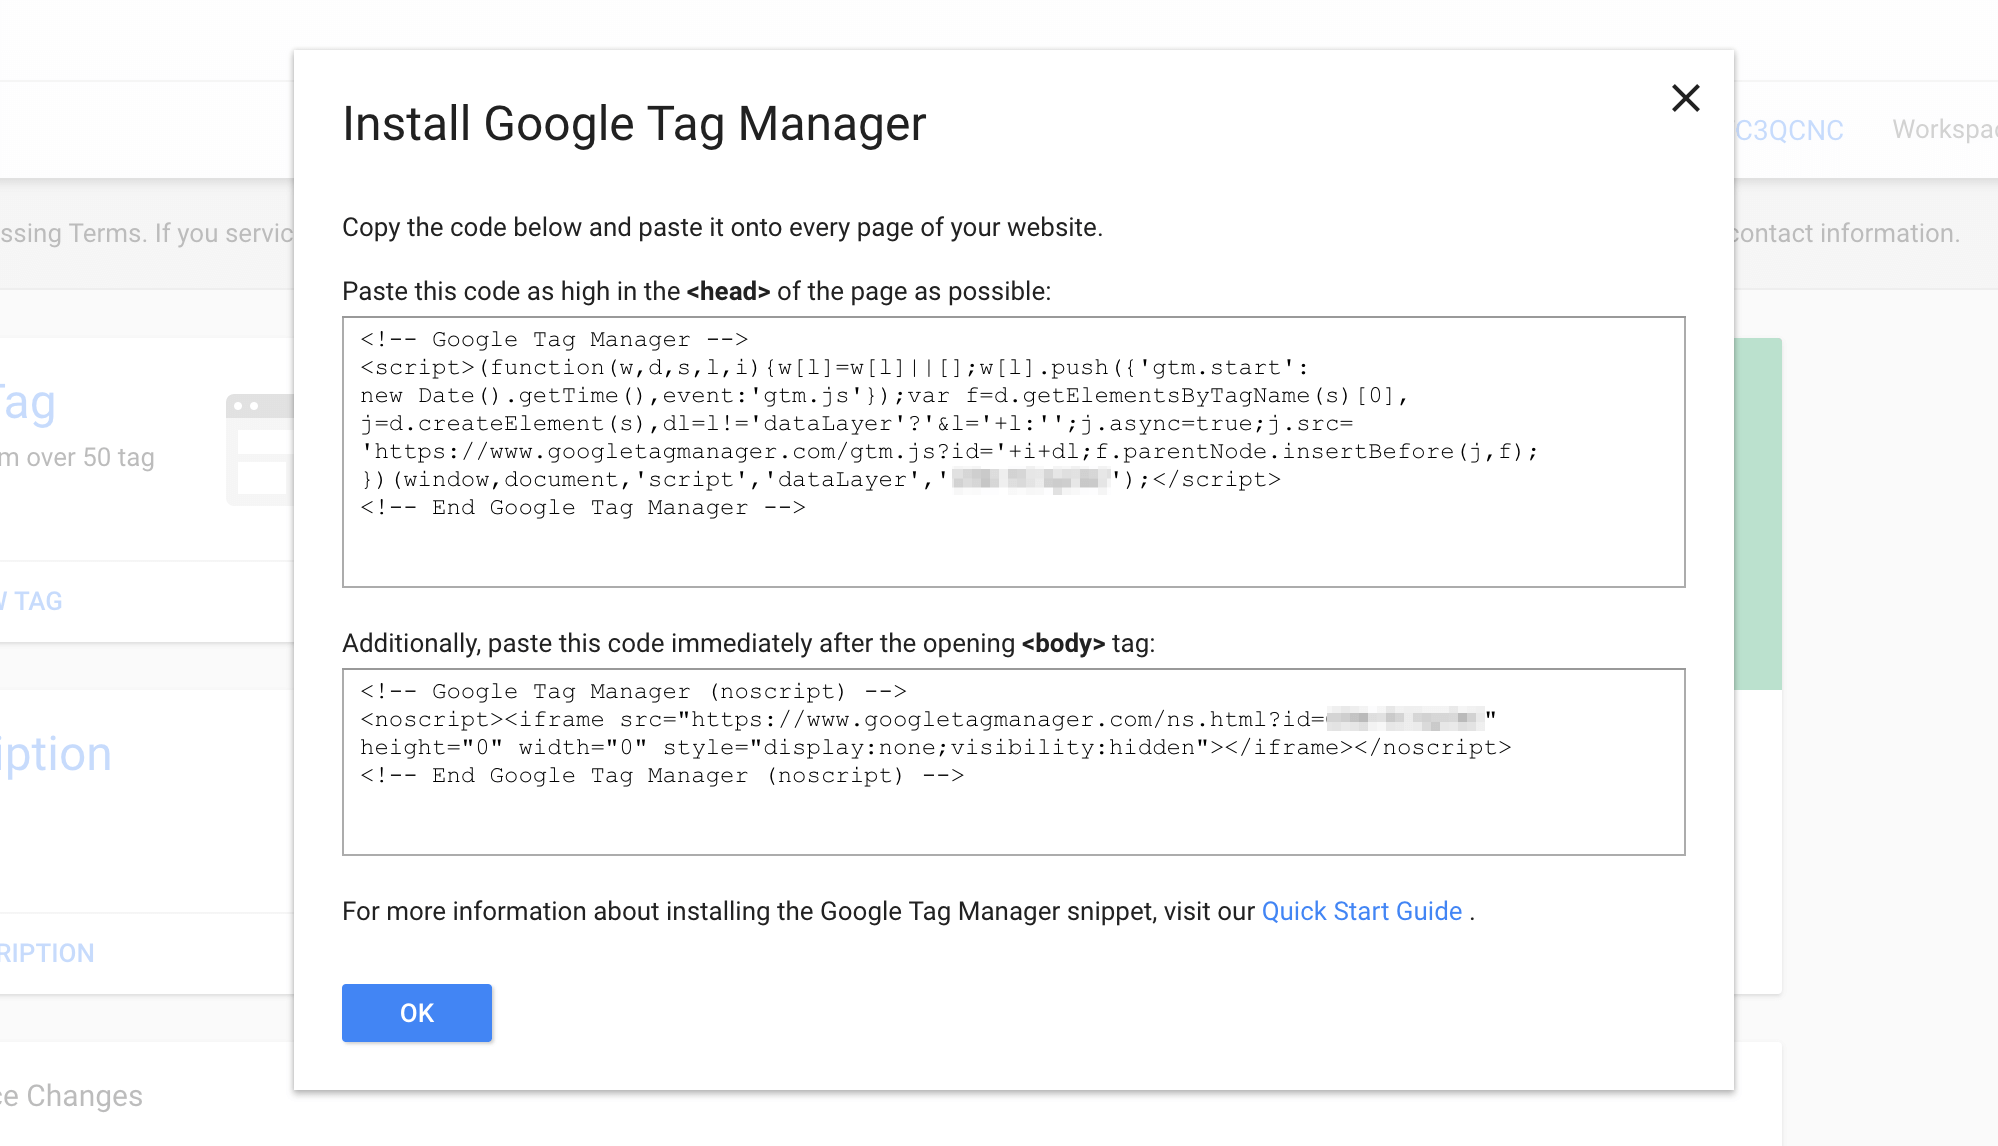
Copy these down for now, along with your unique ID (beginning with GTM-), which you’ll see on the dashboard:
You’ll need both of these as you next implement Google Tag Manager into your site.
2. Add the Google Tag Manager Code to Your Site
To enter your code snippets, you’ll need to access your WordPress dashboard. There are a few ways you can add your Google Tag Manager code, so let’s look at them now.
Firstly, you could add the code snippets manually to the head and body of your site. This is a lot easier if you’re using Divi, as the dedicated Integration options enables you to add code directly into the head and body tags.
However, you can also use a plugin such as DuracellTomi’s Google Tag Manager. This is a handy plugin that enables you to easily integrate Google Tag Manager into your WordPress site:

Install and activate the plugin and you’ll see a notification asking you to add your ID:
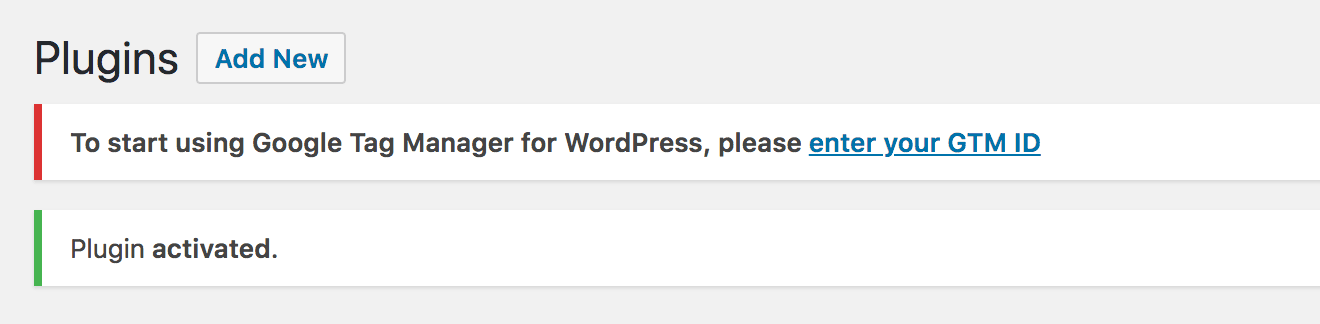
This is why we asked you to save the ID in the last step. Click this link now to access the plugin’s settings page.
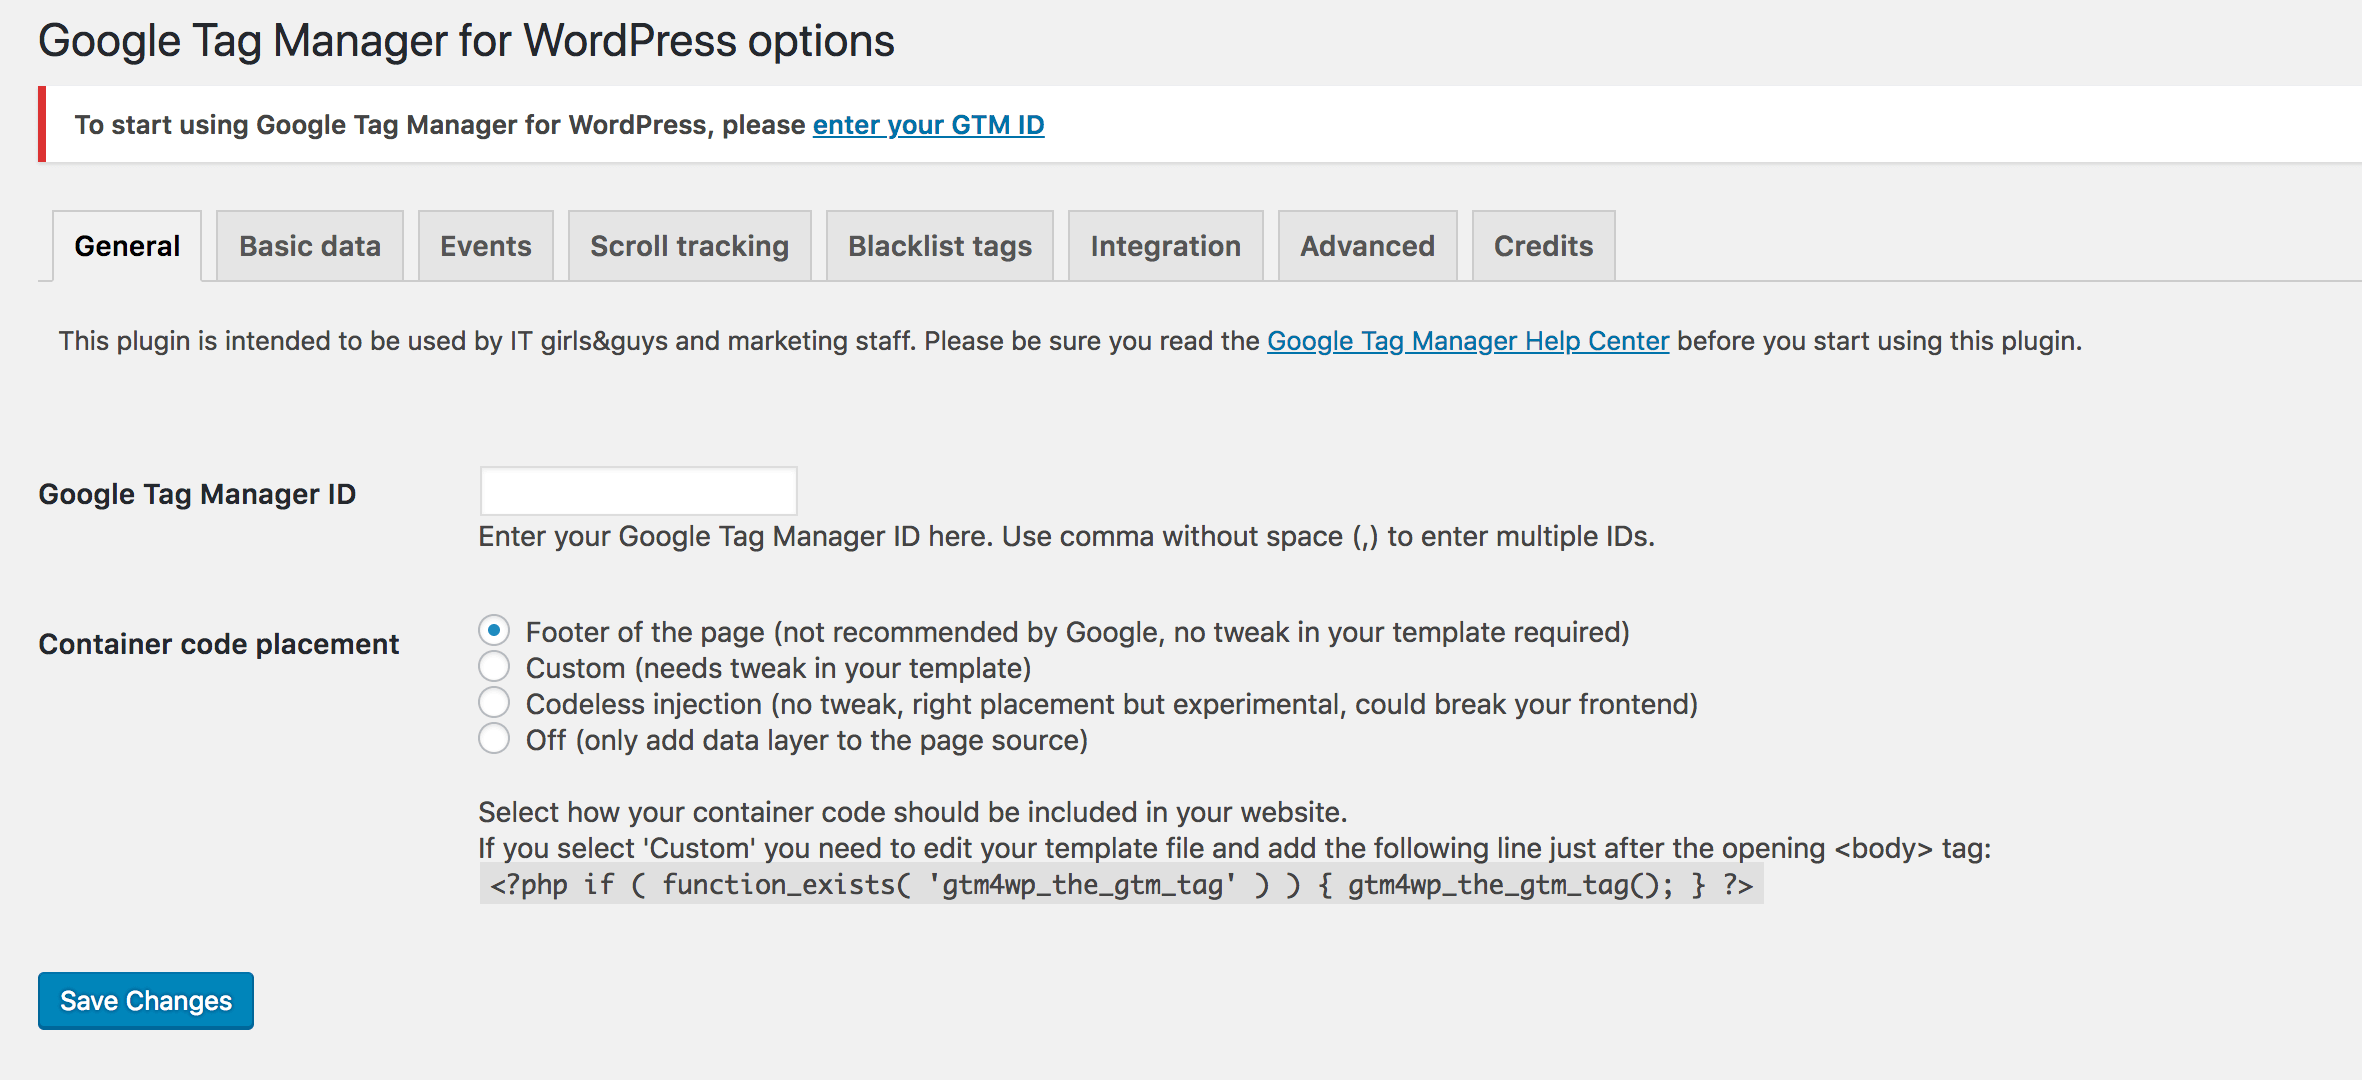
Next, paste your ID into the text field provided and click Save Changes. When you do this, the plugin will insert the code in your site’s head and body tags. At this point, you’ll have successfully integrated Google Tag Manager into your site. Let’s return to that interface now and see how you can start adding tags.
3. Create a Tag
Return to the Google Tag Manager interface, and we’ll look at how to create your first tag, firstly by clicking the New Tag link:
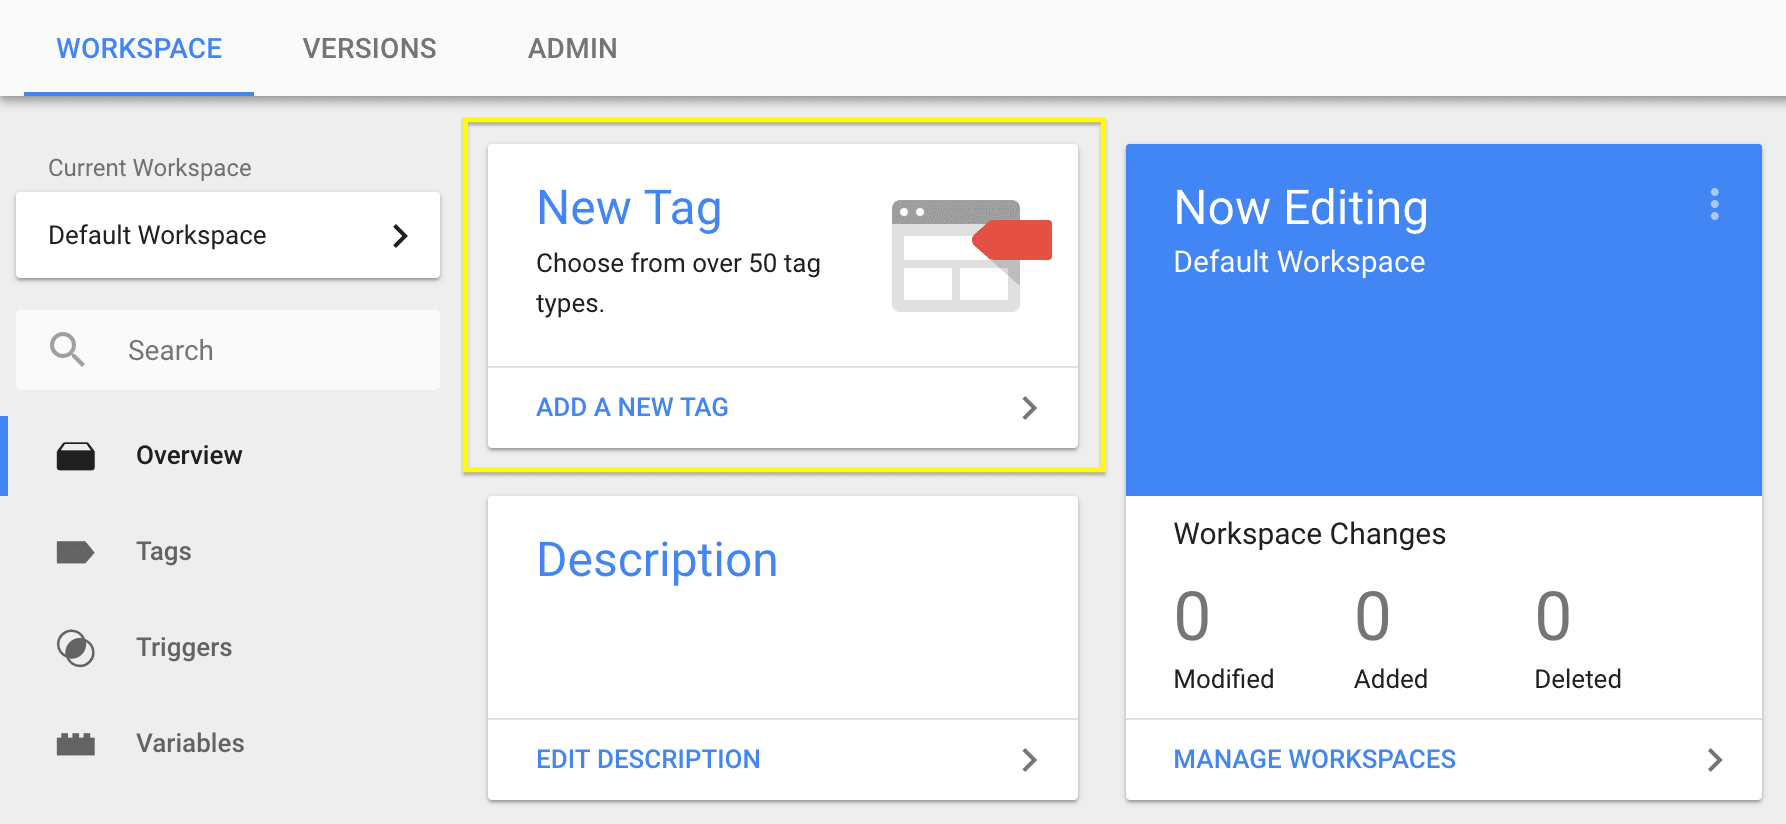
This will slide out a panel where you can configure the tag.
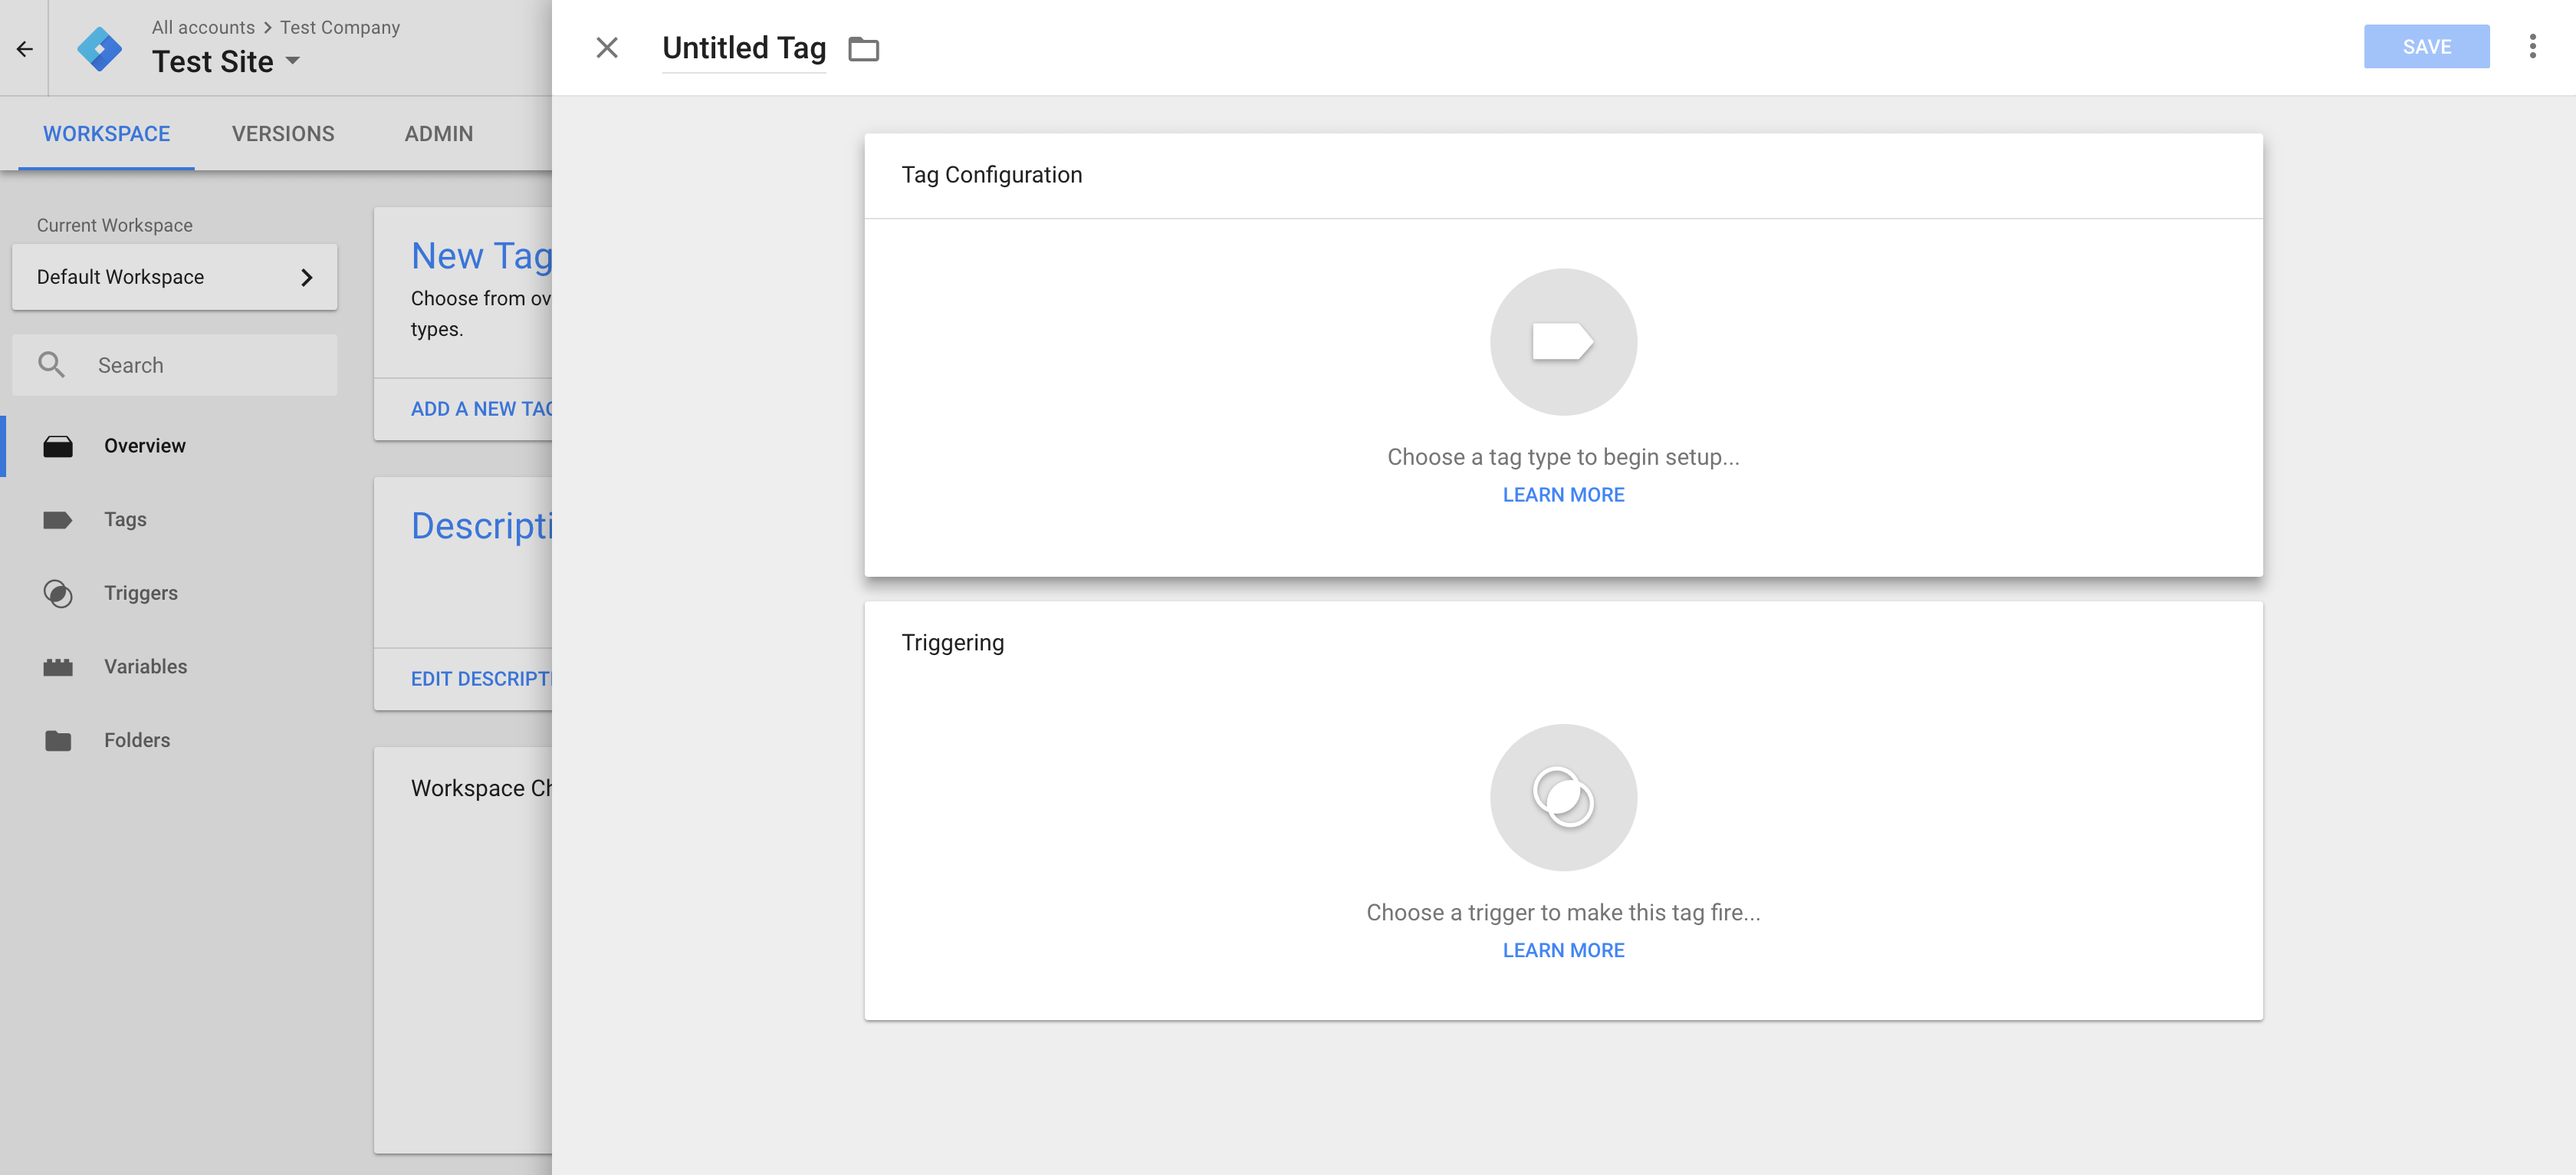
Start by giving the tag a name, then click Tag Configuration to choose a type from the displayed menu:
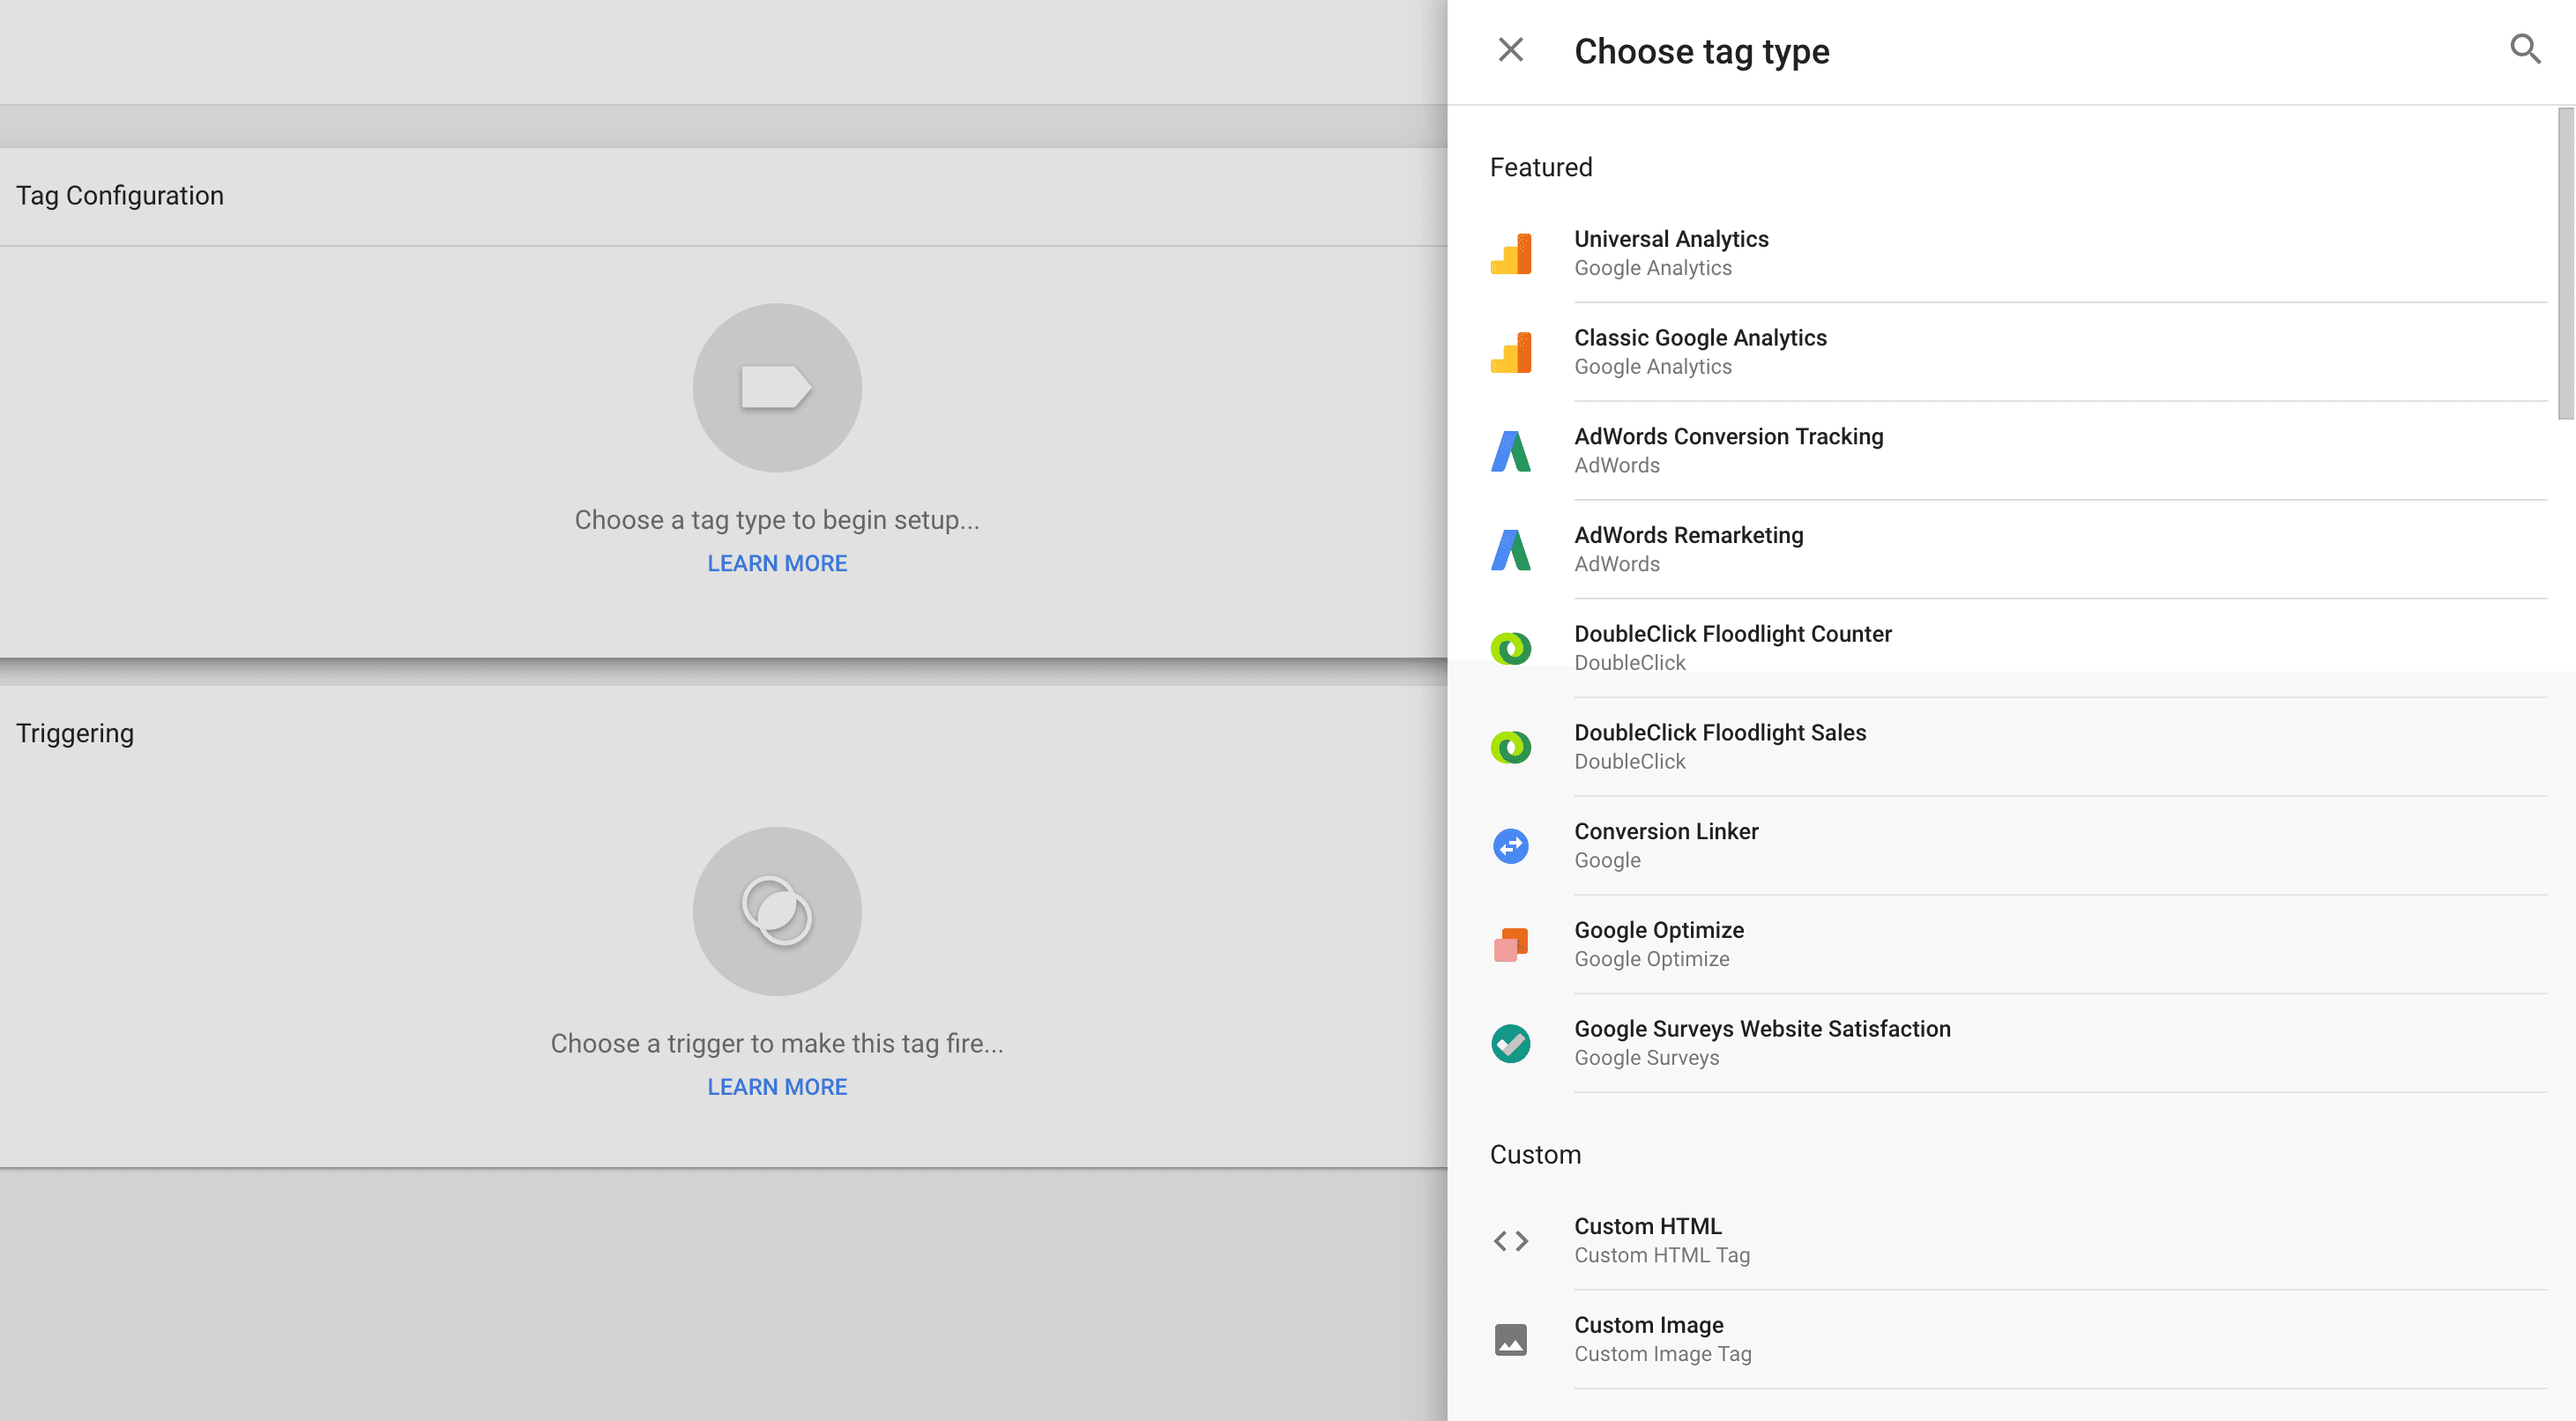
As we mentioned earlier, there are dozens of options available, but for this example we’re just going to use Google Analytics. Click the Classic Google Analytics option to add it to your tag:
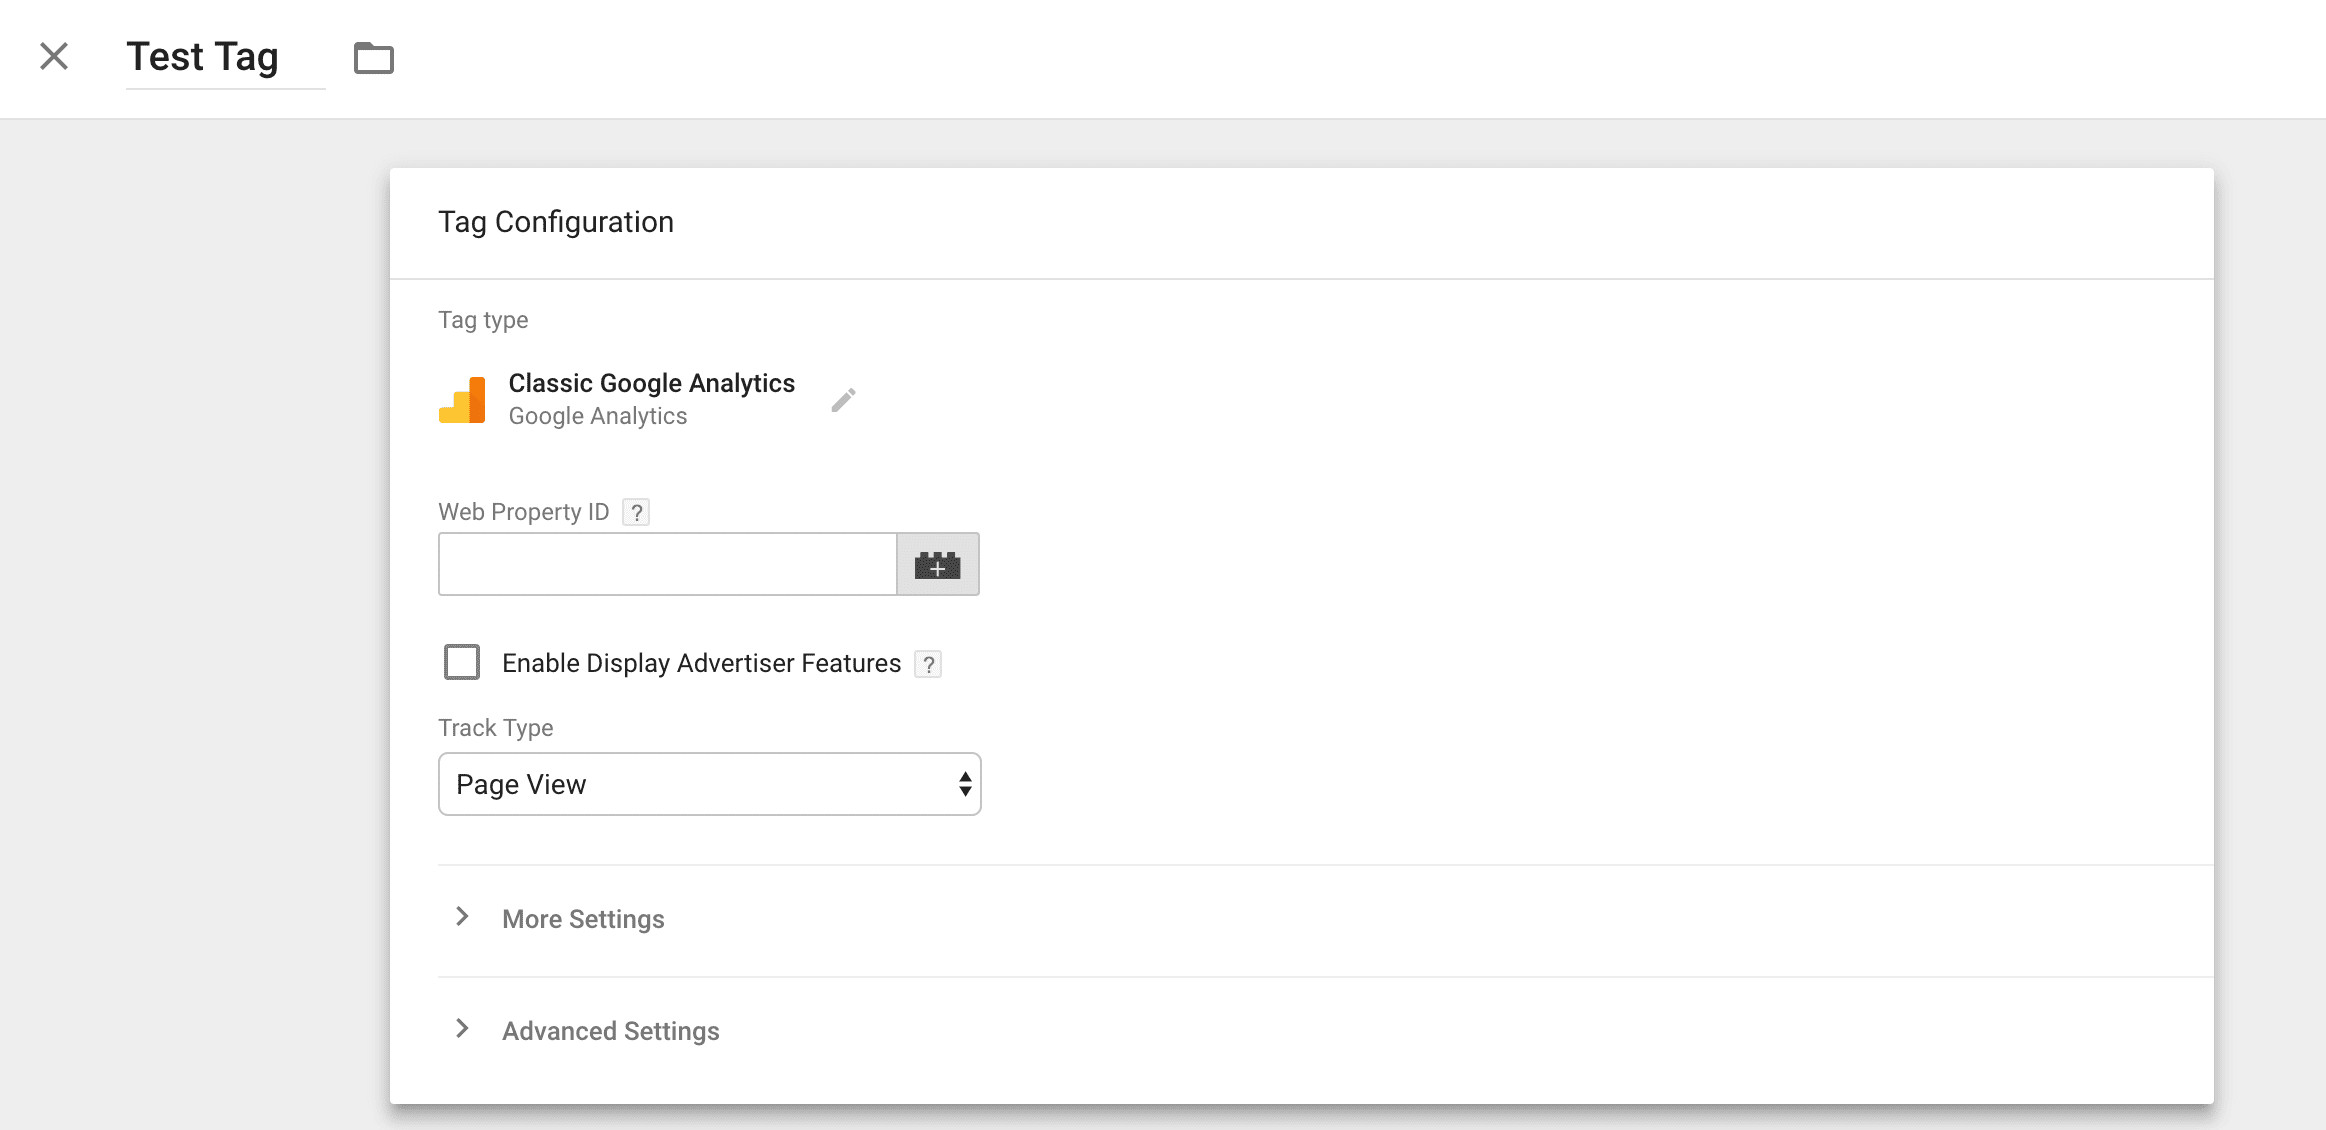
You can now configure the chosen tag. These settings will vary depending on the tag type, but for Google Analytics, you’ll be asked to provide your Google Analytics ID. You should also look at Option, where you can select the Track Type. This determines the tag’s purpose, with the default option being Page View, meaning it will count how many people view each page.
Leave these options at their defaults for now. Instead, turn your attention to the Triggering section. This is where you can add a trigger to the tag, which determines when the tag will fire or be blocked:
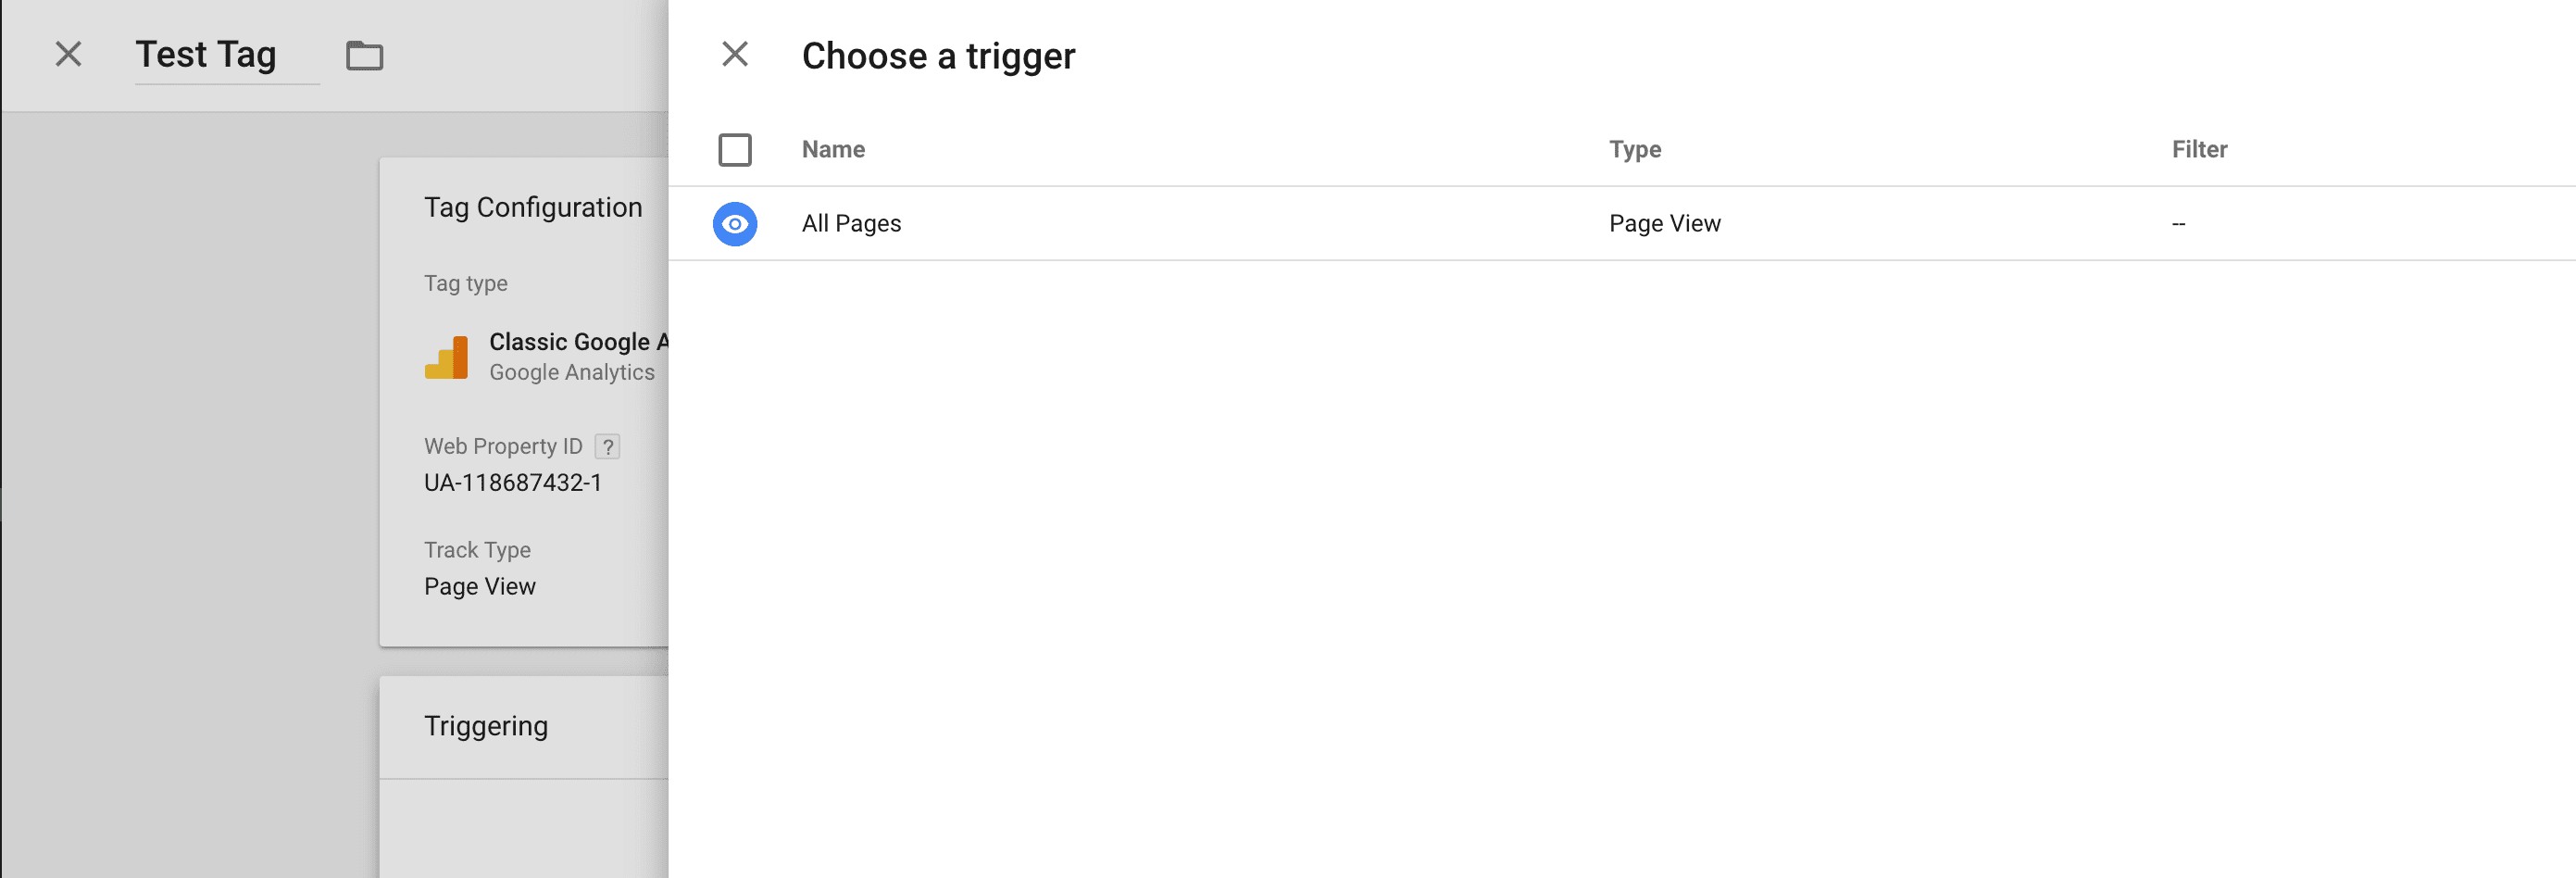
You can create your own triggers, or use the built-in options. Since this tag is meant to track page views, you can use the existing All Pages trigger found in the list:
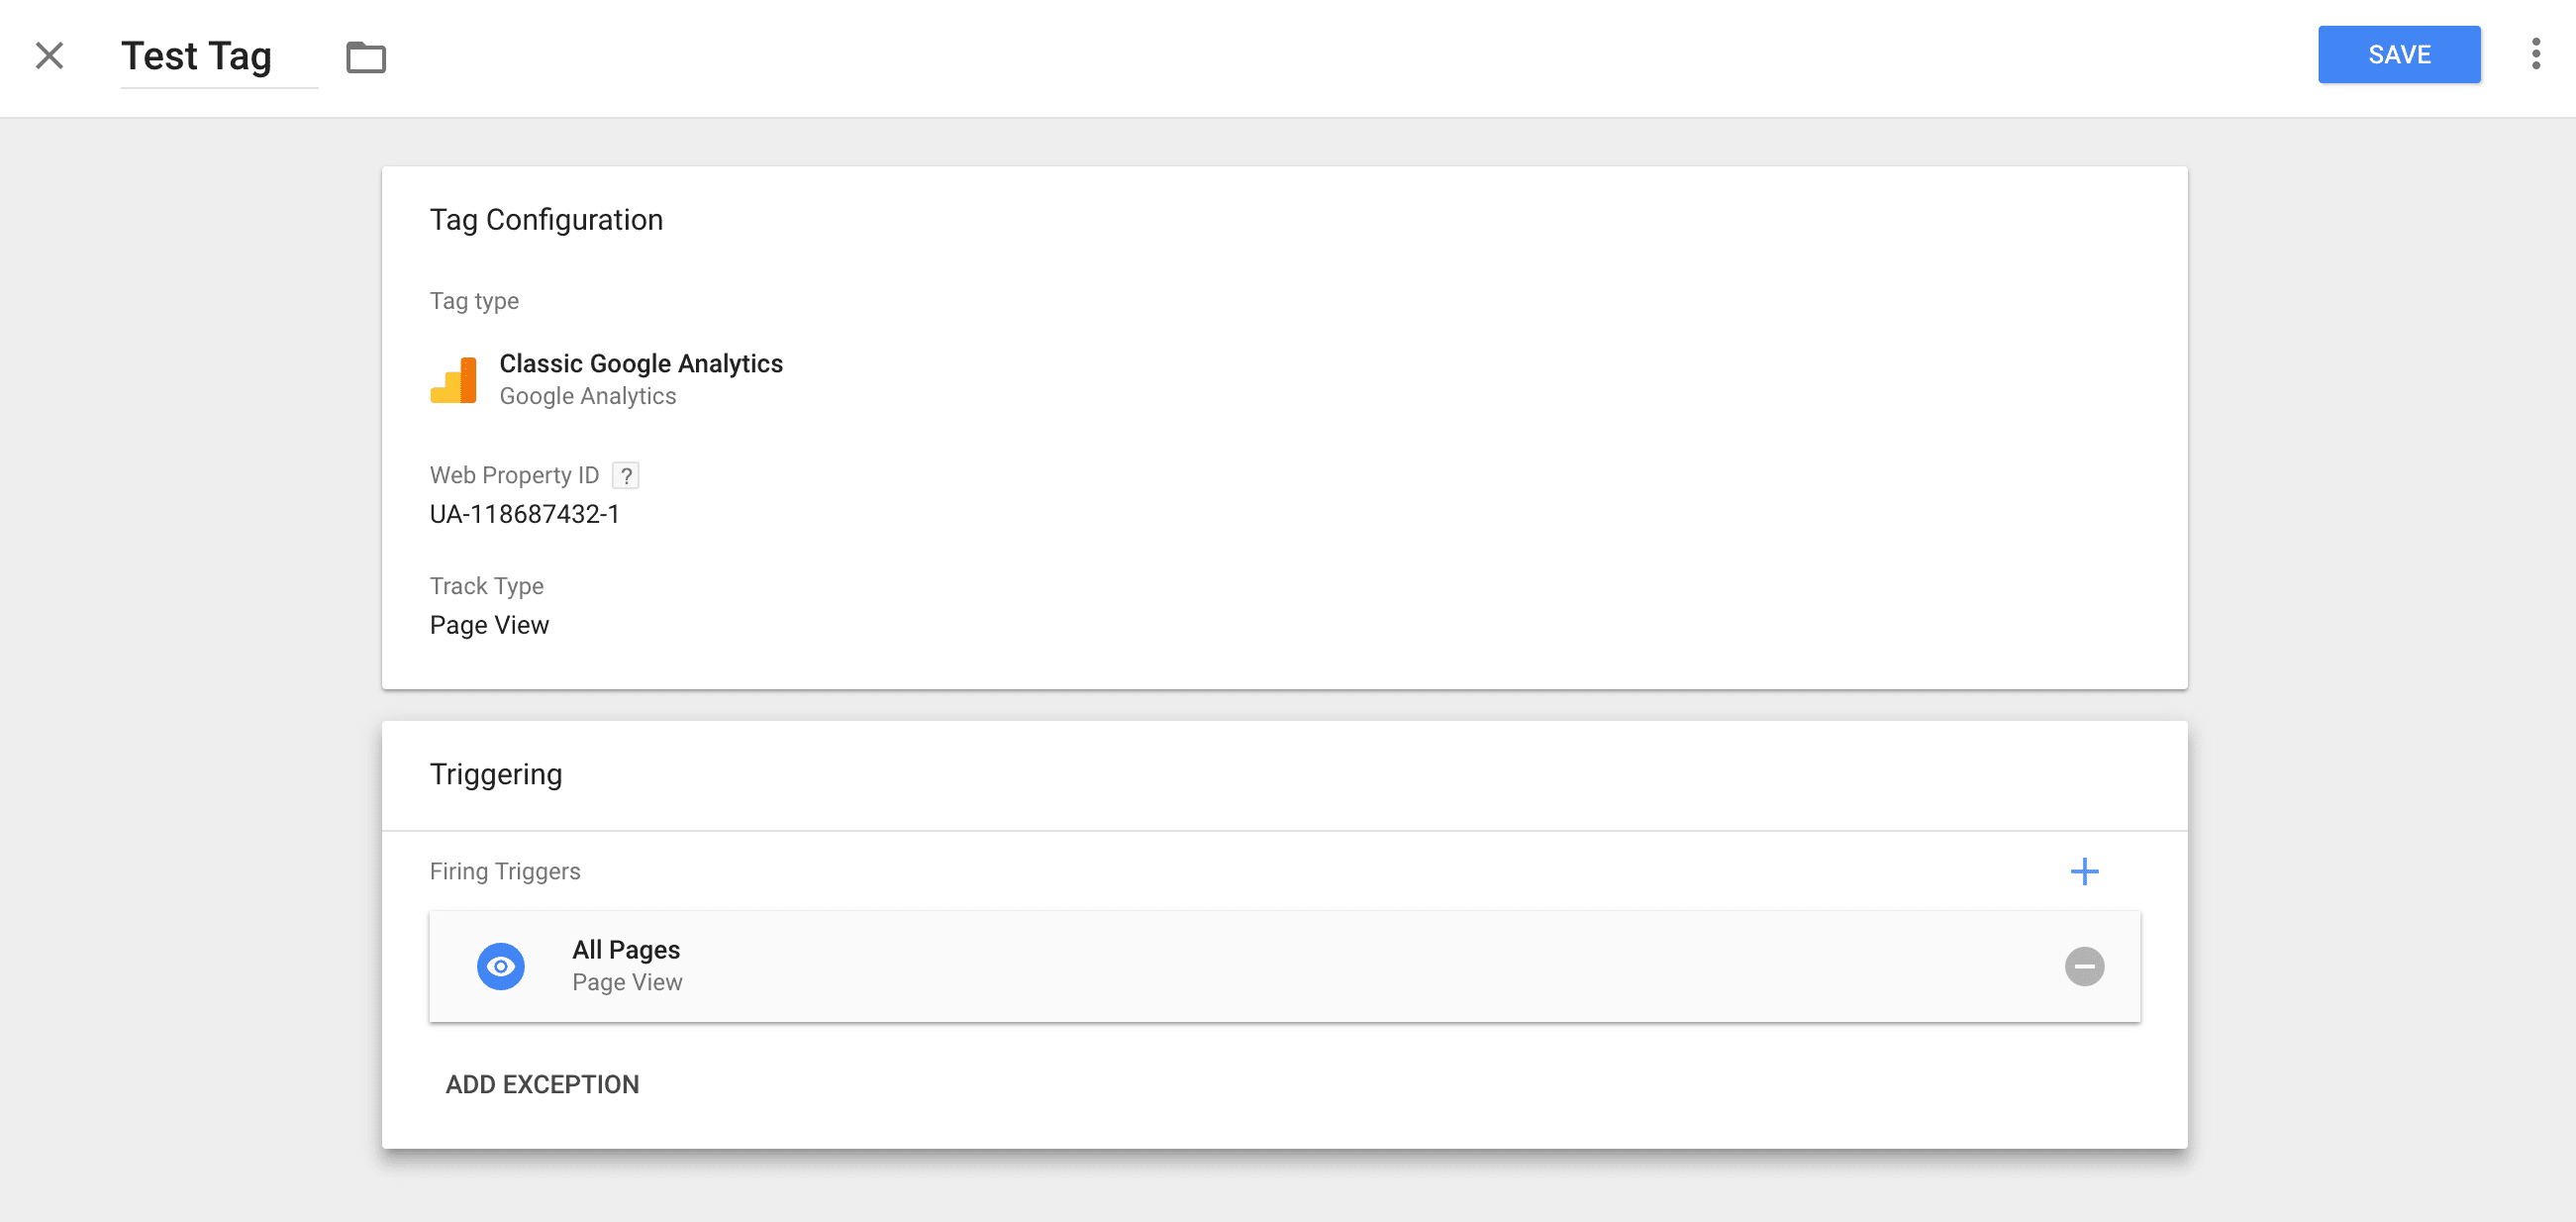
Triggers are a powerful tool that enable you to use Google Tag Manager in exciting ways, as you can add variables and exceptions to triggers. However, you don’t need to worry about this for now. Click Save to add the tag to the container.
Finally, your tags will not go live before you publish the container, which you can do by clicking Submit:

In the resulting form, you can give the current version of your container a name and description. This enables you track all changes every time you publish the container. Enter some suitable information in each field, then click Publish.
You’ve now successfully set up and configured a Google Tag Manager account, and implemented it on your WordPress site! At this point, you may want to dig deeper into the possibilities of what this powerful tool offers.
Conclusion
One of the trickiest aspects of online marketing has historically been to keep track of several services and scripts added to your site. Thanks to Google Tag Manager, this process is made much easier. It enables you to add multiple tags to your WordPress site and track them all from one location. This makes it simple to analyze your site’s performance and improve your marketing strategy.
In this article, we’ve covered the steps you need to take in order to use Google Tag Manager with your WordPress site. These include:
- Set up Google Tag Manager.
- Add the Google Tag Manager code to your site, either manually or with a plugin.
- Create a tag.
Do you have any questions about using Google Tag Manager with WordPress? Let us know in the comments section below!
Article image thumbnail by sammby / shutterstock.com


Could you update this blog with Google4 ? And how to make the mosst relevant Google tags?
I would also like to hear your thoughts on G4. I added the code to Divi and it slowed down my site so much. I see on the new G4 woocommerce has a spot to add it. Can I use this if I use Divi and Woocommerce to prevent this from slowing down my site so much?
Google says: “paste this code immediately after the opening tag” but via DIVI Integration options you can paste the code only near tag.
So – did you test if it works correctly?
Not entirely sure I’m understanding this at this point. So despite each tag being created per website and the GTM number being the same for all tags, it automatically picks up on which tag goes with which website based on the Analytics code?
Yes, that’s right. You set up each tag to trigger when a specific event occurs, which you determine yourself. A single website (or ‘container’, as GTM calls them) can have multiple tags for different events. I understand that it can be quite complex, but I hope that makes it a little clearer. 🙂
The plugin you recommend has not been updated for some time and has not been tested with the current version of WordPress. Is it still the best option?
Hello Christopher. Thanks for your question.
The plugin DuracellTomi’s Google Tag Manager for WordPress has recently been updated (at the time of this comment, 4 hours ago).
Hope this helps.
There is a new version in beta 🙂
And it is being used by me on many WP sites with latest WP version
https://github.com/duracelltomi/gtm4wp/releases/tag/1.8beta1
Thanks for your article. I need to go deeper in this topic. Please may you suggest any advanced book or online advanced resources available?
Google
I love the honest answer in life.
?
To add, if you are using a child theme – you can use insert following code in theme’s functions.php file to hook Google Tag Manager on all pages.
function analytics_hook() { ?>
// Your entire Google Analytics javascript code
<?php }
add_action( 'wp_head', 'analytics_hook', 999 );