")
Selling a property is no walk in the park. Even if you have the perfect listing available, chances are you won’t find the right buyers unless you know just how to show it off. That’s where WordPress can help you.
WordPress offers plenty of ways to create real estate listings and display them in all their glory. In this article, we’ll introduce you to one of our favorite tools to do so – the Easy Property Listings plugin. Furthermore, we’ll teach you how to set it up from start to finish, including how to integrate it with Divi.
An Introduction to the Easy Property Listings Plugin
Easy Property Listings is more than a simple tool to create real estate listings. In fact, it offers enough features to power an entire real estate agency. It supports multiple agents, seven property types, and dozens of fields for each. Furthermore, the plugin is fully customizable and can be used alongside most themes (including Divi). It makes it to #2 on our list of recommended real estate plugins.
Key Features:
- Integrates with most WordPress themes
- Displays listings grids or lists
- Fully responsive
- Includes built-in tutorials
- Comes with several unique listing types
- Supports as many agents as needed
Price: The basic Easy Property Listings plugin is free, but there are several premium extensions available | More Information
How to Set Up Easy Property Listings (In 3 Steps)
Before we get started, it’s worth noting that you should always back up your WordPress site before installing any plugins that implement major new functionality. If you’re not sure how to do so, you might want to check out our complete guide to using the UpdraftPlus plugin.
We should also mention that the Easy Property Listings plugin is not the only choice available if you want to create real estate listings in WordPress. It’s one of the best free options out there, but there are also premium alternatives, such as Estatik Pro.
Additionally, you might want to take a look at some of the real estate focused themes available, which work rather well with most of these options.
Moving on, let’s get to setting up this plugin.
Step #1: Activate the Types of Listings You’ll Need
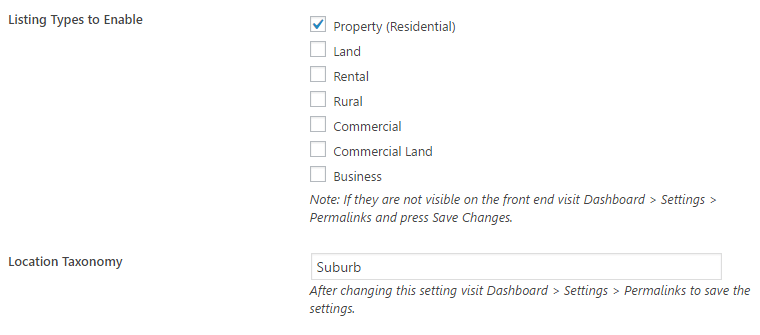
After activating the plugin, an Easy Property Listings tab will appear on your dashboard. Click on it and choose the Settings option. The first thing you need to do is select which types of listings you want to display, and activate them:
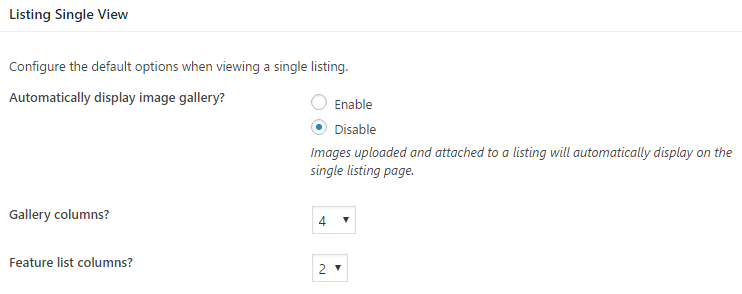
Once you’ve done that, scroll down to the Listing Single View section. In there, you may enable an option to automatically show galleries whenever a visitor clicks on one of your listings. We recommend that you enable this setting and add the number of columns you’d like displayed:
Now, save your changes and head to Settings > Permalinks on your dashboard. Once inside, click on the Save Changes button.
You’ll now see additional tabs on your dashboard – one for every listing type you activated. We’ll need to use these tabs to add our listings, but there’s one step to go before we get there.
Step #2: Create Pages for Your Listing Types
Now that you’ve enabled the types of listings you want to display, you need to create individual pages for each of them. These pages will be entirely blank until you start adding properties, but you need to create them manually for the plugin to work.
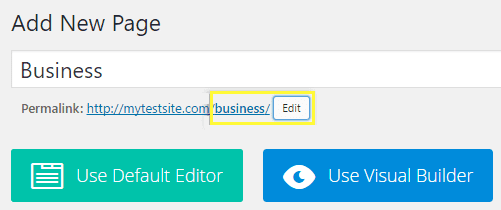
Let’s say, for example, that you activated the Business listing type during step number one. You’ll need to go to Pages > Add New and type Business as the name of your new page:

Now, take that same name and add it as your page’s permalink:
Then we’re good to go. Hit the Publish button, and you’ll be able to start adding properties under that particular category right away.
Depending on how many listing types you added, you may have to repeat the process several times. The only slug that’s slightly different from the rest is that for the Commercial Land property type, which is commercial-land.
Step #3: Publish Your First Listing
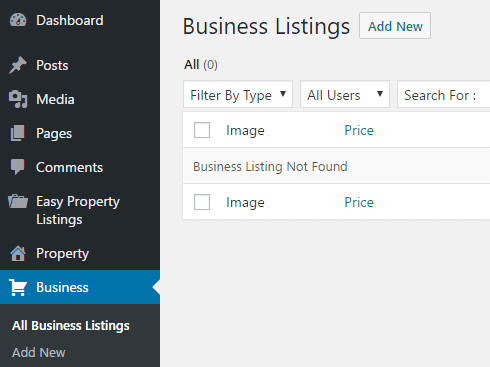
We just created a blank page for our Business listings, so let’s use that category as an example. If you enabled this option under listing types, a corresponding tab should have appeared on your dashboard:
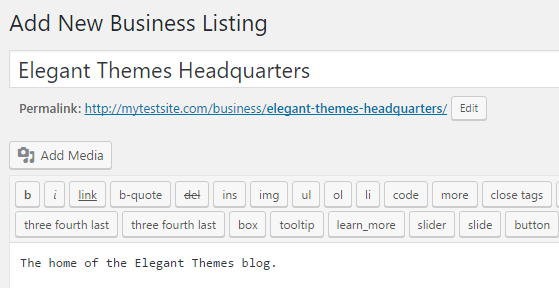
After clicking on Add New, you’ll find yourself facing the WordPress editor. First of all, enter a name and description for your listing:
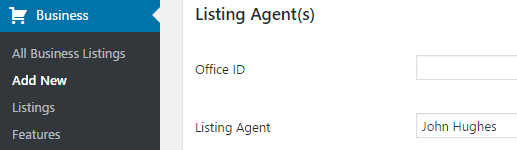
Next, you’ll want to specify a listing agent. If the name of your agent matches that of a user on your site, the plugin will automatically output a short biography alongside the listing:
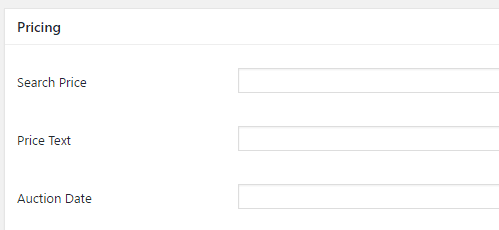
In this same page, you’ll also need to input pricing details:
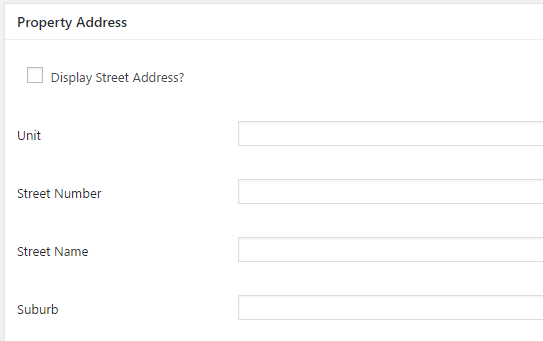
There is also a section for the address of the property in question:
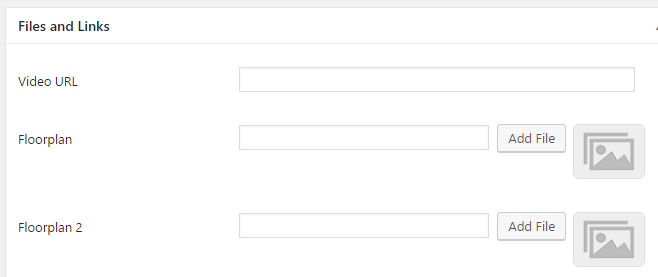
Aside from the information we mentioned, you’ll also want to add a featured image to each listing. Furthermore, the plugin even enables you to add videos and floor plans for your listings:
As you can see, each custom post type comes with a large number of fields to be populated. While this can be a bit cumbersome, detailed information should increase your chances of connecting with the right buyers. Once you’ve entered the relevant information, hit the Publish button and your property will be listed under the Business category (or whichever type you’re using).
And that’s it – you’ve added a listing to your website!
How to Publish a Listing Using Divi
If you’re a Divi user, chances are you’ll want to create and style unique pages for each type of listing on your site. Fortunately, Easy Property Listings includes a robust shortcode system, which enables you to include listings wherever you want.
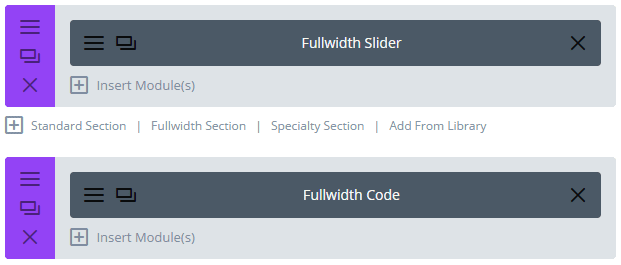
To add one in Divi, open the page you want and load the Divi Builder. Then add a Code module where you want the property to show up:
Now, open your Code module and locate the Content field:
At this stage, you should go ahead and check out Easy Property Listing’s shortcode documentation, since there are too many commands to cover here. However, if all you want is to publish your listings for a single category, here’s the shortcode you need to use:
[listing post_type="property"]
Just replace property with the type of listing you want to display, and you’ll be good to go!
Conclusion
WordPress is an excellent tool if you’re looking to get your real estate listings in front of as many eyes as possible. Whether you’re a realtor or an agency, setting up a website to display your properties in all their glory is entirely within your reach.
In fact, all it takes is installing the Easy Property Listings plugin and following these three simple steps:
- Identify and activate the types of listings you need.
- Create individual pages for each type of listing.
- Publish your first property!
If you’re a Divi user, you can also easily integrate listings using the Code module.
Looking to integrate your website with an MLS listing service? Browse these top IDX plugins to see if they can help you out.
Do you have any questions about how to create real estate listings using WordPress? Subscribe and ask away in the comments section below!
Article thumbnail image by Stokkam / shutterstock.com


Does this plugin integrate with the MLS or IDX? I couldn’t find info on their site. If not, is there another plugin that does?
I feel kind of stupid, but I can’t for the life of me find a shortcode for showing the single listing page- the one that shows all the details of the property. I just get the summary link, and I’d like to be able to work on the detailed page with Divi builder. Any help would be deeply appreciated!
Is anyone aware of a real estate plugin that manages featured image open house notices? I have a client that I manually update the featured image with a watermark version of the photo I created in Photoshop – and switch out for regular, vs. open house vs. pending vs. sold. I haven’t found a plugin or code that would apply those watermarks with just a click of a button/setting.
Hi Mary – thanks for your comment! I don’t have an answer for you, I’m afraid, but Google will be your friend on this one. 🙂
Hi Linus,
Thanks for this tip. Few screenshot or a live demo should have been very awesome to see the result.
Would be great to go more in depth with this plugin and show an example of styling a property page.
I have been using the EPL and its core bundle for over a month. While anything is possible…be prepared for a learning curve when getting off the beaten path. Real estate data varies widely across North America (MLS). You have to flex your coding muscles and take a fair bit of time to do any customizations to tweak this Aussie focused input form. Not so simple as described here! Challenge anyone to capture an NA MLS effectively with this plugin and output it in the format of your choosing. Can be done but if you have the time know how. I will say Merv is very helpful and a pleasure to work with getting over the bumps and humps.
Who is Merv?
Thanks for the insight, Jim!
Hi John,
Any chance of a blog post for a business listing plugin setup? I’m looking at the Business Listing Plugin, and any tips on making it easy to use with Divi will be awesome.
Thanks
Hi Dirk! That’s a good suggestion; I’ll keep it in mind. 🙂
Thanks for the tips on this plugin. I would love to see some screen shots included with this overview. I’m also a little confused – I am using DIVI – do I need to go through the entire process and then go to the DIVI code module and enter the property type? I’m not sure if some of this is redundant.
I’m unsure of where you’re stuck exactly, Heather. My advice is to start again from the top, then if you run into the same problem, let us know exactly where. We’ll try our best to help. 🙂
Hi Linus! Thanks, I’m glad you found our article helpful. 🙂
Hi ,
In order to be fair i wanted to say good work as for as proposing an up-to-date plugin.I hope the whole team to be more careful and post guides and info only for updated plugins compatible with the latest version of wordpress.
Thanks
Hi Linus,
You need to be aware that how recently a plugin was updated is no measure of its security.
I could write a simple plugin that is perfectly secure and never update it unless there are changes to WordPress that break it.
New does not mean secure – see: the WP 4.7.0/4.7.1 REST API fiasco.
Thanks