
If you like to stream yourself on Twitch, your primary goal is probably to get as many views (and subscribers) as possible. You can do this by using your social media accounts to let people know when you’ll be on, but what if you also have a WordPress website with its own audience?
Fortuantely, WordPress enables you to display your Twitch status on your website. It’s not a default feature, but it’s very simple to add. In this article, we’ll talk about why you should display your Twitch status on WordPress, and teach you how to do it in three different ways. Let’s get started!
Why You Should Add Your Twitch Status to WordPress

As a streamer, your main goal should be to get as many eyes as possible on your streams.
For the uninitiated, Twitch is a platform that enables anyone to stream themselves while playing video games. According to their own statistics, over 100 million people tune in to watch their favorite streamers each month. If you’re hoping to build an audience, you’ll want people to know whenever you’re streaming, and displaying your status is an excellent way to do so.
Adding your Twitch status to WordPress is a very simple tweak, but if you have a built-in audience, it can help you get more eyes on your stream. Once you’ve added your own button, people will be able to click on it and access it directly from your site.
What’s more, you can also embed your Twitch stream into your WordPress website. It’s a quick process that shouldn’t take you more than a few minutes, and we’ll walk you through it after we’re done talking about your Twitch status.
Introducing the Twitch Status Plugin
The Twitch Status plugin is remarkably simple. It enables you to add a simple Twitch status button to your WordPress navigation bar, which tells your visitors whether you’re live or offline.
If you want to spice things up, you can also display a widget that includes information about which game you’re playing, and it can even include a miniature version of your stream.
Keep in mind that while the plugin hasn’t been updated for a while, the functionality it offers is quite simple. We encountered no issues during our tests with Divi, and many users are happy with its performance.
Key Features:
- Displays your Twitch status on your WordPress website.
- Provides either a button or a widget to show your stream’s status.
- Lets you customize your widget using CSS
- Updates automatically every 30 seconds to display changes in your status.
Price: Free | More Information
How to Add Your Twitch Status to WordPress (In 3 Ways)
To kick things off, you’ll need to install and activate the Twitch Status plugin, then navigate to Settings > Twitch Status tab on your WordPress dashboard:
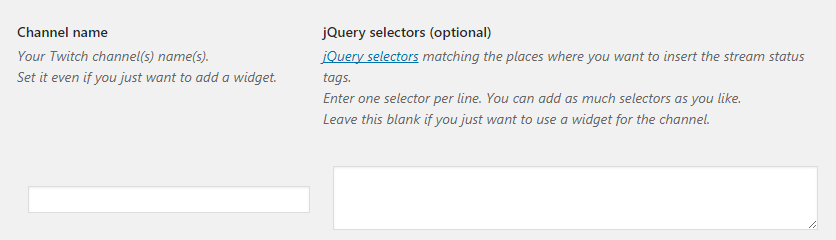
Here, you’ll enter your Twitch channel’s name into the appropriate field and save your changes. Then add the .twitch class to the jQuery selectors field – you’ll need it in a minute. Now, you’ll want to choose a suitable method for displaying your stream.
If you go to the Appearance > Widgets tab on your dashboard, you should find a new Twitch Status widget. As with all other WordPress widgets, you can drag and drop it to either your sidebar or your footer areas. We recommend your sidebar as the most logical option, as it’s more prominent. Drag the Twitch Status widget to your sidebar, and rearrange it as necessary.
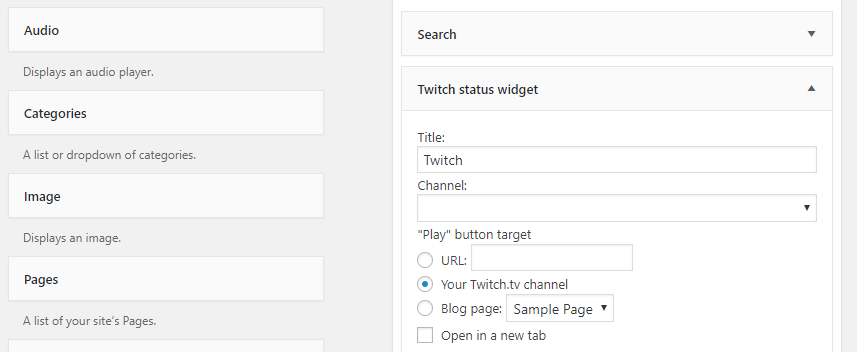
Once added, you’ll have to configure a few options. Firstly, set a title and indicate which channel you want your widget to display. For this to work, the channel must already be configured in the Settings > Twitch Status tab:
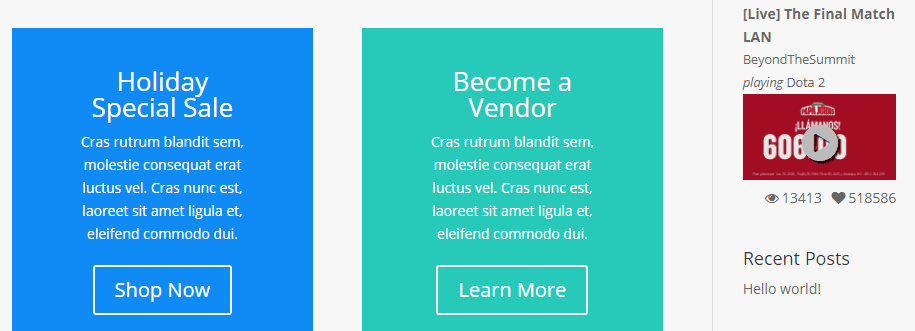
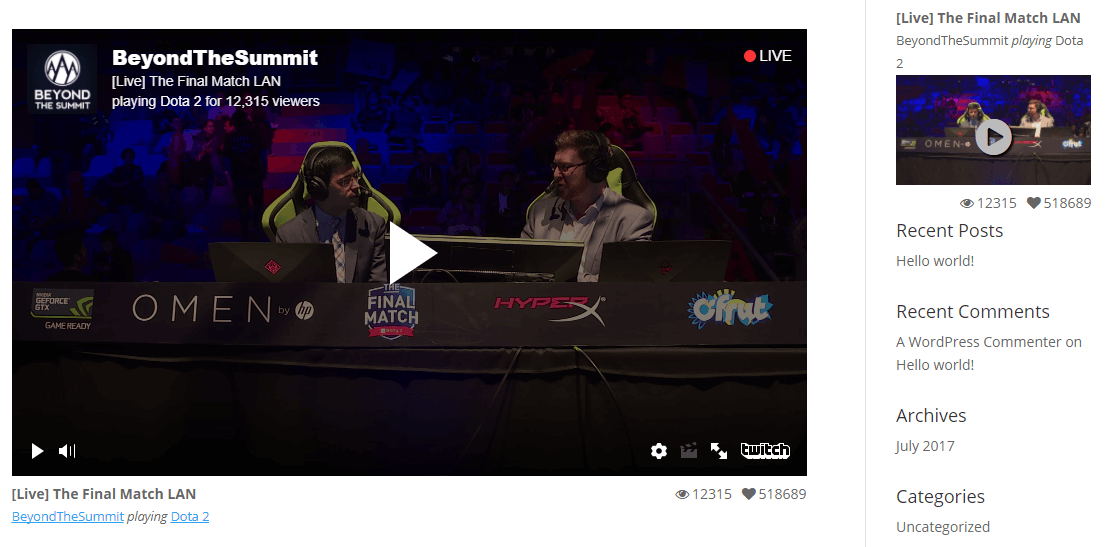
Secondly, indicate what should happen when someone clicks on your widget’s Play button. The safest choice is to redirect users to your Twitch channel, and we also recommend enabling the Open in a new tab option. That way, your visitors may be more likely to return to your website once they’re done watching. Now let’s save our changes and see how the widget looks from the front end:
If you want to add a little more flair to your widget, remember you can always customize the way your sidebar looks. However, there are other ways to display your Twitch status – using buttons, for example.
The Twitch Status plugin also enables you to add a simple button on your site using a shortcode. It’s a good idea to display this in your navigation menu, as it’s more likely to be clicked. Unfortunately, WordPress doesn’t enable you to do this by default, but we can still get the desired effect. To get started, go to the Appearance > Menu tab on your dashboard, look for your main menu, and find the Custom Links option:
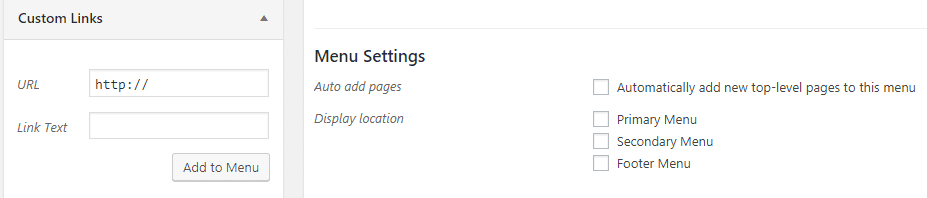
Now, add the address of your Twitch channel to the URL field, as well as the text that should appear next to the Live button. Click on Add to Menu when you’re done, and scroll to the top of the Menu page. Look for the Screen Options tab at the top and click on it – you want to make sure the CSS Classes option is enabled:

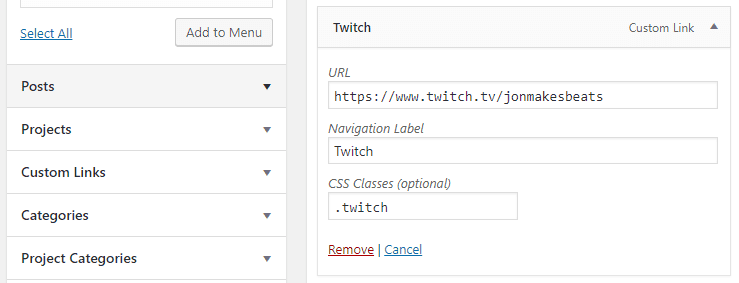
Scroll back down and look for your Twitch menu item, then expand its settings. You’ll find a new CSS Classes field right below the link’s URL and text. Go ahead and add the .twitch selector we added at the beginning of this section:
Save the changes to your menu, check out your front end to make sure the button is working:

Remember that you can style your menus to your liking using the WordPress customizer, so feel free to play around until you find a design that looks good with your new button.
If you’re a Divi user, you’re probably familiar with its secondary menu, which lets you create a smaller menu above your primary one. While they’re normally used to display contact information, they’re also a good fit for the Twitch status button.
To do this, you’ll need to create and assign a menu to the Secondary Menu display location, which you can do from the Appearance Menu tab:

Next, add a custom link to your menu and repeat the process from the previous section. When that’s done, save your changes and see how things look from the front end:

The Twitch status button itself will appear just as big regardless of which menu you decide to display it on. It’s a matter of personal preference, so feel free to go with either option depending on your taste.
How to Embed Your Twitch Stream Into WordPress
Before wrapping up, let’s talk about how to embed your live Twitch stream into WordPress. This is an optional step, but it’s a good move if you want users to spend more time on your site.
Fortunately, this step doesn’t require any additional setup. If you’ve already set up the Twitch status plugin, simply paste the [twitch-player channel=”yourchannelgoeshere”] shortcode into any page or post where you want your stream to appear, remembering to add your own channel name. Once you save your changes, check out if the player is displaying correctly on the front end:
There you go! Now you know about multiple options to display your Twitch status and how to embed your stream anywhere on your site!
Conclusion
Displaying your Twitch status on your WordPress website is a simple trick that can net you more viewers and subscribers. Plus, you can also embed your stream on your site if you want to give visitors more options for following you. The best part is, achieving both using WordPress is very simple.
Let’s recap the three different ways to add your Twitch status to WordPress:
- Add your status to your site’s sidebar.
- Include your status on your navigation menu.
- Add your status to Divi’s secondary menu.
Do you have any questions about how to use Twitch and WordPress together? Ask away in the comments section below!
Article thumbnail image by Rzt Moster / shutterstock.com.


Leave A Reply