
Pricing tables are often the main CTA of a page. That’s why it is important to style them properly. With Divi, you can take many turns and create pricing tables exactly the way you imagine them. To give you some food for thought, we’ve created a stunning pricing table that you can use for any kind of website you’re working on. We’ll guide you through creating the outcome from A to Z using Divi’s built-in options only.
Let’s get to it!
Preview
Before we dive into the tutorial, let’s take a quick look at the outcome on different screen sizes.
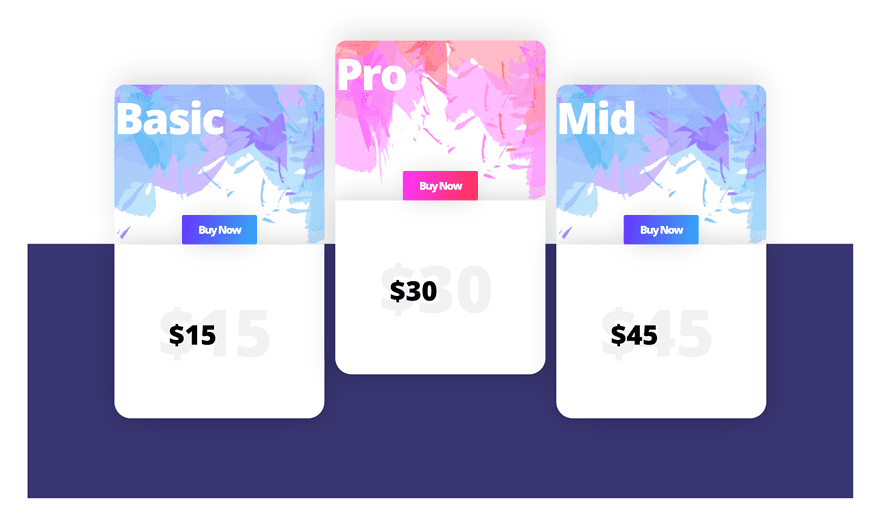
Desktop
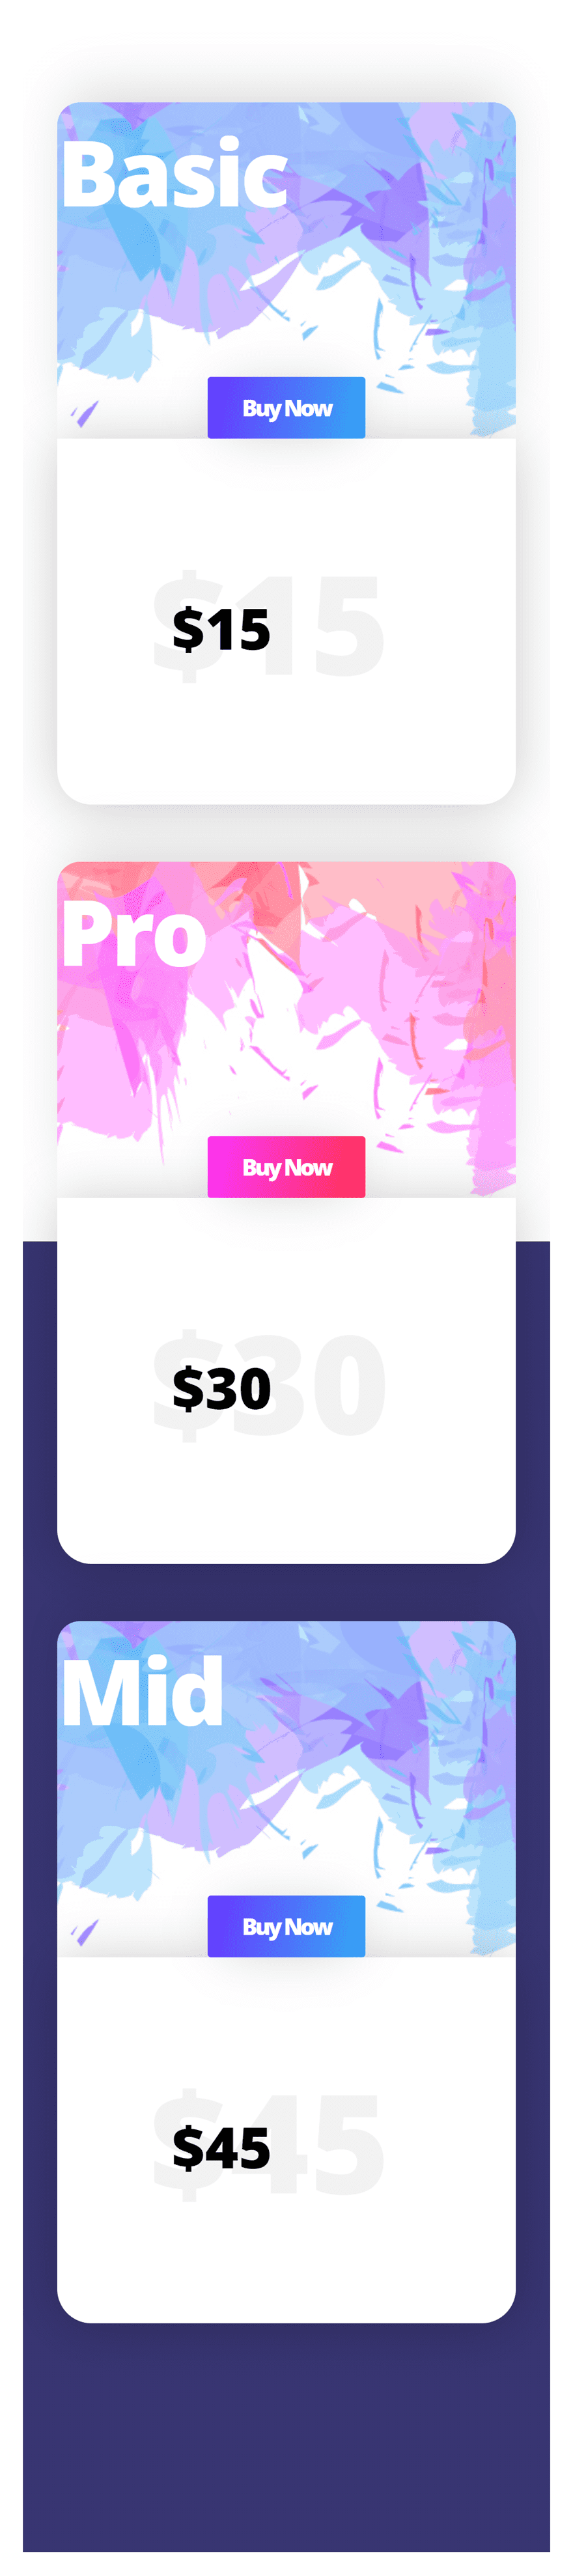
Mobile
Download The Images for FREE
To lay your hands on the images that are used within this tutorial, you will first need to download it using the button below. To gain access to the download you will need to subscribe to our newsletter by using the form below. As a new subscriber, you will receive even more Divi goodness and a free Divi Layout pack every Monday! If you’re already on the list, simply enter your email address below and click download. You will not be “resubscribed” or receive extra emails.

How to Style a Beautiful Pricing Table in Divi
Subscribe To Our Youtube Channel
Let’s Start Creating!
Add New Section
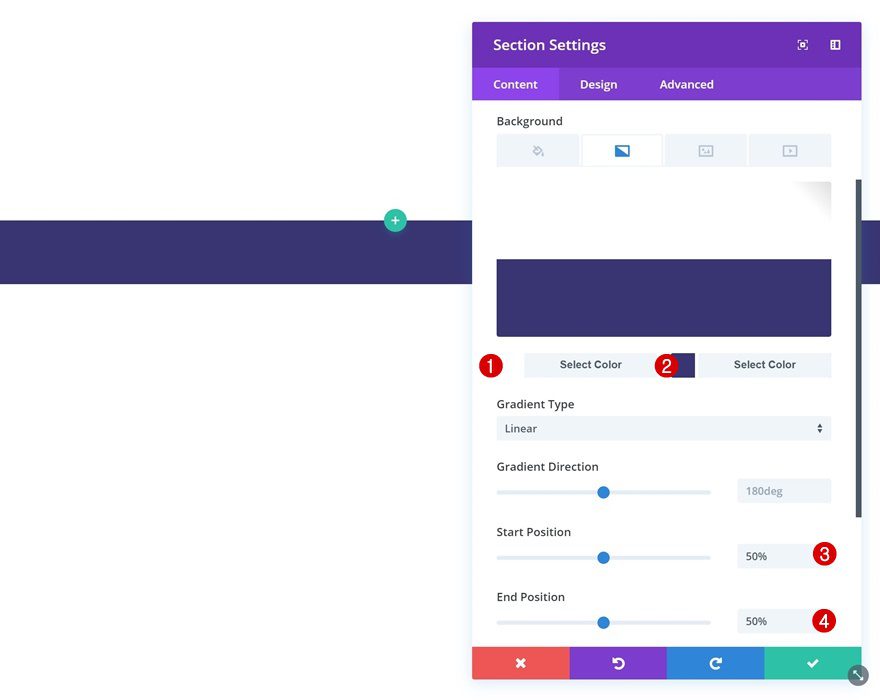
Gradient Background
Create a new page and add a regular section using the following gradient background:
- Color 1: #ffffff
- Color 2: #353272
- Start Position: 50%
- End Position: 50%
Spacing
Then, go to the spacing settings of the section and modify the custom margin and padding values.
- Bottom Margin: 50px (Desktop), 20px (Tablet & Phone)
- Left Margin: 50px (Desktop), 20px (Tablet & Phone)
- Right Margin: 50px (Desktop), 20px (Tablet & Phone)
- Top Padding: 0px
- Bottom Padding: 0px

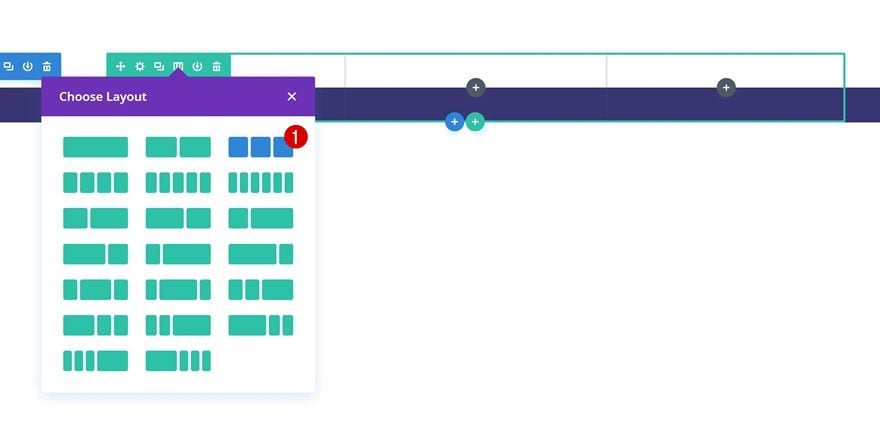
Add New Row
Column Structure
Once you’re done modifying the section settings you can go ahead and add a new row using the following column structure:
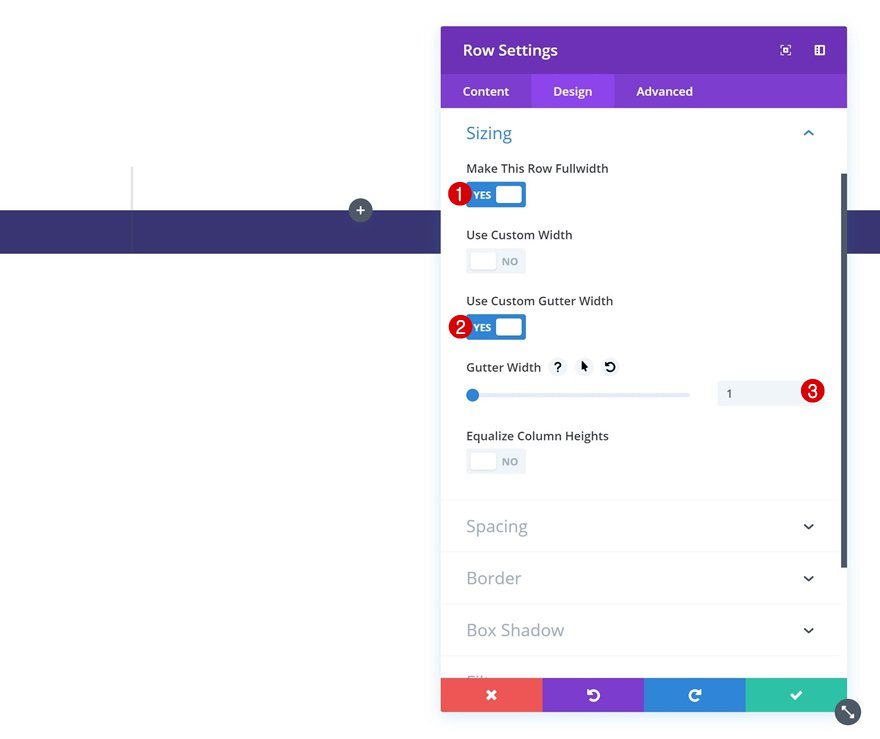
Sizing
Without adding any modules yet, open the row settings and modify the sizing settings in the design tab.
- Make This Row Fullwidth: Yes
- Use Custom Gutter Width: Yes
- Gutter Width: 1
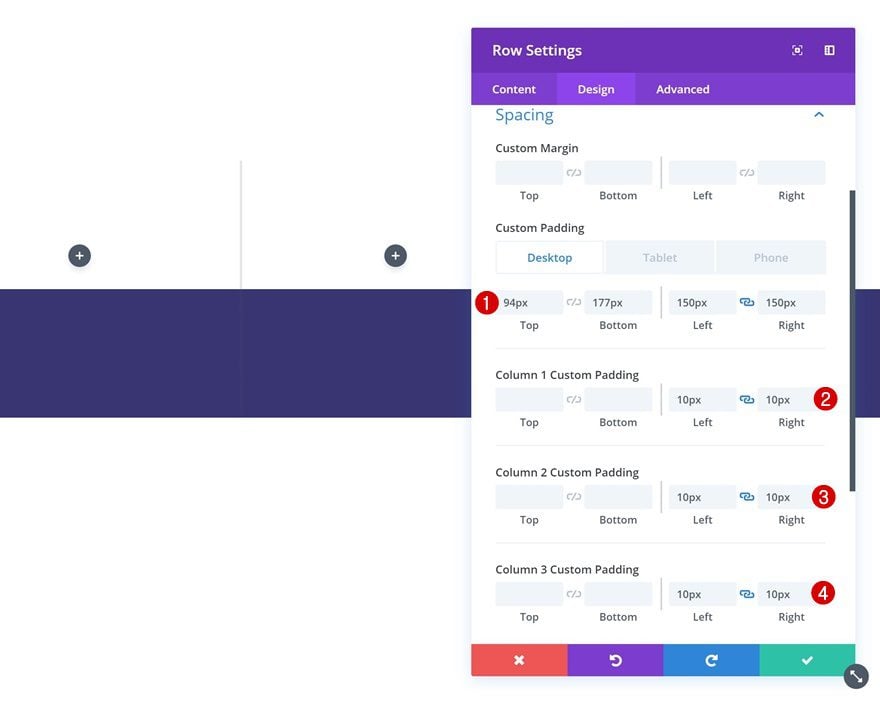
Spacing
Then, go to the spacing settings and add some custom padding values.
- Top Padding: 94px
- Bottom Padding: 177px
- Left Padding: 150px (Desktop), 30px (Tablet & Phone)
- Right Padding: 150px (Desktop), 30px (Tablet & Phone)
- Column 1, 2 & 3 Left Padding: 10px
- Column 1, 2 & 3 Right Padding: 10px
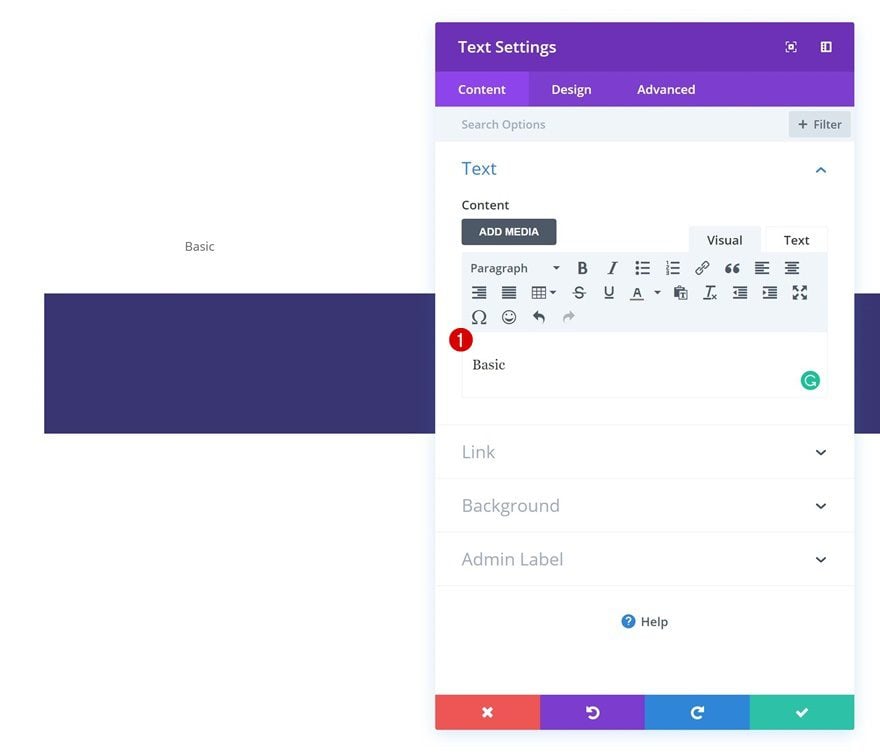
Add Text Module #1 to Column 1
Add Content
Time to start adding modules! We’re customizing the pricing table we want to create by using various modules. The first module we’ll need is a Text Module. Add the name of the first membership type in the content box.
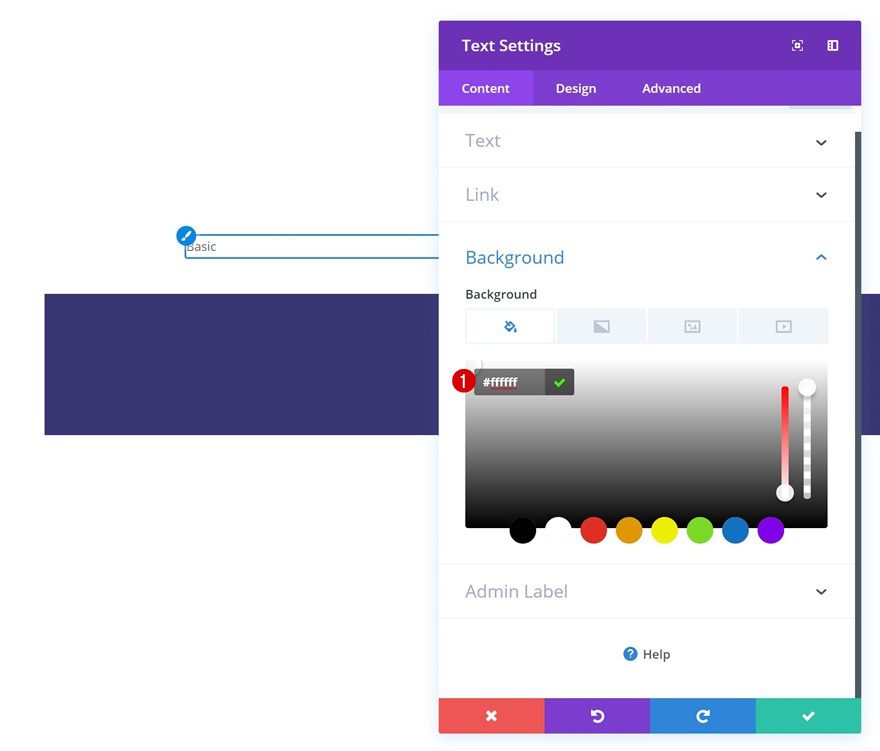
Background Color
Once you’ve added the content, go to the background settings and add a white background color.
- Background Color: #ffffff
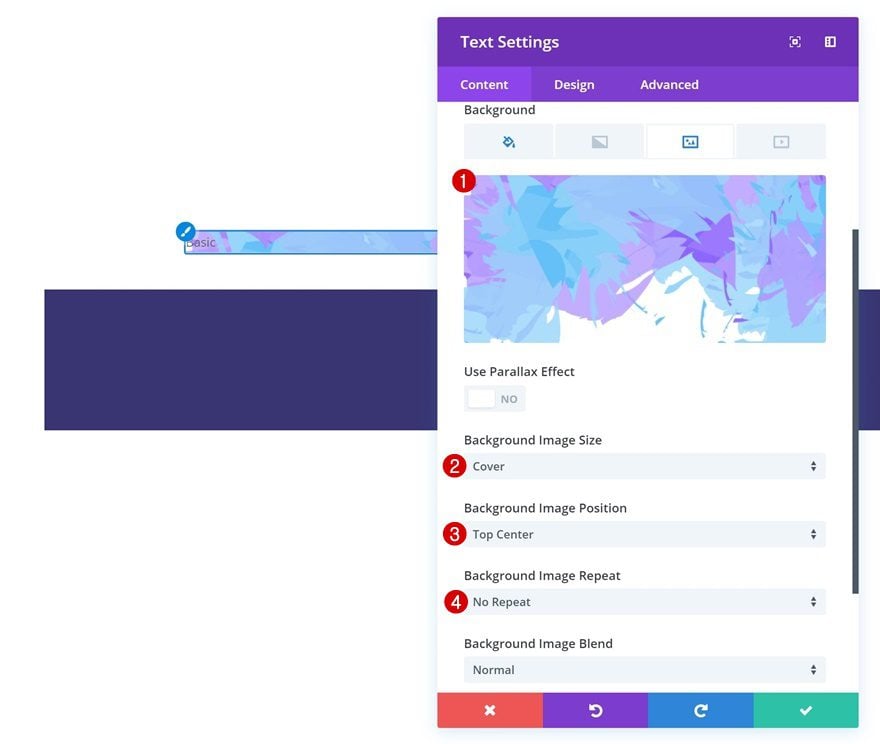
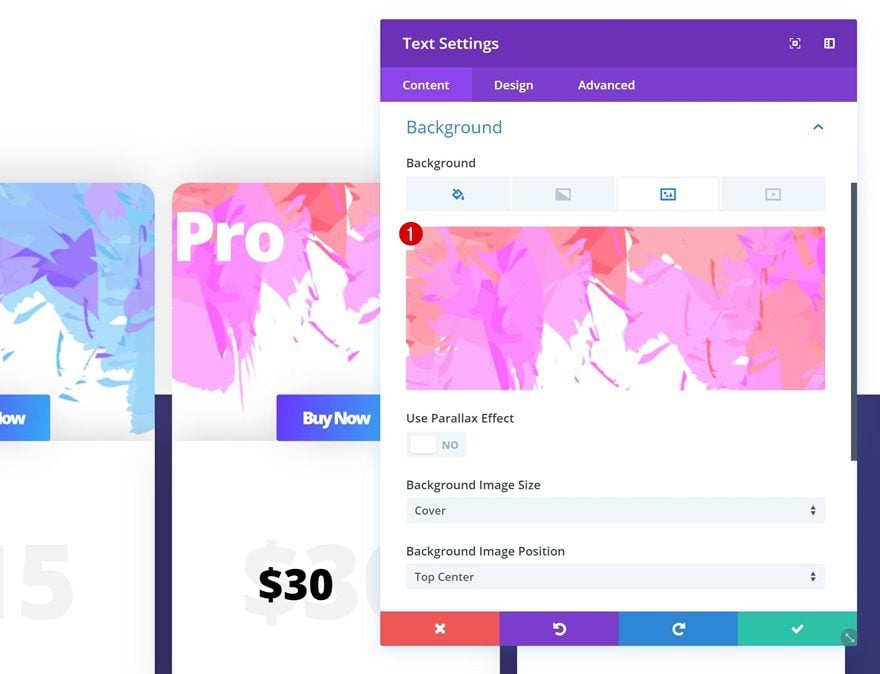
Background Image
Switch over to the background image tab and upload the ‘divi-beautiful-pricing-table-background-pattern-1.png‘ file which you can find in the download folder that was shared at the beginning of this post.
- Background Image Size: Cover
- Background Image Position: Top Center
- Background Image Repeat: No Repeat
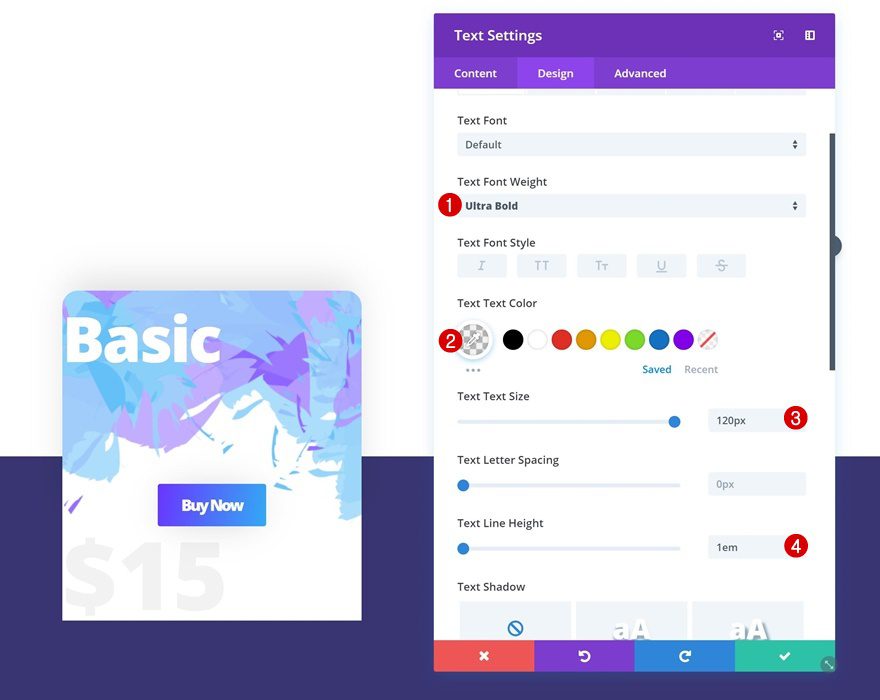
Text Settings
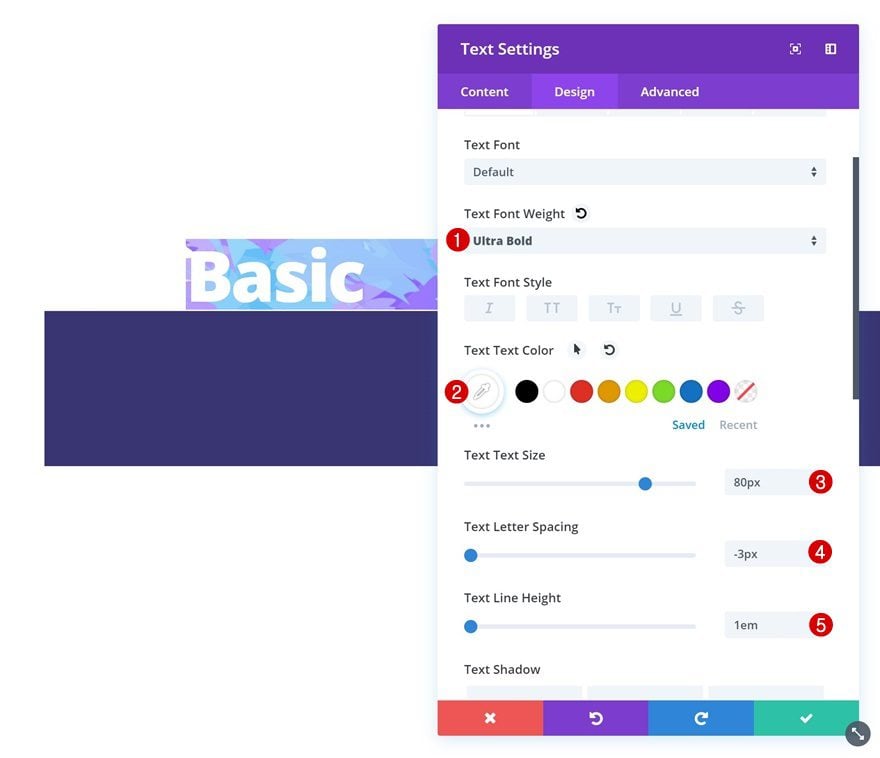
Modify the text settings next.
- Text Font Weight: Ultra Bold
- Text Color: #ffffff
- Text Size: 80px
- Text Letter Spacing: -3px
- Text Line Height: 1em
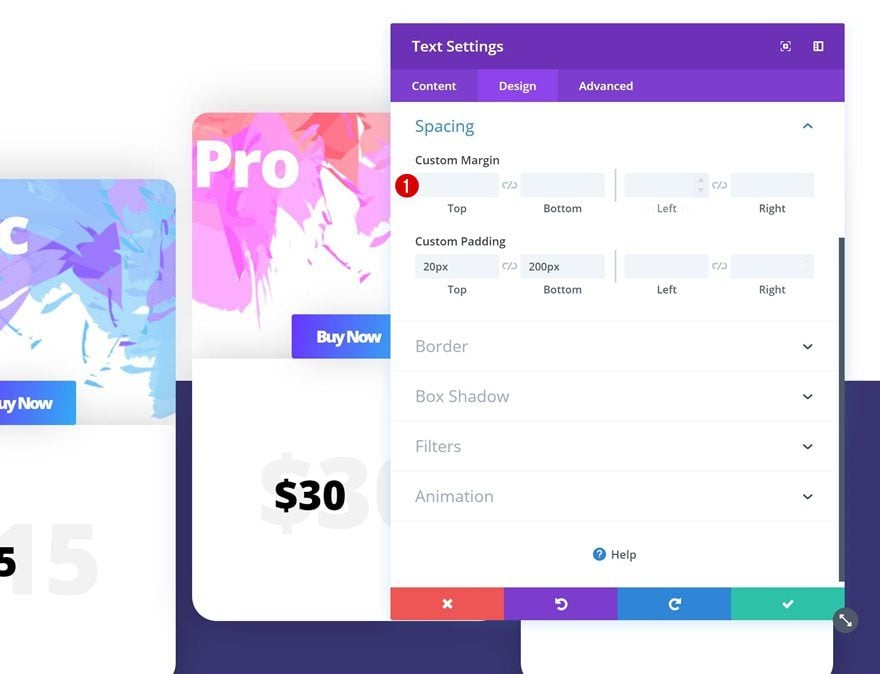
Spacing
And add some custom margin and padding values.
- Top Margin: 5vw (Desktop), 0vw (Tablet & Phone)
- Top Padding: 20px
- Bottom Padding: 200px

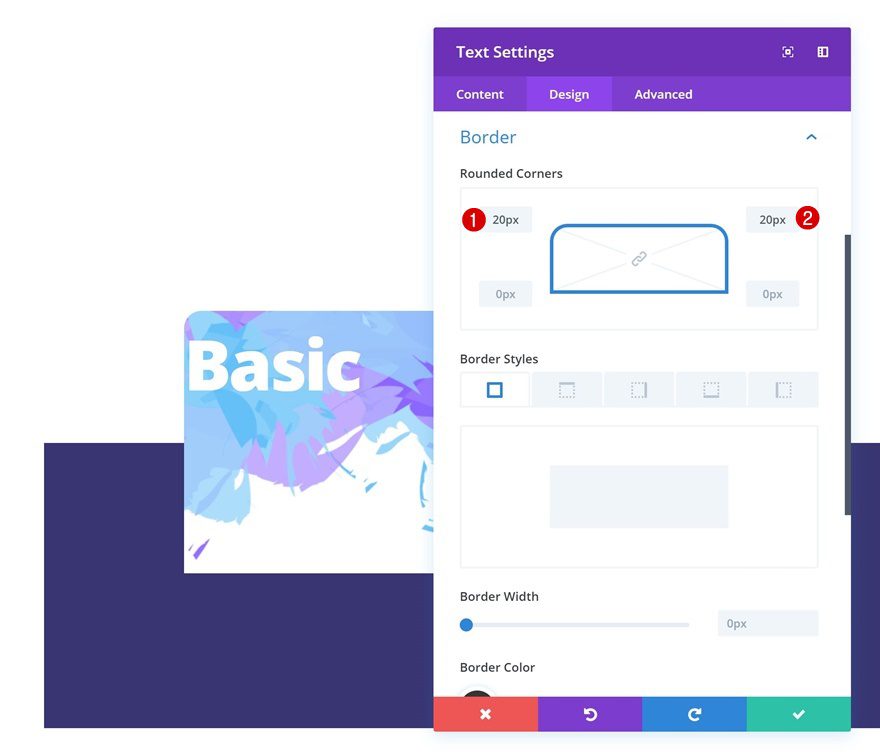
Border
Continue by adding ’20px’ to the top left and right corners.
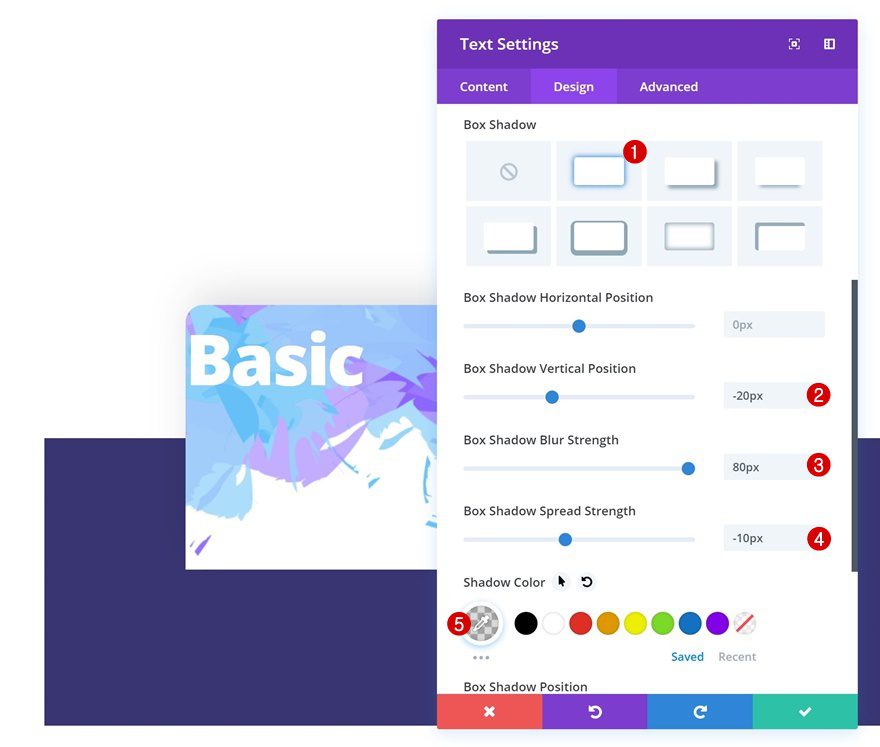
Box Shadow
To top it off, give the Text Module a subtle box shadow.
- Box Shadow Vertical Position: -20px
- Box Shadow Blur Strength: 80px
- Box Shadow Spread Strength: -10px
- Shadow Color: rgba(0,0,0,0.15)
Add Copy
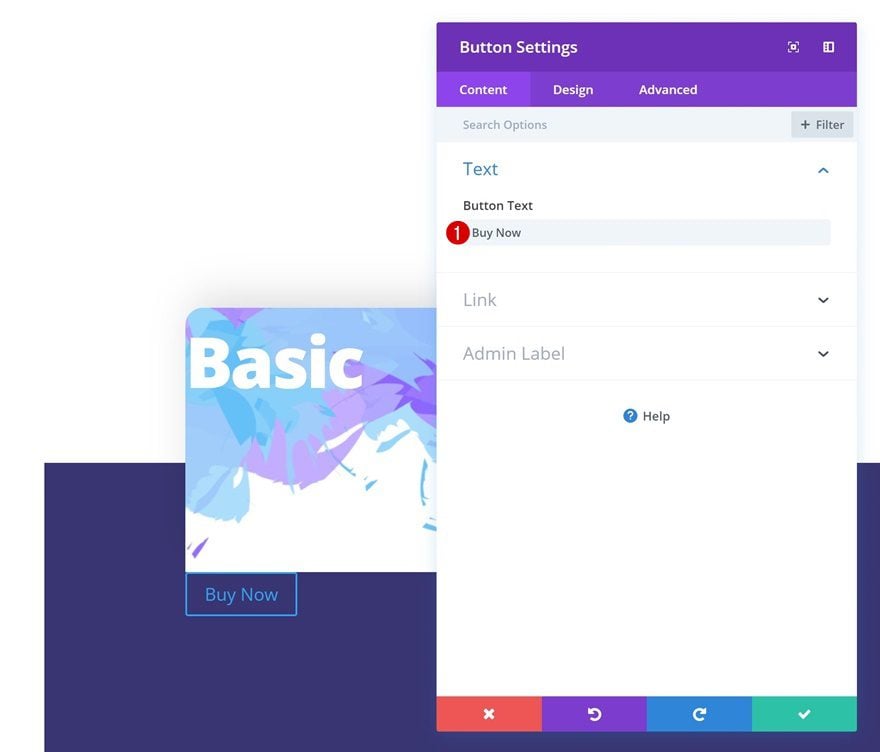
The second module we’ll need in column 1 is a Button Module. Add some copy of choice.
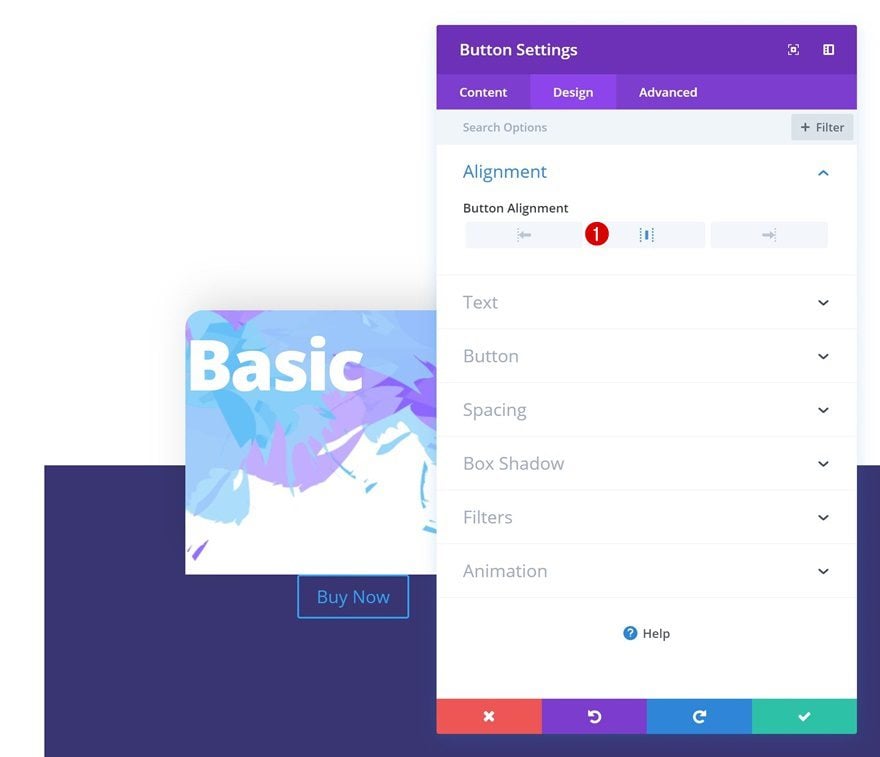
Button Alignment
Then, go to the alignment settings and change the alignment to center.
- Button Alignment: Center
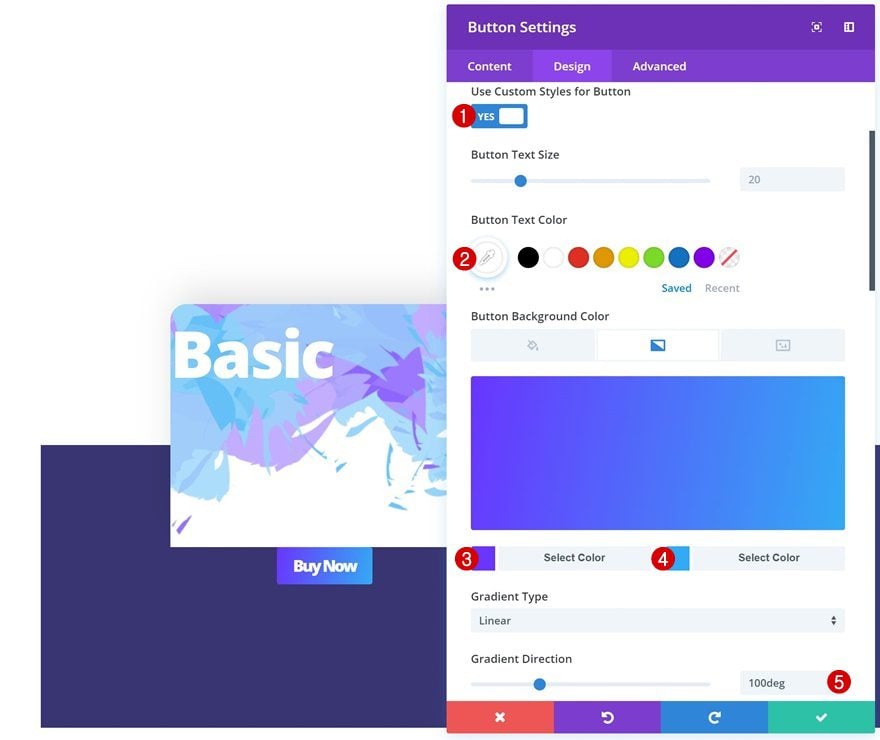
Button Settings
We’ll continue by making some changes to the appearance of the button in the button settings.
- Use Custom Styles for Button: Yes
- Button Text Color: #ffffff
- Color 1: #6932ff
- Color 2: #30acf4
- Gradient Direction: 100deg
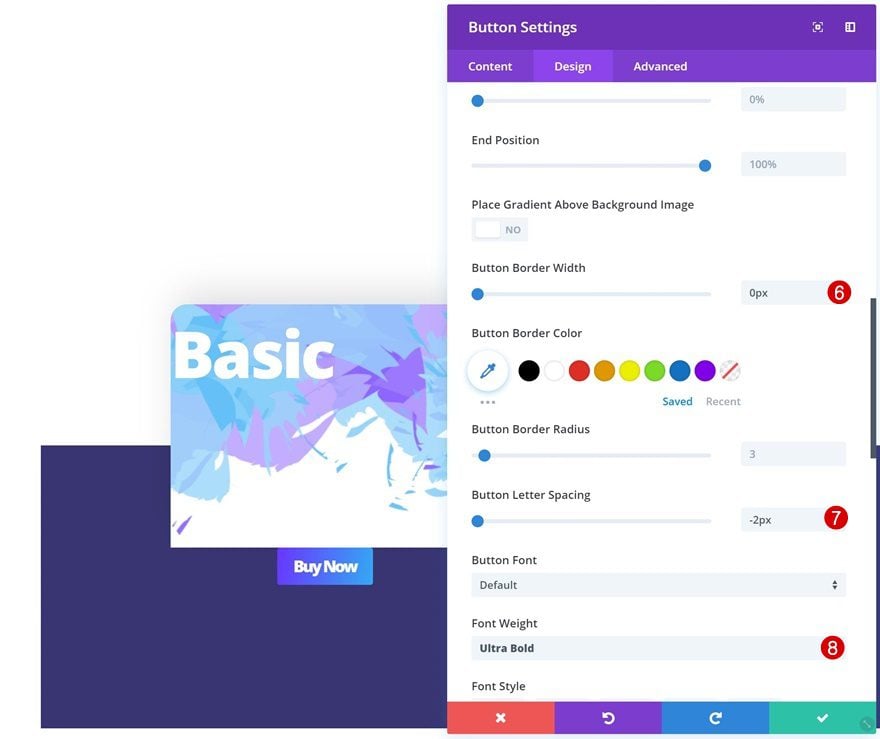
- Button Border Width: 0px
- Button Letter Spacing: -2px
- Font Weight: Ultra Bold
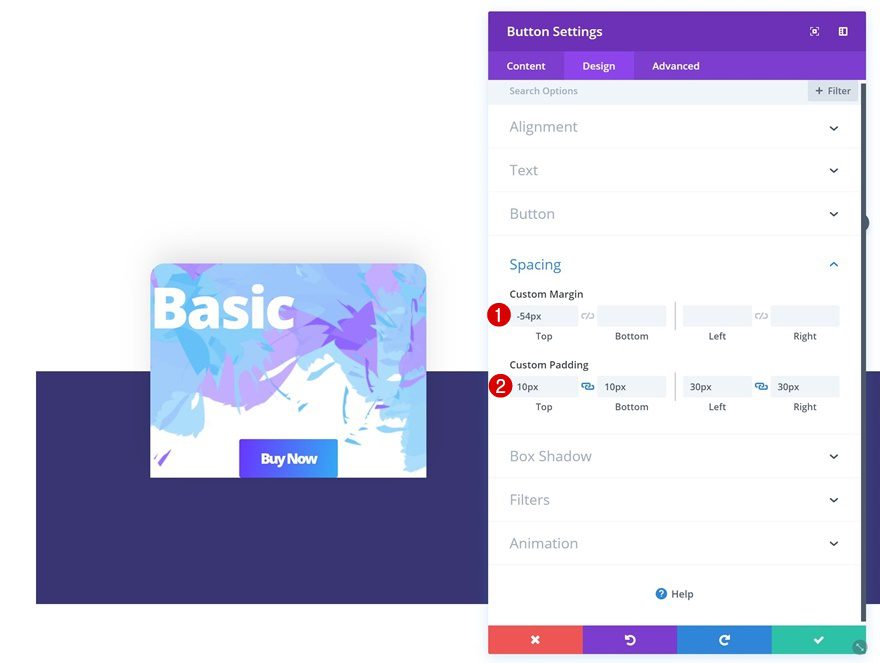
Spacing
Next, add some padding to the button to make it look nice and apply negative top margin to create an overlap with the previous module in the column.
- Top Margin: -54px
- Top Padding: 10px
- Bottom Padding: 10px
- Left Padding: 30px
- Right Padding: 30px
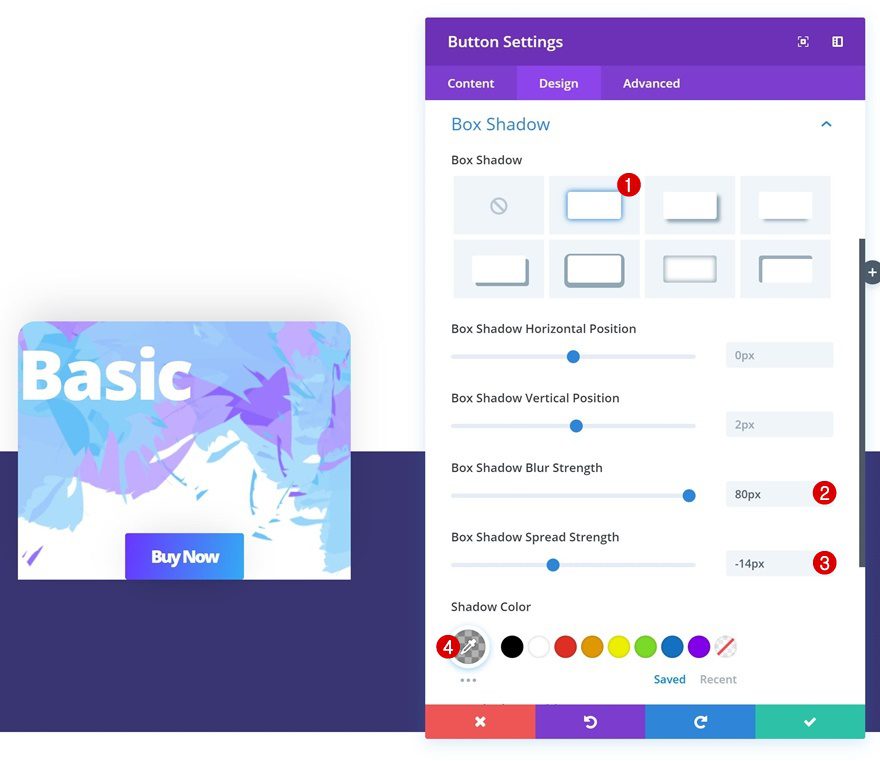
Box Shadow
Last but not least, add a subtle box shadow.
- Box Shadow Blur Strength: 80px
- Box Shadow Spread Strength: -14px
- Shadow Color: rgba(0,0,0,0.3)
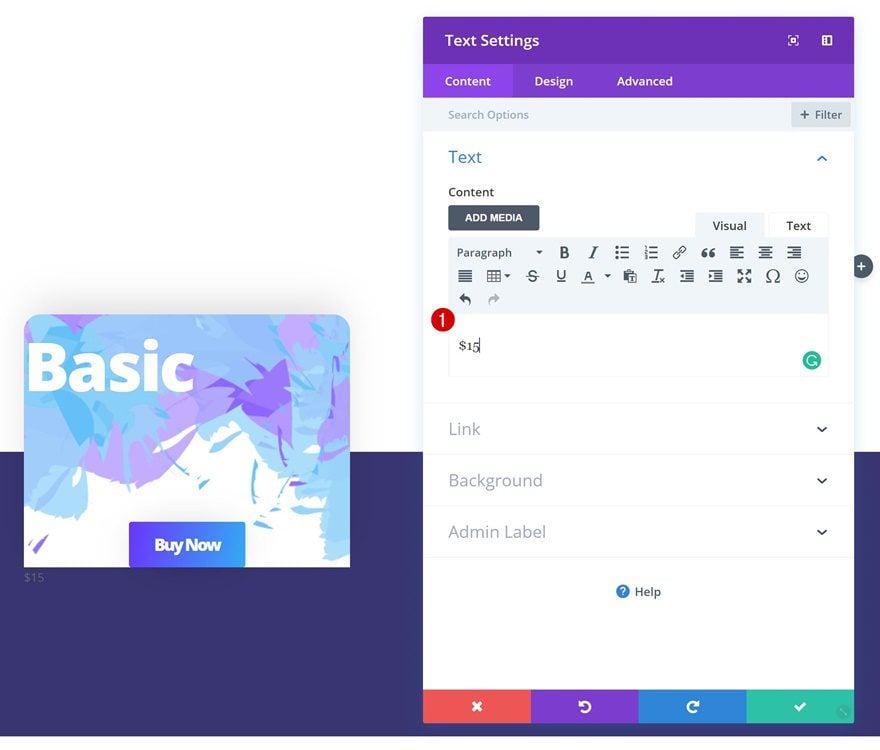
Add Text Module #2 to Column 1
Add Content
The next module we’ll need is another Text Module with the price of the membership type.
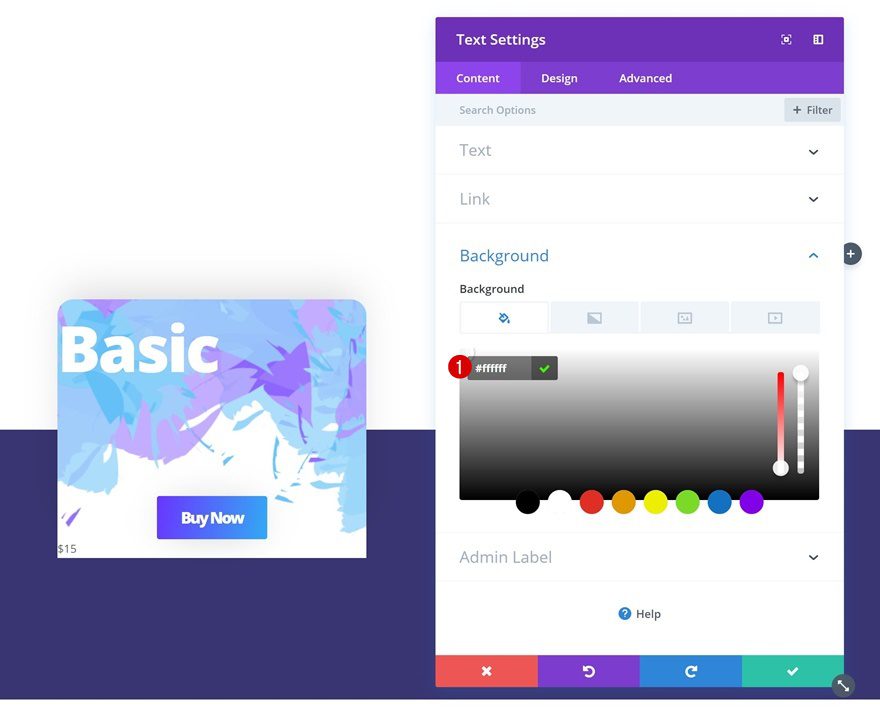
Background Color
Once you’ve added the price, go to the background settings and apply a white background color.
- Background Color: #ffffff
Text Settings
Change the text settings next.
- Text Font Weight: Ultra Bold
- Text Color: rgba(0,0,0,0.05)
- Text Size: 120px
- Text Line Height: 1em
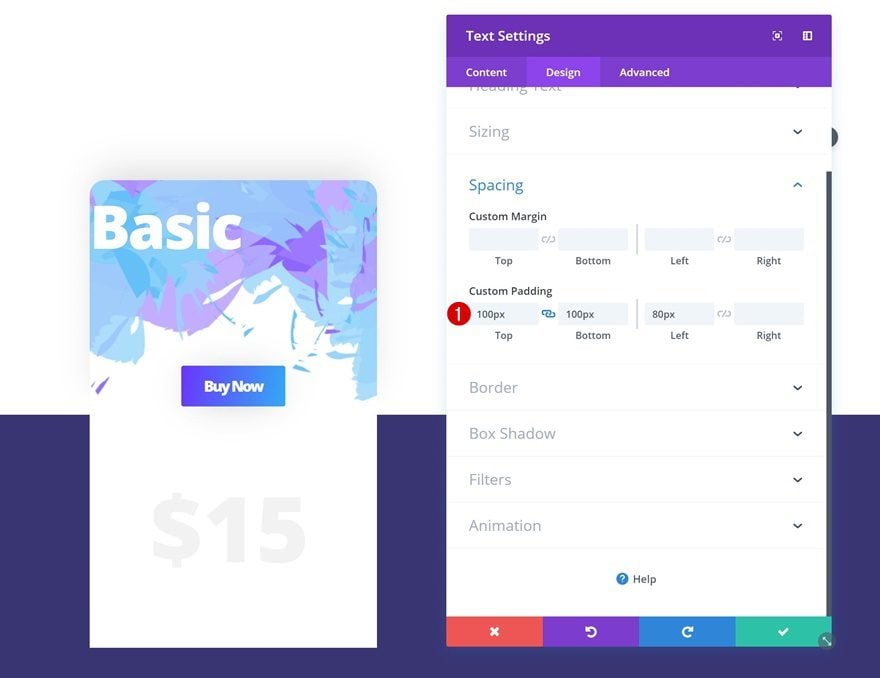
Spacing
And apply some custom padding values in the spacing settings.
- Top Padding: 100px
- Bottom Padding: 100px
- Left Padding: 80px
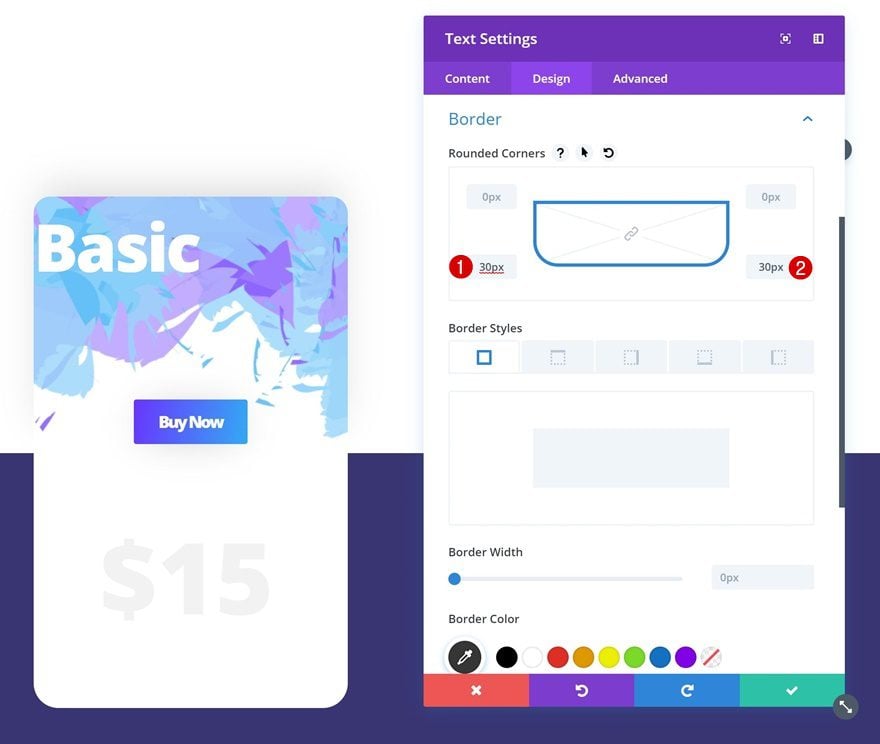
Border
Then, go to the border settings and add ’30px’ to the bottom left and right corners.
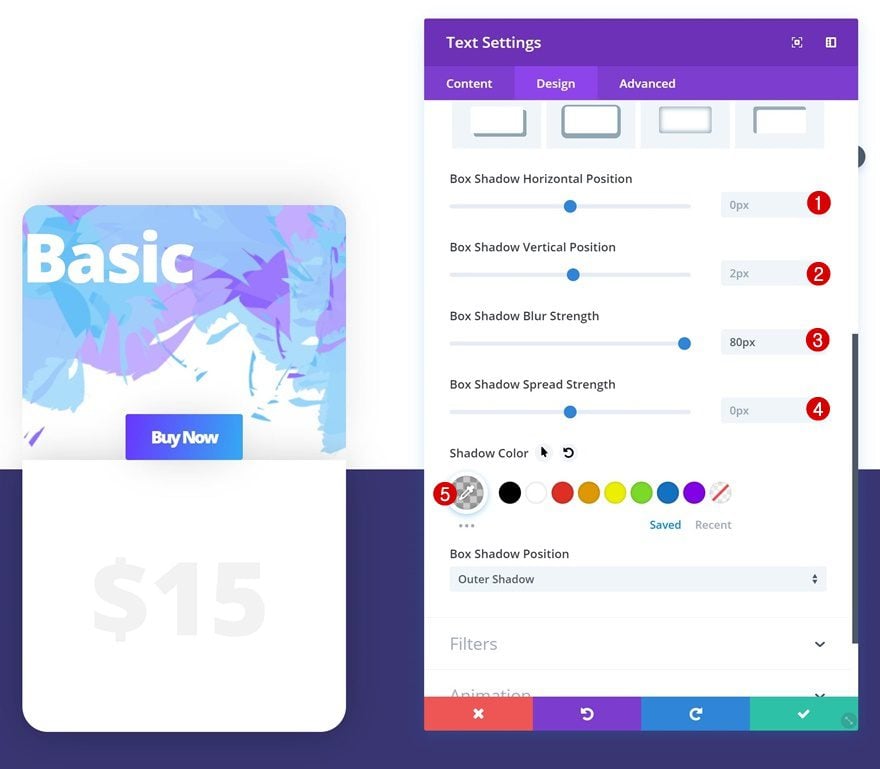
Box Shadow
Last but not least, give the module a box shadow.
- Box Shadow Horizontal Position: 0px
- Box Shadow Vertical Position: 2px
- Box Shadow Blur Strength: 80px
- Box Shadow Spread Strength: 0px
- Shadow Color: rgba(0,0,0,0.21)
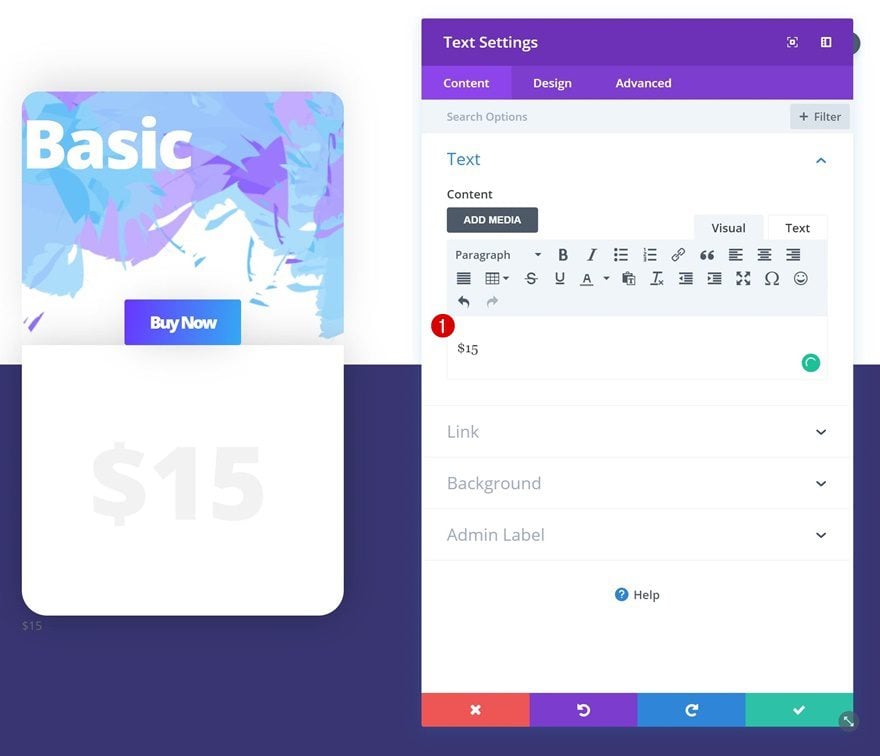
Add Text Module #3 to Column 1
Add Content
The next and last module we need in column 1 is another Text Module. Add the price of the membership type to the content box.
Text Settings
Change the text settings next.
- Text Font Weight: Ultra Bold
- Text Color: #000000
- Text Size: 50px
- Text Line Height: 1em

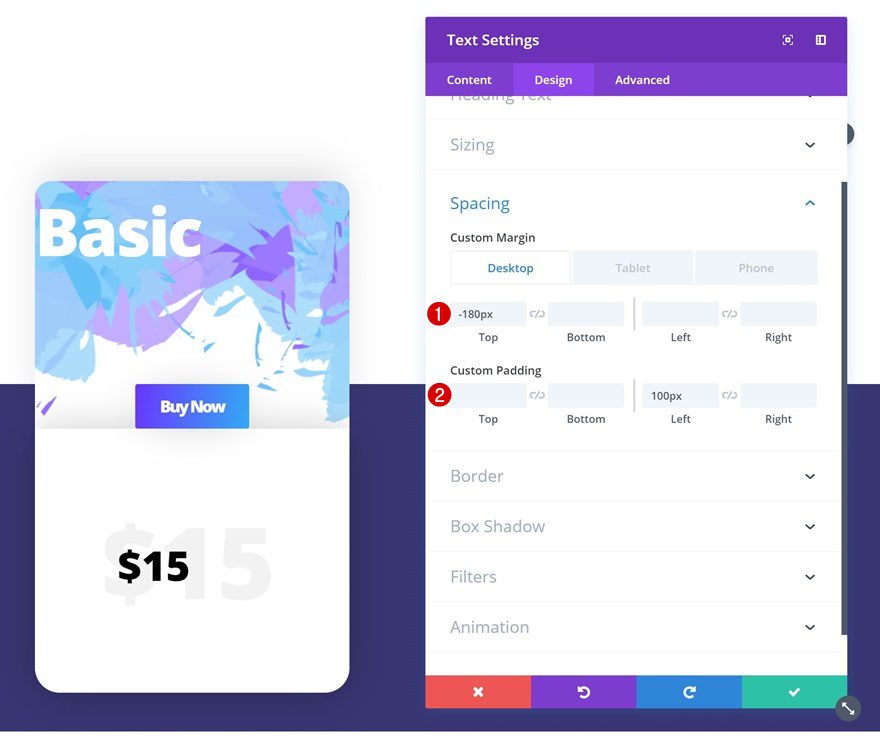
Spacing
And create an overlap between this module and the previous one by playing around with the custom spacing values.
- Top Margin: -180px
- Bottom Margin: 180px (Tablet & Phone)
- Left Padding: 100px
Clone All Modules in Column 1 Twice & Place Duplicates in Remaining Columns
Once you’re finished modifying the modules in column 1, you can go ahead and clone each one of the modules twice and place the duplicates in the two remaining columns.
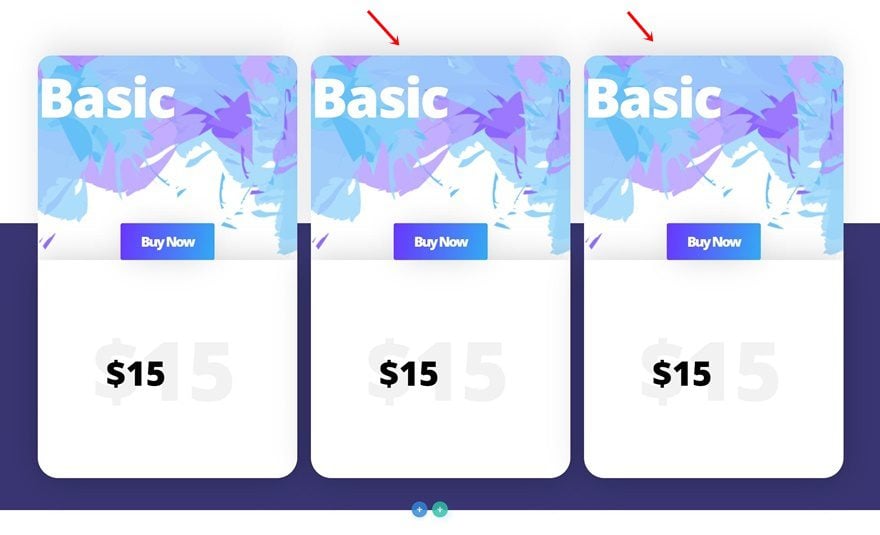
Change Content of Modules in Column
Change the content of the duplicates according to the two other membership types you’re sharing on your website.
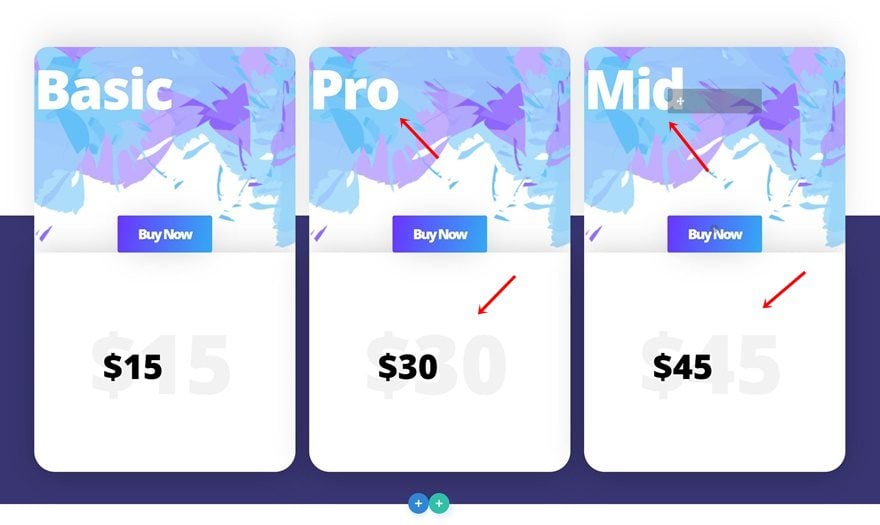
Change Pricing Table in Column 2
Change Background Image of Text Module #1
We’re also highlighting the middle pricing table. Open the first Text Module in column 2 and change the background image into the ‘divi-beautiful-pricing-table-background-pattern-2.png‘ file you can find in the download folder.
Remove Top Margin of Text Module #1
To emphasize this membership type, we’re going to remove the top margin of the first Text Module in the spacing settings.
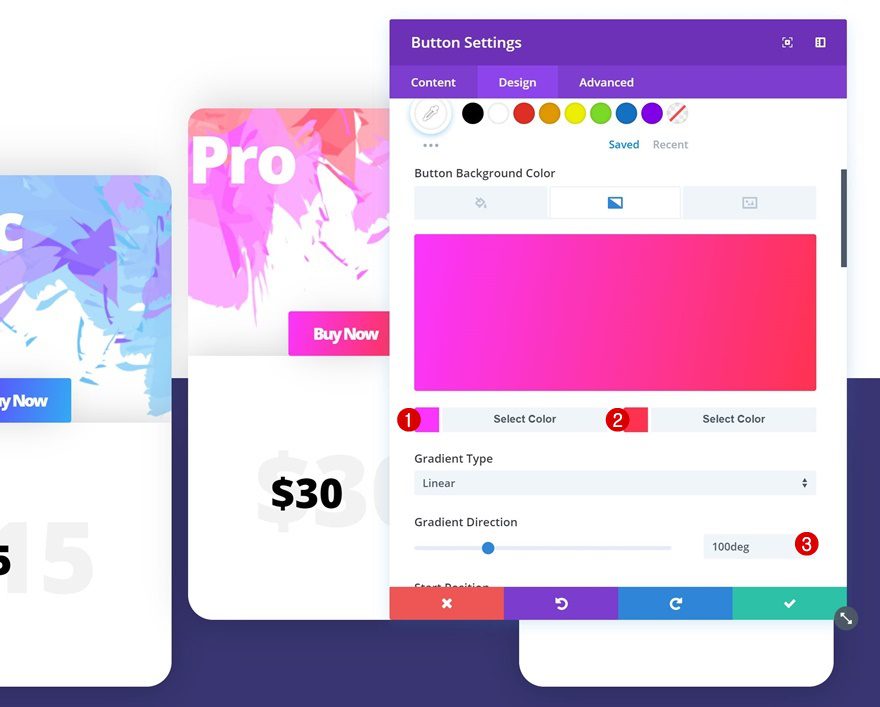
Change Button Gradient Background
We’ll also match the new background image using another gradient background for the Button Module.
- Color 1: #fb32ff
- Color 2: #ff304f
- Gradient Direction: 100deg
Preview
Now that we’ve gone through all steps, let’s take a final look at the outcome on different screen sizes.
Desktop
Mobile
Final Thoughts
In this post, we’ve shown you how to style a beautiful pricing table for your next Divi project. We’ve guided you step by step through the tutorial and achieved a stunning outcome using Divi’s built-in options only! If you have any questions or suggestions, make sure you leave a comment in the comment section below.


Aloha guys,
Your tutorials are always great, but it makesit so complicated forus to redo everything you did.
Why can’t you simply put the layout in the Divi Library? (Btw why isn’t there a searchable library section only for modules? It’s very hard to browse all the Library Layouts when only looking for a particular module)
PS: And that’s the same for layouts you email on Monday, I don’t have the time to always download and re-upload on my Divi Projects. Simply putting them in the Divi Library would be way more convenient.
Thx for your amazing work!
Oh wow, those are nice! I hope that still works with the latest Divi version. Will definitely give that a try. Thanks for sharing!
Hello,
Thanks for the article! I’m just wondering how I can have 5 columns? I have made 5 but the 5th one is on the line below. Is there a way to make it appear all in one row.
Hi Stefanie. The column limit for this module is four. Take a look at some of the alternative options in this article: https://www.elegantthemes.com/blog/resources/best-wordpress-pricing-table-plugins. WRC Pricing Tables in particular should work for what you’re trying to do. 🙂
If I will like to go with Two price table Will it be simple or have to read above article
How have people addressed the issue of getting a pricing table to work for mobile. They are two wide and don’t scale.
Hi Glenn! I’m afraid I can’t answer that without seeing your exact setup. Feel free to contact us directly for further information: https://www.elegantthemes.com/contact/.
Can I customise this for a TIMETABLE?
I have started trying on my website…
Hi Michael. The Pricing Table module is probably not the best solution for creating a timetable. You may want to look at our previous post on creating HTML tables instead (https://www.elegantthemes.com/blog/tips-tricks/creating-advanced-html-tables-in-wordpress-using-plugins). 🙂
Hi – great tutorial and very helpful. Thanks heaps for posting !
At the risk of asking silly questions – regarding the “button url” in the pricing table General settings….
How does it link to, say, a paypal checkout page ? Is it simply a case of putting in a big ugly paypal link into this field ?
I’m not sure I understand why, in the example screenshot above, would a “sign up” button redirect to a nice neat page url ? In this example, would there be a paypal button there on that page ?
Or, perhaps it links to a specific Product page (eg Woocommerce), at which point the user can add to cart and check out via the site shopping cart ? (But this involves another set of clicks by the user.)
Creating the button itself makes sense as per the excellent tutorial above – but I’m sorry, I’m confused with what to actually do with that button – and I presume that the “button url” field is the place to start…..
Thanks,
Matthew
(Melbourne, Australia)
Thanks for your question, Matthew! Our suggestion is to take a few steps back and test out each link you’d want to use. For example, enter a checkout page URL into the field and see what happens. That way, you’ll get the answer to your question and figure out what each element does. 🙂
In short, though, you’re right – it starts with the Button URL, and adding the complete URL of the page you want to link to should get the user where you want them to go. Hope this helps. 🙂
Thanks John 🙂
Thanks Matthew and John (great article).
I have exactly the same question as Matthew, and it is taking me days and headaches to solve this crucial problem.
I have checked that clicking on the button, after inserting the checkout page URL, the user is sent to the check out page but there is a message that says “Checkout is not available whilst your cart is empty”. So I guess the first instruction for the button needs to be “add to cart” and then somehow redirect to the checkout page.
I suppose I need to learn more about Woocommerce, which I downloaded yesterday. It does not seen too complex, as long as one wants to sell through a dedicated shop page, but that is not my case; my webpage has price tables in a few pages.
Please, any help that you can provide will be greatly appreciated. A new article about the topic will be a matter of celebration 😉
Ps: Matthew, I lived in Melbourne 3 years, what a great place (now in Europe, I really miss that city)
Hi, thanks for your tutorial…
I’m using DIVI 3. I do not have Use Border button so for me it is impossible to change borders. What theme are you on?
You’re welcome, Joe. 🙂 As for your question, trying getting in touch with us via the contact form (https://www.elegantthemes.com/contact/) or our forums (https://www.elegantthemes.com/forum/) for more information.
Is there a way to remove the bottom row of the pricing table module? My prices are based on user age, not escalating services, so the additional row is extraneous.
Hi Shane. I’m not sure if there’s a way to remove the entire row, but try posting in our forums (https://www.elegantthemes.com/forum/) to see if another user may know how to do it!
Thanks for recommending typ.io. Looks like a great tool (I always struggle with picking good fonts).
No problem, Amadeusz!
Hello John,
I am preparing one company’s site and pricing table is the headache for me because I was using Thrive Content builder plugin till now. But after going through this guide everything seems easier than I thought.
Thanks a lot.
Thanks for the kind words, Debadeep! Glad to see you’re getting the hang of things. 😉
Hi, thank you for a wonderful pricing table features in Divi.
There is one thing Ive been trying to do, but to no avail as probably due to lack of knowledge.
How do we change the color of the featured table as in the default? As far as I try there is no option on that.
Go to the general edit-screen where you see the tables you’ve created and click on the tab ‘advanced design setting’.. scroll to the bottom and you see al kinds of styling option for the featured table. If you want to go back to the default you will see the rounded arrow next to each option.
Hope this was what you were looking for!
This is great and I have created a table but I cannot find the “advanced design setting” option. How do I find this? Thanks so much for your help. I only have “Price Tables Setting”
Hello Dekan,
I’m not sure I completely understand what you mean. Could you rephrase your question please?
Great tutorial. I should be able to walk right through what it takes to create custom pricing tables.
Custom plugins charge nice fees for less performance in a variety of cases that I have examined in the past. Creating custom pricing tables using a variety of drawing tools is a pain in the rear. This is a very nice built-in option.
Thank you for your insight and kind words, Thomas. I’m glad the piece served you well. 🙂
Did you make the 1st example as well.. it’s the best I’ve seen so far! Would be awesome to know a bit of that styling 🙂
If you mean the very first image in the piece, that’s not an example we’ve created – sorry. 🙂
Yes, that’s the one.. too bad! But it’s from a Divi website?
ps. If anyone ever reads this and creating something like this, please let me know 😉
Kelly – Prebuild Table #3 here in their free templates is relatively close and could be edited a bit more to fit what you want: https://www.elegantthemes.com/blog/divi-resources/free-divi-downloads-creative-pricing-tables-layout-kit-1
If so – this must be heavily hacked module as DIVI require same number of points to keep elements same height.
There is more design errors to this module as well.. For example using currency that does’t have single mark and uses couple letters (for example Polish Zloty – PLN) cause letters clash with price digits.
I really like DIVI editor but modules… flaws, flaws, flaws….
cannot agree more on this. i want the same.. 😀
Thanks for this pricing table walkthrough. Definitely helpful as we are building our pricing page.
One thing I haven’t been able to figure out is how to toggle between monthly and annual pricing. Is there a way to do it on Divi?
Not as quick/slick as a toggle-between, but you could just create a duplicate page with a “toggle” text link. Both pages would be designed identically, but one would have the monthly pricing and the other would have annual pricing?
Thanks for the kind words Heather! Off the top of my head, I don’t believe there’s a way to toggle pricing. However, you could always post in our forums (https://www.elegantthemes.com/forum/) – another user may have found the answer!
you could place the pricing table inside a slider?
That would be awesome if we could toggle between monthly and annual!
I was hoping for the same thing. I don’t think it’s possible. And if you try to add that info into the pricing table, it clutters the pricing and ruins the formatting.
I was thinking about looking at alternative pricing table plugins because the divi one is a bit to restrictive.