
A quote form (a.k.a. request-a-quote form) is a great solution for small businesses looking to grab qualified leads without the hassle of answering phones. A good quote form can sort out the bad eggs who aren’t ready for your service by asking the right qualifying questions. It can also help pinpoint a client’s needs so that you can prepare an effective response/offer and close the sale once you do get them on the phone.
There are a number of great WordPress form plugins out there that are dedicated to form processing. But if you are looking for a simple and effective solution for your Divi site, Divi’s updated Contact Form Module is just what you need.
Today, I’m going to walk you through the process of building a simple yet powerful quote form using conditional logic to better qualify leads. I will also be adding a few advanced design features using custom CSS that will make the form even cleaner and more readable.

Let’s get started.
Implementing the Design with Divi
Building the Fullscreen Header Section
The quote form can be added to any page but for this example, I’m going to use a dedicated page just for the quote form.
To welcome the visitor I’m using a fullscreen header that forces the user to click the button or scroll to see the form. This is a cool feature that creates a more personal experience and warms the user up to the idea of scrolling and clicking before seeing the form. In some cases, it seems a bit uninviting and overwhelming when I get to a page with nothing but a long form to fill out. This is optional of course and I would definitely test it to see if it converts better without the fullscreen header.
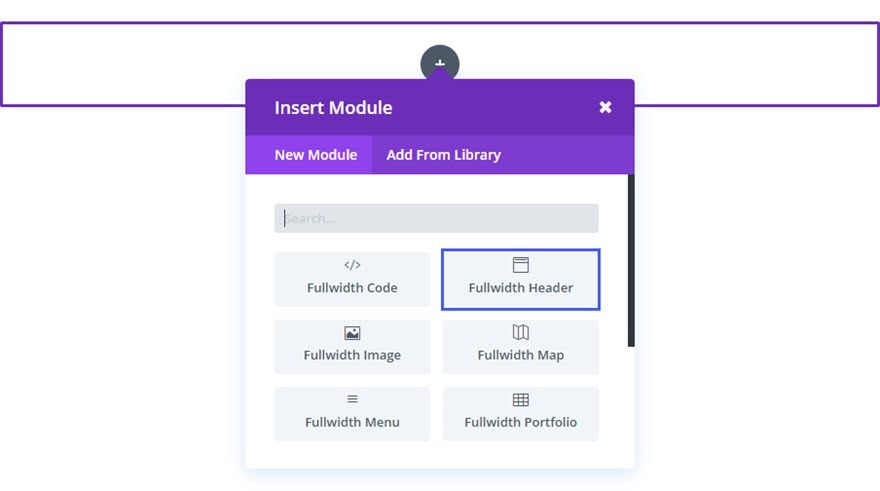
Using the Visual Builder, add a fullwidth section and a fullwidth header module to the top of your page.
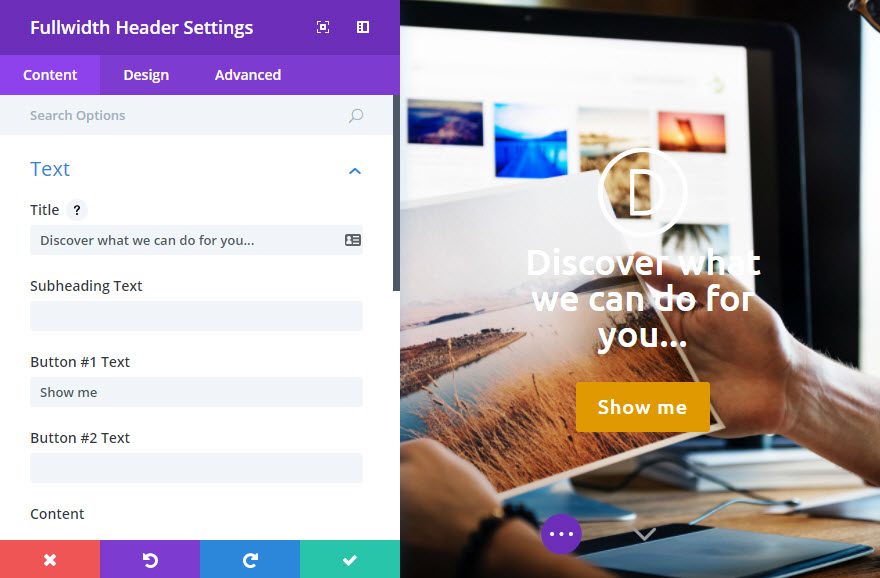
Update the Fullwidth Header settings as follows:
Content Options
Title: [enter title; try to be more personal rather than a boring title like “Quote Form”]
Subheading Text: [enter subheading text]
Button #1 Text: [enter button text; something like “show me” or “Let’s do this”]
Button #1 URL: #quote (this will be used for anchor CSS ID that will scroll to the section containing the form below)
Logo Image URL: [enter logo image]
Background Overlay: rgba(0,0,0,0.7)
Background Image: [upload your 1920 x 1080 background image]
Design Options
Text & Logo Orientation: Center
Make Fullscreen: YES
Show Scroll Down Button: YES
Icon: [choose icon]
Scroll Down Icon Color: #999999
Text Color: Light
Title Font: Ubuntu
Title Font Size: 36px
Subhead Font: Ubuntu
Subhead Font Size: 22px
Use Custom Styles for Button One: YES
Button One Text Size: 20px
Button One Text Color: #ffffff
Button One Background Color: #e09900;
Button One Border Color: #e09900
Button One Letter Spacing: 1px
Button One Font: Ubuntu
Save Settings
Building the Quote Form
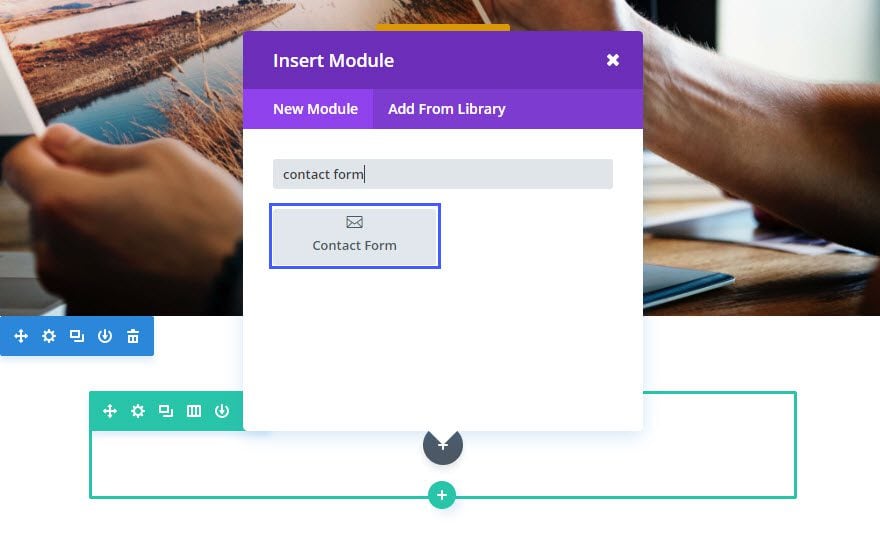
Now for the quote form, we are going to use Divi’s Contact Form Module. First we need to add a regular section with a fullwidth (1 column) row. Then add a Contact Form Module to the row.
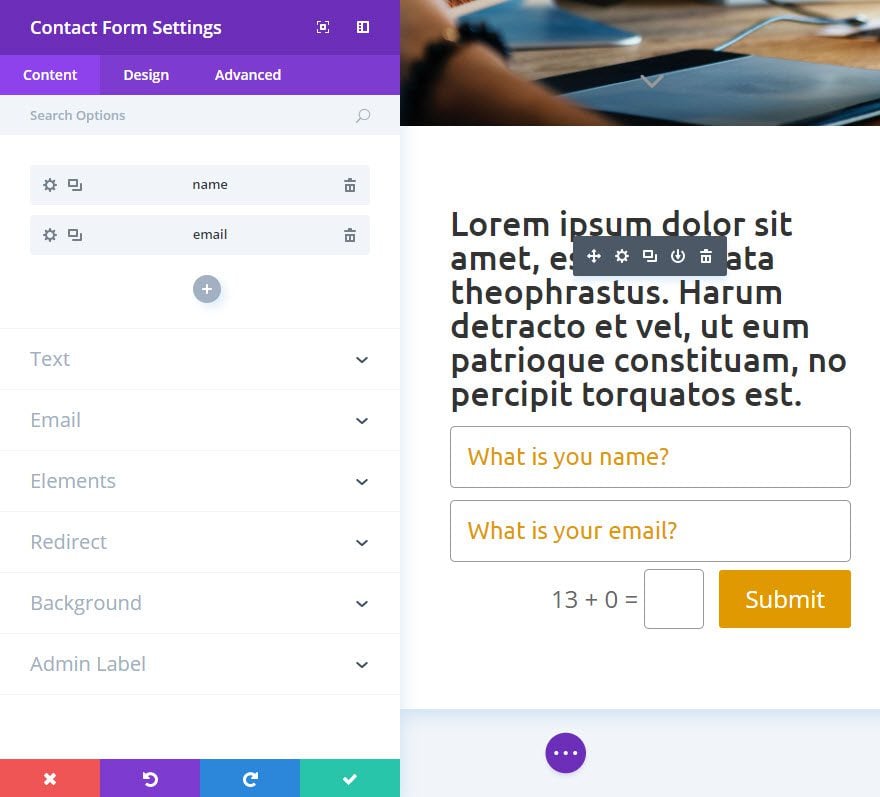
Update the Contact Form Settings as follows.
Content Options?
Title: [define a title for your contact form or add additional instructions]
Submit Button Text: Get Quote
Email: [enter the email address where messages should be sent]
Enable Redirect URL: YES (this is optional but a good idea)
Redirect URL: [enter redirect URL to a custom thank you page]
Design Options
Title Font: Ubuntu
Title Font Size: 30px
Title Letter Spacing: 1px
Form Field Font: Ubuntu
Form Field Font Size: 24px
Form Field Text Color: #e09900
Input Border Radius: 5px
Use Border: YES
Border Color: #999999
Border Width: 1px
Use Custom Styles for Button: YES
Button Text Size: 24px
Button Text Color: #ffffff
Button Background Color: #e09900;
Button Border Color: #e09900
Button Letter Spacing: 1px
Button Font: Ubuntu
Advanced Options (Custom CSS)
Captcha Field:
Font-size: 24px;
Max-width: 60px;
Padding: 16px 14px 14px;
Captcha Text:
Font-size: 24px
Save Settings
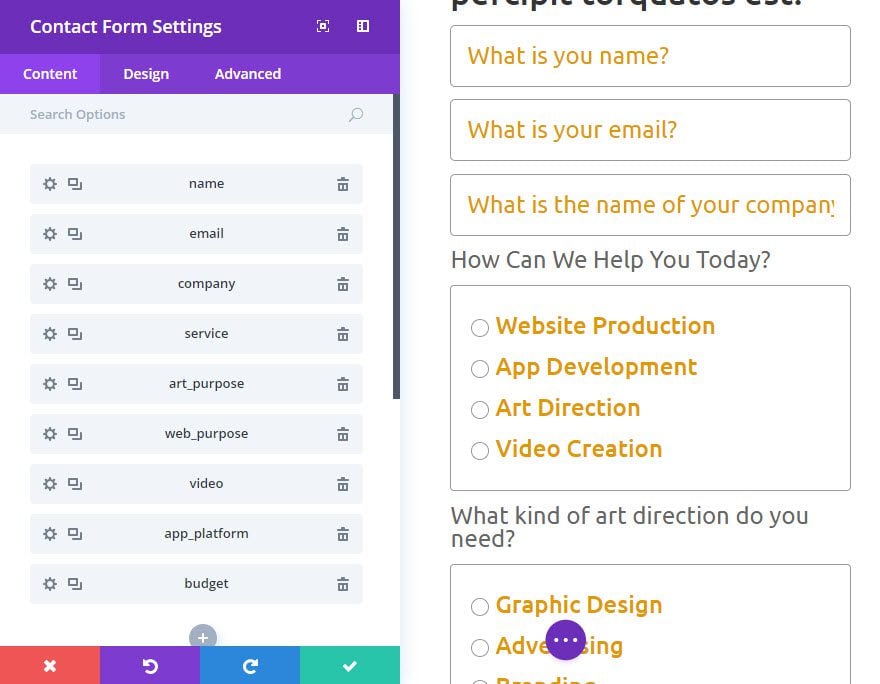
Adding the Quote Form Fields
Not what you have your settings in place, it is time to add our form items. By default, the form contains the fields “name”, “email”, and “message”. You can delete “message”.
Company Field
Under the “email” field add a new field and update the settings under Content Options as follows:
Field ID: company
Title: What is the name of your company?
Required Field: YES
Service Field
Under the “company” field add a new field and update the settings under Content Options as follows:
Field ID: service
Title: How can we help you today?
Type: radio buttons
Options:
- Website Production
- App Development
- Art Direction
- Video Creation
Required Field: YES
Art Purpose Field
Under the “service” field add a new field and update the settings under Content Options as follows:
Field ID: art_purpose
Title: What kind of art direction do you need?
Type: radio buttons
Options:
- Graphic Design
- Advertising
- Branding
- Packaging
Required Field: YES
Enable Conditional Logic
Relation: ANY
Rules: How can we help you today? > Equals > Art Direction
Note: This logic shows this field whenever a user selects “Art Direction” from the previous question.
Web Purpose Field
Under the “art_purpose” field add a new field and update the settings under Content Options as follows:
Field ID: web_purpose
Title: What kind of website do you need?
Type: radio buttons
Options:
- E-Commerce
- Blog
- Web App
- Landing Page
Required Field: YES
Enable Conditional Logic
Relation: ANY
Rules: How can we help you today? > Equals > Website Production
Note: This logic shows this field whenever a user selects “Web Production” from the previous question.
Video Field
Under the “web_purpose” field add a new field and update the settings under Content Options as follows:
Field ID: video
Title: On what device do you want the video shown?
Type: radio buttons
Options:
- Mobile Phone
- Tablet
- Monitor or TV
- Projector
Required Field: YES
Enable Conditional Logic
Relation: ANY
Rules: How can we help you today? > Equals > Video Creation
Note: This logic shows this field whenever a user selects “Video Creation” from the previous question.
App Platform Field
Under the “video” field add a new field and update the settings under Content Options as follows:
Field ID: app_platform
Title: On what platform do you want the app developed?
Type: radio buttons
Options:
- iOS
- Android
- Windows
- Blackberry
Required Field: YES
Enable Conditional Logic
Relation: ANY
Rules: How can we help you today? > Equals > App Development
Note: This logic shows this field whenever a user selects “App Development” from the previous question.
Budget Field
Under the “app_platform” field add a new field and update the settings under Content Options as follows:
Field ID: budget
Title: If you have a budget in mind, let us know.
Type: radio buttons
Options:
- Less than $1k
- Around $5k
- Greater than $10k
Required Field: NO
Enable Conditional Logic
Relation: ANY
Rules:
How can we help you today? > Equals > App Development
How can we help you today? > Equals > Video Creation
How can we help you today? > Equals > Website Production
How can we help you today? > Equals > Art Direction
Save Settings
Add the Anchor CSS ID
Go back and edit the Section Settings for the section containing the form. Under the Advanced tab, enter the CSS ID “quote”.
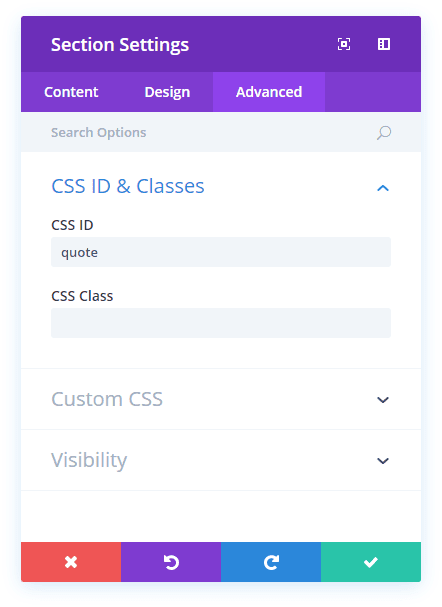
This will correspond to the button url in the fullwidth header so that the button will scroll to the section when clicked.
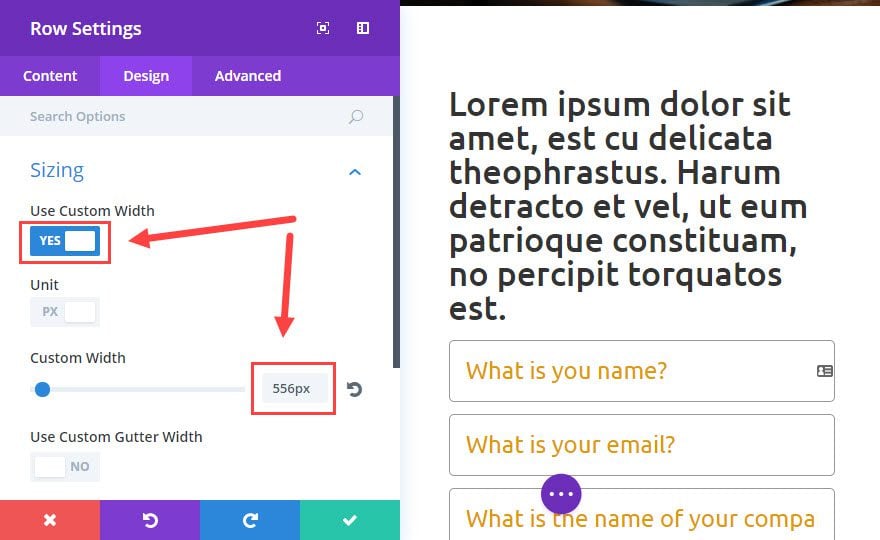
Set a Custom Width for the Quote Form Column
Next, go to Row Settings for the row containing the quote form and update the Design Options as follows:
Use Custom Width: YES
Custom Width: 556px
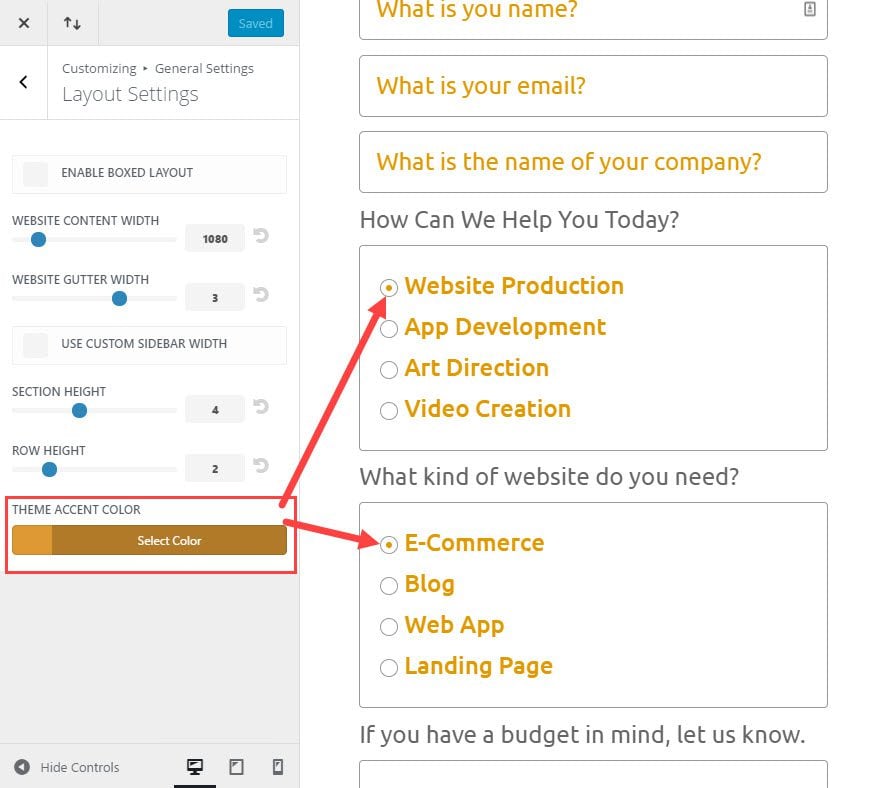
Additional Design Customizations
For this quote form, we are using radio buttons, once a radio button/circle is clicked, the color of the circle filler corresponds to your sites theme accent color under Theme Customizer > General Settings > Layout Settings >
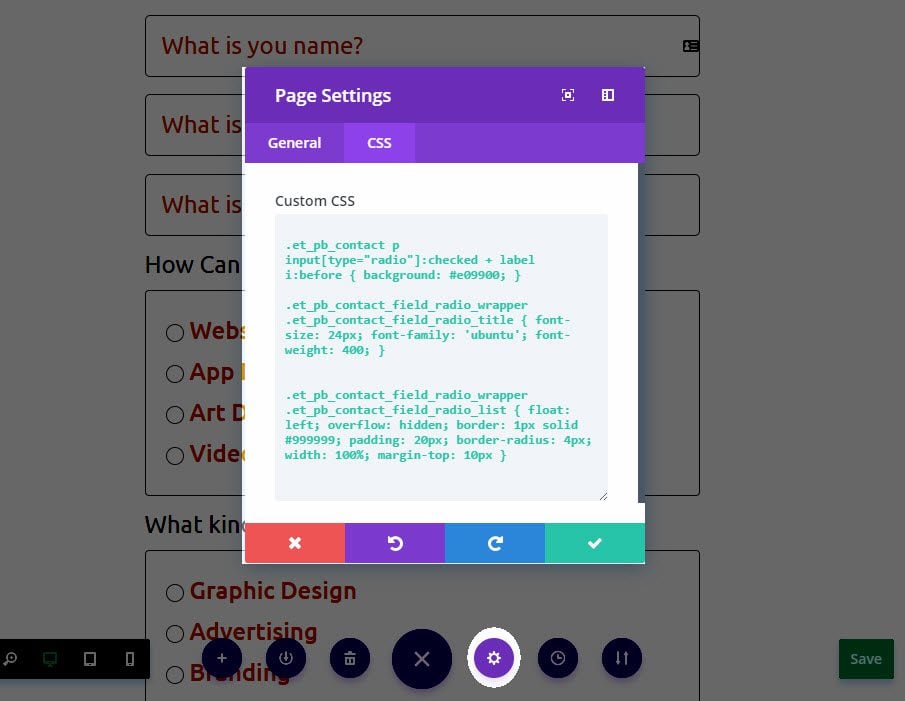
If you don’t want to change your theme accent color sitewide for the radio button fill color you go to Page Settings and enter the following Custom CSS un the CSS tab:
.et_pb_contact p input[type="radio"]:checked + label i:before { background: #e09900; }
Also, you can add the following CSS to customize the title text for the questions containing radio buttons:
.et_pb_contact_field_radio_wrapper .et_pb_contact_field_radio_title { font-size: 24px; font-family: 'ubuntu'; font-weight: 400; }
Lastly, you can add a styled border to the radio button lists to match the style of the form with the following CSS:
.et_pb_contact_field_radio_wrapper .et_pb_contact_field_radio_list { float: left; overflow: hidden; border: 1px solid #999999; padding: 20px; border-radius: 4px; width: 100%; margin-top: 10px }
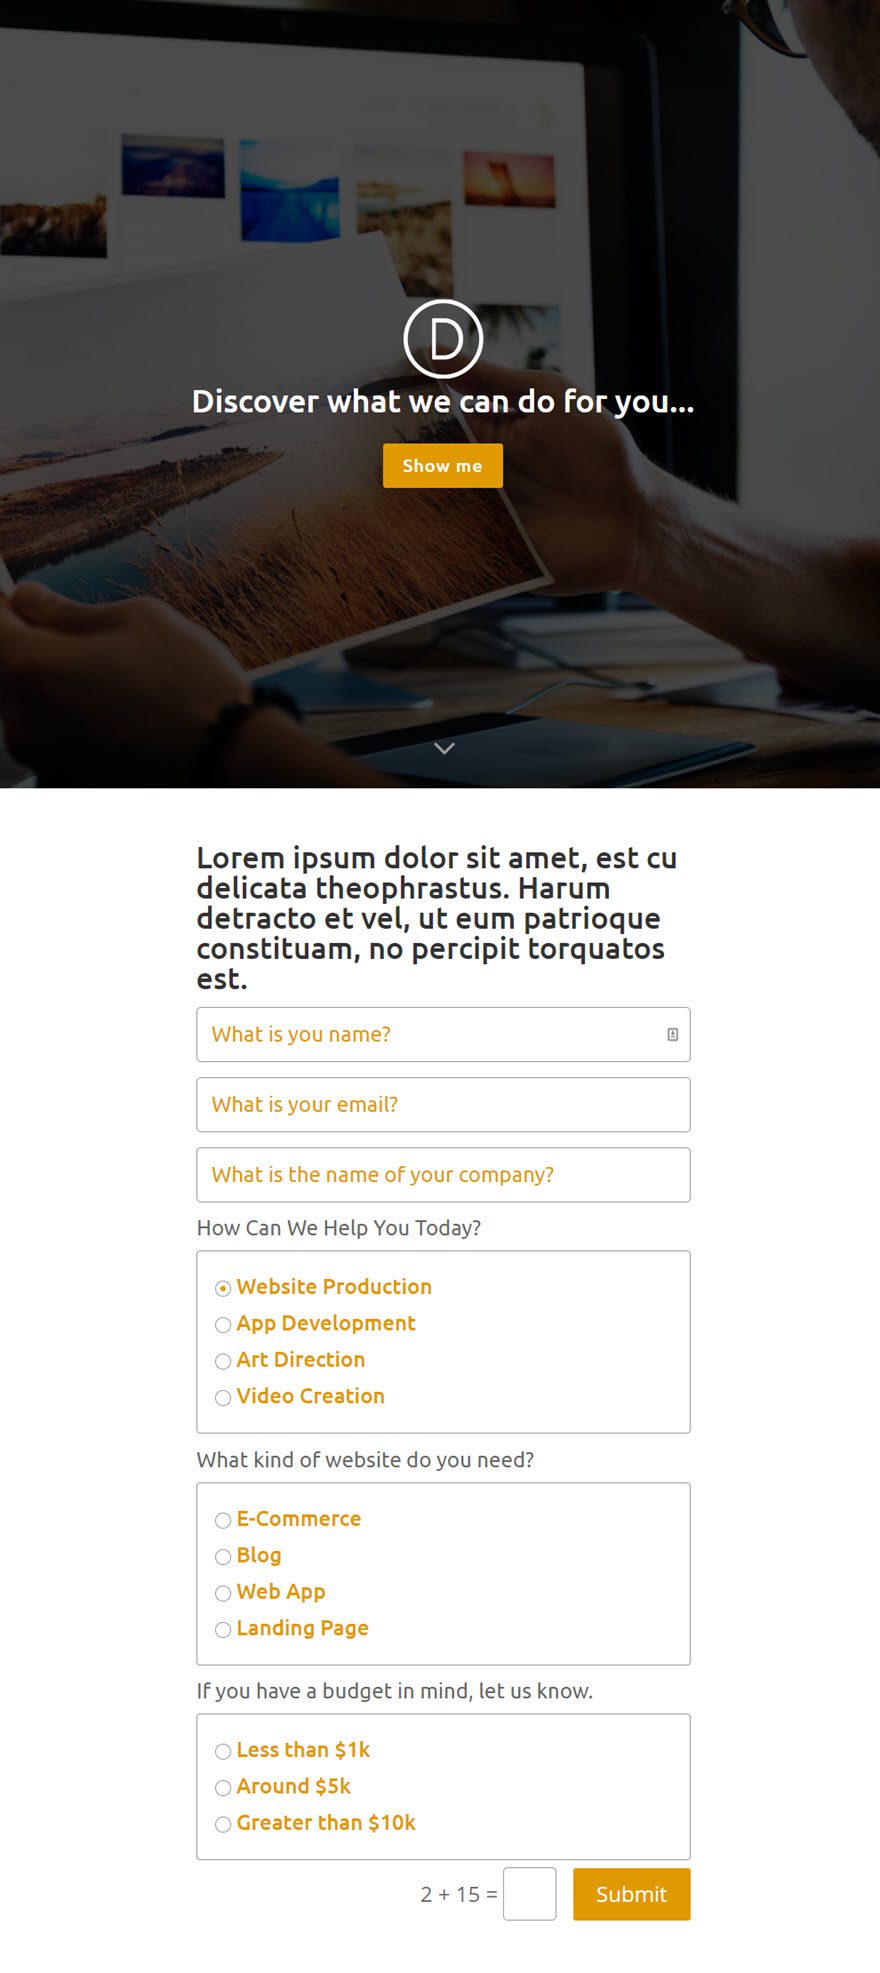
That’s it.
Checkout the final result:
Final Thoughts
This quote form is a simplified example of what you can do with the quote form. For your own quote form, you may want to add additional field such as “Phone Number” so you can give your leads a call back. You could also use more conditional logic to get more specific info regarding the customer’s needs.
Like I said in the beginning of the article, there are more advanced plugins out there. There are whole companies who specialize in robust contact form solutions for a reason. I hope this post was helpful in showing how the Contact Form Module is more than capable of handling most of your standard contact form needs.


This is awesome, Thank you for such great work. I have 3 questions about the form:
1. How can I break it down in multiple pages or slides so only the parts that have no been filled out are visible?
2. What is the function of the Link tab and what does it do?
3. is it possible to add a field type like A date calendar for people to use when they want to enter their date of birth, for example?
A video demo would be appreciated.
Thank you.
I need this too! 🙂
Hi, great news! Is there any way to save the ansvers into database (like CF7)?
Thank you very much!
Somebody has to create a Divi Contact Plugin so it can take this contact form to the next level. I recommend that Date and Time Picker, auto-email-client responses, upload-file, etc. I would definitely buy something like that.
Great tutorial, I’d like to be able to visually break up the contact form into sections and have a short paragraph separating each section to describe the section.
How would I go about doing this?
Thanks!
Hi Great work, This is an awesome feature with some more options for eg.
Can you explain how to add a country list drop down option, instead of in putting each country individual.
Cheers
The Divi Form module is coming along quite nicely, add a few more features and you could give GravityForms a run for their money. The $200 a year for the license has always been a bit of a tinder point with me. Especially when customizing the look of the forms is still such a chore. I’ve already replace GF with the divi module on at least a dozen sites.
+1
This is a necessary feature!
Are you going to include the field option of attaching files to a contact form?
Great suggestion. Thanks Peter.
Nice. Perfect timing, thanks
Hi
Great article, thanks.
Does the form incorporate a honeypot spam trap?
Thanks again.
very perfect tutorial. thanks jason
Hello, does it allow multiple choice?
Thank you!
I need this too! 🙂
I tried to build the form, and followed all the way through, but the contact form module is missing radio buttons type, how could it be that you are able to choose radio buttons and I and not, just input field, email field and text area, could u guys please fix that.
Anastasia,
Please update Divi for the new contact form features to become available. You can find instructions on how to update Divi here: https://www.elegantthemes.com/documentation/divi/update-divi/
Hello – I would love to use this instead of contact form plugins, BUT my contact form module does not have these options – only name, email and text field. How do I get/update Divi so these options become available?
Thank you, Alex 🙂
You can find instructions on how to update Divi here: https://www.elegantthemes.com/documentation/divi/update-divi/
This is amazing! Hardly wait to test it! Thanks!
Thank you, very good job
Hi Jason,
great auto,
why not offering to customer a .json of it like that we don’t have to spend time and we can adapt quicker
I agree for Fields missing (date calendar, hours, informations about IP address of sender..like WPCF7)
Best regards
I love that idea, I enjoy reading how, prefer a .json, that way I can use the instructions to change things rather than having to build them, people who want to do it from scratch can.
Great way to use the updated form Jason, thanks! This will come in very handy 🙂
Great tuto..
Would be cool for the client to receive a copy of his request on his mail too 😉
Great update, Jason.
There’s one thing that’s missing for me, though. That is the option to attach a file. Without that functionality, I can’t really use it for my clients.
Hi, thank you for this amazing article. Do you think there is a way that client can check more than 1 answer in a case if he is looking for graphic design and he needs logo and business cards? Do you think it is possible?
Please let me know, thanks! 🙂
Thanks for the kind words. Yes you can! Just use the checkboxes field type instead of radio buttons. That will allow you to check multiple selections.
I can write options when have a type:radiobuttons but when changing to checkbox the options disappear so Couldn’t use multiple selections. any solutions/updates for that?
Indeed… I’m missing a way to add labels / titles to the form.
E.g. adding a label/title above a set of checkboxes.
Will this be added ?
Herre
I want this too!!!!
“is a great solution for small businesses looking to grab qualified leads without the hassle of answering phones.”
Now I’ve officially heard everything. What type of business owner considers it a “hassle” to SPEAK to a potential customer?
Maybe “hassle” was the wrong word. I agree with you. That is why I suggested putting the phone number as a field option. What I was trying to say is that it may be difficult for really small companies to answer phones 24/7 and that having a form like this a good fallback.
Jason, When I get a client to fill the form out all I get in my email is “COMPANY NAME” that’s it! Can you help, please?
Can’t wait for an auto email response to the customer ! All this form needs to take it to usable level !
Thanks Jason for your effort.
Yet our clients need essential fields like date calendar and time selection — and these are unfortunately still missing in the contact form.
Just read from a guy that you can add the datepicker to your .php.
Hi.
Care to share the link to that guy?
Would be appreciated.
Thank you,
Oh how do I add a date picker? I also would like a multi-select option…
Very interesting and clear. Thank’s