
Designing a digital resource page with Divi is easy when you utilize the design elements of your layout to work for you. The visual builder has many helpful features that make this process rather enjoyable. But design isn’t everything. It is also important that your resource page functions. That’s why it is always a good idea to use third party storage providers like Google Cloud, to help you manage and deliver your digital downloads quickly and efficiently. And, adding links to these downloads is really easy using Divi’s modules.
In this use case tutorial, I’m going to walk you through how to design a functional digital resources page using Divi’s Design Conference Layout Pack.
Here are some of the things we will be accomplishing together:
- Build a Resource Page with three sections of content using the Schedule Page Layout
- Create a custom resource menu that jumps to the different sections on the page
- Add custom back-to-top buttons under each of the three resource sections
- Store download files in Google Cloud and create public links to those files to use on the resources page
Let’s get started!
- 1 Sneak Peek
- 2 Create your Digital Resources Page
- 3 Creating the Resource Links Section
- 4 Creating the Past Conference Sessions Section
- 5 Creating Your Resource Menu
- 6 Add CSS ID’s to your Page
- 7 Adding Custom Back-to-Top Links Under Each Section
- 8 Using Google Cloud to Store your Download files
- 9 Adding your download links to your Resources Page
- 10 Final Thoughts
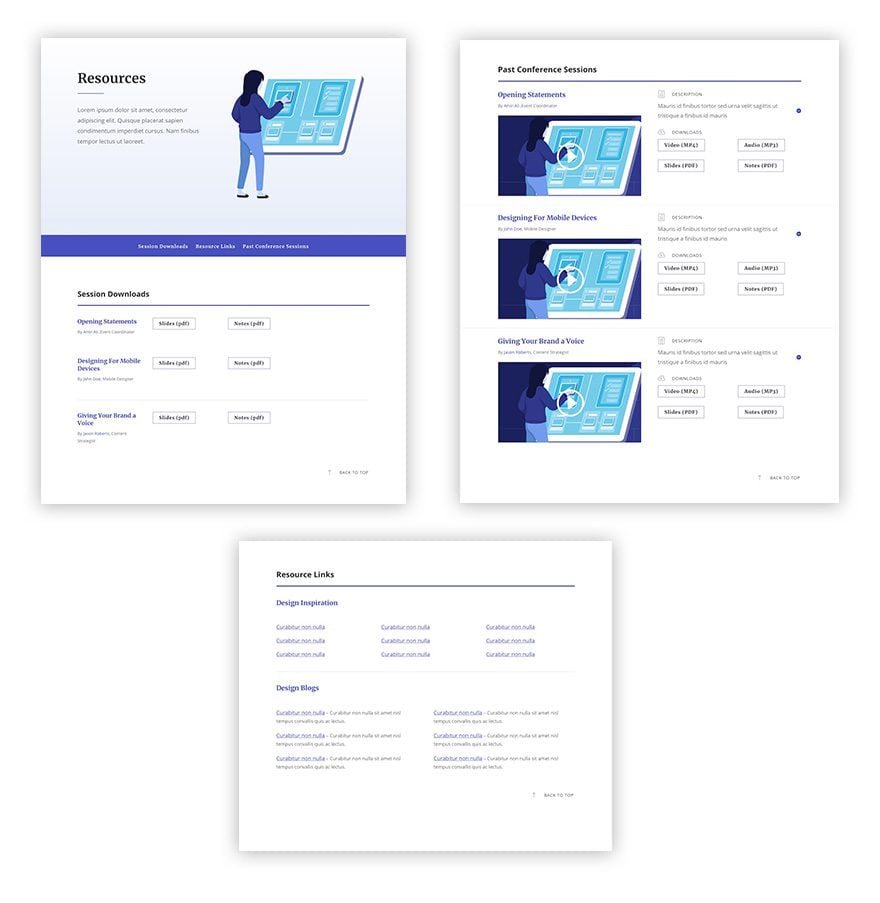
Sneak Peek
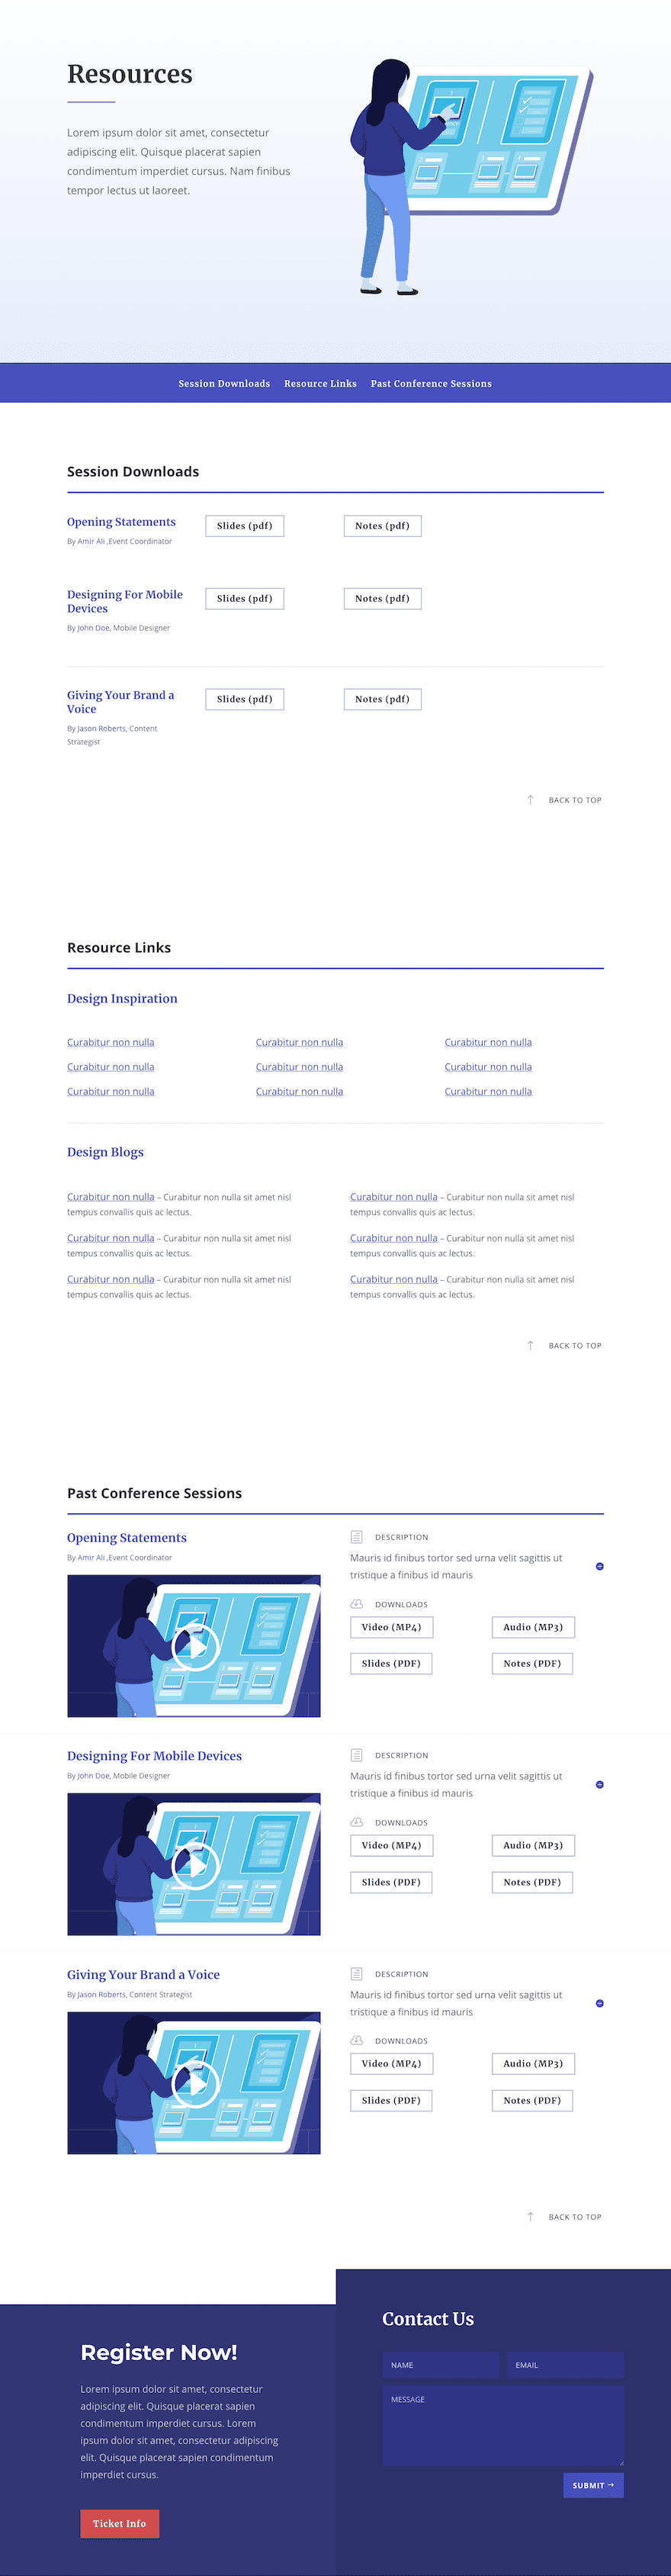
Here is a sneak peak of the resource page we will be creating together.
Create your Digital Resources Page
To create the resources page, add a new page, give it the title “Resources”, and deploy the Visual Builder. From the settings menu, add the Design Conference Schedule Page layout to your page.
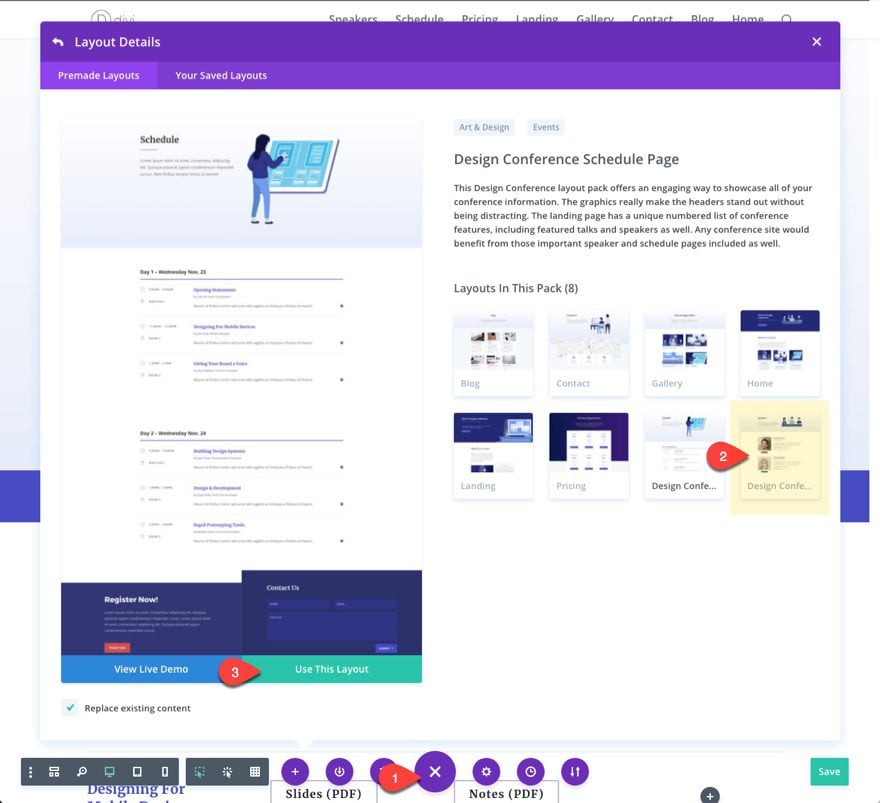
For details on how to add layouts to your pages, check out the blog post featuring the Design Conference Layout Pack.
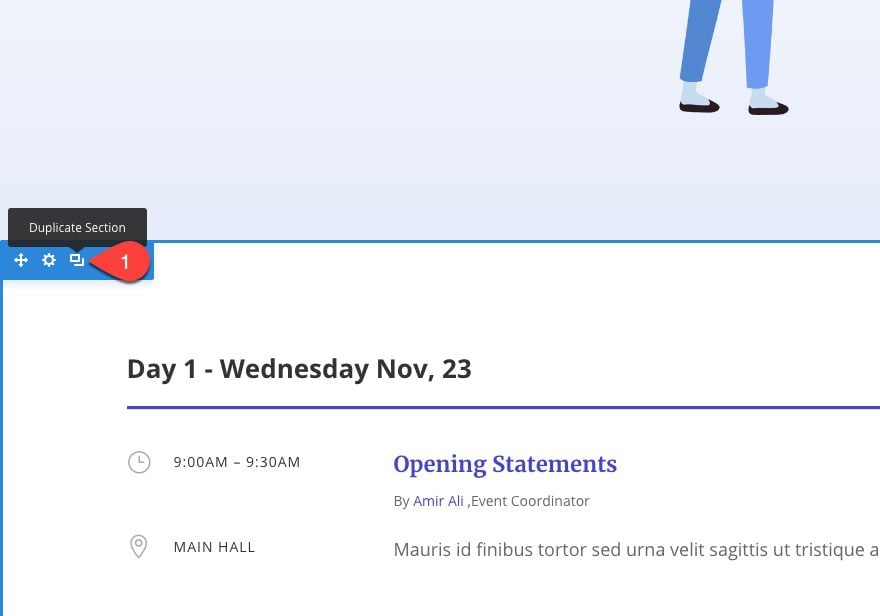
Change the Title in the header section from “Schedule” to “Resources”. Then duplicate the section directly below the header section.
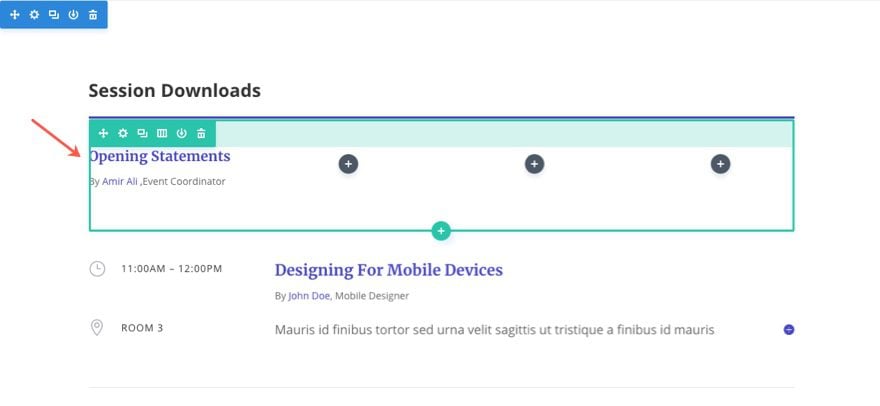
In the same section, update the title in the text module in the top row to read “Session Downloads”. (You can just click on the text and use the inline editor for this)
In the row directly underneath, change the column structure to four columns and delete all of the modules except the text module with the header “Opening Statements”. Then drag that text module to the far left column.
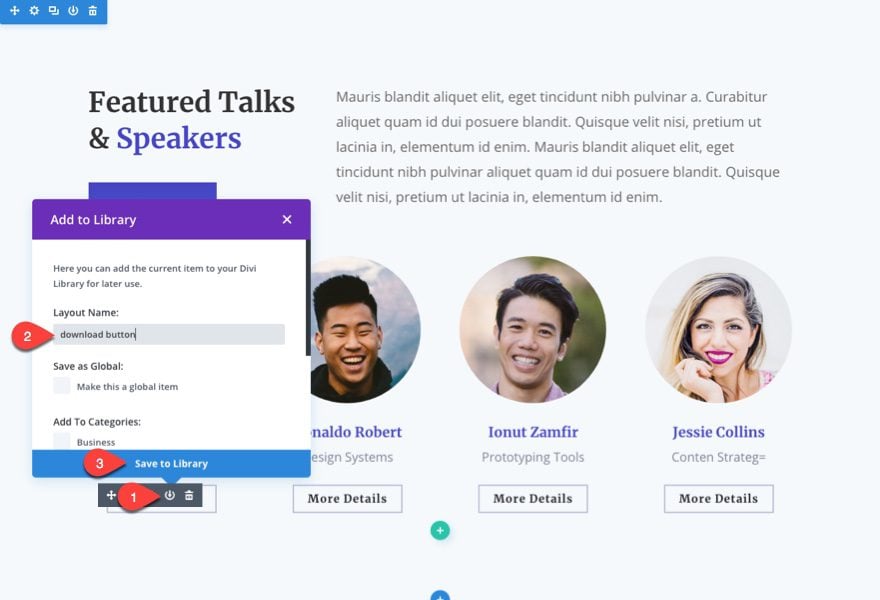
Now we are ready to add our download links. To do this, I’m going to use the buttons used under the “Featured Talks & Speakers” section of the design conference home page layout. Go to the page with your home page layout (or create one if you don’t have one yet). Using the Visual Builder, save one of the buttons to your library with the name “download button”.
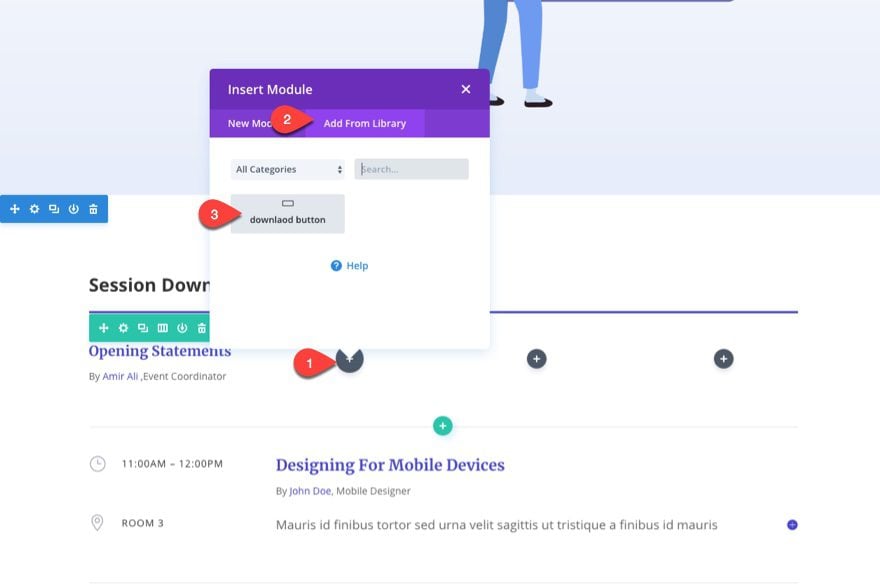
Now go back to your resources page and add that button the the second column of your four column row.
Go to the button module settings under the content tab and update the button text to say “Slides (PDF)”.
Under the design tab, change the button alignment to be Left aligned.
Save Settings.
Copy and paste (or duplicate) the button you just created and add it to the 3rd column directly to the right. Then update the button text to read “Notes (PDF)”.
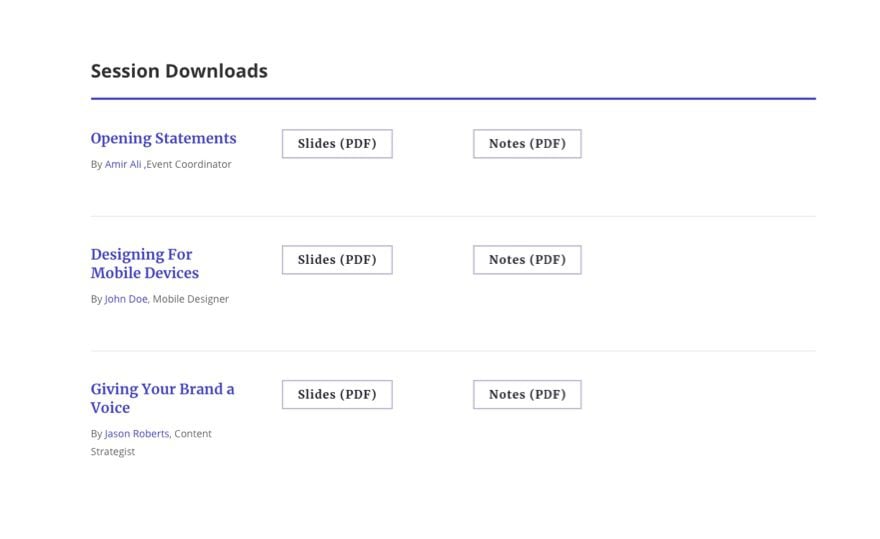
Next, duplicate the entire row twice. Update the text module heading text in each of the rows with each of the featured sessions.
Then delete the final two rows you didn’t use in the section. The final design of the section will look like this.
Creating the Resource Links Section
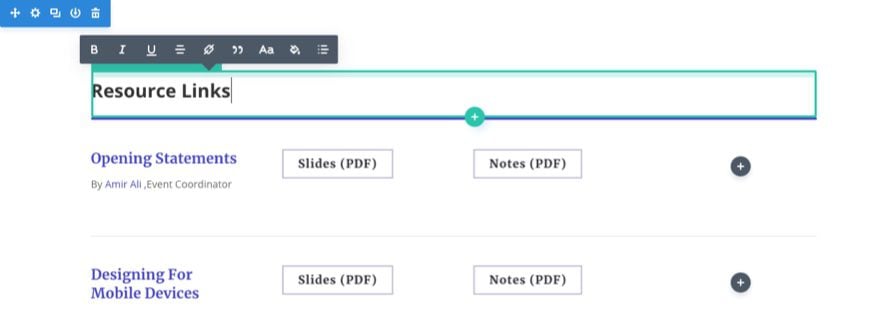
To create this section, duplicate the “Session Downloads” section you just created. Then
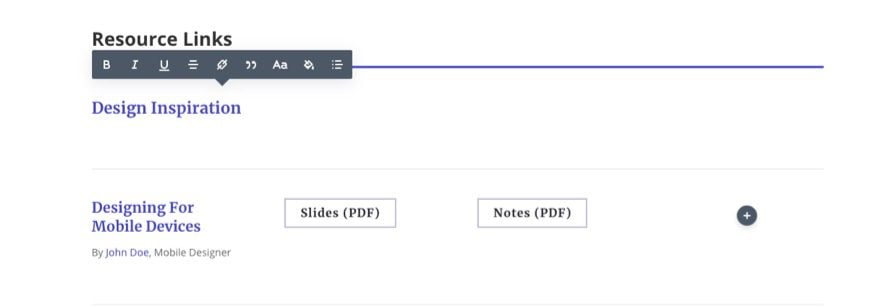
change the title text in the first text module of the duplicated section to read “Resource Links”.
In the row directly underneath, change the column structure to one-column and delete the two button modules in the row. Then update the remaining text module content to read “Design Inspiration”.
Next, add a three column row under the row you just created. Add a text module to the left column and add a link to the content box. If you are using html, add the following:
<a href="enter url here" target="_blank">Link to website</a>
Under the design tab, click the link tab and update the following:
Link Font Style: Underline
Link Text Size: 16px
Link Text Color: #4646c4
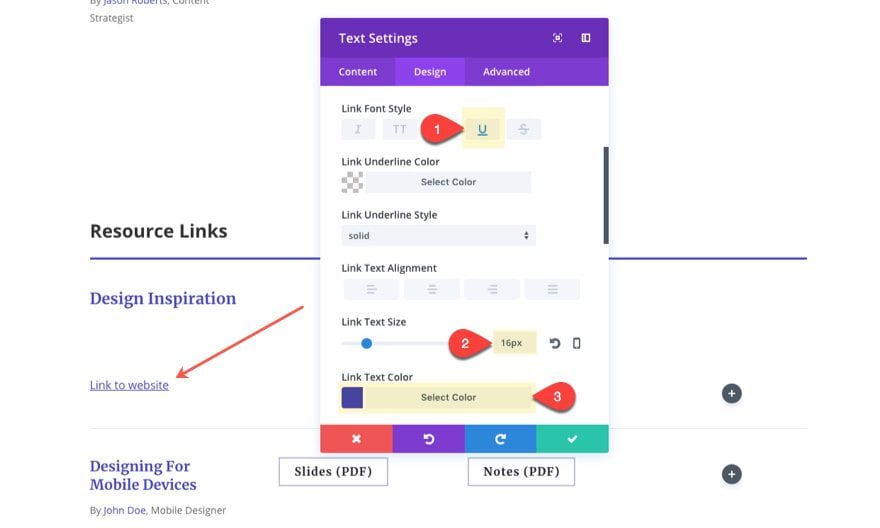
Save settings.
Next, let’s add another category of links called “Design Blogs”. To do this copy the row containing the “Design Inspiration” title text module and also the row containing the three columns of links and paste them below.
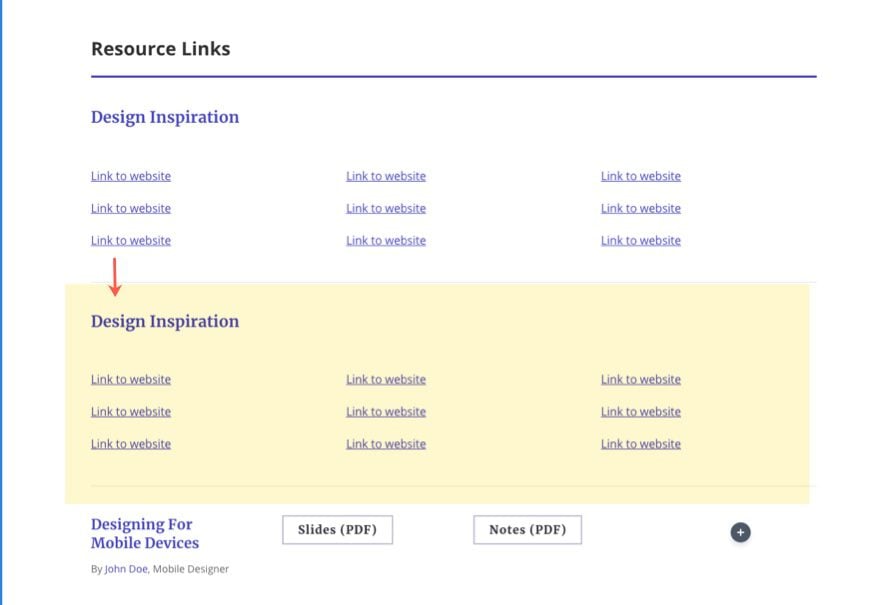
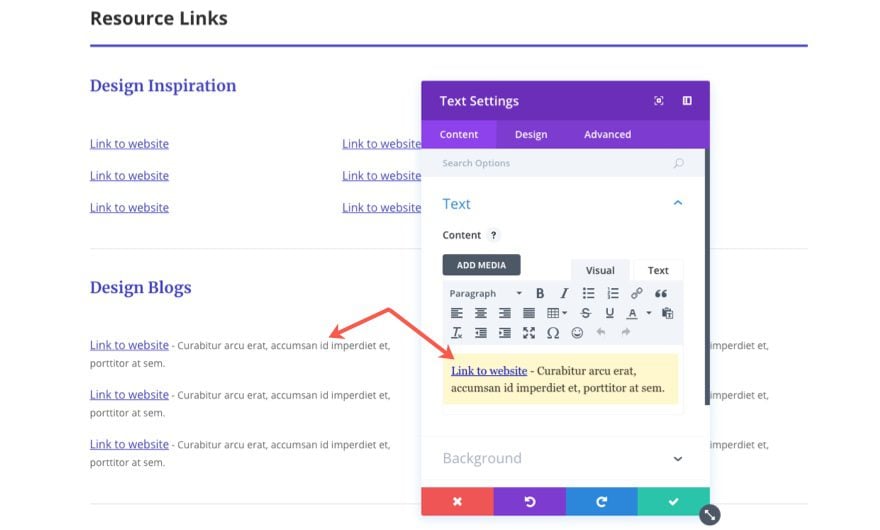
Update the text module with the title “Design Inspiration” to read “Design Blogs”. Then change the three column row below to a two column structure. And you can add some description text next to each link to help users better understand what each link has to offer.
Delete the remaining two rows we aren’t using in the current section.
Creating the Past Conference Sessions Section
The last section we are going to create for our resources page is a section to showcase videos and downloads for past sessions.
To do this we are going to be using some of the remaining design elements of the original Schedule page layout we started with. You should still have the two original schedule sections below the “Resource Links” section we just created. You will need this.
In the first original section, delete all of the rows except the row containing “Day 1 – Wednesday Nov, 23”. Now that section should only have one row. Update the heading text to read “Past Conference Sessions”.
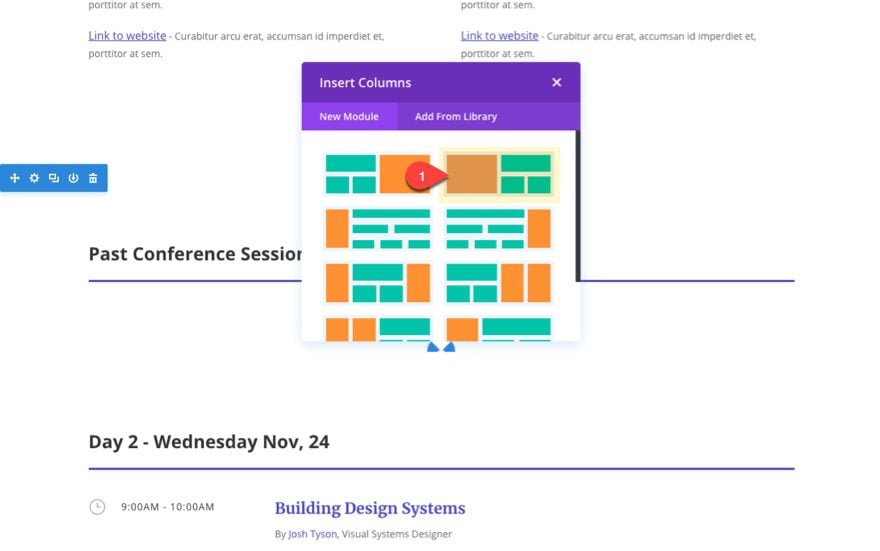
Under that section, add a specialty section with the one-half one-half column structure with the rows located in the right column.
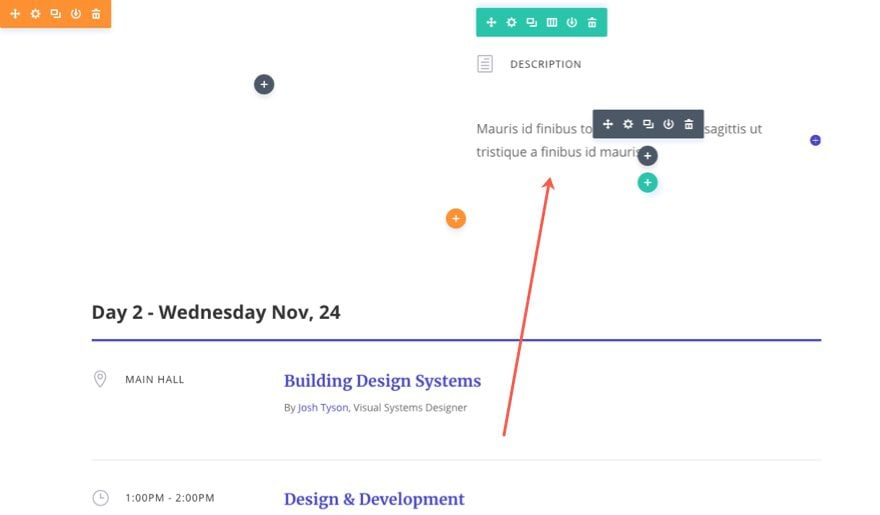
Then add a one column row to the right column and drag in one of the blurb modules from the original section below being used to show the time and location of sessions.

Udpate the blurb settings with the title “Description” and give in a new document icon.
After that drag in a toggle module from the original section below right under the blurb module you just added.
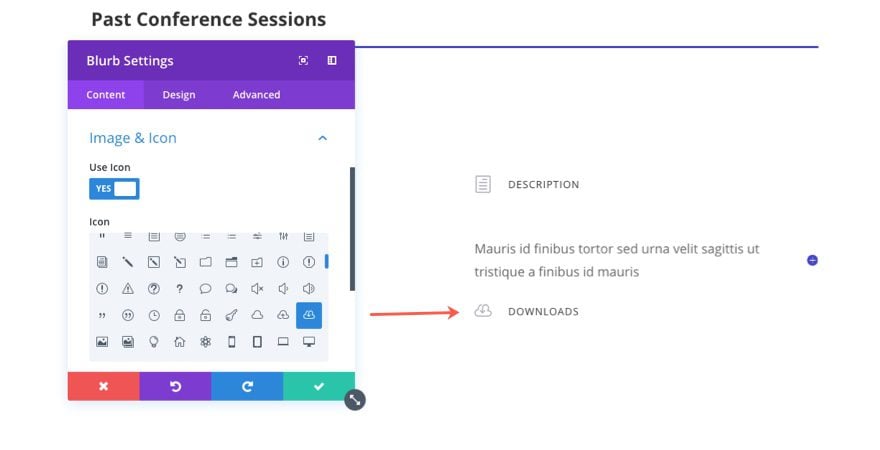
Duplicate the blurb module with the new title “Description” and drag it under the toggle module. Then change the title to “Downloads” and give it a cloud download icon.
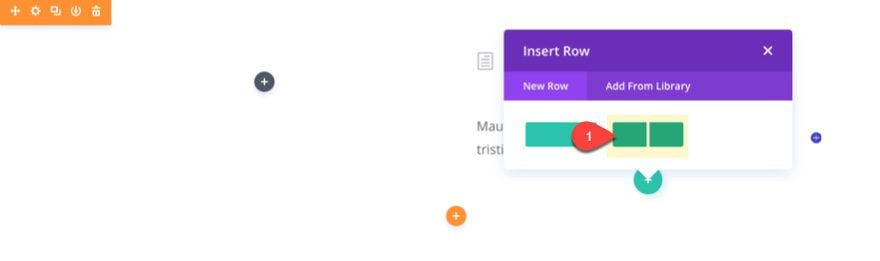
Under the toggle module, add a new two column row.
Then copy one of the buttons we created in the “Sessions Downloads” section and paste 2 buttons in each of the columns of the new row.
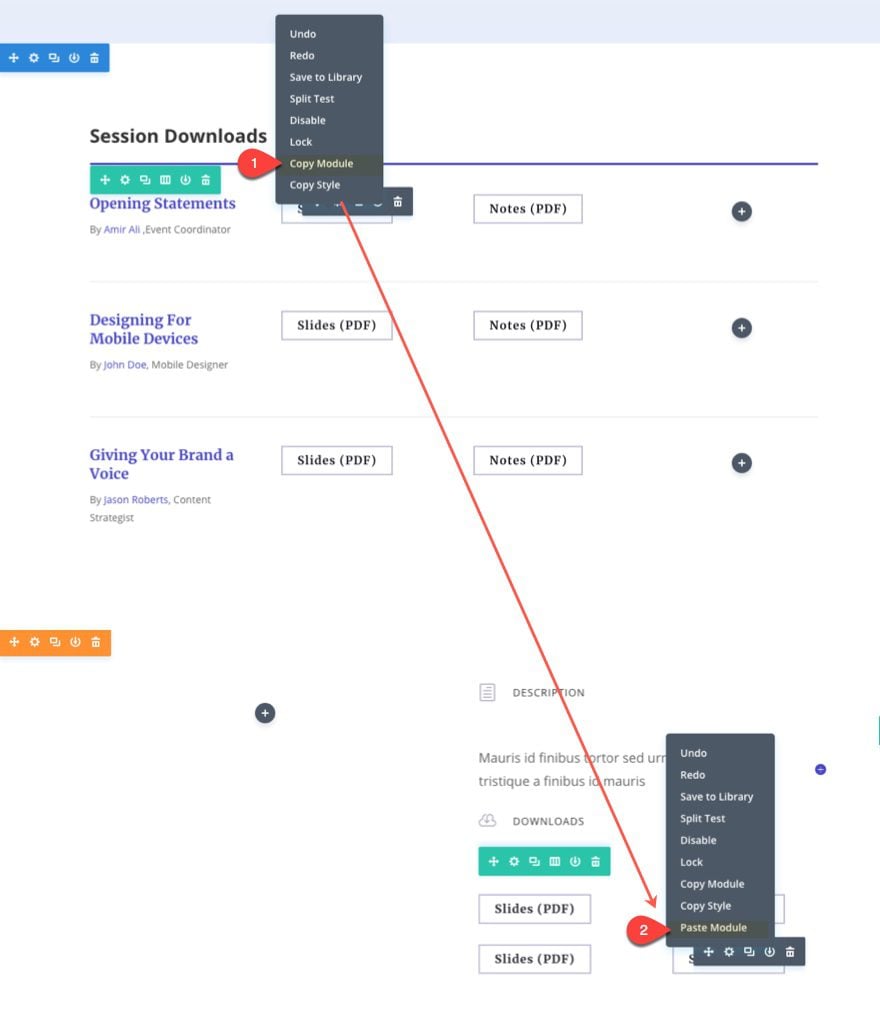
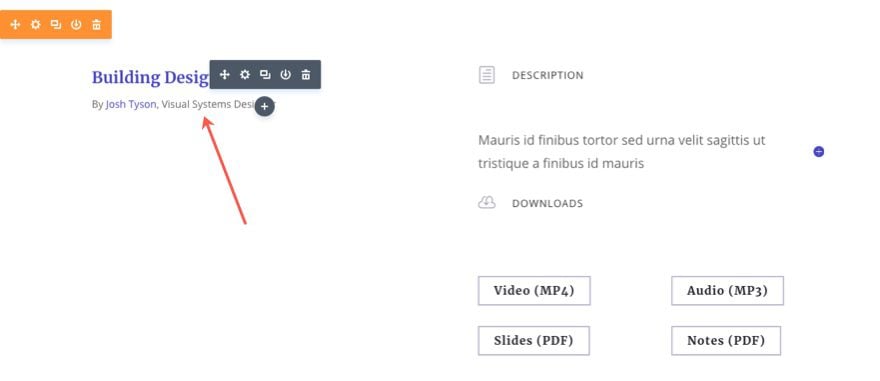
Then you can update the button text to reflect type of download each button will link to. Here is the four types I added:
Video (MP4)
Audio (MP3)
Slides (PDF)
Notes (PDF)
You may need to add a custom bottom margin of 0px to get rid of some space below the blurbs.
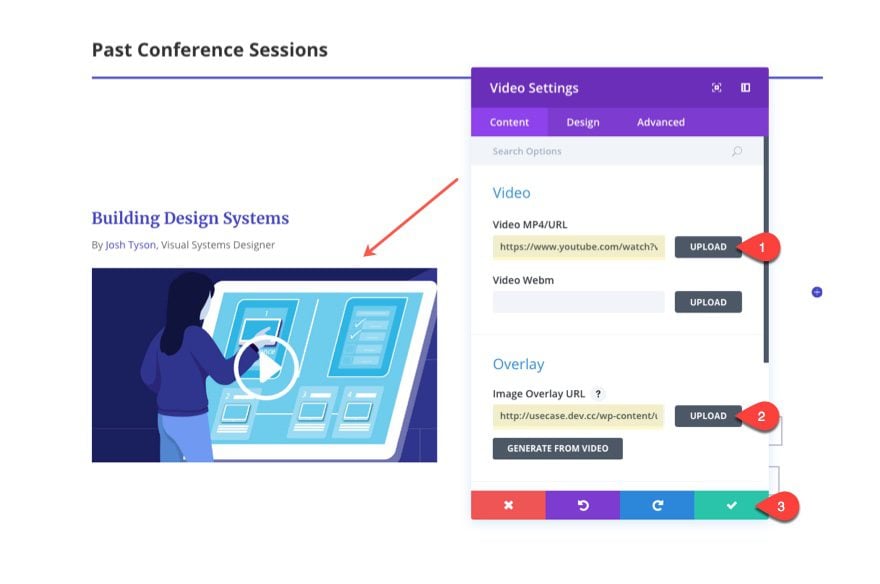
Now drag in one of the text modules holding the session title from the original section below into the left column of the specialty section.
Now we can add a video recording of the past session. To do this, add a video module under the text module by entering the url of the video (if hosted on youtube or vimeo) and add a custom image overlay if you want to better match the design of the page.
That’s it. Now just duplicate the section and update the content as needed for each additional session. Delete the left over original section(s) below and save your page.
For resource pages that hold a lot of content it helps to have sub navigation in order to improve the user experience of finding what they need quickly and easily. For this resource page, I’m going to show you how to add a custom menu with anchor links that will jump to specific sections on the page. This method is similiar to how you would create a one page website with Divi.
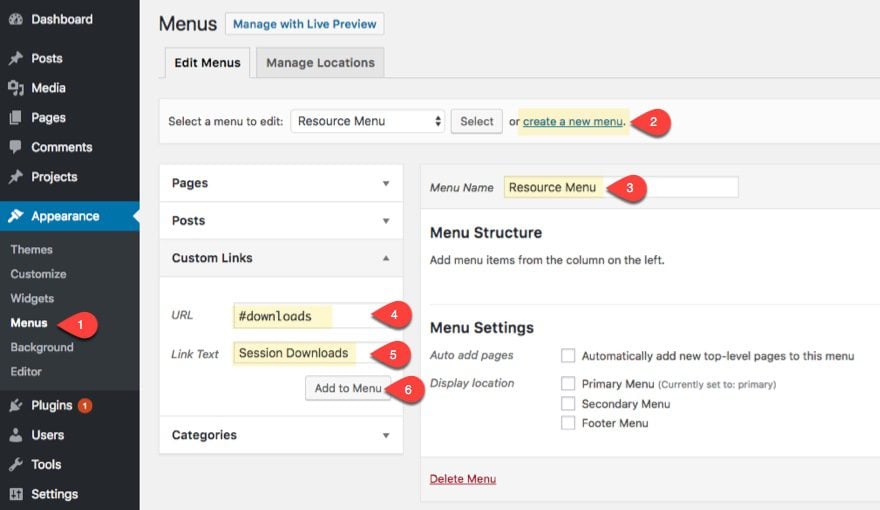
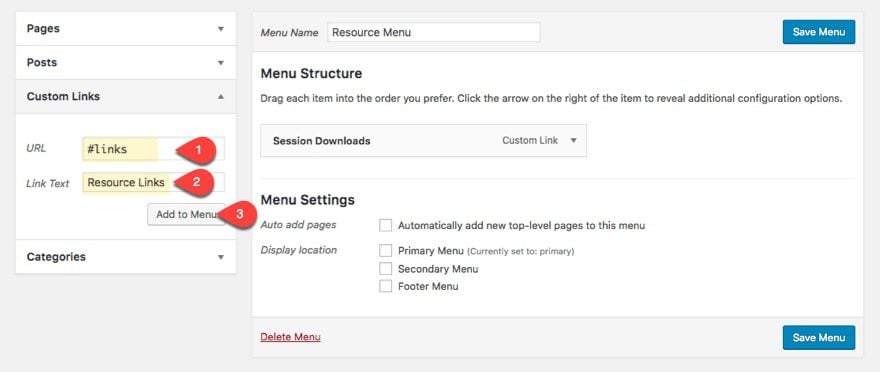
Navigate to Appearance > Menus and create a new menu called “Resource Menu”. For this menu we are going to be using three custom links that will jump to the three sections on our resource page. For the first custom link, enter “#downloads” inside the url input box and “Session Downloads” for the link text. Then add it to the menu.
For the second custom link enter the url “#links” and the link text “Resource Links”.
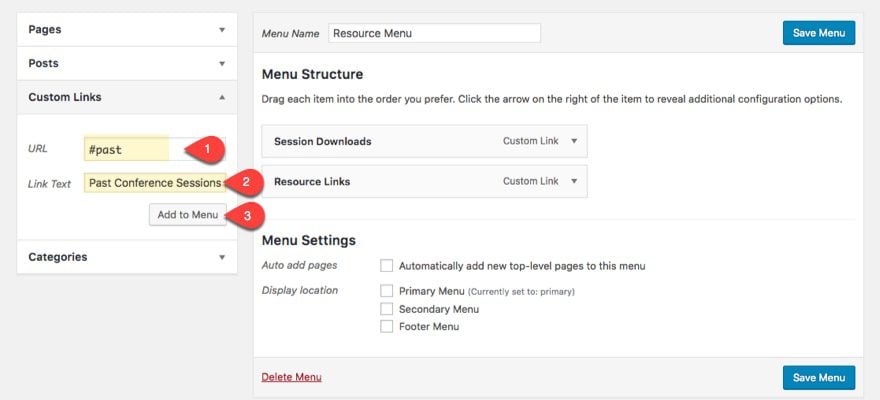
For the third custom link enter the url “#past” and the link text “Past Conference Session”.
Now that our menu has been created, let’s add it to our page. First, add a new fullwidth section just below the top header section of your layout. Then add a fullwidth menu module to the section. In the content tab under menu settings, select “Resource Menu” as the menu to display, and add the following background color: #474bc1.
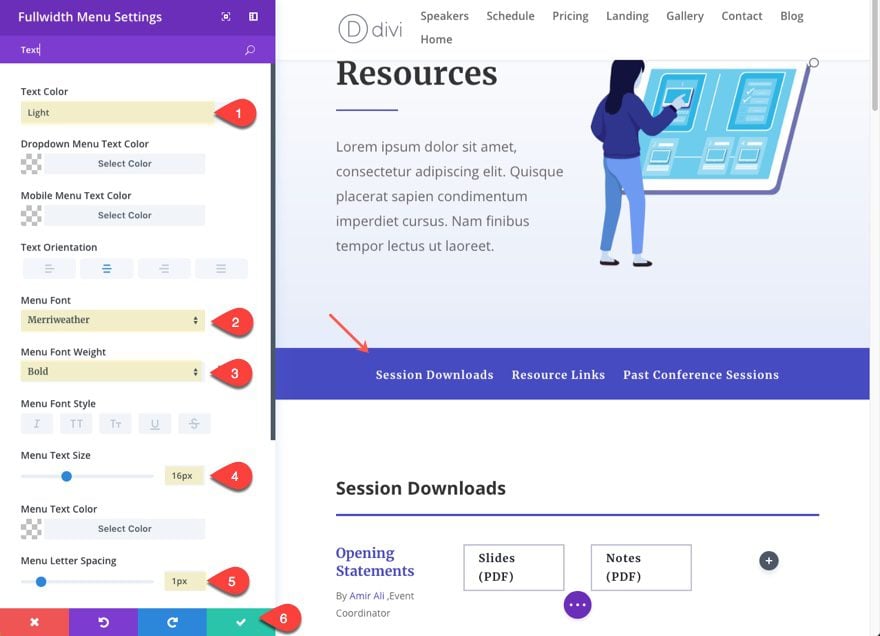
Under the design tab settings update the following:
Text color: Lightf
Text Orientation: Center
Menu Font: Merriweather
Menu Font Weight: Bold
Menu Text Size: 16px
Menu Letter Spacing: 1px
Save settings.
Add CSS ID’s to your Page
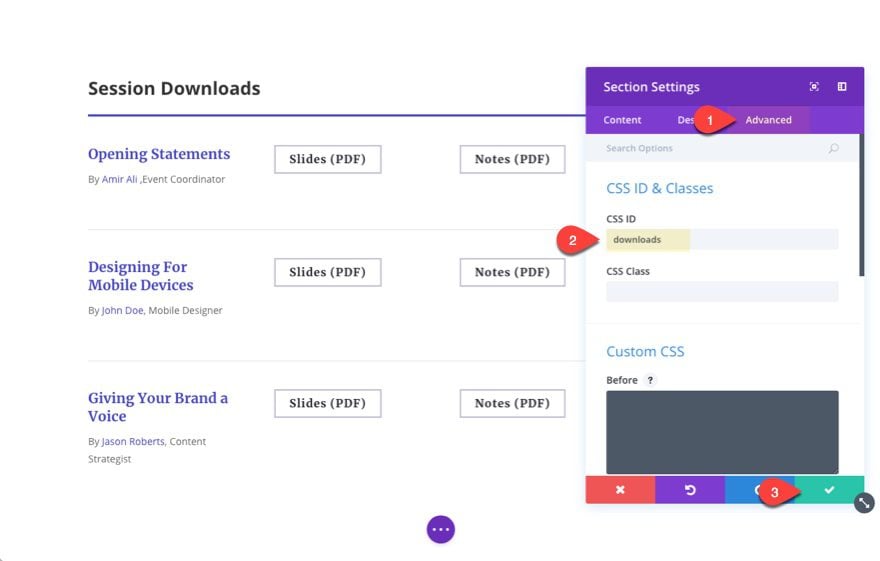
Remember the custom link urls we added to create our menu anchor links? Now we need to add corresponding CSS ID’s for each of those links so that each link will know where to jump when a user clicks it.
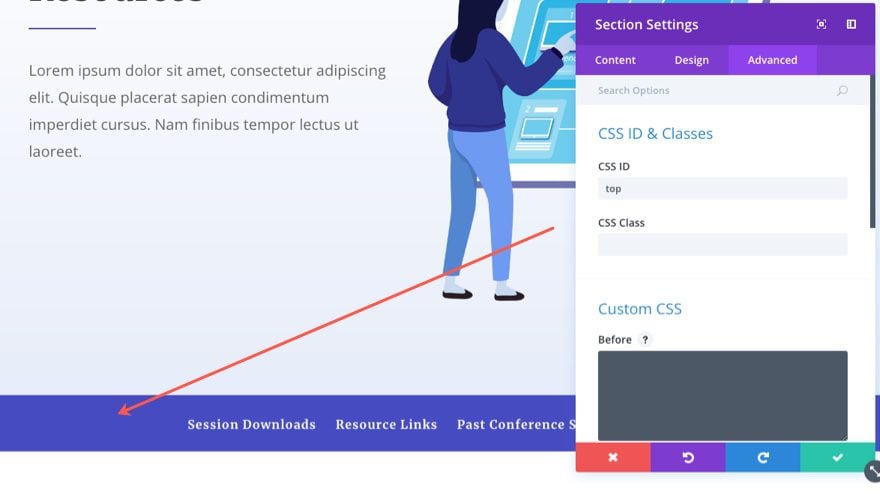
Let’s start with the first section containing our session downloads. Open the section settings, navigate to the advanced tab, and enter “downloads” in the CSS ID input box. Then save your settings.
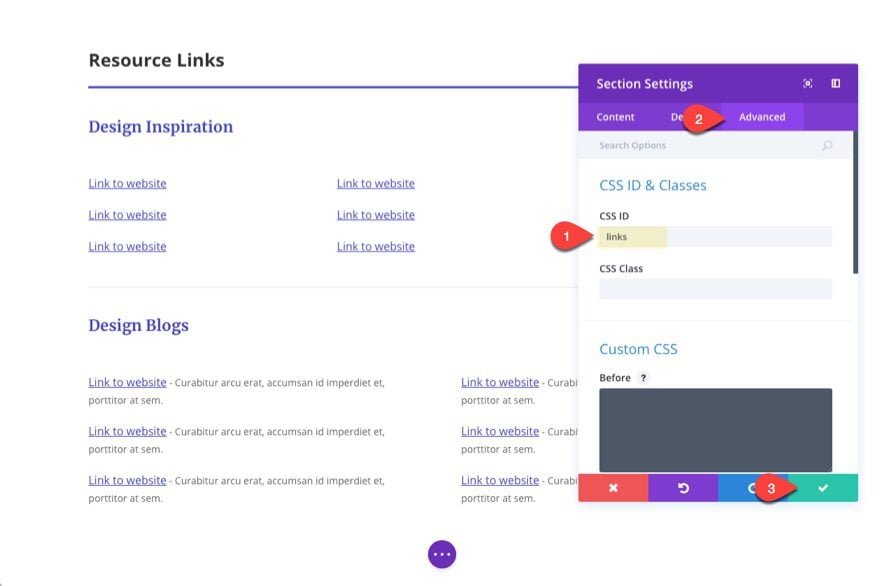
For the next section containing resource links, enter “links” for the CSS ID.
And for the last section containing the past conference sessions, enter “past” for the CSS ID of the section containing the title of the section (to one just above the two specially sections).
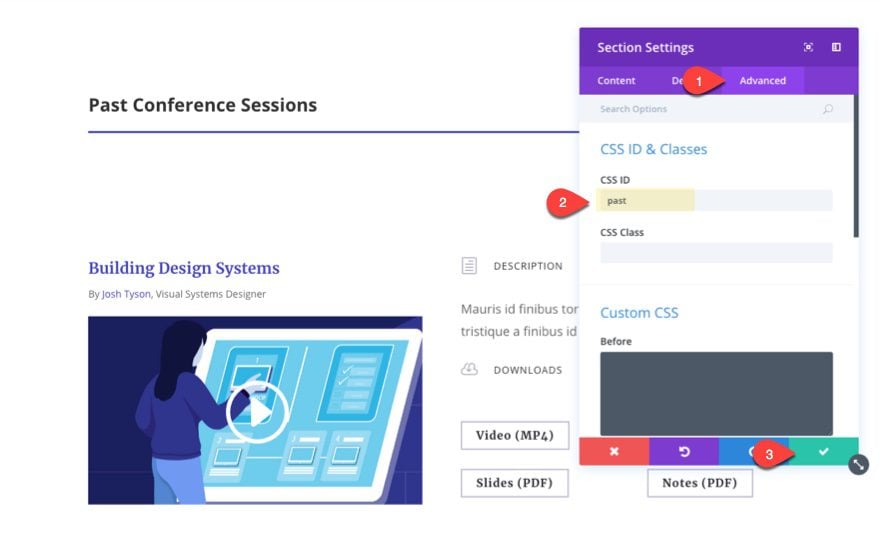
Save your settings.
Now when you click on the navigation menu links, they will scroll to the corresponding section.
Adding Custom Back-to-Top Links Under Each Section
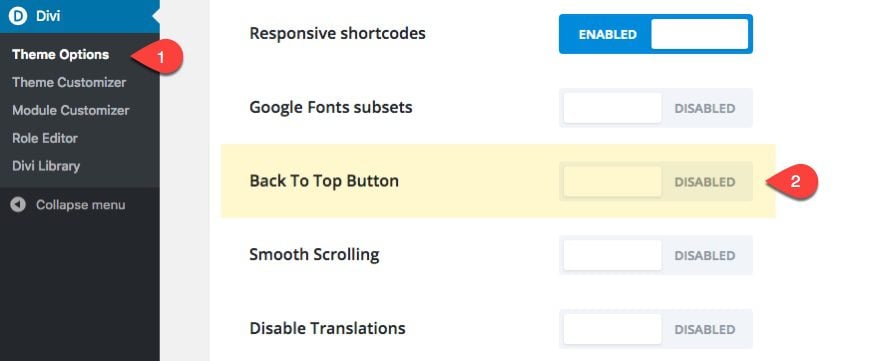
Divi has a built in back-to-top button option that will float at the bottom right of your page. You can easily enable this option under Divi > Theme Options under the General Tab.
However, you can also create a back-to-top button of your own after each section of your resources page. This can create a better user experience for users who may not notice the default back to top button at the bottom right of the page.
To create a back-to-top button, we need to add a new one column row under the last row of content in each of our three resource sections.
Then we are going to copy one of our blurbs used in the Past Conference Sessions section. Copy the blurb with the title “Description” and paste it in the new row. Update the blurb module to have the title “Back to Top” with an up arrow for the icon. For the url, enter “#top”.
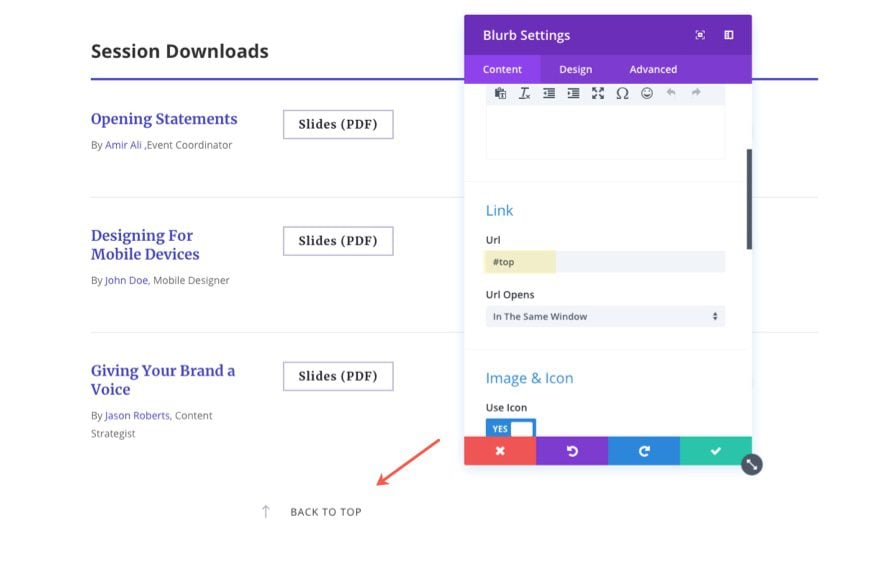
This url will serve as a anchor link that will link to the top of the page where the resource menu is located.
Under the design tab, update the following:
Width: 150px
Module Alignment: Right
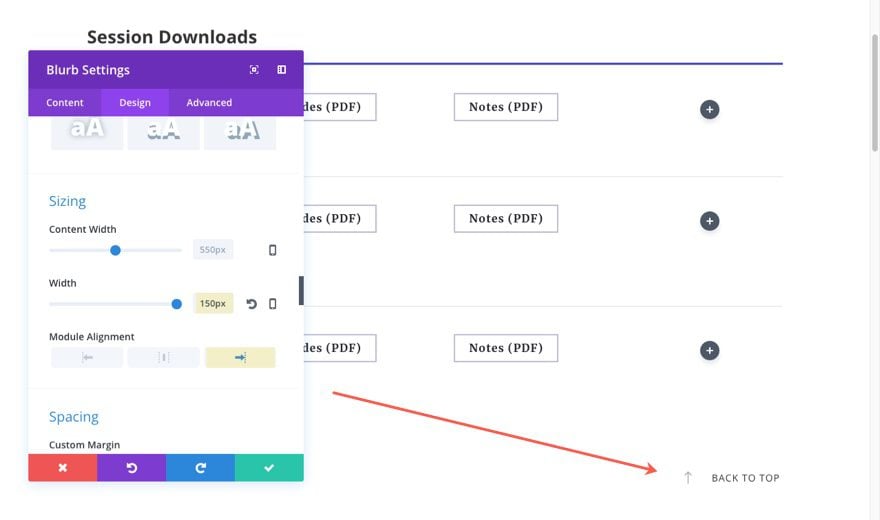
Now copy this blurb module with the back-to-top link and paste it in the row you created under each of the three sections. That way when a user gets to the end of a section, they can easily get back to the menu at the top of the page.
The last step is to add the CSS ID to the fullwidth menu section. Open the fullwidth menu settings and, under the advanced tab, enter “top” for the CSS ID. Save settings.
Notice the functionality of the anchor links combined with the back-to-top buttons.
That’s it! Your resource page layout is complete. The only thing left to do now is to update each link or video url with your own video or download resources.
Here is the final design of the page.
Using Google Cloud to Store your Download files
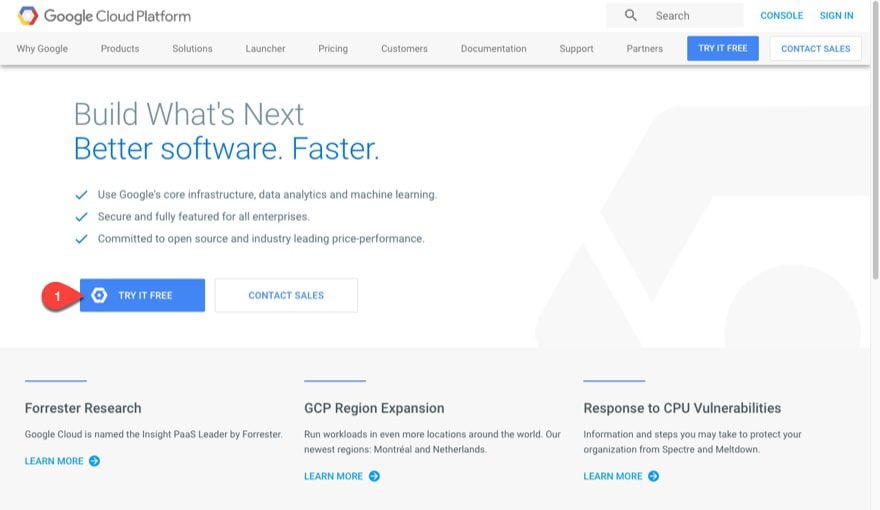
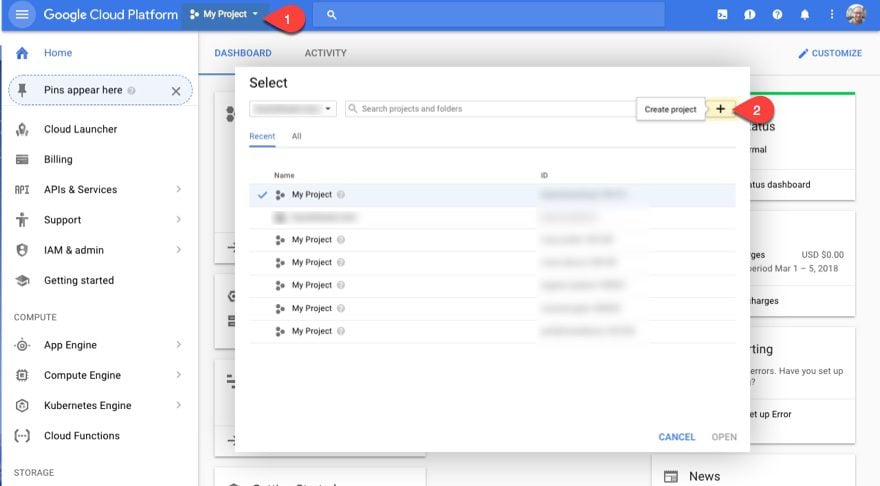
Once you’ve signed up for Google Cloud (there is a free trial option), you’ll need to log into your Google account, and access the Google Cloud Console. From the Project drop-down, click Create project:
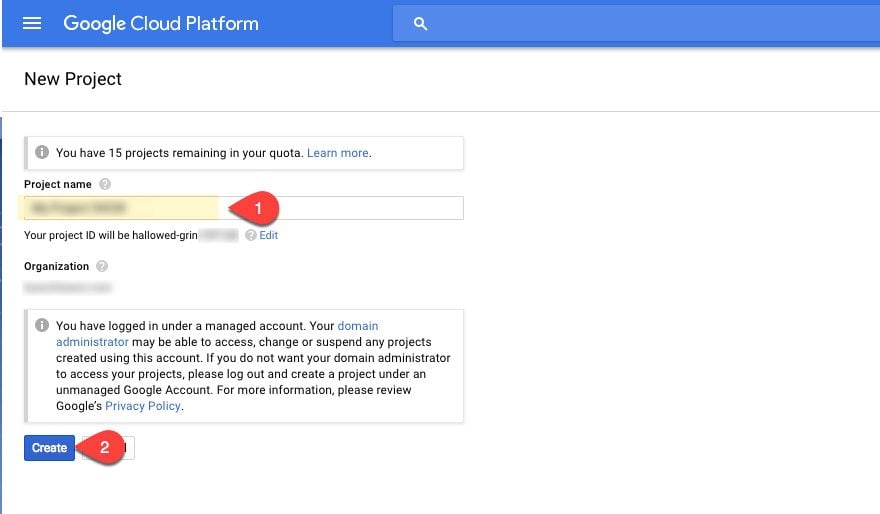
Then create your new project by giving the project a name and selecting Create.
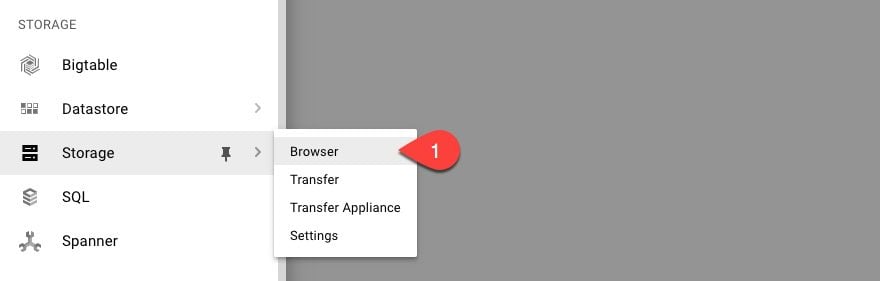
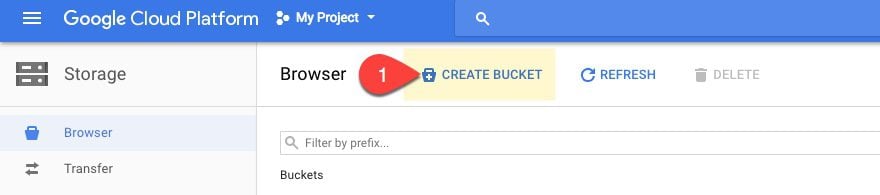
Next, from you dashboard, navigate to Storage > Browser.
Then click the Create Bucket link at the top of the page.
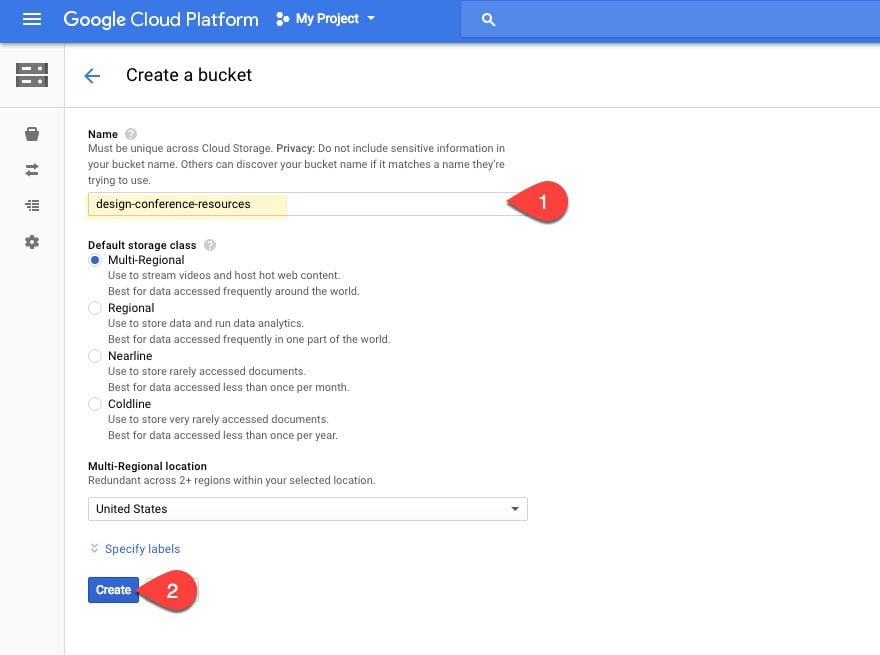
Enter the name of your new bucket. I’m calling it “design-conference-resources”. You can keep the default multi-regional option selected and click the Create button.
The open your new bucket and drag your download file into the browser. Once it finishes uploading, click the checkbox next to “Public Link” in order to make the download available to anyone.
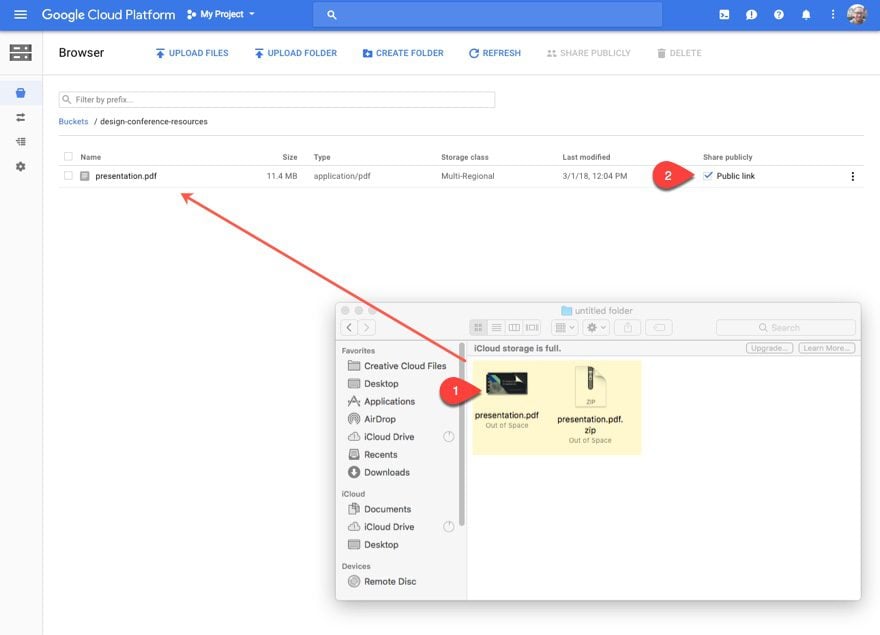
Tip: If you want the file to automatically download to the user’s hard drive instead of opening in a new browser, compress your file into a zipped version before adding it to your bucket.
If you are interested, you can learn more about Google Cloud and how it compares with other providers.
Adding your download links to your Resources Page
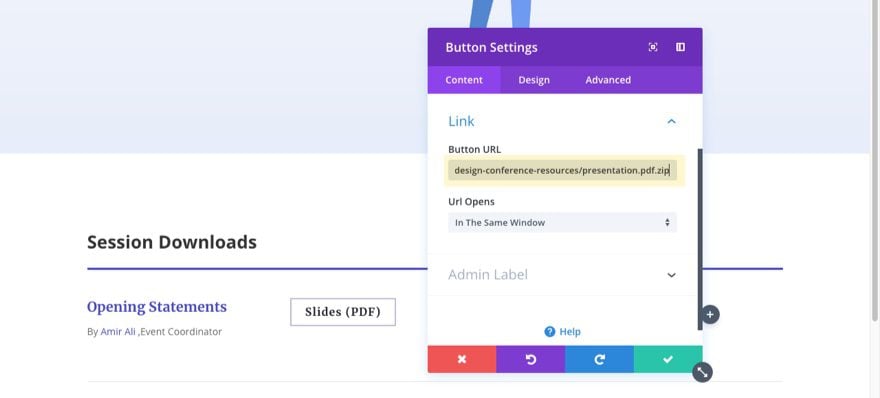
To add your new download links to your resources page, you must first copy the public link you created in your Google Cloud Bucket. Simply right click on the public link next to the file you want, and select Copy Link Address.

Then go back to your resources page and paste the link url in in the Button URL input box for each of the button modules accordingly.
Final Thoughts
If you need a resources page for your conference website, you really don’t have to start from scratch. The design conference layout pack will provide all the design elements you need. You can provide digital download links that look great and, if you want, you can use a third party storage provider like Google Cloud Storage to store those download files for faster streaming and delivery of those files to all parts of the world without overloading your own server.
I hope this use case tutorial will inspire you to create a resource page your users will love.
I look forward to hearing from you in the comments.
Cheers!


Hi Jason Champagne,
this is amazing post with details description, very easy to understand
That’s a nice tutorial. A digital resource page or in other words a tools page is a must in every blog to showcase to visitor. I think DIVI is really doing nice to create such an easy way to create pages.
Can I set it up so different people have access to different content? For example, someone might pay for access to one thing, but others might pay for a bundle and have access to multiple resources.
It sounds like you may need a plugin to help you with this (Restrict Content plugin comes to mind). Many membership plugins do this and you may be able to do it without getting a paid or pro version of the plugin.
https://www.elegantthemes.com/blog/resources/restrict-content-pro-an-in-depth-overview
Beautiful work, thanks 🙂
I would love that Elegant Themes had a blog in Spanish, so I would not have to use Google Translate to read each entry.
Good post!
Greetings from Colombia
Use Chrome with auto translate !
Support and for the Russian language!:))
This is a great thought provoker for other applications too.
Dennis,
I agree! Feel free to share some ideas with us.
Thanks