
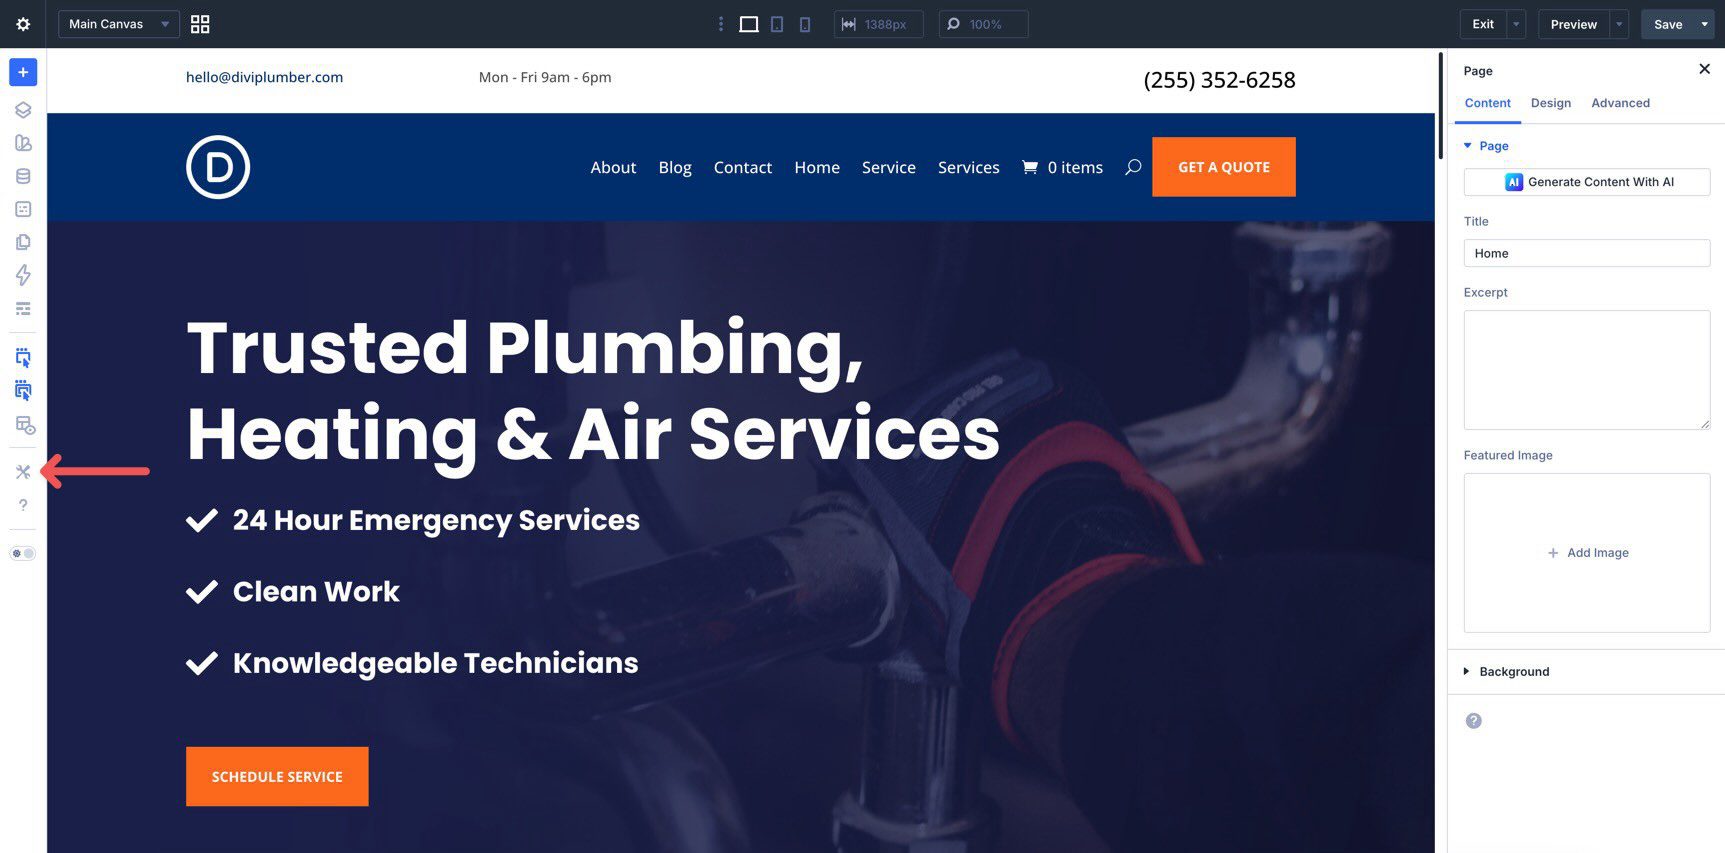
Divi 5 is now available, bringing a rebuilt foundation focused on performance, a modernized builder experience, and a growing list of new features. One of the latest additions is Editable Theme Builder Areas, also referred to as complete site editing. Instead of leaving the Visual Builder to open the Theme Builder separately, you can now edit the active header, footer, and body template areas directly on the front end while working on the page itself.
This creates a smoother workflow because the global template areas assigned to the page you’re viewing appear inside the same editing session. You can update site-wide elements and page-level content side by side, with less context switching and faster visual feedback.
In this post, we’ll walk through what Editable Theme Builder Areas are, how to use them, and a few practical ways to work with them more efficiently.
Let’s dive in.
What Are Theme Builder Areas In Divi 5?
Divi has always been more than a page builder. It also gives you control over structural parts of your WordPress website, including headers, footers, post templates, product templates, category templates, and other dynamic layouts.
Subscribe To Our Youtube Channel
Those site-wide and conditional layouts are managed inside the Theme Builder, where you can create templates using Divi’s modules and design settings, then assign them to specific parts of your site.
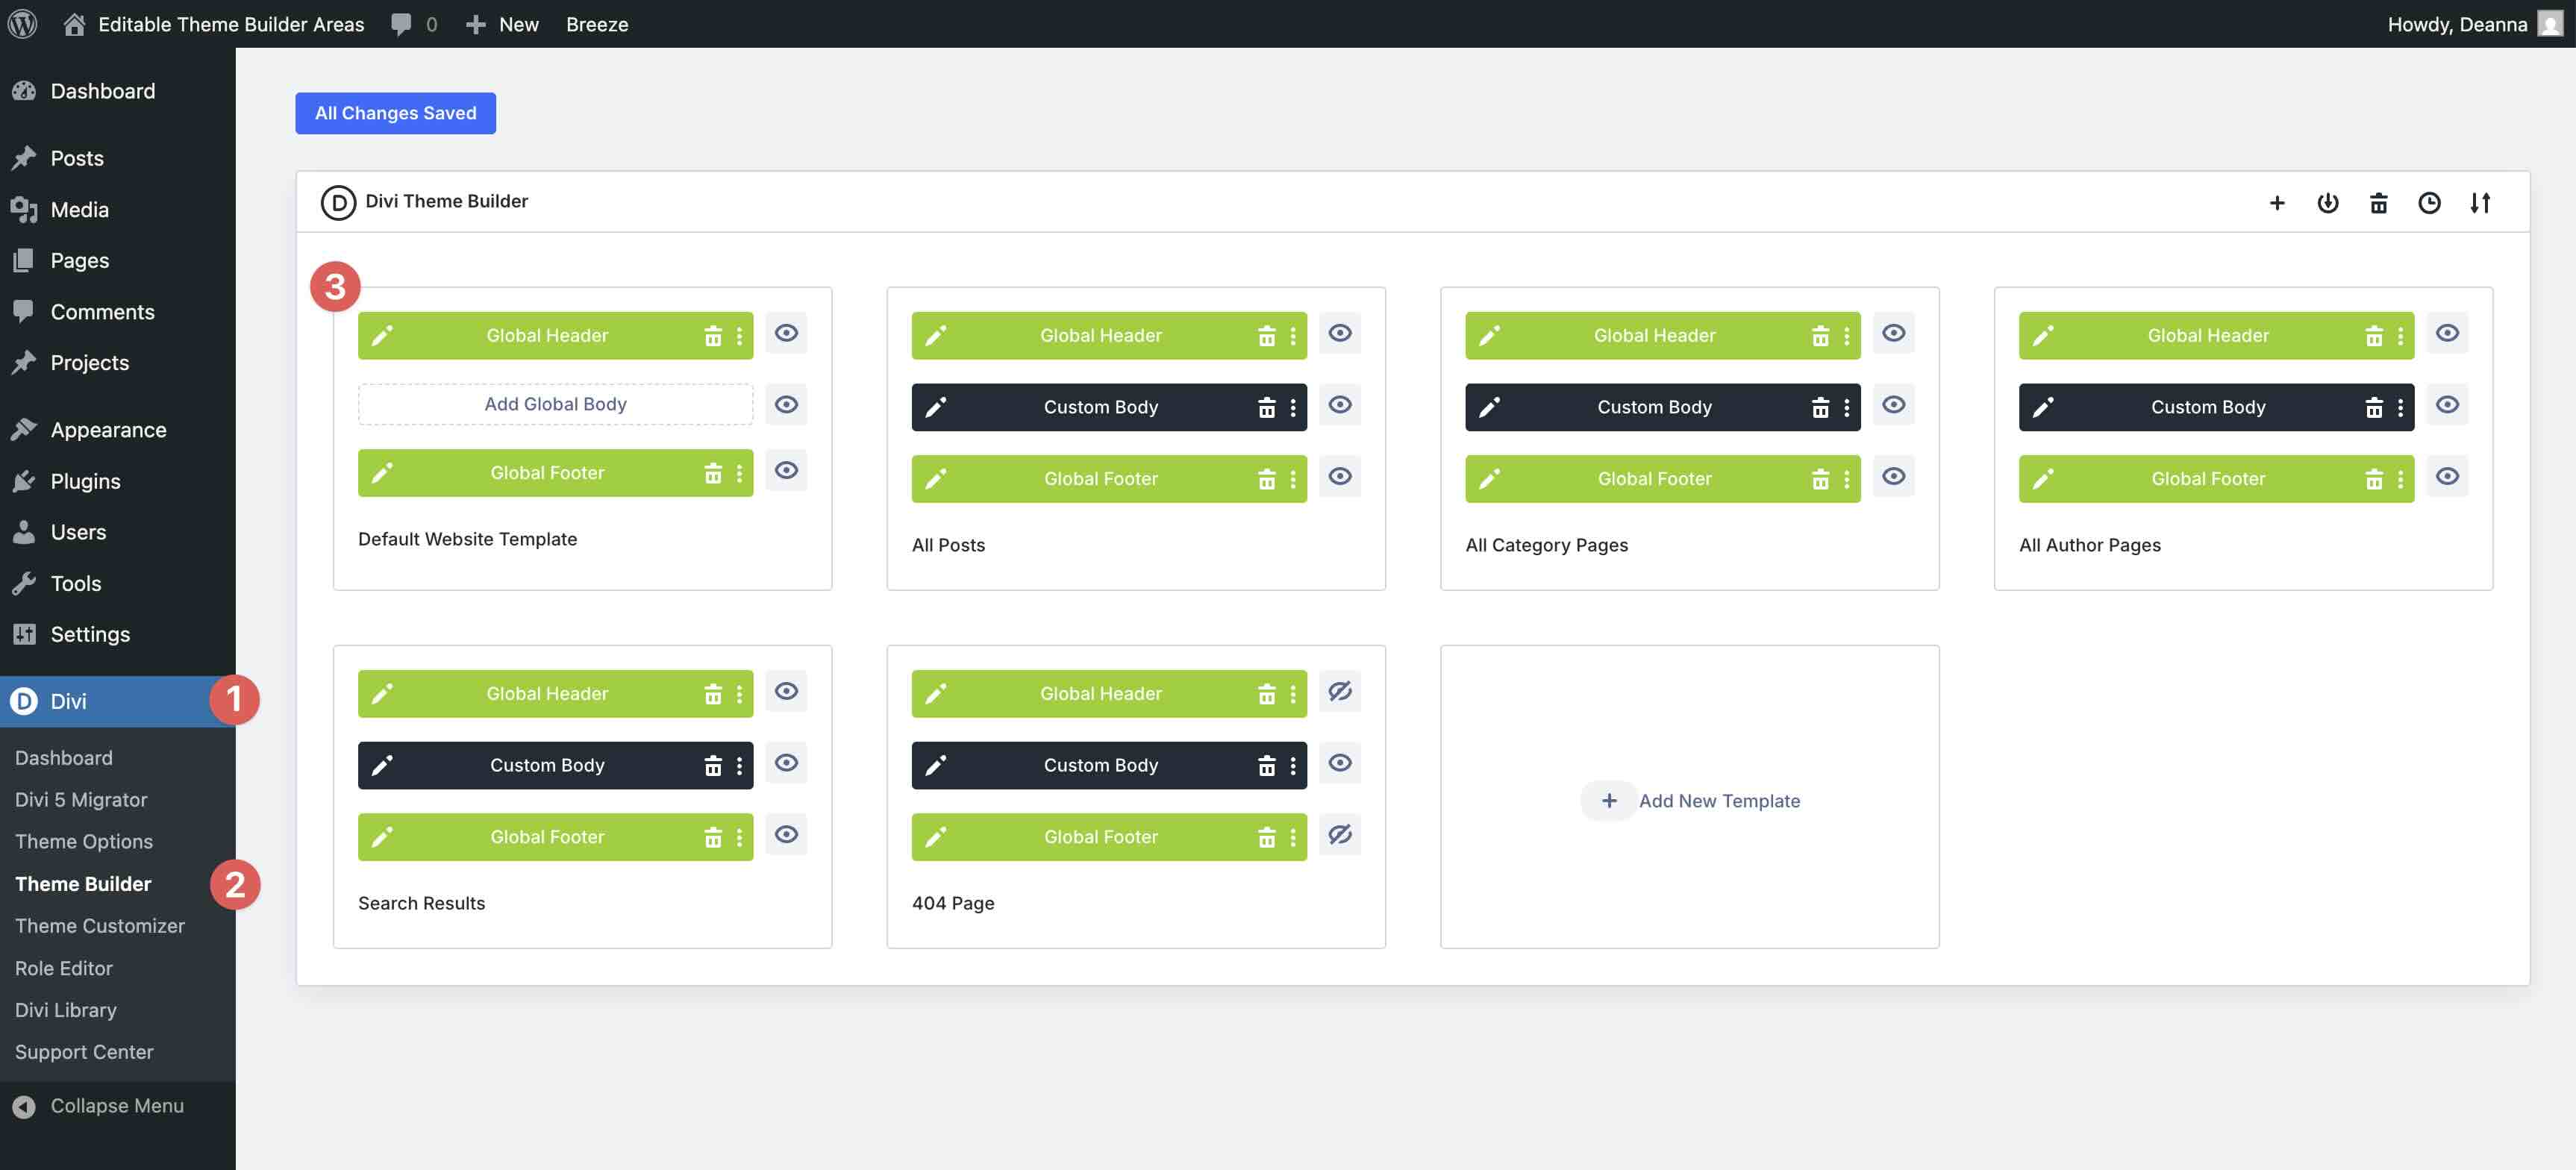
Traditionally, editing those templates meant going to WordPress Dashboard > Divi > Theme Builder, opening the relevant template, and working on it in a separate builder session. In Divi 5, that workflow changes. The Theme Builder areas assigned to the current page can now be edited directly inside the Visual Builder on the front end.
Achieve Complete Site Editing In Divi 5
With this update, Divi 5 brings a more complete front-end editing experience. When you visit a page, post, archive, product page, or another template-driven area of your website, you can click Edit With Divi and open the builder with the relevant Theme Builder areas already loaded.
Inside the builder, you can work across the full page structure in one place, including the header template, the page or template body, and the footer template. That means you can refine global elements and local content without bouncing between separate interfaces.
Key Advantages
- Less context switching: You can edit the assigned header, body, and footer in one builder session instead of opening the Theme Builder separately.
- Seamless editing between areas: You can copy, paste, drag, and move elements between template areas more naturally while seeing the full page context.
- Front-end editing on more parts of your site: Divi 5 makes Edit With Divi available across more template-driven areas, not just singular content like pages and posts.
- Better visual decision-making: Because you’re editing in context, it’s easier to judge spacing, navigation, calls to action, and how global elements interact with the content below them.
This makes editing headers, footers, and body templates feel more integrated and efficient, especially when you’re fine-tuning site-wide elements in context.
How To Access And Use Editable Theme Builder Areas
Editing Theme Builder Areas in Divi 5 happens directly on the front end. Here’s how to get started.
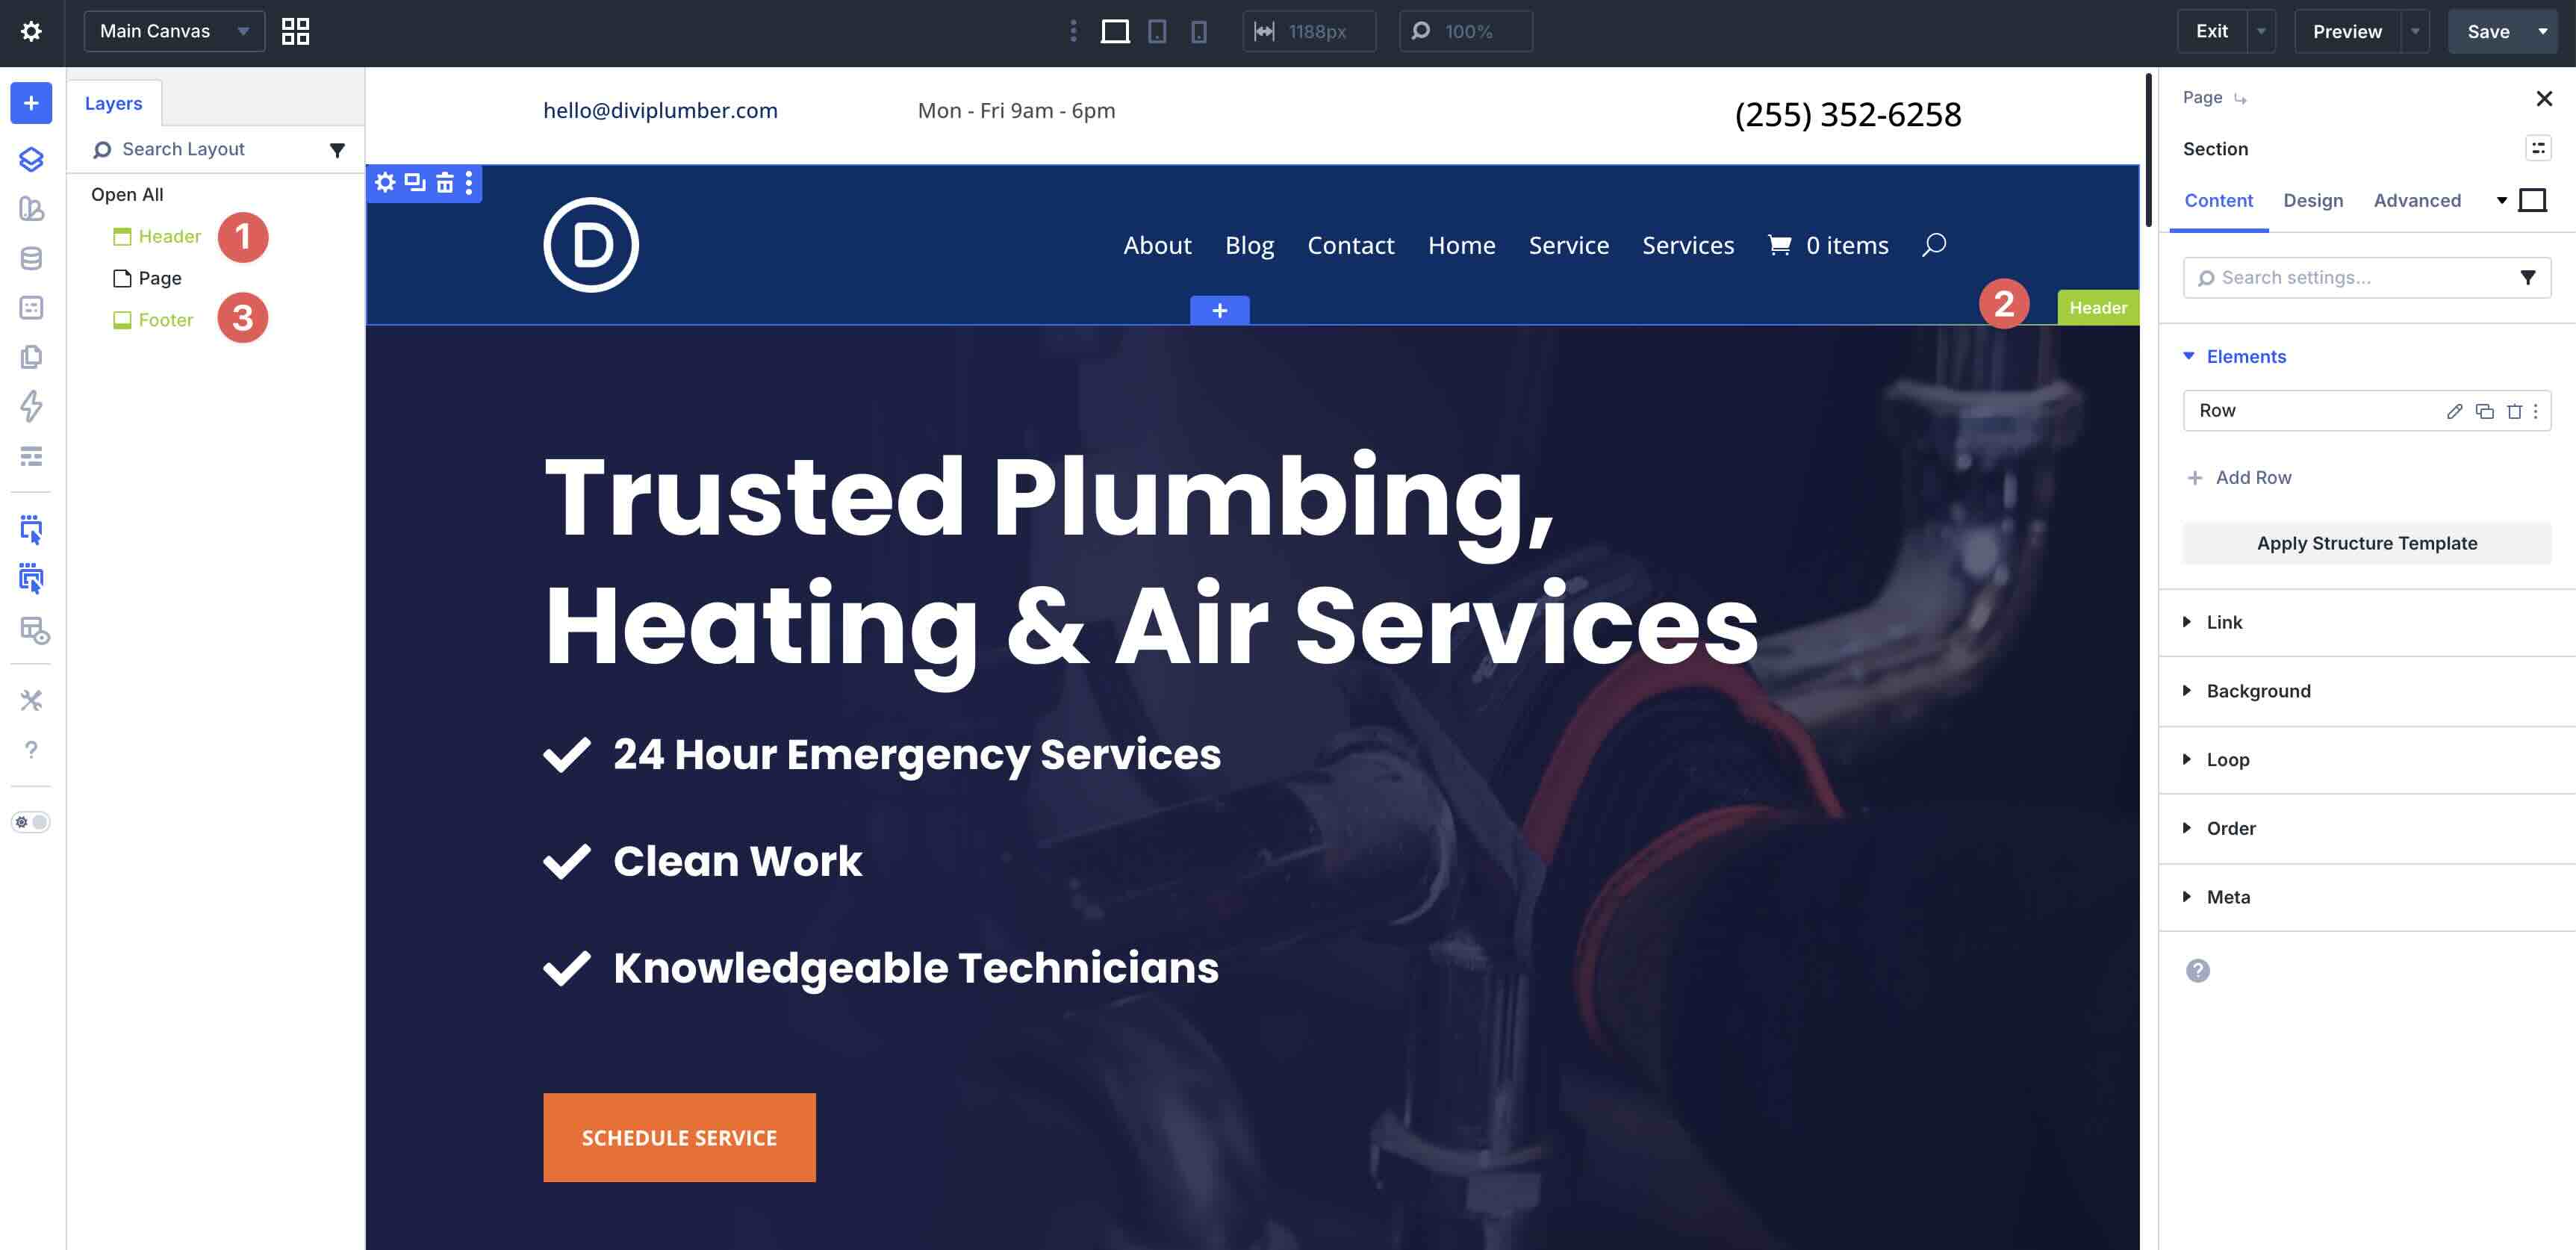
Log in to WordPress and navigate to the front end of your website. Click the Edit With Divi button in the top admin bar.

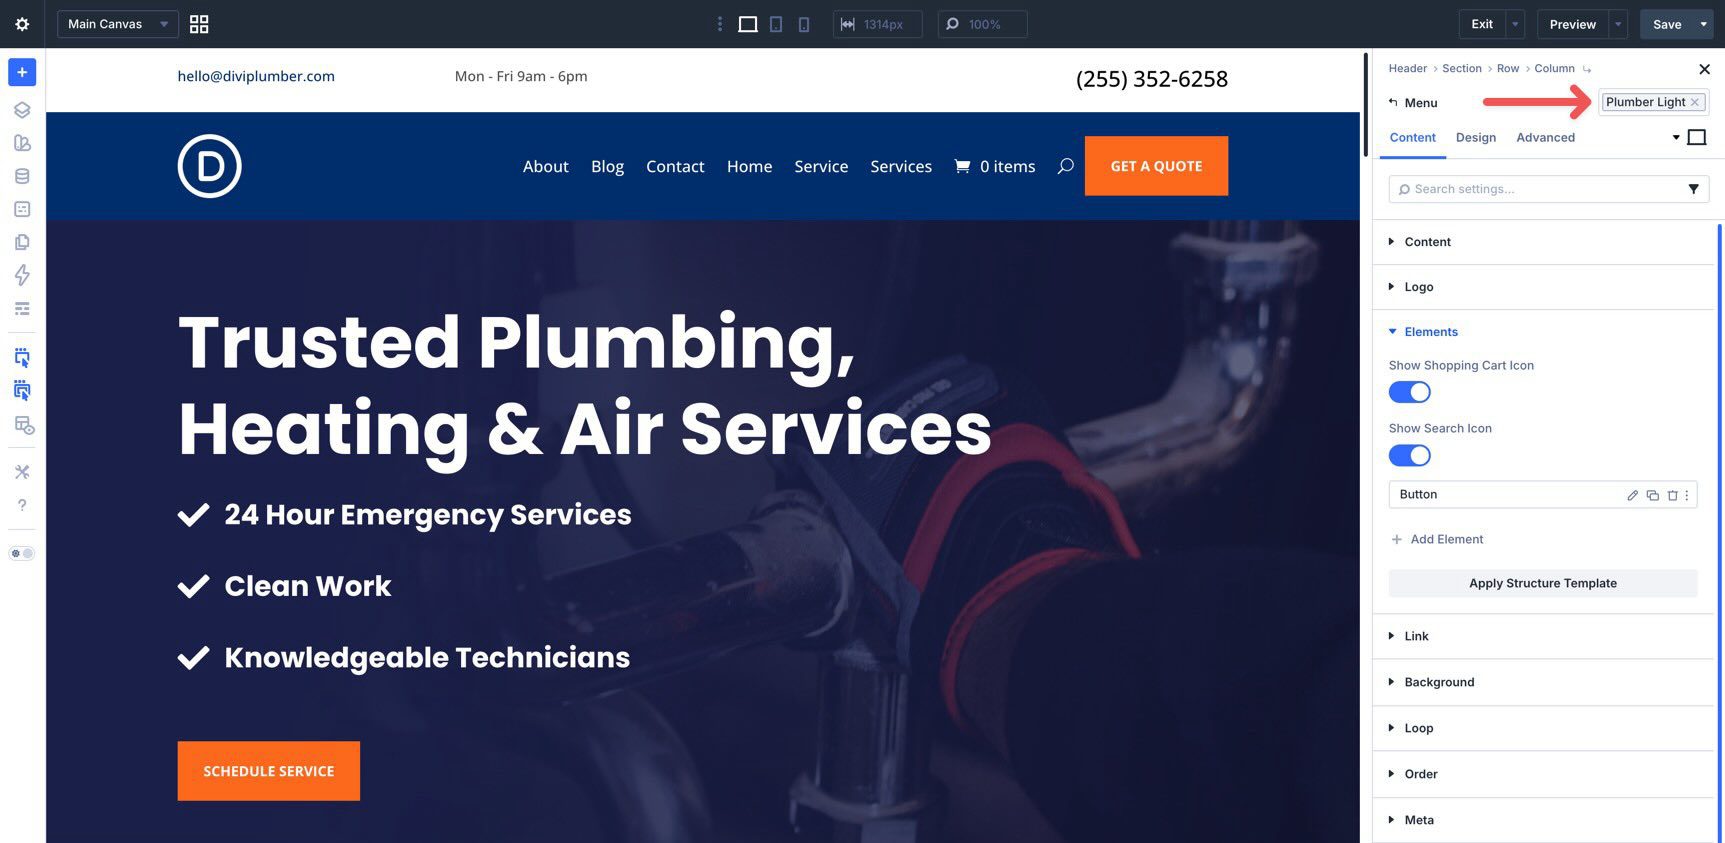
Once the builder opens, hover over the header, footer, or other template-controlled area. Divi highlights Theme Builder areas with a bright green label so they’re easy to identify.
Click into the Header area to start editing it directly.
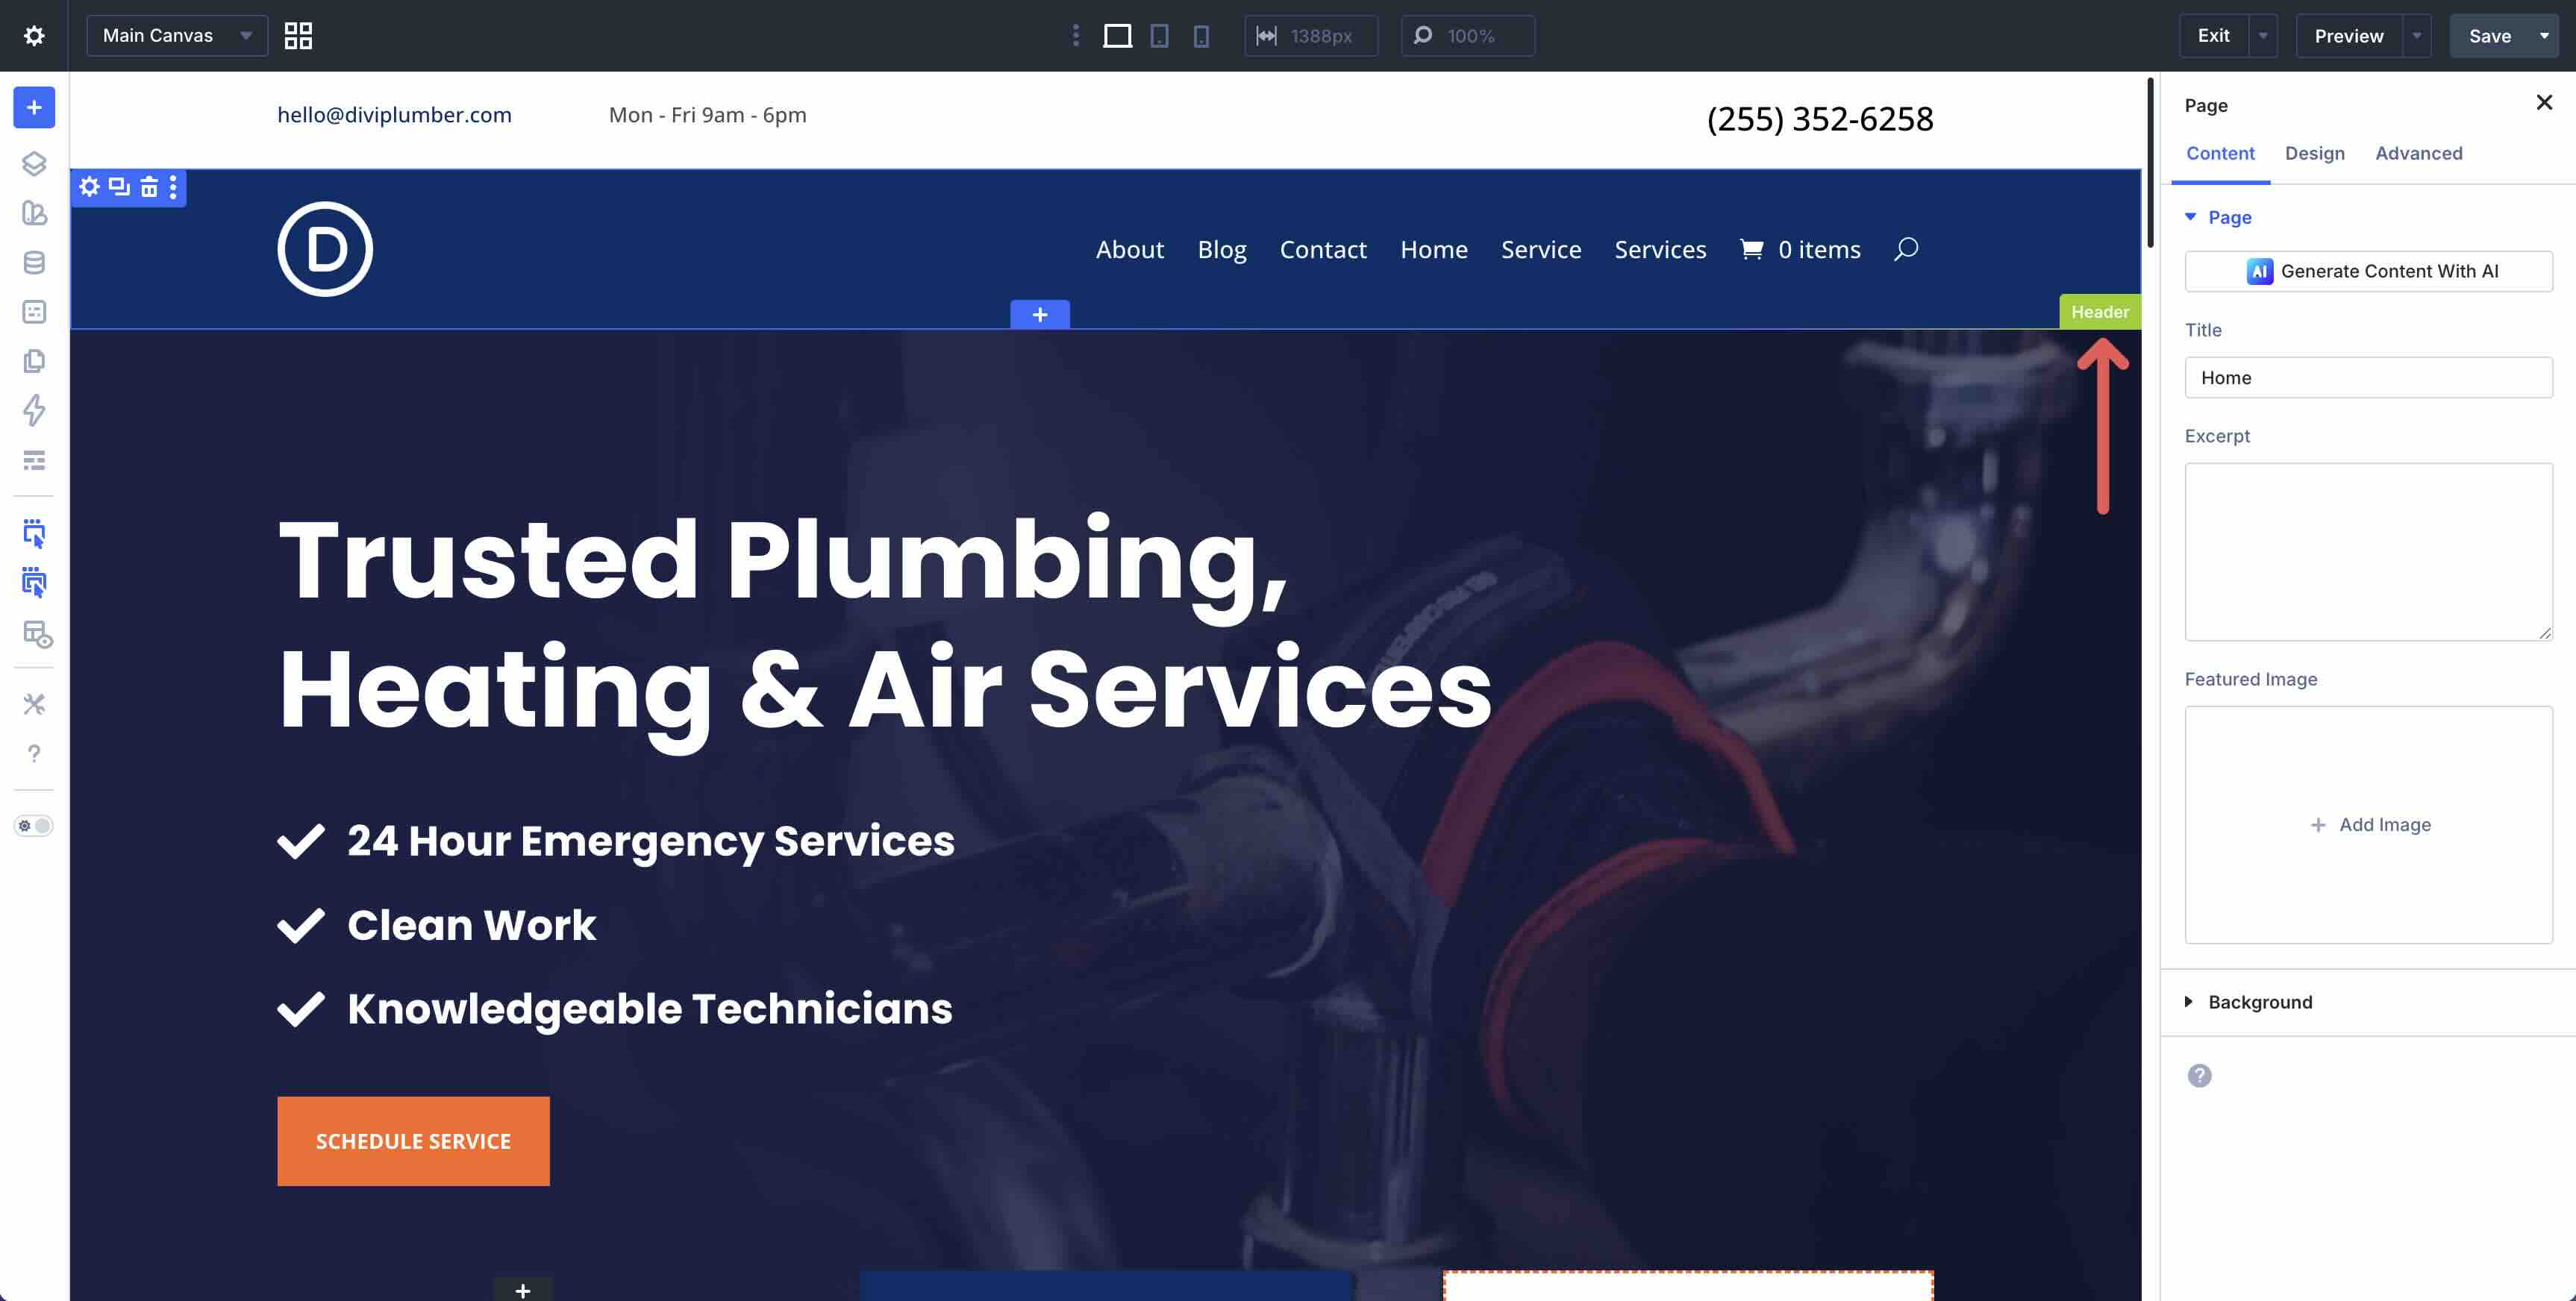
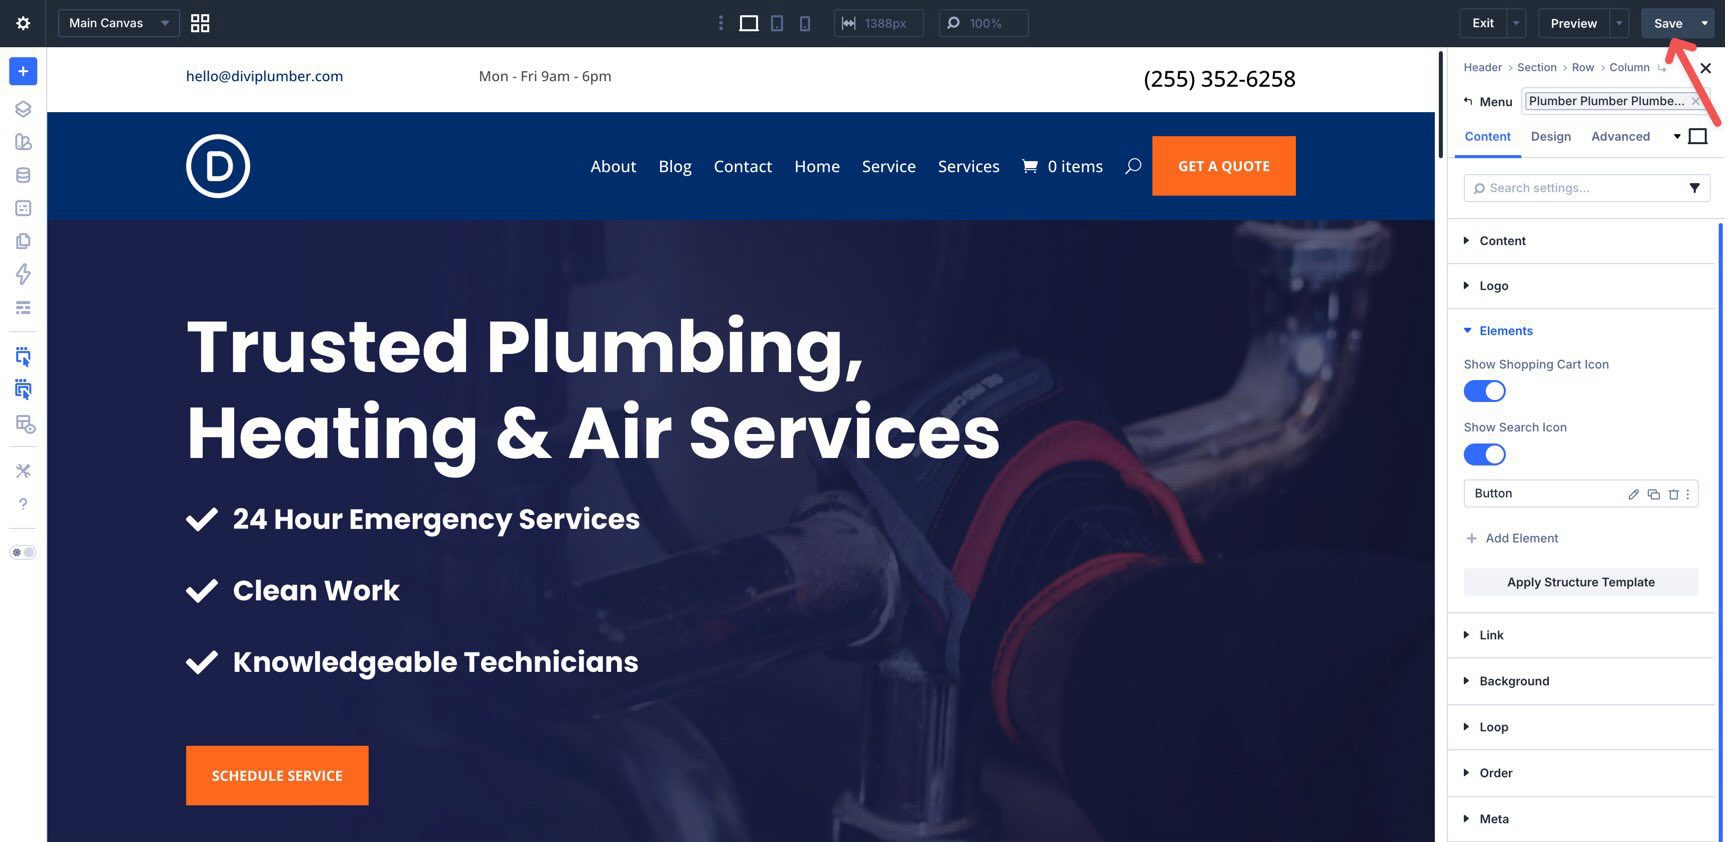
From there, you can edit the header like any other part of the layout. For example, you can copy a Button module from the body content and place it directly into the Header area without leaving the builder.
When you’re finished, save your changes as usual.
Just like edits made through the Theme Builder, changes to a global template area apply everywhere that template is assigned.
One important thing to keep in mind is scope. You’re editing the Theme Builder areas assigned to the page you’re currently viewing, so any changes to those global templates will affect every location where that template is used.
By bringing Theme Builder editing into the Visual Builder, Divi 5 removes a lot of back-and-forth from the workflow and makes site-wide editing feel faster and more intuitive.
Managing And Protecting Editable Areas
Direct front-end access to Theme Builder areas is powerful, but there will be times when you want to simplify the interface or restrict access, especially on client websites or collaborative builds.
Disable Theme Builder Areas In The Visual Builder
If you want to hide Theme Builder areas while editing, launch the Visual Builder on any page and click the Builder Settings icon in the left sidebar.
When the Builder Settings modal opens, scroll until you find the Show Theme Builder Layouts toggle. Switch it off to hide those areas from the current editing view.
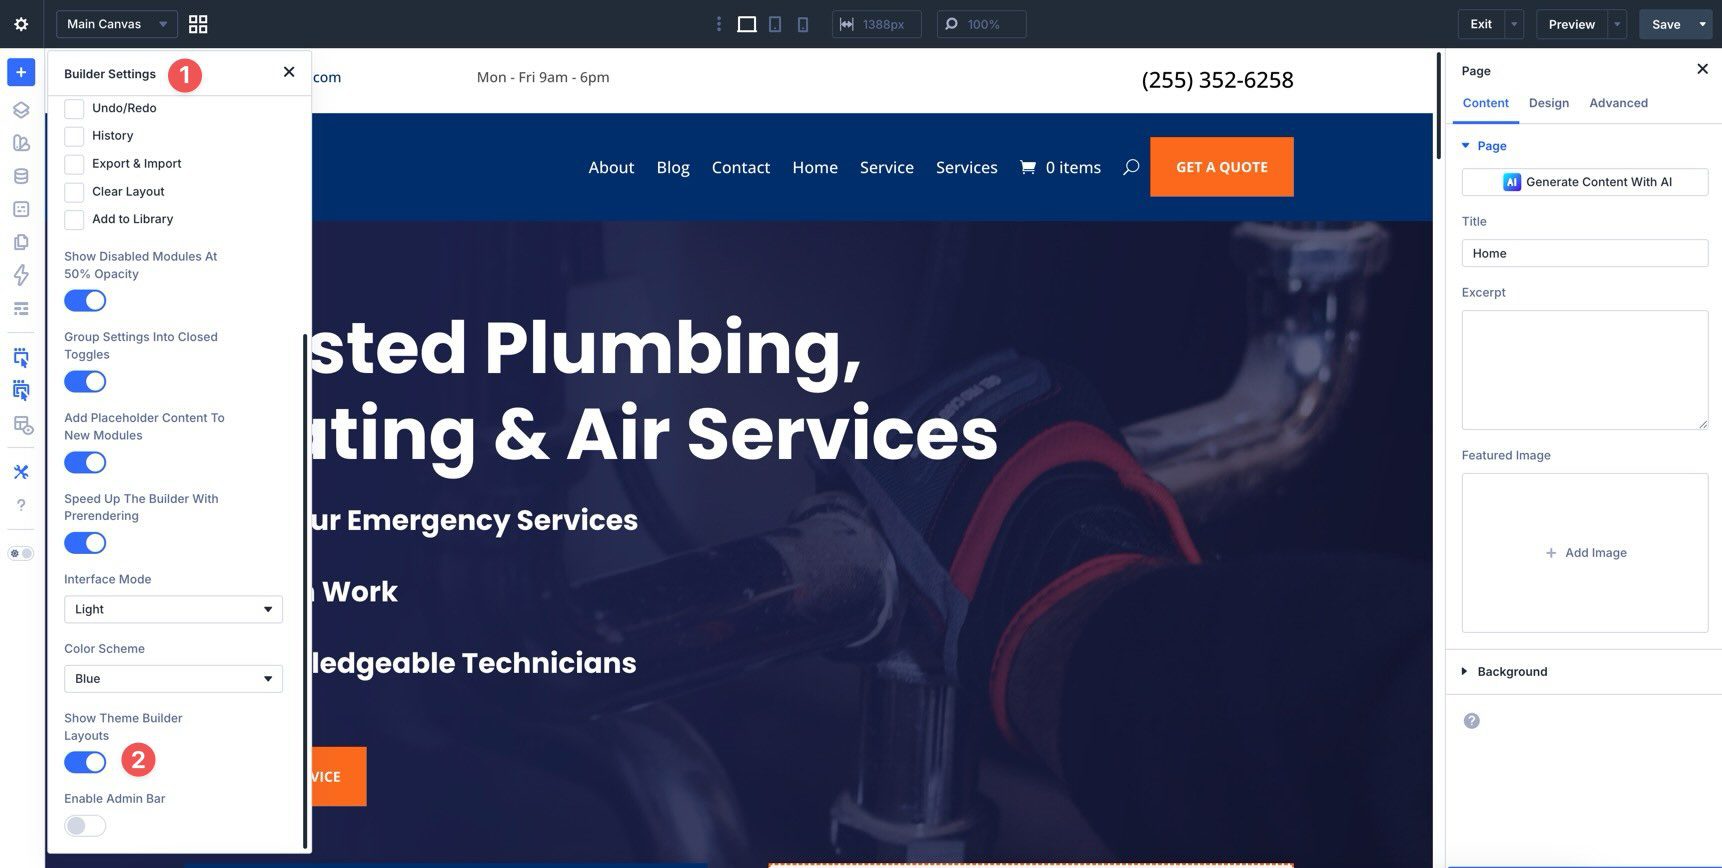
The header and footer will now be hidden in the builder, allowing you to focus only on the page content.

This is especially useful when you’re editing content on a live page and don’t want global template areas cluttering the workspace.
Use The Divi Role Editor To Restrict Access
For client or team websites, you can prevent certain users from editing Theme Builder areas entirely.
Go to the WordPress dashboard and select Divi > Role Editor.
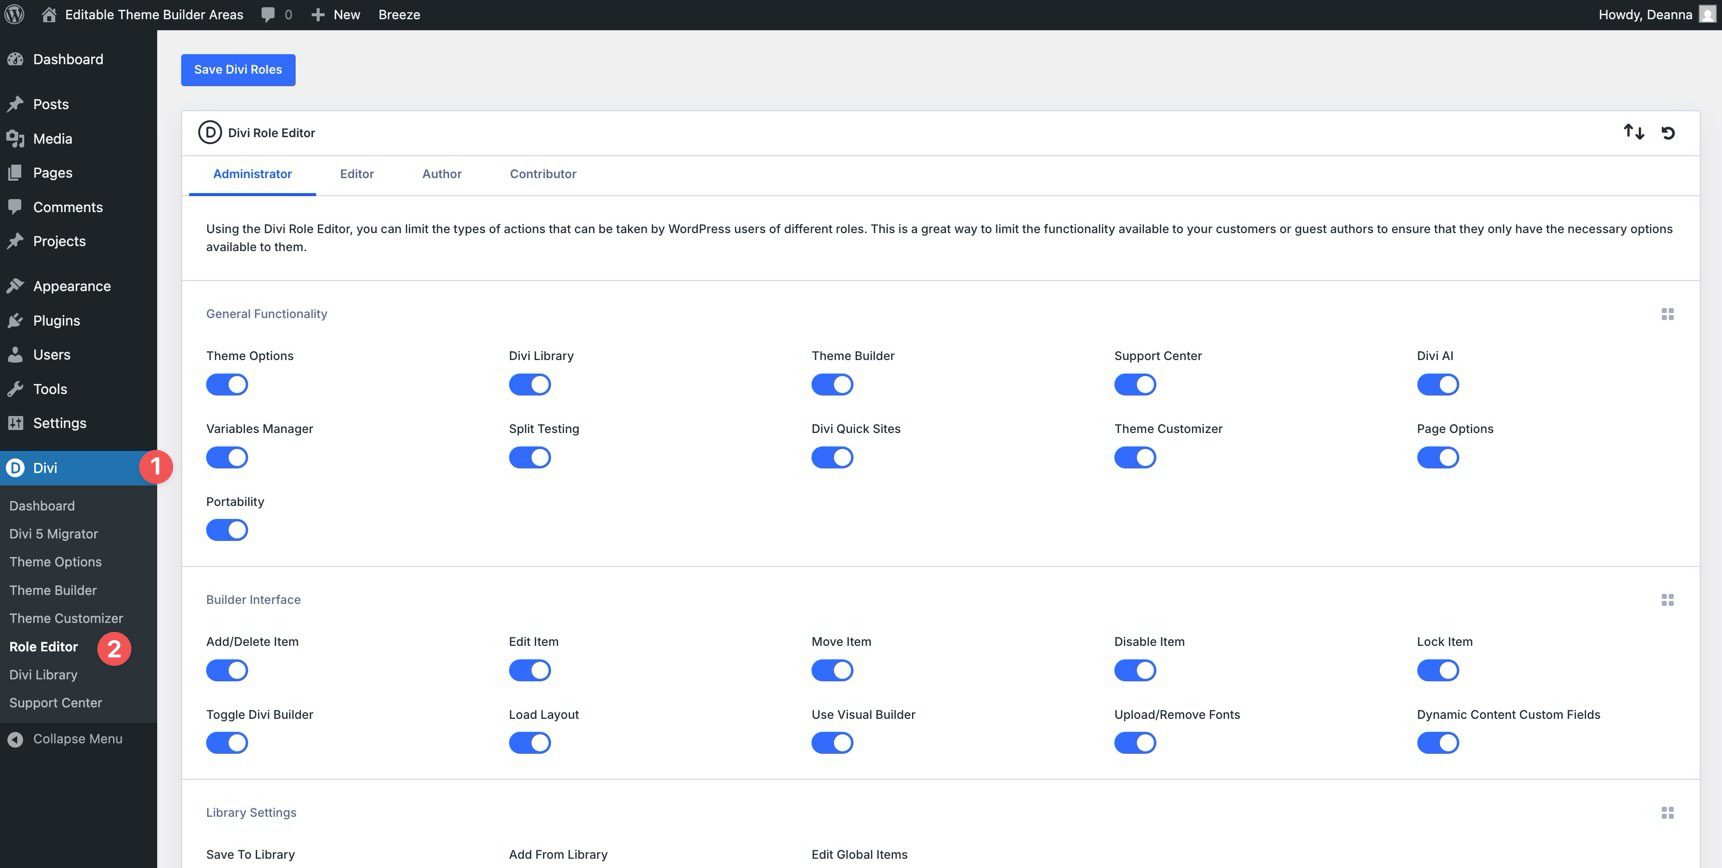
To restrict access, toggle Theme Builder off in the General Functionality settings for the relevant role.
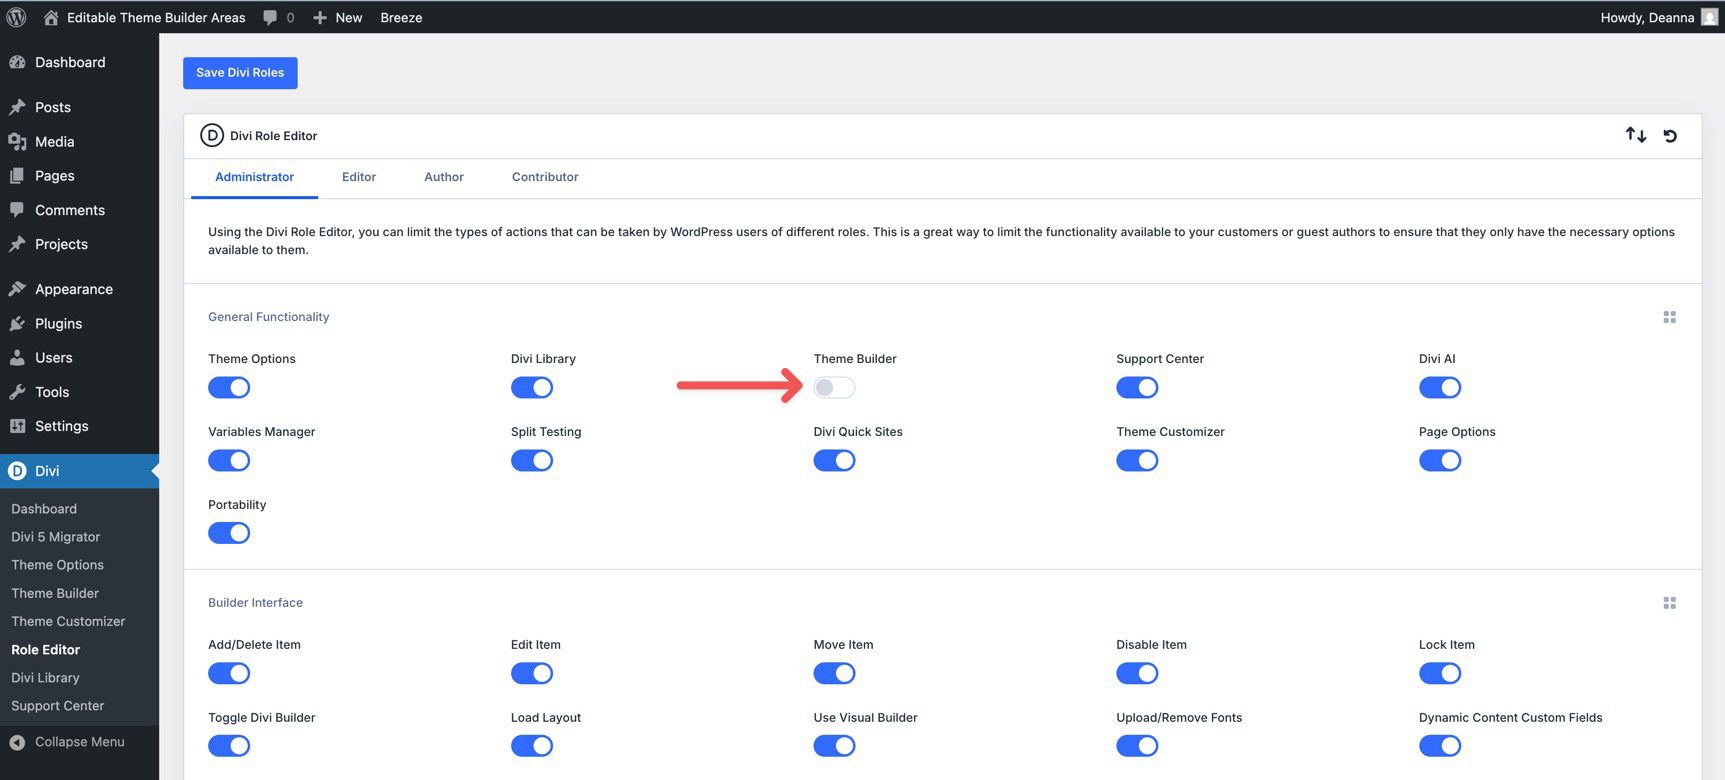
Click the Save Divi Roles button to apply the changes.
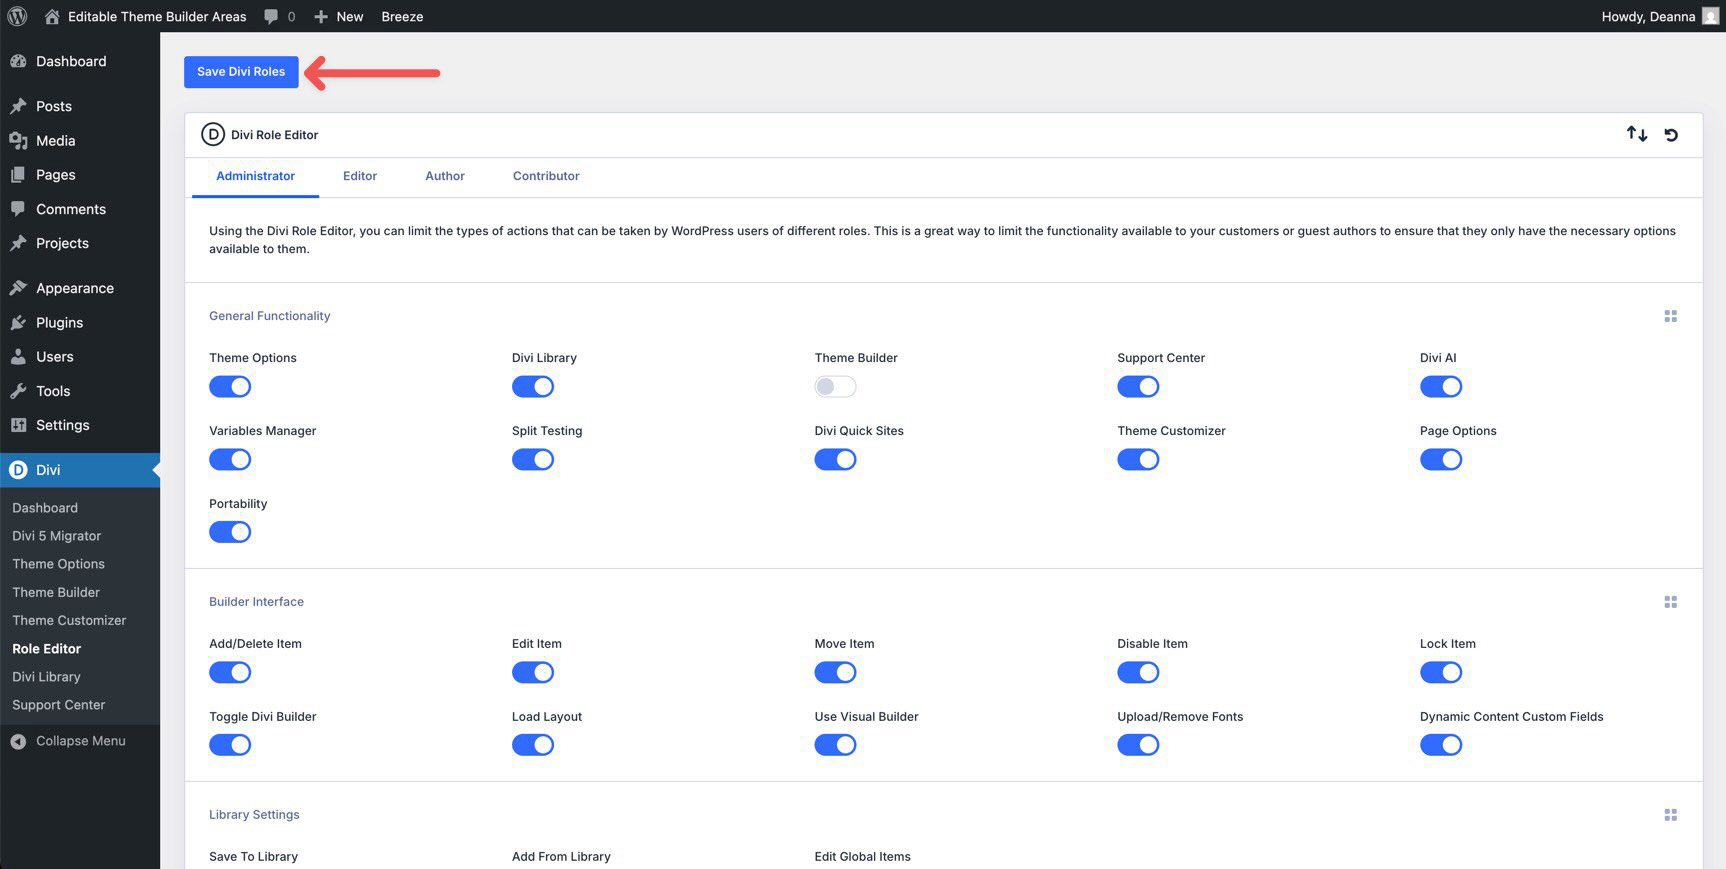
Users will still be able to work with page content in the Visual Builder, but they won’t be able to access or edit Theme Builder templates.

The combination of the in-builder toggle and the Role Editor gives you both workflow flexibility and protection against accidental global edits.
Tips And Best Practices
Here are a few practical ways to get even more out of Editable Theme Builder Areas in Divi 5.
Global areas like headers and footers often contain more complex structures, including Nested Modules and Nested Rows. Instead of hunting visually for the right element, open Layer View to see the full hierarchy and jump directly to the item you want.
Divi 5 Breadcrumbs also make it easier to move up and down a deep layout structure without excessive clicking or scrolling.

Enable Speculative Prerendering
Divi 5’s Speculative Prerendering helps speed up navigation by preloading likely next pages based on user behavior. That can make entering and exiting the builder, or moving between pages while testing template edits, feel much faster.
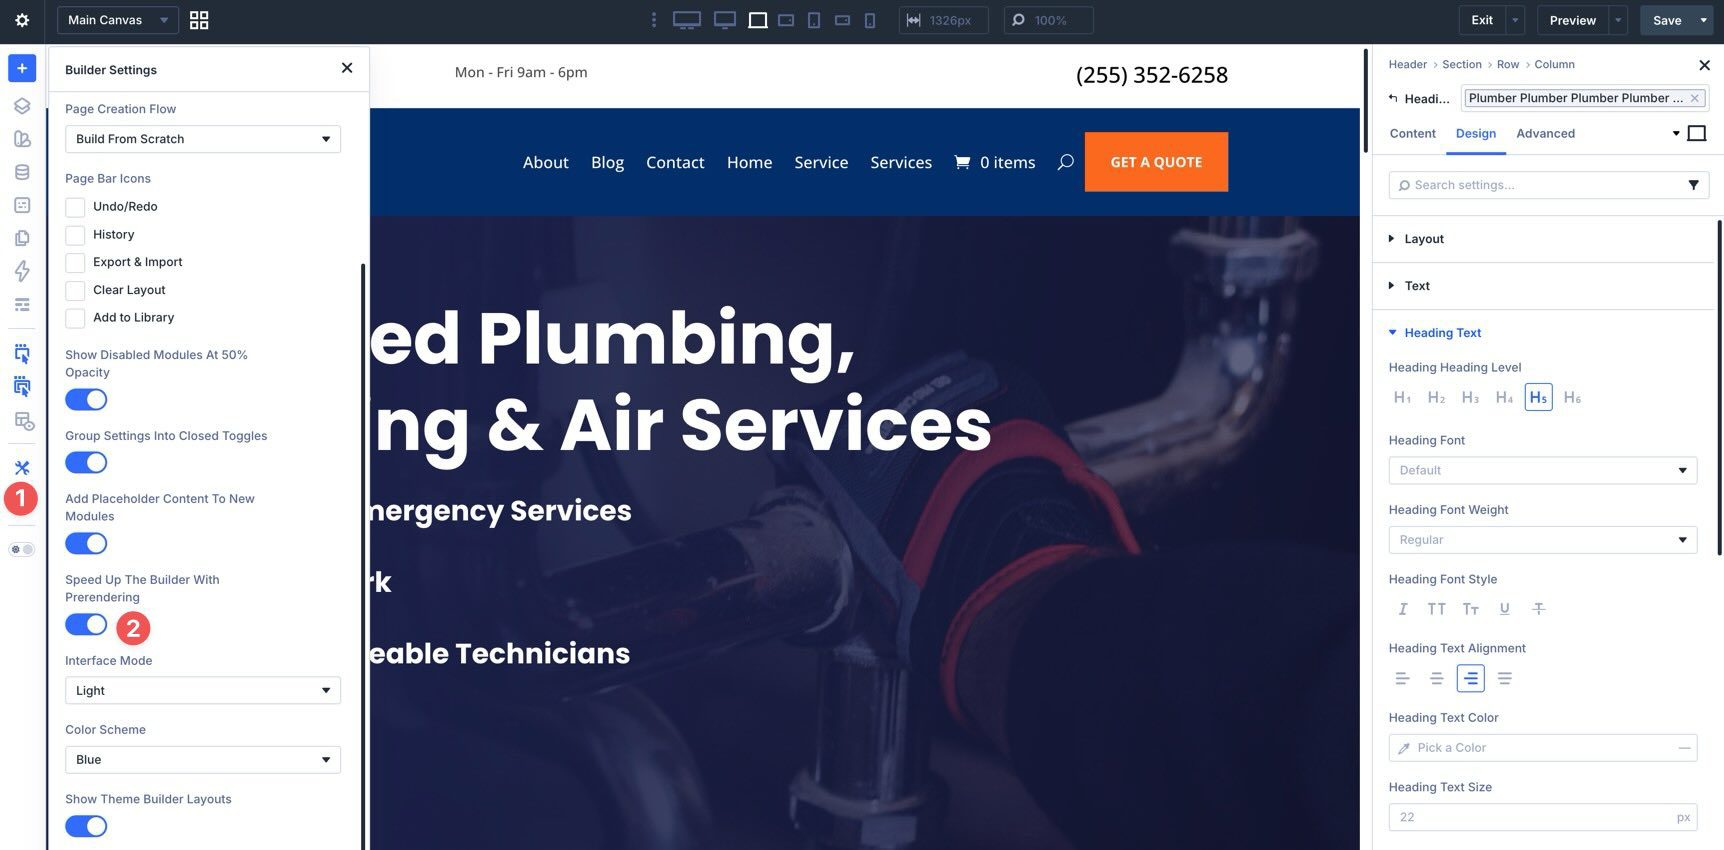
If you’re making several header, footer, or template adjustments across different pages, this feature can noticeably reduce friction in your workflow.
Use Design Variables And Presets For Consistency
Define Design Variables such as brand colors, font sizes, and spacing values in the Variable Manager.
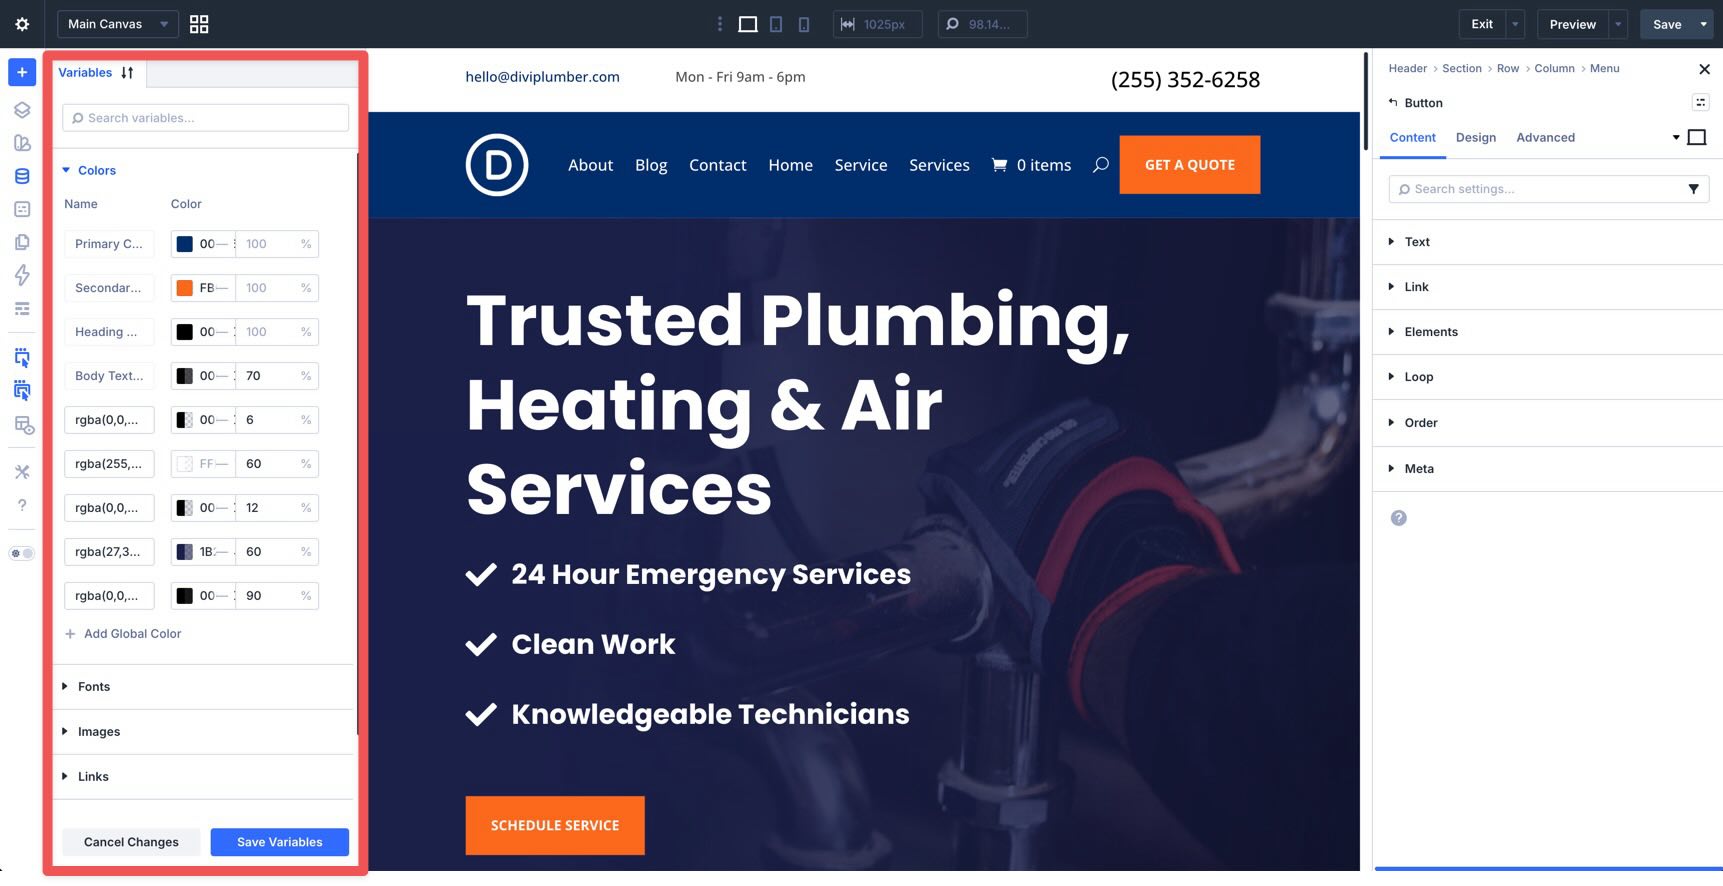
Then apply them through Element Presets or Option Group Presets to keep styling consistent across global areas.
This is particularly helpful for headers and footers. Instead of manually repeating design choices, you can update a variable or preset once and maintain consistency across every assigned template area that uses it.
Test Global Changes With Responsive Tools
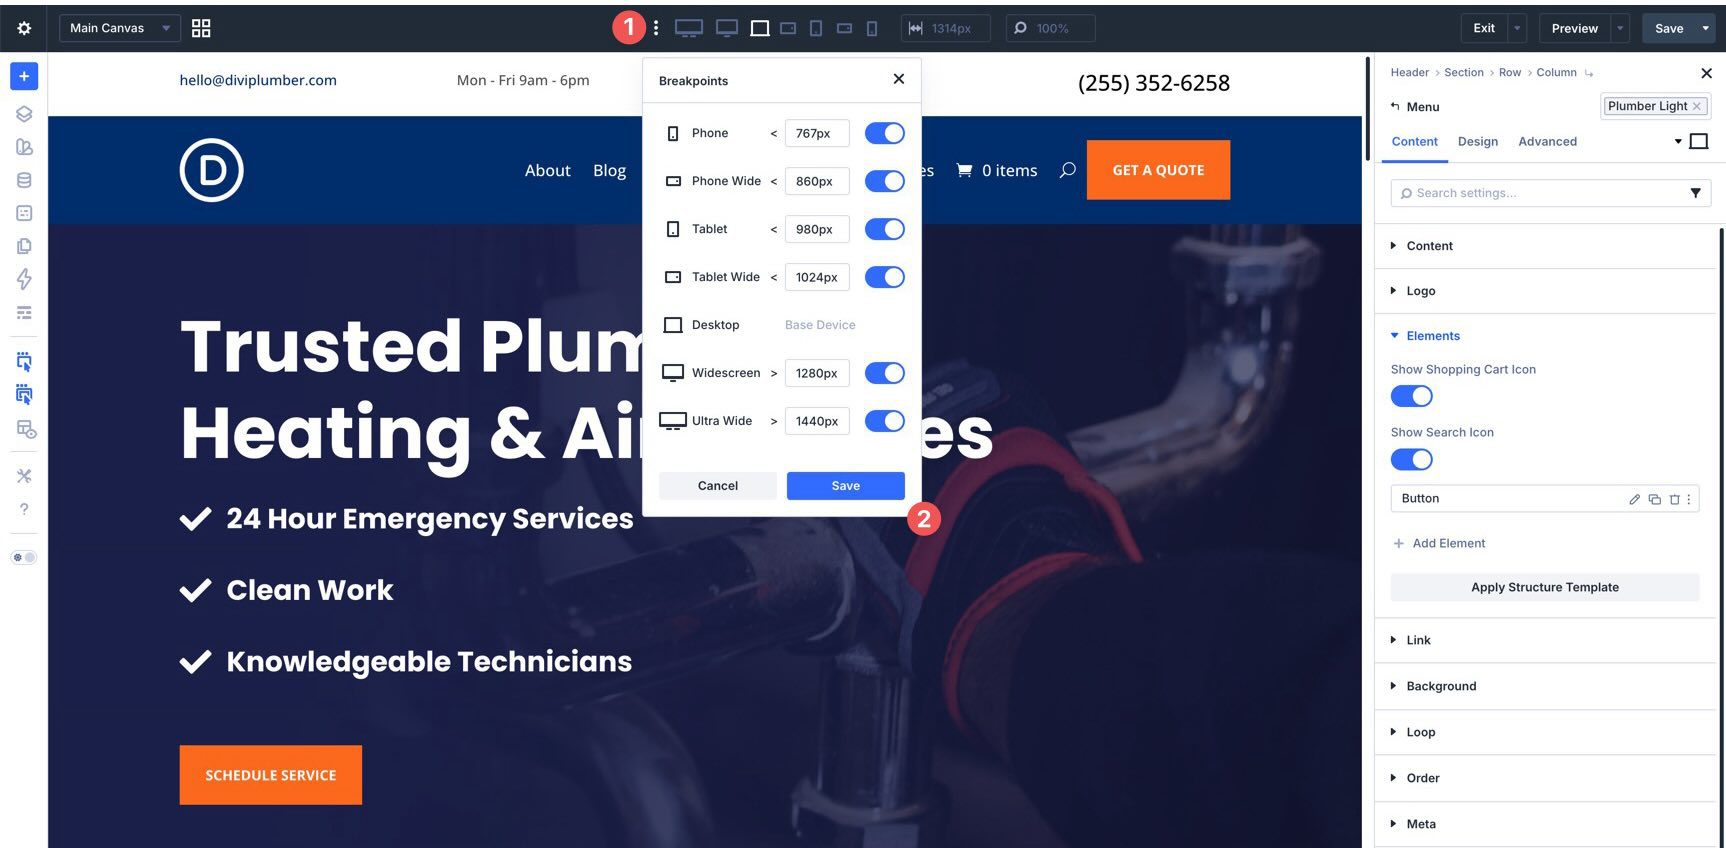
Because Theme Builder Areas affect multiple parts of your website, every change should be reviewed across screen sizes. Use Divi’s Customizable Responsive Breakpoints to check how your global layouts behave on desktop, tablet, and mobile.
For more granular edits, the Responsive Editor lets you adjust values such as menu text size, spacing, and logo sizing from one centralized interface.
A good habit is to test the template in the exact contexts where it appears. For example, check a blog post template on an actual post, a category template on an archive page, and a product template on a product page before publishing broader changes.
Start Building With Divi 5 Today
Editable Theme Builder Areas are one of the most practical workflow improvements in Divi 5. They let you edit assigned global template areas directly in the Visual Builder, in context, without constantly jumping back to the Theme Builder interface.
That makes everyday tasks faster, especially when you’re adjusting navigation, calls to action, promotional bars, footer content, or dynamic template layouts while reviewing the page itself.
If you haven’t tried Divi 5 yet, this feature is an excellent place to start. Download it from the members area, enable it on a staging site first, and test editing a header or footer directly from the front end. You’ll quickly see how much smoother the workflow feels.
Ready to share your thoughts? Drop a comment below or let us know what you think on social media.


Do you have to go back into the Theme Builder to create new header, footer, and/or page layouts? Is there a way to switch between them in the active builder area? With multiple headers, footers, etc. how do you choose between them for individual pages? Do you have to go back into theme builder to make these settings?
Currently, yes you do, but this raises a really interesting point for the guys at ET – it would be a big efficiency bonus if we could:
1) Create new header and footer areas on the front end and then save them to the Theme Builder – and also be able to assign them to posts/pages from the front end. Massively useful when trying out diff versions, and a real time saver when you realise you’ve assigned the wrong one in the TB.
2) Reassign templates from the front end.
Any chance, Nick?
Hey, Mark! I’ve logged your suggestion as a formal feature request to our development team for consideration. Thank you for your input!