

Divi Notes keeps a review request connected to the part of the page it concerns. We can identify a heading that needs attention, assign the work, and keep the follow-up conversation beside that element in the Visual Builder.
We’ll work through a page review from the first note to a completed discussion, including how to find assigned work and reopen a task. The example uses headline wrapping and event details, but the same process works for your own page content and layout feedback.
- 1 How Divi Notes Fits Into A Page Review
- 2 1. Prepare The Page For Review
- 3 2. Create A Note On The Relevant Element
- 4 3. Review And Update An Existing Discussion
- 5 4. Reply, Resolve, And Reopen Feedback
- 6 5. Find The Feedback You Need To Work On
- 7 6. Choose Your Notification Preferences
- 8 7. Save And Check The Review Before Leaving
- 9 Keep Your Next Design Review In Divi
How Divi Notes Fits Into A Page Review
Notes is part of the Divi 5 editing workflow. Each note identifies its target element and holds the request, assignment, and conversation about that task. Notes stay inside the builder and are available to authorized website editors.
Our example page has a large headline, event details, and a contrasting program section. We use a Design note for headline wrapping, a Content note for checking the sample event details, and an Accessibility note for program legibility. These are separate review tasks: completing the headline check doesn’t complete the content or accessibility checks.
1. Prepare The Page For Review
Give The Target Modules Descriptive Labels
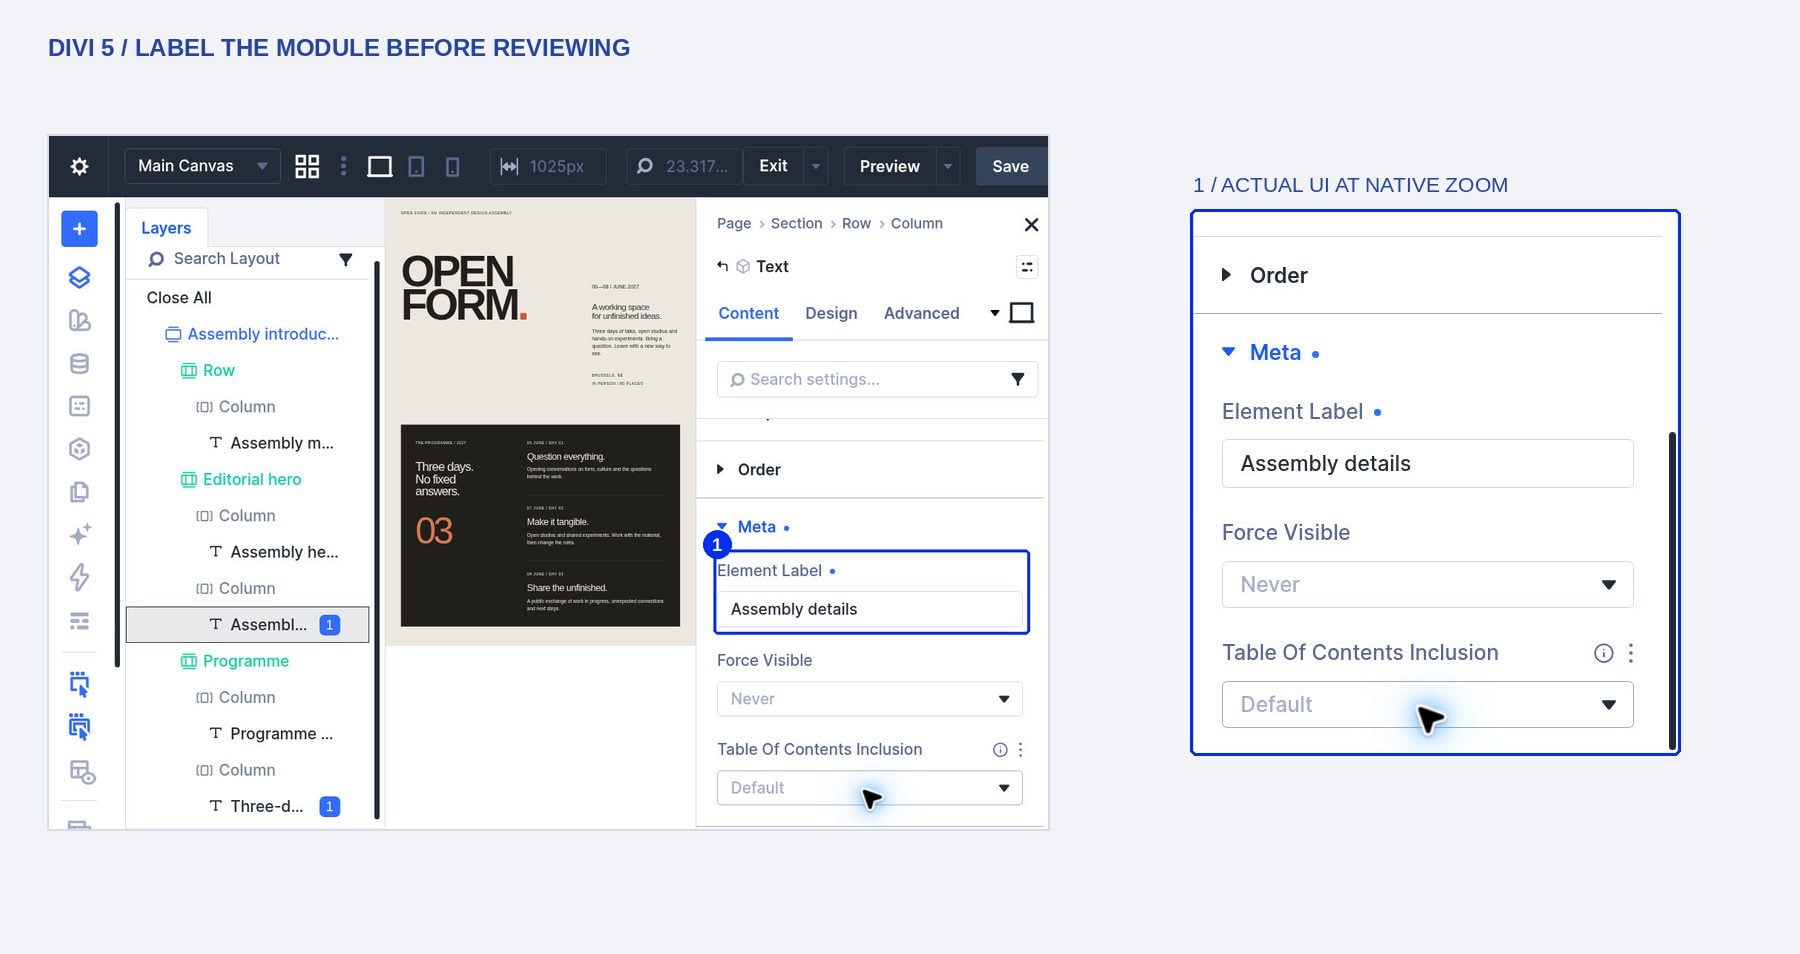
Open your page in the Visual Builder and locate a module you want to review in Layers. Double-click its layer to open the settings, then go to Content > Meta > Element Label. Give the module a label that identifies its purpose, such as the headline or event details. The editor-facing label identifies the target in Layers and the note’s element picker.
Save The Page Before Adding Feedback
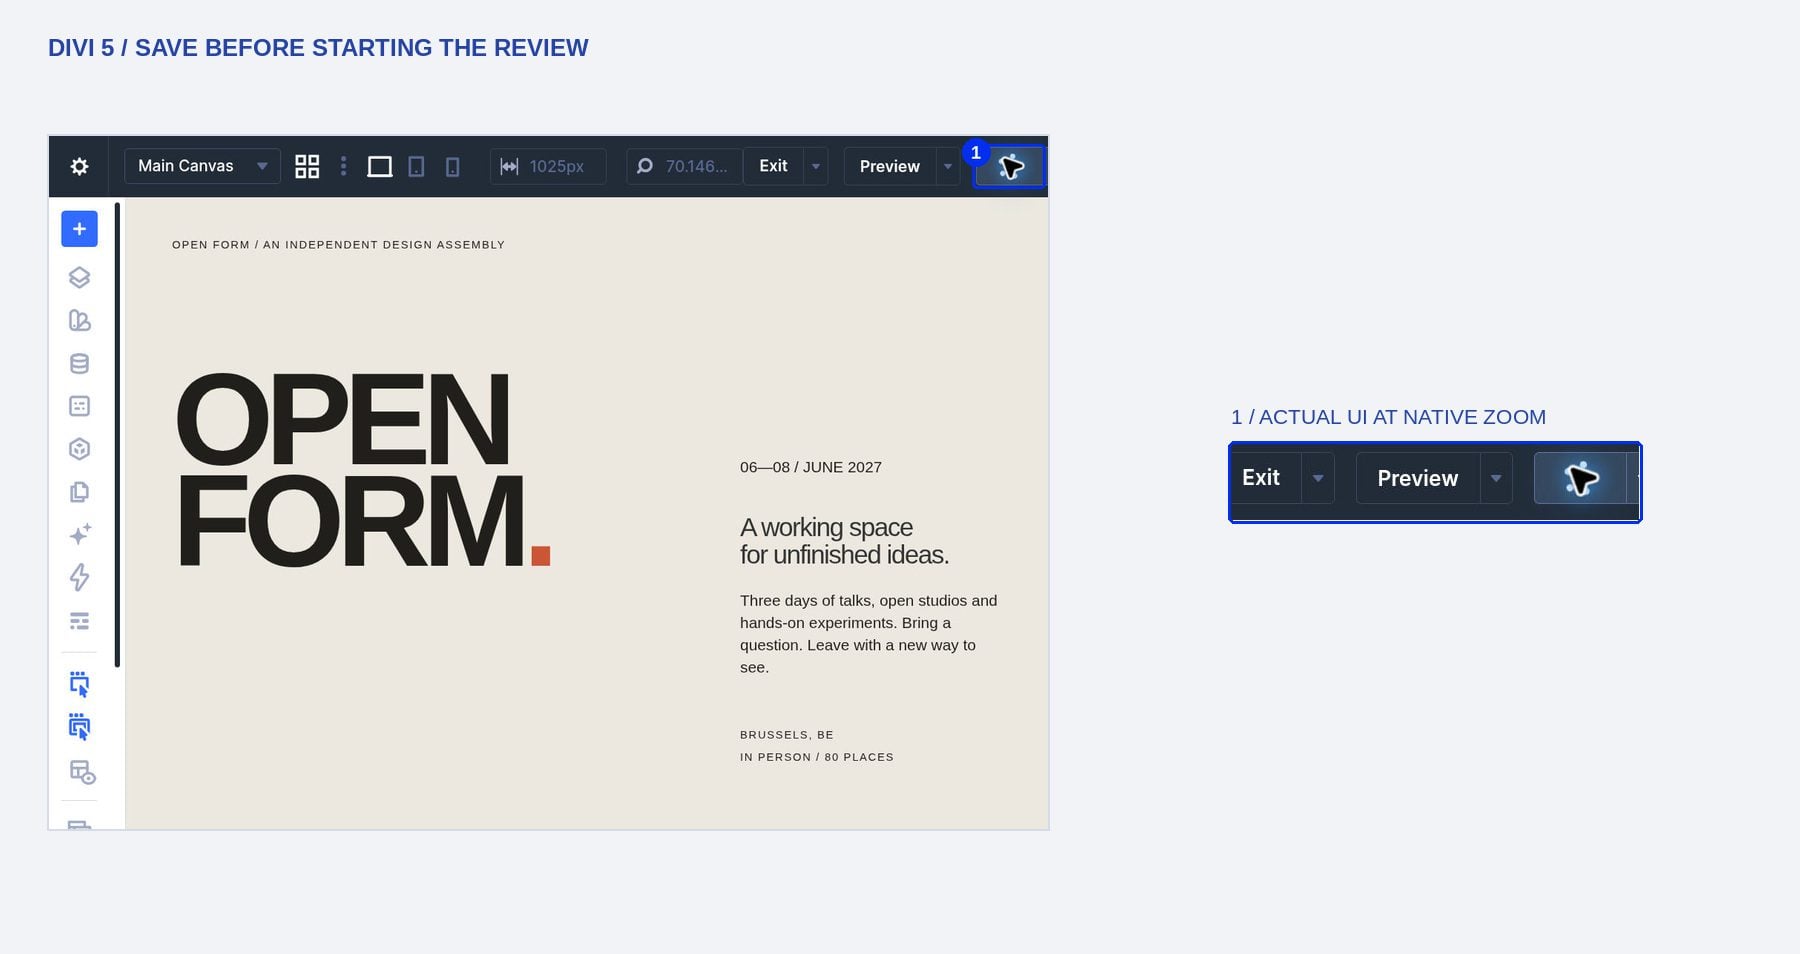
Close the module settings and click Save in the builder’s top bar. Wait for saving to finish before adding feedback, especially if you have just added modules or changed their labels. Starting with a saved page gives the review a defined layout to refer to; you can then save again as you work through the notes.
2. Create A Note On The Relevant Element
Open The Notes Panel
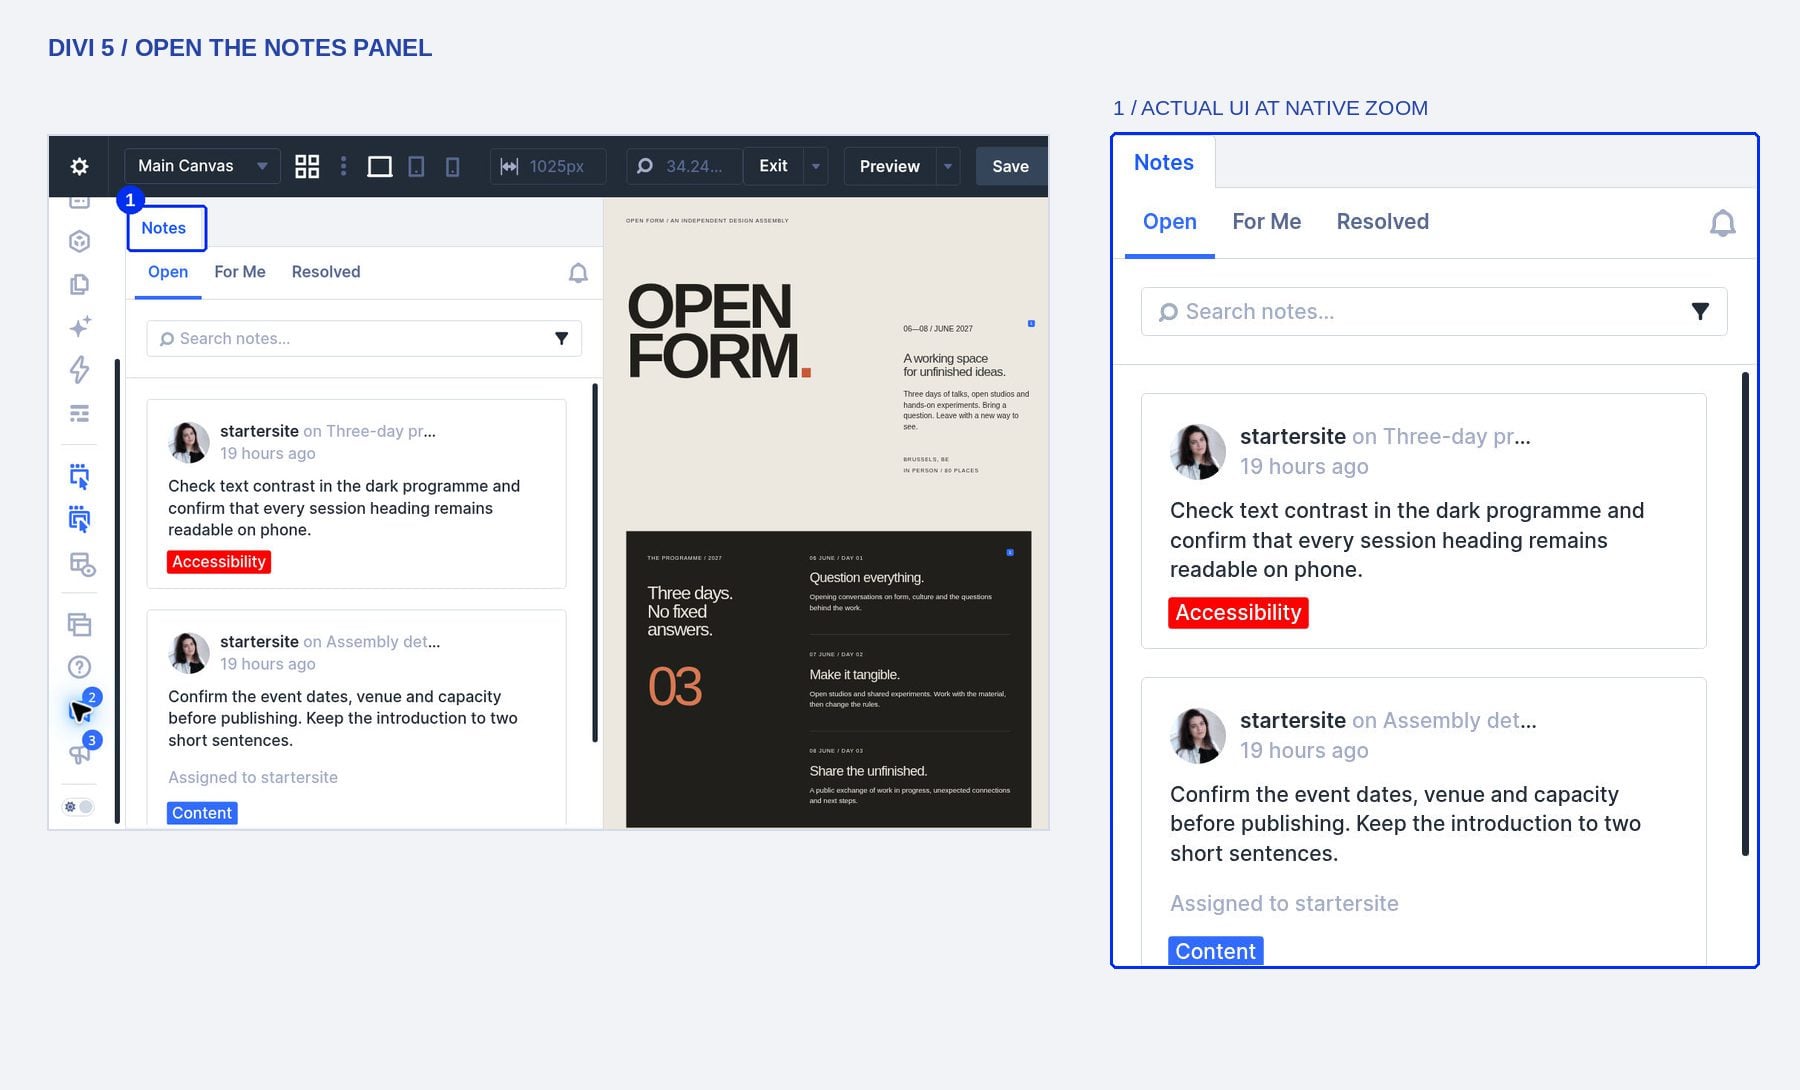
Click the Notes icon in the builder sidebar to open the panel. Its Open view lists unresolved feedback, while For Me gathers open notes assigned to you or mentioning you. The Resolved view keeps completed discussions available for reference. Start in Open so you can see where the new request will appear after you submit it.
Select The Element The Note Refers To
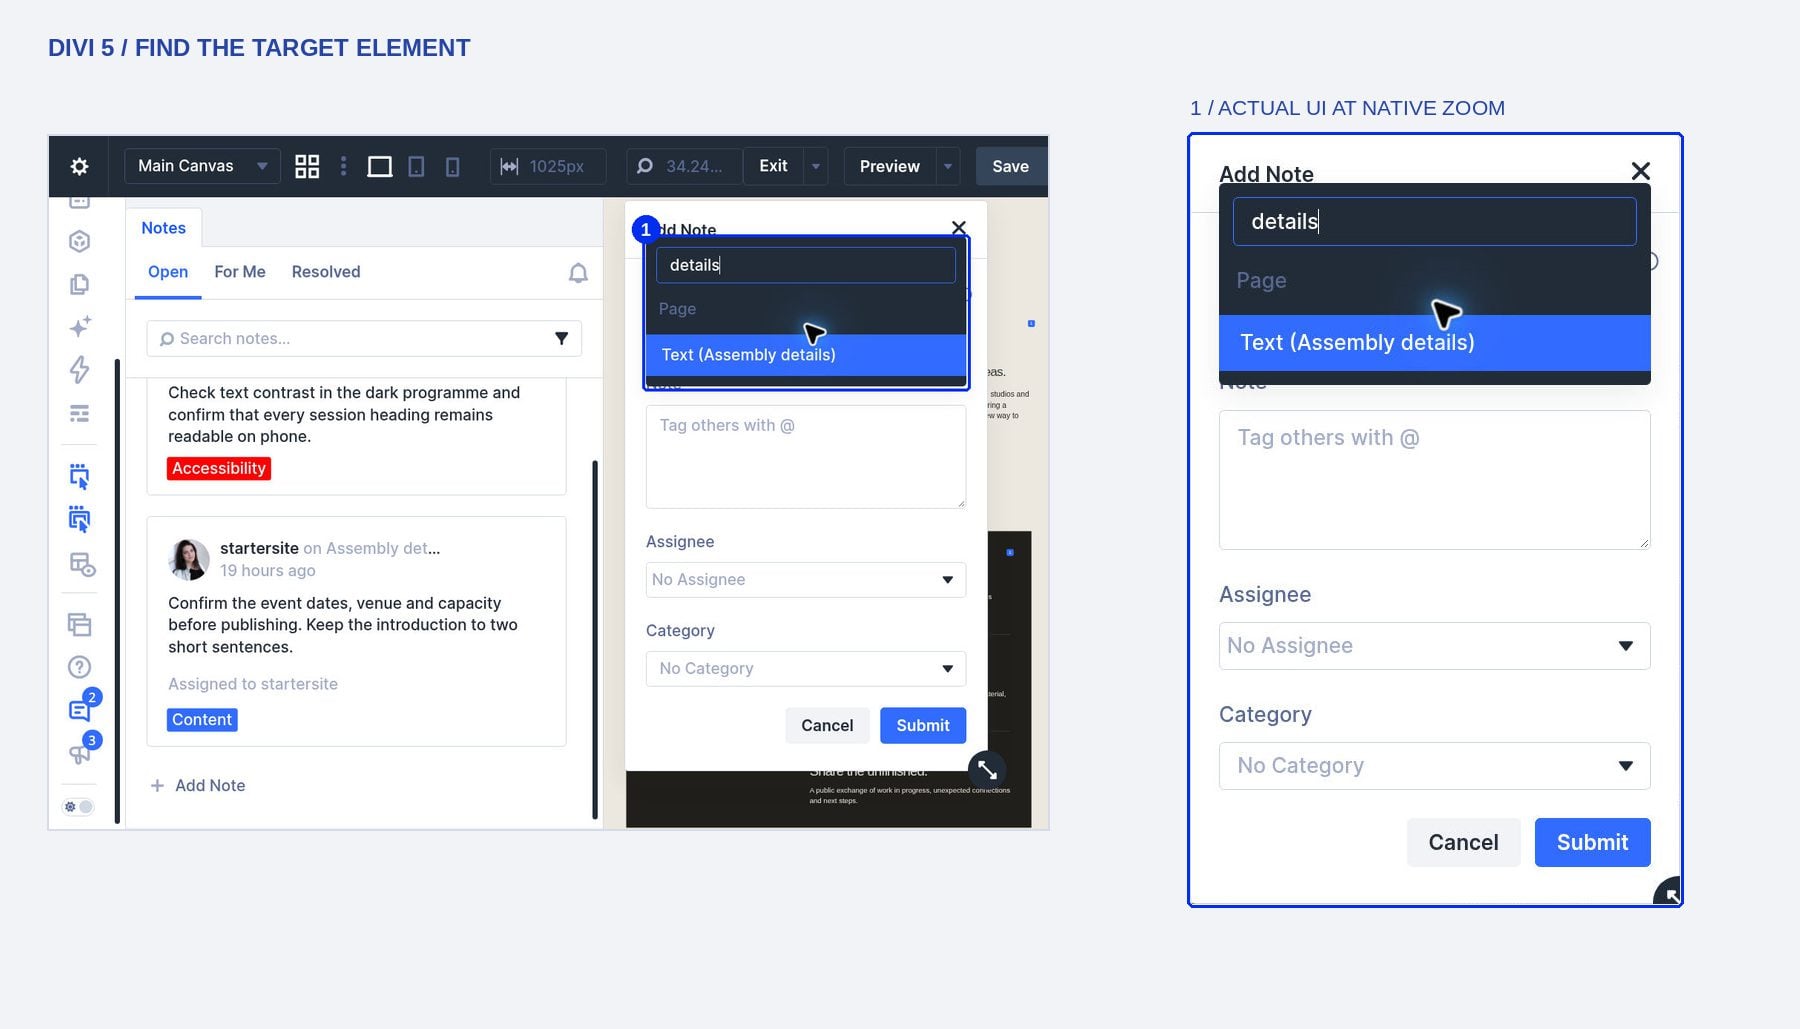
Click Add Note at the bottom of the panel, then open the Element field. Use the picker’s search to find the module by its label and choose the matching result. Check both the element type and its label before continuing: the note should refer to the module that contains the content under review.
Write Feedback Someone Can Act On
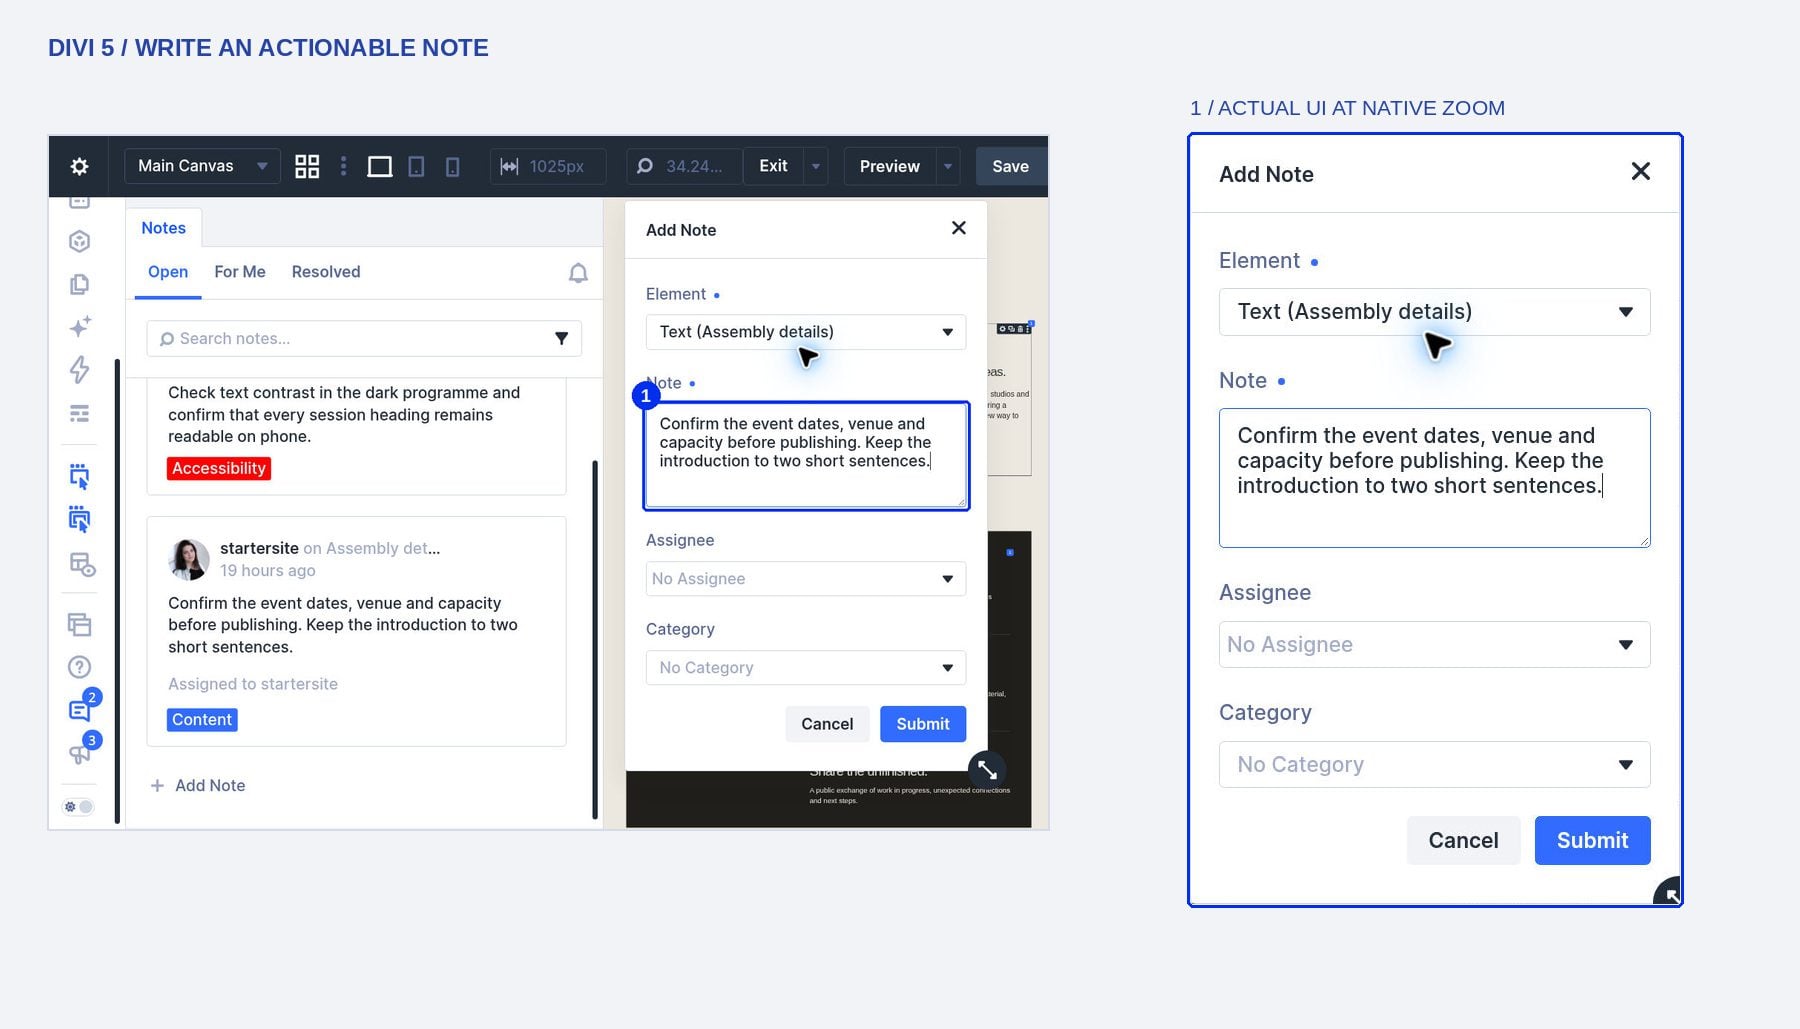
Enter the request in the Note field. Identify what needs attention and what the reviewer should check or change. For a heading, that might mean checking how it wraps on a phone; for event details, it might mean confirming dates and venue information before publishing. Keep unrelated requests in separate notes so one task can be completed without closing another that still needs work.
Assign The Task
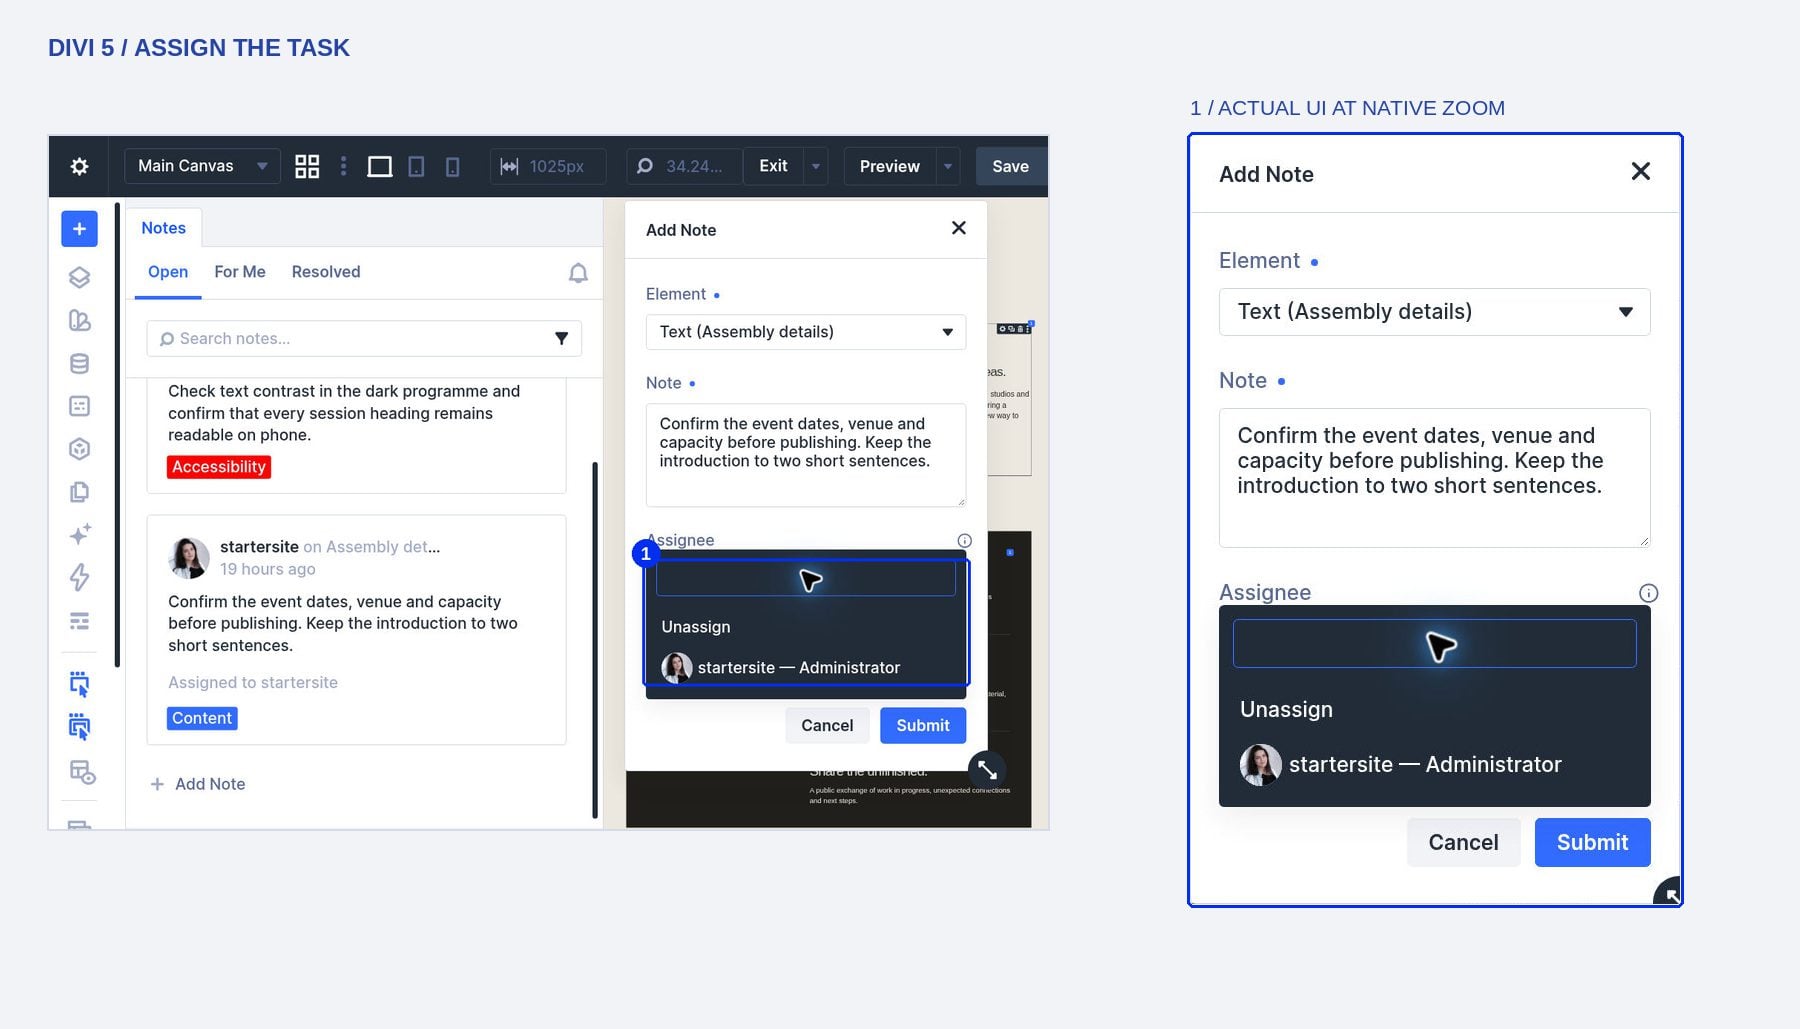
Open the Assignee field and select the eligible website user responsible for the request. Leave it unassigned if responsibility has not been decided yet. In this example, the reviewer account is available in the picker; your site’s choices depend on its user accounts and their access. An assignment also makes the open task available through that person’s For Me view.
Choose A Category
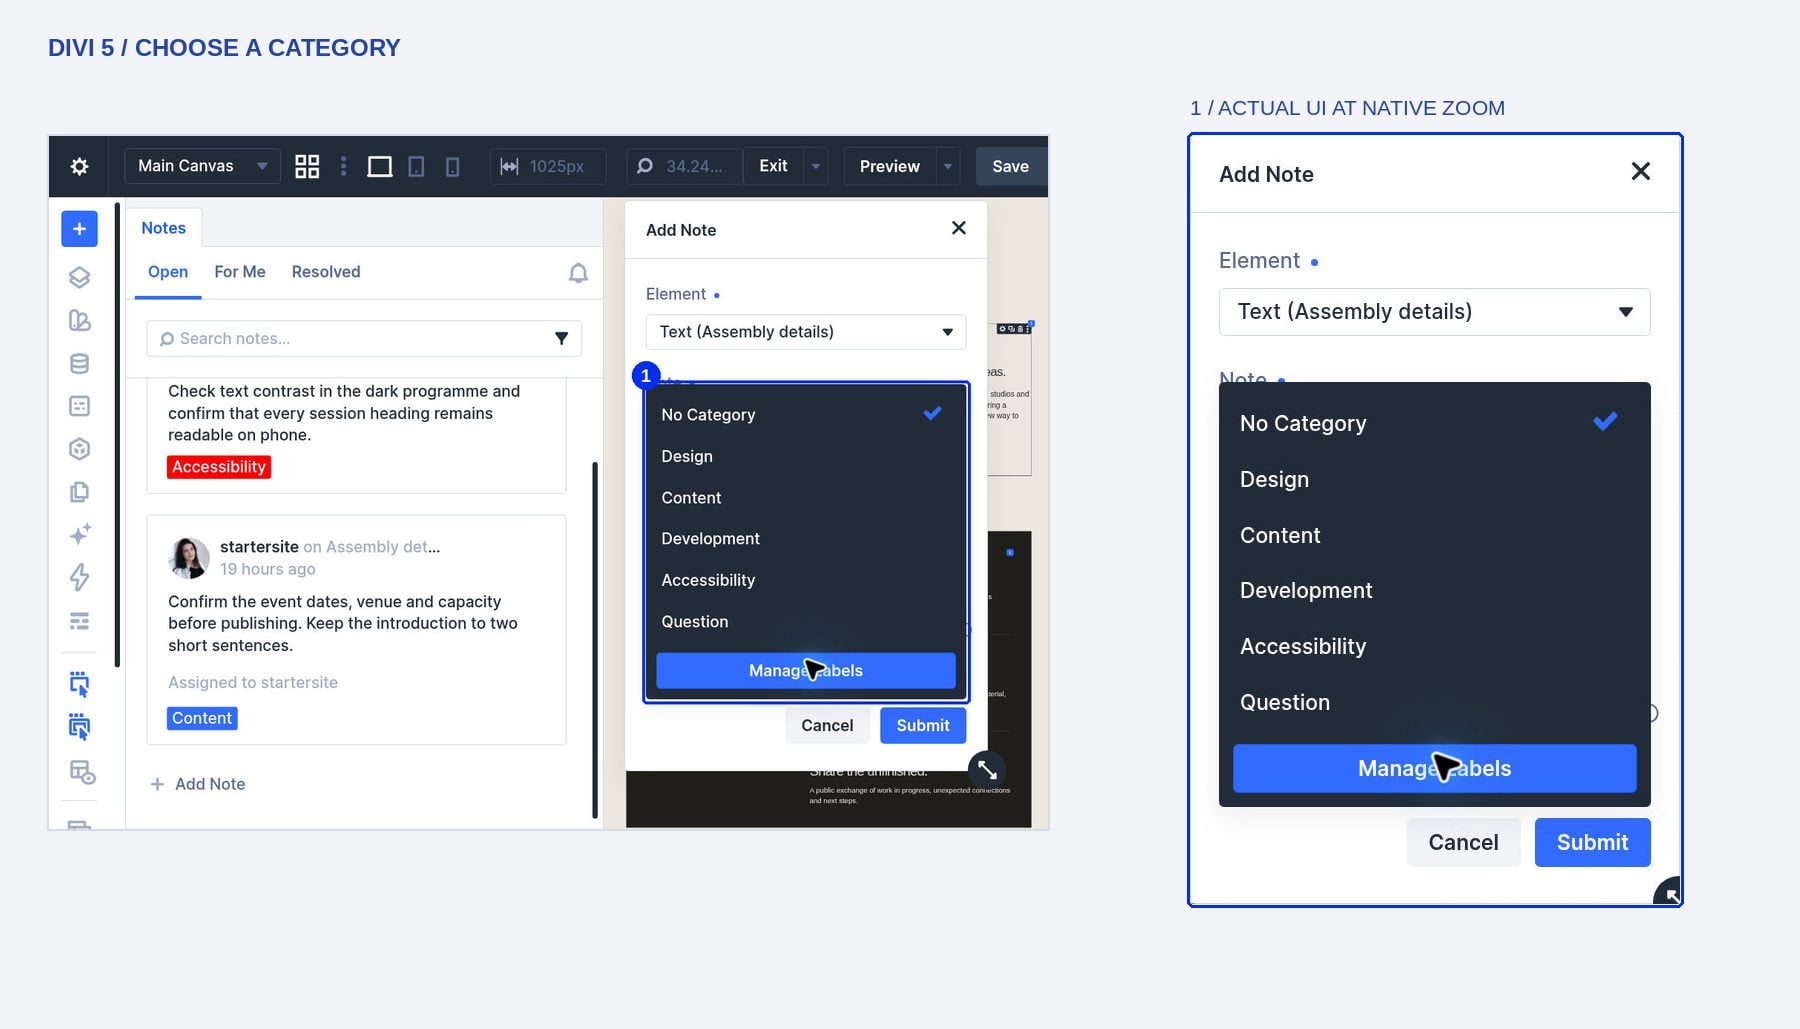
Open Category and choose the label that describes the request. The menu includes Design, Content, Development, Accessibility, and Question. We use Content for the event-information check because the request is about checking the copy. The category gives the note a recognizable label in the queue and lets us filter similar work together later.
Review The Form And Submit
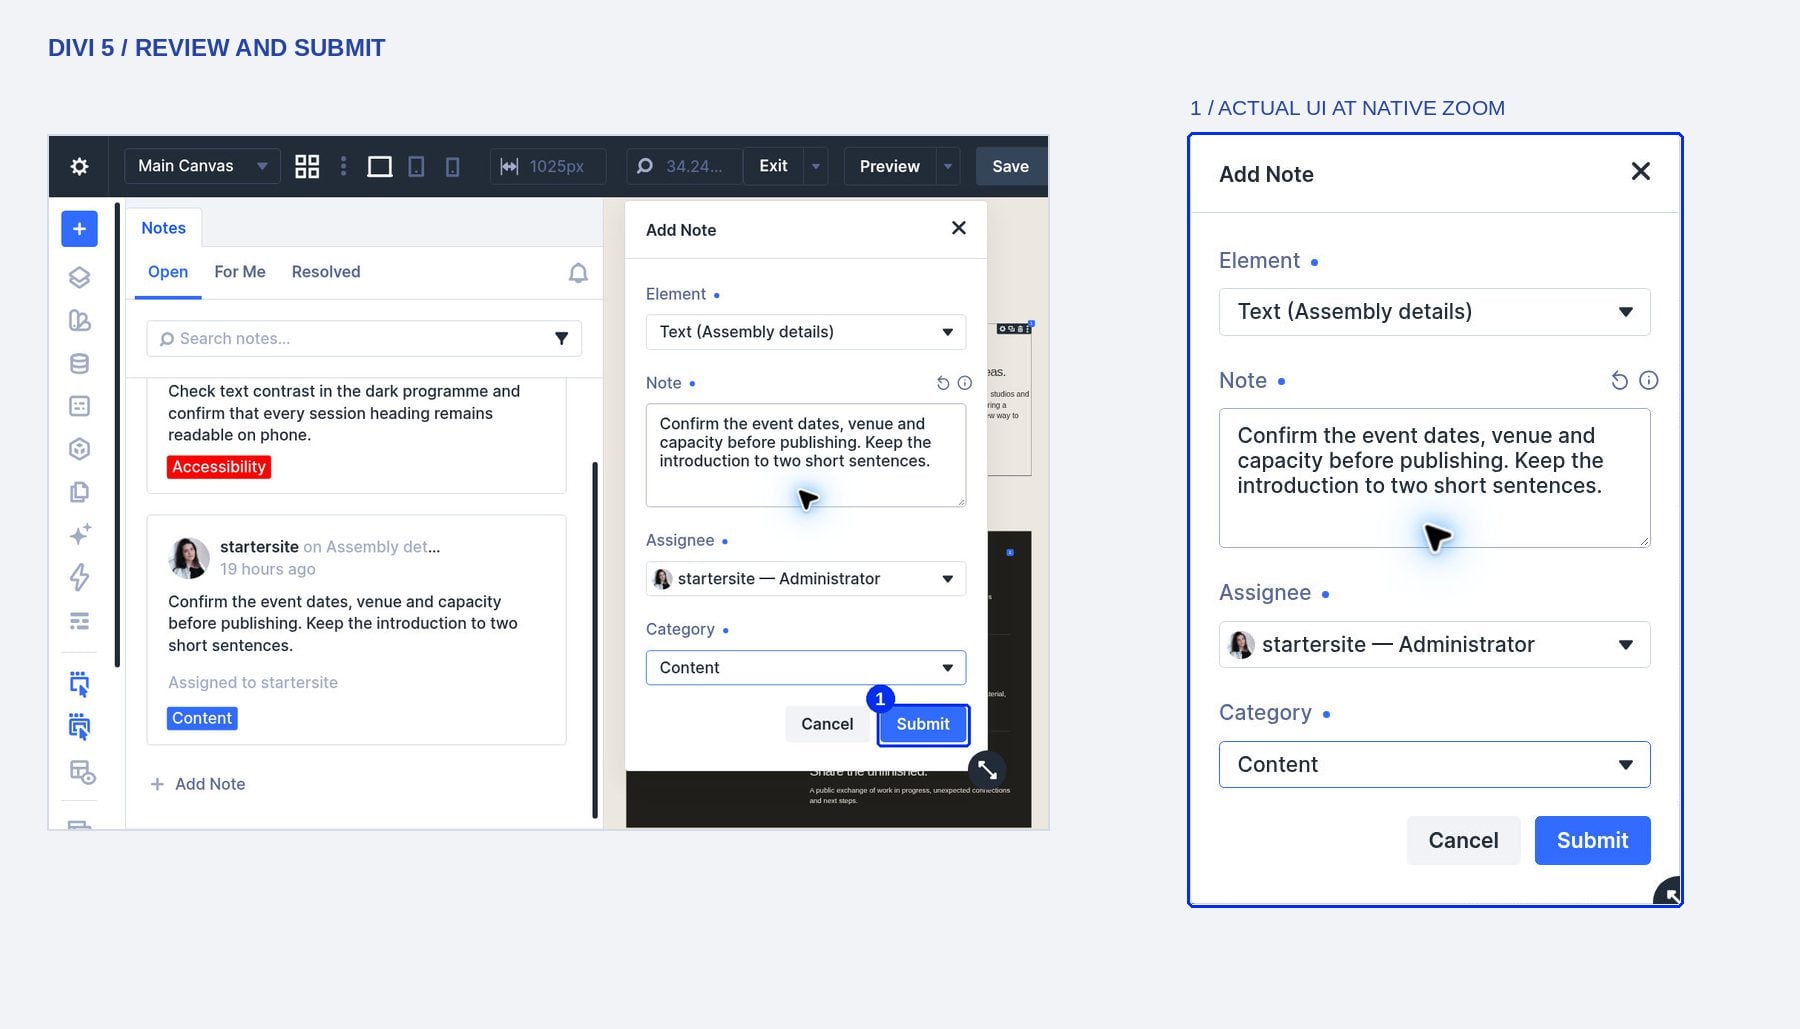
Before clicking Submit, check that the selected element matches the request and that the assignee and category are appropriate. Submit the note once those details are correct. It becomes a saved discussion in the Notes panel, where other authorized editors can read the request and respond. The form below shows the completed fields before submission.
Use Layers As An Alternative Starting Point
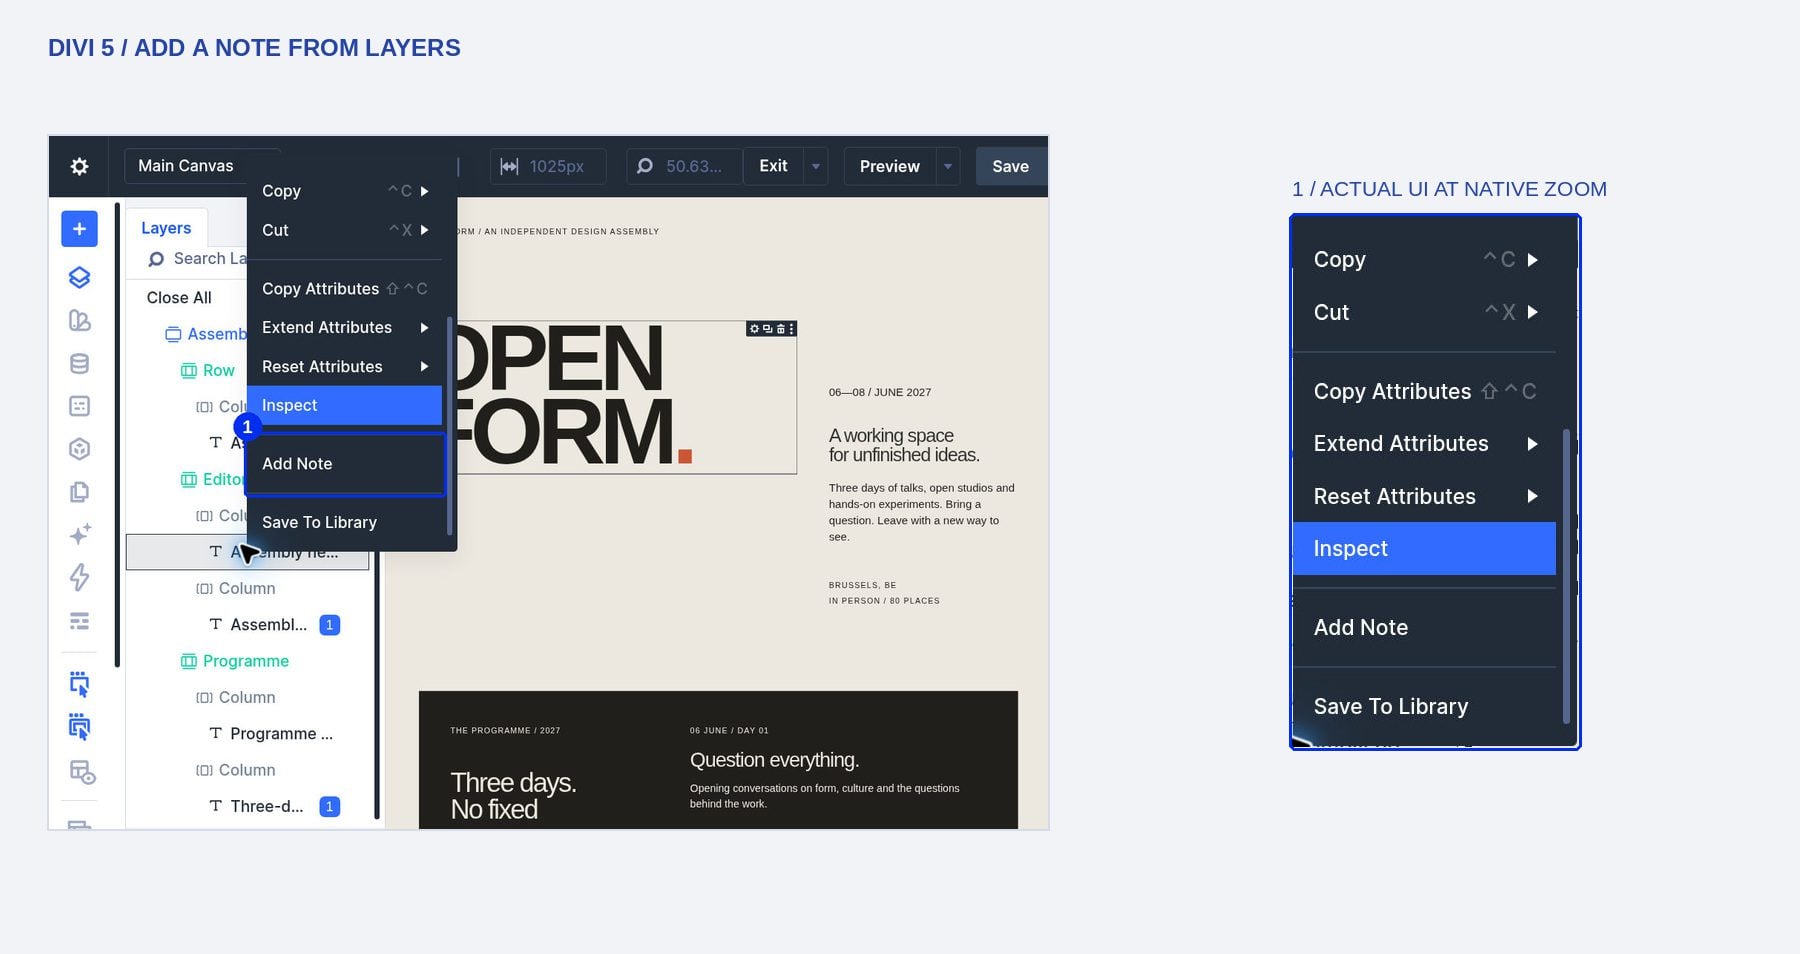
When you already have the target module in view, you can start from Layers instead. Right-click the module’s layer and choose Add Note, scrolling inside the context menu if necessary. Then check the element selected in the note form and complete the same fields. Use either route to create the note once.
3. Review And Update An Existing Discussion
Open The Saved Note
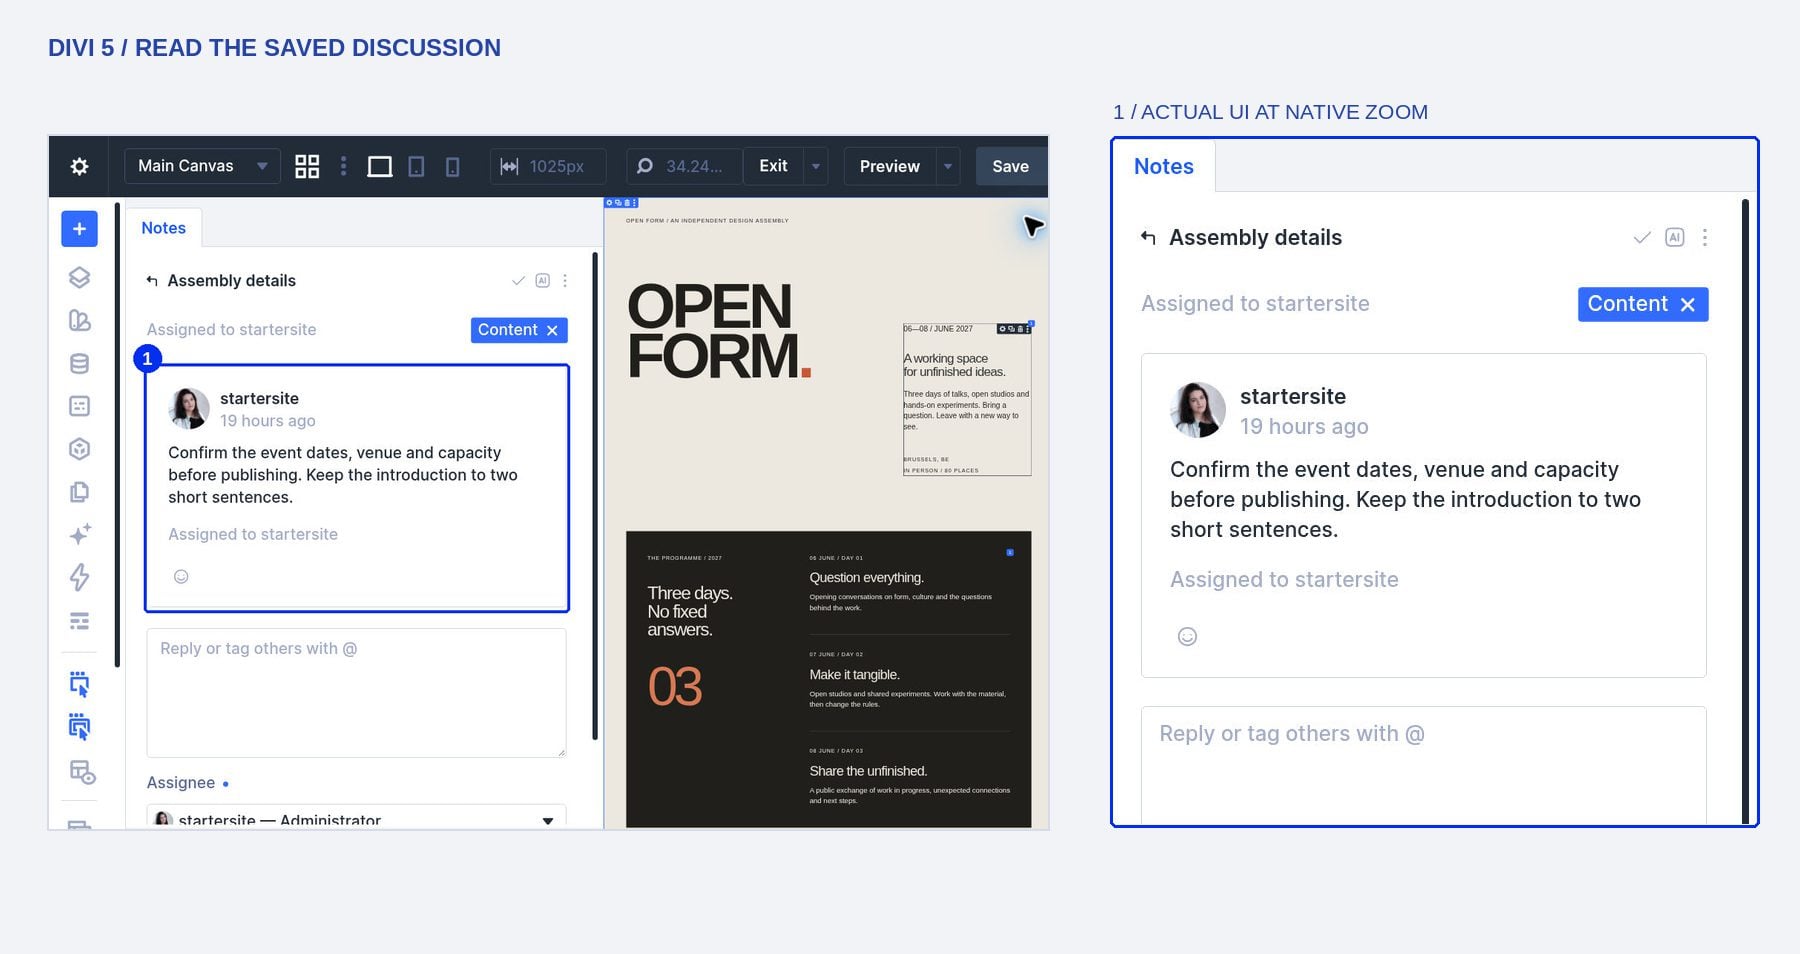
Select the note’s card in the Notes panel to open its discussion. Read the original request before making a change, and check the element name at the top of the thread. The discussion shows the task’s assignment and category alongside its messages, so you can confirm both what needs doing and where the feedback belongs.
Clarify Your Original Message
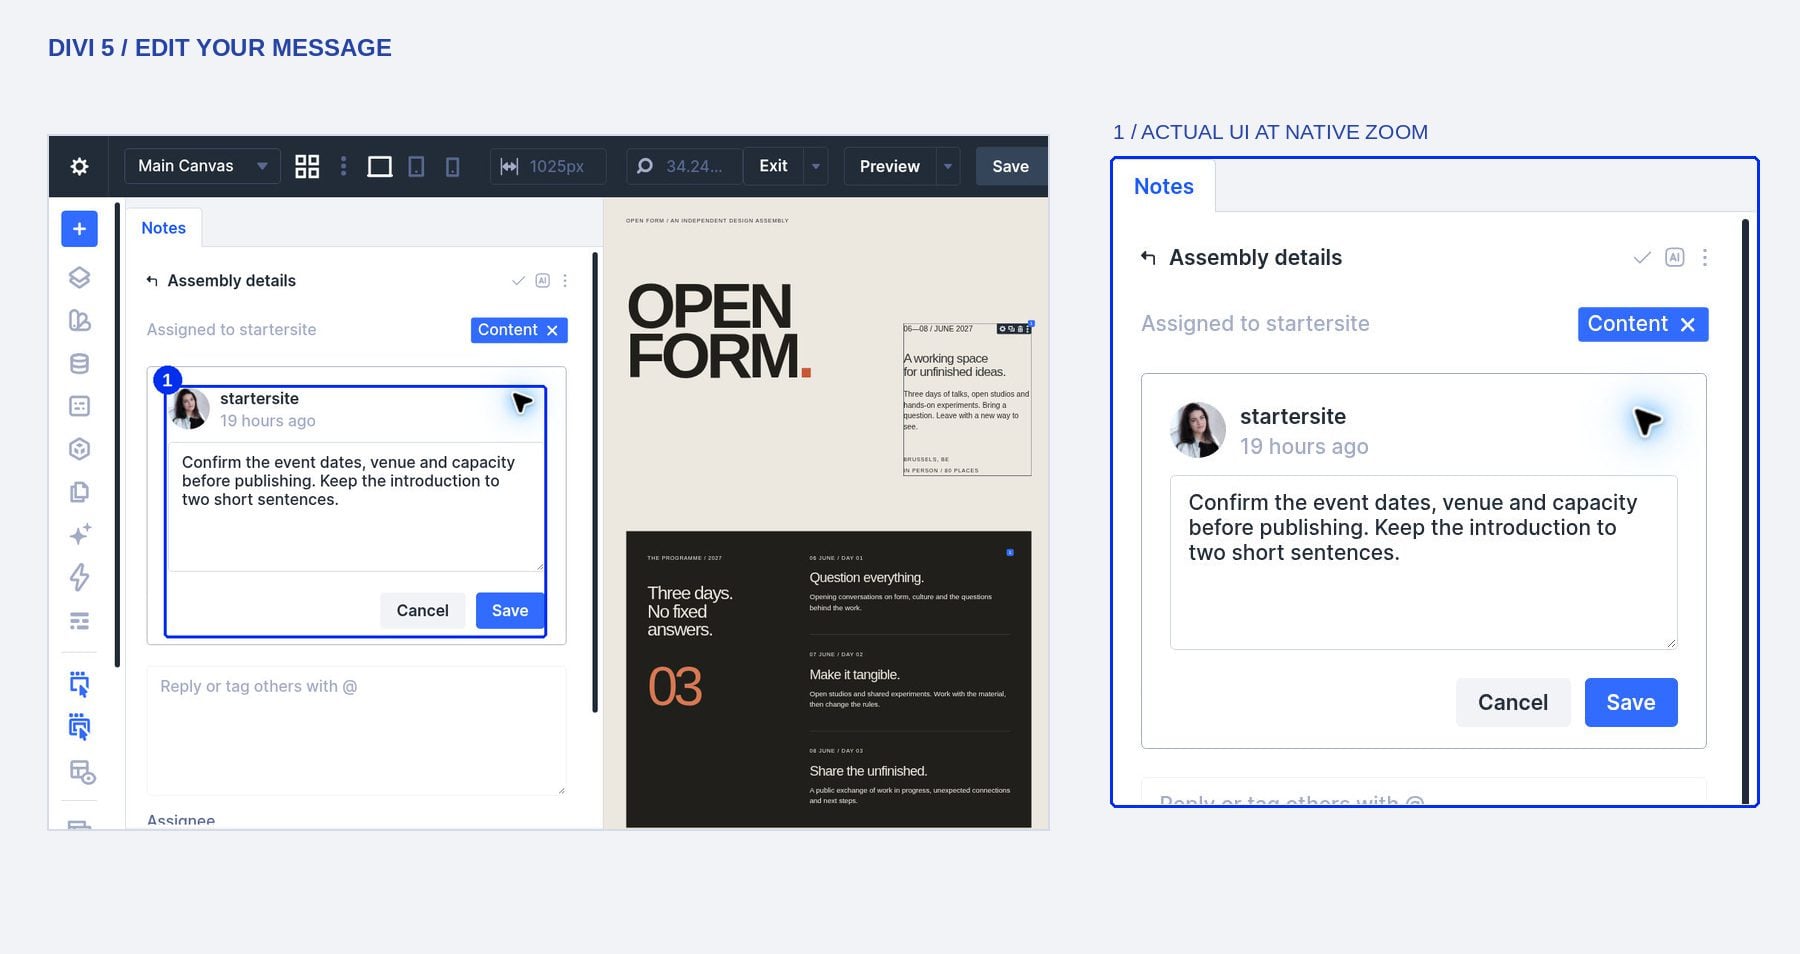
If your own request needs clarification, choose Edit message on the message you want to change. Update its wording in the editable field, then use the message’s Save button to commit the edit. Choose Cancel to keep the existing wording. Editing corrects the original request; use a reply when you want to add a follow-up response instead.
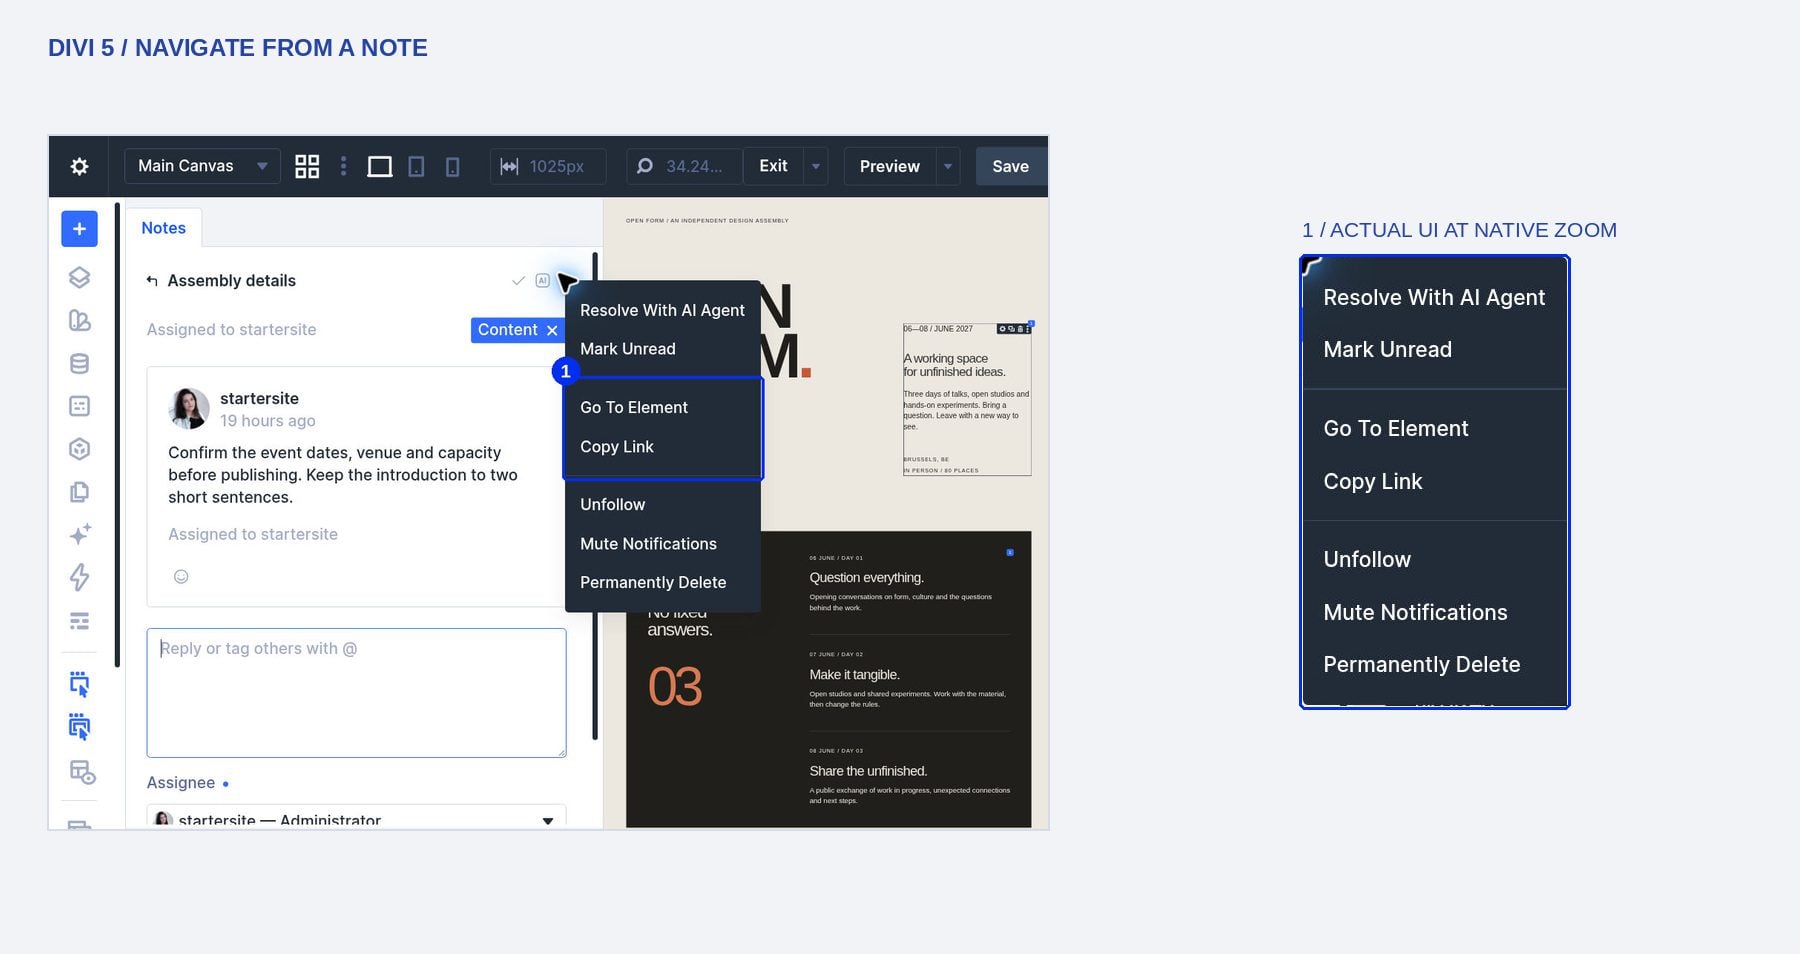
Open Note actions from the thread’s three-dot menu. Choose Go To Element when you need to locate the associated part of the page, or choose Copy Link to obtain a direct discussion link for another authorized editor. The link provides a route back to the conversation; it does not grant access to someone who cannot edit the relevant page.
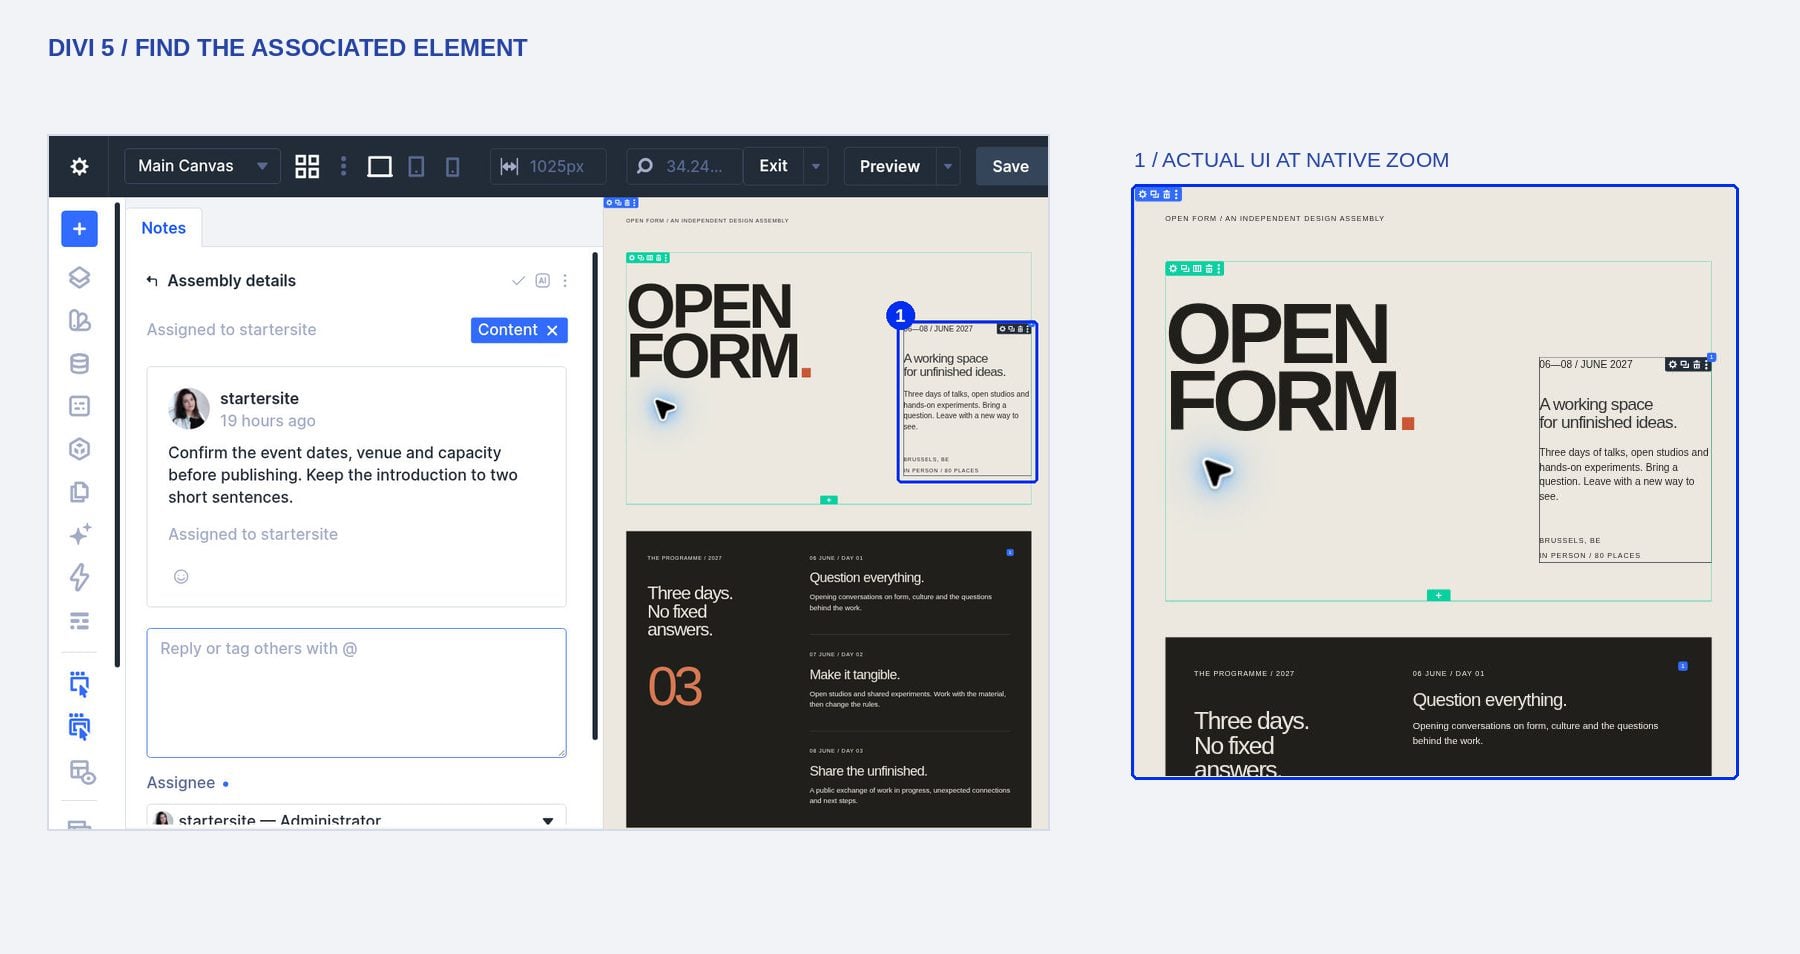
After using Go To Element, check the selected area on the canvas against the request you read. In our example, the Content note points to the module containing the event details. This gives us a way to return to the relevant content while keeping the discussion available in the Notes panel.
4. Reply, Resolve, And Reopen Feedback
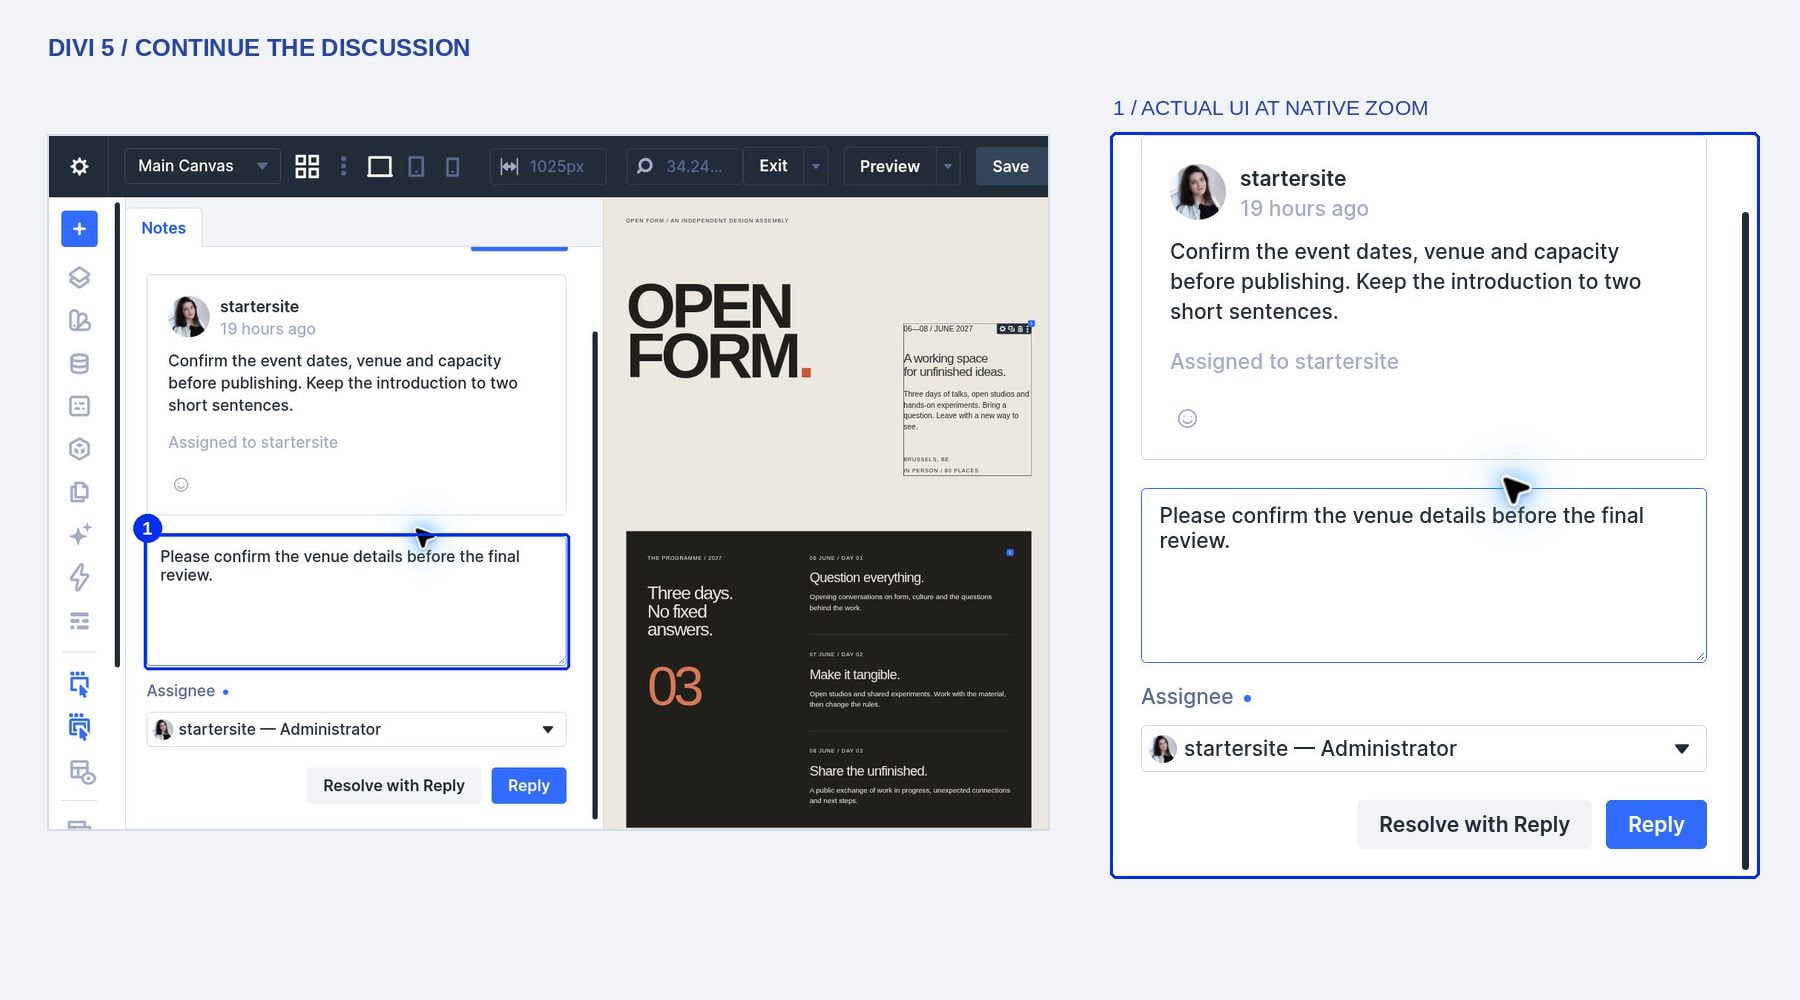
Enter your response in the reply field beneath the discussion. Use Reply to post a question or progress update while keeping the task open. For a content check, that could mean asking for confirmation before approving the details. The drafted response below illustrates that situation: requesting confirmation does not mean the content has already been verified.
Resolve With A Reply After Completing The Work
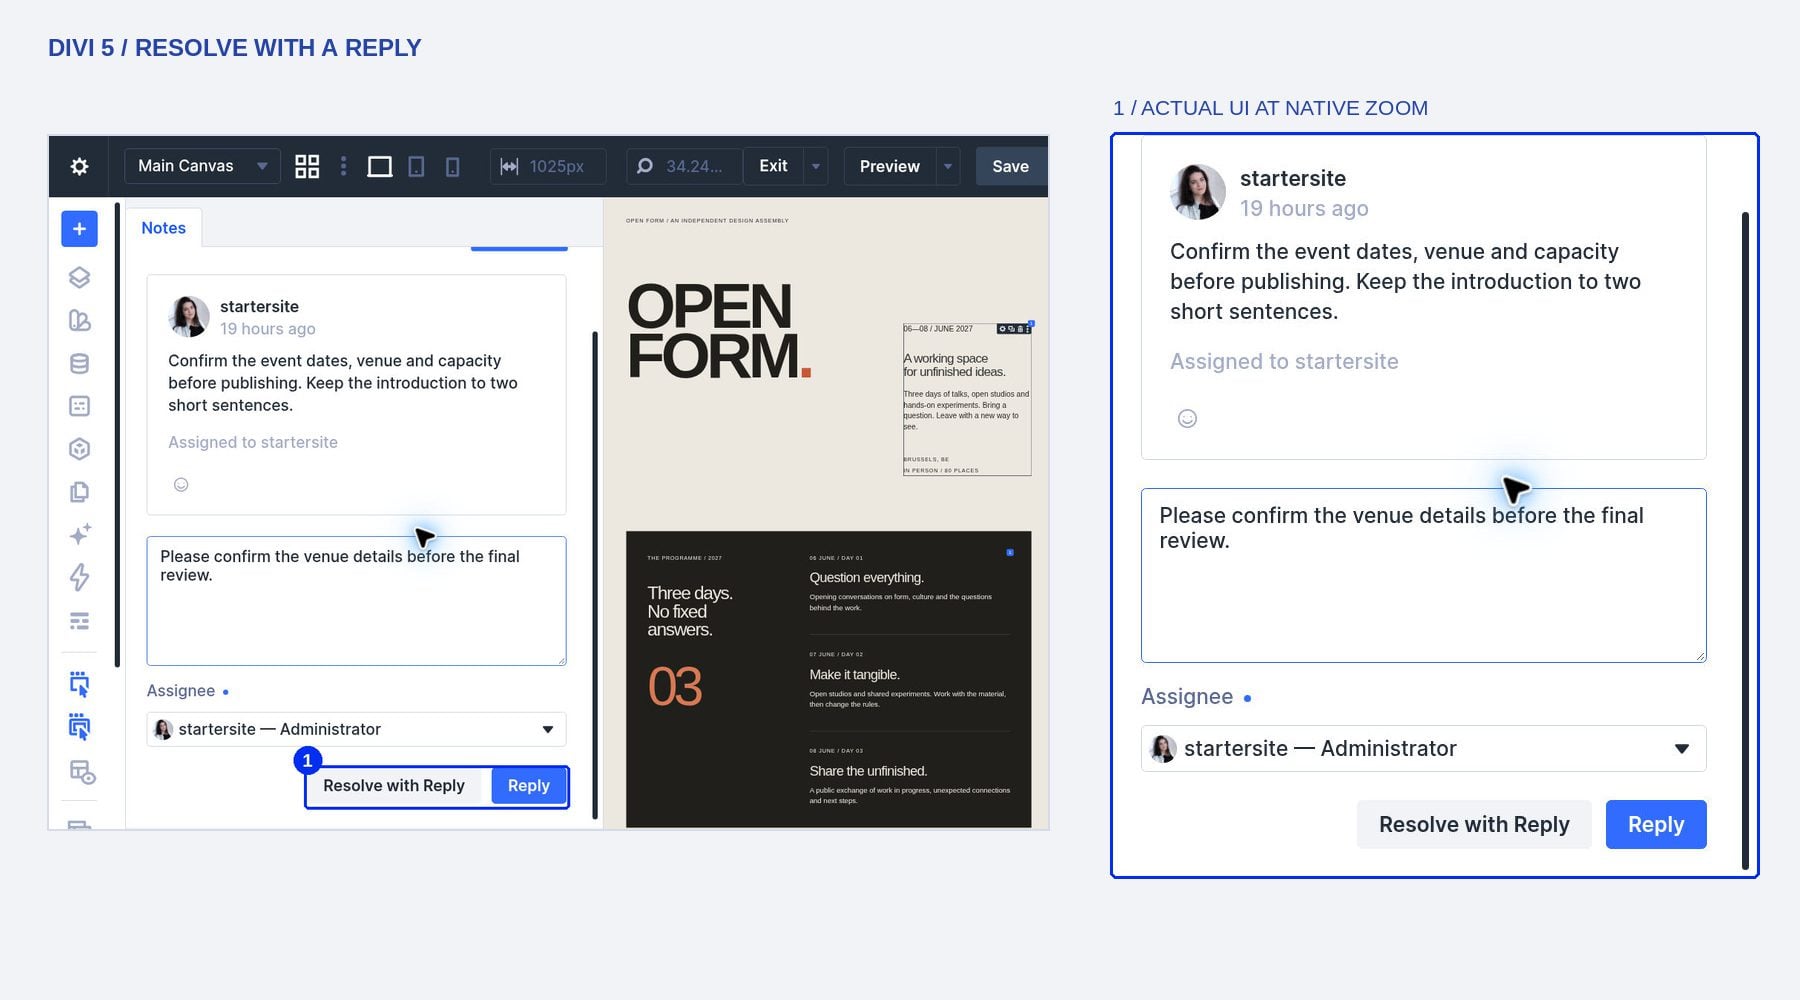
When you have completed the requested work, describe the result in the reply field and choose Resolve with Reply. This posts the response and closes the task together. The separate Reply button leaves it open, so choose based on whether further work remains. Describe the change you made or the check you performed so another reviewer can understand why the task is complete.
Find The Completed Task
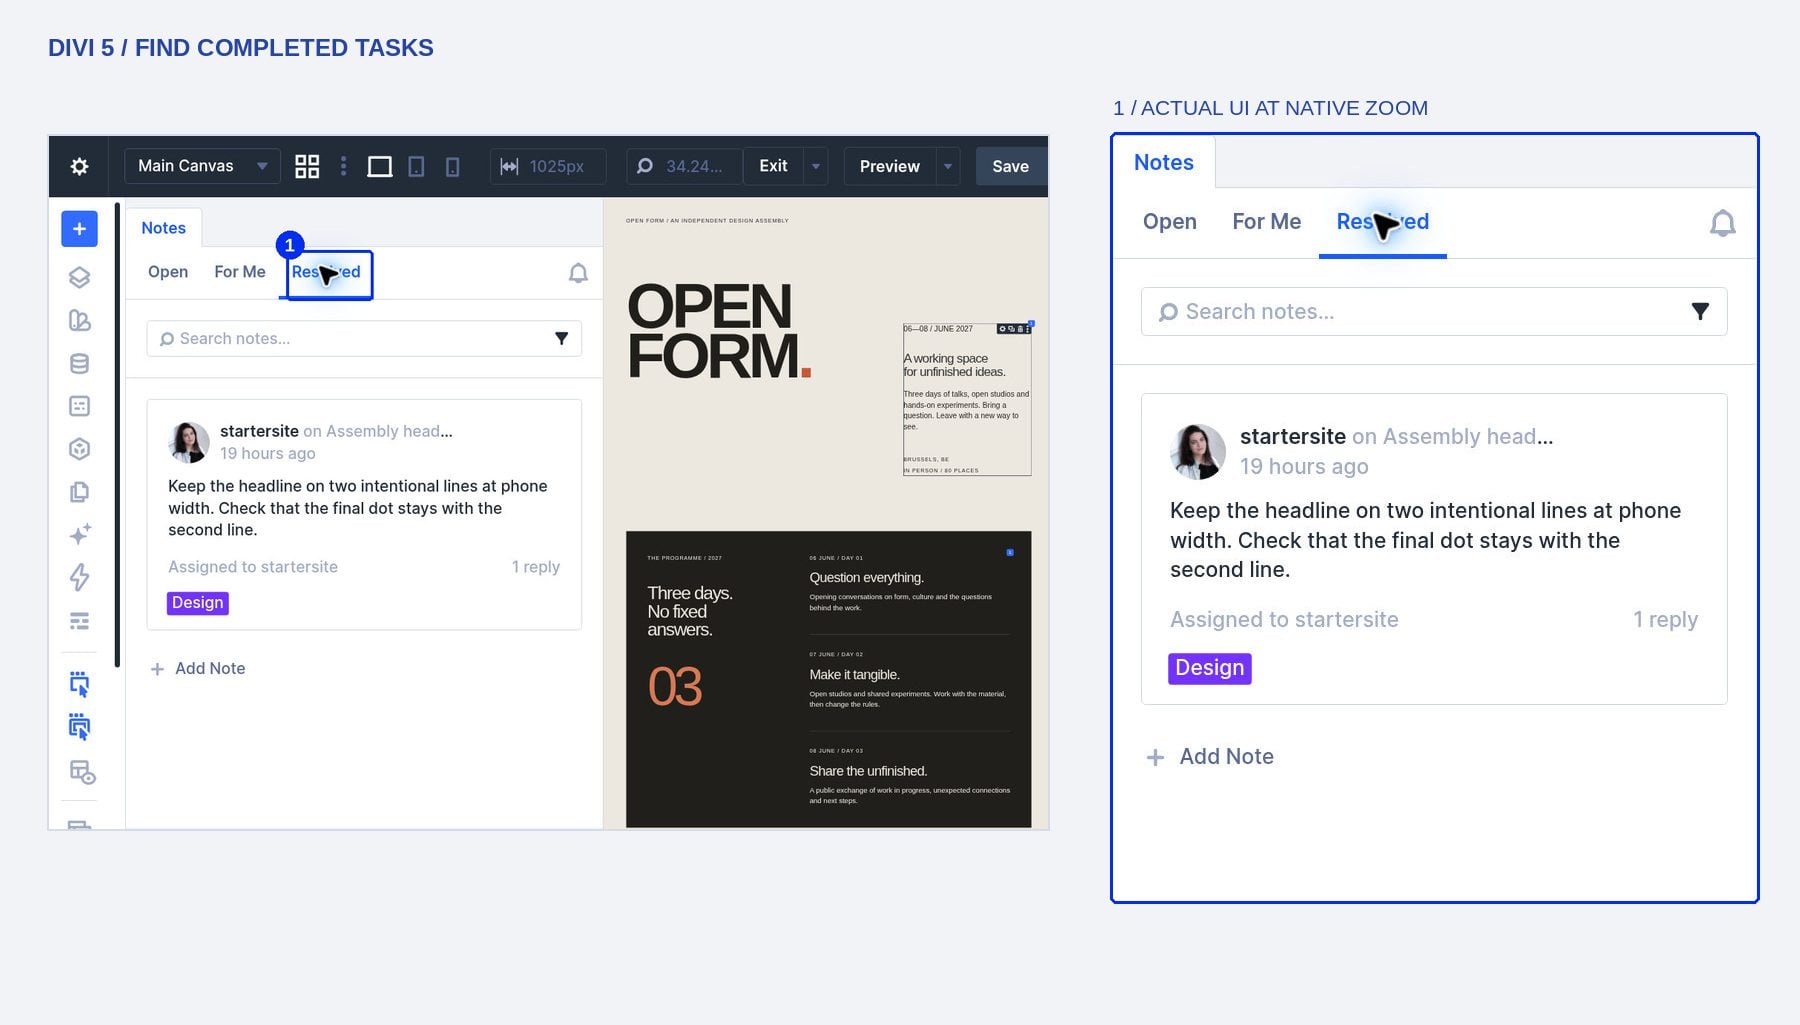
Use the back control beside the element name to return to the Notes list, then select Resolved. This view keeps completed notes with their replies. Our headline task is resolved, but the Content and Accessibility requests remain open until their own checks are complete.
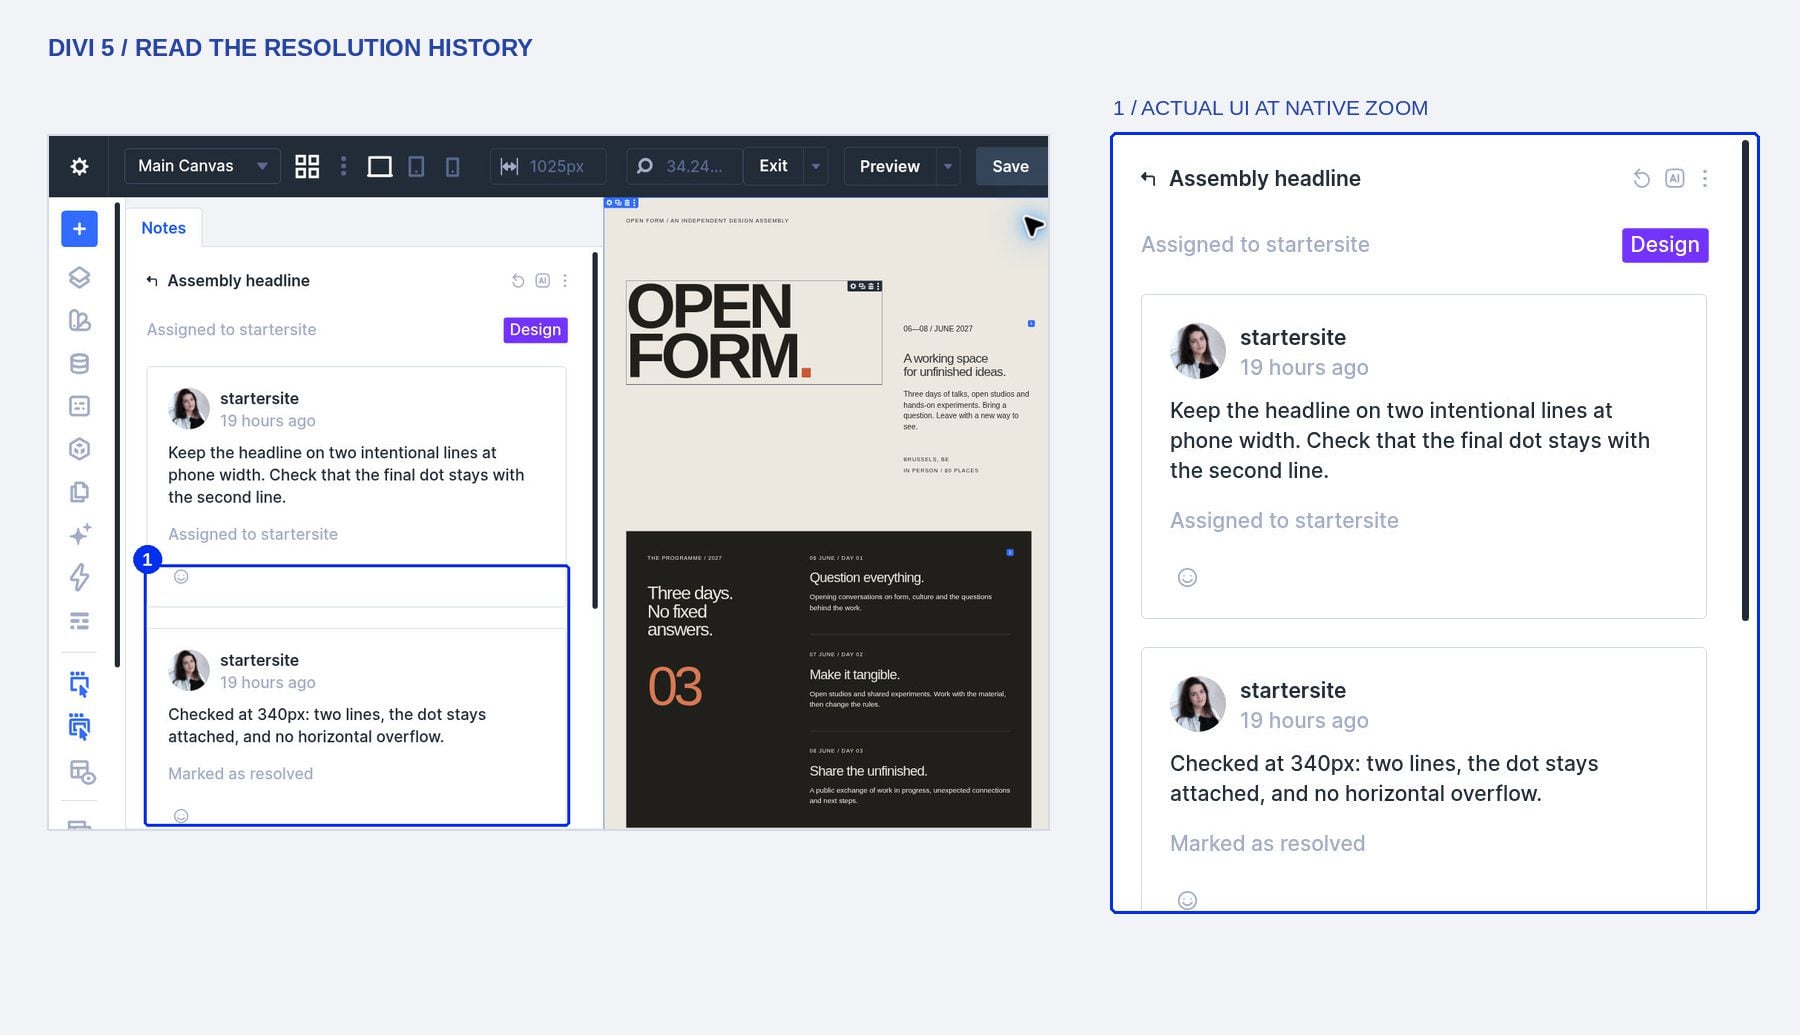
Open the completed task to read its history. The original request remains alongside the response and its resolution status. Our Design reply records a check at a phone width of 340 pixels, including headline wrapping and horizontal overflow. Keeping that explanation in the thread lets a later reviewer see what was checked without having to reconstruct the conversation.
Reopen The Same Discussion For Follow-Up Work
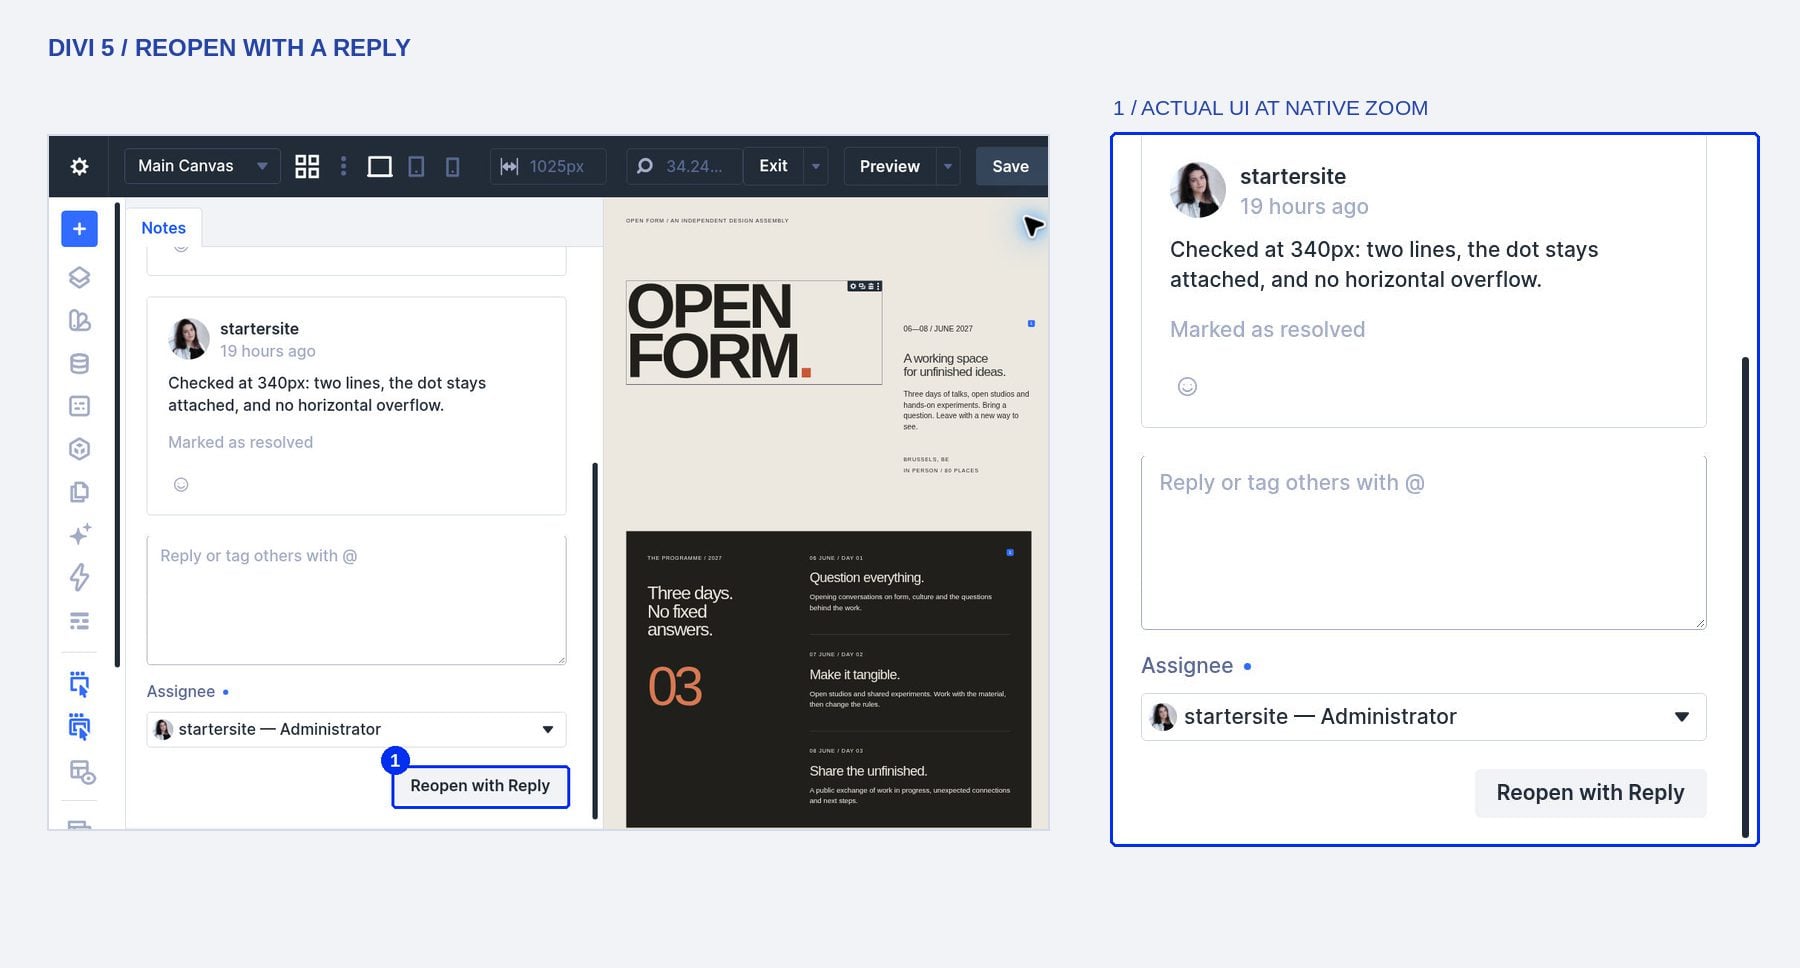
If the task needs another revision, use Reopen at the top of the thread. You can also enter an explanation in the reply field and choose Reopen with Reply to bring the task back into the open list with that context. Reusing the discussion preserves the earlier request and response in one place.
5. Find The Feedback You Need To Work On
Start With For Me
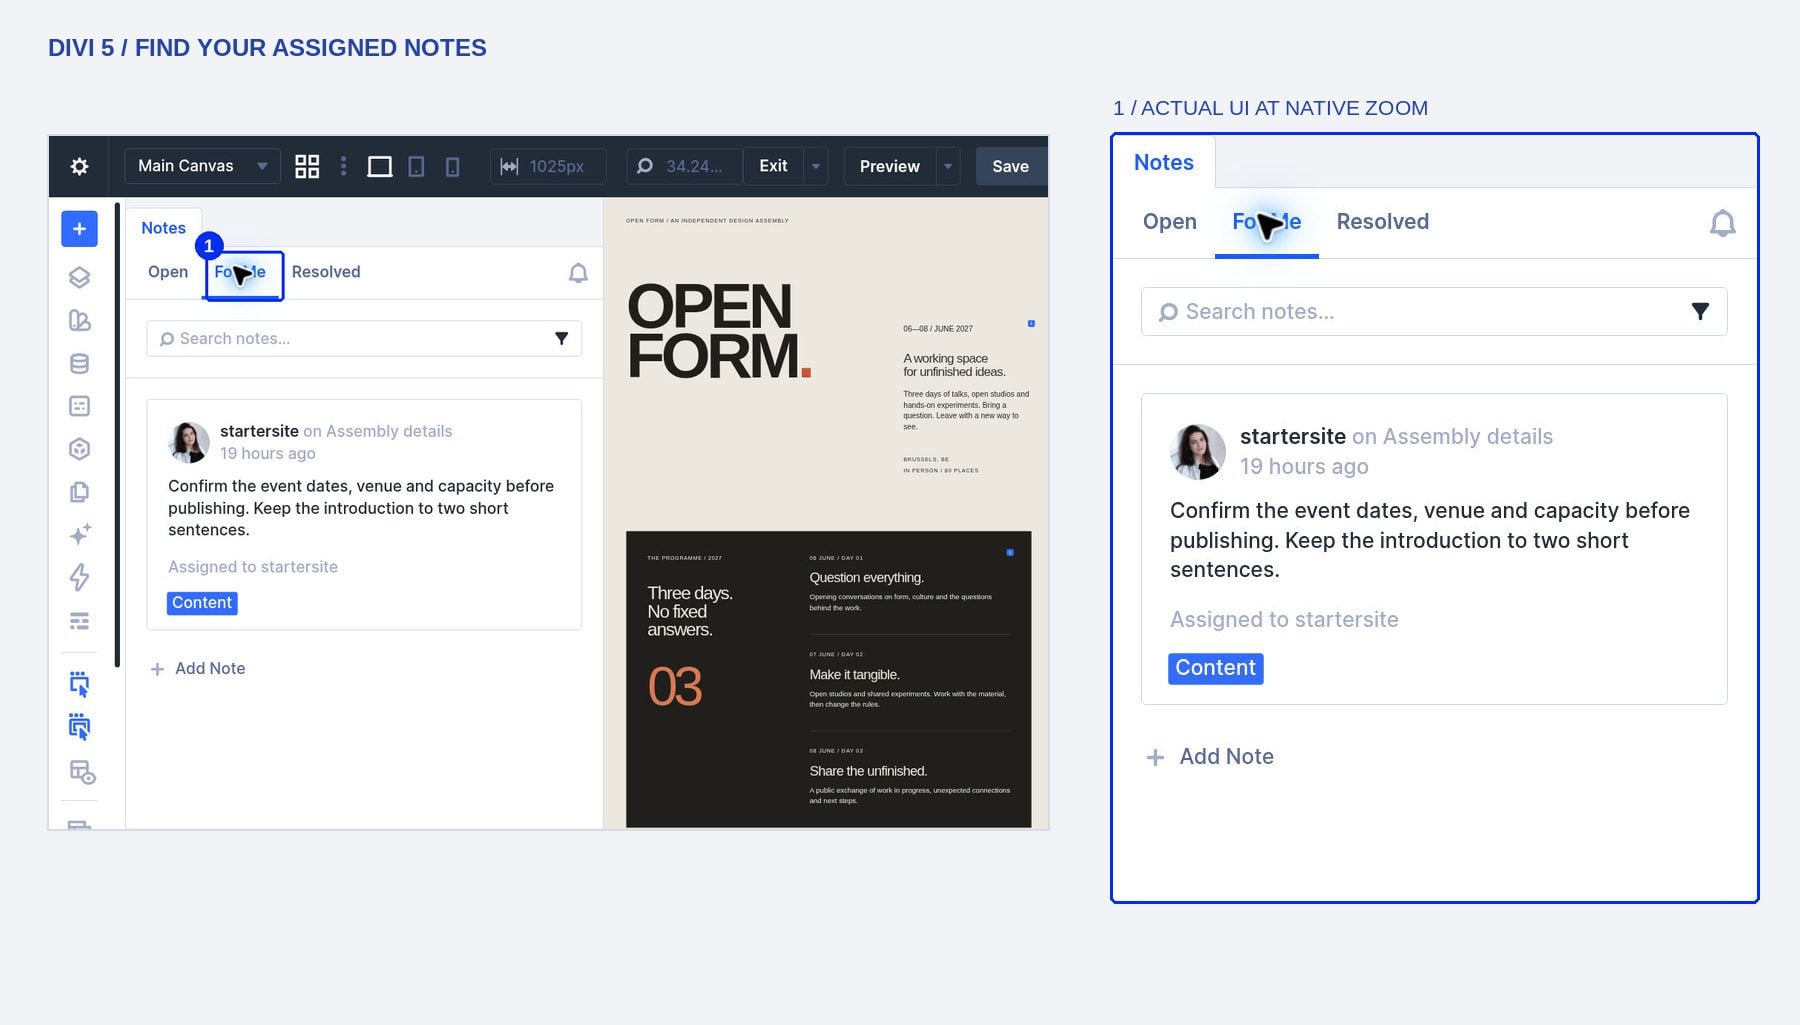
Choose For Me when you want to focus on open notes assigned to you or mentioning you. This view helps separate your review work from the wider queue. In the example, the Content request appears because it is assigned to the current reviewer. If a request is missing, return to Open and check its assignment before assuming it was removed.
Search The Notes And Their Replies
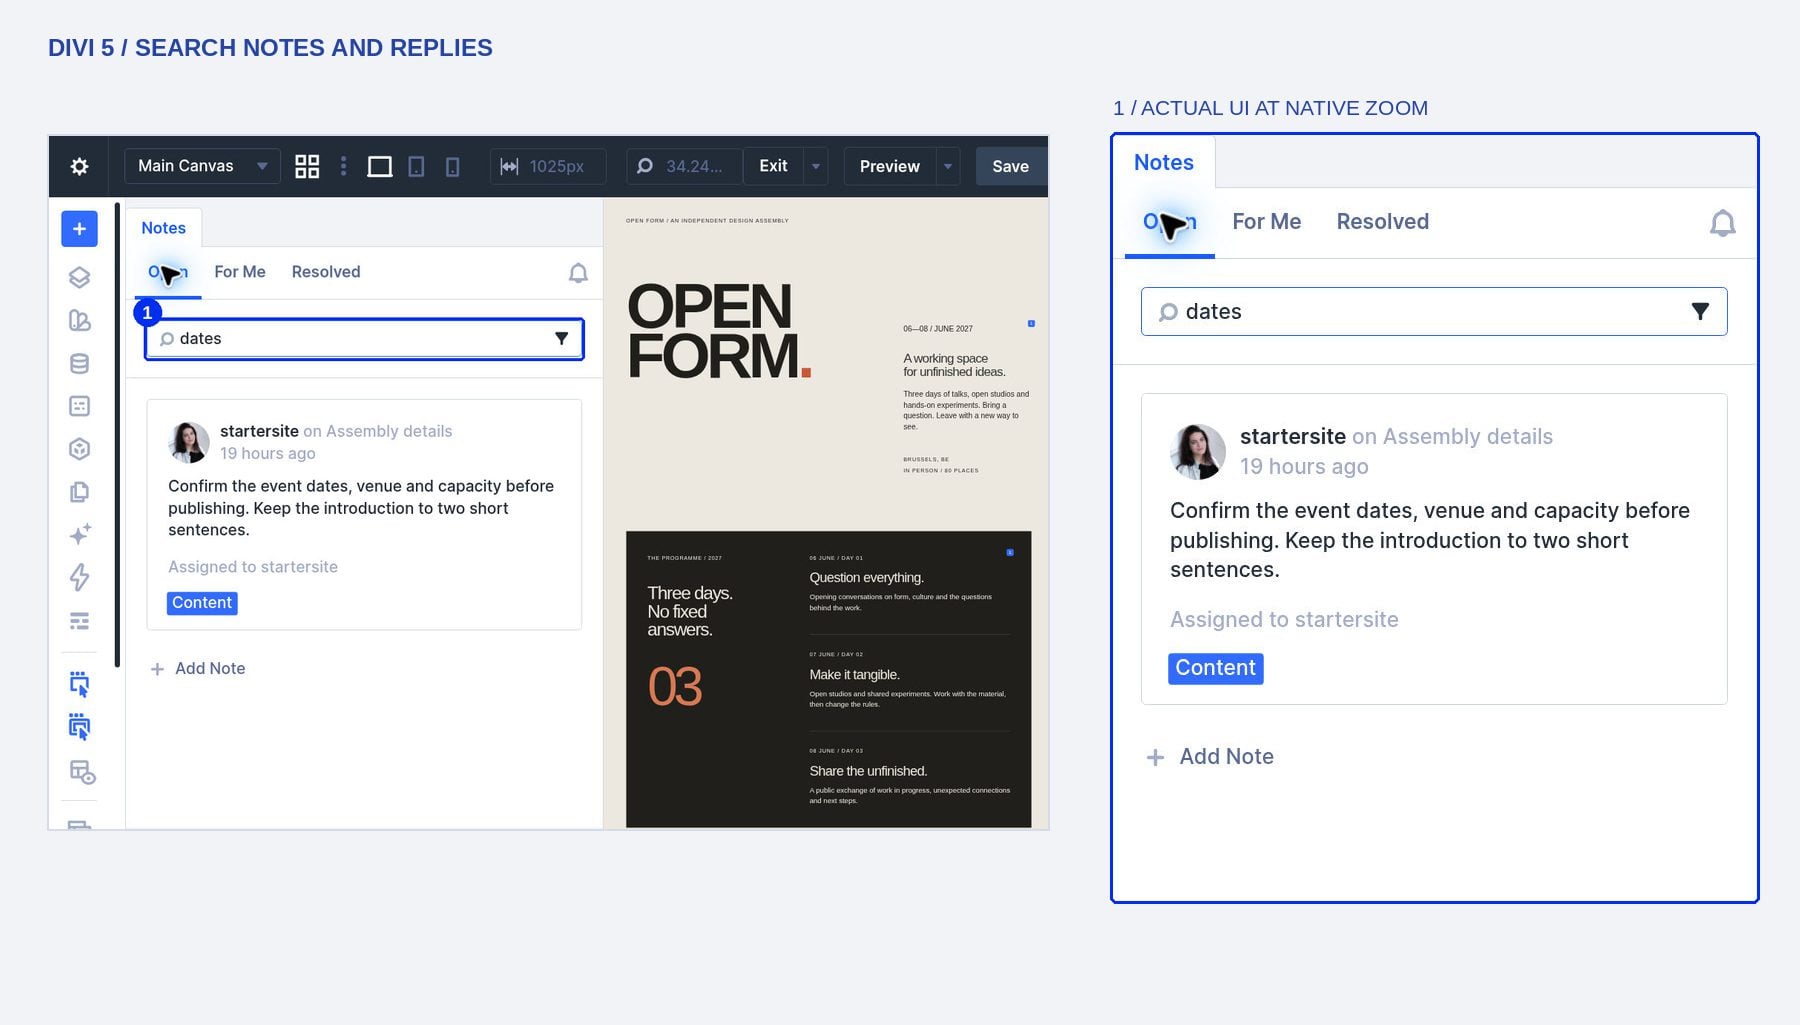
Enter a relevant word in Search notes… to narrow the current list. Choose a word from the request or a reply. Our example searches for a word in the event-details request and returns the Content discussion. Clear the search text before moving to another task if you want to restore the full list for that view.
Find And Apply A Category Filter
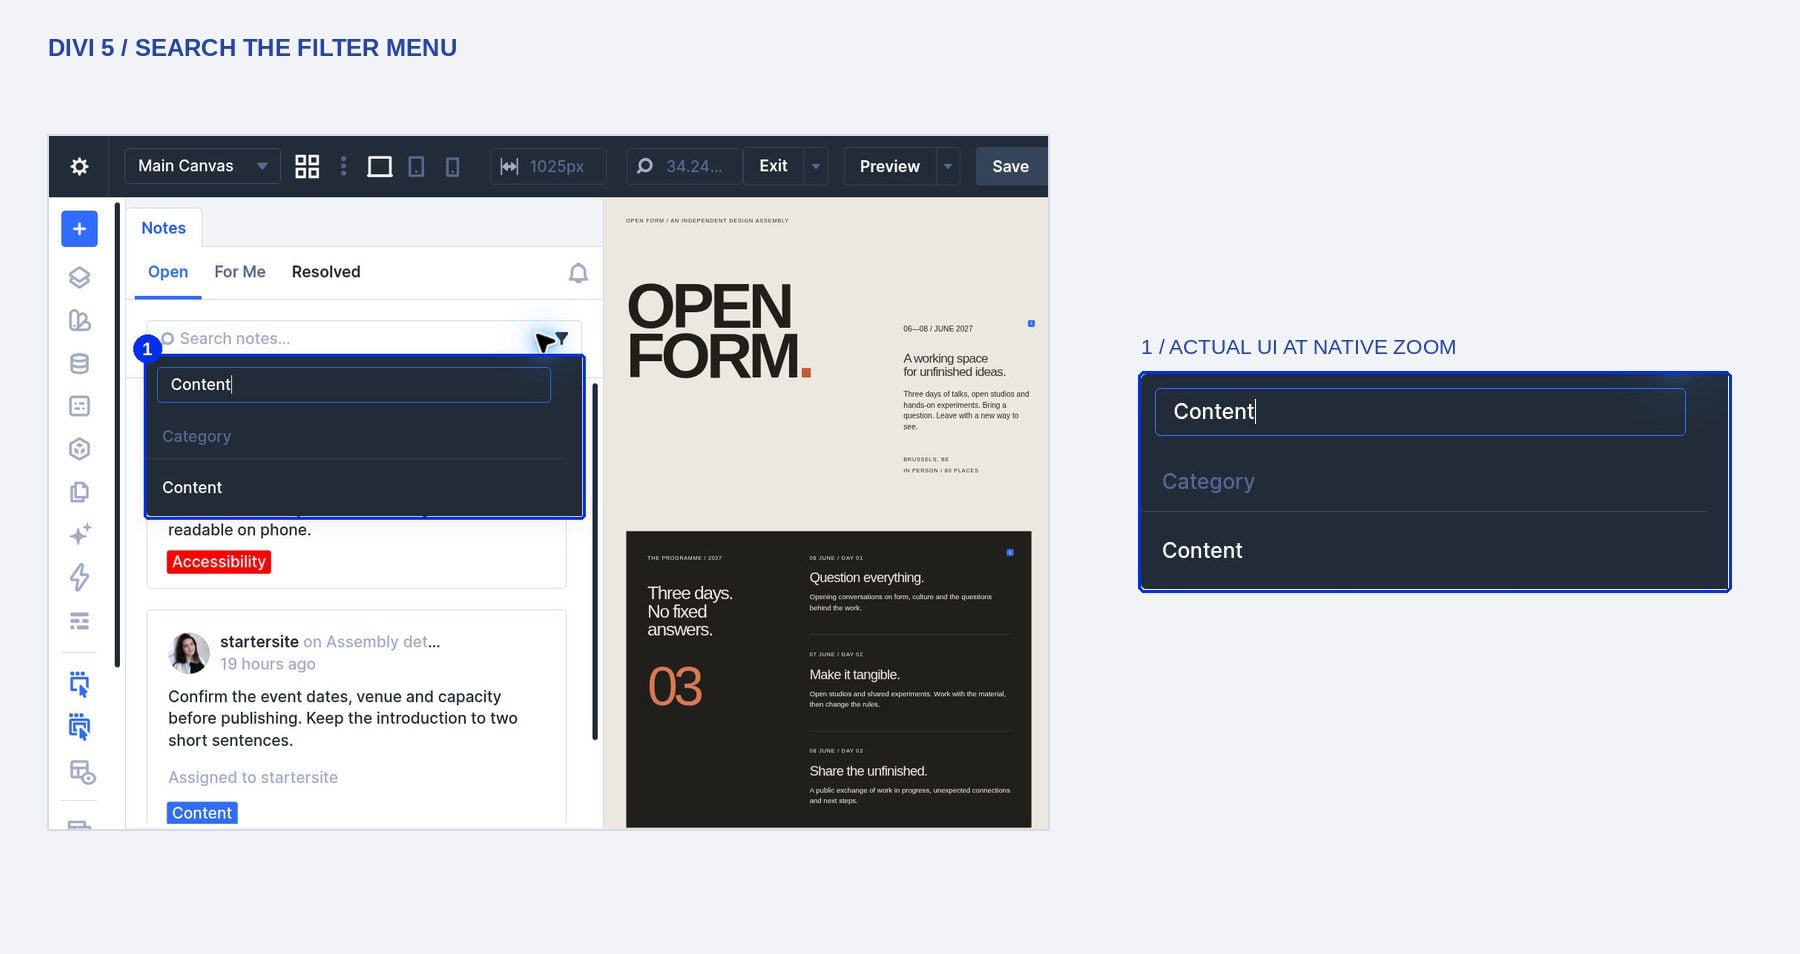
Open the filter control beside Search notes… and type Content in Start Typing. Choose the Content result under Category. The picker also has groups for assignee and author, so searching for a category helps you locate its option without scrolling through the full filter menu.
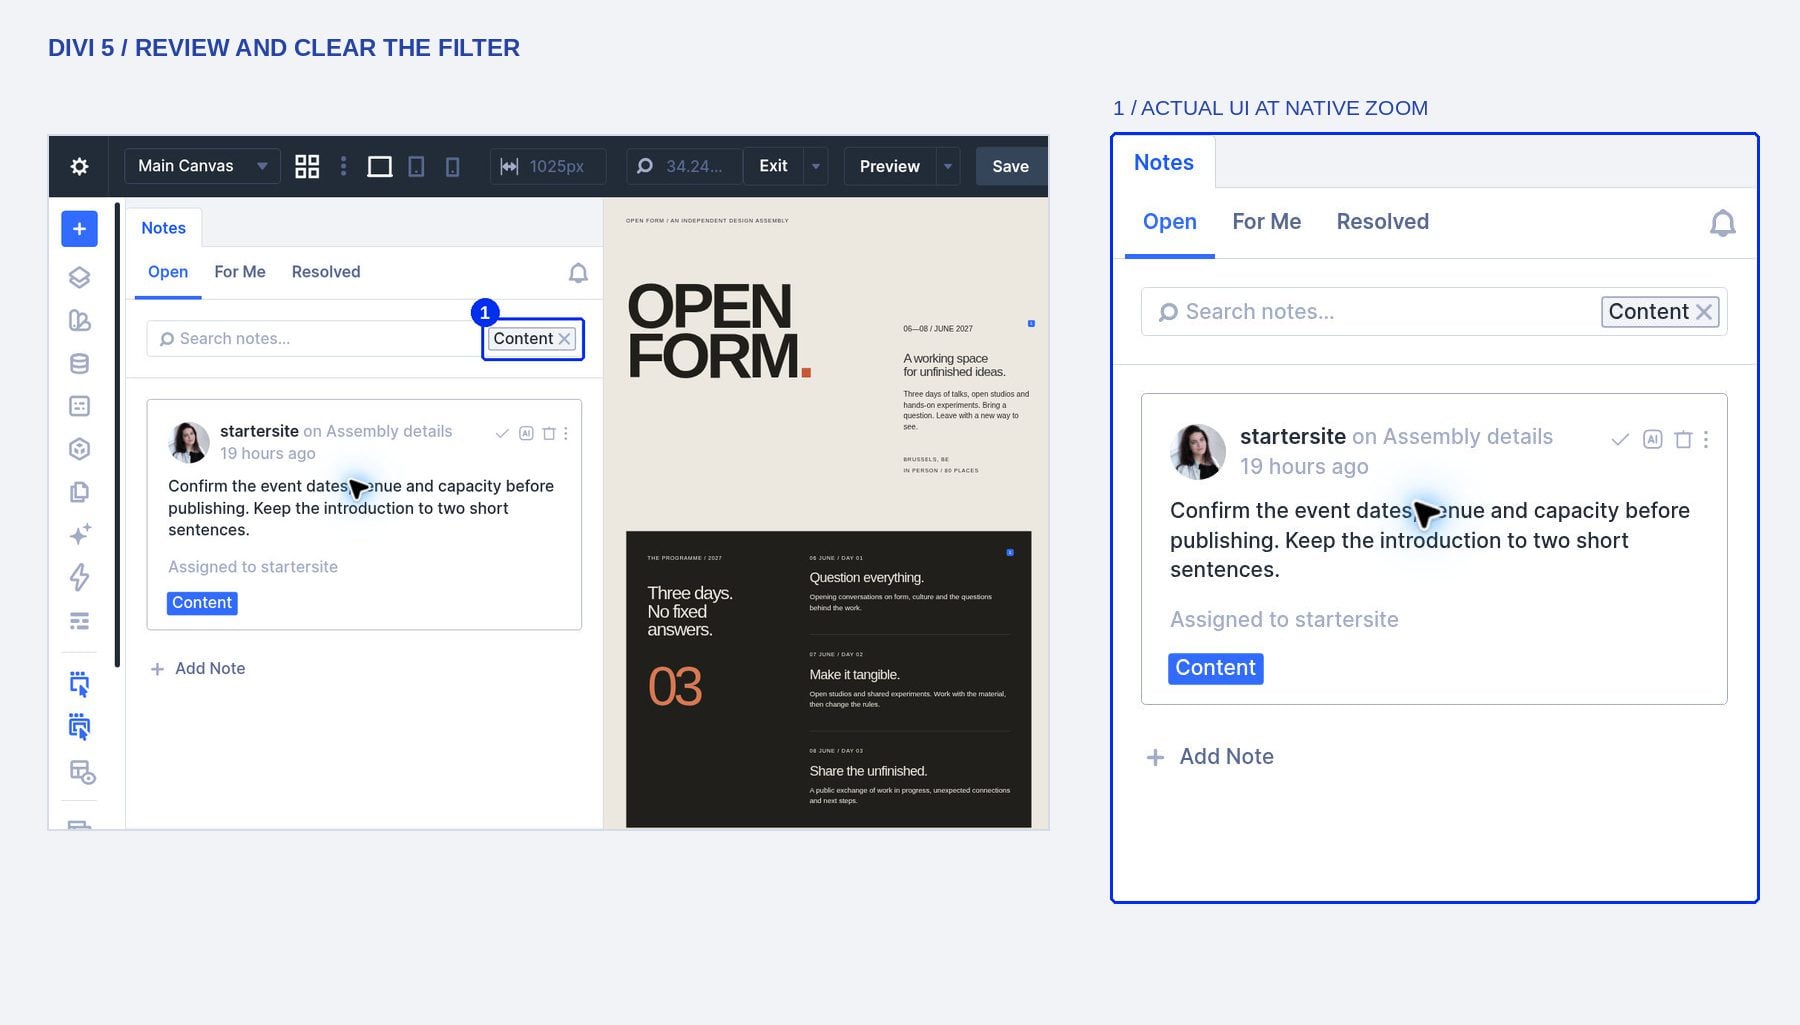
The selected category now appears in the filter control, and the list shows matching notes. Remove it using the small close icon beside the category name when you want to broaden the results again. Remember that the active view, search text, and filters work together: clearing only the category will not reveal unrelated notes while a restrictive search is still active.
6. Choose Your Notification Preferences
Select The Events That Should Send Email
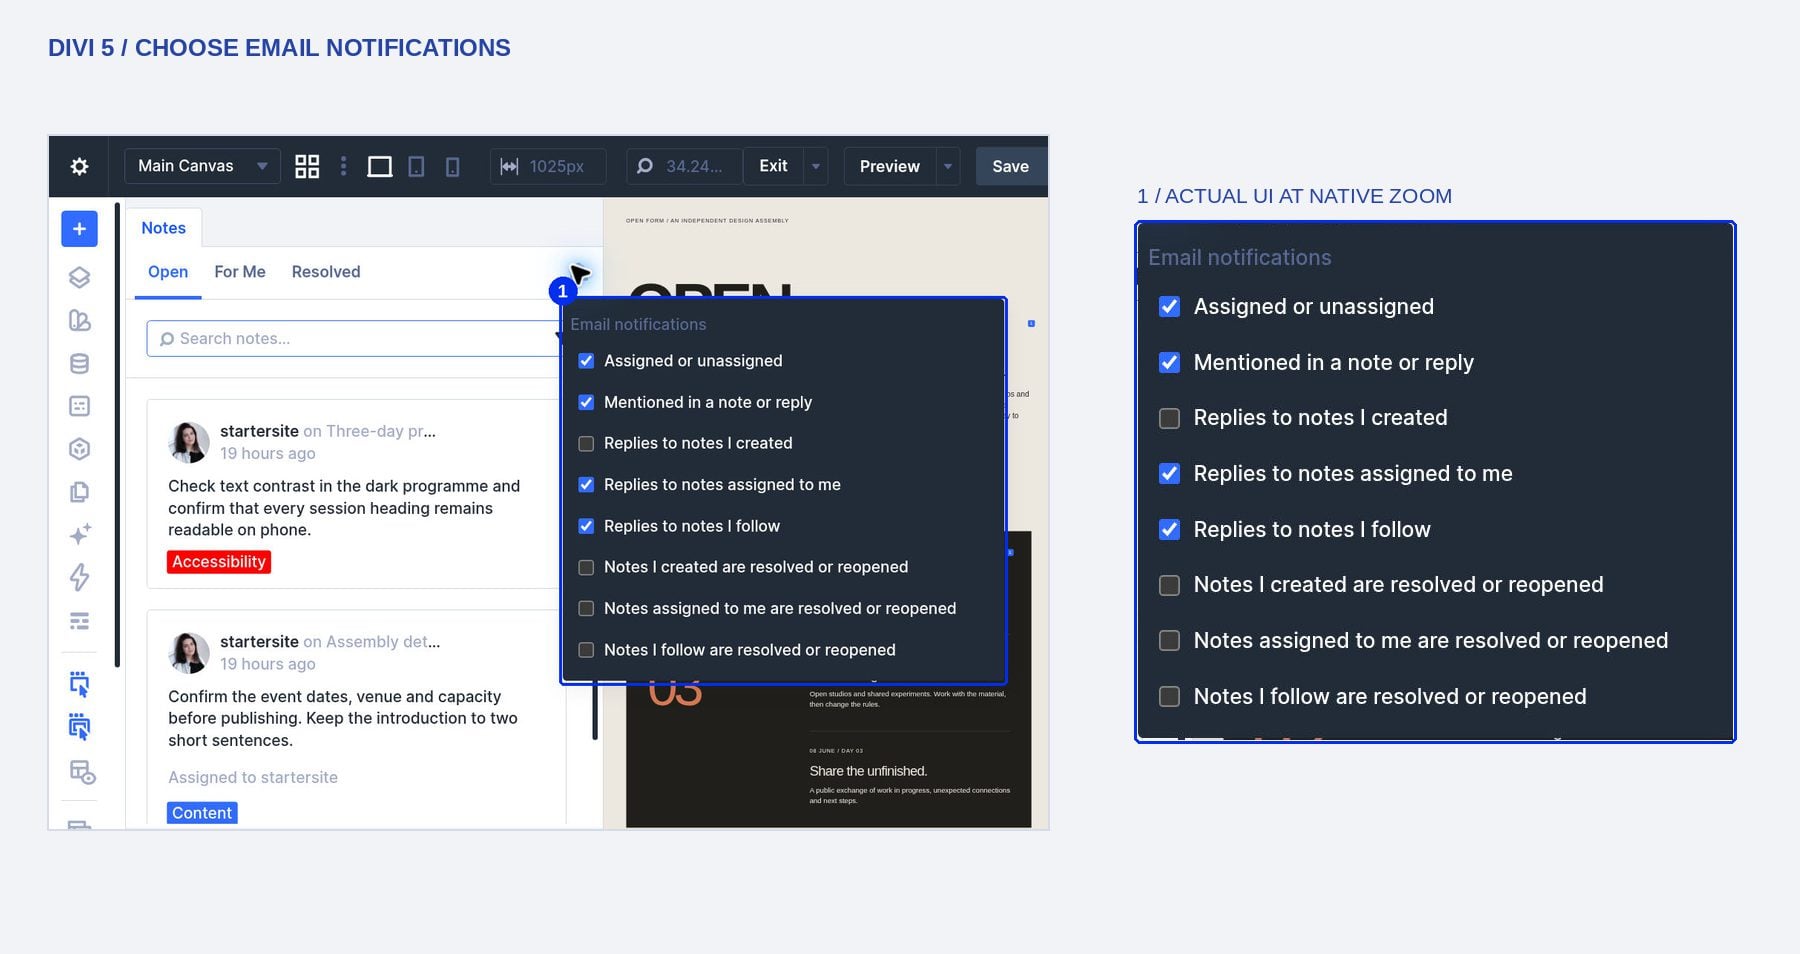
Click Email notifications in the Notes panel to open the preferences menu. Its checkboxes cover assignments and mentions, along with replies and resolution updates for notes you created, follow, or are assigned to. Enable the events you want to receive and leave the other checkboxes unchecked. These preferences control which activity requests email; delivery uses the website’s email setup.
Mute An Individual Discussion
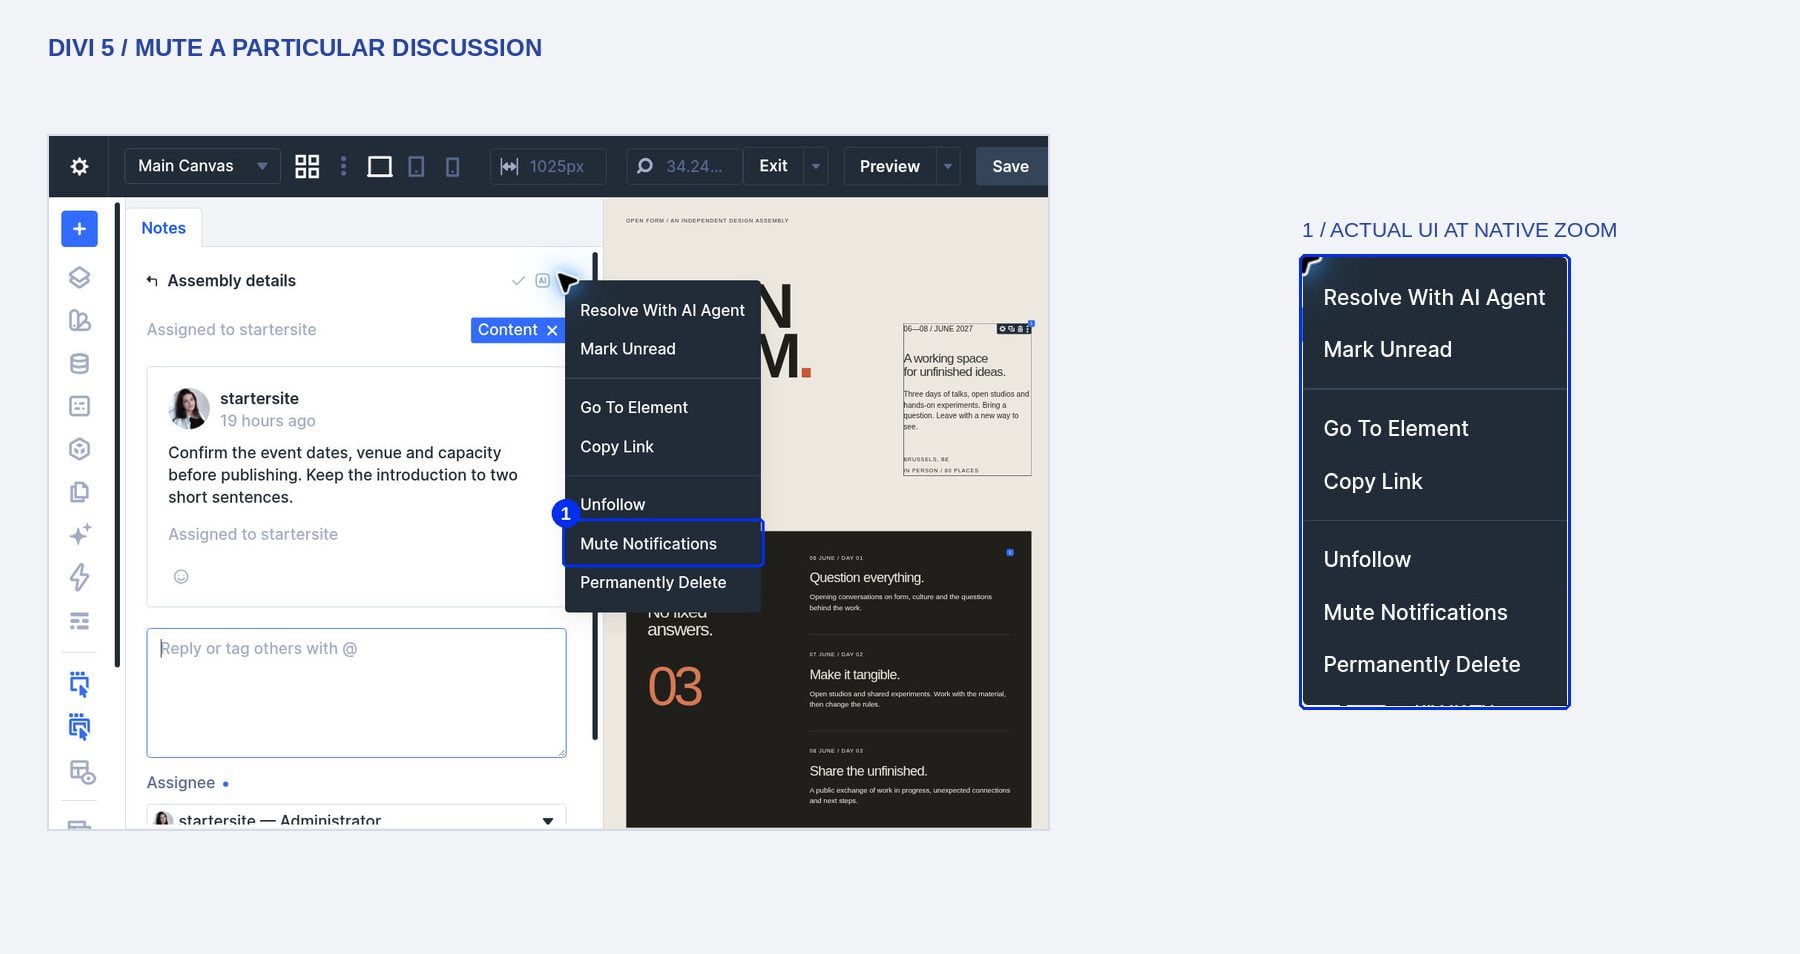
If you want to silence one conversation, open its Note actions menu and choose Mute Notifications. This provides control over that particular discussion without changing all your email preferences. The same menu also shows the thread’s following action. Keep these controls separate from resolving the task: reducing notifications does not establish that the requested work has been completed.
7. Save And Check The Review Before Leaving
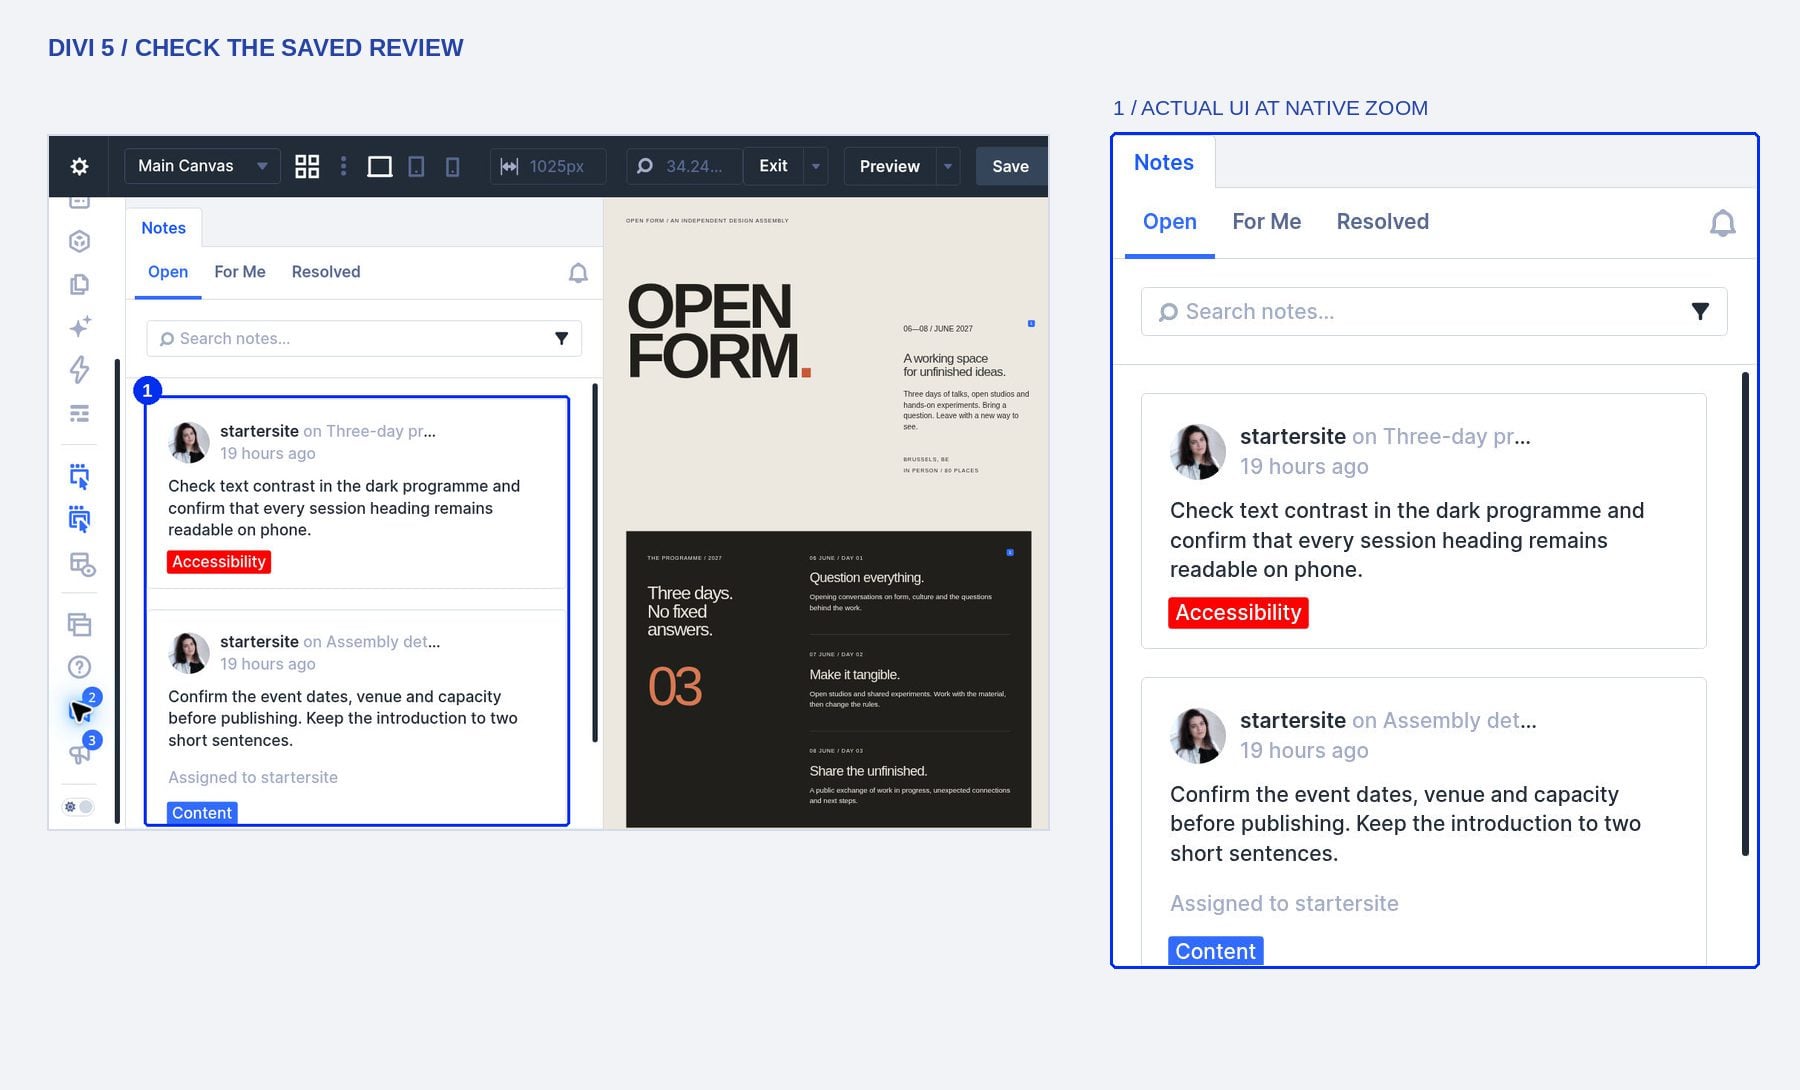
Save the page after attaching your notes and finishing any layout changes. Once saving completes, reopen or reload the builder and check the review queue. Confirm that the open notes still identify their intended elements, and use Resolved to find completed discussions. On our example page, the Content and Accessibility requests retain their module targets after saving and reloading, while the Design discussion keeps its recorded response.
Keep Your Next Design Review In Divi
With Divi Notes, you can keep feedback attached to the elements you’re reviewing in Divi 5. Start with a specific request, assign the task, and use the discussion to clarify the work and record the result. Resolve it when the work is complete, with the conversation available whenever you need to revisit it.





Leave A Reply