
Divi 5‘s preset system makes it easier to create, reuse, and maintain consistent styles across an entire website. Instead of rebuilding the same button, border, form field, or card style again and again, you can save those styles as presets and apply them wherever they fit.
With the release of Nested Option Presets, the preset system goes deeper. You can apply presets to nested option groups inside modules, and you can nest option presets inside other option presets. That means a small preset, such as a border style, can be reused inside a button preset, which can then be included inside a larger element preset.
In this post, we’ll explain what Nested Option Presets are, how they work, how they connect to Element Presets and Option Group Presets, and how to use them to build a cleaner design system in Divi 5.
Let’s get started.
What Are Presets In Divi 5?
Divi 5’s preset system lets you save groups of design settings and reuse them across your site. When you update a preset, every element using that preset updates with it, which makes presets useful for building consistent buttons, typography, backgrounds, borders, spacing, shadows, and other shared styles.
There are two main preset types to understand before working with Nested Option Presets:
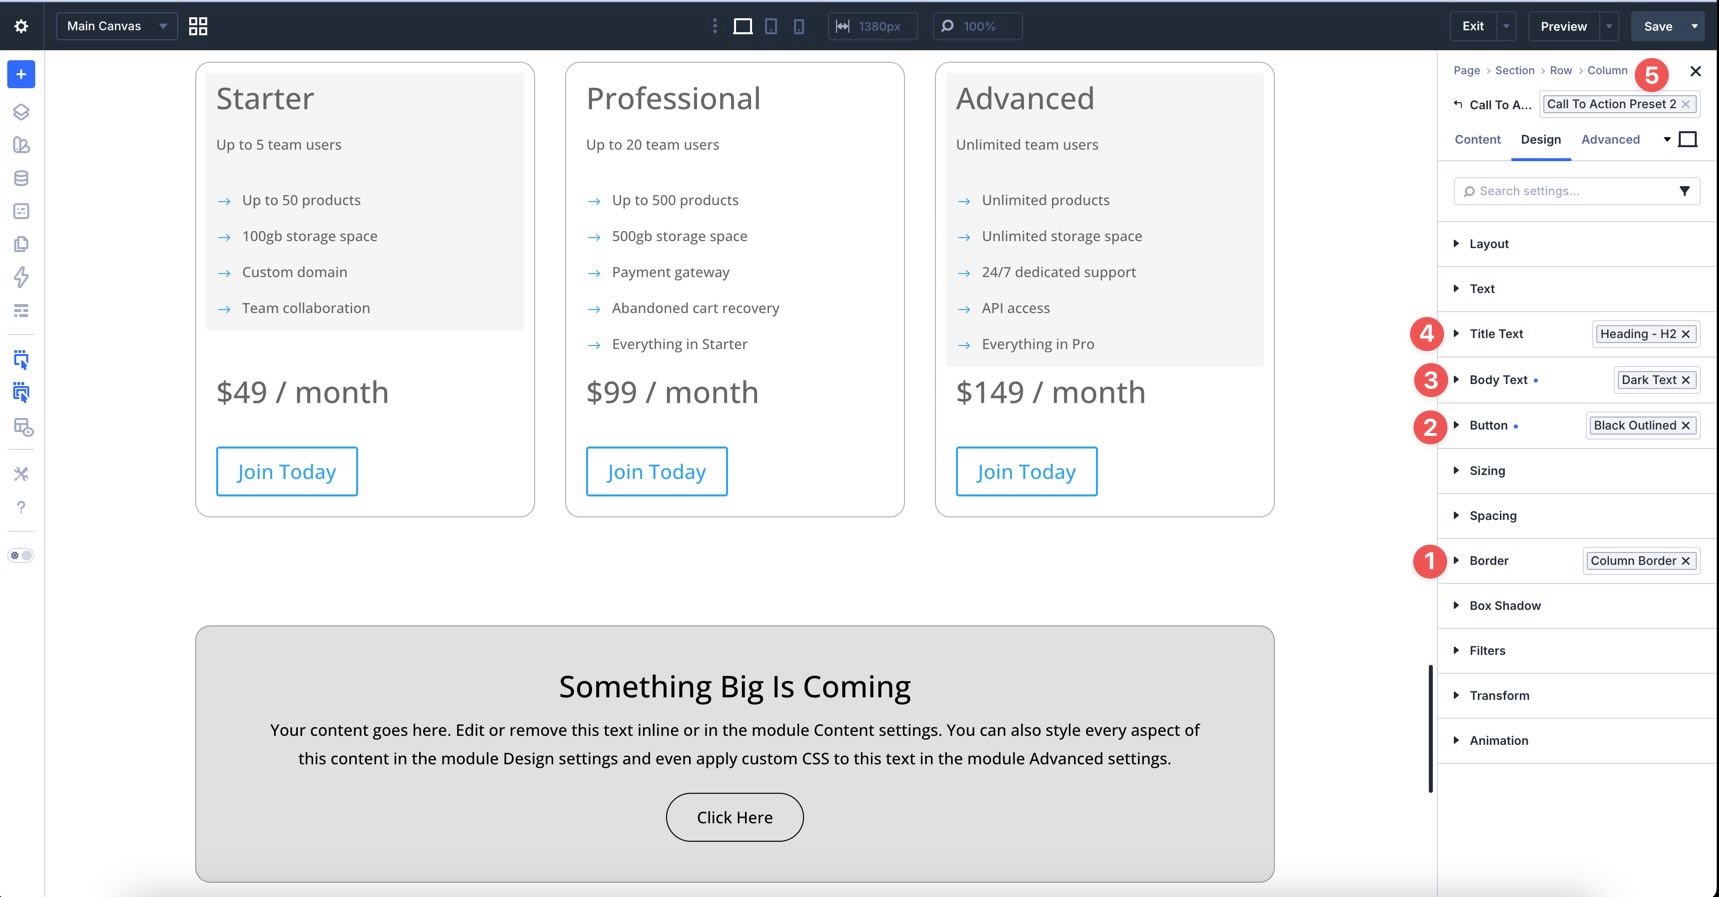
Element Presets: These apply to entire elements, such as modules, rows, columns, and sections. For example, you can create an Element Preset for a Button module and reuse that complete button style on other Button modules.
Option Group Presets: These apply to specific groups of settings inside an element, such as Typography, Background, Border, Spacing, Button, Box Shadow, or Effects. They are more granular than Element Presets and can be reused anywhere a compatible option group exists.
Previous updates introduced stacked presets and nested presets. Stacked presets let you apply multiple presets to the same element or option group. Nested presets let you include Option Group Presets inside Element Presets, so a complete module style can still be built from smaller reusable pieces.
Why Presets Matter
Presets are useful because they keep your design decisions connected. If your site uses the same rounded border preset on buttons, images, icons, and cards, you can update that border style once instead of editing each element manually.
They also make your workflow faster. You can create a small set of reusable styles, apply them throughout a layout, and make future changes from one place. That matters on larger sites where small design inconsistencies can add up quickly.
Nested Option Presets Explained
Nested Option Presets extend the preset system to deeper option groups inside modules and sub-elements.
Before this update, presets could be used for full elements and standard option groups, but deeply nested option groups had more limitations. For example, a border group inside a module’s button sub-element could not always have its own reusable preset.
Now, nested option groups can support presets too. That includes deeply nested controls such as a button border inside a CTA module, an image border inside a Blurb module, or form field styles inside a form-based module.
This works especially well with Composable Settings. Composable Settings let you enable additional design option groups for module sub-elements, such as Sizing, Border, Background, Transform, or Animation. Once those option groups are available, they can become part of your preset workflow.
How Multi-Level Nesting Works
Nested Option Presets add another level to Divi 5’s preset structure. A small Option Group Preset can be nested inside another Option Group Preset, which can then be included inside an Element Preset.
For example, you could create a Pill Border preset, use it inside a Primary Button option preset, and then include that button preset inside a CTA Element Preset.
You can also reuse compatible Option Group Presets across different modules. A border preset created for one element can be applied to another element as long as that option group supports the same kind of preset.
The advantage is global updating. If you change the low-level border preset later, that change can flow through every button, icon, image, card, or module using it, including styles where the preset is nested inside other presets.
How To Use Nested Option Presets
Now, let’s walk through the process inside the Visual Builder.
1. Create A Nested Option Preset
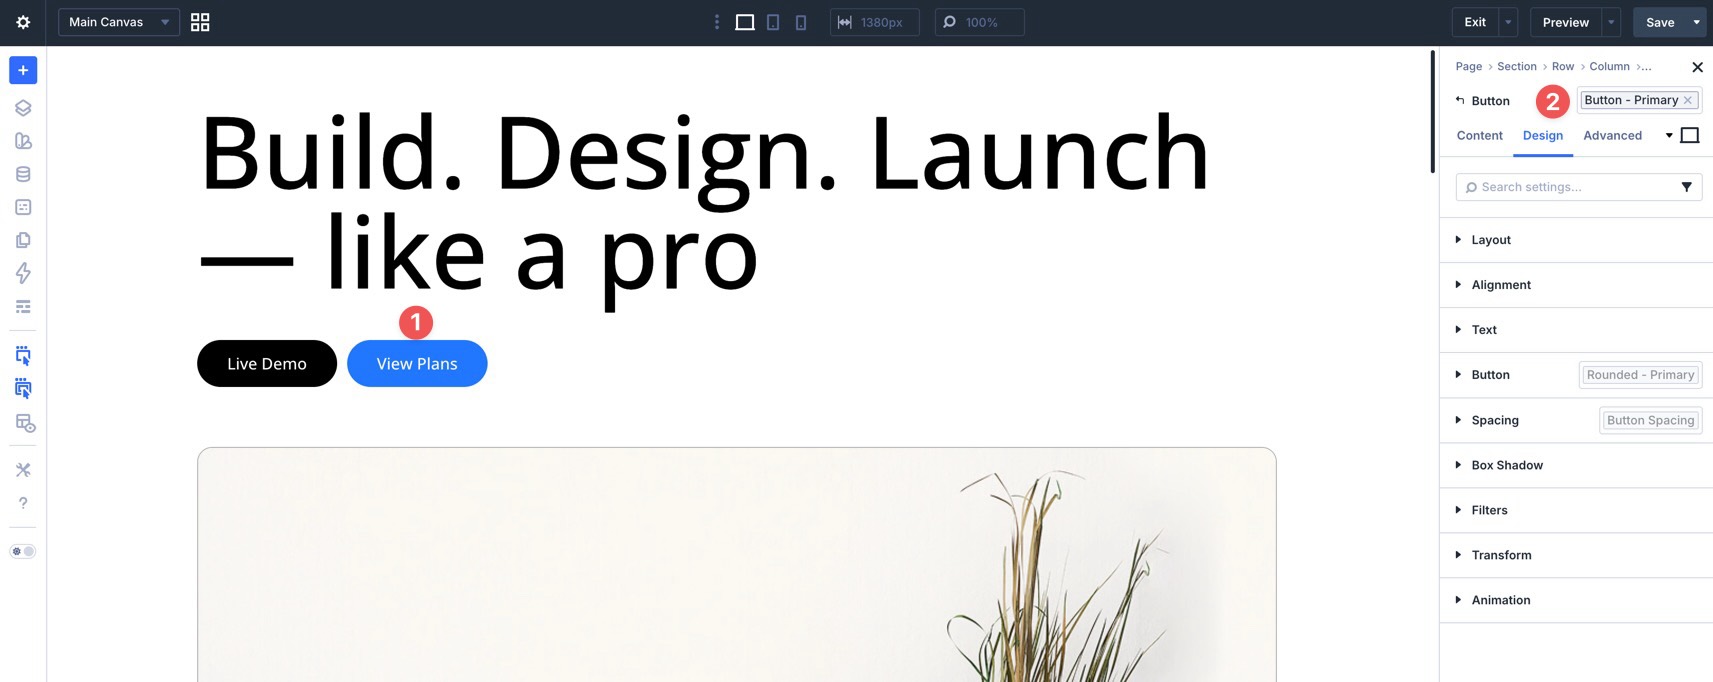
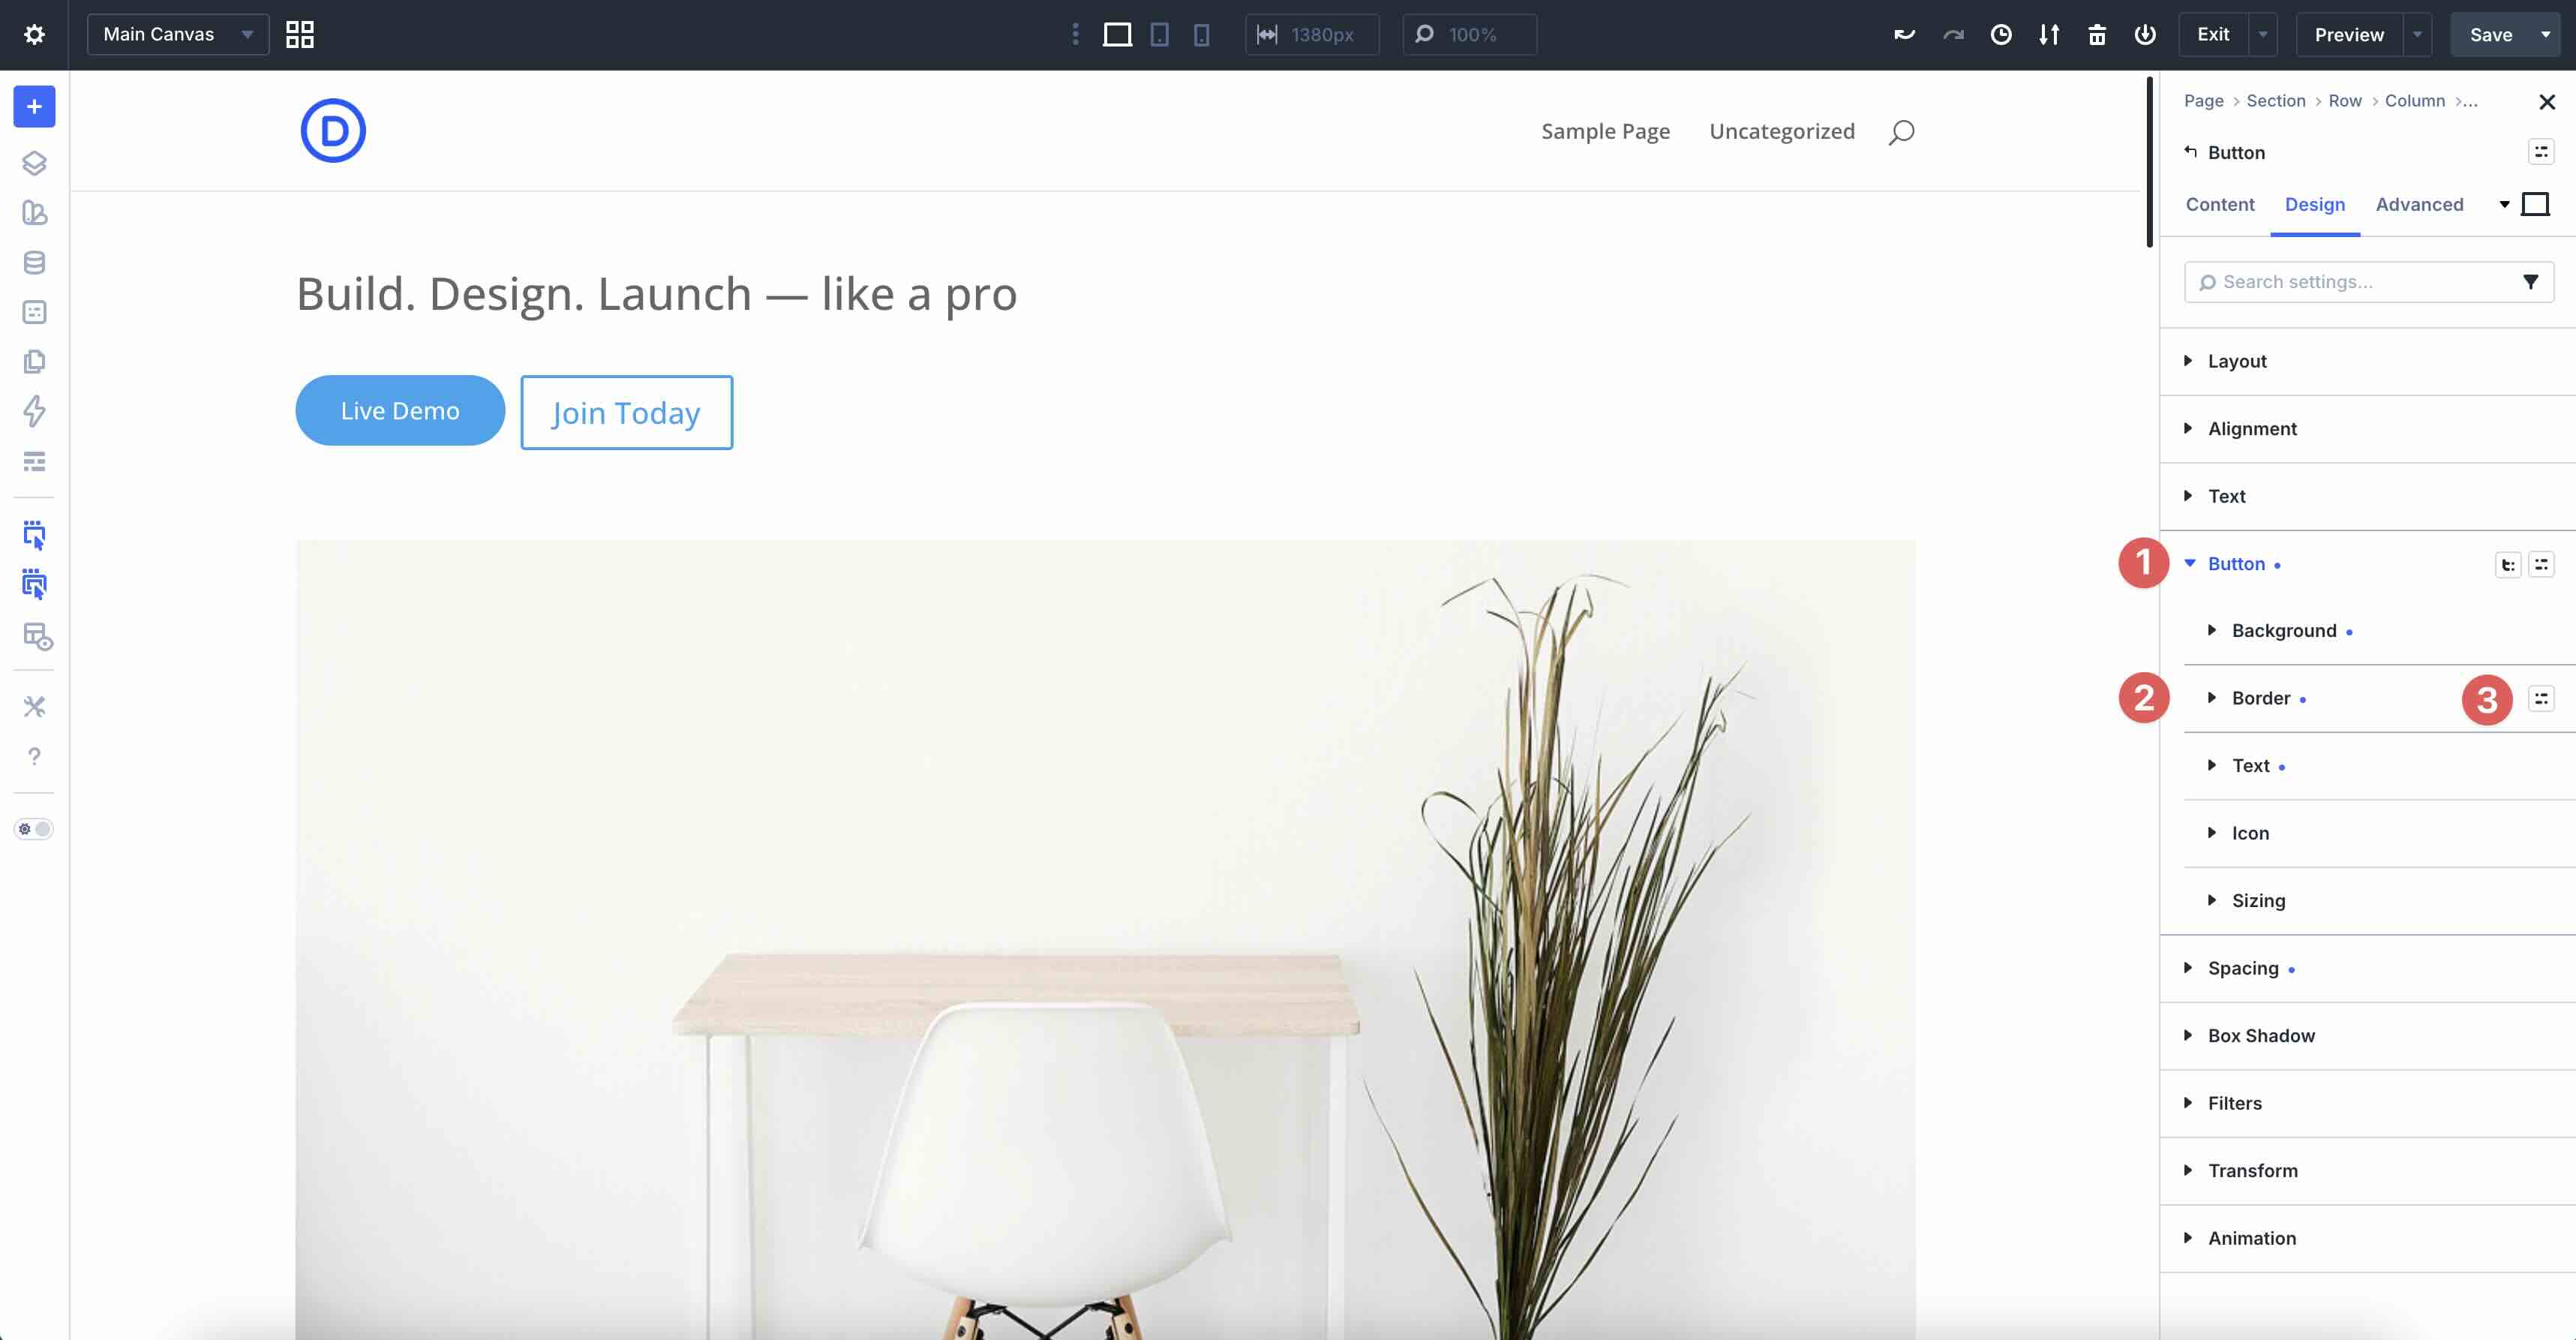
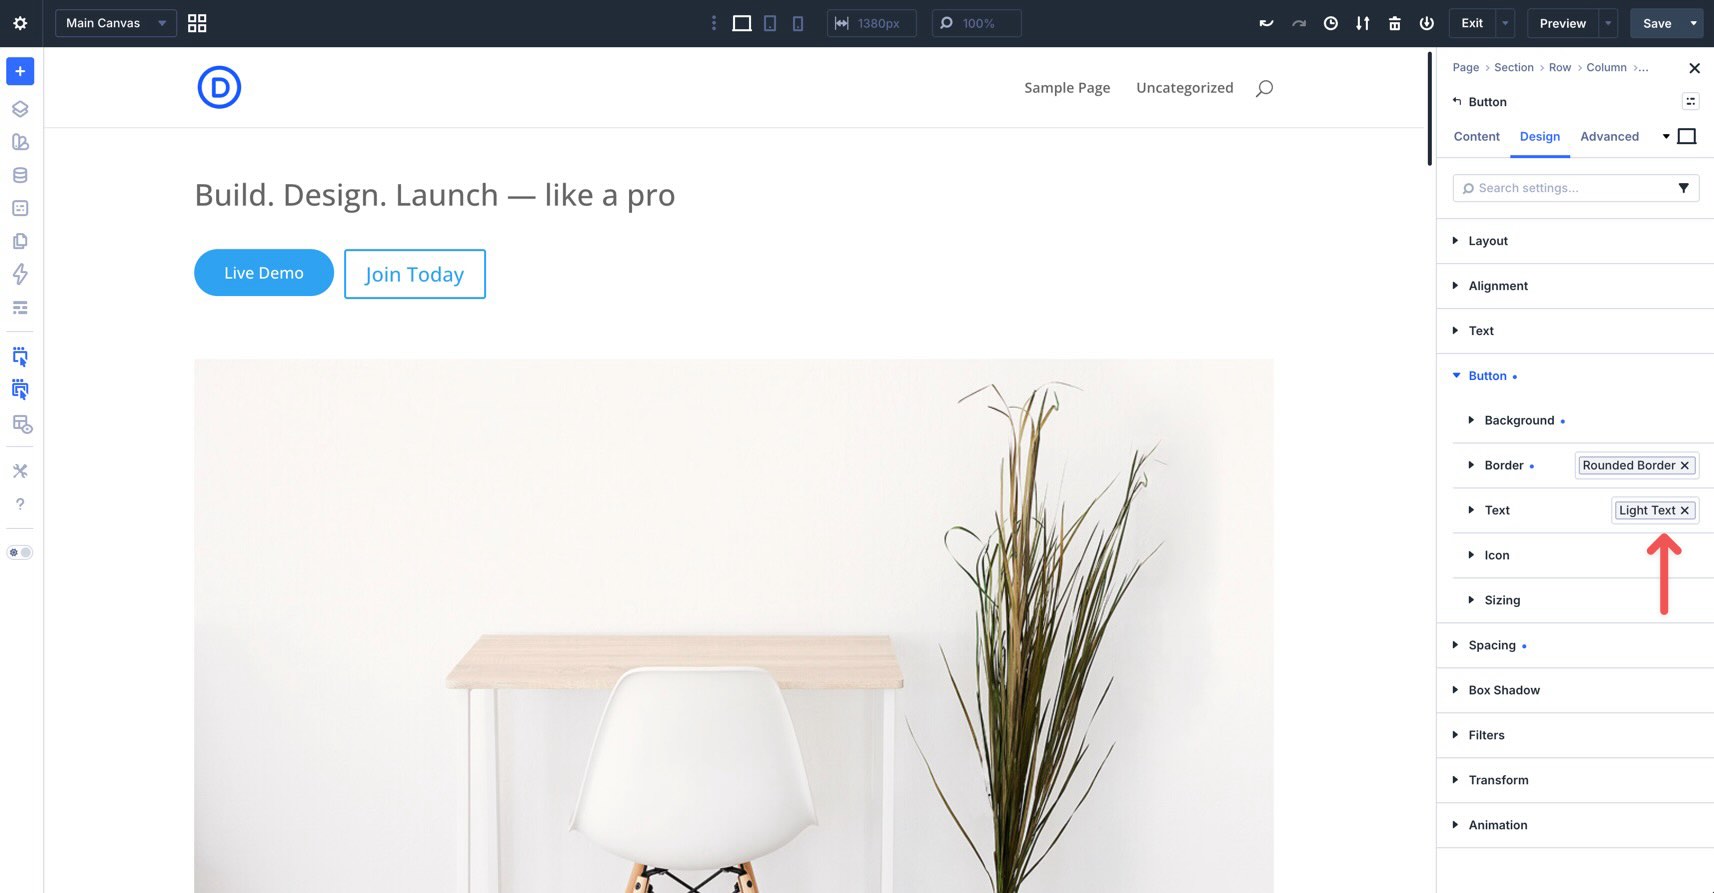
Open any page in the Visual Builder. Click a Button module, open its settings, and go to the Design tab. Style the button as needed.
Once your styles are in place, locate the nested option group you want to save. For this example, use the Border option group inside the button settings. Hover over the option group title to reveal the Assign Preset icon.
Click the icon, then choose New Preset From Current Styles.
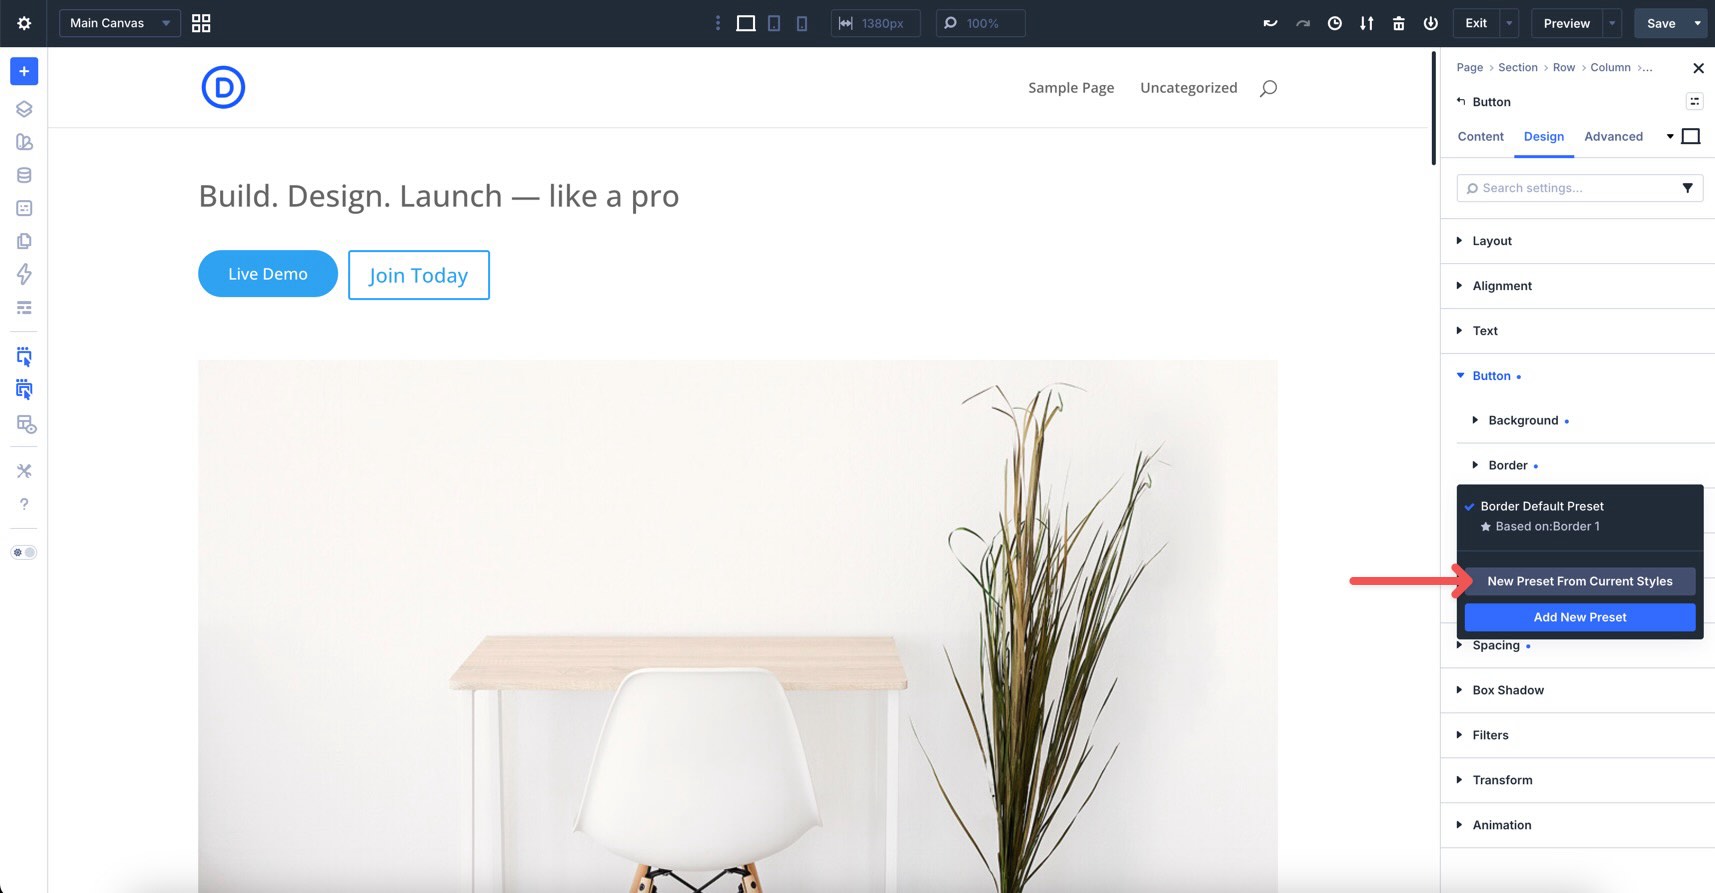
Give the preset a clear name, confirm the border styles are correct, and click Save Preset.
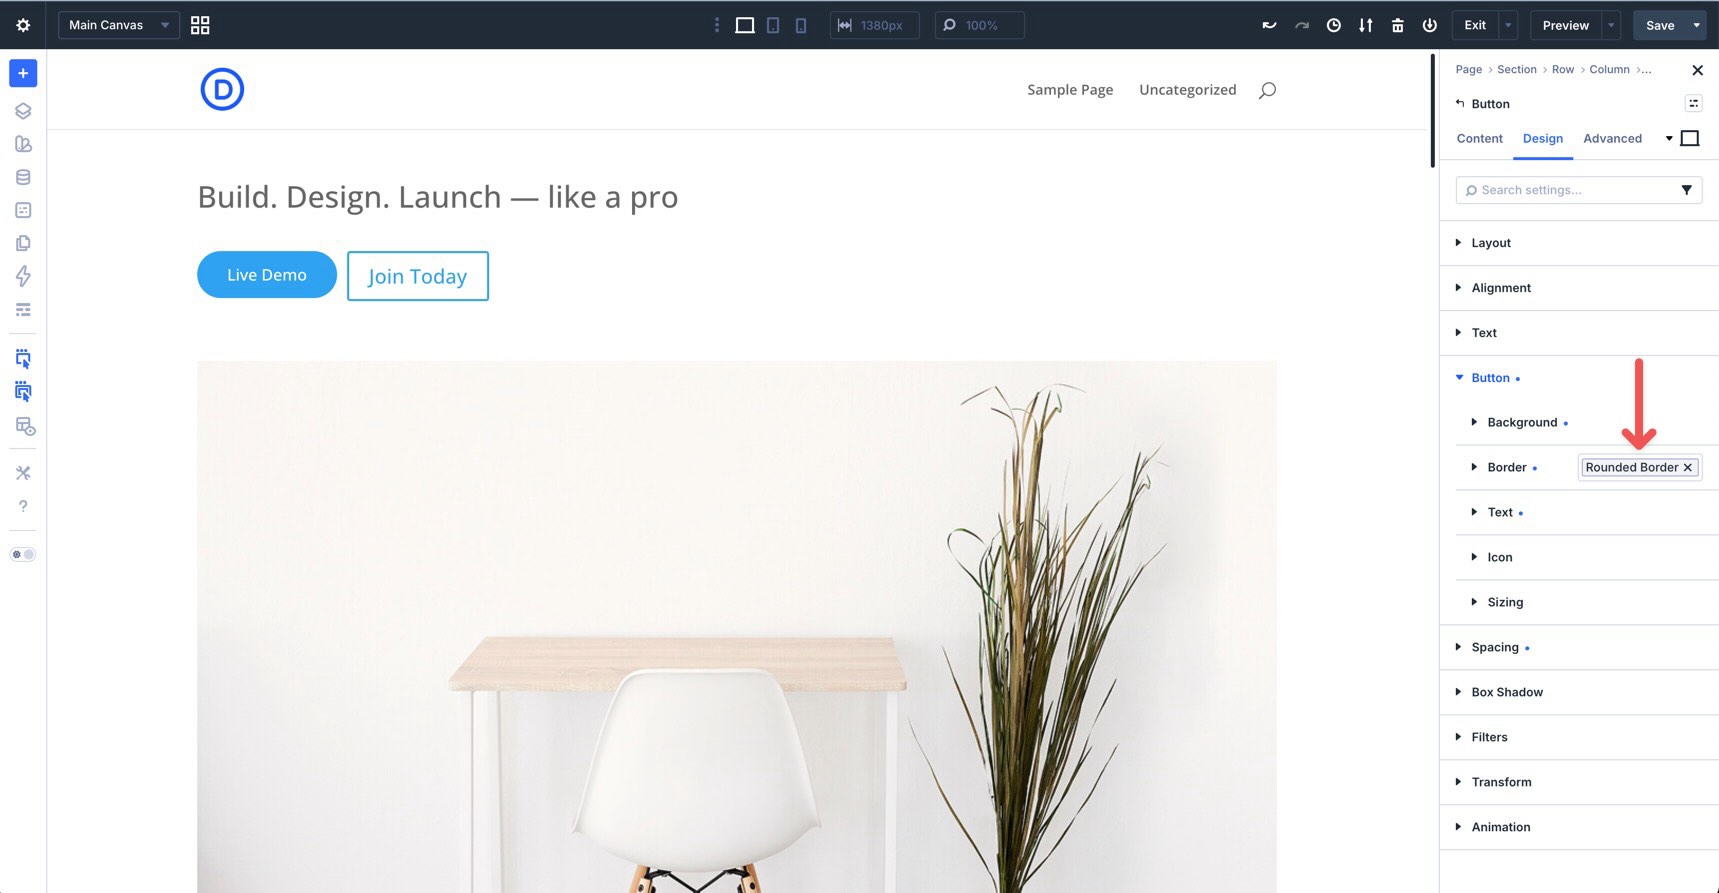
After the preset is created and applied, it appears next to the option group’s title. You can apply it to compatible option groups elsewhere in the Builder.
Repeat the same process for other nested option groups you want to reuse, such as shadows, spacing, sizing, or backgrounds.
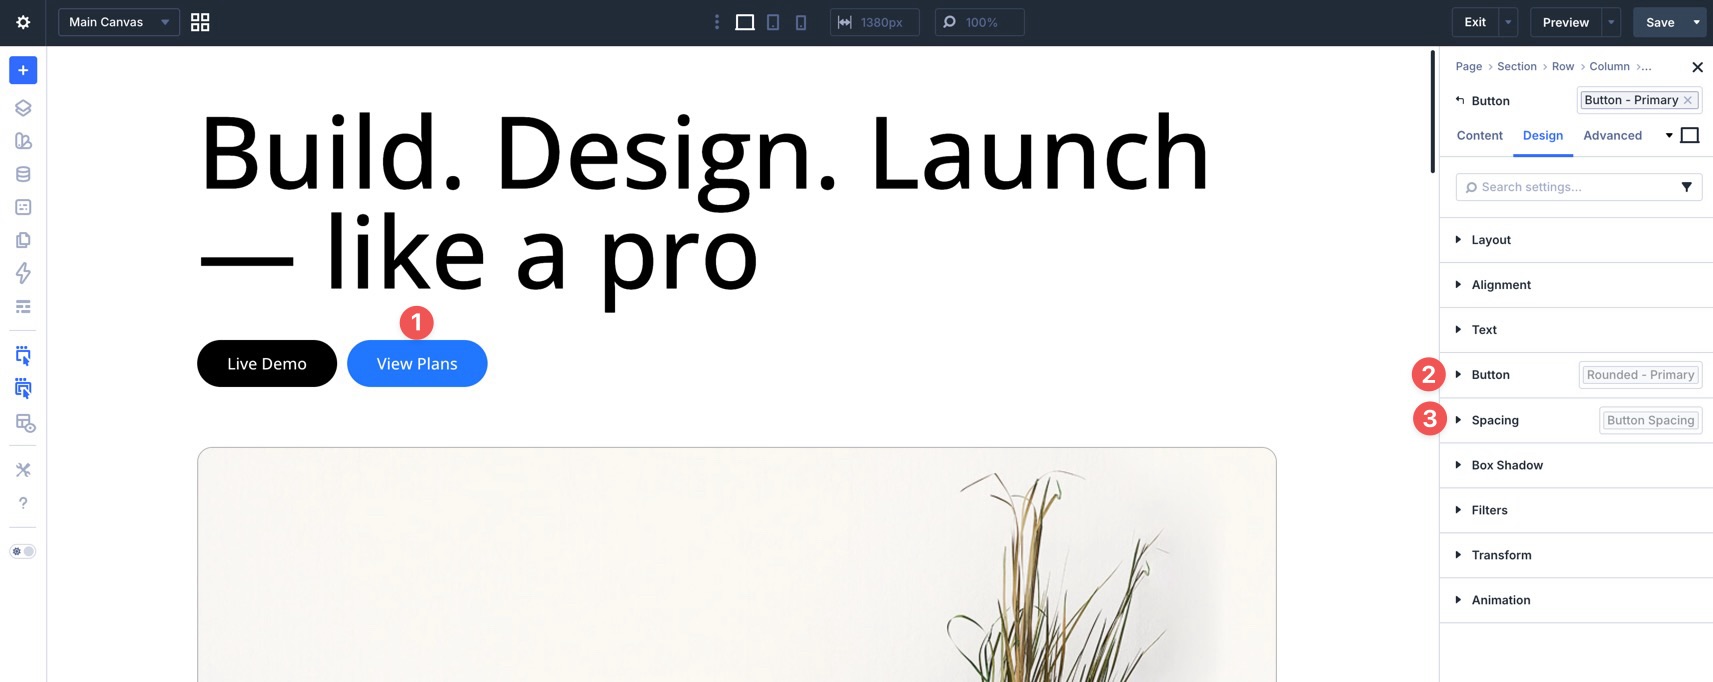
2. Create An Option Group Preset
Next, create broader Option Group Presets for the Button’s main option groups, such as Spacing or Button. The process is similar: style the option group, click the Assign Preset icon, choose New Preset From Current Styles, name the preset, and save it.
Quick Tip: Include important state styles, such as hover styles, before saving the preset. That way, the preset stores the button’s normal and interactive styling together.
This gives you a reusable button-level style that can still contain smaller nested presets, such as the border preset you created earlier.
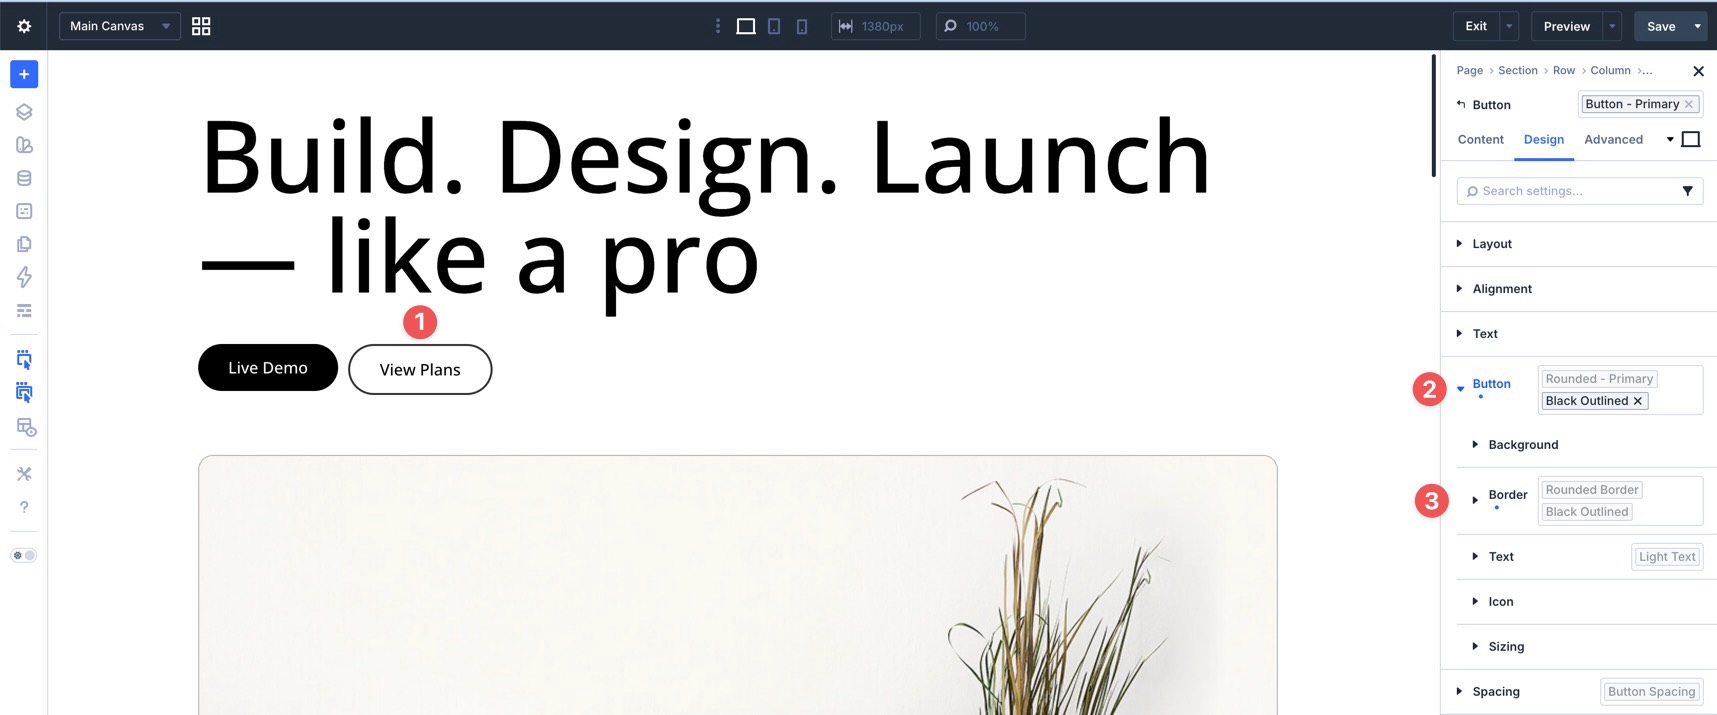
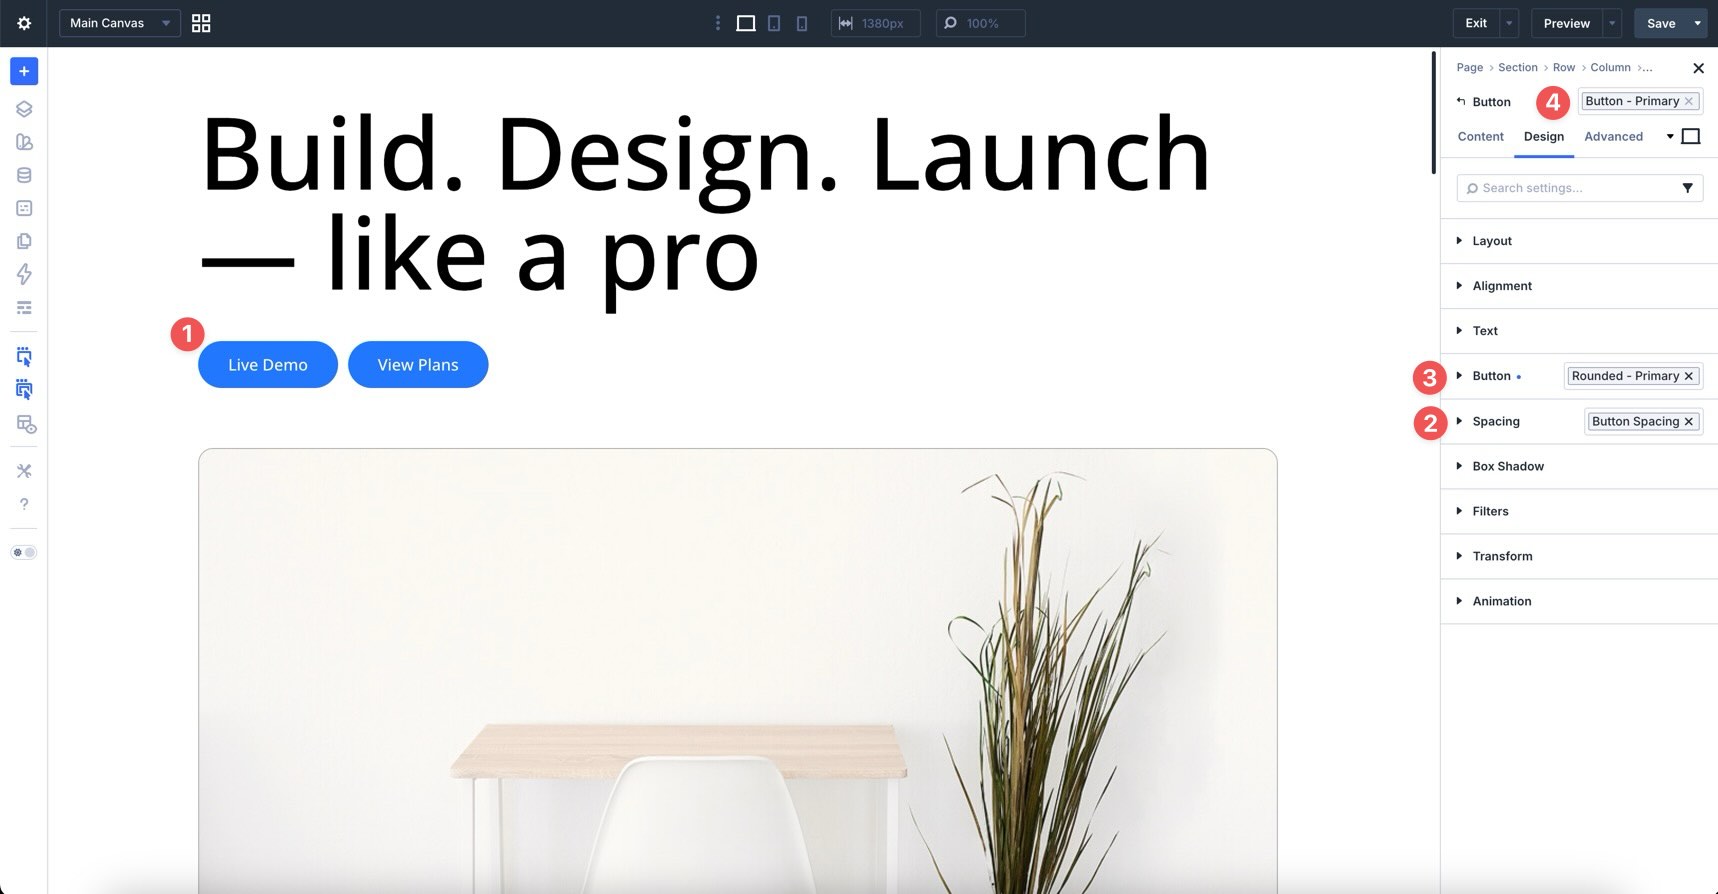
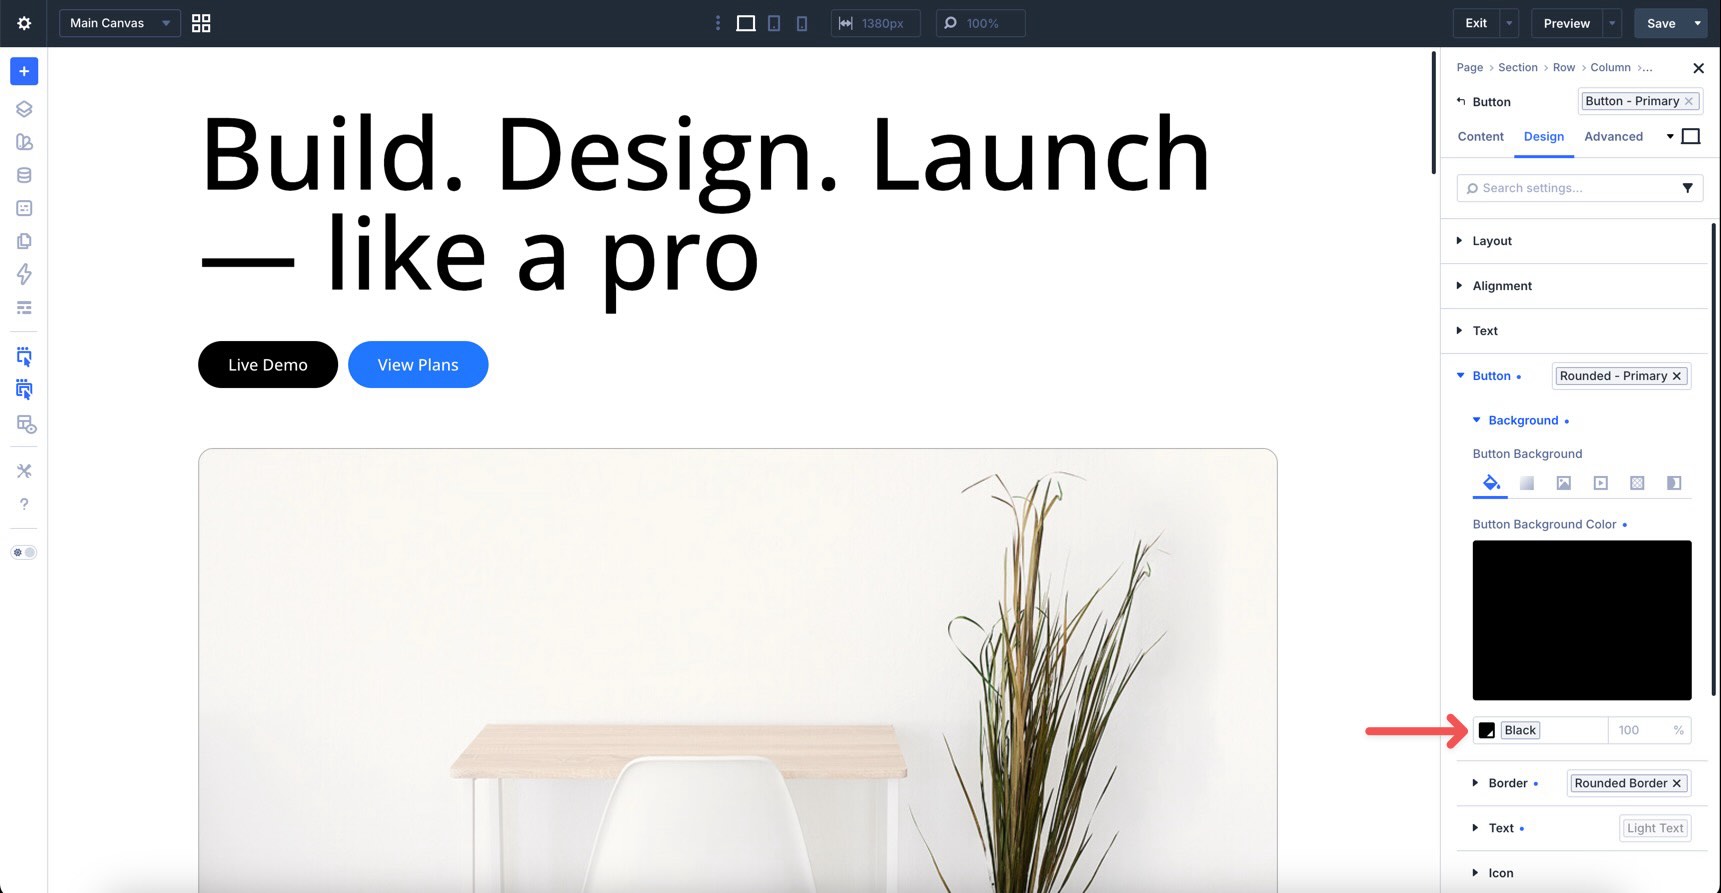
3. Create An Element Preset
Once your nested option presets and option group presets are in place, you can include them inside an Element Preset for the Button module.
In the Button module settings, hover over the module header to reveal the Assign Preset icon.

Click New Preset From Current Styles, name your preset something clear, such as Button – Primary, and save it.
You can now apply that Element Preset to other Button modules. The Element Preset can include the Option Group Presets and Nested Option Presets used to build it, so the full button style remains reusable and easier to update.
4. Apply Nested Option Presets To Other Modules
Nested Option Presets become more useful when you reuse them across different module types. For example, the same rounded border preset you created for a Button module can also be applied to an Icon module if the compatible Border option group is available.
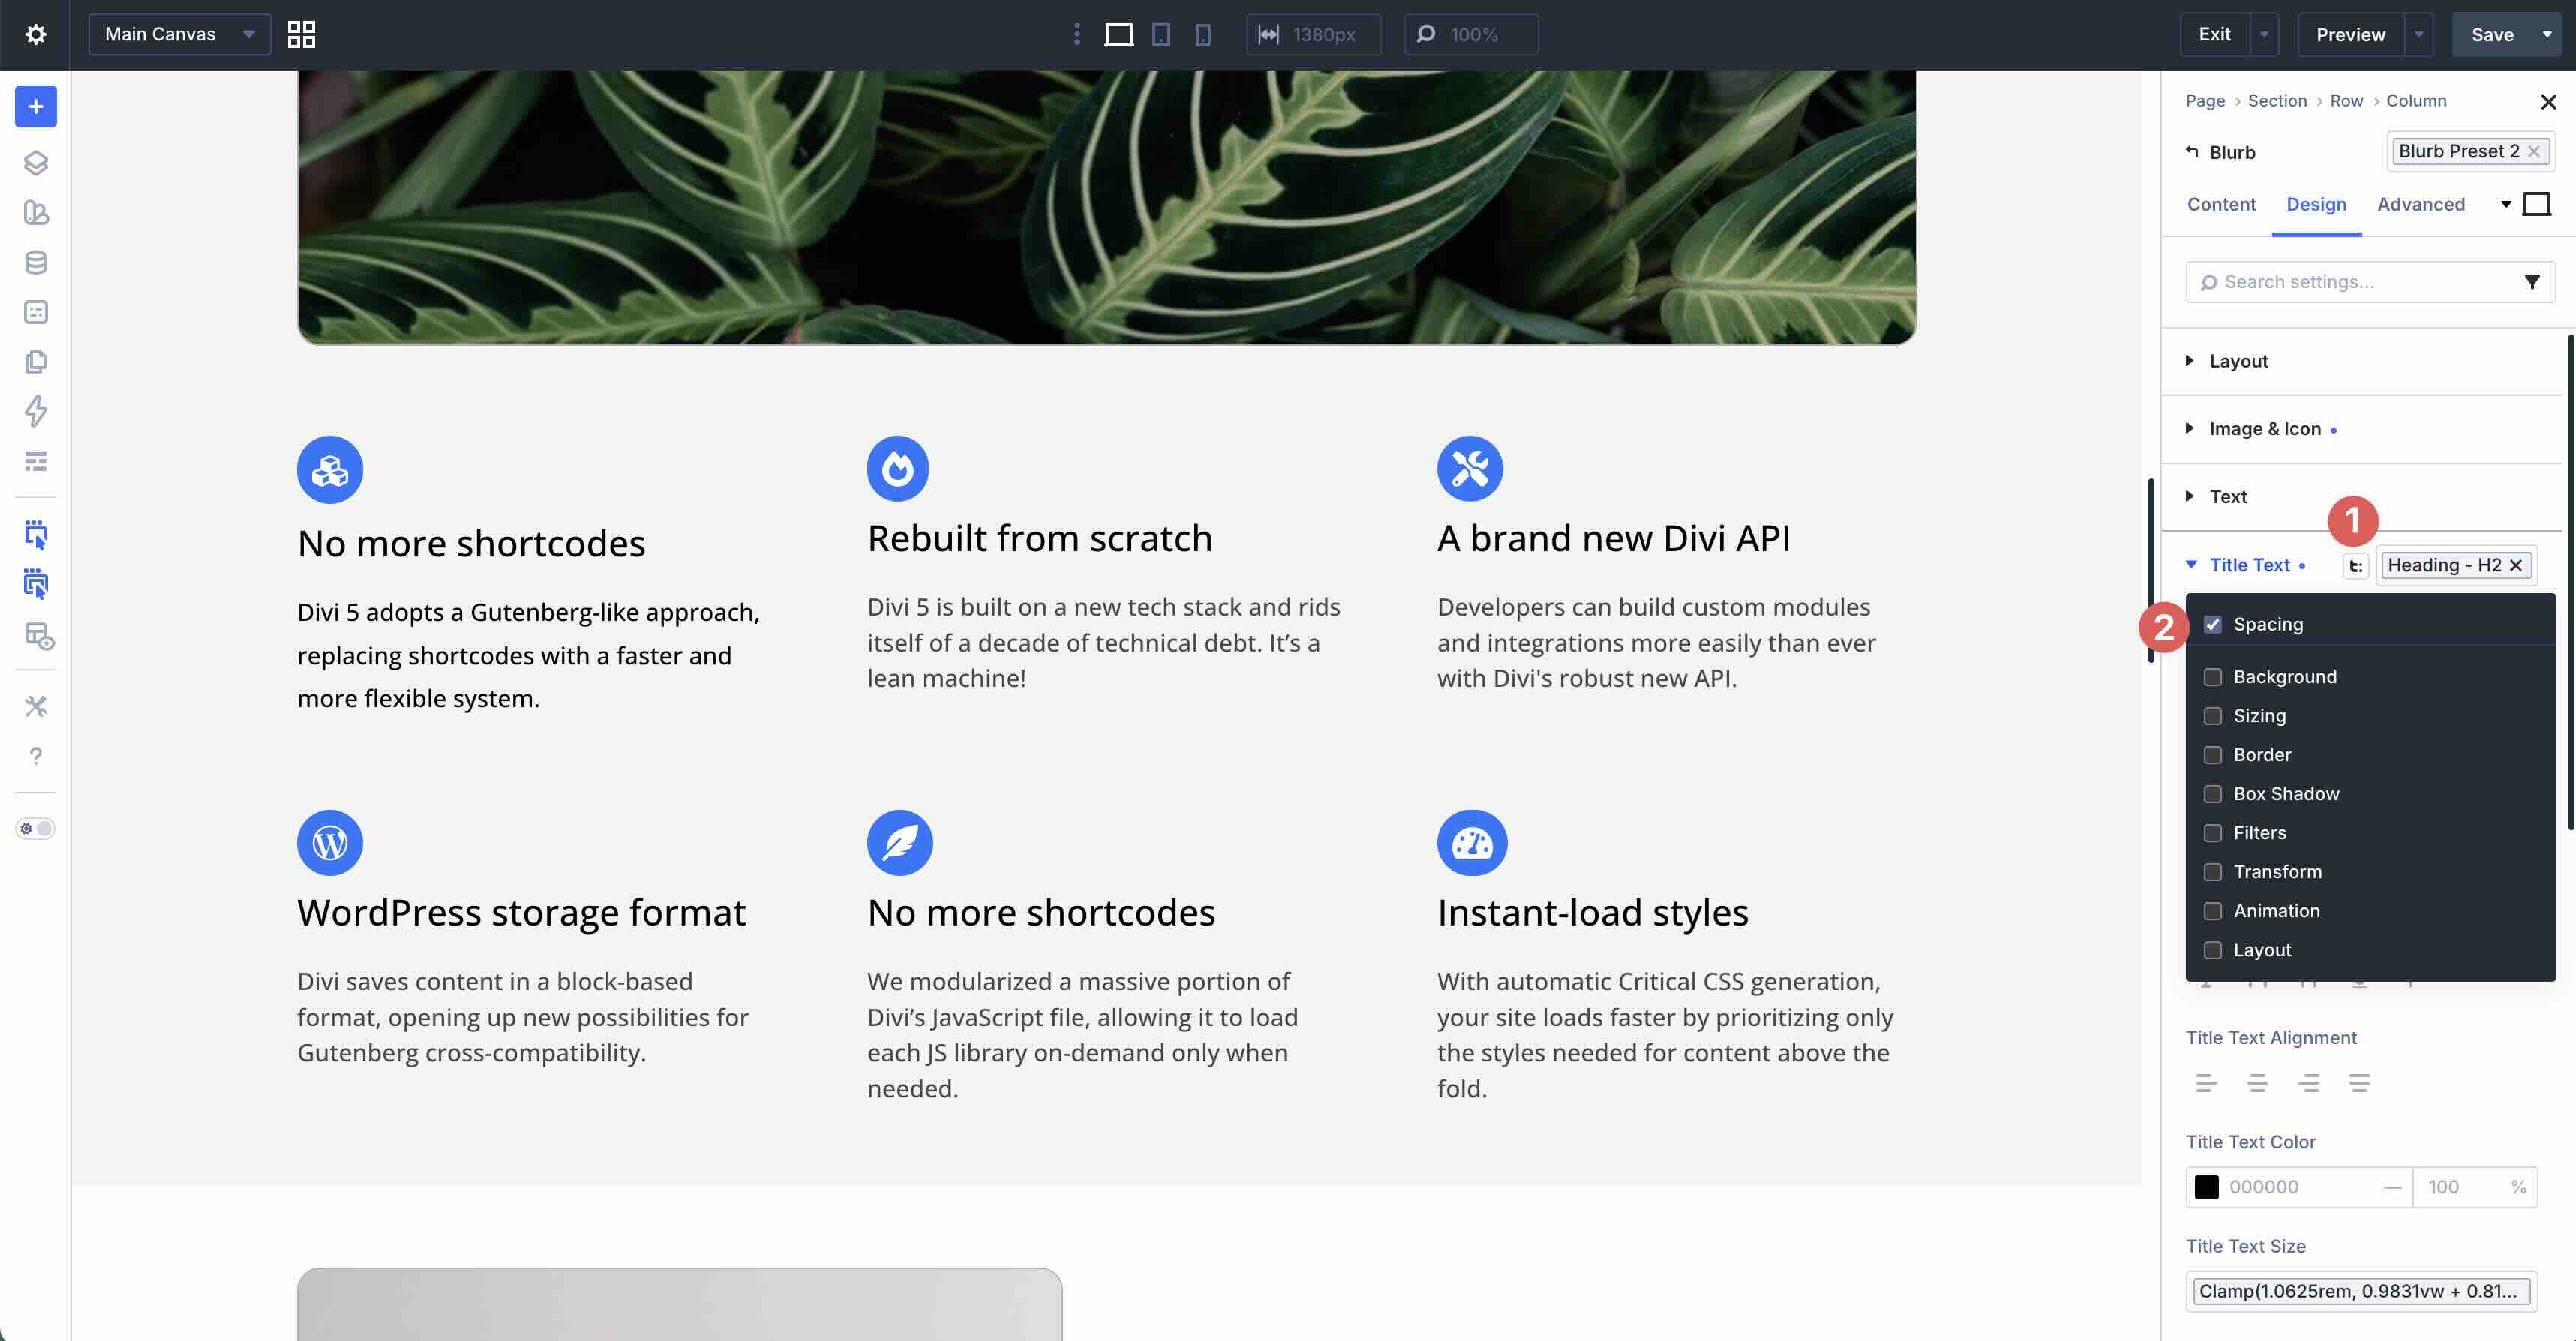
Add or locate an Icon module on the page. Open the module settings, add a background color and padding, and adjust the icon size. Then locate the Border option group in the Design tab.
Hover over the option group title, click the Assign Preset icon, and apply the border preset you created earlier.
From there, you can create additional Nested Option Presets and Option Group Presets for the Icon module, then include those styles inside an Icon Element Preset.
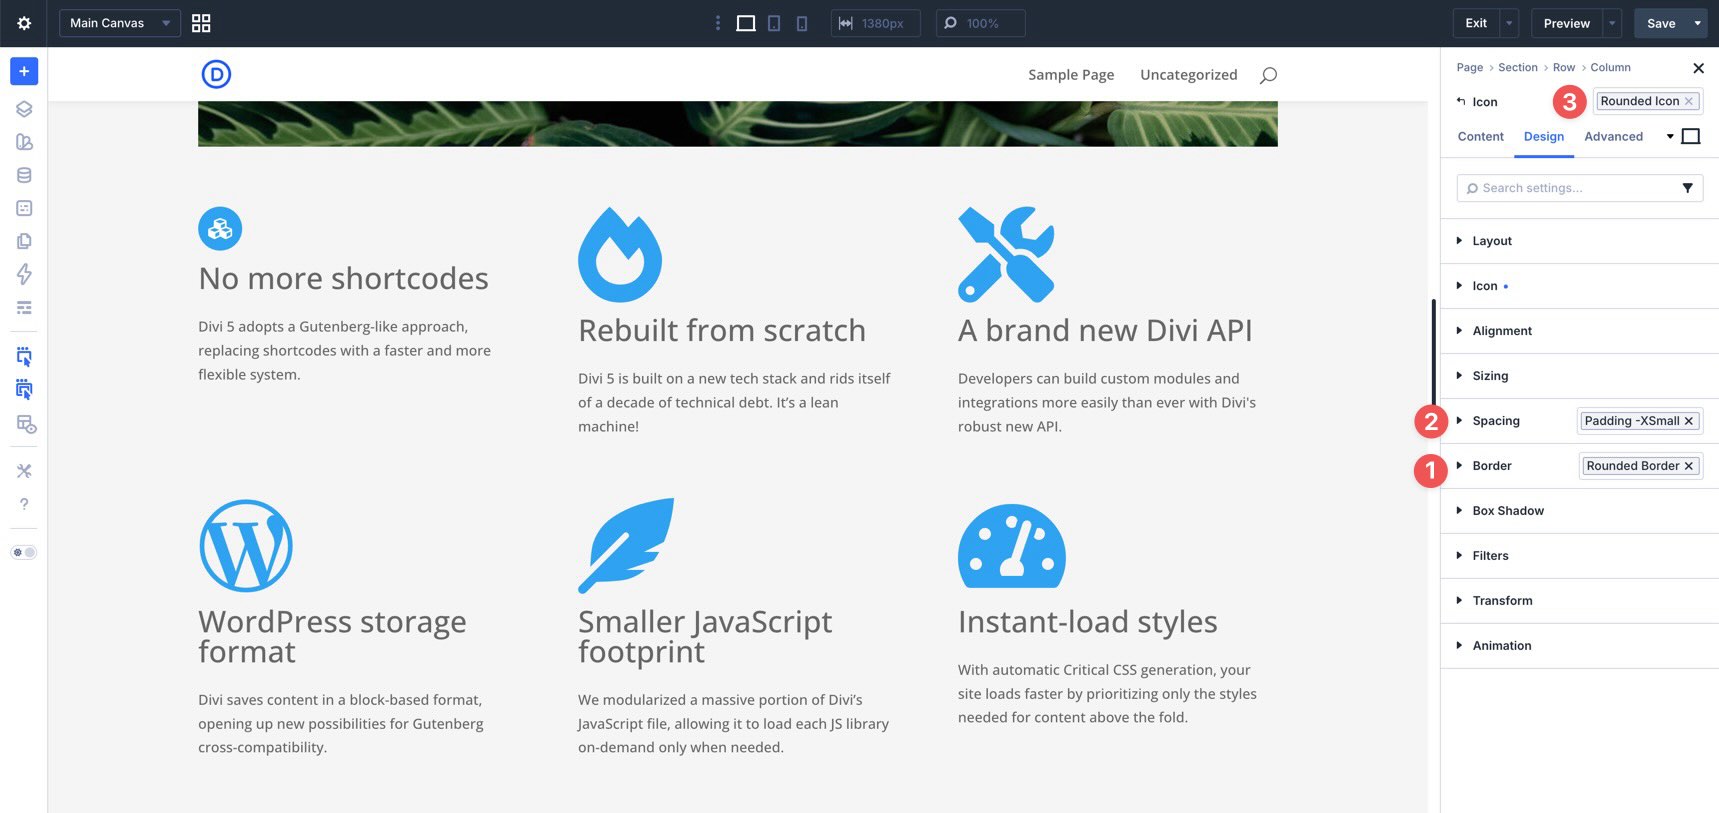
With just a few clicks, you can apply that Element Preset to other Icon modules and avoid repeating the same styling work.
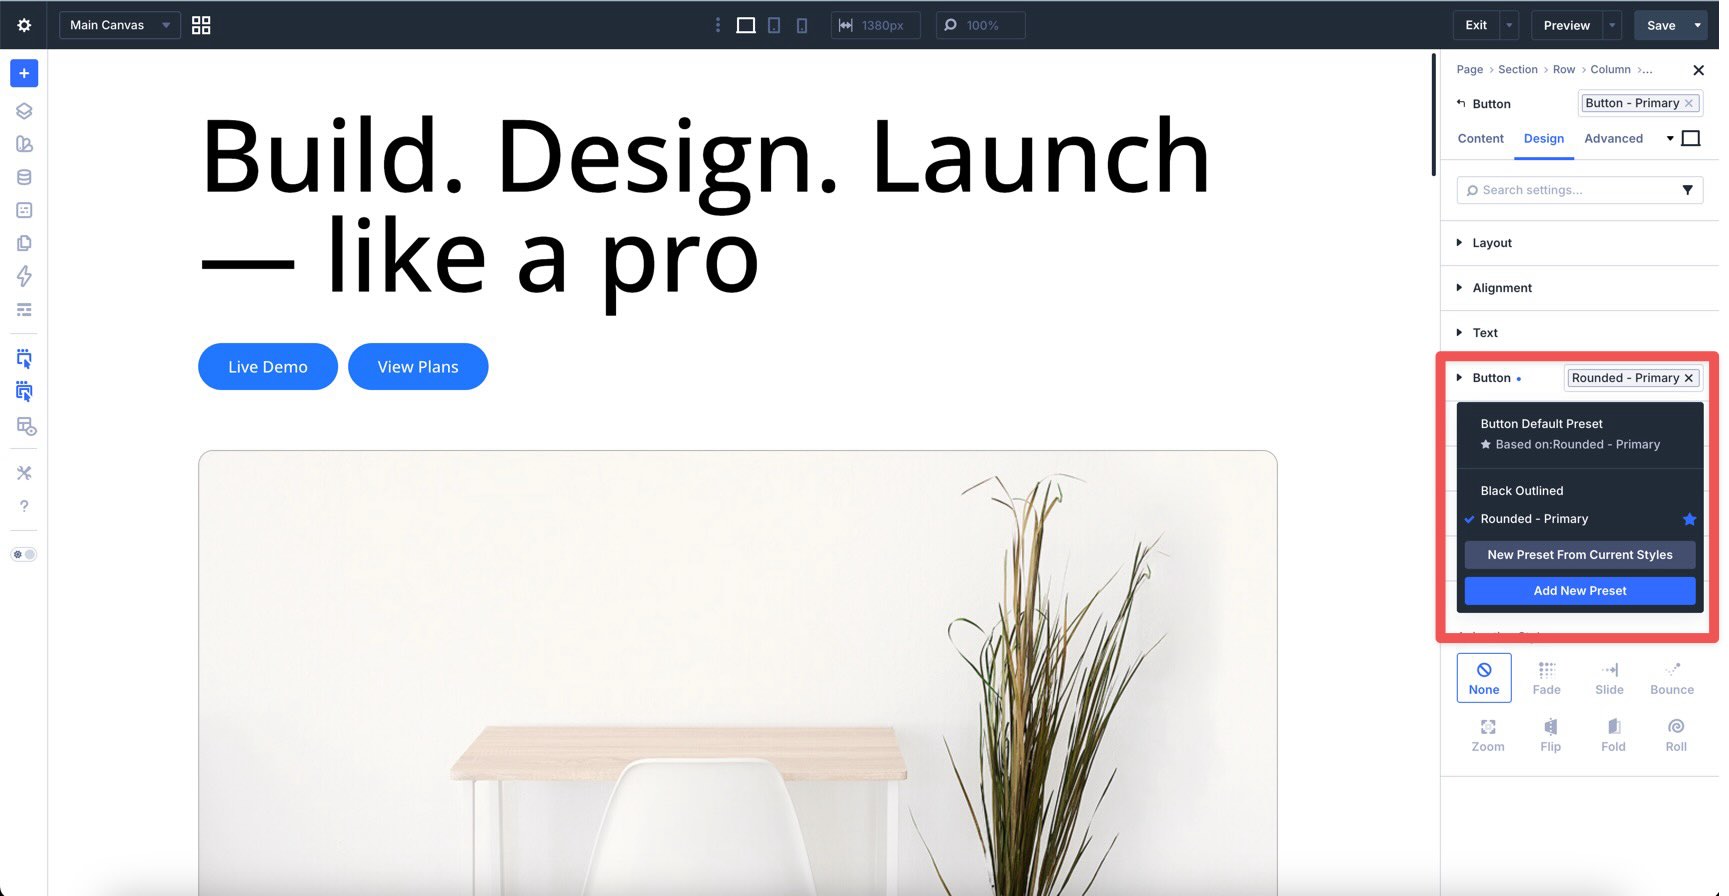
5. Edit And Update Presets
When you edit a preset, every element using that preset updates across your site. This also applies when the preset is nested inside another preset.
That is the main reason to keep presets focused. If one border preset is used across buttons, icons, and cards, changing it will affect all of those places. That is powerful when intentional and frustrating when the preset is too broad.
Tips And Best Practices
Nested Option Presets are powerful, but they work best when your preset library is organized. Use the tips below to keep your design system flexible and easy to maintain.
Use Nested Option Presets With Other Divi 5 Design Tools
Nested Option Presets work well with other Divi 5 design system features. Use them with Design Variables when you want colors, fonts, spacing values, or other design tokens to stay consistent across presets.
Use Composable Settings when you need additional design controls for a module sub-element. For example, you can enable a Border option group for a sub-element, style it, and then save that style as a preset.
Together, presets, variables, and Composable Settings let you create a design system that is reusable without becoming rigid.
Start Simple And Build A Modular Library
Start with small, focused presets before creating large Element Presets. Good low-level presets include borders, shadows, spacing rules, text styles, button styles, and background treatments.
Once those smaller pieces are working, combine them into broader Option Group Presets and Element Presets. This modular approach makes your preset library easier to update later.
Use Clear And Consistent Naming
Good names make presets easier to trust. Use names that describe the preset’s role and scope, such as Border – Pill, Button – Primary, Button – Outline, Shadow – Soft Card, or Text – Section Heading.
Avoid vague names like New Preset, Style 1, or Blue. They may be understandable today, but they become hard to manage as your site grows.
Know When To Override And When To Nest
Nested presets are best for styles you want to reuse and update globally. Local overrides are better for one-off changes that should not affect the rest of the site.
For example, if one promotional button needs a unique black background, a local override may be enough. If every primary button needs a new border radius, update the shared border or button preset instead.
Manage Presets From The Preset Manager
As your preset library grows, use the Preset Manager to keep it organized. From one place, you can create, edit, duplicate, delete, search, filter, and set default presets.
The Preset Manager is especially helpful when you want to adjust a design system without hunting through individual modules on the page.
Export And Import Presets For Reuse Across Projects
Divi 5 lets you export and import presets, which is useful for freelancers, agencies, and anyone maintaining multiple websites. You can build a preset library once, export it as a reusable design system, and import it into future projects.
This is a practical way to standardize buttons, typography, card styles, borders, spacing, and other repeatable design patterns across client sites.
Build Better With Nested Option Presets
Nested Option Presets make Divi 5’s preset-based design system more flexible. You can save styles for deeply nested option groups, reuse those styles across compatible modules, and nest small presets inside larger presets.
That gives you a more modular way to build. Start with focused presets for things like borders, spacing, shadows, and buttons. Then combine them into larger Element Presets that are easier to apply, update, and reuse across a full website.
Download the latest version of Divi 5, open the Visual Builder, and experiment with Nested Option Presets in your next layout.


Leave A Reply