The comments section of your blog posts — or pages — in WordPress allows you to have meaningful discussions with users and readers of your site. There was a time when the comments section of our favorite websites was a place to connect with one another. With the slow demise of some social media platforms, many are turning back to creating blogs. With this in mind, we can use this opportunity to beautify our comments section.
In today’s tutorial, we’re focusing on styling the comment avatar in Divi. However, let’s take a look at some of the other elements of Divi’s Comments Module that we can style.
Subscribe To Our Youtube Channel
- 1 Elements of Divi’s Comments Module
- 2 Styling the Comment Avatar in Divi
- 3 Styling the Comment Avatar in Divi ft. Divi Stone Factory
- 4 Example Two: Styling the Comment Avatar in Divi with the Divi Consultant Blog Post Template
- 5 Divi Home Care: Our Third Example of Styling the Avatar within the Divi Comments Module
- 6 Styling the Comment Avatar in Divi ft. Divi NGO
- 7 Final Example: Divi Data Science Blog Layout
- 8 Bringing it All Together
Elements of Divi’s Comments Module
Divi’s Comments Module has quite some elements. One can use the module to both showcase comments and submit comments. The module also shows how many comments have been submitted, along with the name and photo of the comment submitter. Here’s a look at the various elements of the module:
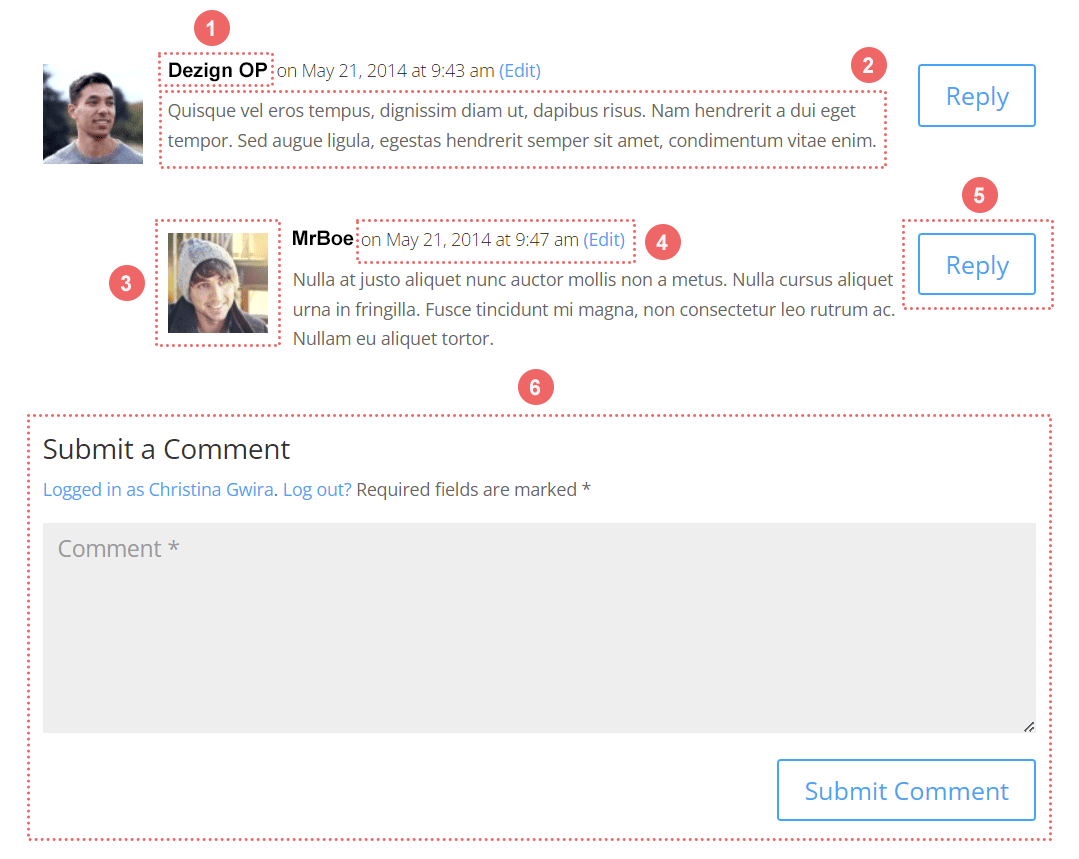
In order, here’s what each numbered section corresponds to:
- Name of the comment author
- The comment itself
- The avatar of the comment author
- Metadata of the comment (date, time posted etc.)
- Reply button
- Submit a comment form
Within the Design Tab of the Comments Module, you can see that we have many options that we can use interchangeably to style the various aspects of the module.

Styling the Comment Avatar in Divi
Within the Comments Module settings, we’ll be spending most of our time in the Design and Advanced tab. We will be using the built-in features to lay the framework for styling the comment avatar in Divi. Afterward, we will use a few snippets of CSS to bring our vision to life. For this tutorial, we will be using freebies that are available in the Divi Resources section of our blog. When it comes to styling any aspect of your site, it’s imperative to draw inspiration from the design that you’ve created. This helps there to be cohesion in your work and causes you to build stronger brand awareness with your audience.
You can see how we plan on doing this through the examples below:
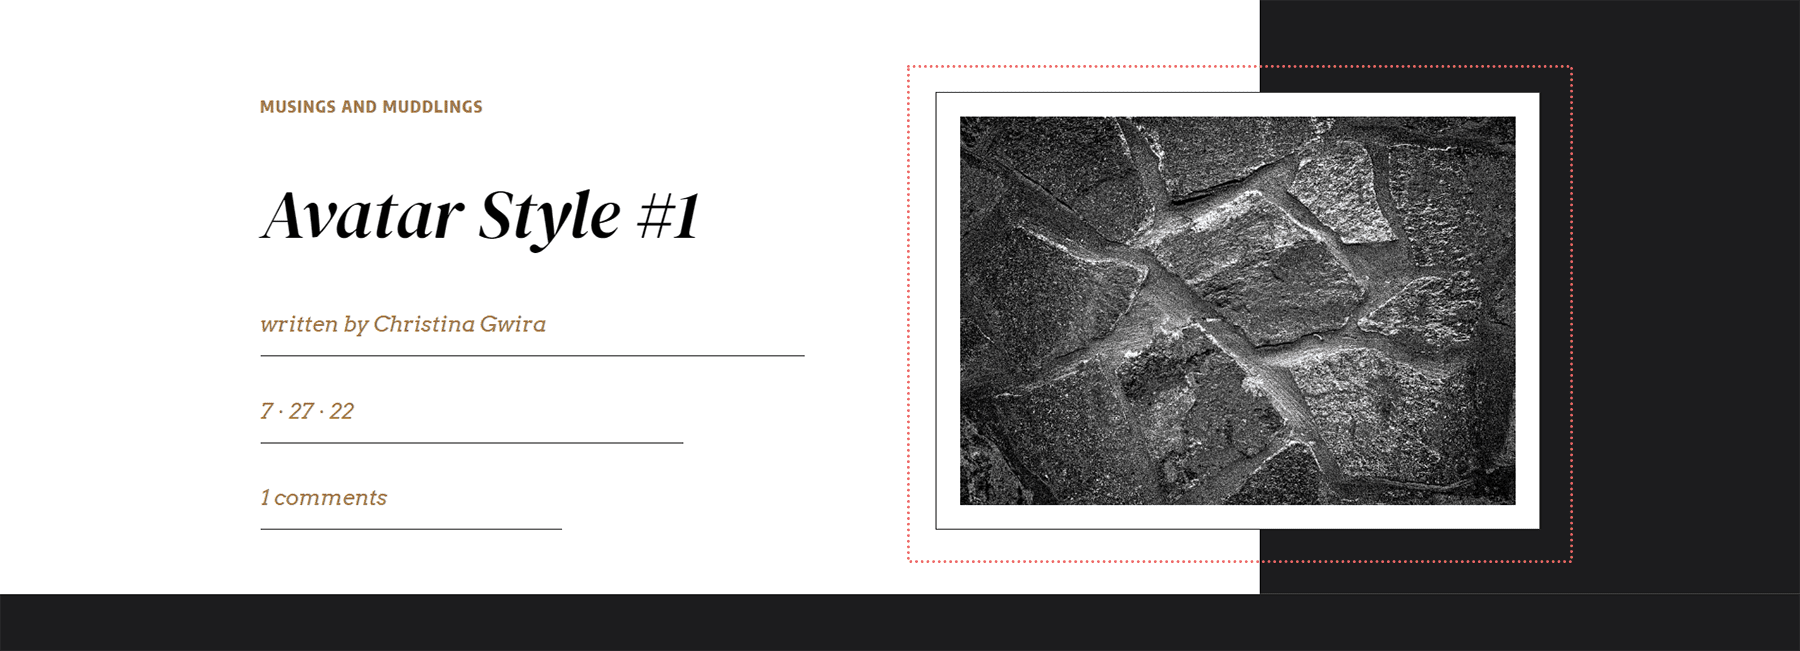
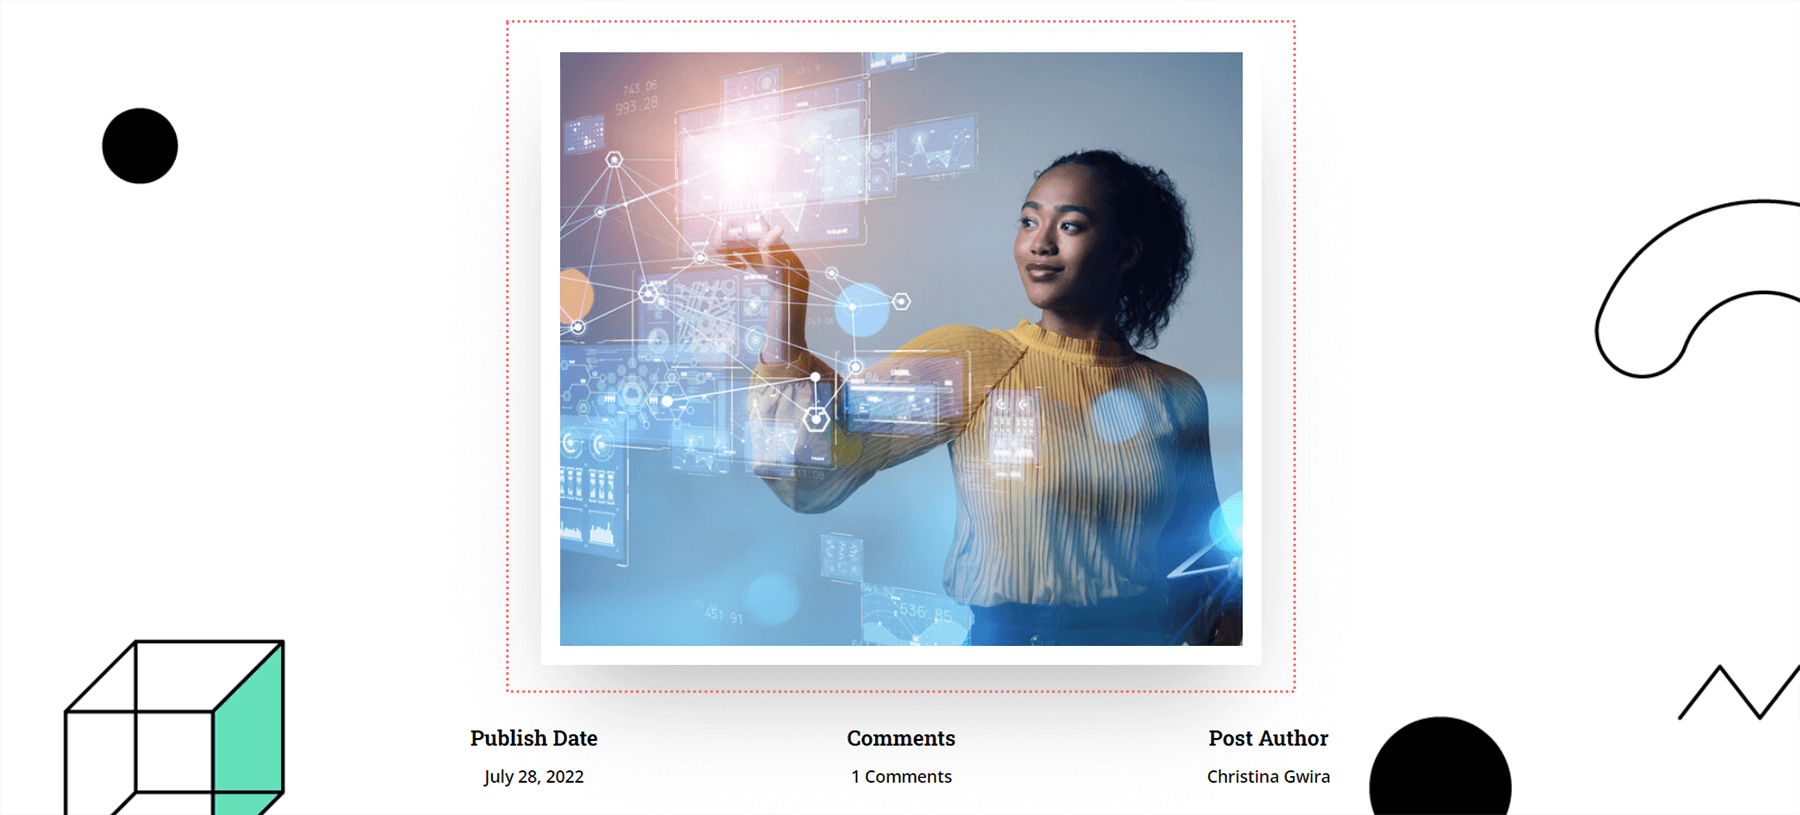
First Example: Divi Stone Factory
![]()
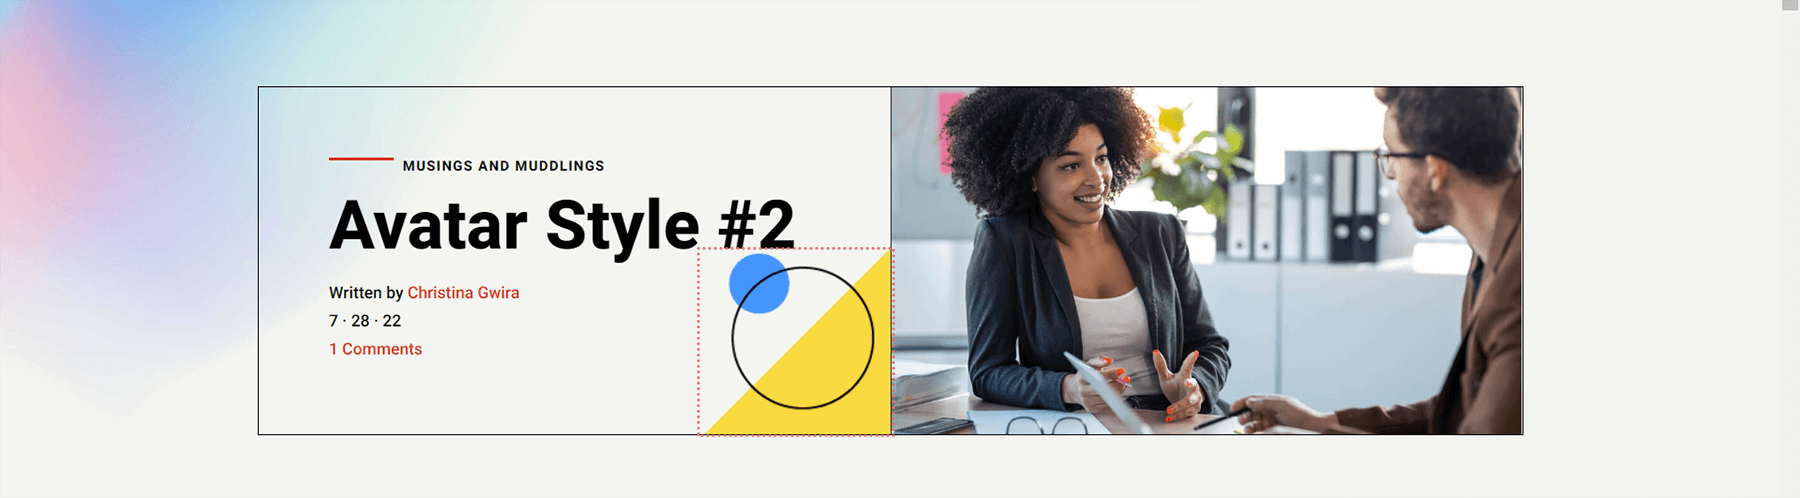
Second Example: Divi Consultant
![]()
Third Example: Home Care
![]()
Fourth Example: Divi NGO
![]()
Fifth Example: Divi Data Science
![]()
For each of these examples, we pull inspiration from assets and designs that are already within the layout template. By doing this we ensure that as we are styling the comment avatar in Divi, we are still speaking to the overall design of our chosen layout.
Let’s jump into the first example!
Styling the Comment Avatar in Divi ft. Divi Stone Factory
Firstly, you will need to follow the instructions in this blog post to download and install the Blog Post Template for the Divi Stone Factory Layout Pack.
Identifying Inspiration Before Styling the Comment Avatar in Divi
A major key in this tutorial is to become familiar with drawing inspiration from a design and applying that to the styling throughout a layout. In our case, we’ll be taking inspiration from the way that the featured image is styled. Let’s bring the same idea to our Comments Avatar.
Open Comments Module Settings
Once your layout is installed, scroll down to the Comments module and open the settings.
Add Border to Avatar Image
Navigate to the Design tab. Click on the Image tab. Scroll down to Image Border Styles and select the first icon for All Borders. Next, add an Image Border Width of 10px and an Image Border Color of #FFFFFF. We also want to keep the Image Border Style at Solid.
![]()
Image Settings:
- Image Border Styles: All borders
- Image Border Width: 10px
- Image Border Color: #FFFFFF
- Image Border Style: Solid
Add Image Box Shadow
Add an Image Box Shadow to your avatar. Adjust the Horizontal and Vertical Position to -10px. Next, make the Shadow Color #000000.
![]()
Image Box Settings:
- Image Box Shadow: Shadow #4
- Box Shadow Horizontal Position: -10px
- Box Shadow Vertical Position: -10px
- Shadow Color: #000000
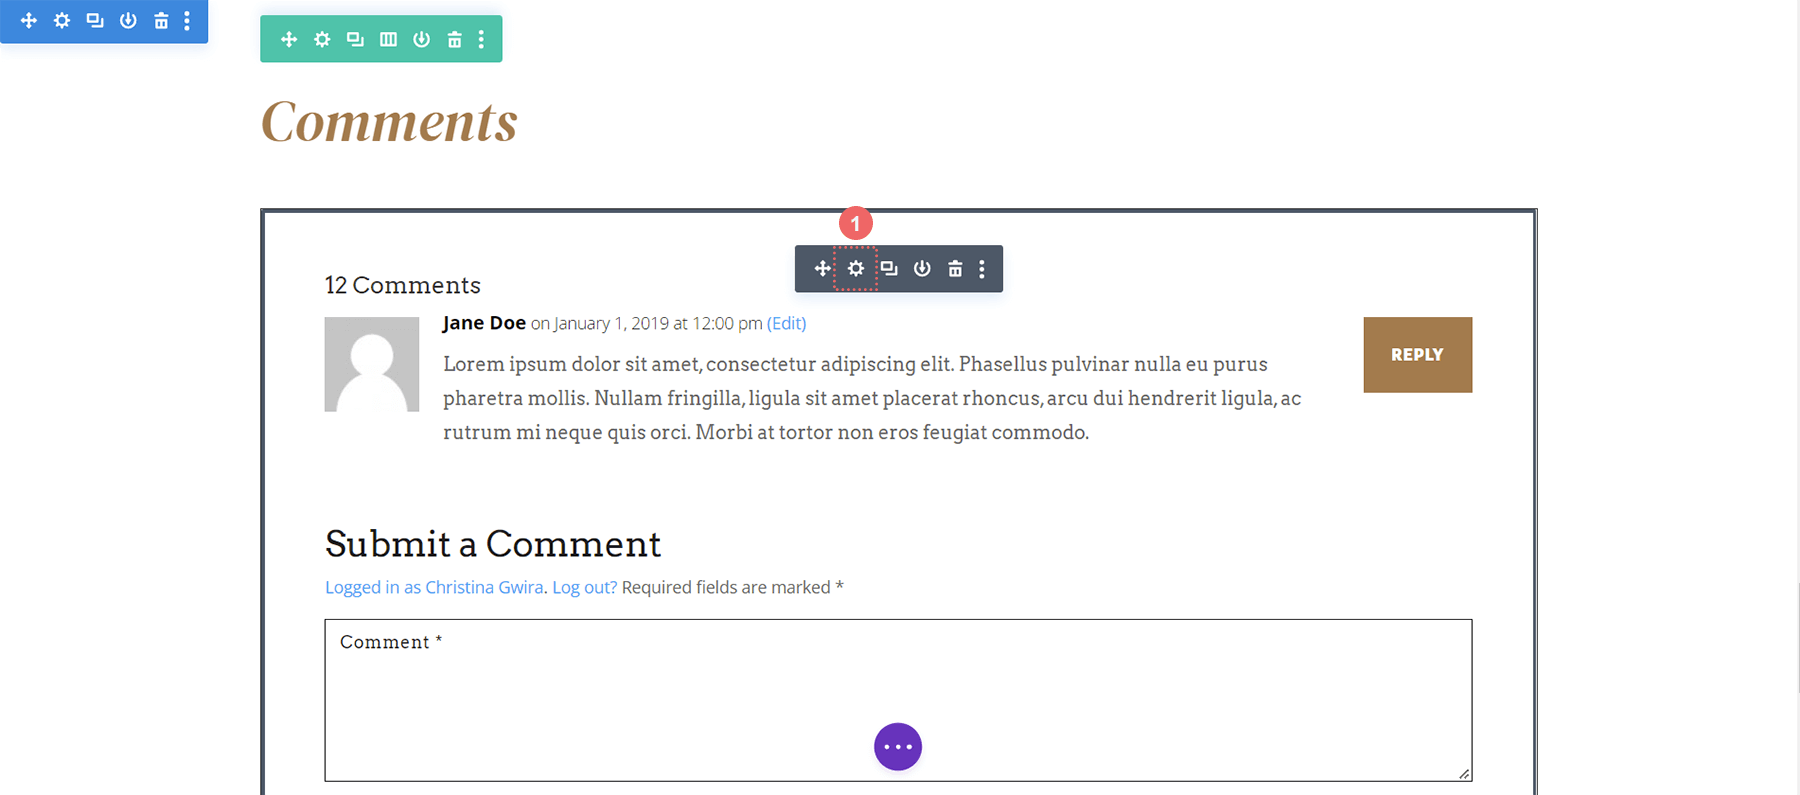
Add Custom CSS
Taking a look at our avatar as it stands now, it slightly overlaps the comment body. We’re also missing a thinner border around the image. We’re going to add this in with CSS in the Advanced tab of the Comments settings modal.
![]()
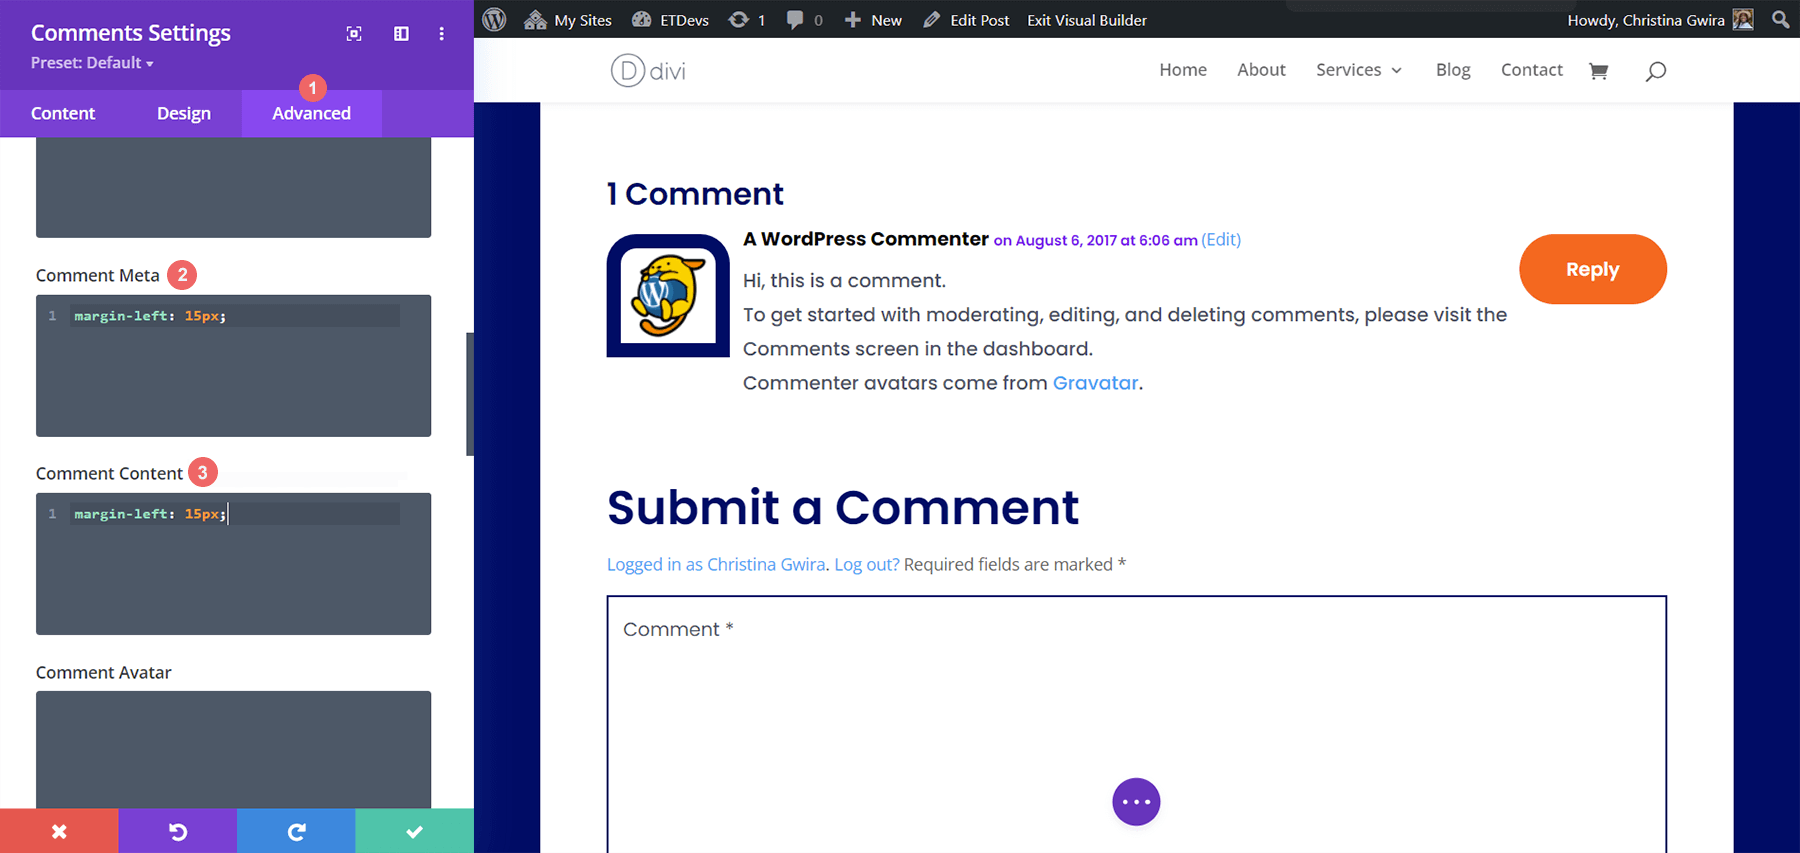
Navigate to the Advanced tab within the Comments Module settings. Add the following snippets of CSS to the Comment Meta, Comment Content, and Comment Avatar
Custom CSS
Comment Meta:
margin-left: 15px;
Comment Content:
margin-left: 15px;
Comment Avatar:
border: 1px solid #000000;
![]()
A left margin is added to the comment content and meta so that the added border to the avatar doesn’t cover the comment text and meta information. We add another border to the comment avatar to replicate the design that was found with the featured image.
With all that said, let’s move on to example number two with the Divi Consultant Layout Pack!
Example Two: Styling the Comment Avatar in Divi with the Divi Consultant Blog Post Template
For our second example, we’ll be taking our inspiration for the comment avatar from a design element that is used within this layout pack.
Changing Avatar Shape with CSS Borders
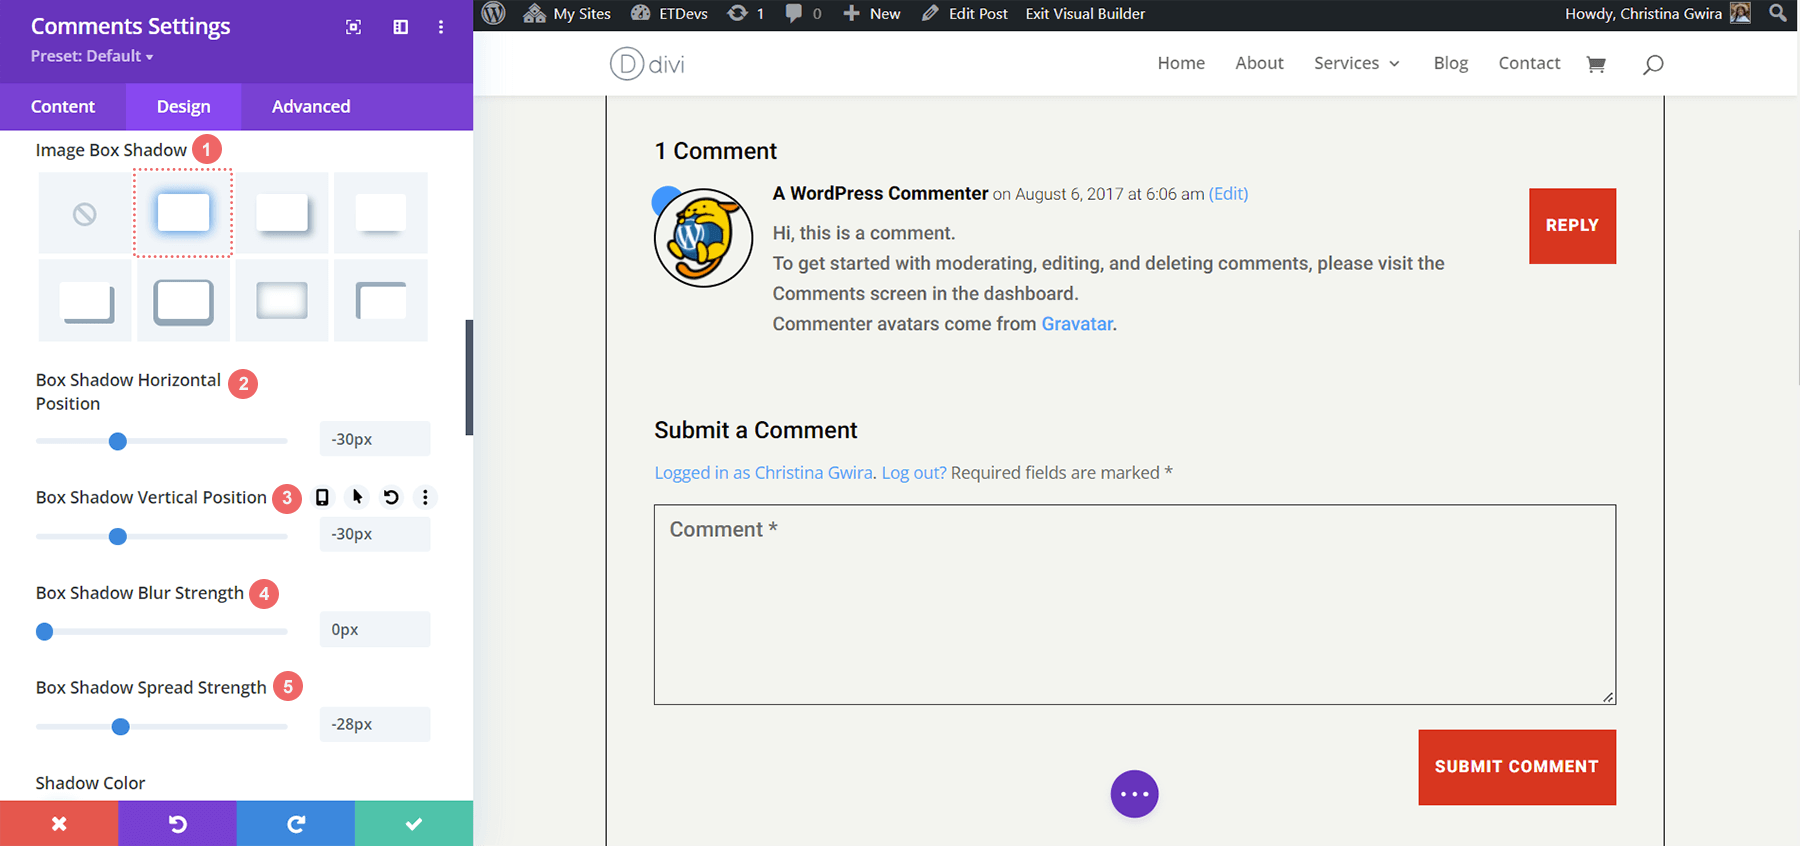
Firstly, we’re going to scroll down to the Comments Module and enter into the settings menu. Secondly, we’re going to navigate to the Design tab. Within the Design tab, let’s click on the Image tab to start making our border changes. Firstly, let’s make Rounded Corners on our avatar with a value of 55px. This will make our avatar a circle. Next, we’ll add a 2px, solid border in black.
![]()
Image Settings:
- Image Rounded Corners: 55px, all corners, linked
- Image Border Styles: All borders
- Image Border Width: 2px
- Image Border Color: #000000
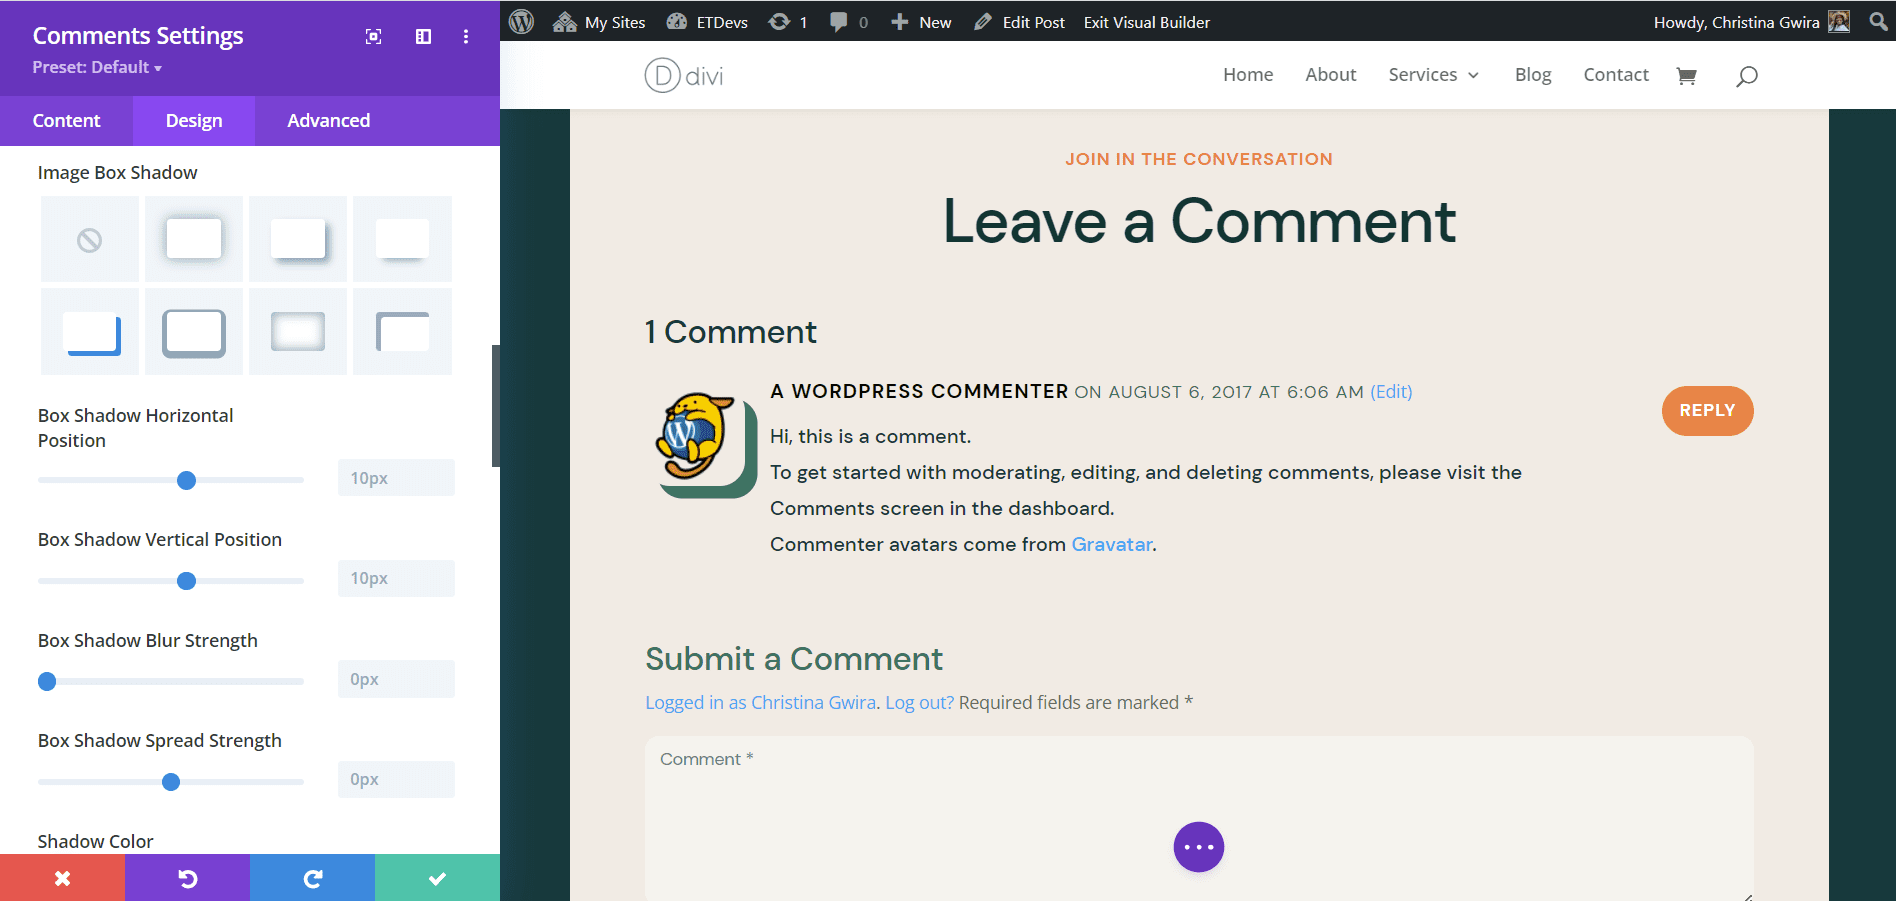
Adding an Accent to Our Avatar
Now, we’re going to add a cute blue accent to our avatar. We will be using the Box Shadow setting to create a circle that’ll appear behind each avatar. Notice how this calls back to the inspiration that we took from the image used within the header. To do this, we’ll keep on scrolling through the Image tab till we get to the Image Box Shadow. Here, we’re going to select the first option, which is a soft glow. However, we’re going to adjust the settings to turn this into a circle!
Box Shadow Settings:
- Image Box Shadow: Shadow #1
- Box Shadow Horizontal Position: -30px
- Box Shadow Vertical Position: -30px
- Box Shadow Blur Strength: 0px
- Box Shadow Spread Strength: -28px
- Shadow Color: #3093fb
Luckily, in this example, there was no need to use any custom CSS! Our avatar was styled completely using settings found natively within the Divi Builder.
Divi Home Care: Our Third Example of Styling the Avatar within the Divi Comments Module
In our third example, we’ll be using the Divi Home Care Blog Post Layout. Looking at the call-to-action section within this layout, let’s imitate the orange and yellow boxes for our comments avatar.

Shaping Our Comments Avatar with Rounded Corners
The use of rounded corners will give our avatar an interesting shape. However, we will only apply rounded corners to the top left and top right corners. Both of these will be receiving a radius of 25px. The bottom right and bottom left corners will remain untouched with a radius of 0px. Make sure that you have unchecked the link icon within the border-radius box. This will allow us to have different settings for each corner of our image.
![]()
Image Border Settings:
- Image Rounded Corners: 25 px 25px 0px 0px (clockwise, unlinked)
- Image Border Styles: All borders
Adding a Border
Now, we’re going to add a border. This will call to the Email Optin module in the header of this Blog Post Template.
![]()
Let’s notice something. After we’ve added our border settings, the border now overlaps over the comment body as well as the comment author and meta information. We’re going to rectify this by using a few lines of CSS within the Advanced tab of the module.
Custom CSS
Comment Meta:
margin-left: 15px;
Comment Content:
margin-left: 15px;
These two simple lines of code help to add some breathing room around our avatar image… while also allowing us to read the comments clearly!
Styling the Comment Avatar in Divi ft. Divi NGO
For our fourth example, we’ll be using the Divi NGO Blog Post Template. Notice the styling of the avatar’s profile photo. This is what we’ll be emulating for the avatar within our Comment Module.
![]()
Adding Rounded Corners to Our Avatar
Similar to some of our previous examples, we’ll be employing the use of Divi’s Rounded Corner features to style our avatar. In our case, we’ll be making all the corners of this avatar 20px.
![]()
Image Settings:
- Image Rounded Corners: 20px (all corners, linked)
Adding a Box Shadow
The second part of this styling is to add a solid, opaque box shadow behind our avatar. We’ll be using the same color as the author’s photo, to keep our branding seamless throughout this template. We’ll be using the fourth box shadow option, and using the default Divi settings for this shadow.
Box Shadow Settings:
- Image Box Shadow: Shadow #4
- Box Shadow Horizontal Position: 10px
- Box Shadow Vertical Position: 10px
- Box Shadow Blur Strength: 0px
- Box Shadow Spread Strength: 0px
- Shadow Color: #347362
Due to the positioning of the shadow, we won’t be needing any custom CSS on this example either.
Final Example: Divi Data Science Blog Layout
Our fifth and last example of styling the comment avatar in Divi will be using the Divi Data Science Blog Layout Pack. As in previous examples, we’ll be drawing our inspiration from the styling of the featured image within this layout pack.
Therefore, we know that we’ll be adding a thick white border and some box shadow to our Comment avatar.
Adding a Border to our Comment Avatar
This avatar will remain a square, however, we will be adding a border to it. Let’s go ahead and scroll down to the Image tab, and add a white border to our image.
![]()
Image Border Settings:
- Image Border Styles: All borders
- Image Border Width: 10px
- Image Border Color: #000000
- Image Border Style: Solid
Adding Shadow to Our Avatar
In this tutorial also, we’ll be using the default Divi Box Shadow setting to add a shadow to our Comment avatar. We’ll be using Box Shadow option 3.
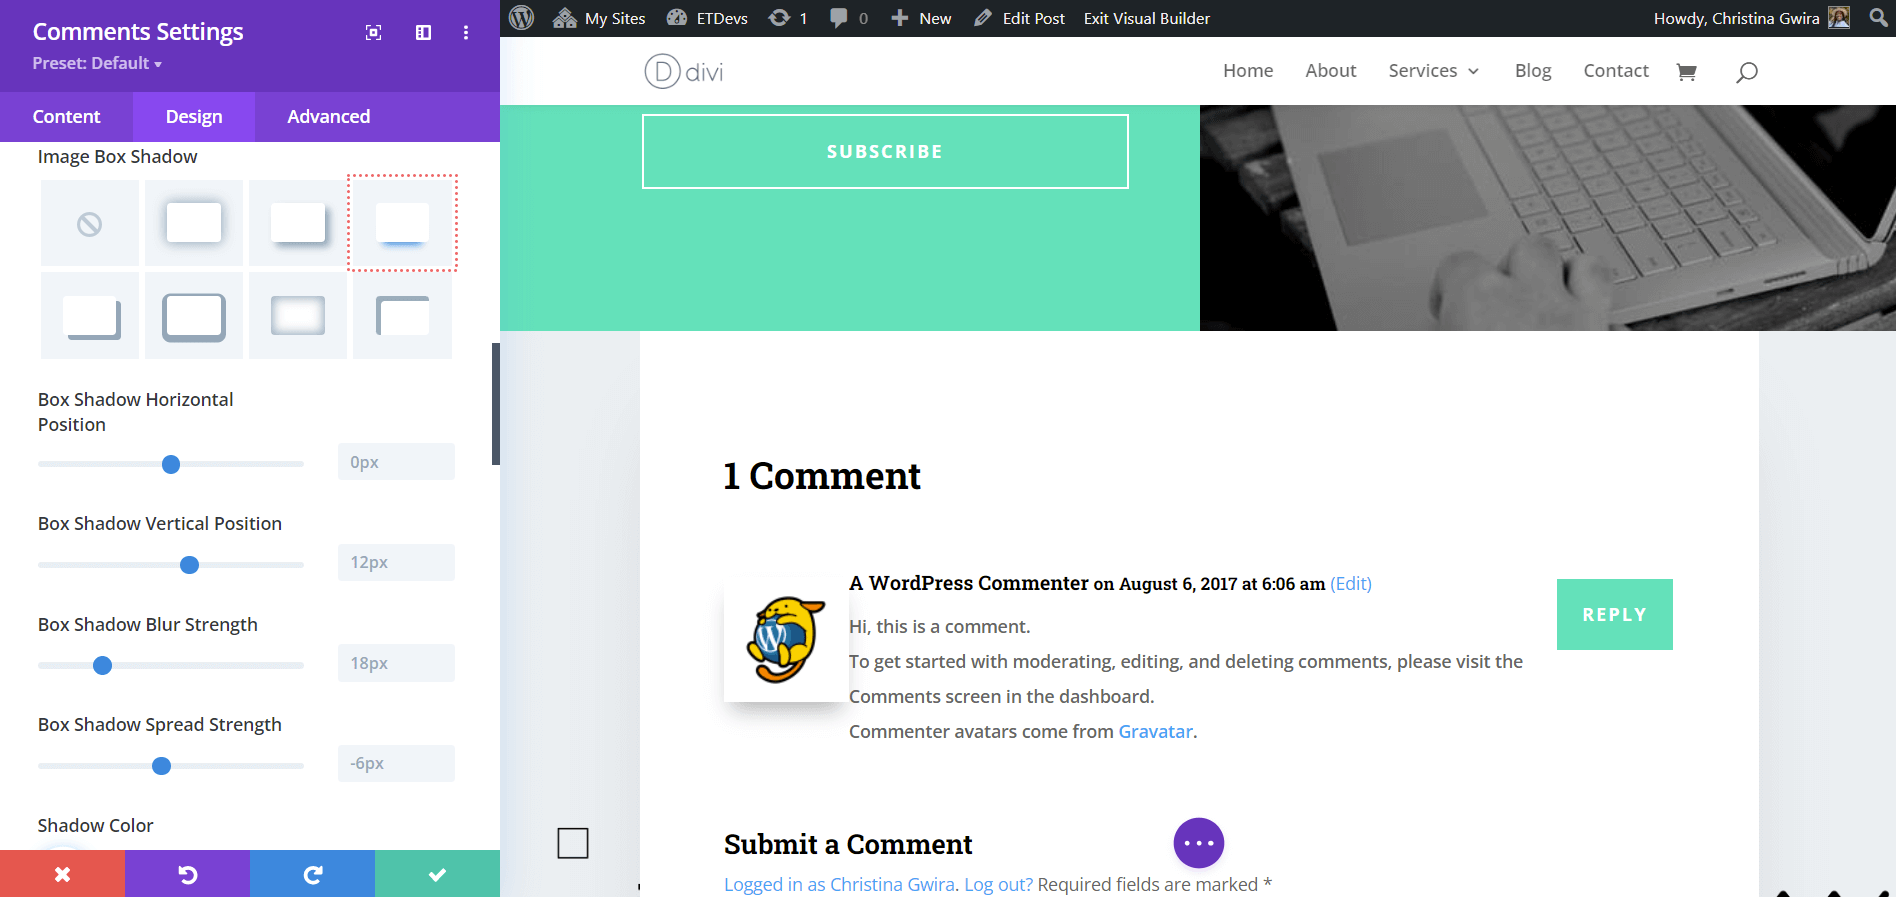
Box Shadow Settings:
- Image Box Shadow: Shadow #3
- Box Shadow Horizontal Position: 0px
- Box Shadow Vertical Position: 12px
- Box Shadow Blur Strength: 18px
- Box Shadow Spread Strength: -6px
- Shadow Color: rgba(0,0,0,0.3)
To prevent our newly styled avatar from covering up our comment information, we’re going to add a few lines of CSS to clean our design up.
![]()
Custom CSS:
Comment Body:
margin-top: 50px;
Comment Meta:
margin-left: 15px;
Comment Content:
margin-left: 15px;
Bringing it All Together
The comment avatar is a small piece of a module that can be customized deeply with CSS and Divi’s native tools. Don’t forget to look to your design to draw inspiration from. Through this inspiration, endless designs can be created that speak for your brand!


I love the different styles for the comments module. I’ve seen alot of bad ones in the past from other blogger websites and if they had these designs they would probably get more comments.
Thank you so much, I really appreciate the comment 🙂