
Blending modes are a great way to digitally enhance your images and designs. There are several ways to use blend modes as a graphic designer (using design software) or as a web designer (using CSS or Divi). In this post, we’re going to cover everything you need to know about blend modes, including a detailed breakdown of each, as well as how to use them in Photoshop and on your website.
- 1 What is a Blending Mode?
- 2 How do Blending Modes Work?
- 3 Introduction to Photoshop Blending Modes
- 4 Blending Mode Descriptions
- 5 How to Use Photoshop Blending Modes
- 6 CSS Blend Modes for Web Design
- 7 CSS Blend Modes Using Divi (An Easy No-Code Solution)
- 8 Design Tools that Use Blending Modes
- 9 Blending Mode Tips & Best Practices
- 10 Conclusion
What is a Blending Mode?
A blending mode is a mathematical equation that defines how pixels will blend together when two or more layers of pixels are combined. Although the algorithms behind blend modes are complex, they are quite easy to work with using design tools or photo editing software like Photoshop. With this kind of software, designers can blend layers (photos, colors, text) in creative ways for unique designs in a few clicks. You can blend any number of layer combinations. But, at minimum, to accomplish a blend mode effect, you will need at least two layers: a base layer and a blend layer.
How do Blending Modes Work?
Blending modes combine a base layer with a blend layer to achieve different effects. Each effect (or mode) uses a mathematical equation that combines red, green, and blue (RGB) or cyan, magenta, yellow, and black (CMYK) color codes with levels of dark and light to create multi-layered effects. For most blend modes, opacity is needed to bring out the blending effect. You can use blending modes to apply color overlays to images, blend images together, manipulate color levels on photos, and much more.
As an example, let’s take a look at combining two layers and applying Multiply. Using a photo layer as the base layer, and a gradient with colors #ff0f0f and #4a00e8 as the blend layer, the resulting image appears darkened and takes on the appearance of the gradient colors.

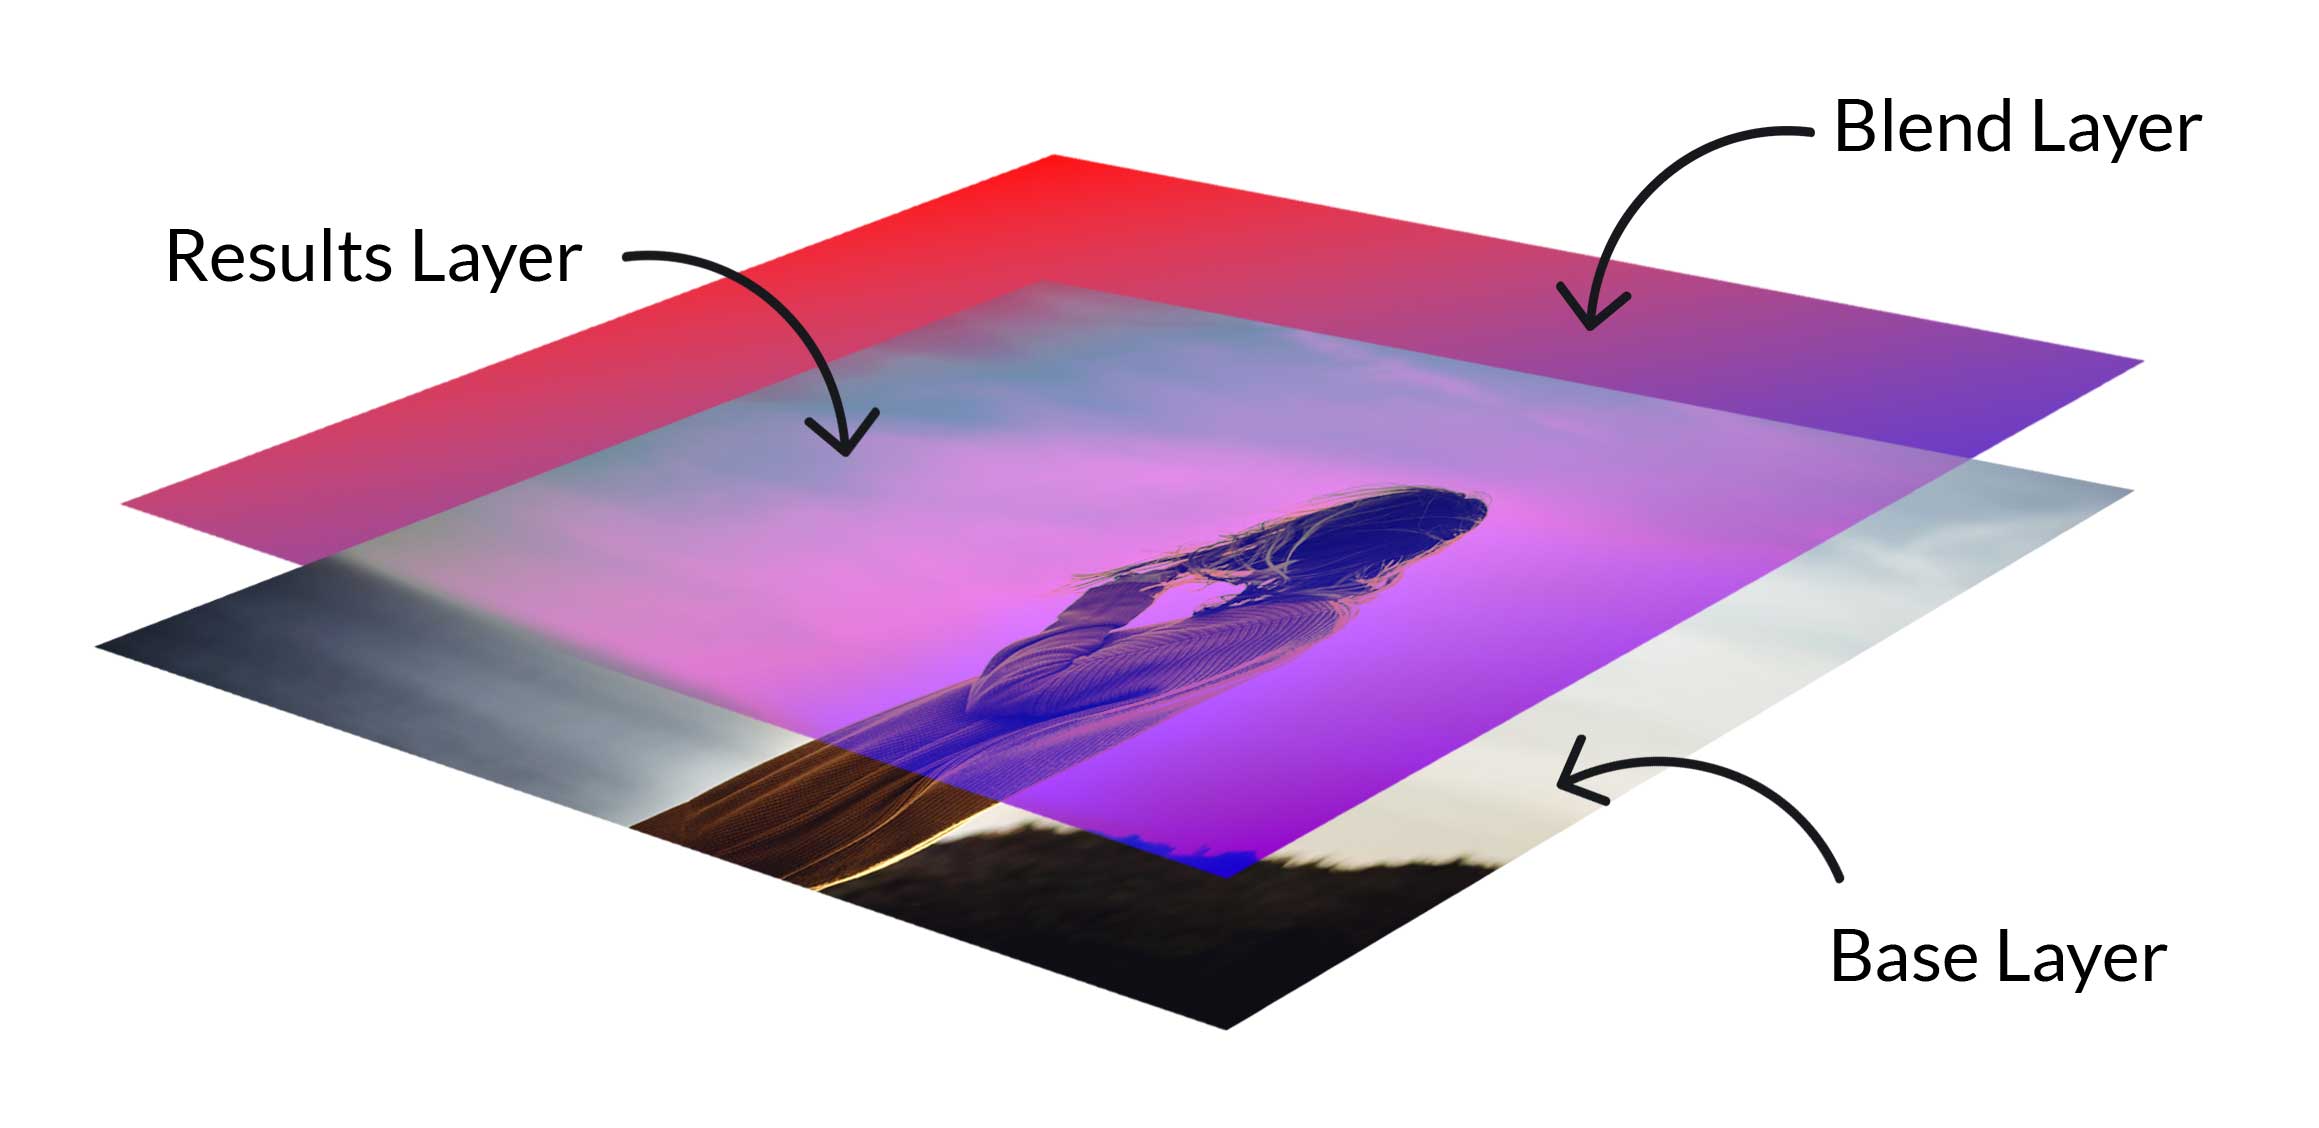
For them to work, there have to be at least two layers. Each option produces different results depending on the mode chosen. It breaks down like this. First, the base layer is the original color or image. Next, the blend layer applies directly to the base layer using a specific mode. The result is a blend of the two layers, which alters the colors to reveal an image with a completely altered appearance.
Introduction to Photoshop Blending Modes
There are 27+ blend modes in Photoshop. Some are used to adjust opacity, while others darken the appearance of photos and designs. There are also blending modes that will lighten images, while others work simply to adjust contrast.
Opacity vs. Fill with Blend Modes
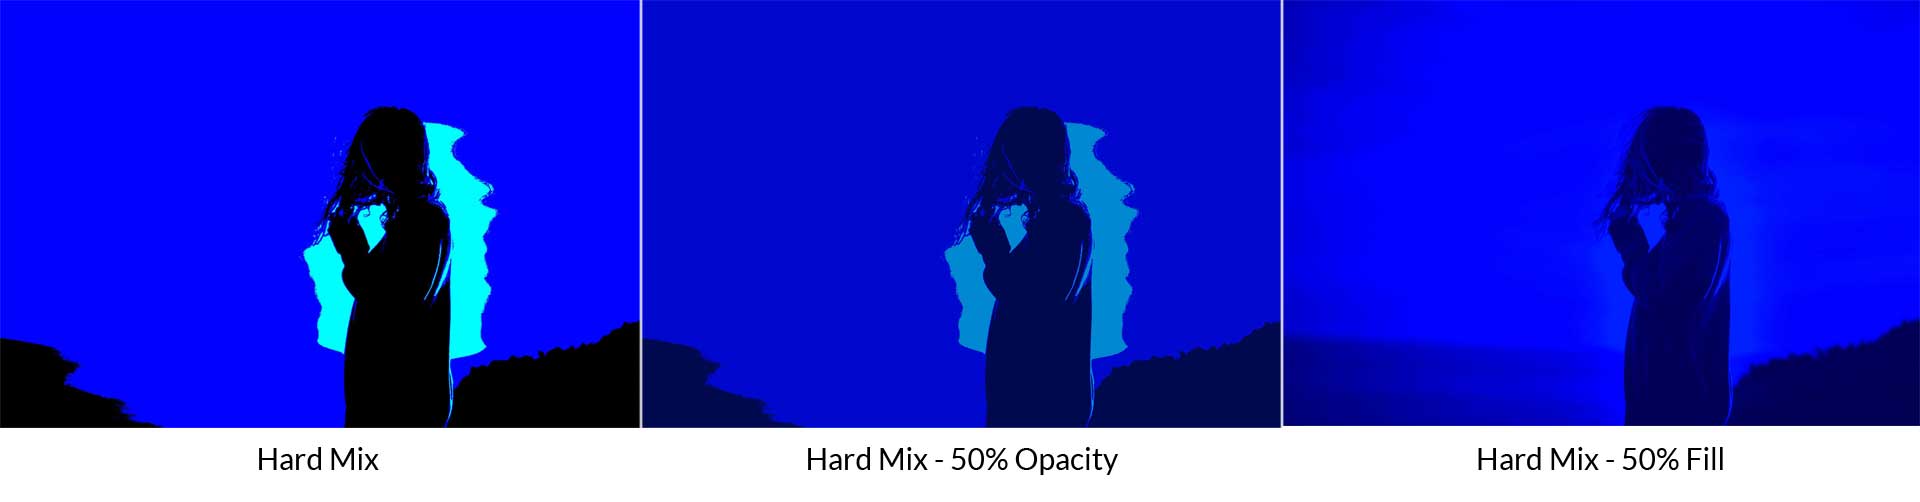
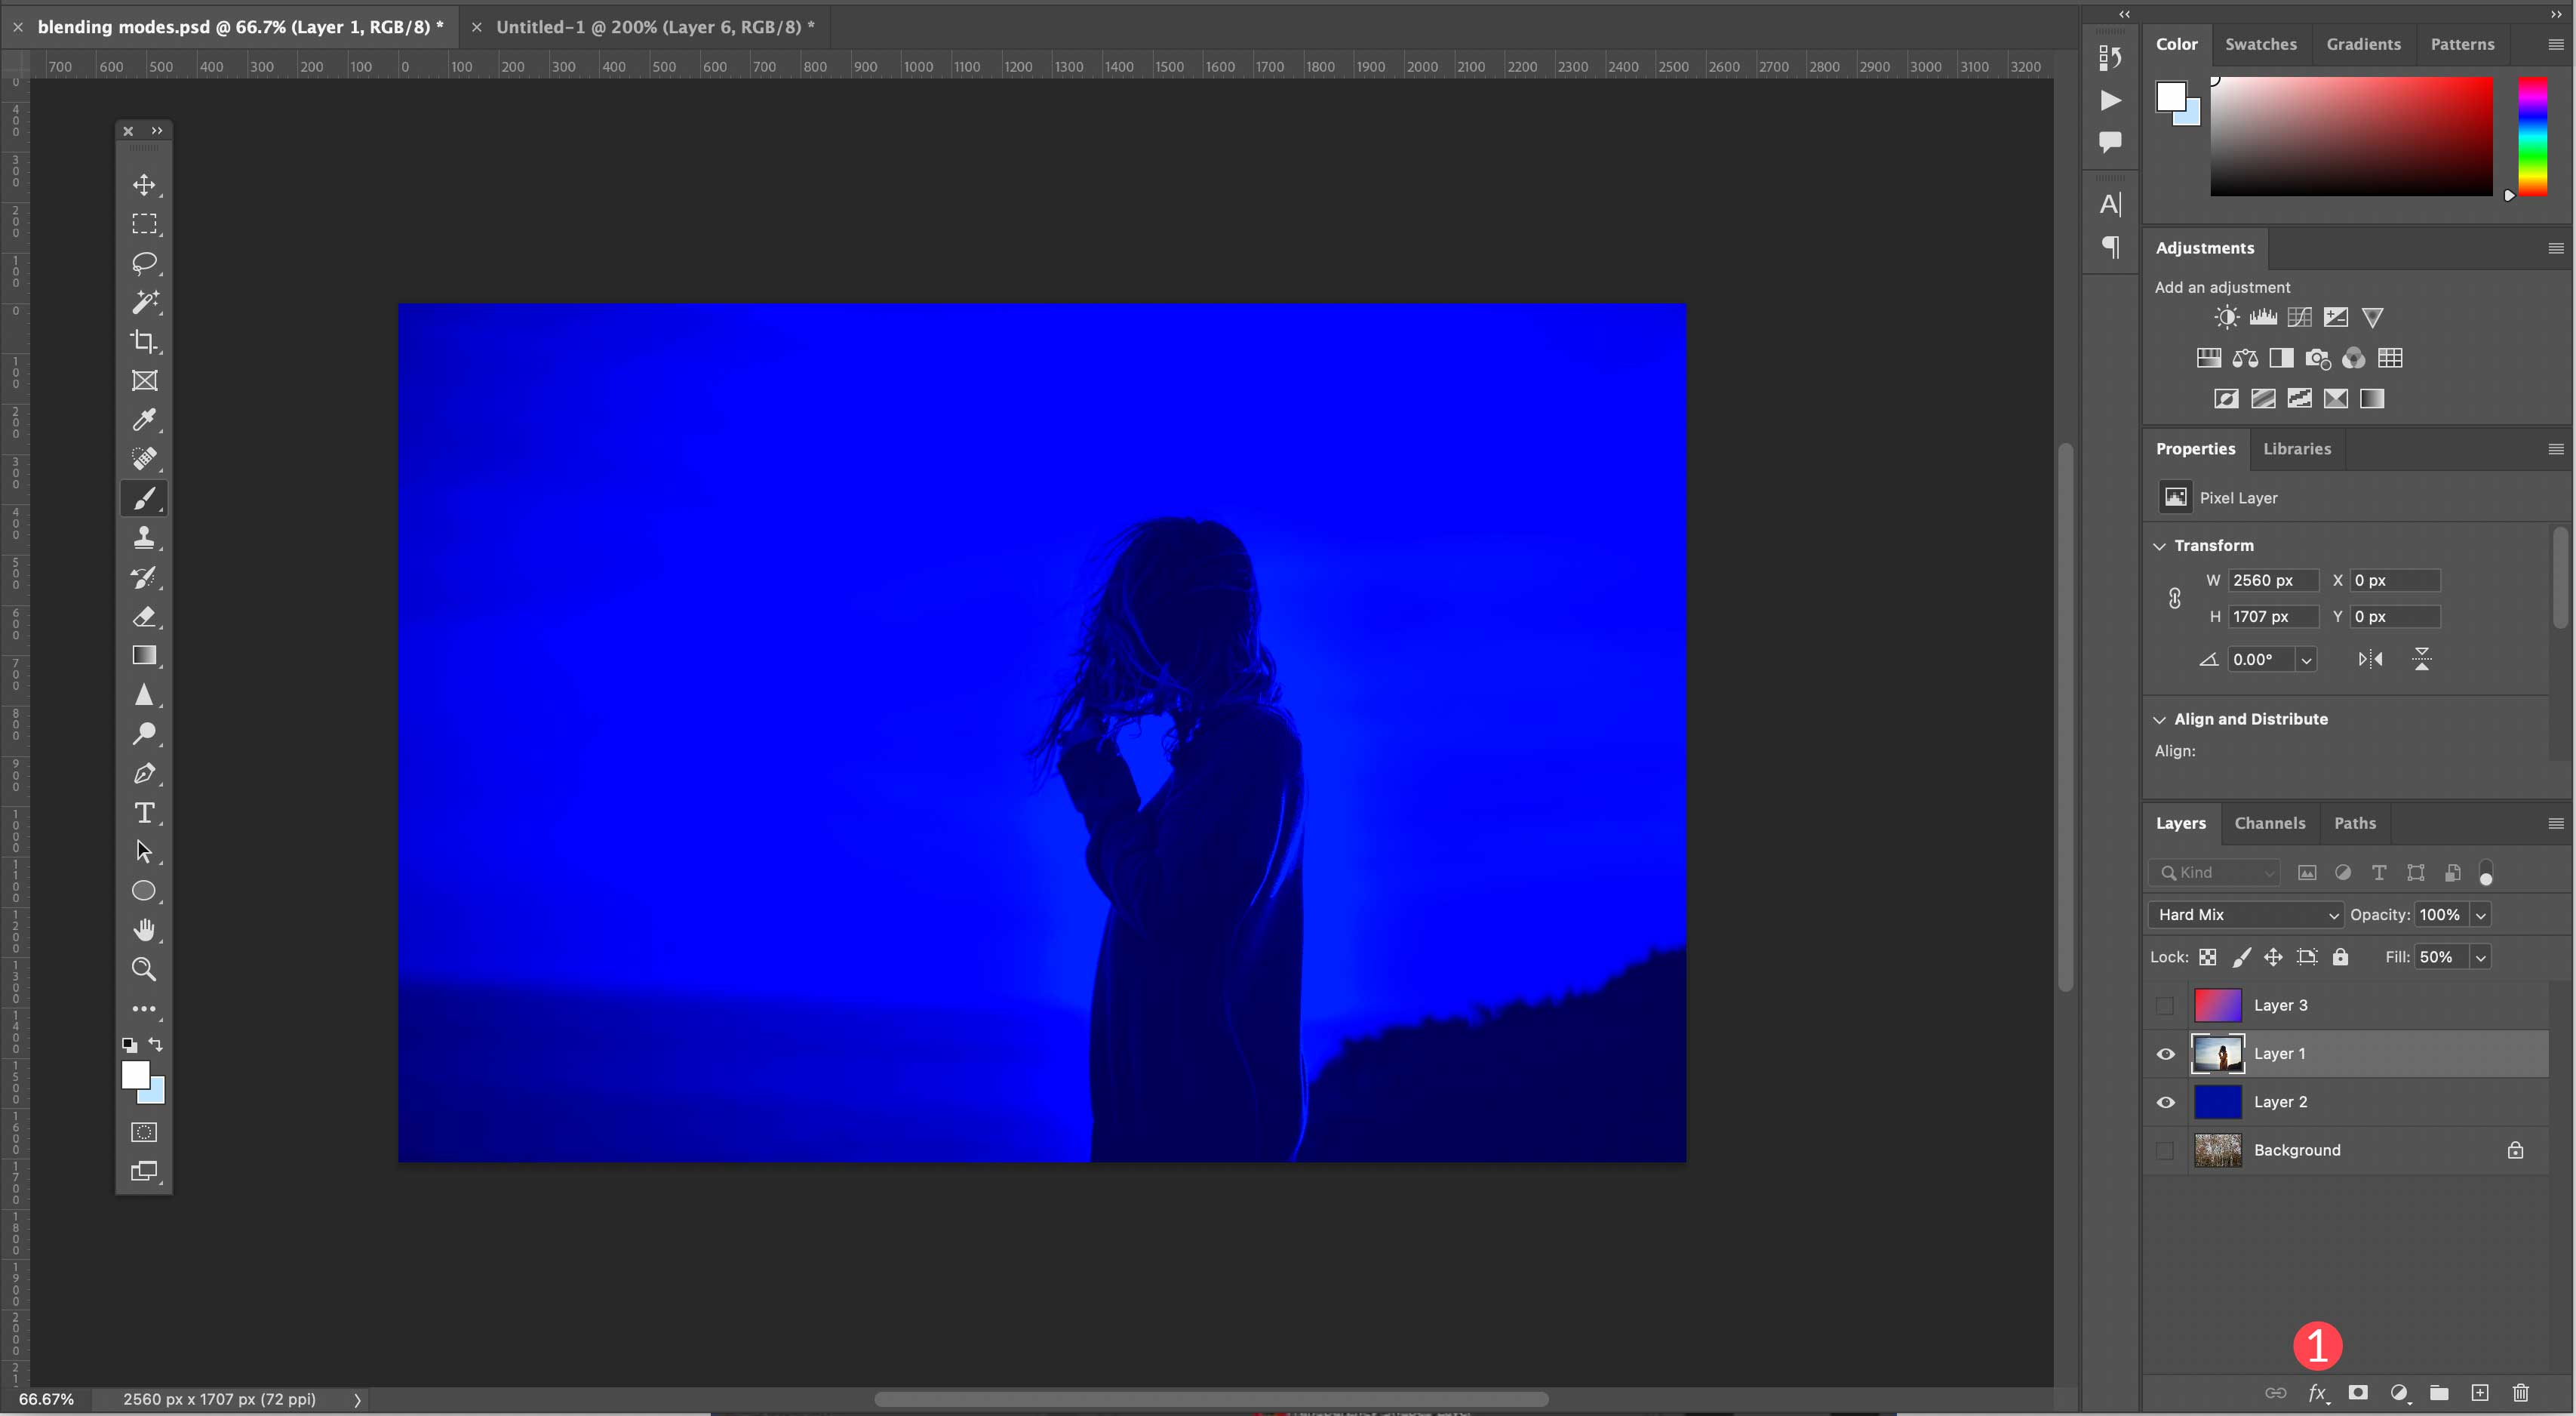
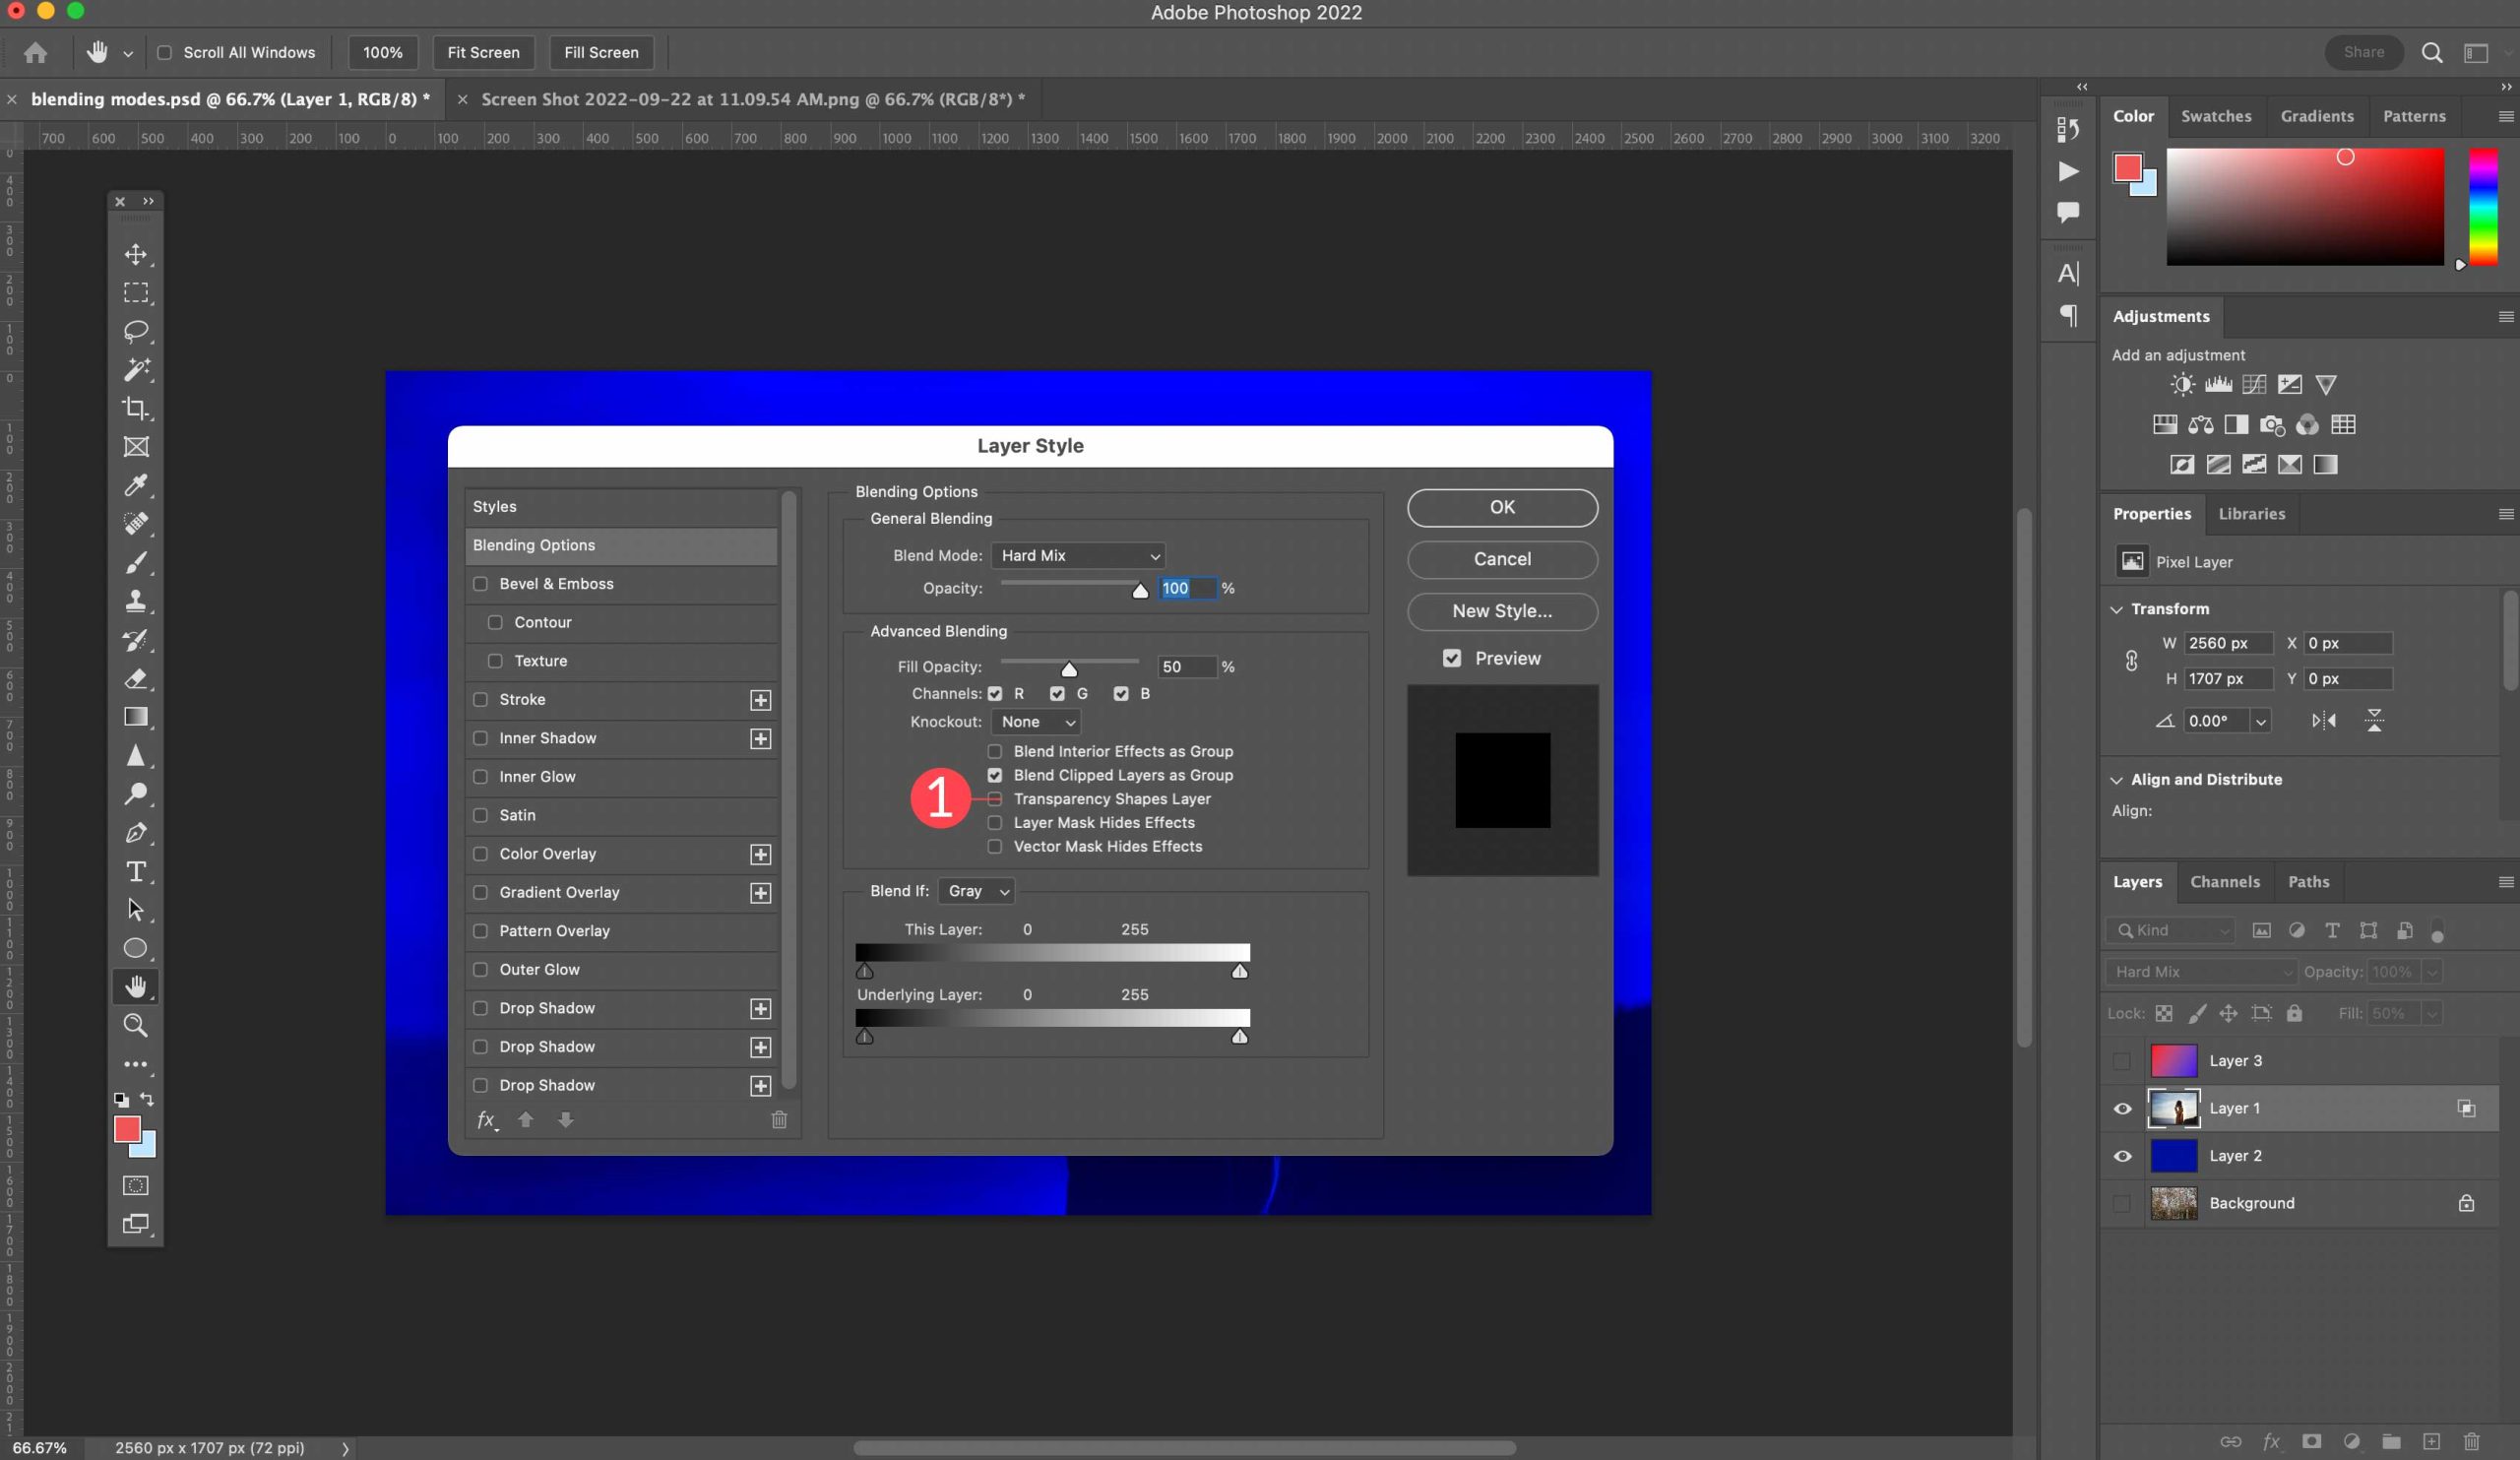
It’s important to note that while blending modes work mostly with adjusting opacity levels, there are 8 special blending modes that work best when adjusting the fill value (or percentage). For example, when combining a base photo layer with a solid color blend layer using Hard Mix, you can see that adjusting the fill value of the blend layer to 50% has a more pleasing effect than adjusting the opacity to 50%.
In addition to hard mix, the remaining special eight blending modes are color burn, linear burn, color dodge, linear dodge (add), vivid light, linear light, and difference.
Blending Mode Descriptions
In Photoshop, each blending mode is categorized by type (normal, subtractive, additive, contrast, comparative and composite). Here is a list explaining each blending mode and how they can be used.
Normal
This category contains normal and dissolve blend modes. In this category, blend layer opacities will need to be adjusted for any effects to be noticeable.
Normal
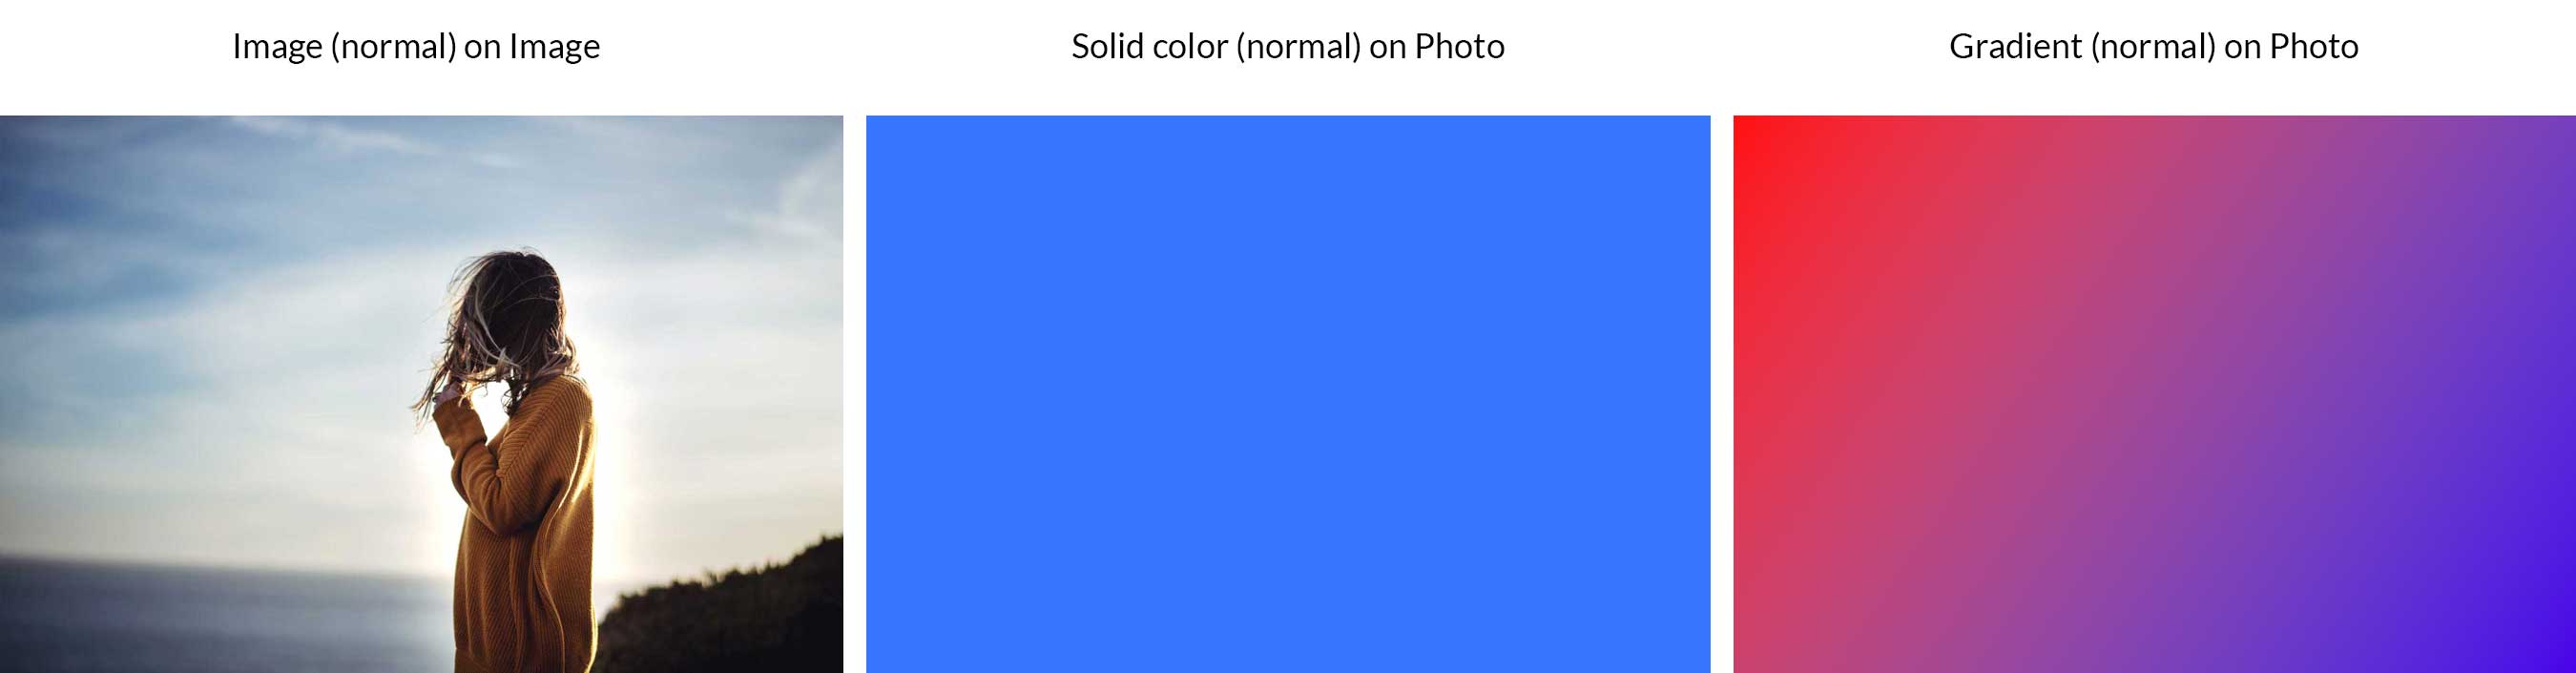
This is the default mode in Photoshop. It requires adjustments to opacity for any noticeable difference in your images. When 100% opacity is applied, the blend layer completely blocks the base layer. In our example, you can see that there is no visible image beneath our image, color, or gradient.
Dissolve
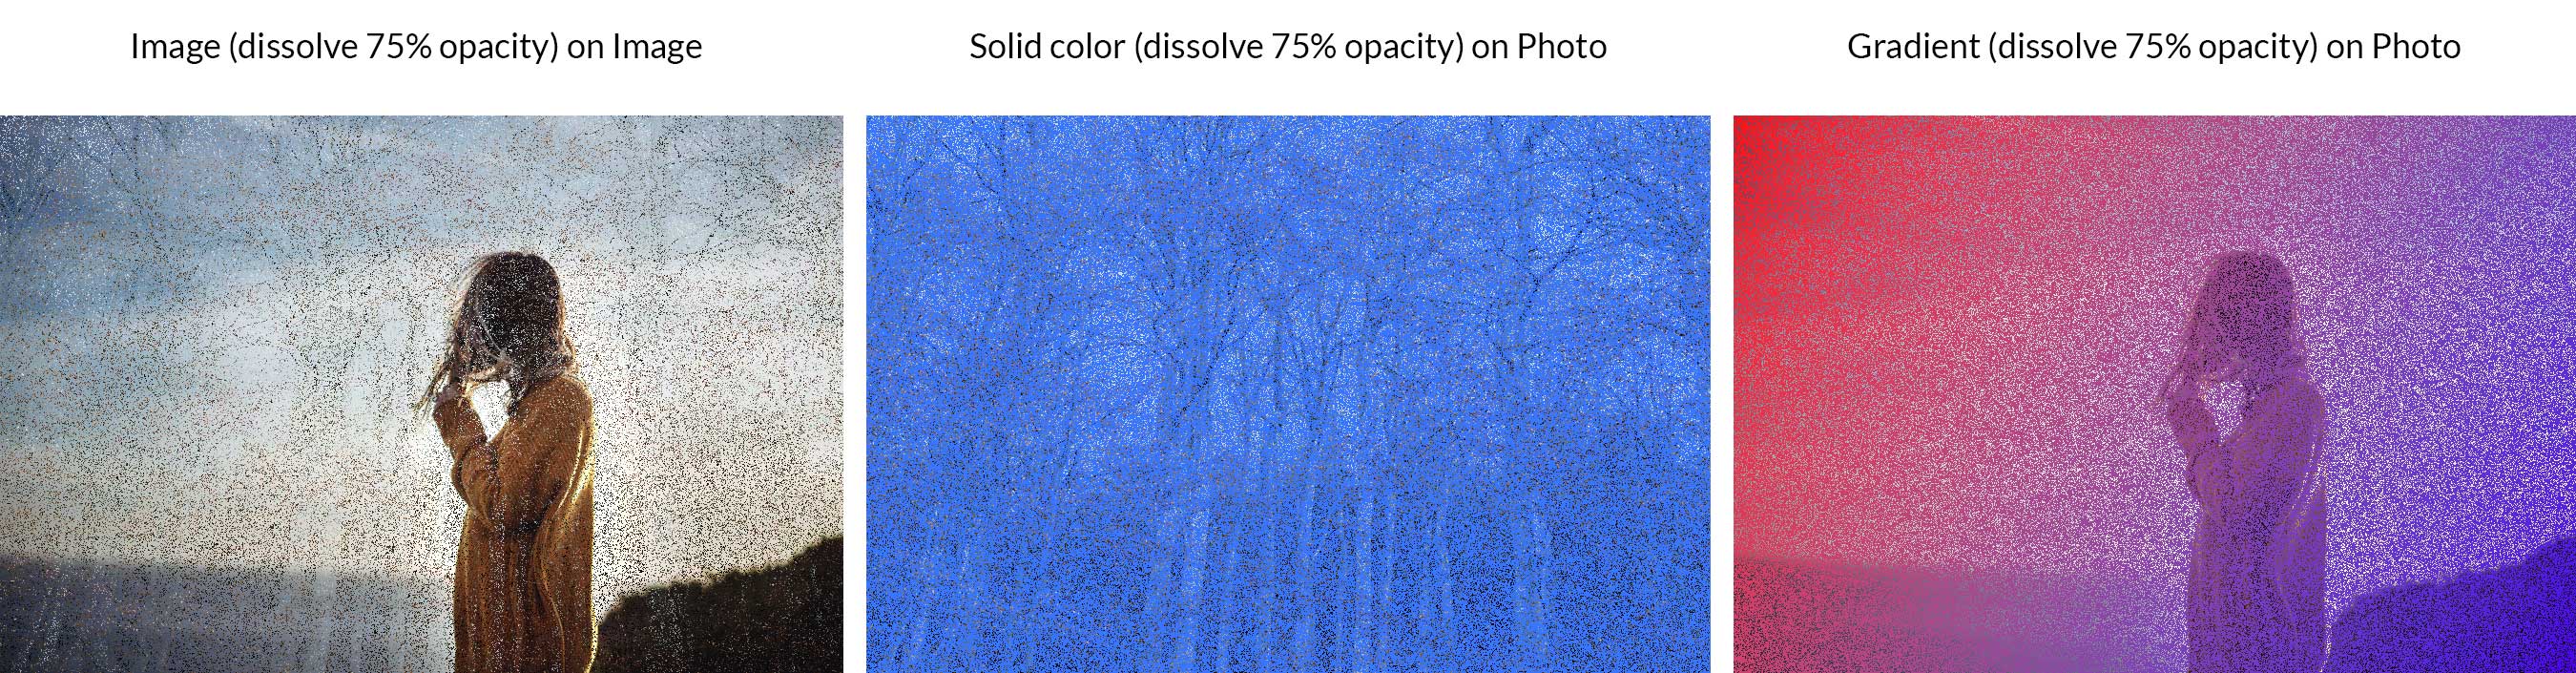
Dissolve takes pixel colors from the base layer and paints over pixel colors in the blend layer (seemingly at random) to produce a uniquely pixelated blending result. As with the normal mode, adjusting opacity is the only way to achieve a visual difference in images and designs. In our example, we show the dissolve mode with 75% opacity applied to our blend layers to create a dither pattern.
Additive
As the name suggests, these blending modes will add dark tones to your images and designs. The additive category contains darken, multiply, color burn, and darker color.
Darken
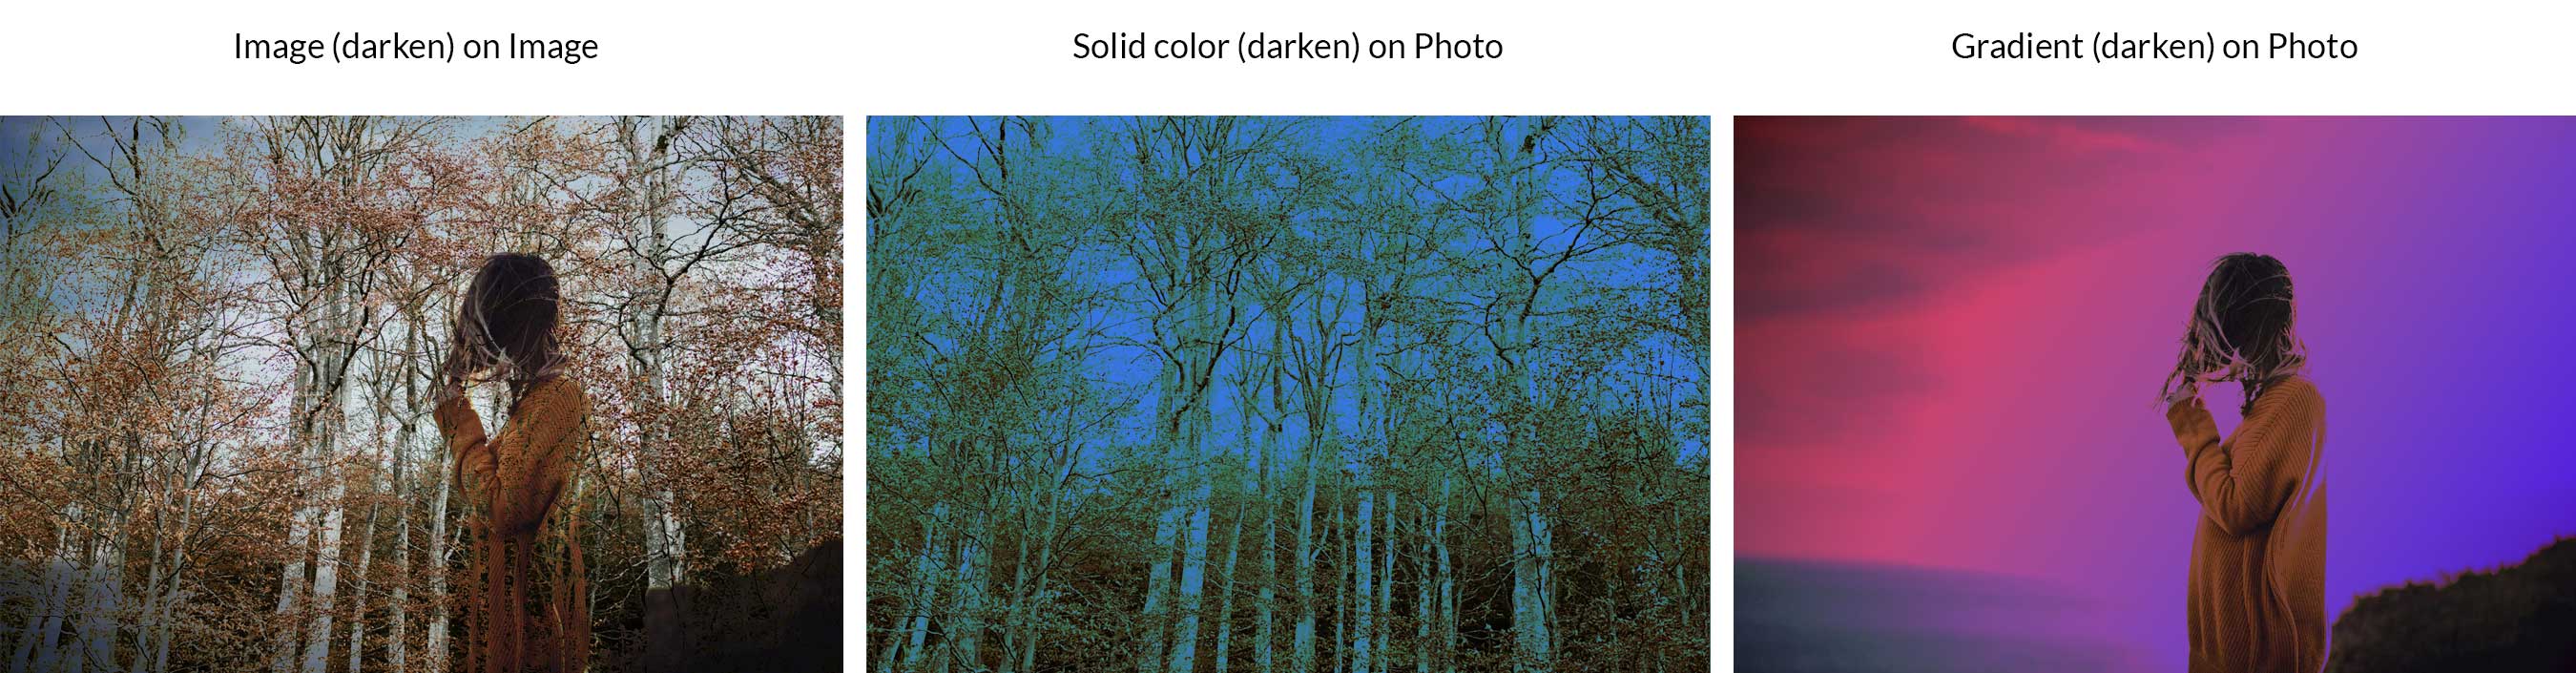
Darken compares the pixels of the base layer with the blend layer, then selects the darkest pixels to give the layer a darkened appearance. In our example, you can see the image darkens with a photo, color, or gradient overlay using this mode.
Multiply
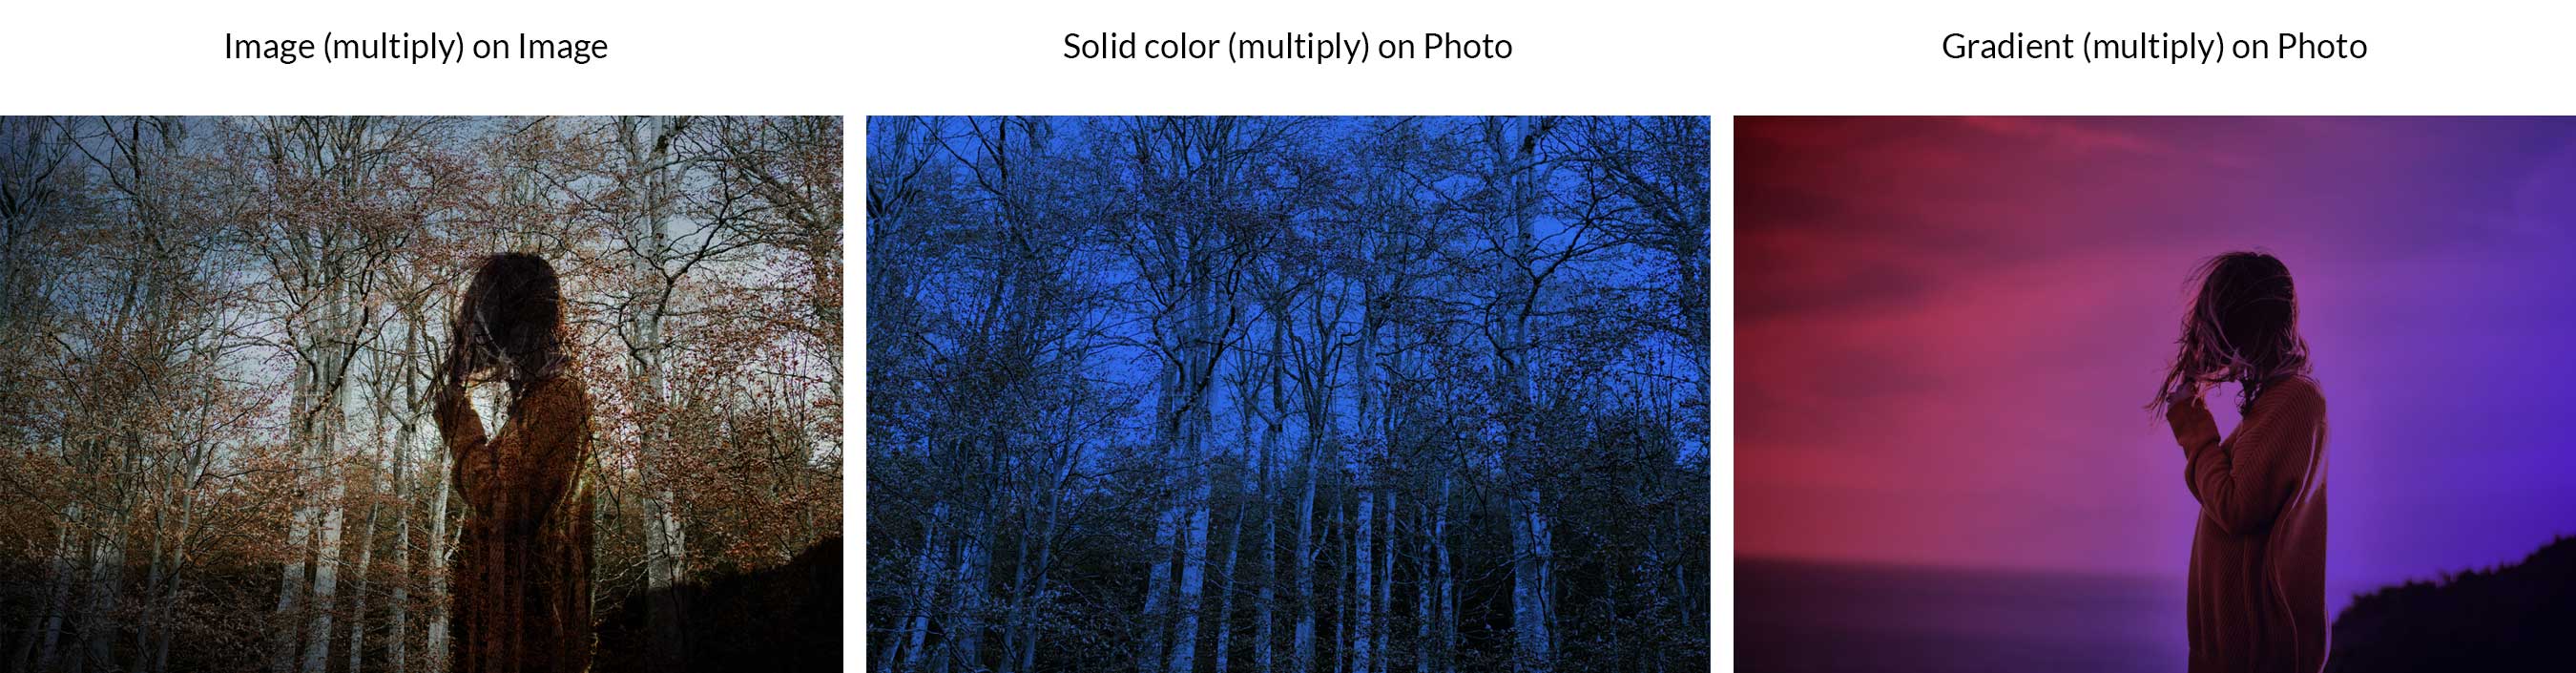
This is one of the most commonly used blending modes in Photoshop. It works by multiplying the colors in the base layer with the blend layer. This results in an image with a darkened appearance. Any whites in the layers are untouched, while darker tones appear much darker than the original photo or design.
Color Burn
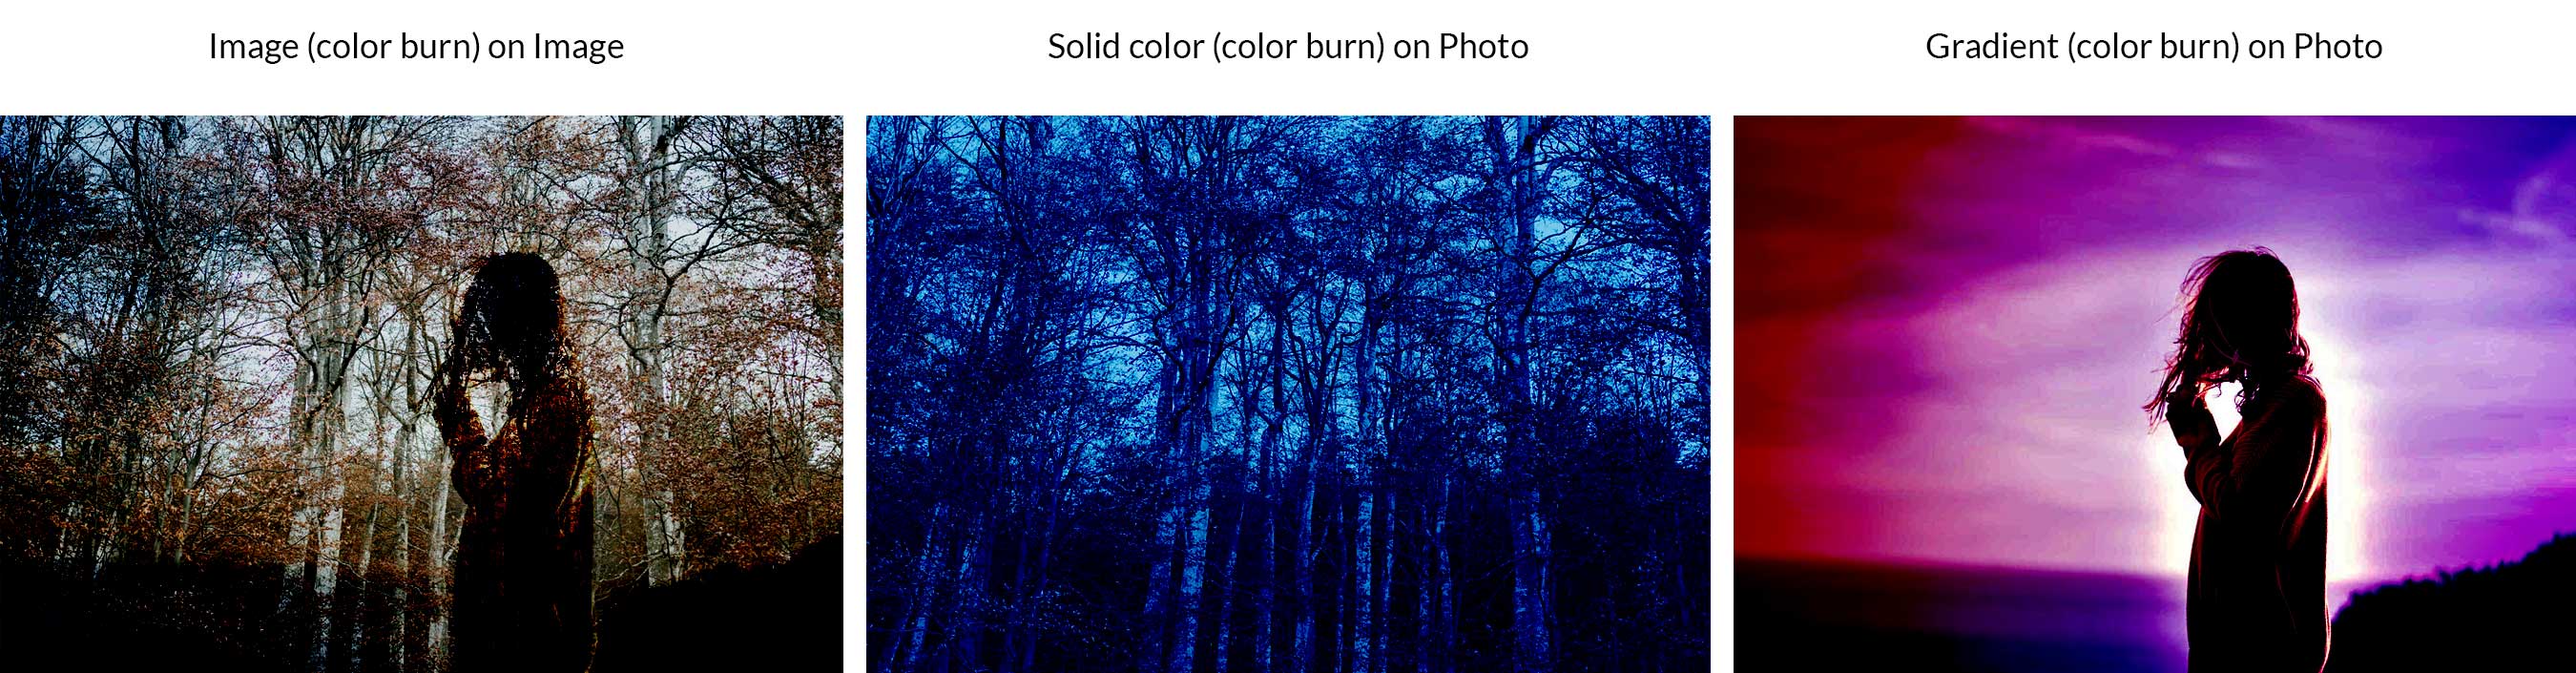
Similar to multiply, Color Burn increases contrast to darken the base layer colors before blending it with blend layer colors. Blending with white colors doesn’t change the appearance of images at all. While color burn is similar to the multiply blending mode, it makes images much darker.
Linear Burn
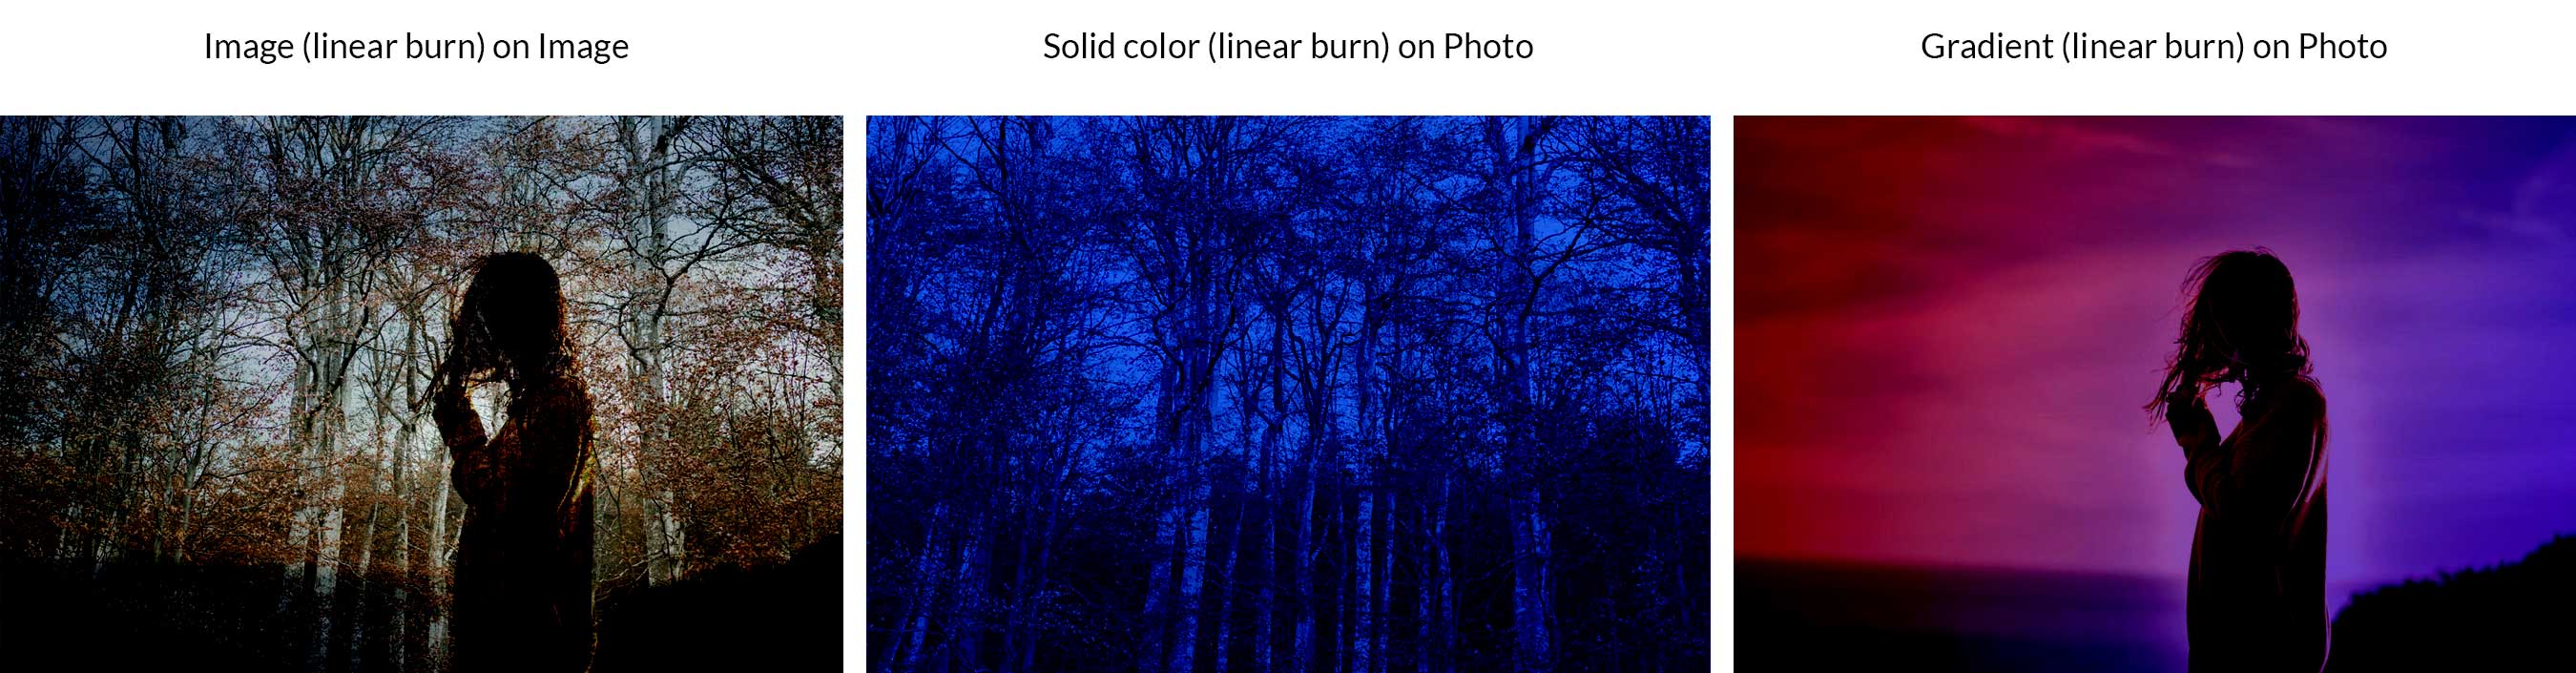
Similar to Color Burn, this “burn” effect is created by lowering the brightness of the base layer colors before blending with the blend layer colors. The results make the base layer much darker without affecting the white pixels in the layer.
Darker Color
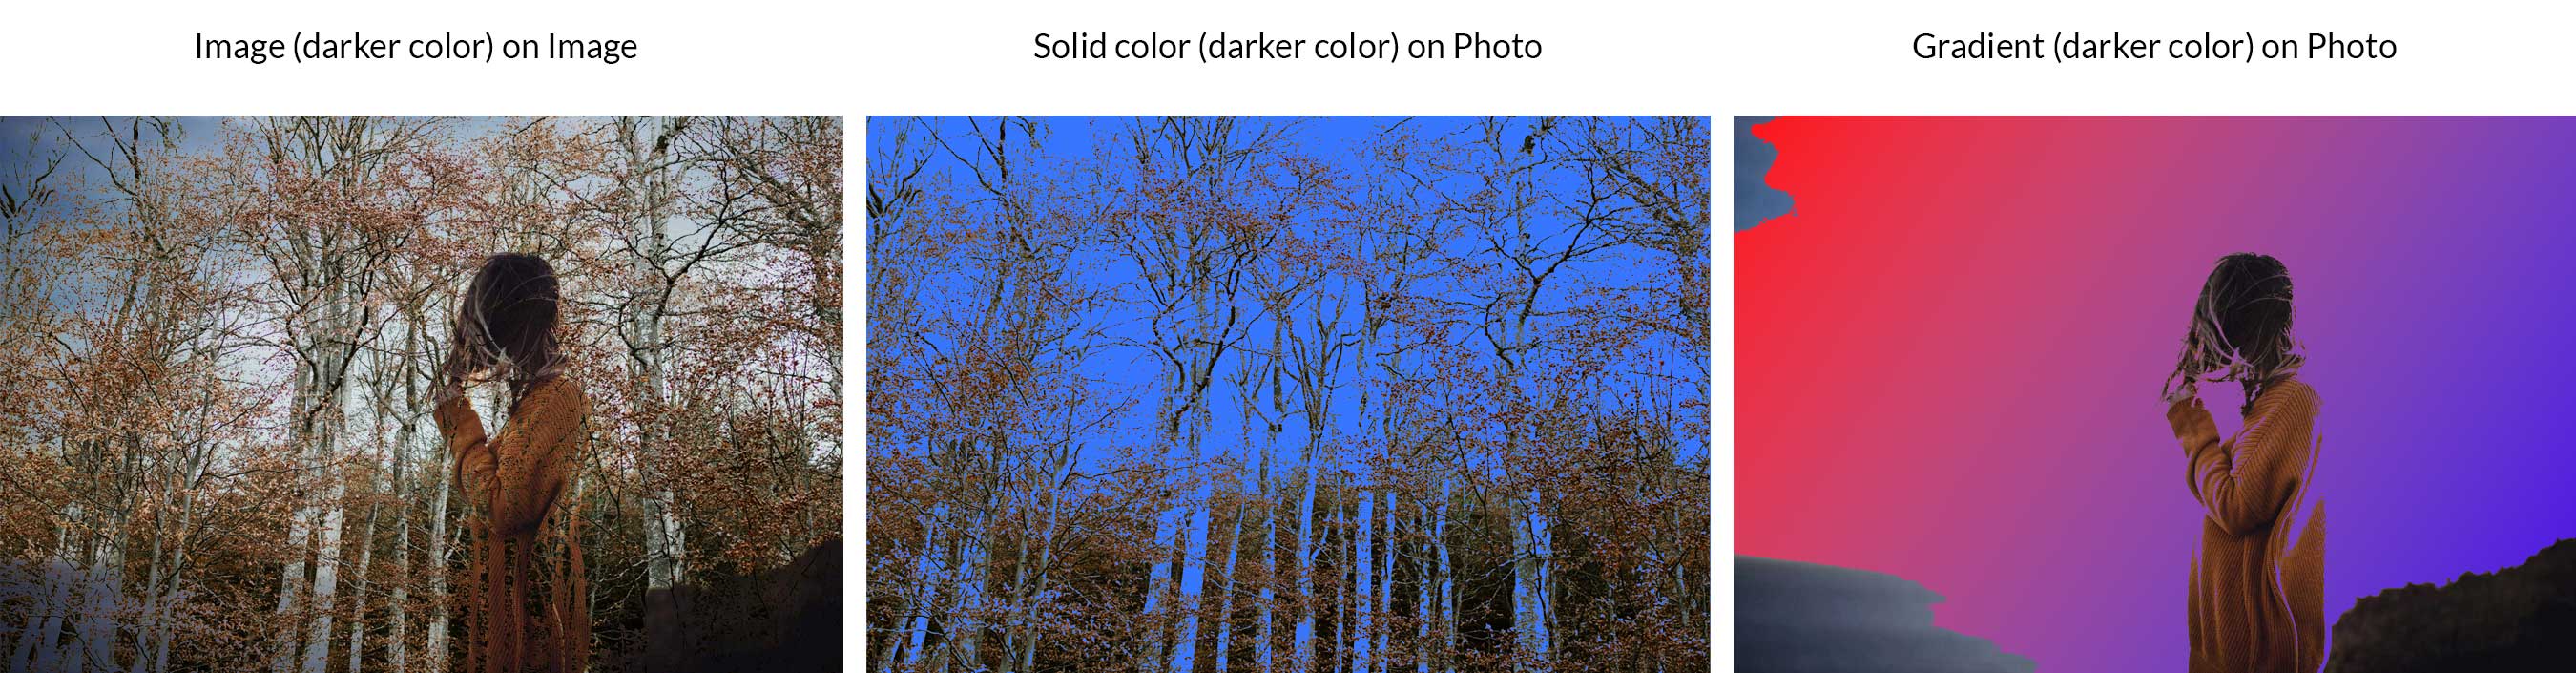
Darker Color compares the image layer’s pixels with the pixels of the blend layer, then it shows the lower value color. Unlike Darken, Darker Color doesn’t create a third color because it chooses the lowest color values from both base and blend layers. In our example, you can see that the browns from our image layer are the darkest, so it stands out much more than the blue color from our blend layer.
Subtractive (Lighter Blend Modes):
Subtractive blending modes will give your images and designs a lighter appearance because they subtract light (or light color tones) when blending the layers. The Subtractive category contains light, screen, color dodge, linear dodge (add), and lighter color.
Lighten
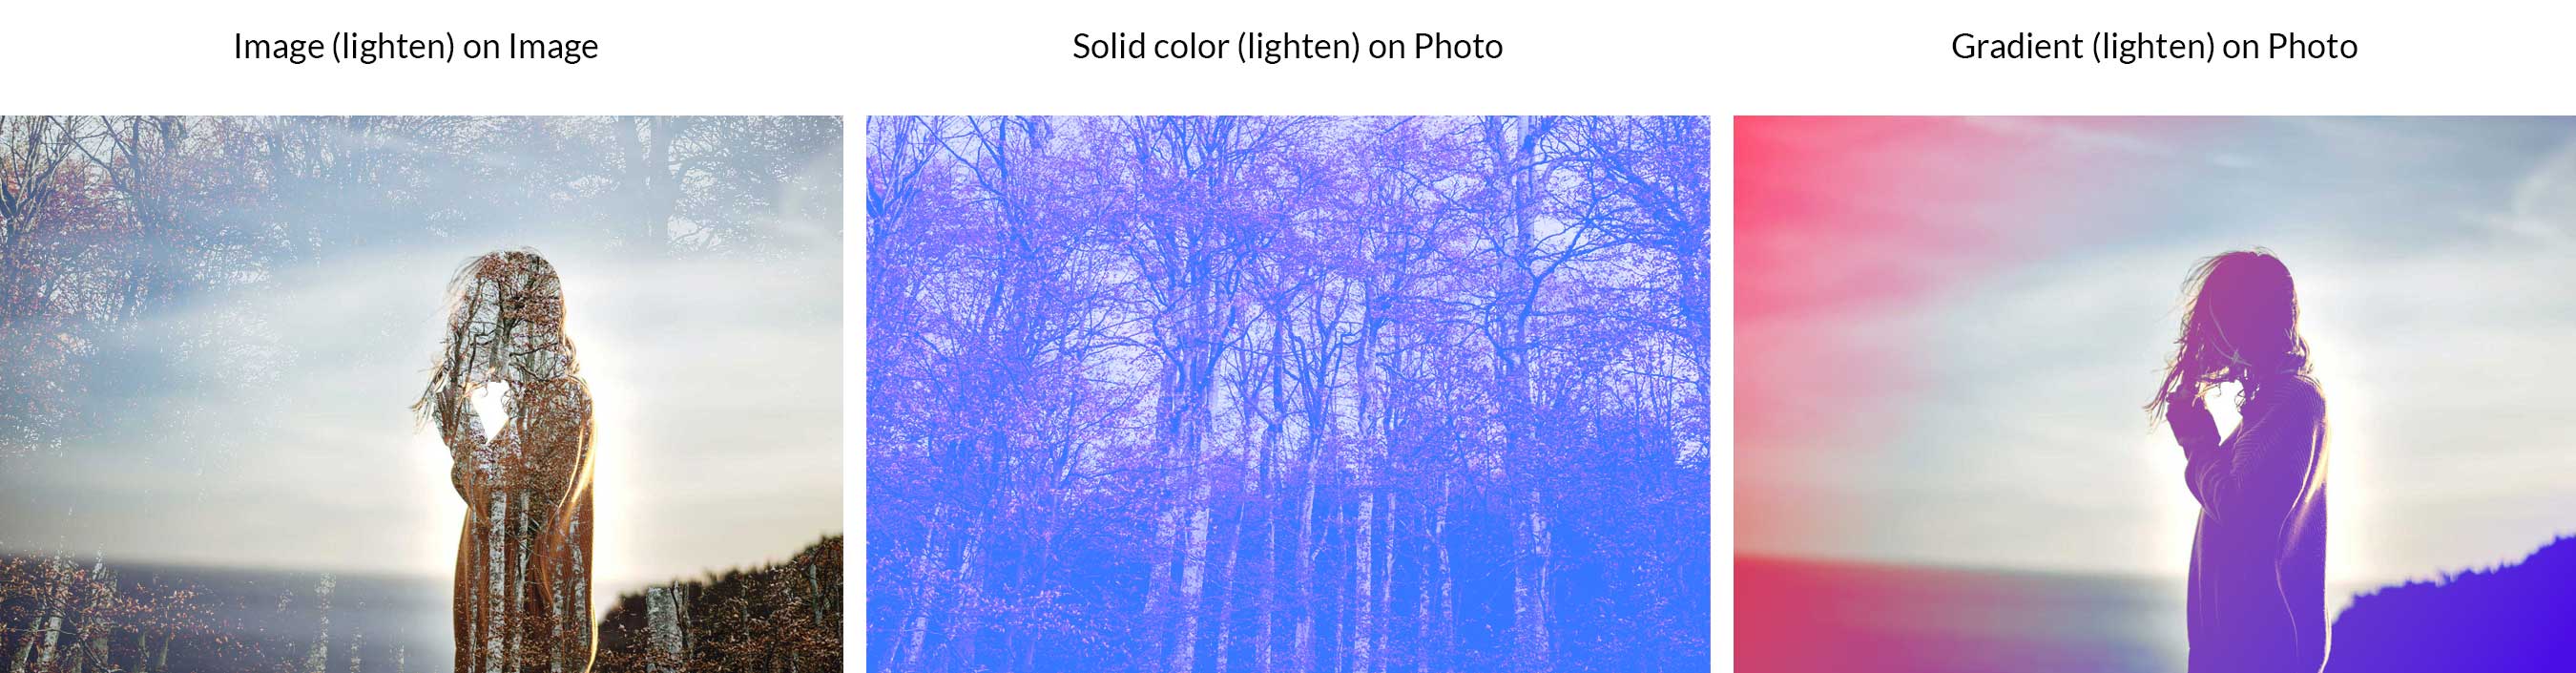
This will select the lightest color of the two layers to replace pixels that are darker than the blend layer without changing pixels that are lighter than the blend layer.
Screen
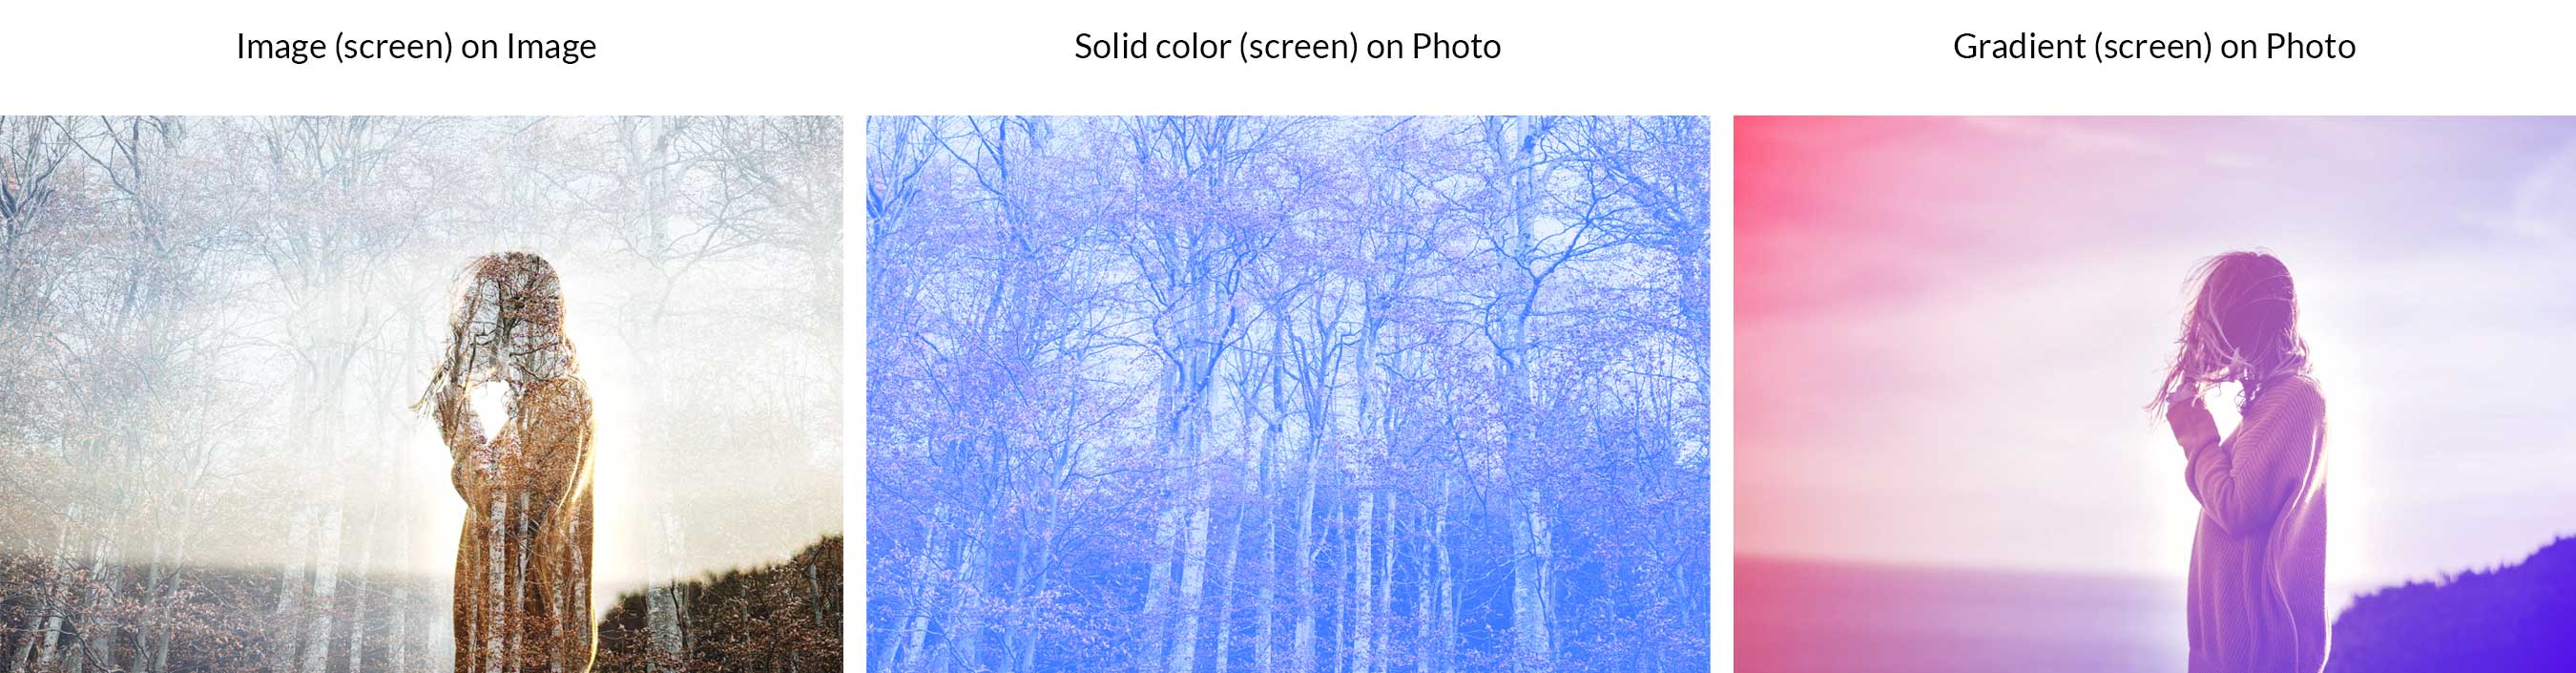
This mode selects the inverse of the blend and base layers, then multiplies it to create a lighter appearance. Black and white colors stay the same.
Color Dodge
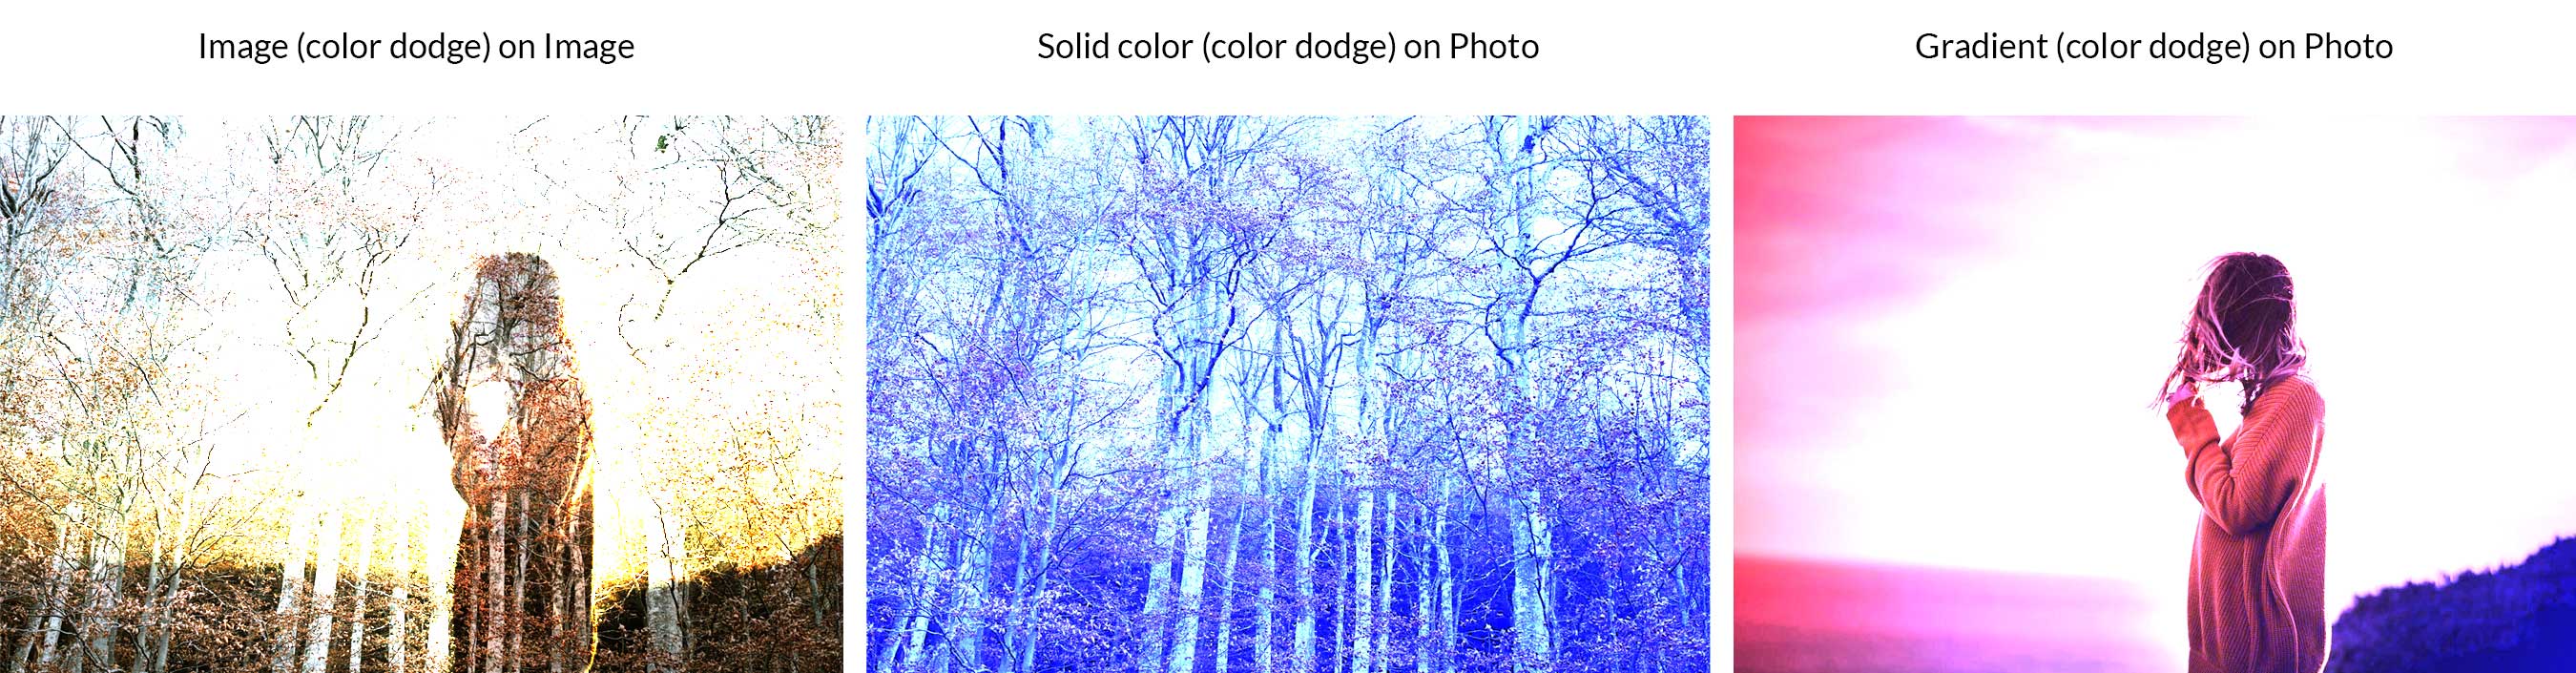
This mode brightens the base layer while decreasing the contrast between both the base and blend layers. The black color stays the same.
Linear Dodge (Add)
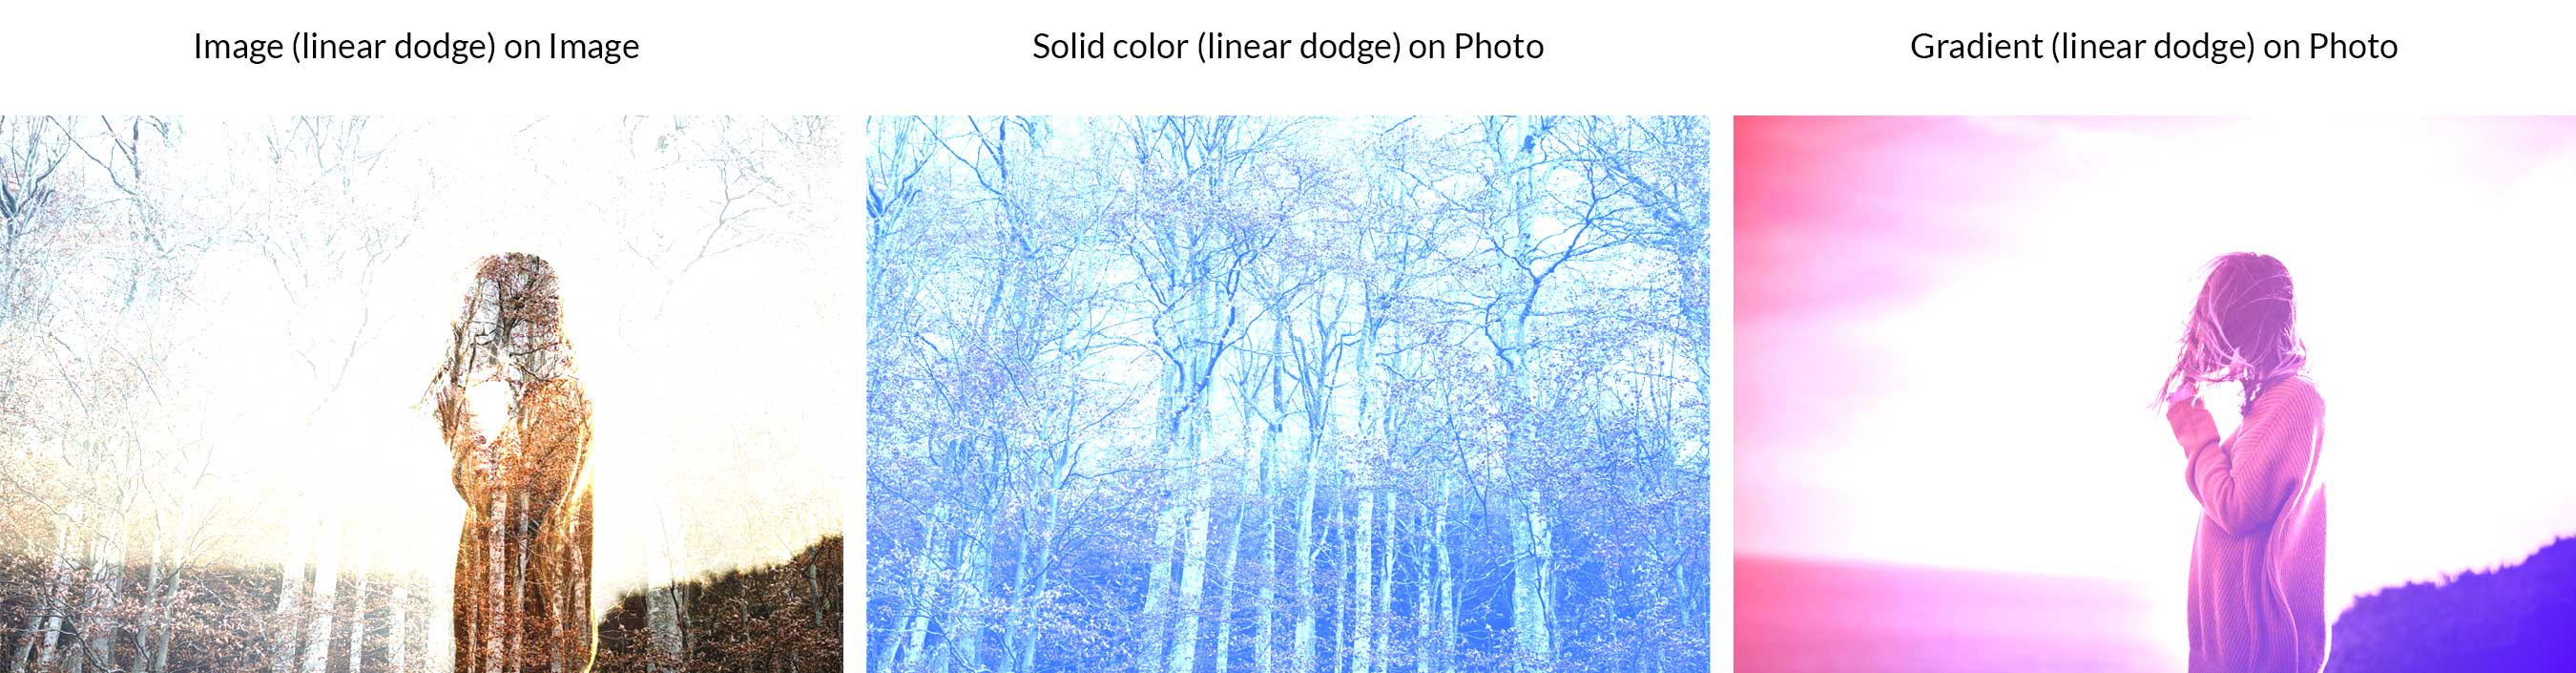
This will brighten the base layer to reflect the blend layer while increasing brightness. Black stays the same.
Lighter Color
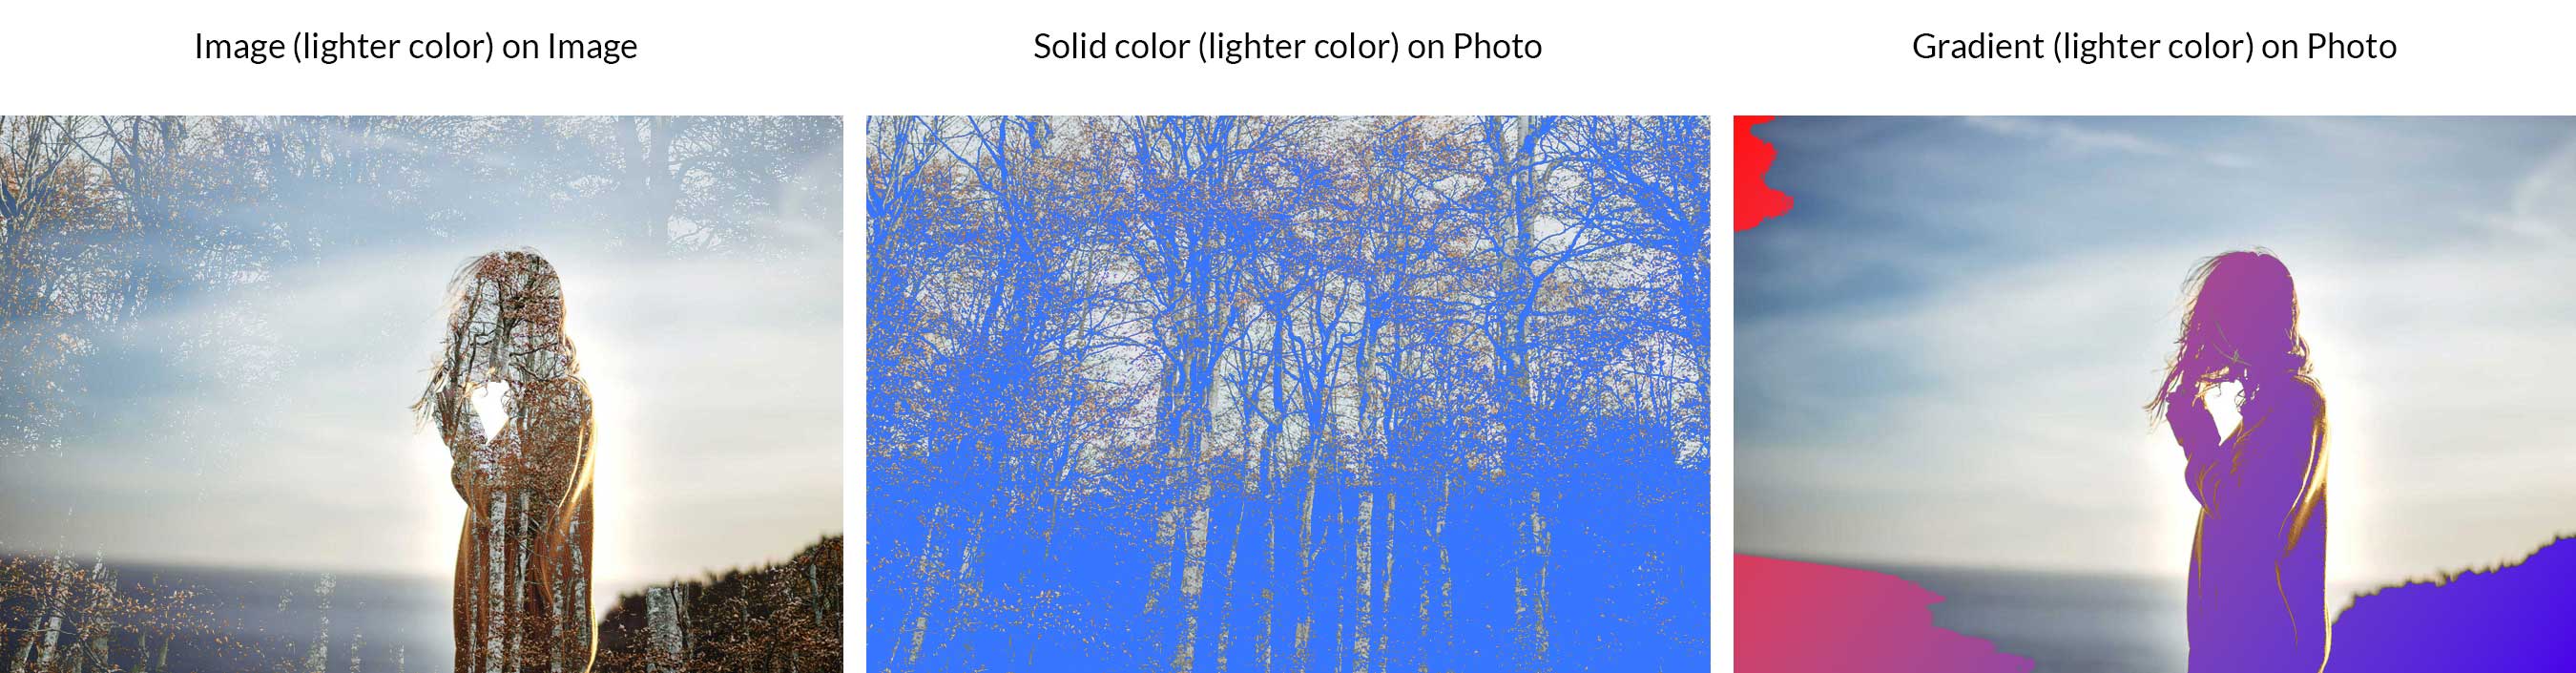
Similar to lighten, lighter compares the base and blend layers, then keeps the lighter of the two. The difference between lighten and lighter color is the fact that lighter color looks at RGB channels as a whole, while lighten looks at the individual channels to complete the blend.
Contrast
These blending modes create different effects using contrast and are based on whether the base or blend layer has a color lighter than 50% gray. This category contains overlay, soft light, hard light, vivid light, linear light, pin light, and hard mix.
Overlay
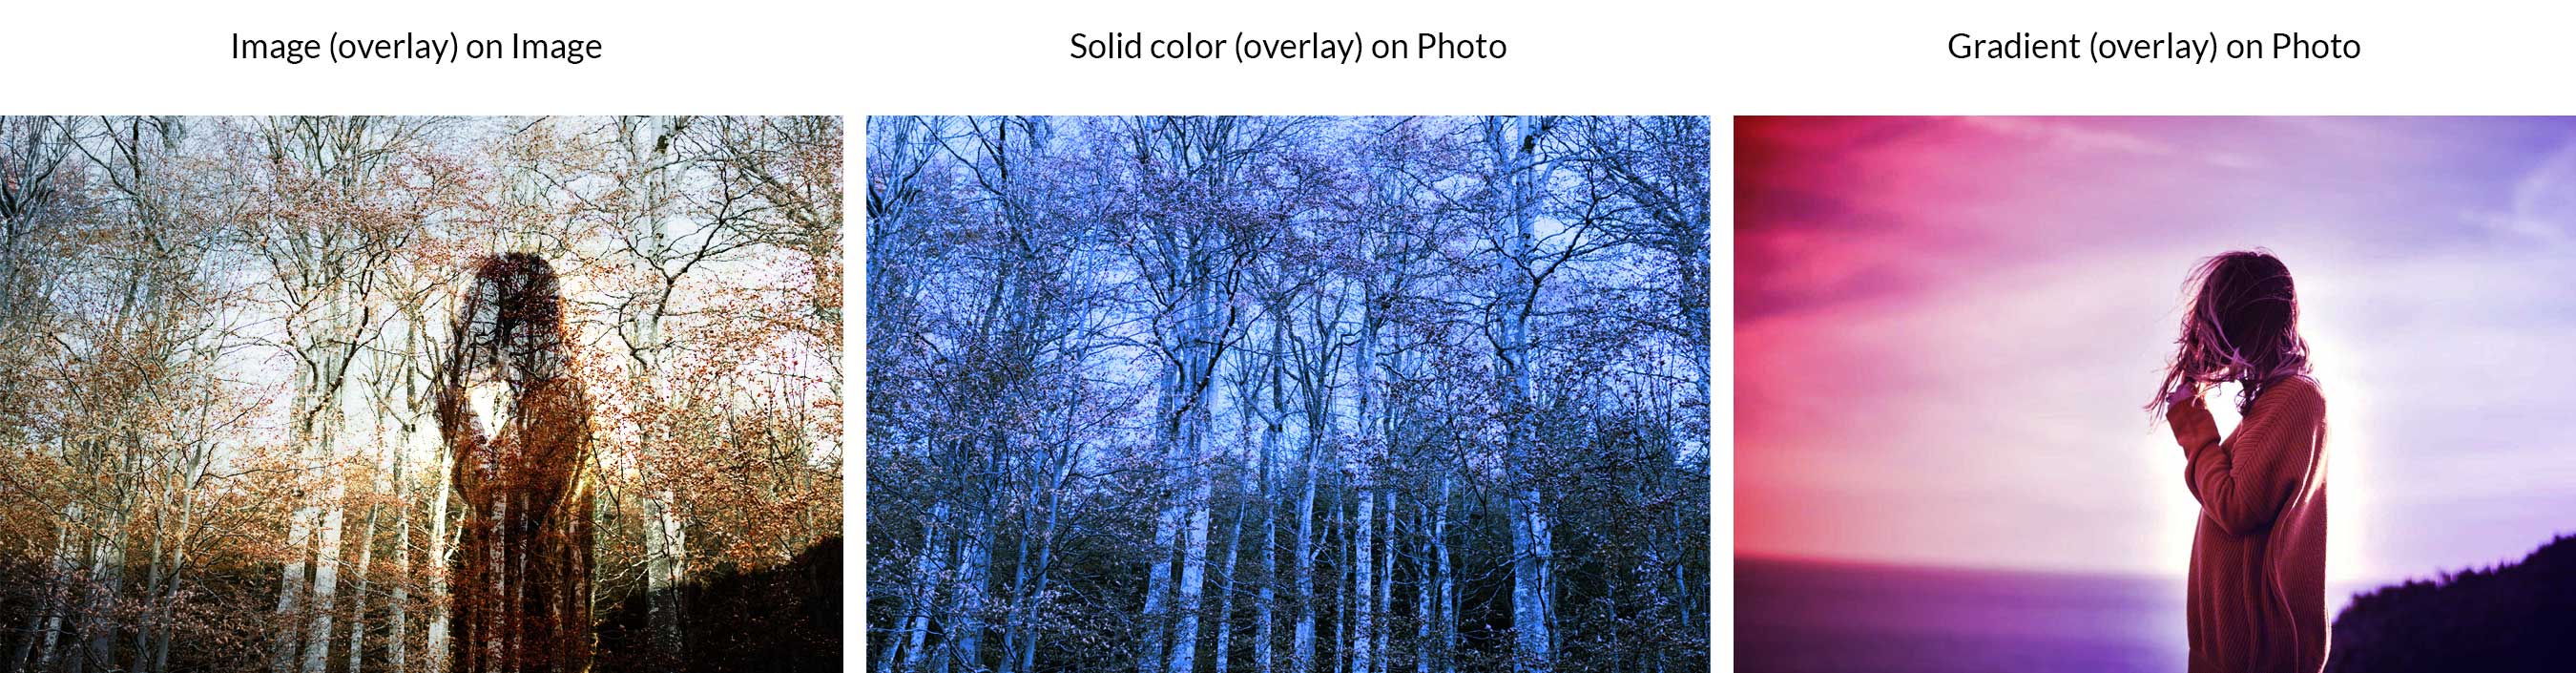
One of the most commonly used modes, overlay uses the screen mode at 50% strength on colors brighter than gray. Dark tones shift mid-tones to become darker, and light tones shift the mid-tones to create lighter colors.
Soft Light
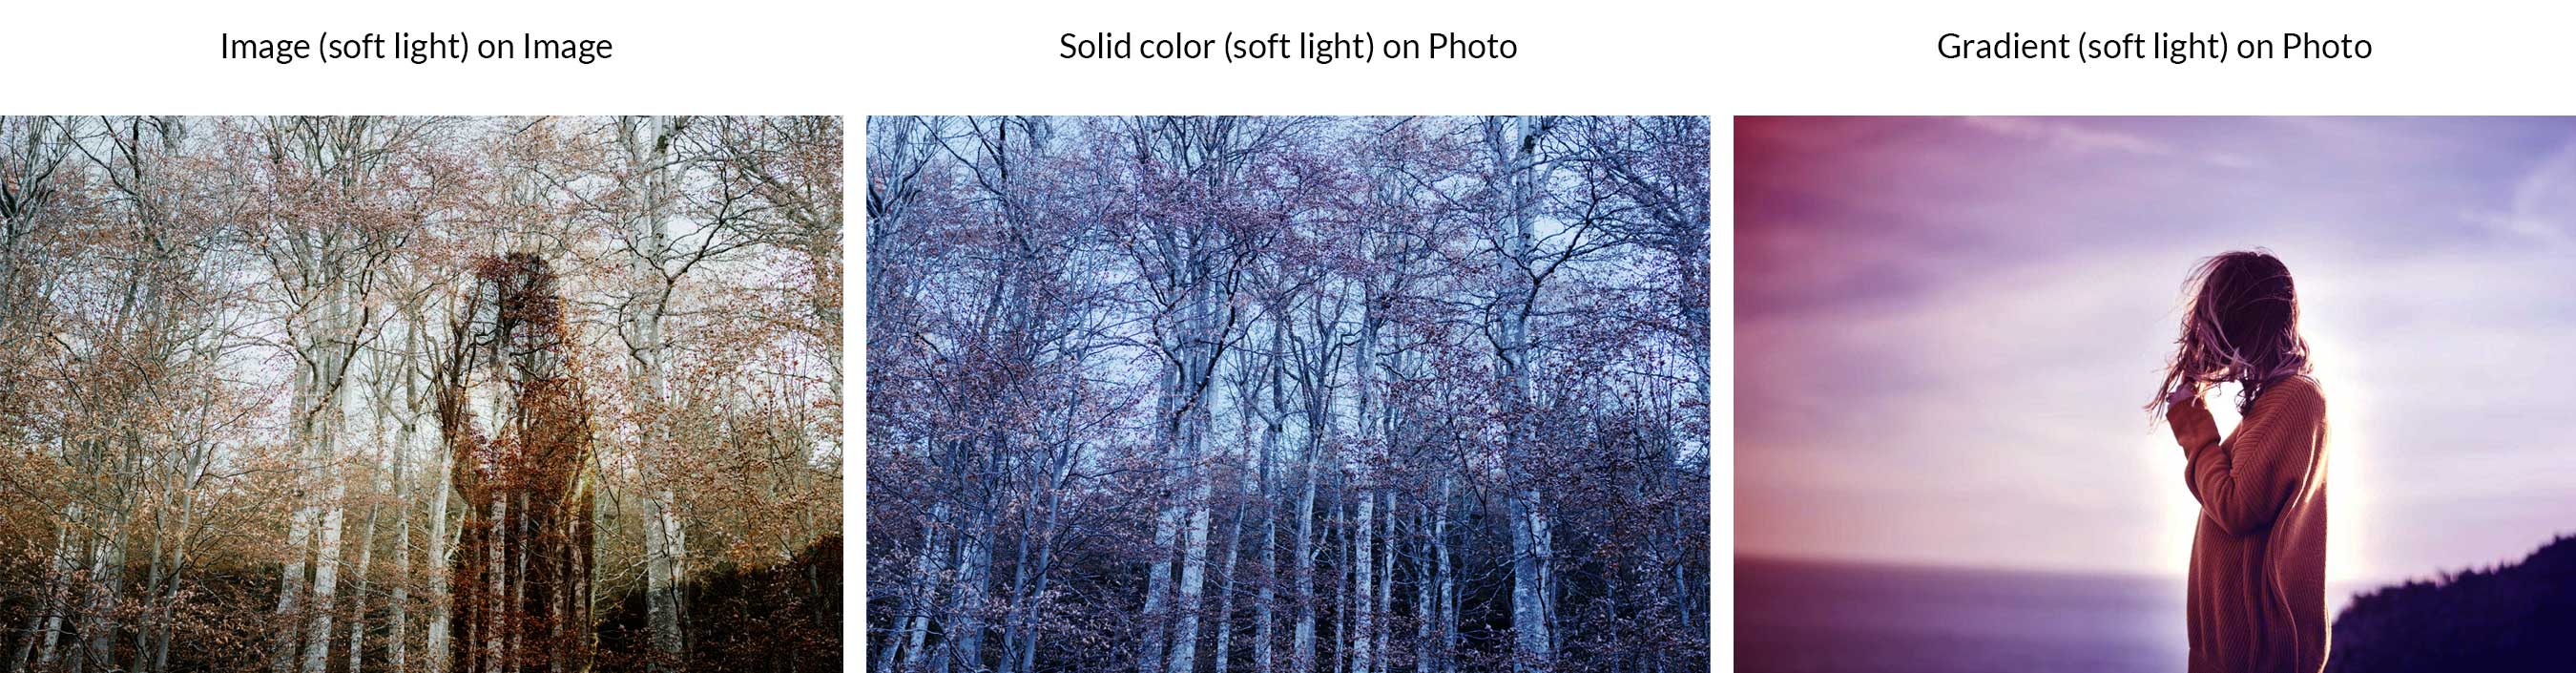
Similar to overlay, soft light applies either a darker or lighter effect depending on the light values in an image or color, but in a more subtle appearance.
Hard Light
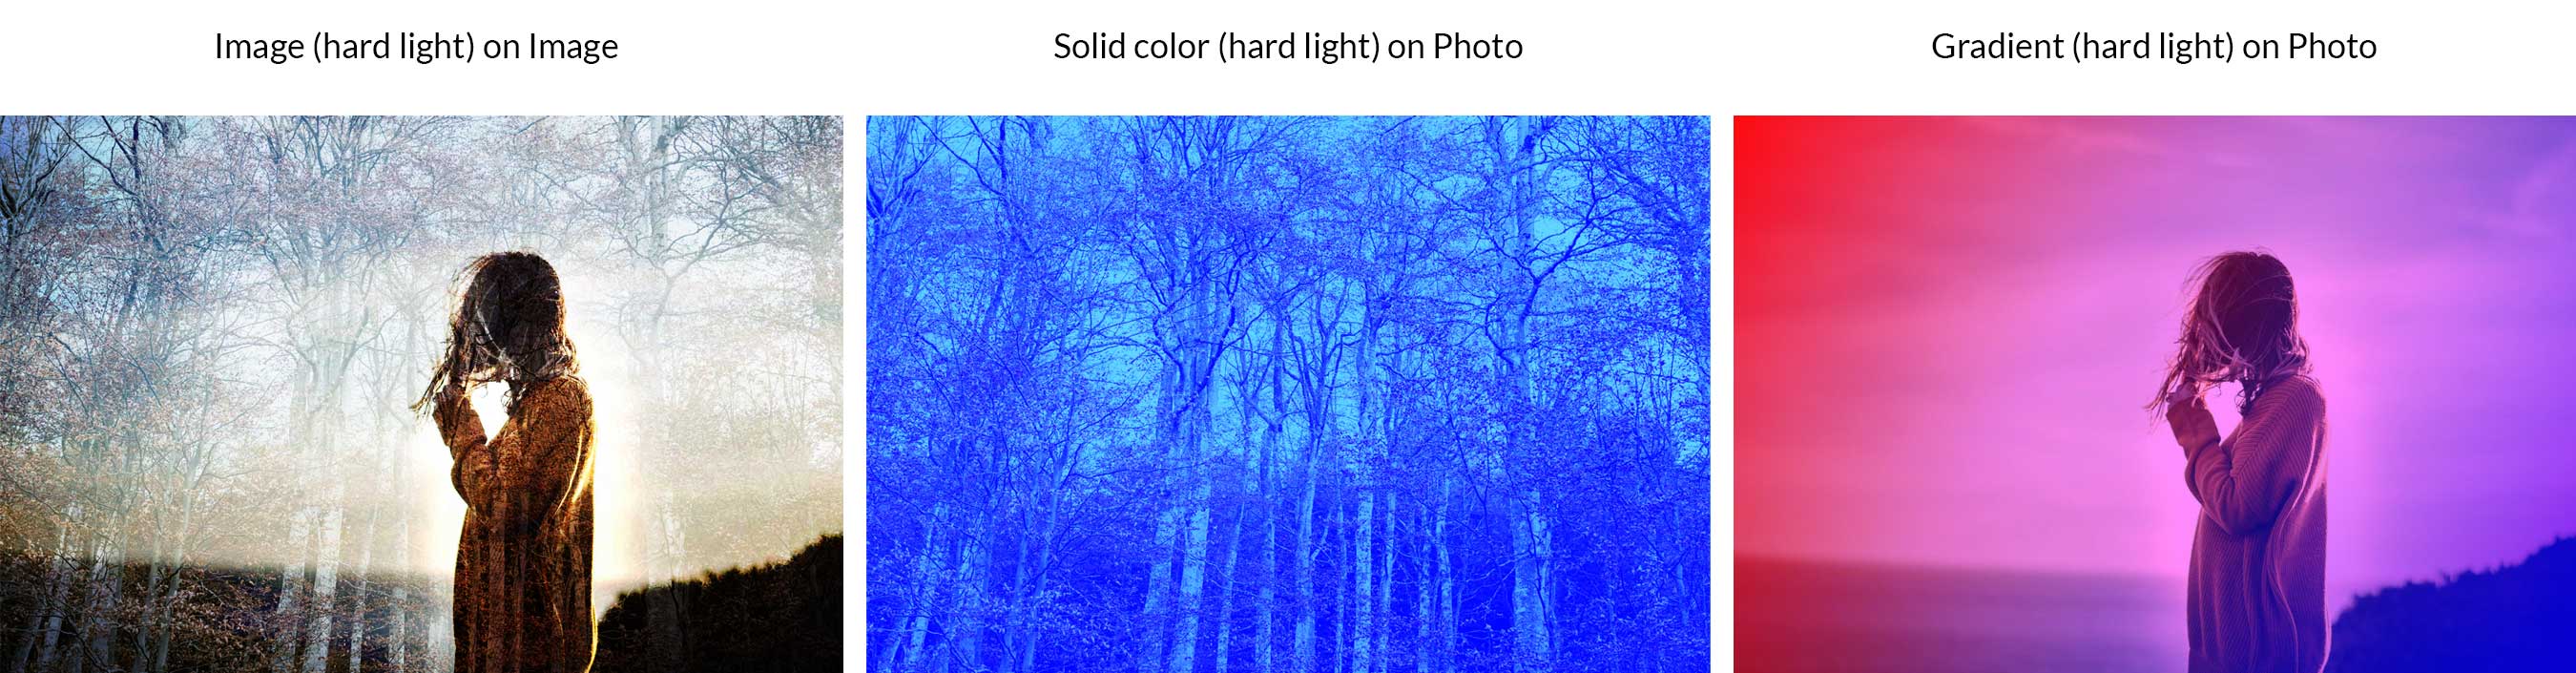
By combining multiply and screen, hard light uses brightness in the blend layer to calculate its result. Usually, it’s best to reduce the opacity of the blend layer when using hard light to get good results.
Vivid Light
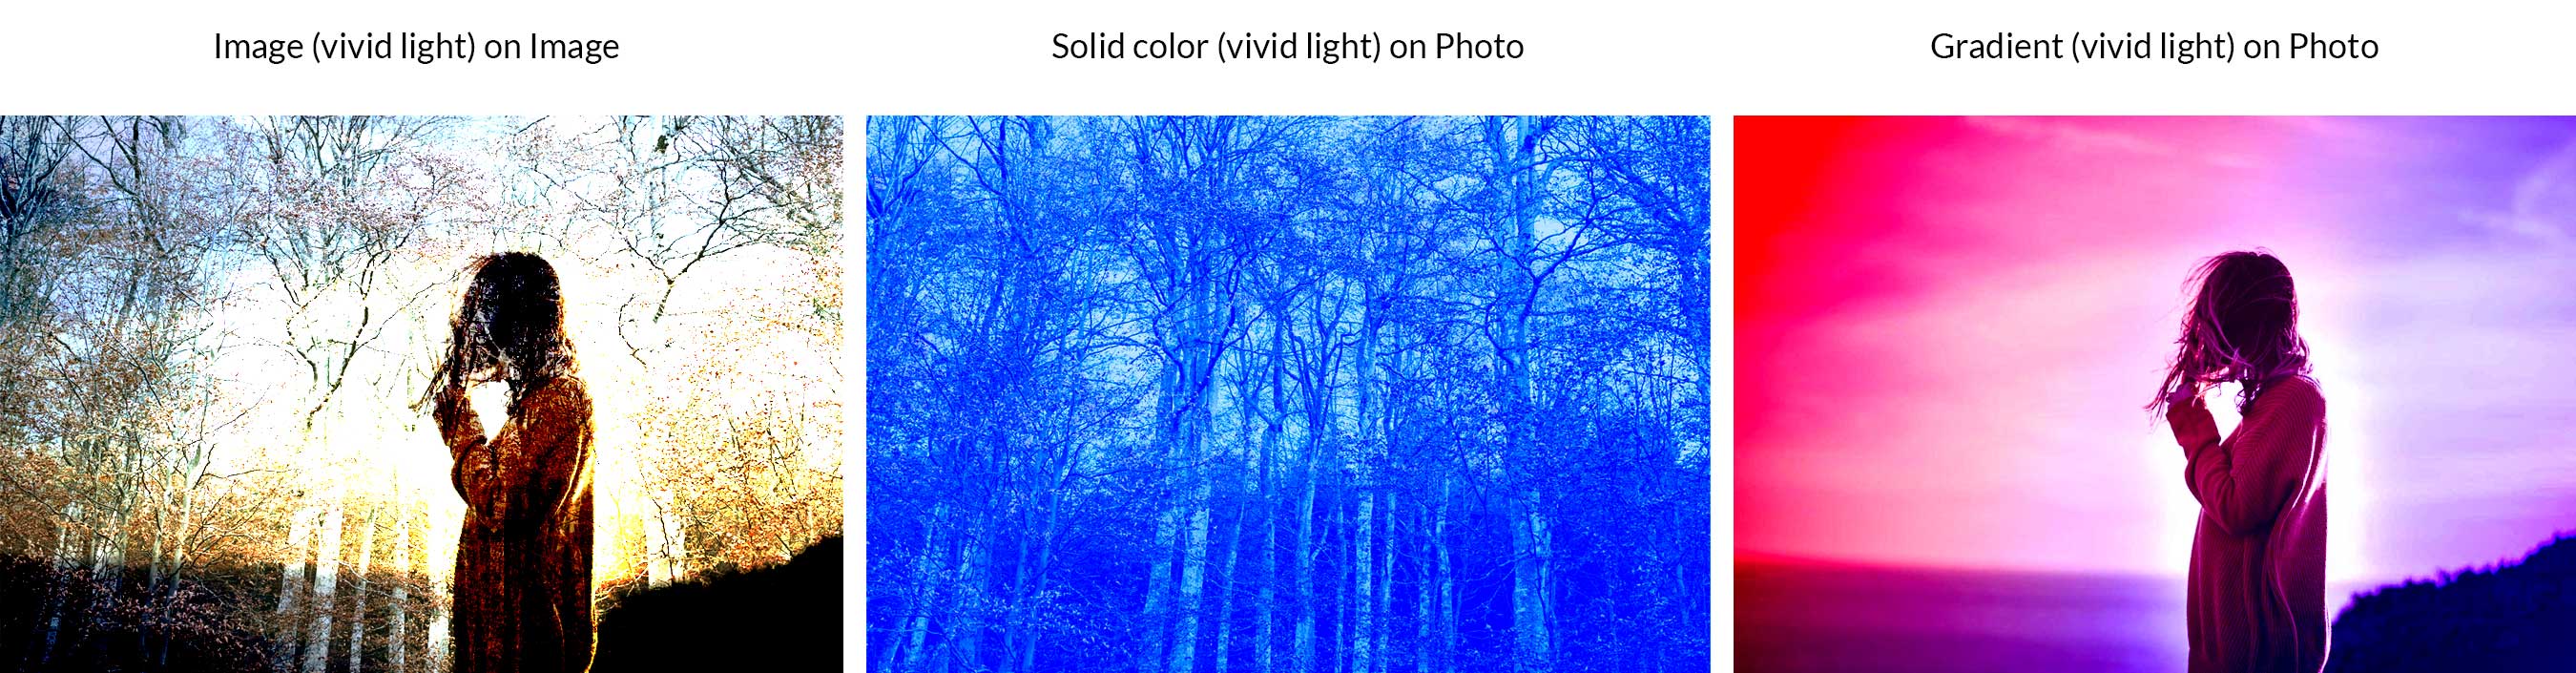
50% gray gets darkened, yet anything lighter than 50% is lightened. Vivid light is one of the special 8, which makes it blend differently based on whether you adjust the fill or opacity.
Linear Light
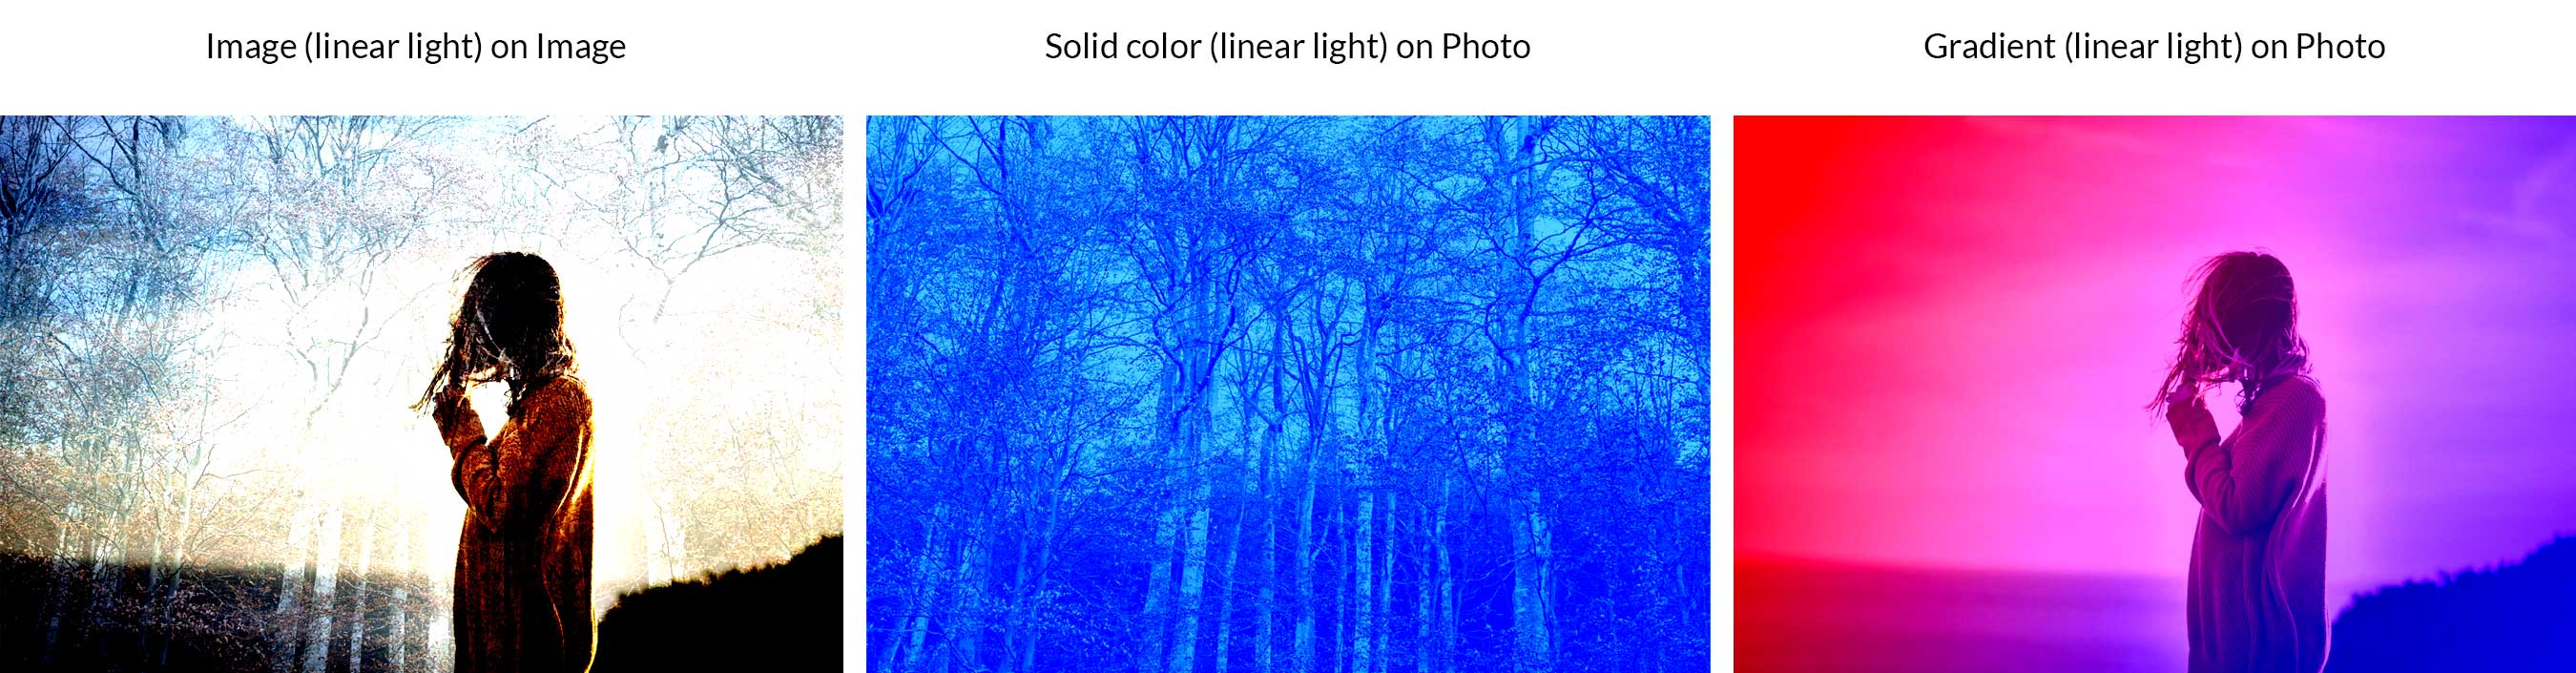
Another member of the special 8, linear light combines the effects of linear dodge (add) on lighter pixels and linear burn on darker ones.
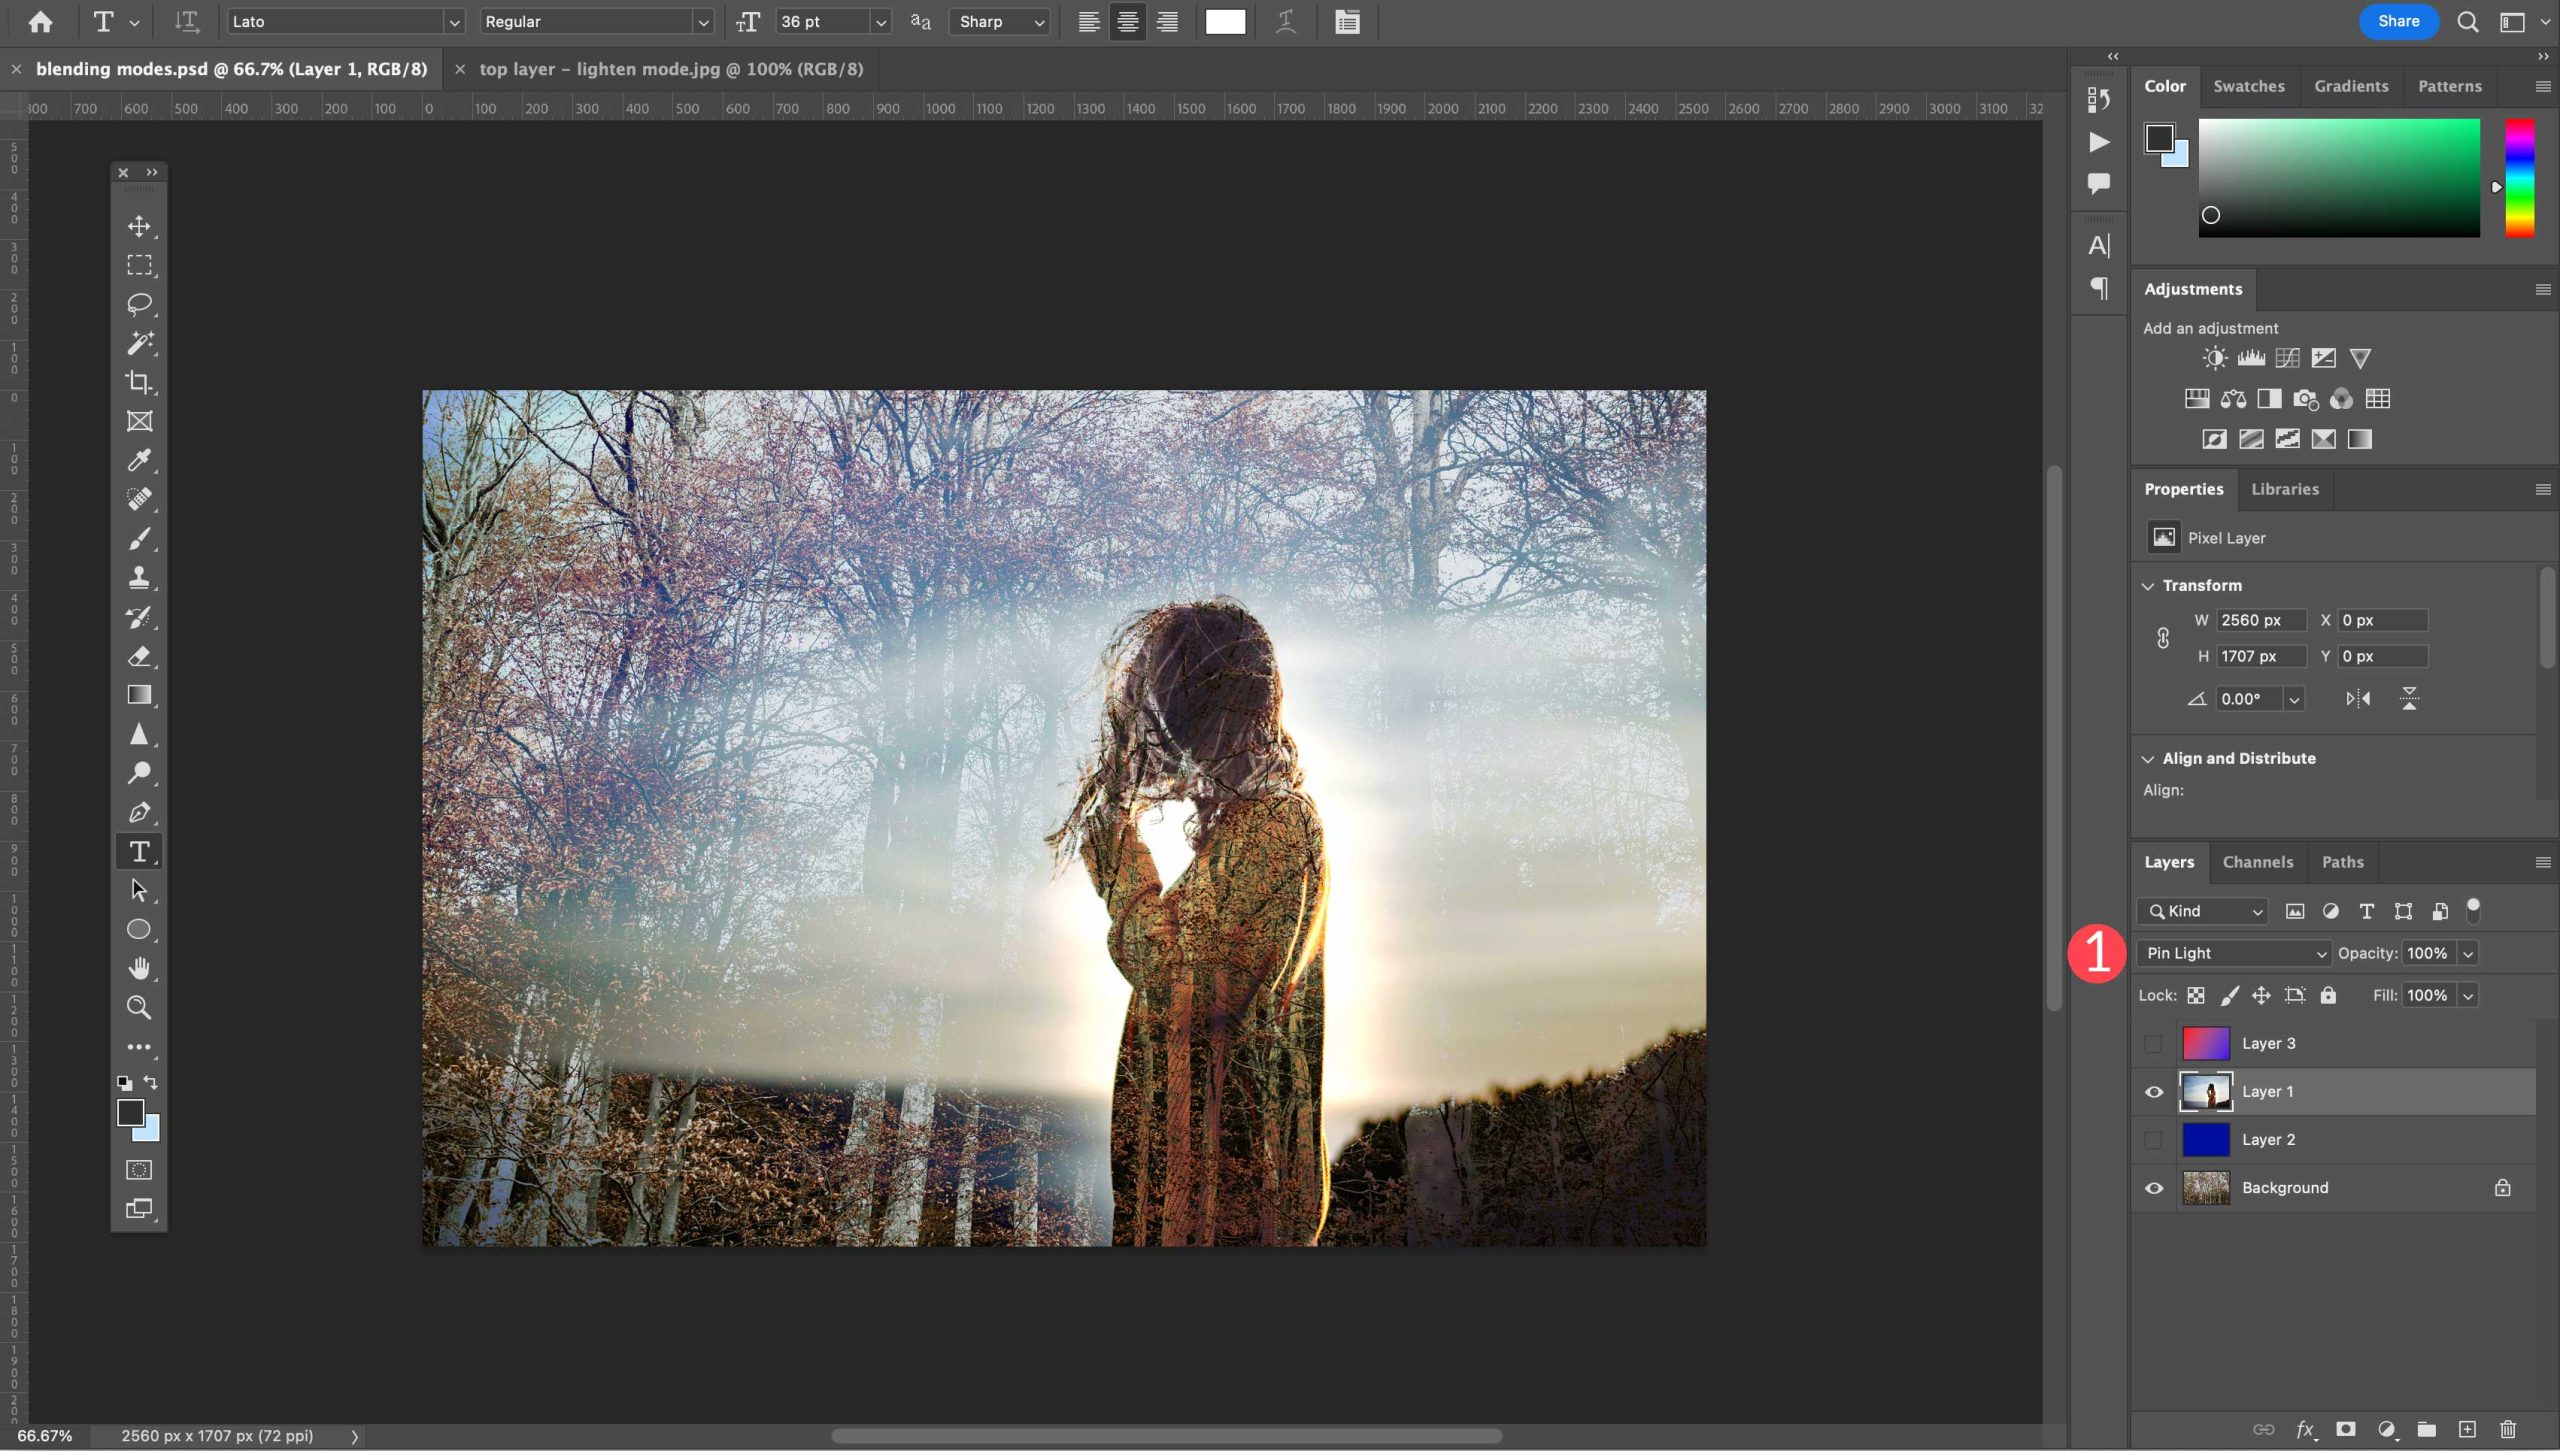
Pin Light
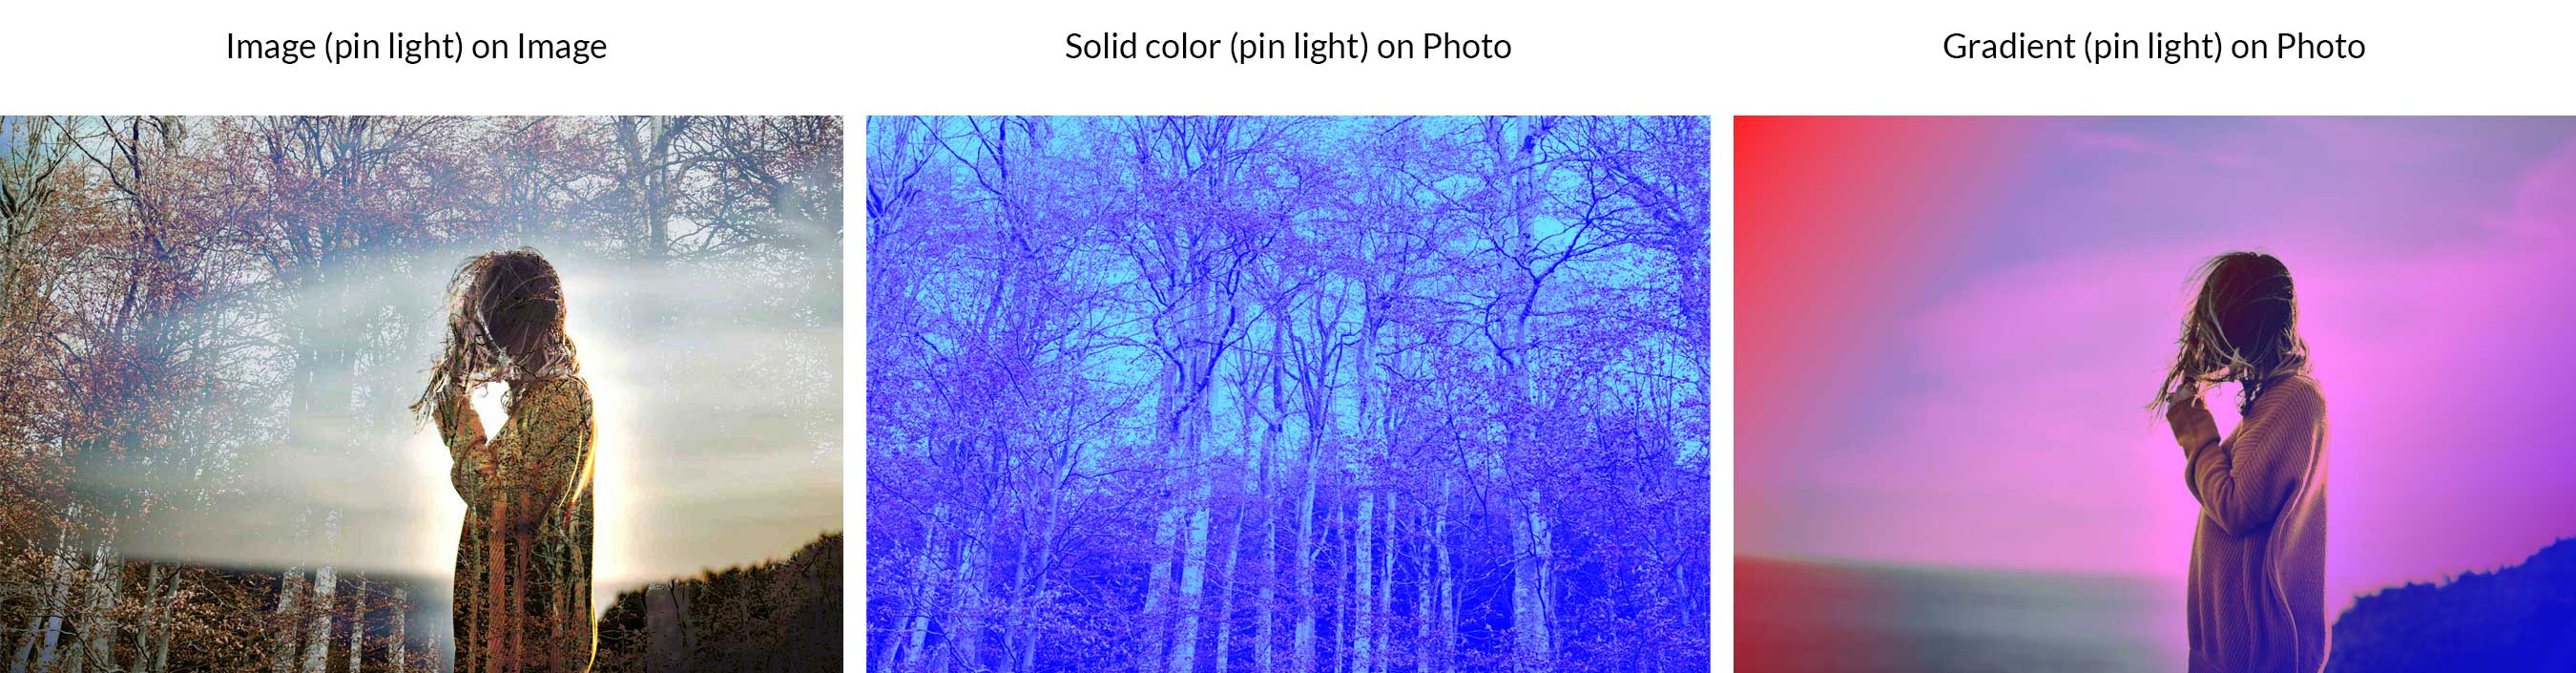
This mode combines a dark and light blend at the same time. It will remove all mid-tones in your image. Adjusting the opacity can produce wildly different results.
Hard Mix
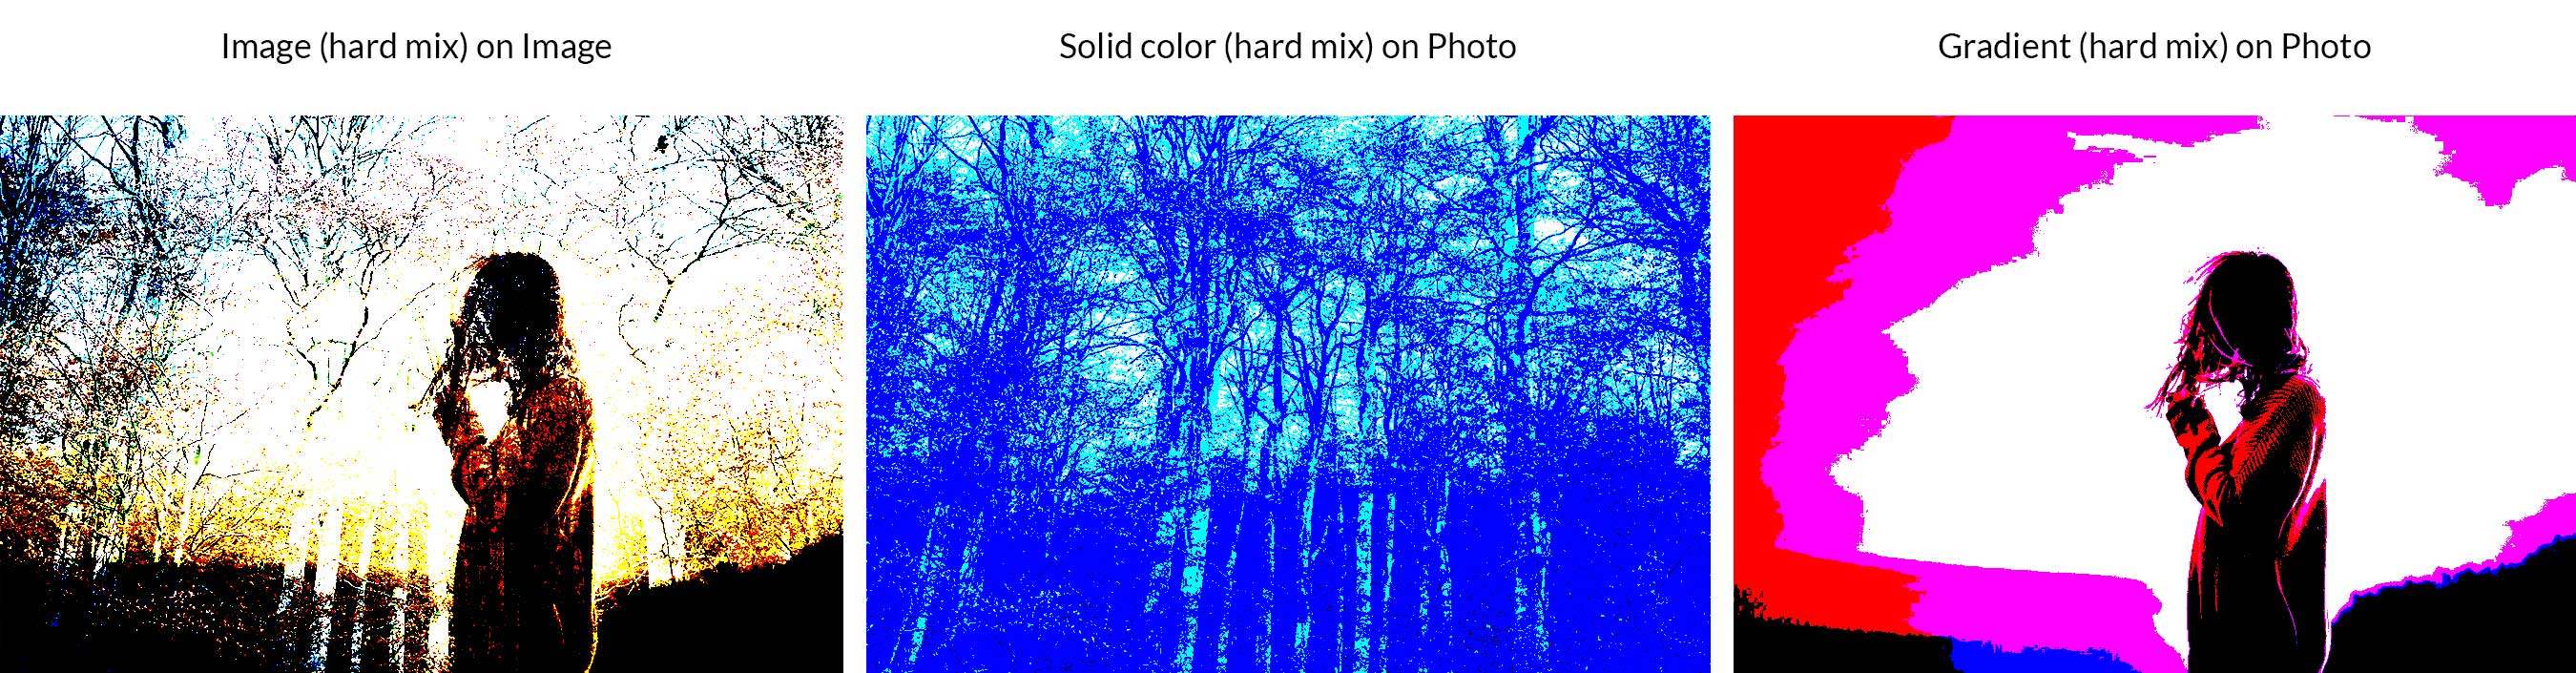
Hard mix works by adding the value of each RGB channel from the blend layer to the matching RGB layers of the base layer. The appearance of hard light results in loss of color except for black, white, gray, or RGB and CMYK.
Comparative
These create variations in color based on the values of the blend layer and the base layer. Difference, exclusion, subtract, and divide are included.
Difference
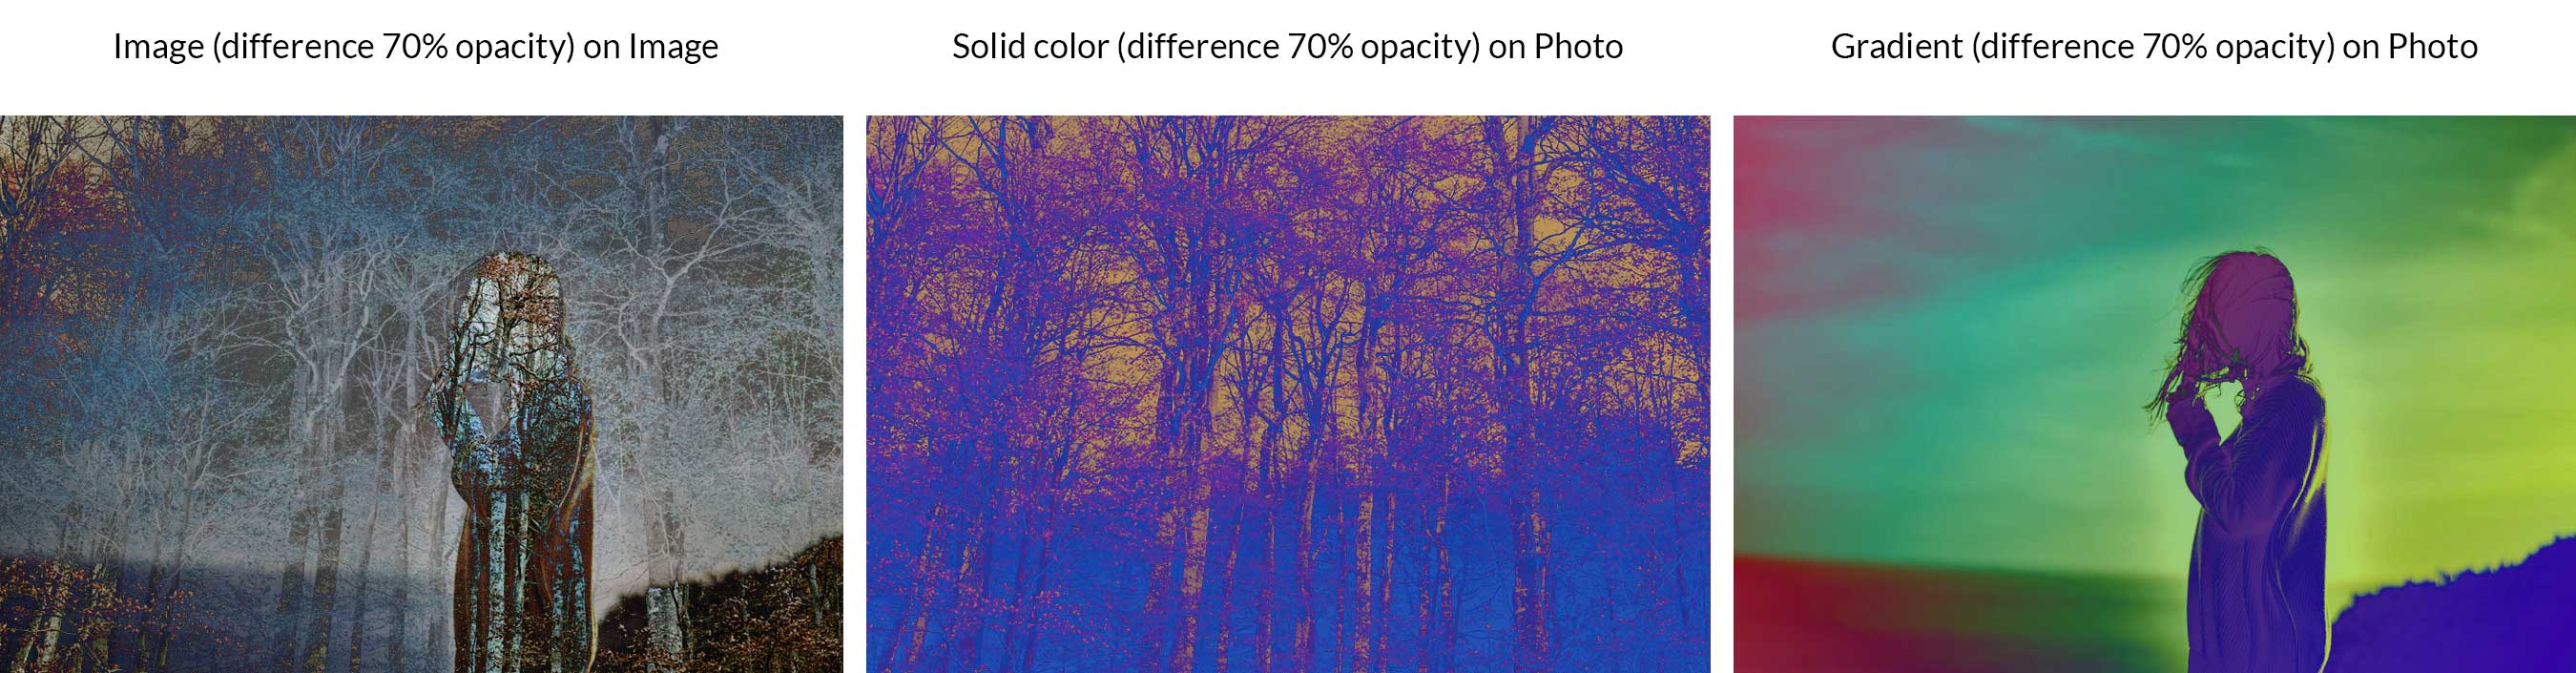
The difference mode takes the information in each color channel and either subtract the blend layer from the base layer or the base layer from the blend layer. The outcome depends on which of the two layers is brighter. Black colors produce no changes.
Exclusion
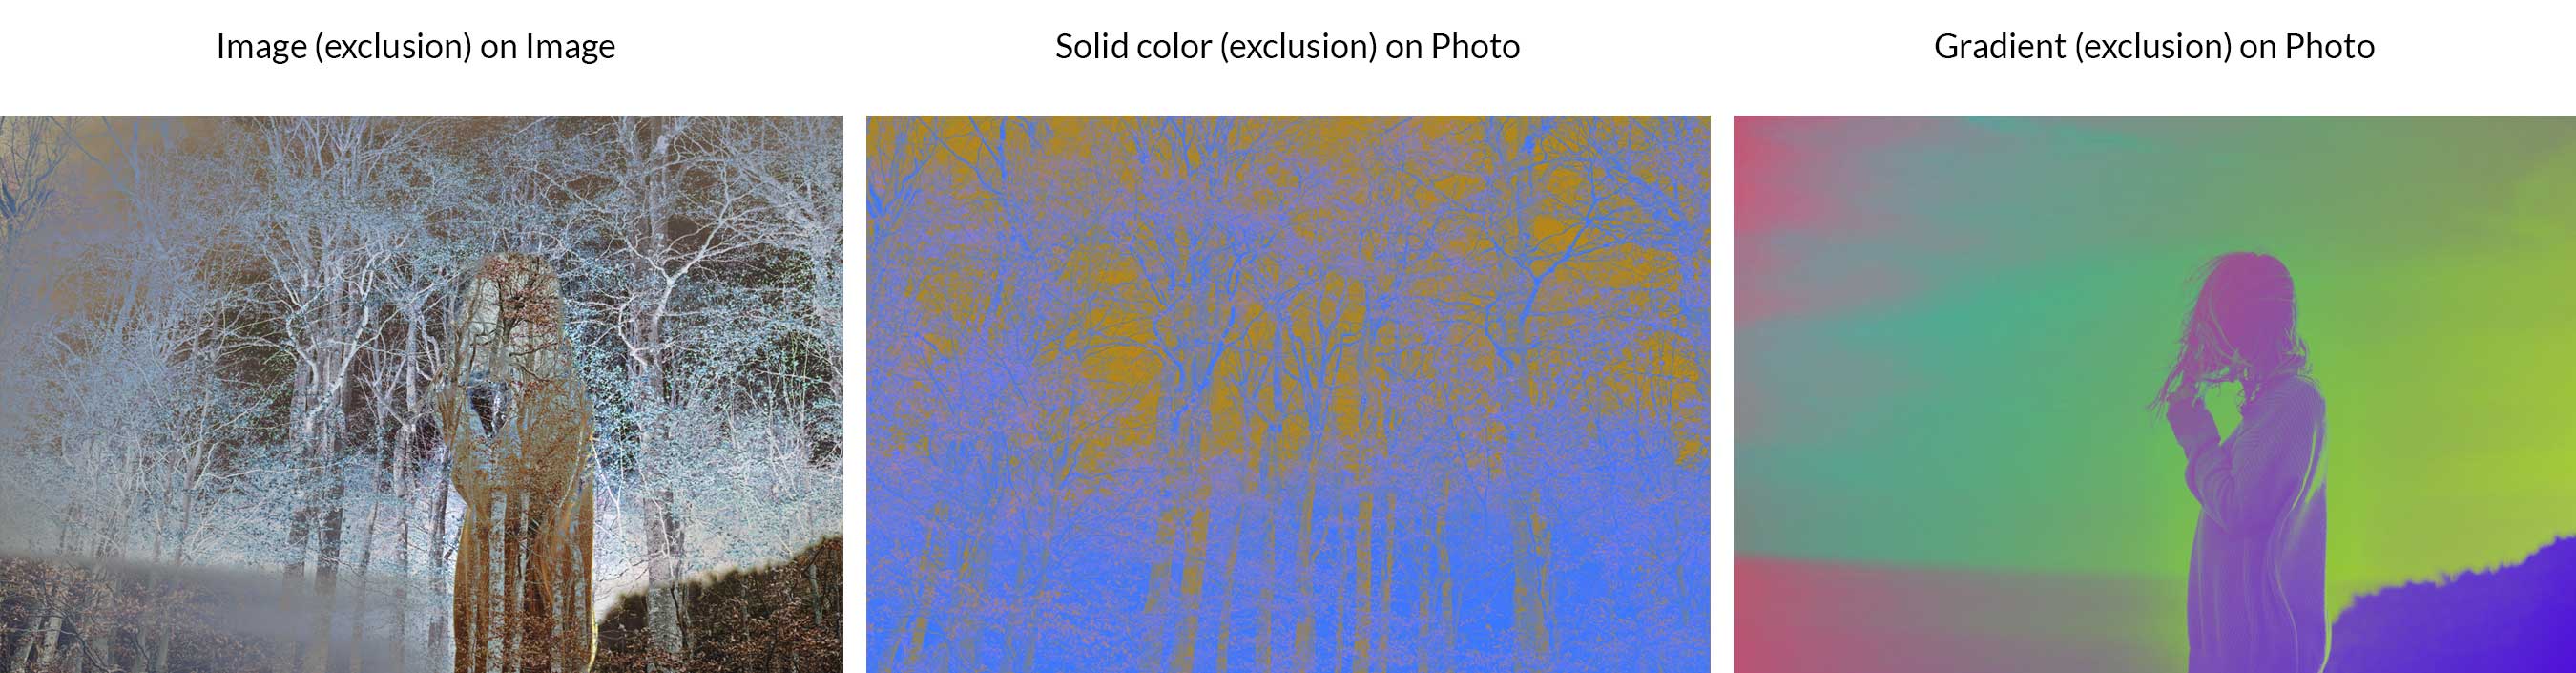
Exclusion is similar to the difference blending mode but lowers contrast. If you blend with white, the base layer becomes inverted. However, black colors do not change.
Subtract

This mode will look at all color channels, then remove the blend layer’s colors from the base layer.
Divide
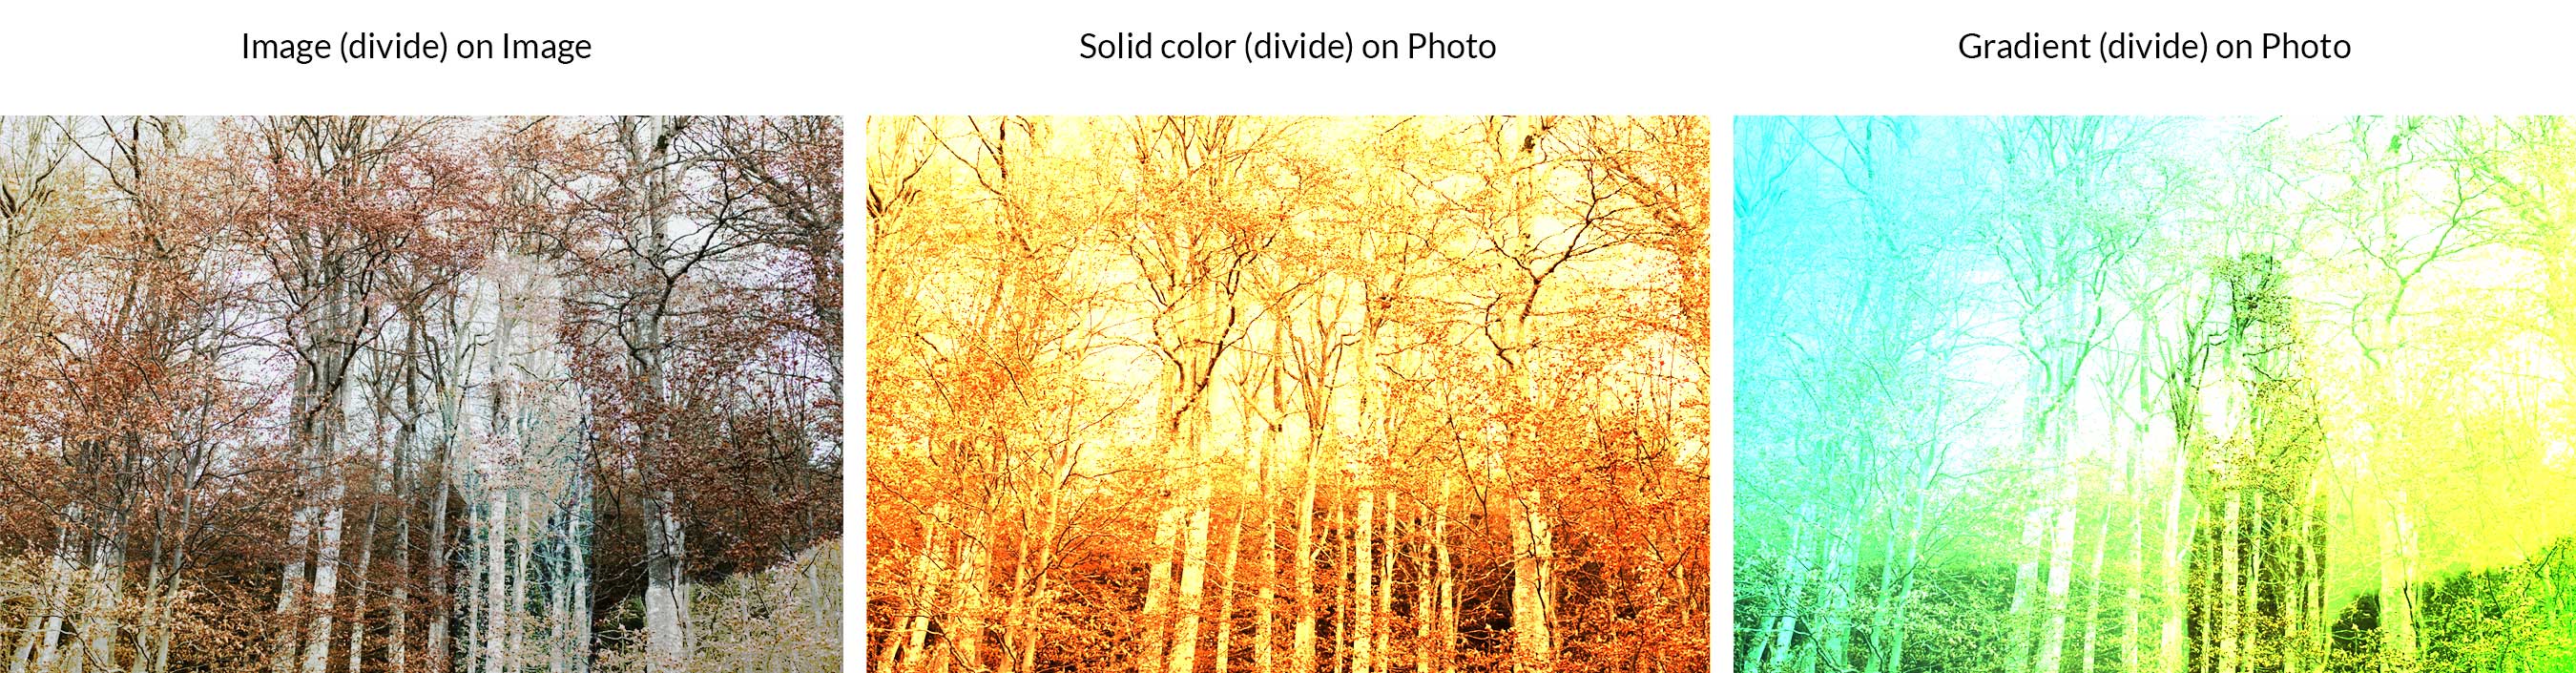
This takes a look at all of the color channels, then divides the blend layer from the base layer.
Composite Blend Modes:
This category works to alter color quality. It uses a combination of white, along with primary colors such as red, green, blue (RGB), and cyan, magenta, yellow, and black (CMYK) to create the blending mode.
Hue
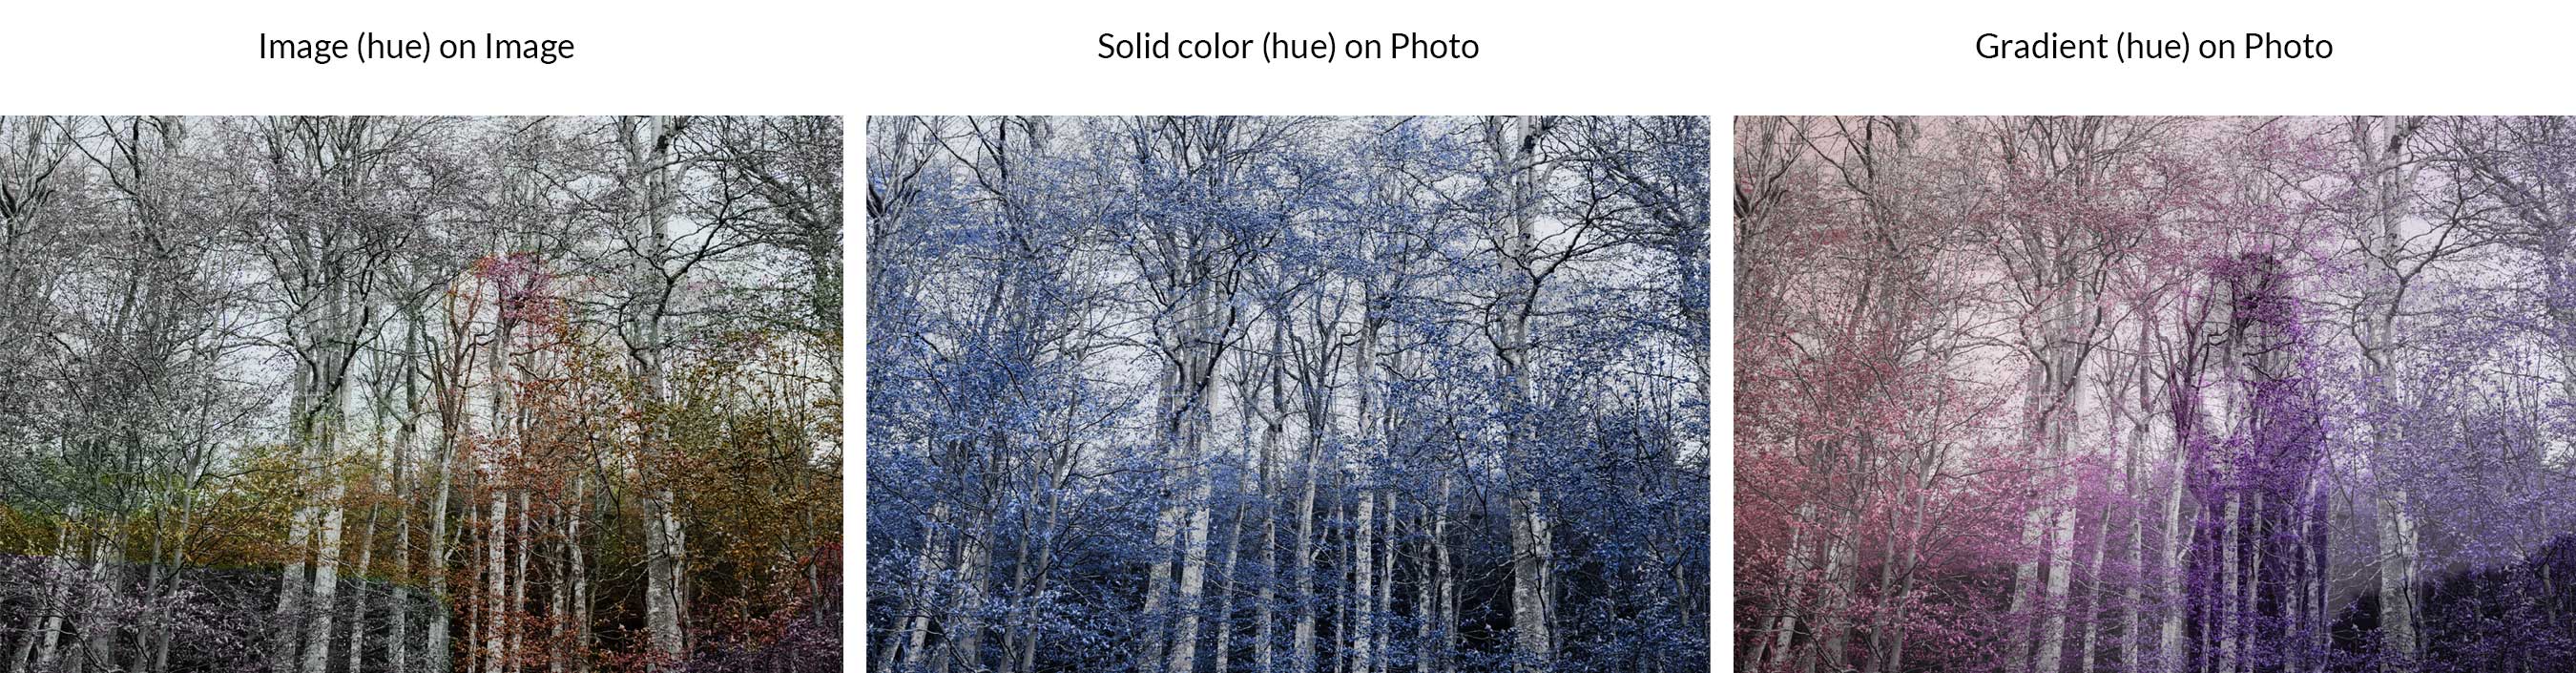
Hue works by forcing colors in the base layer to be recolored with the hue of the blend layer. It keeps all dark colors dark, and all light colors light, but only replaces the hue of the blend layer. In our example, you can see that the lightest colors in the image of trees (minus the whites) are turned into the hue of the blue in our blend color layer.
Saturation
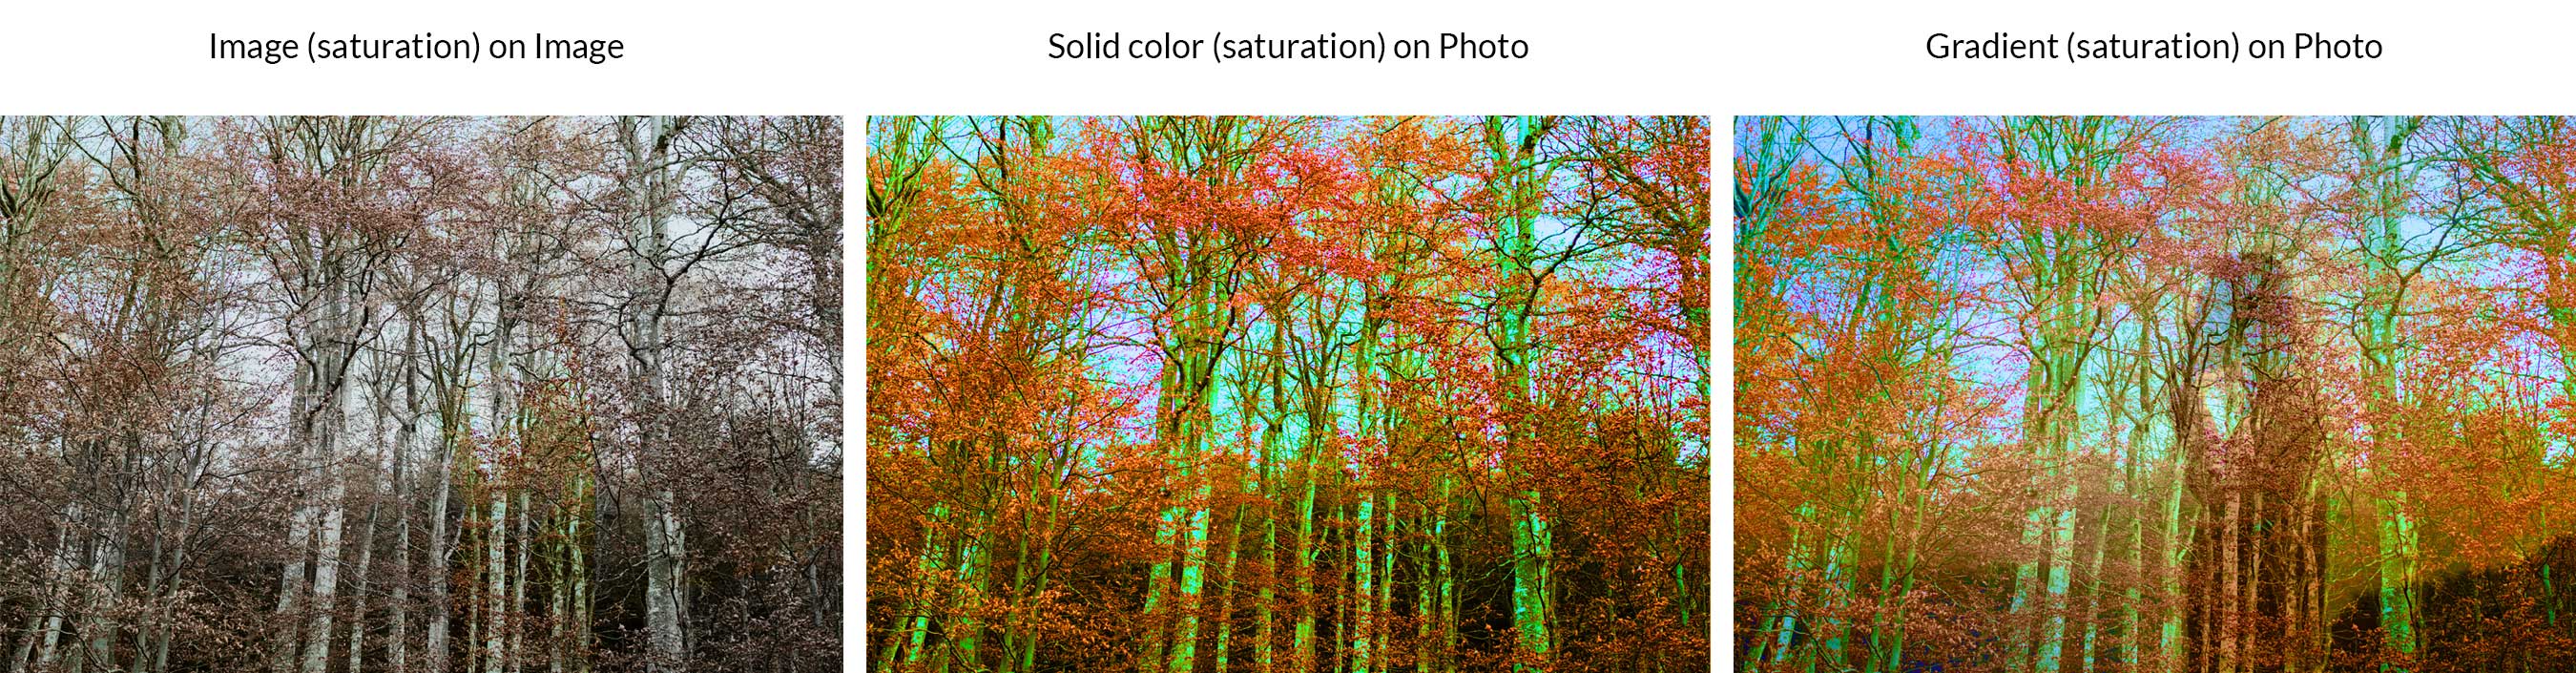
For saturation, the results are similar to hue except the saturation in images is affected. The lightest color and hue in the base layer stay the same, while the saturation is replaced with the blend color.
Color
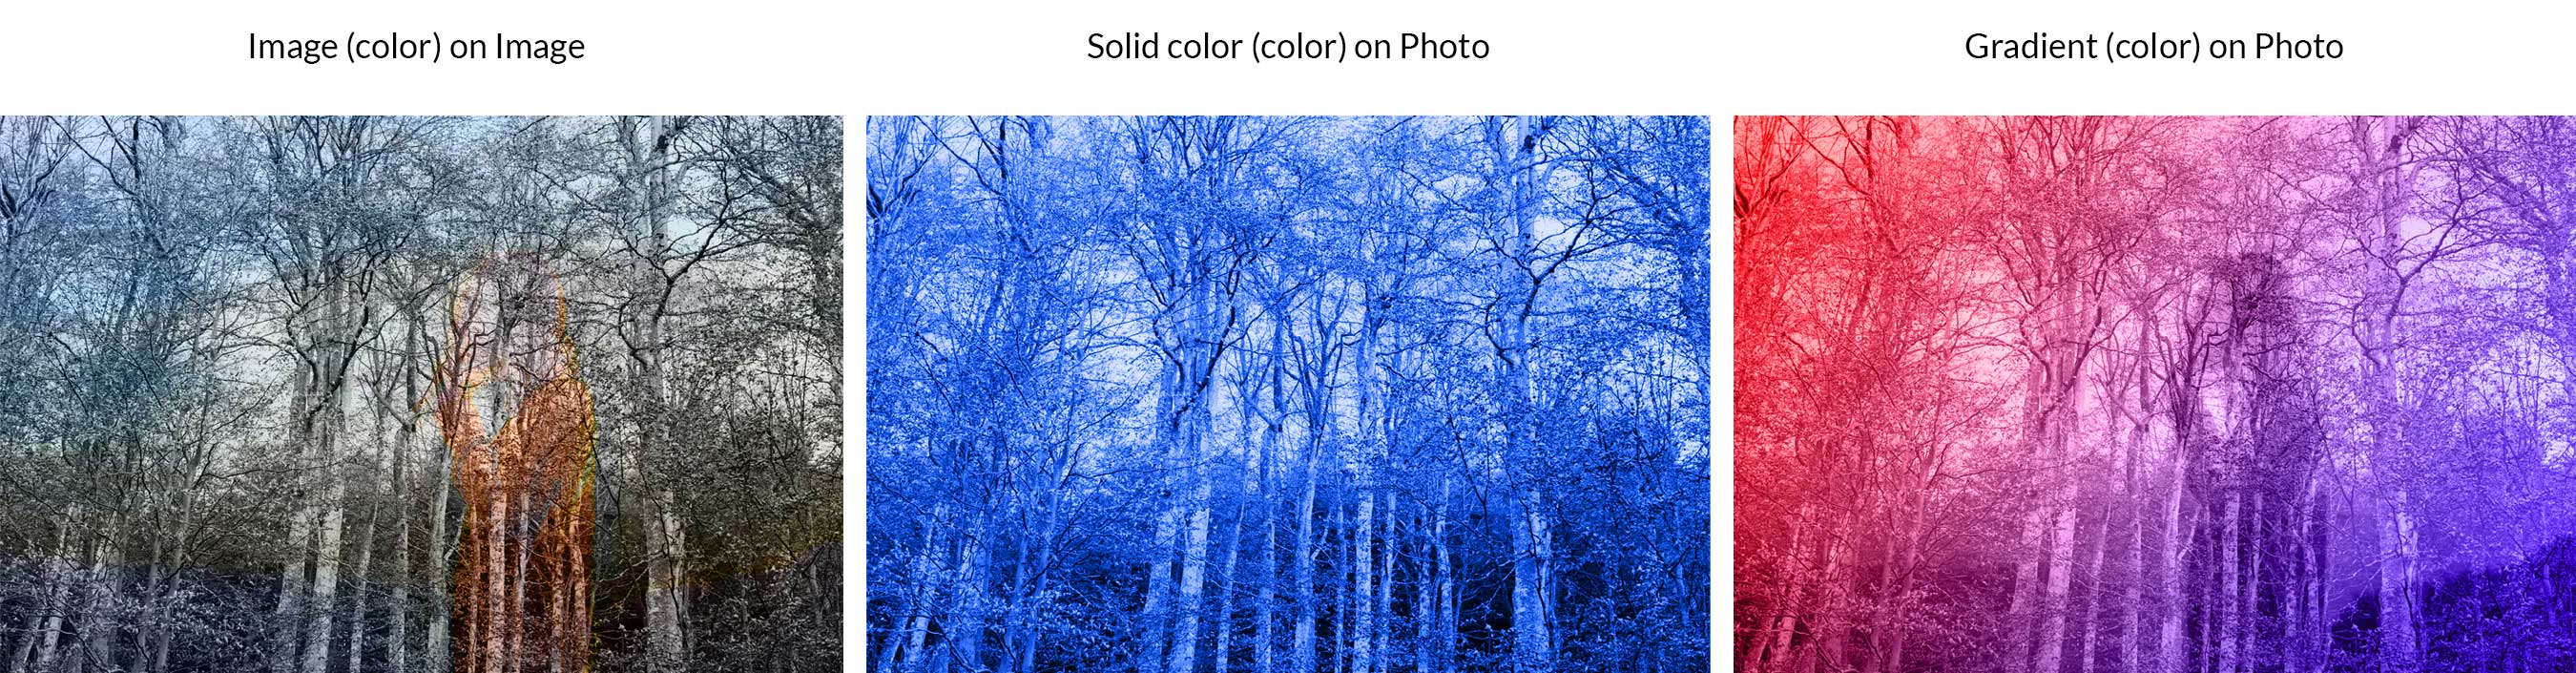
Color works much like hue except that it keeps only the lightest of the base layers’ colors. It then adds the hue and saturation of the blend layer. In our example, you can see that the solid colors’ lighter tones are replaced with the blue. Similarly, the lighter colors in our 3rd example are replaced with the red and blue gradient colors of the blend layer.
Luminosity
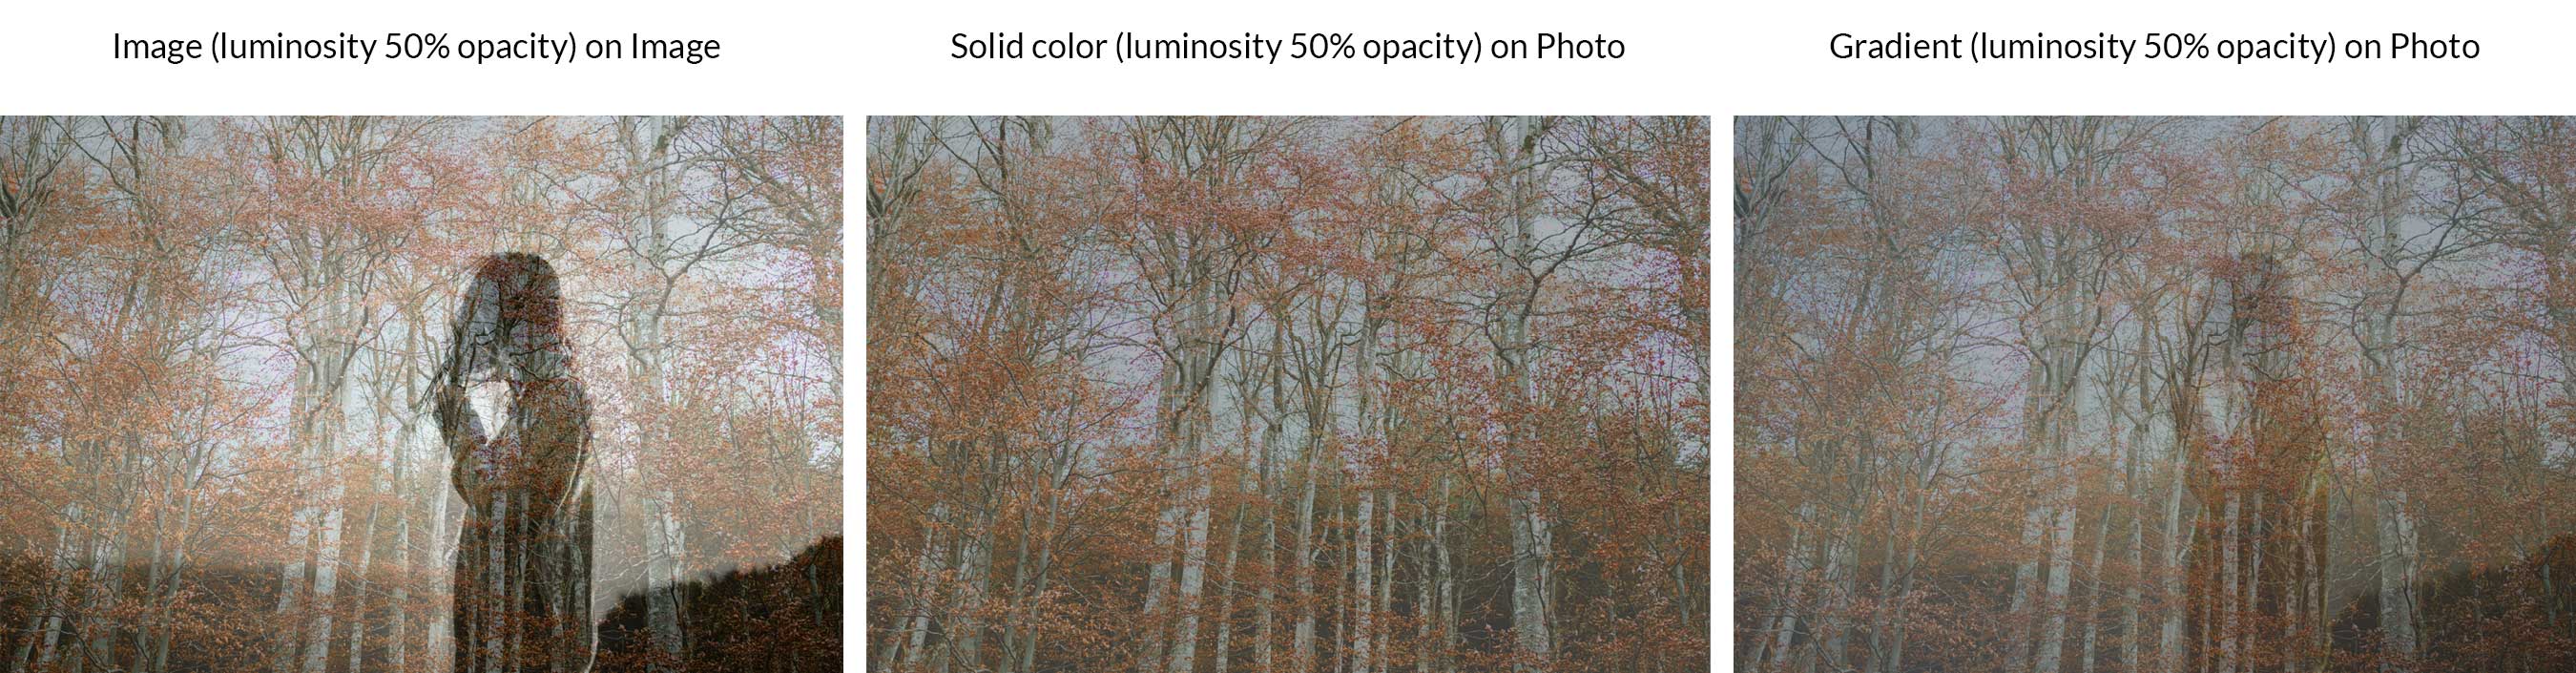
Luminosity is the opposite of color. It manages to maintain both the hue and saturation in the base photo layer of our example while replacing its lightest colors (luminosity) with the blend layer’s colors.
Other Blend Modes
In addition to the 27 layer blend modes listed, there are a few additional ones available in certain situations, or with certain tools. For example, Behind can be used to edit or paint within the transparent part of a layer. It will only work in layers where lock transparency isn’t selected. Clear is only available when using the shape, paint bucket, brush, and pencil tools, as well as the fill and stroke commands. It’s used to edit or paint each pixel to make it transparent.
How to Use Photoshop Blending Modes
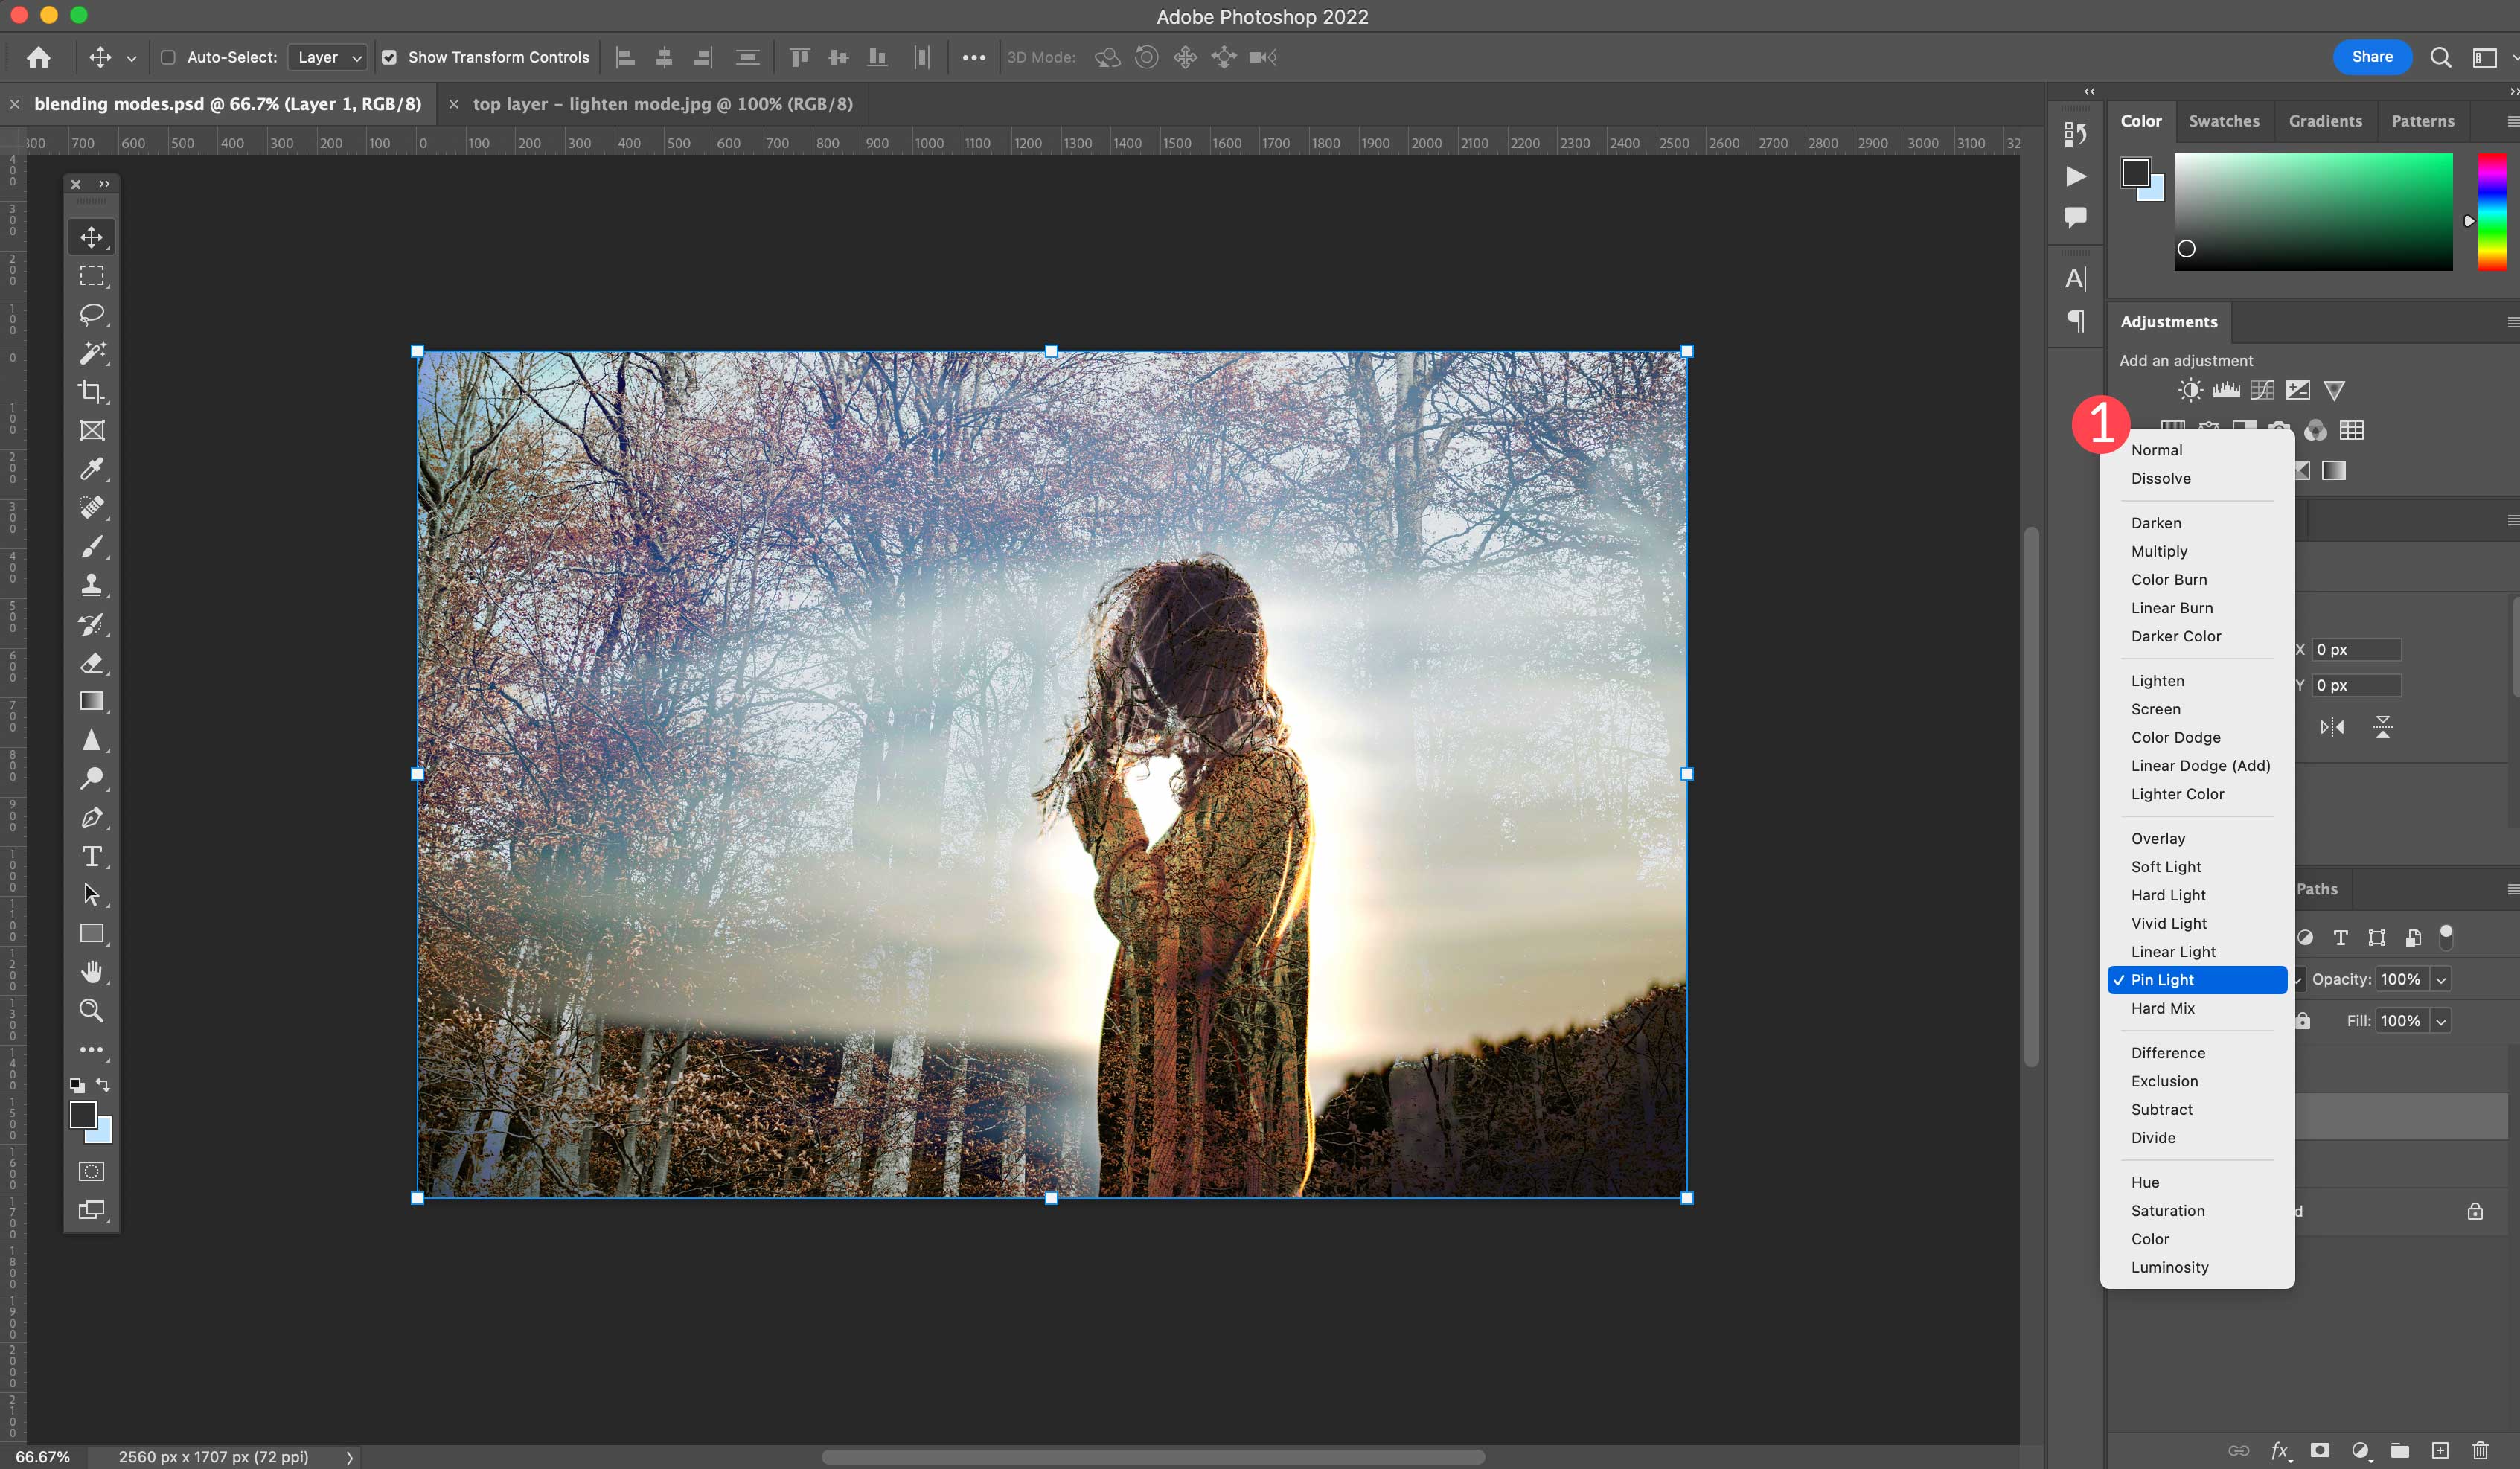
When working in Photoshop, blending modes can be located in two areas. The first is within the layers panel. To access blending modes, click the drop-down menu under Layers.
From there you have layer 27 blending mode options to choose from.
The special 8 blending modes have an additional way to be accessed. In layer styles, you can uncheck the transparency shape layer checkbox. This gives you an additional level of blending capabilities. To access this, click the fx option at the bottom of the layers panel.
Next, choose blending options from the dropdown menu.
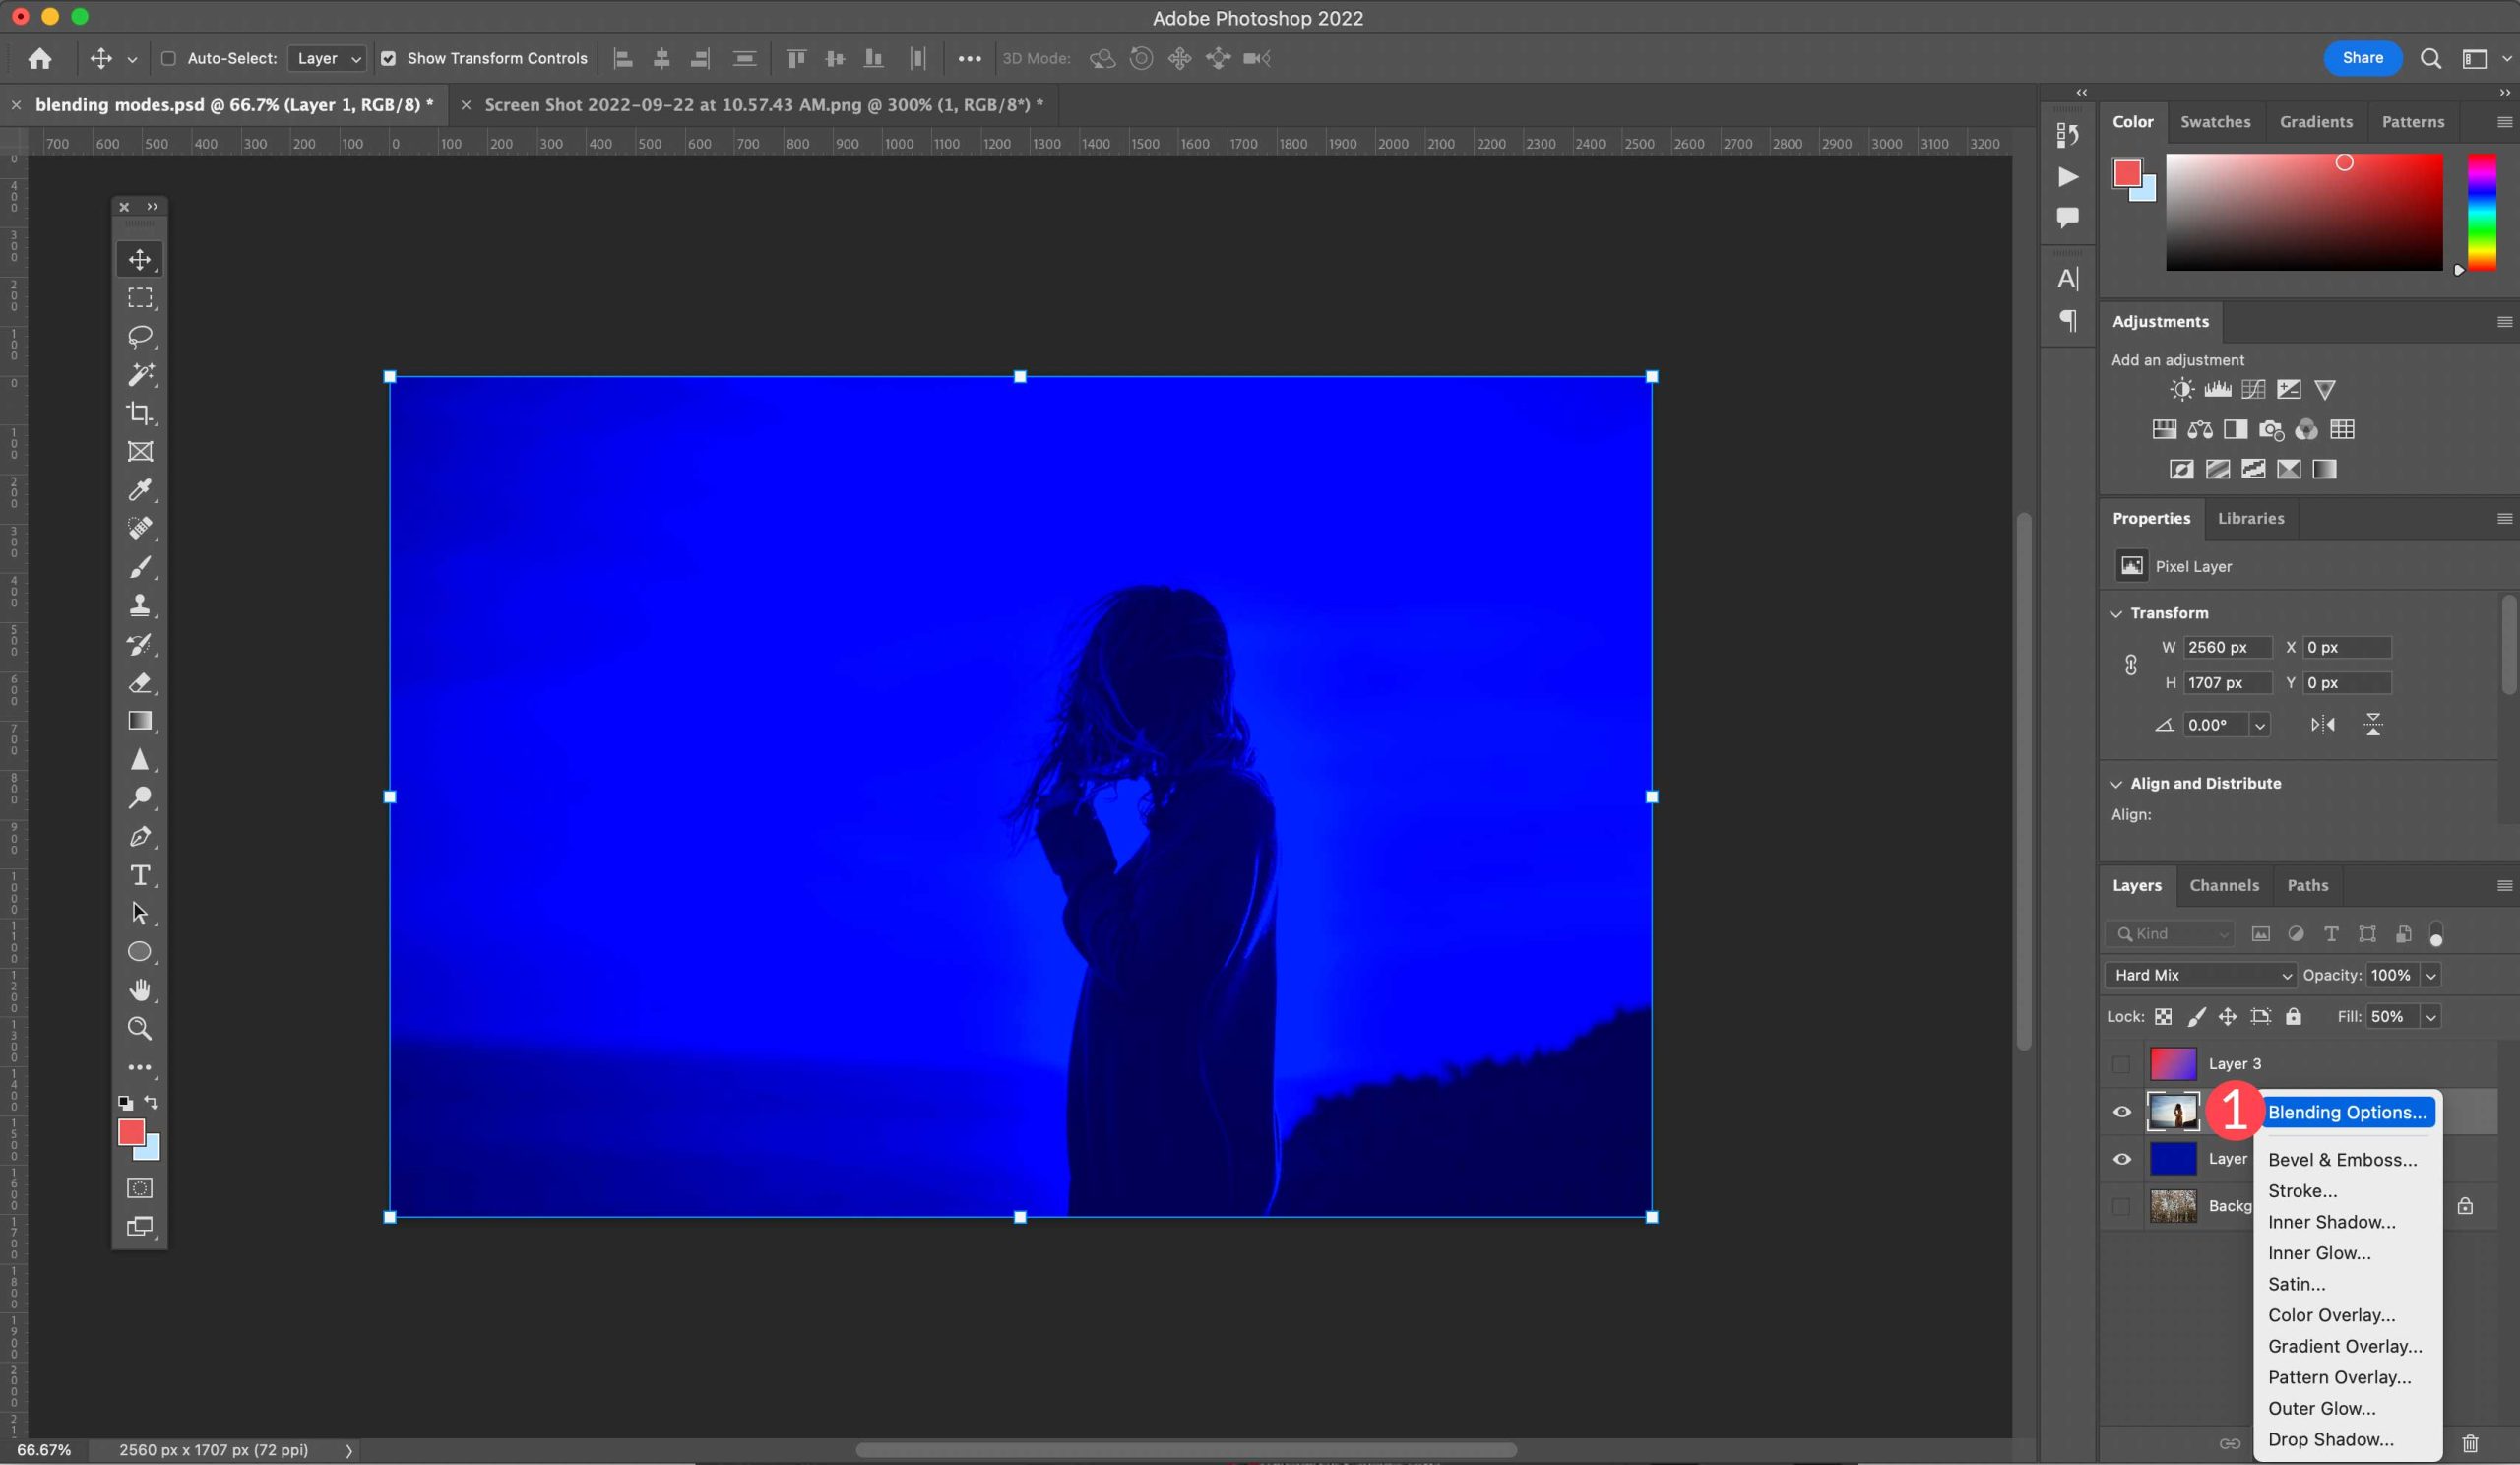
Finally, uncheck the transparency shapes layer.
Creating a Simple Blend
To demonstrate how to use them, we’ll provide a basic example using Photoshop so that you can understand how each one works.
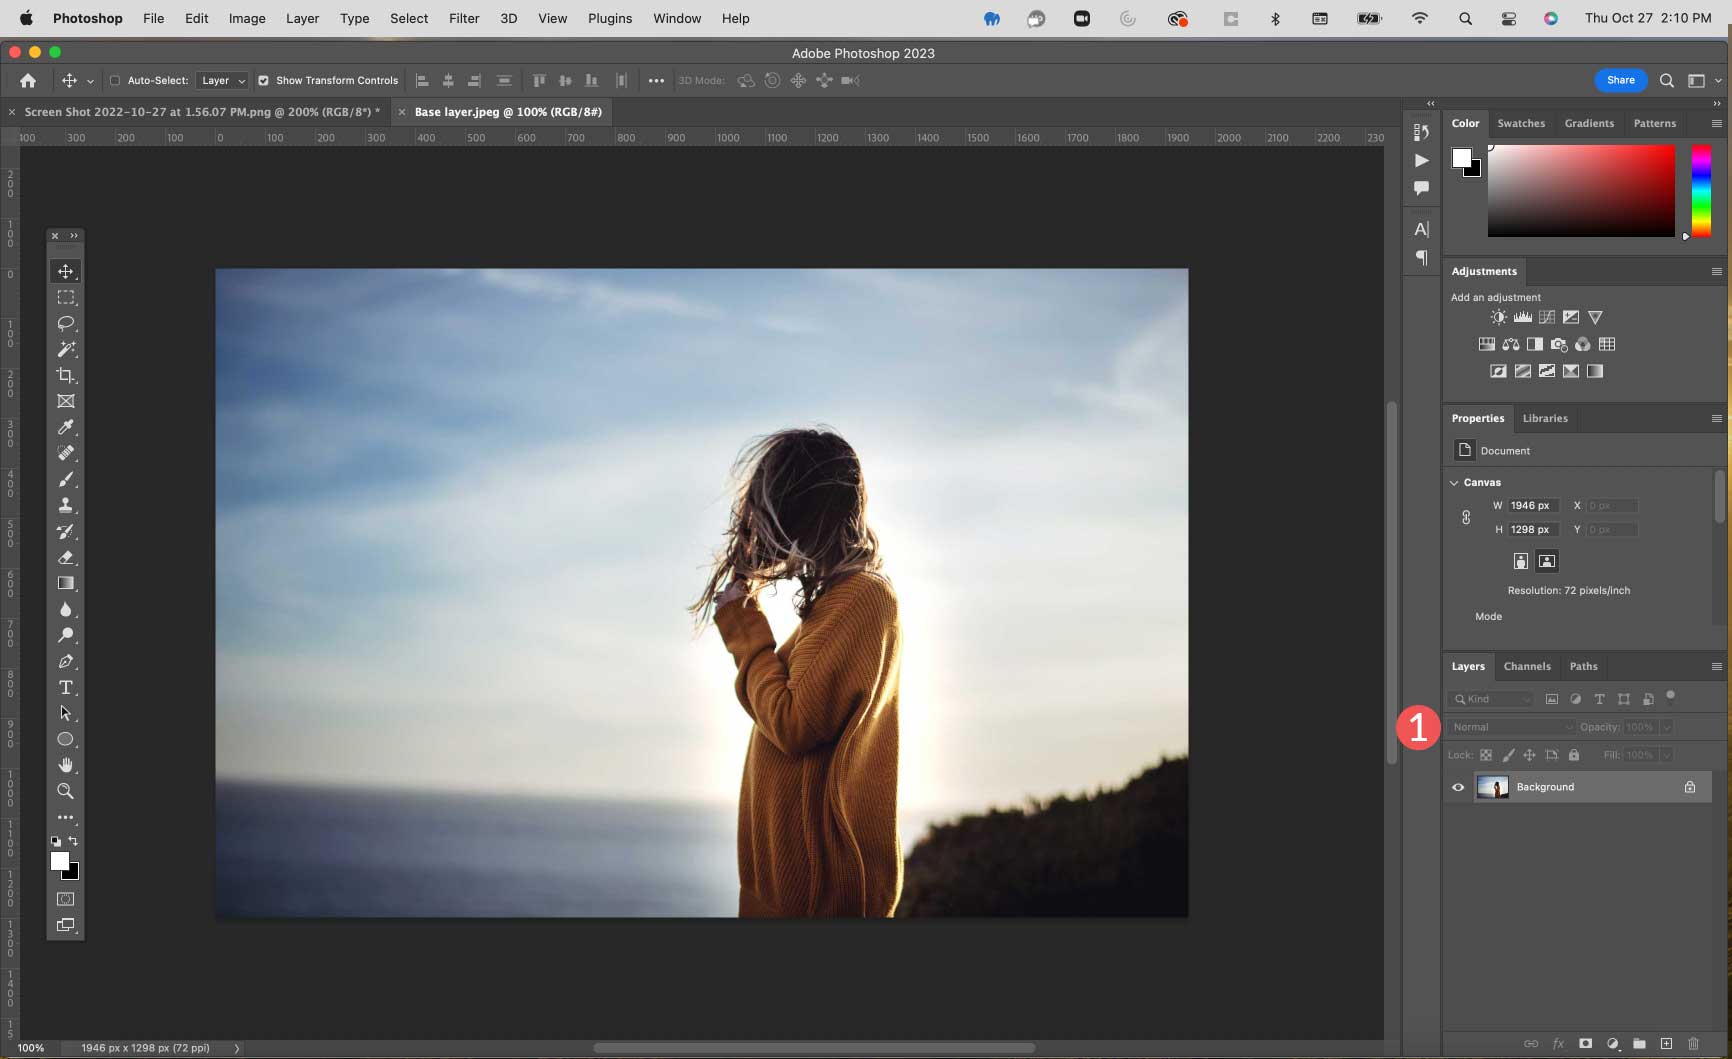
Step 1: Choose an Image
The first step is to open a photograph as your base layer. We’ll use the photograph we’ve used in our other examples. Make sure this layer is set to normal.
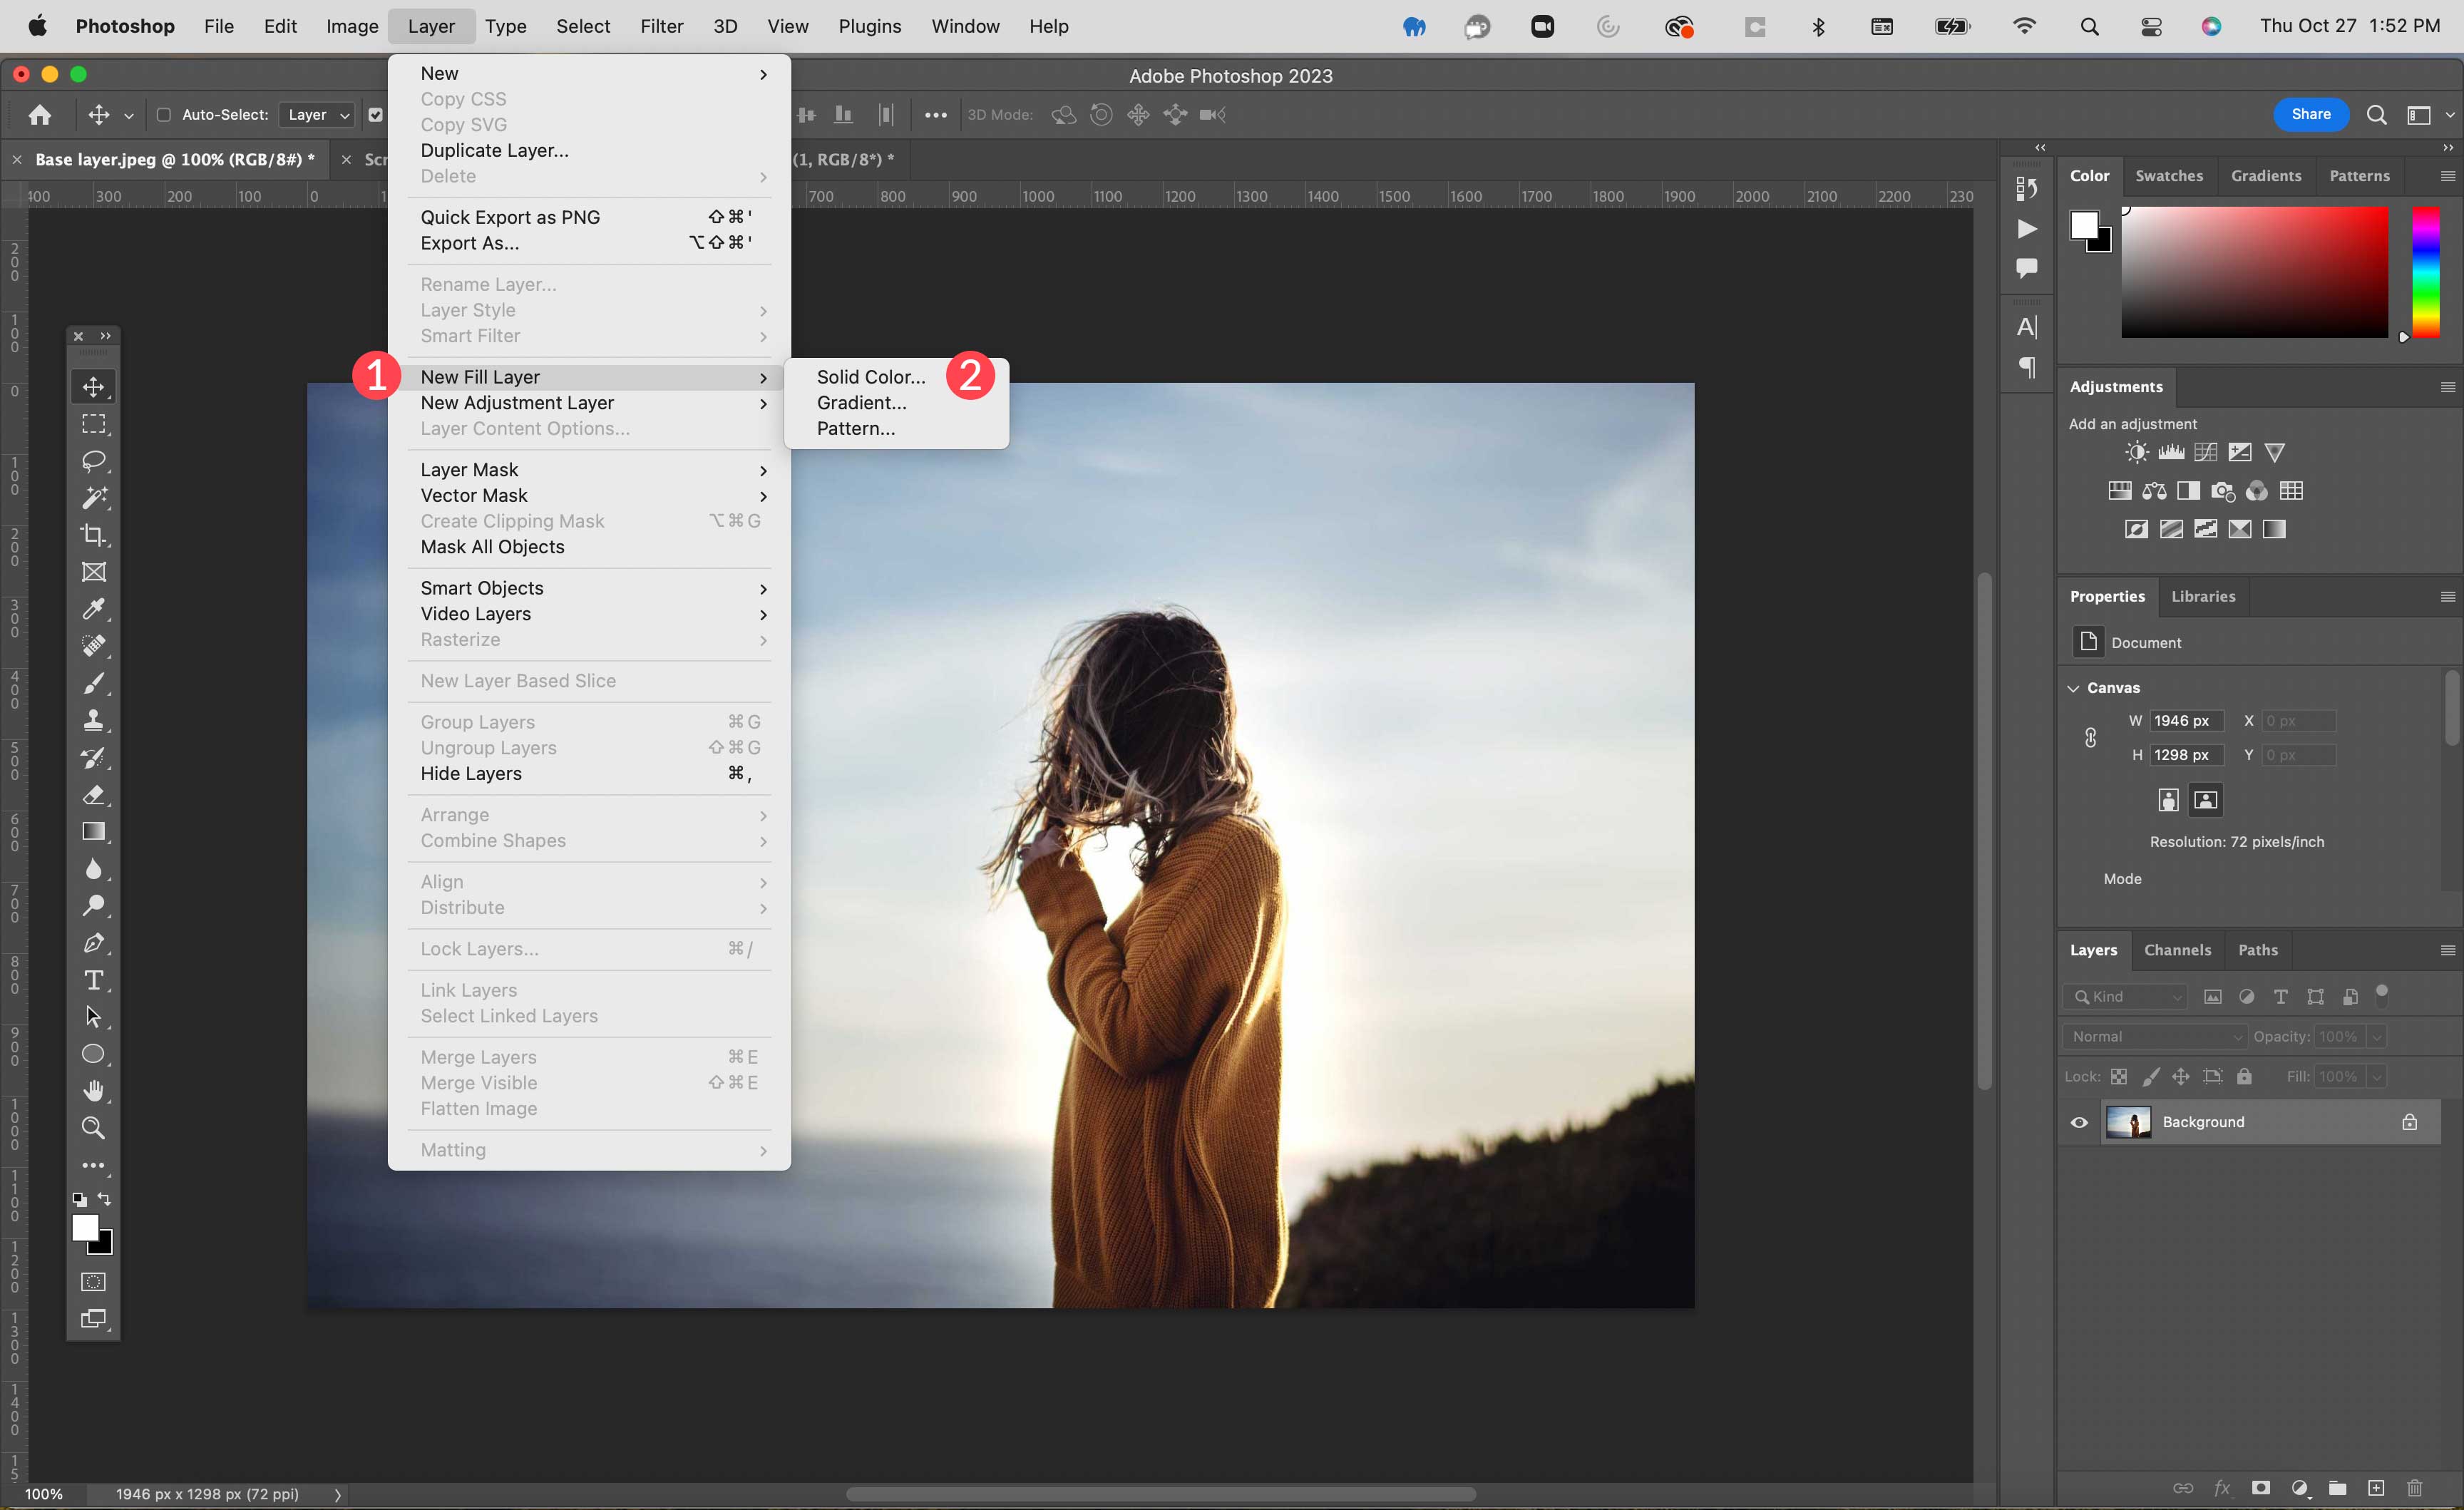
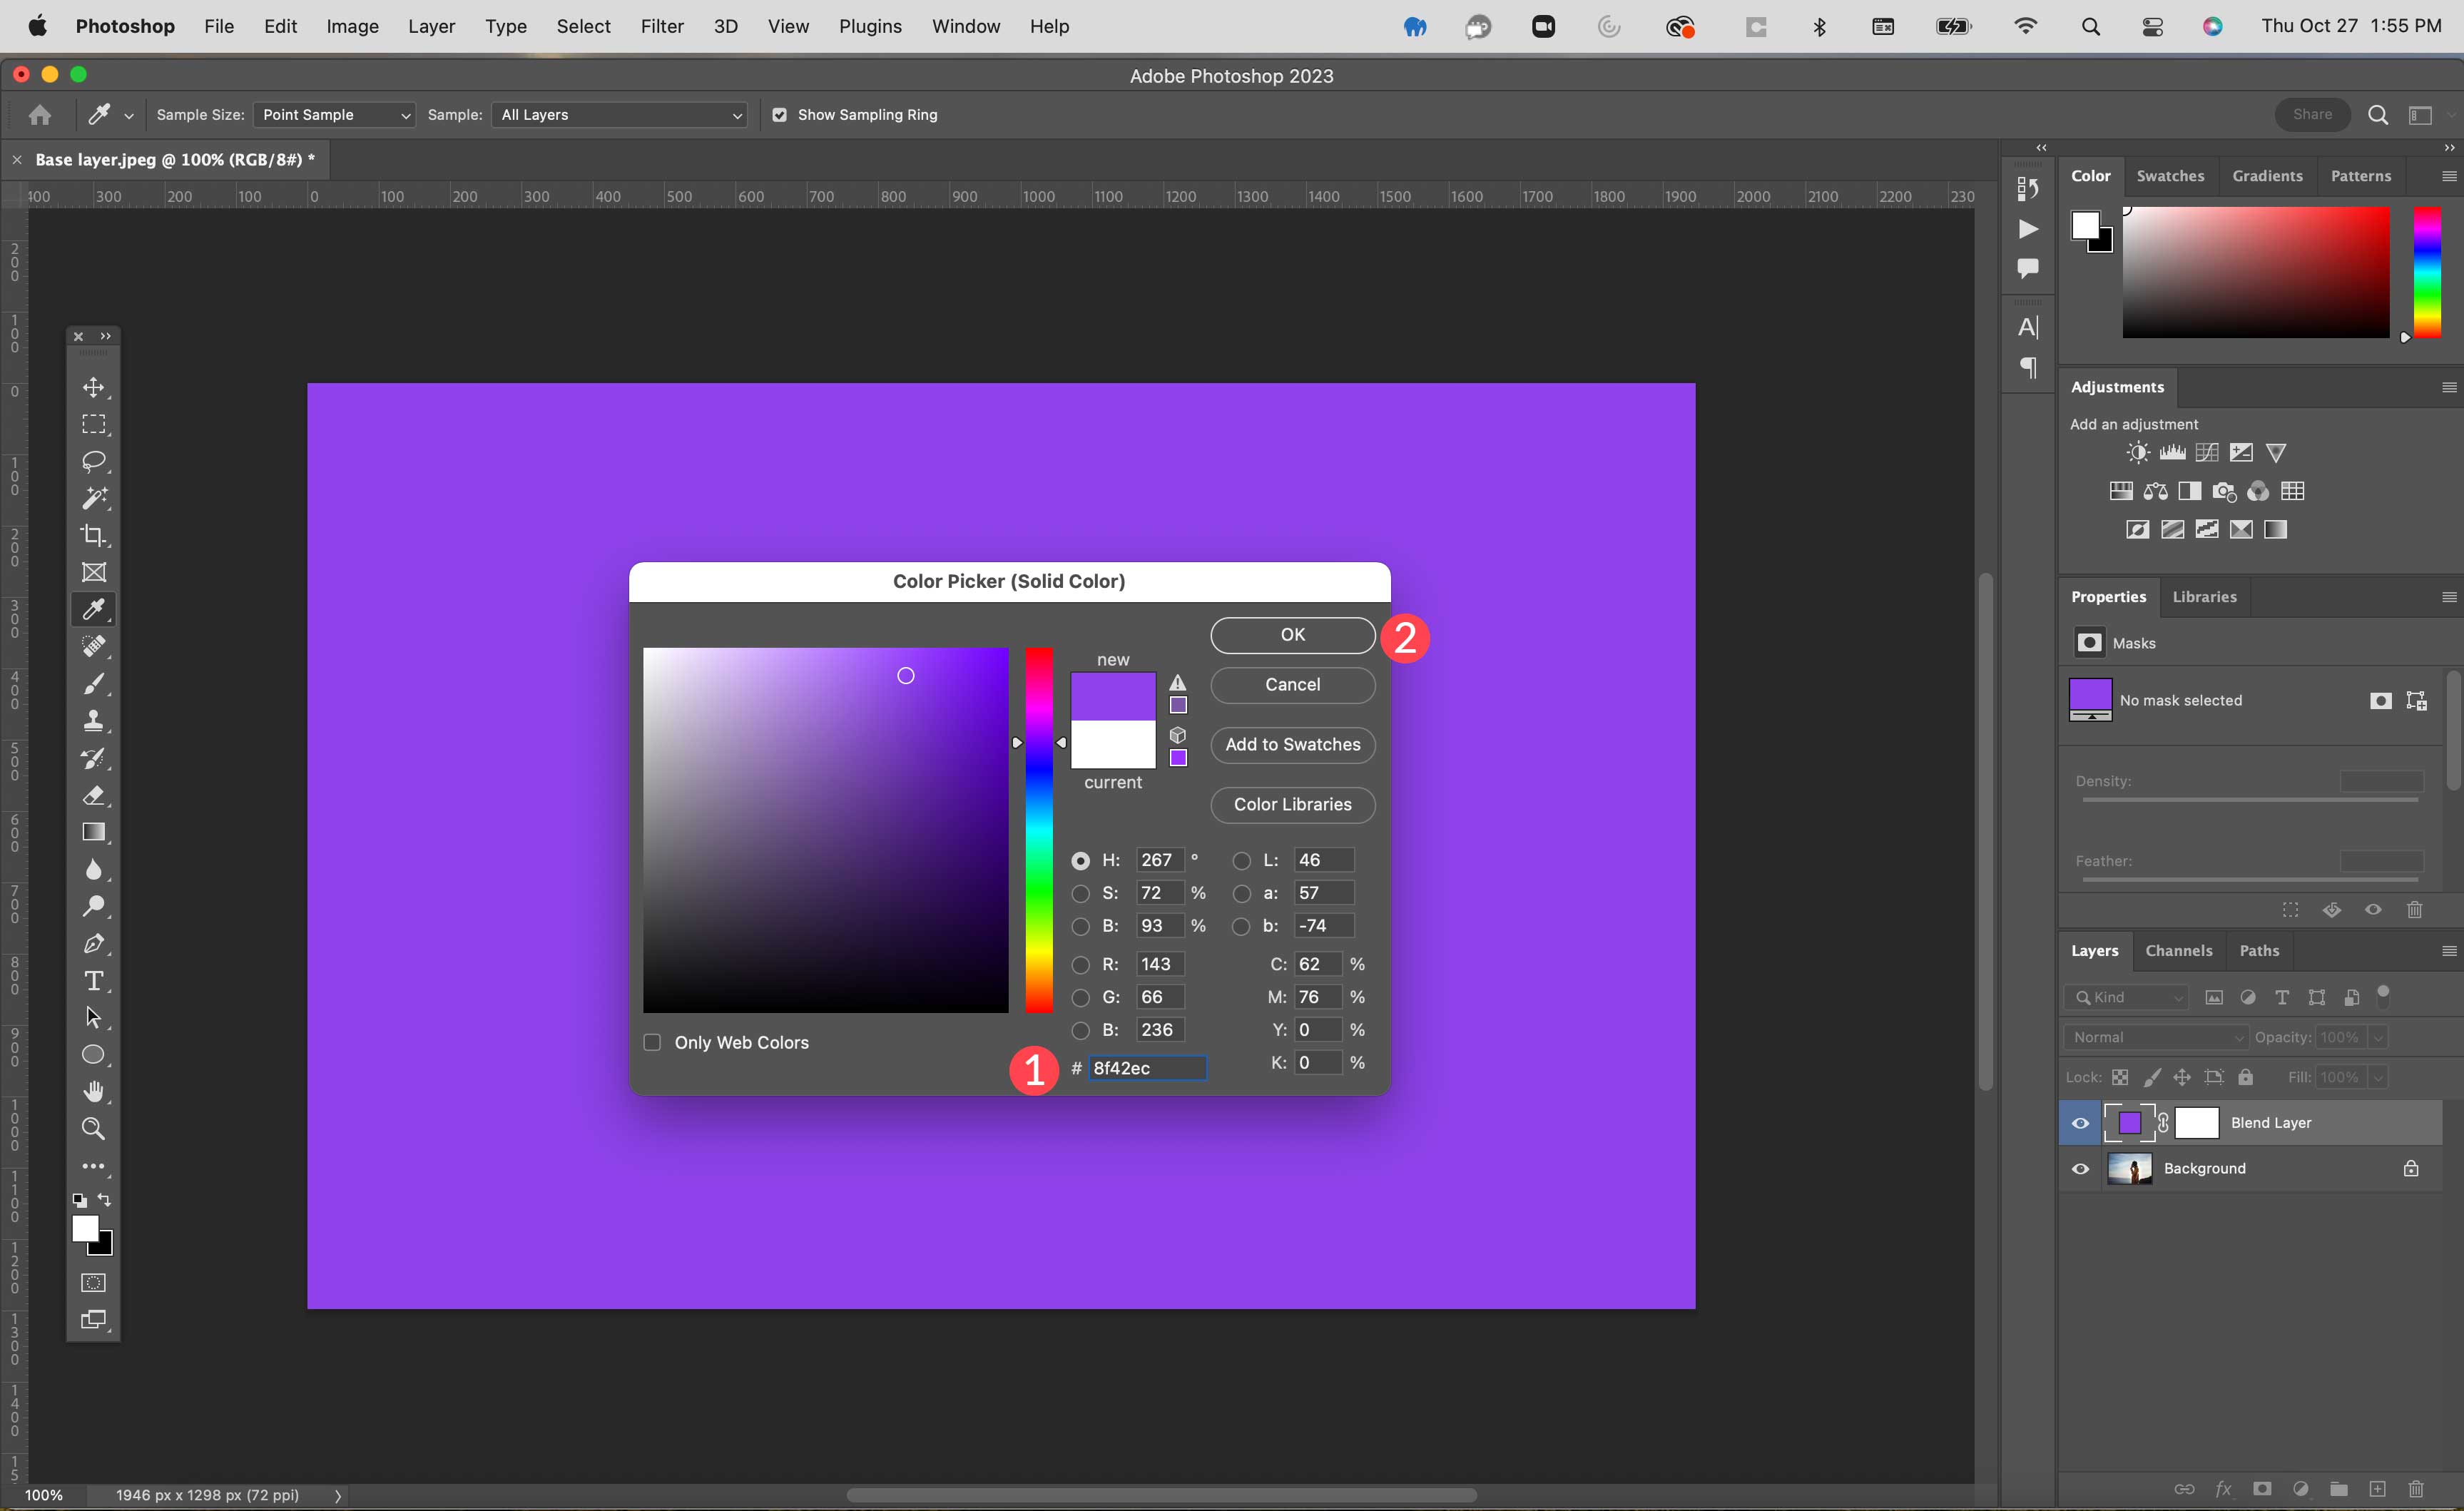
Step 2: Create a New Color Layer
Navigate to Layer > New Fill Layer > Solid Color to create a new layer.
Name the layer Blend Layer, assign blue as the mode, and click ok.
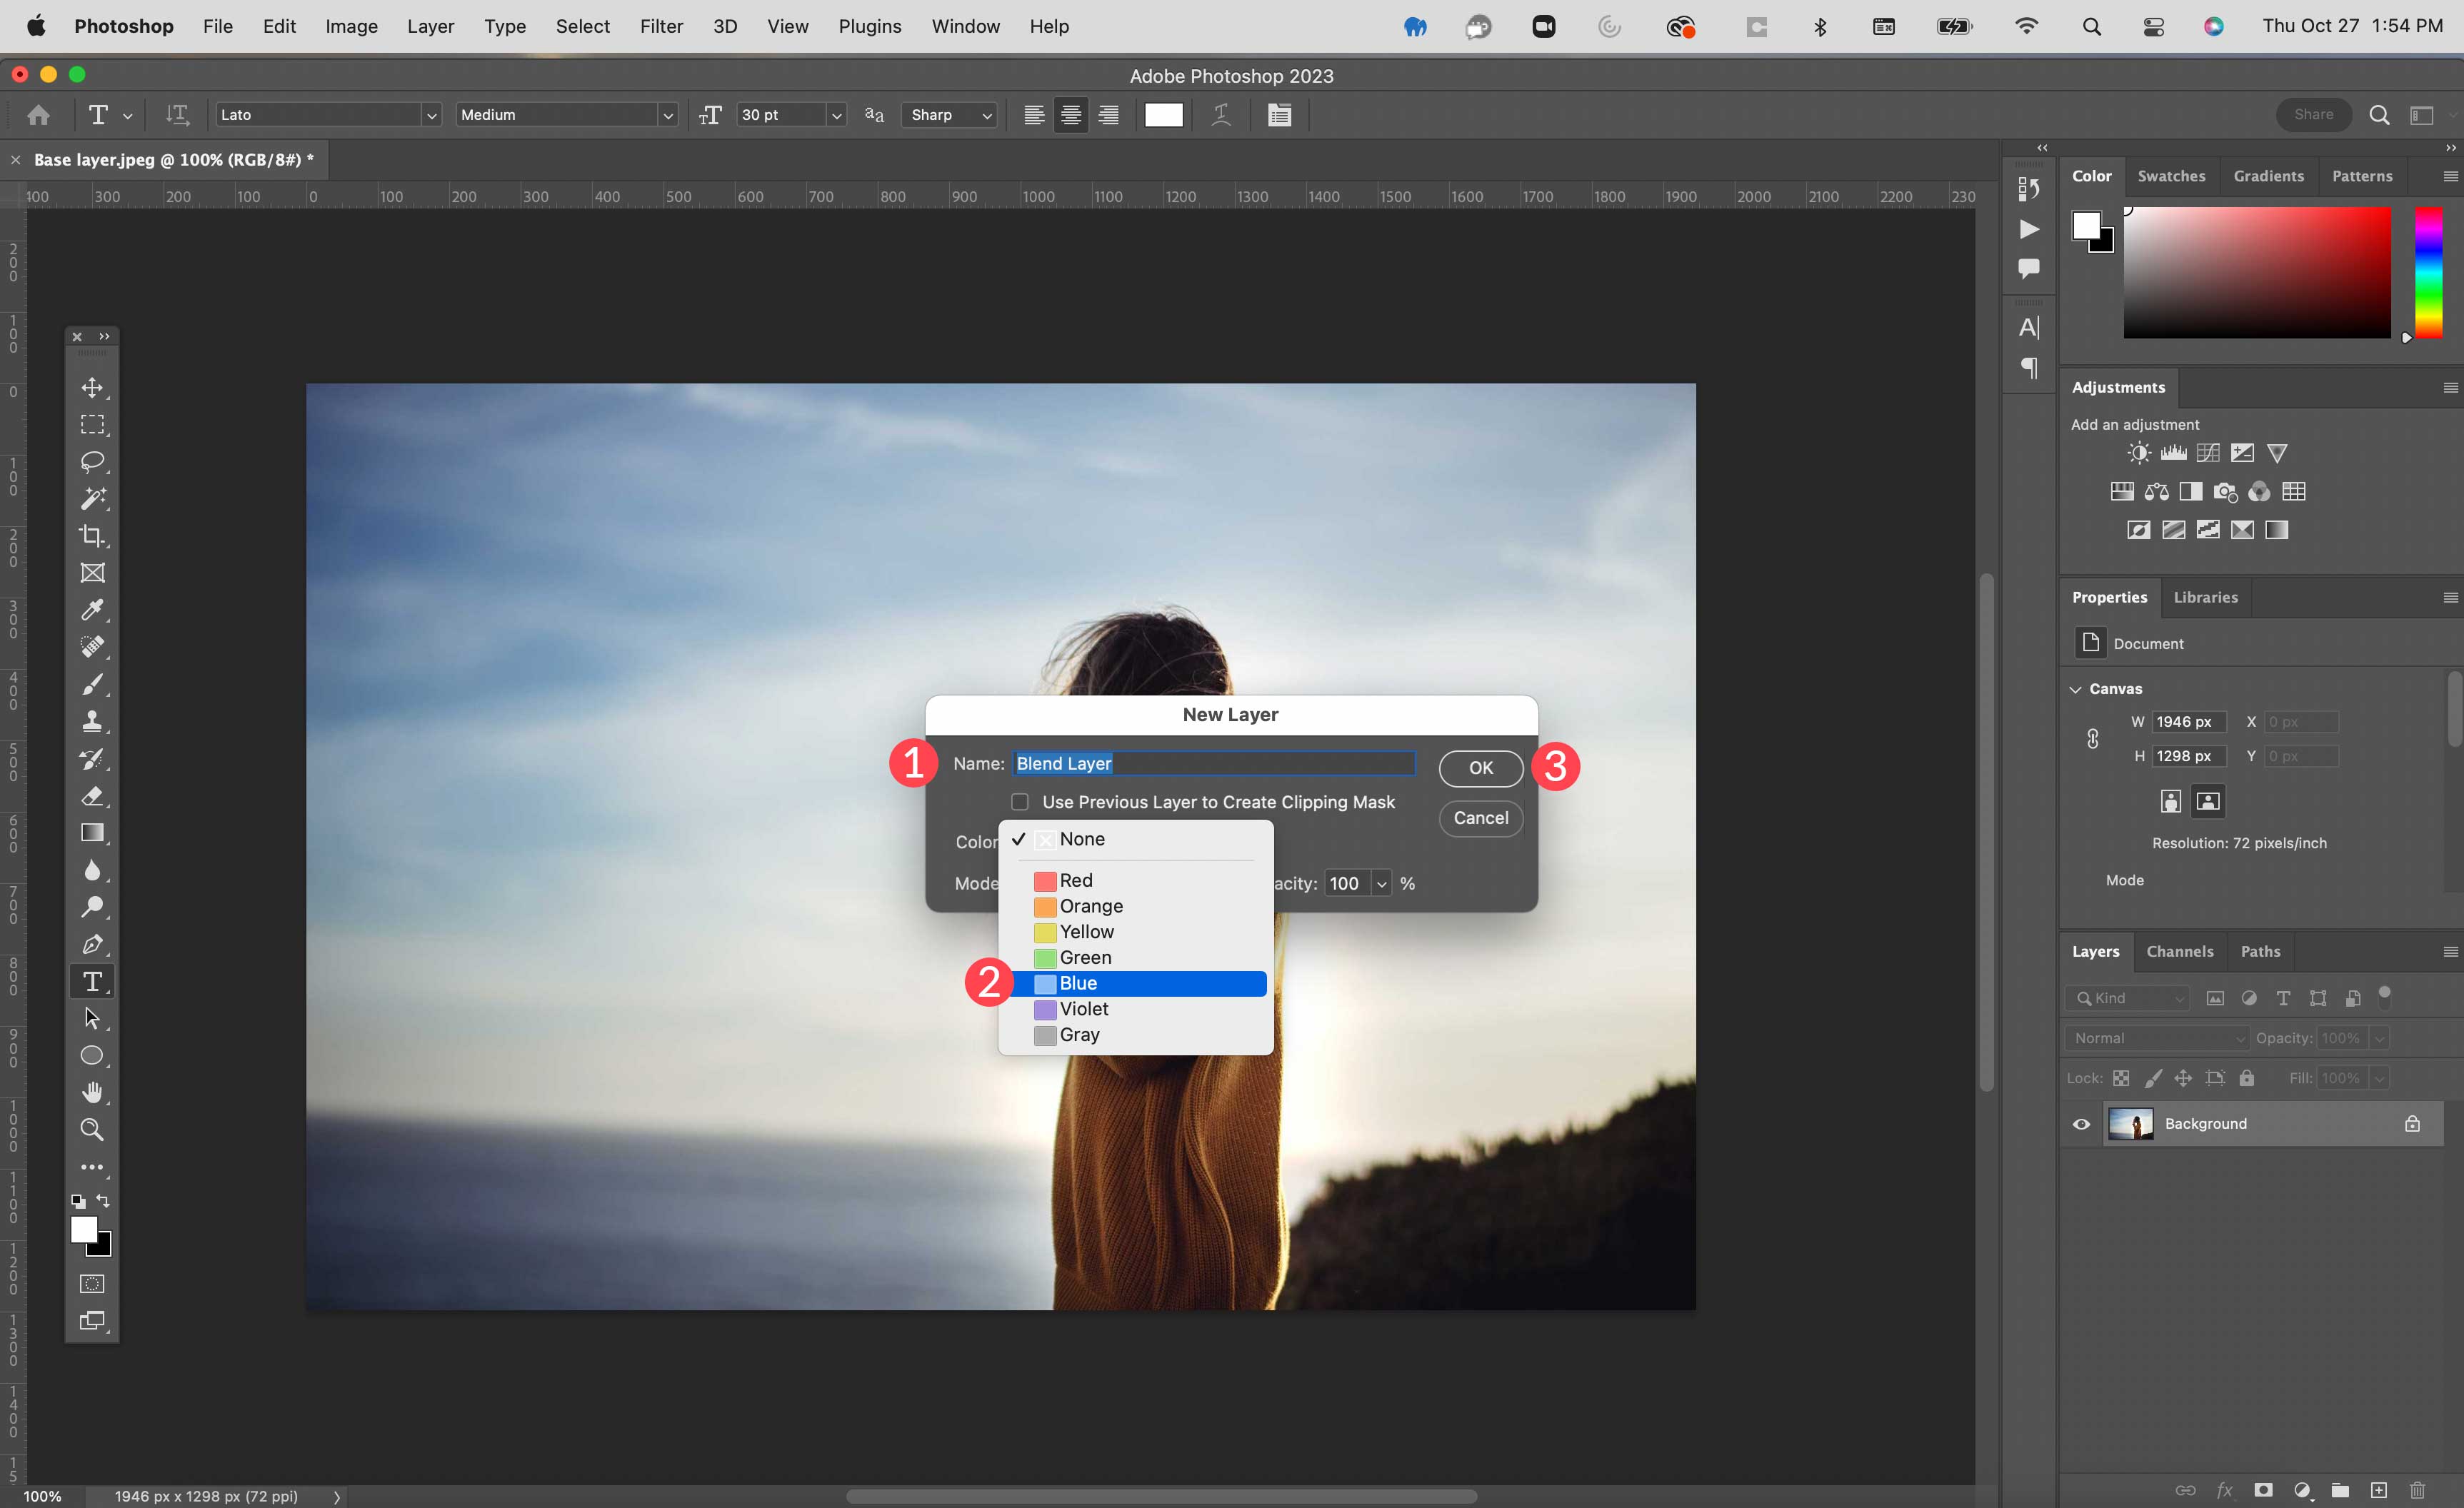
Next, fill it with #8f42ec, then click ok to create the layer.
Step 3: Apply a Blend Mode
Next, apply the pin light blending mode to the blend layer you just created.
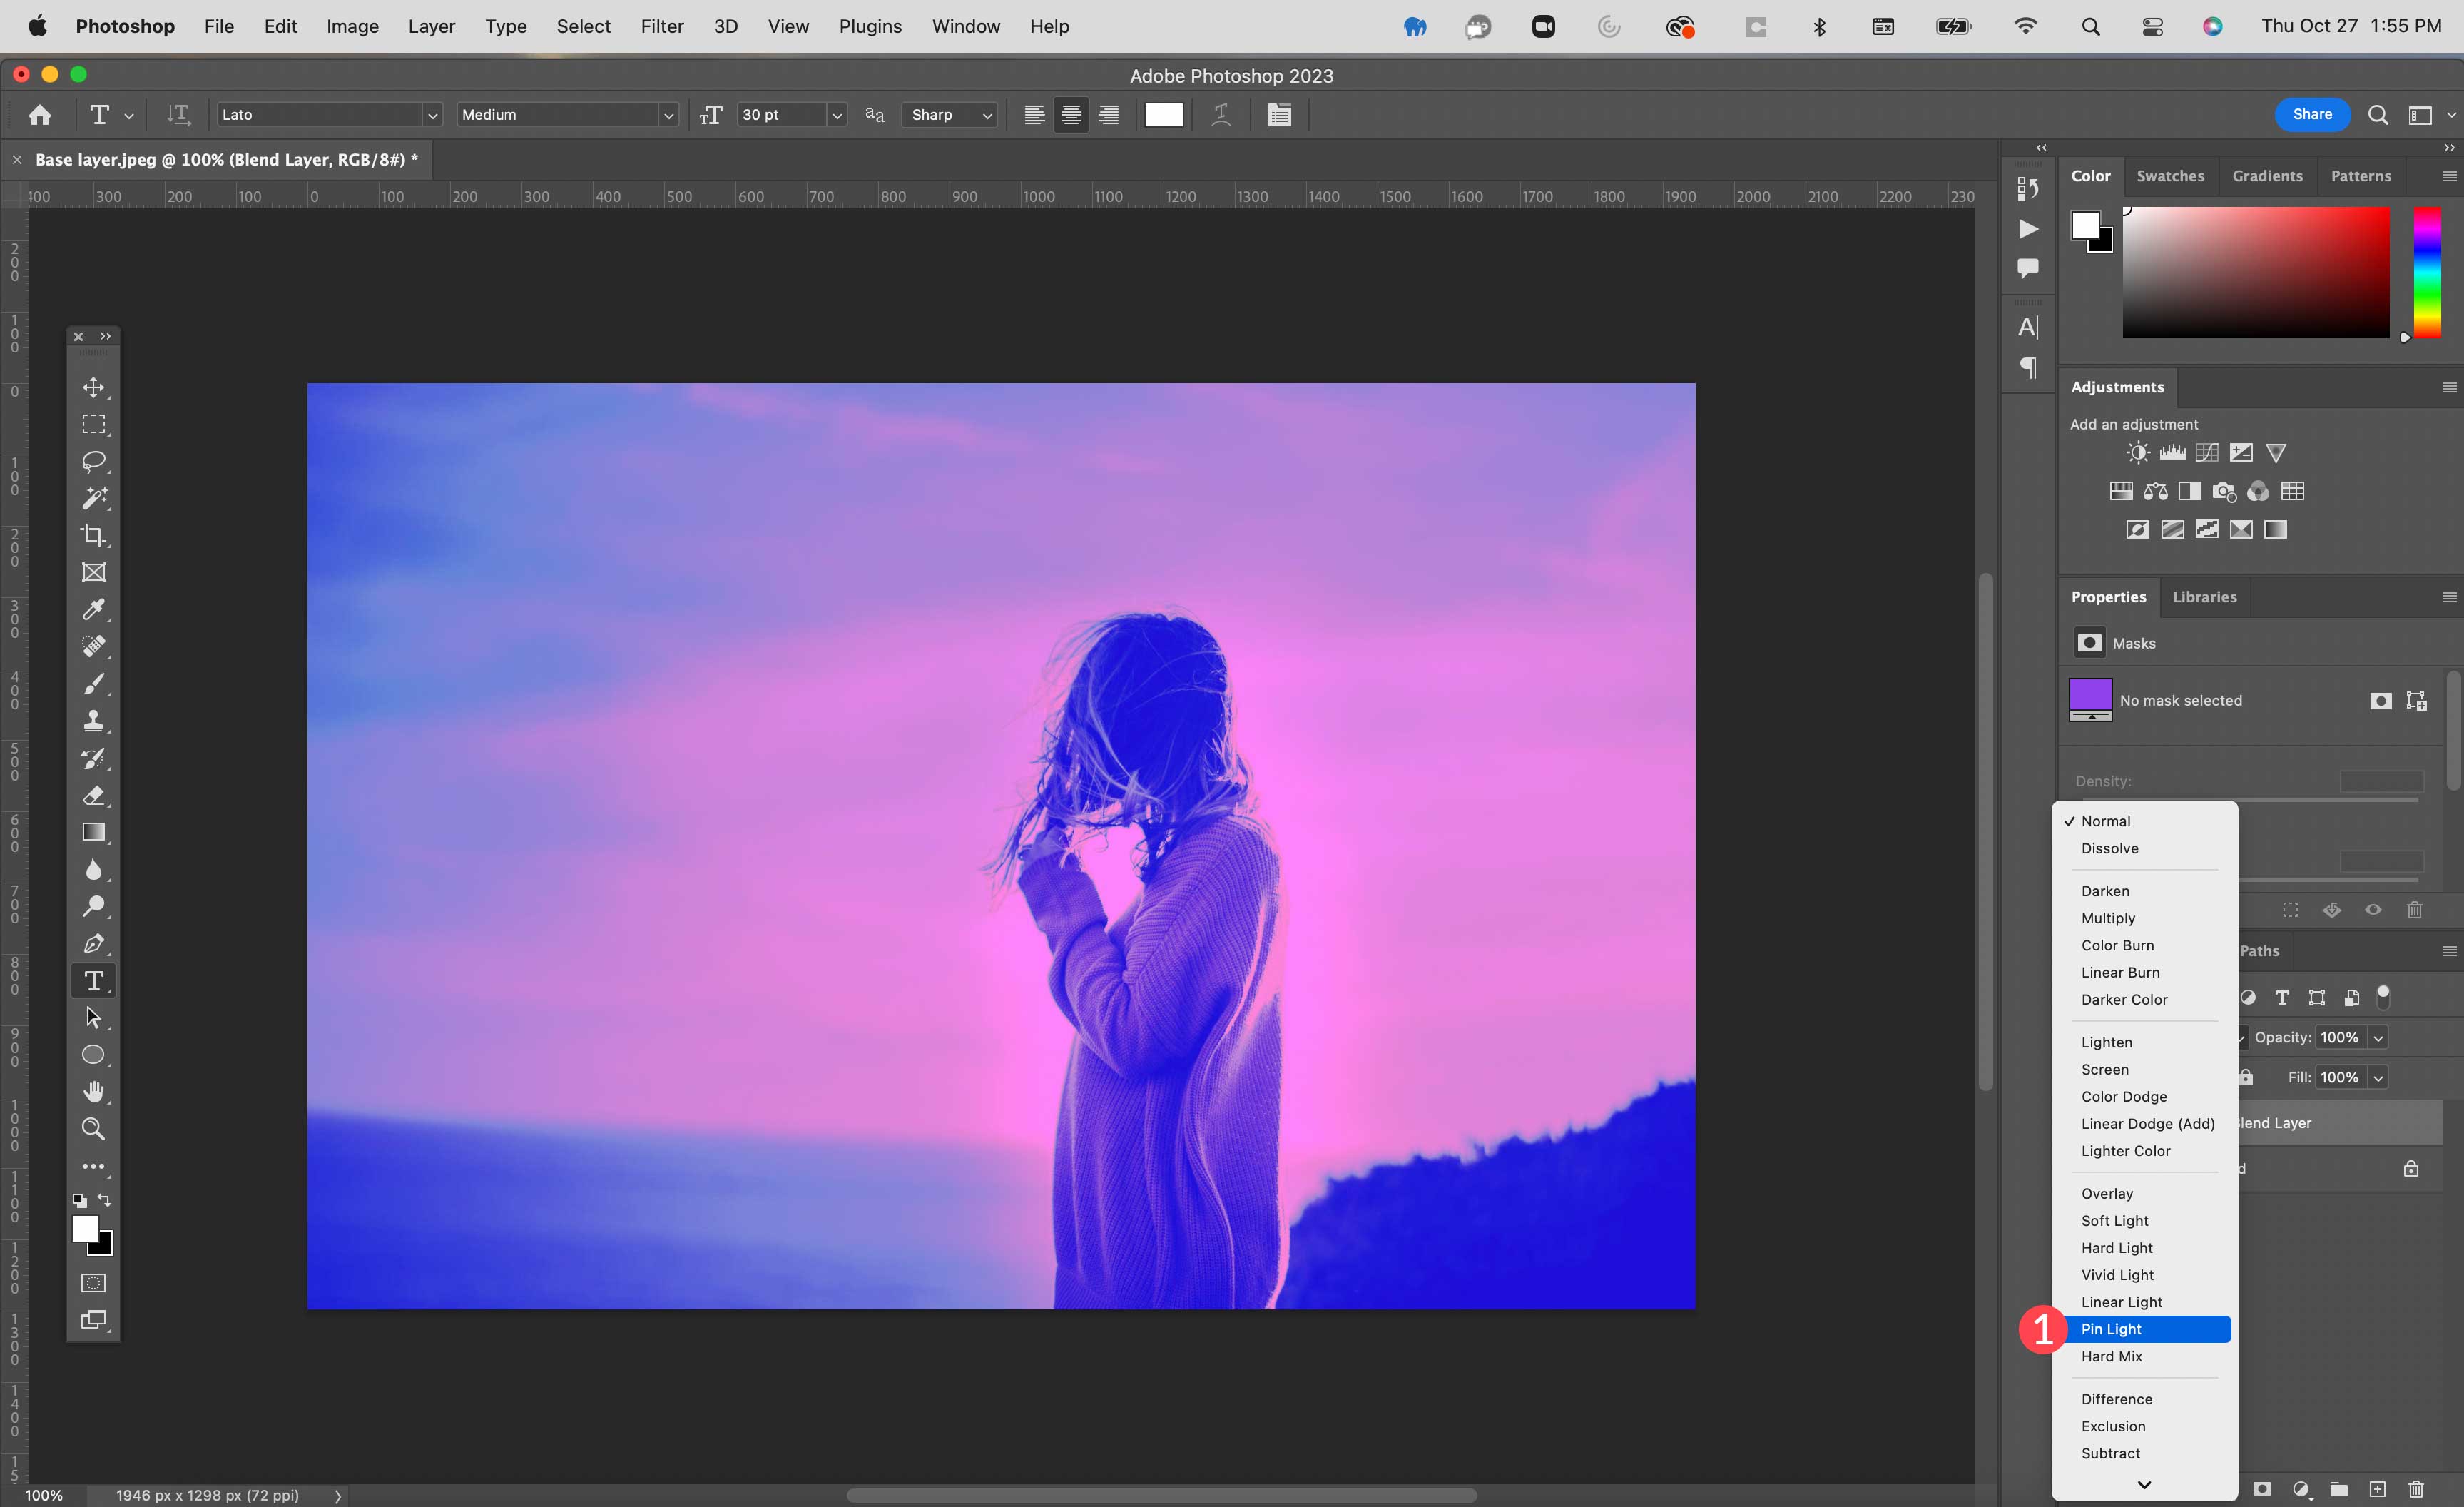
Step 4: Adjust the Opacity
Finally, adjust the opacity on your blend layer to 50%. The results should now show the purple color to be more muted and have a less strong appearance.

If you want a more detailed tutorial, check out our tutorial on how to use blend modes to combine images in Photoshop.
CSS Blend Modes for Web Design
Blending modes work generally the same in web design (with CSS) as they do with video and graphic editors. That being said, you’ll need to use some CSS rules and code to use them on your website. There are 2 main CSS properties that allow you to add blend modes in web design:
-
- background-blend-mode
- mix-blend-mode
Let’s discuss what each does, and provide examples so you can better understand what they do.
Background-Blend-Mode CSS Property
Background-blend-mode is a CSS property used to add blend modes to multiple backgrounds of a single HTML element. In CSS, you can add a background to an element using the background, background-image, or background-color properties. If an element contains two or more background images, linear gradients, or colors, you can use the background-blend-mode property to assign a blending mode to those backgrounds.
For example, here is a div element with three CSS classes (“element”, “backgrounds”, and “with-blend-mode”).
<div class="element backgrounds with-blend-mode"></div>
As the names of the CSS classes suggest, this is an element that will have backgrounds with a blend mode. Using CSS, we can add our backgrounds and background blend mode by targeting these classes.
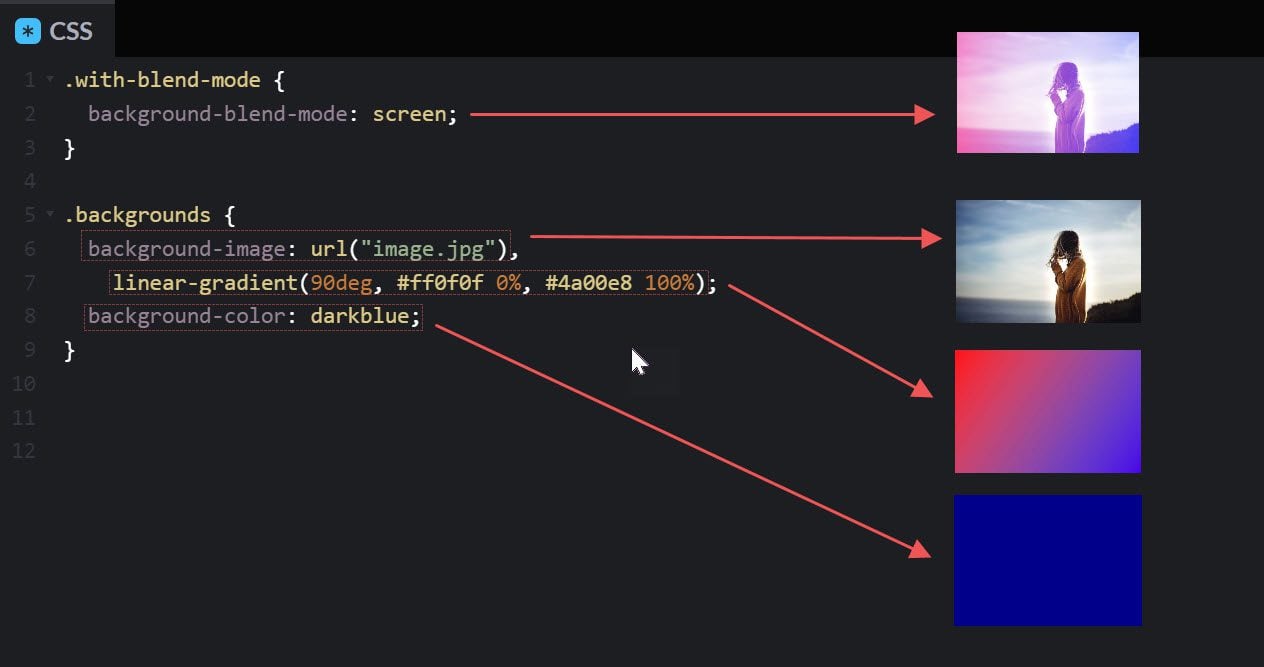
In the example CSS below, you can see the “backgrounds” class adds three backgrounds to the element (a background image, a background gradient, and a background color. The “with-blend-mode” class applies the Screen blend mode to the three backgrounds of the element.
.with-blend-mode {
 background-blend-mode: screen;
}

.backgrounds {
 background-image: url("/image.jpg"),
 linear-gradient(90deg, #ff0f0f 0%, #4a00e8 100%);
 background-color: darkblue;
}

.element {
 height: 400px;
 width: auto;
 max-width: 600px;
}
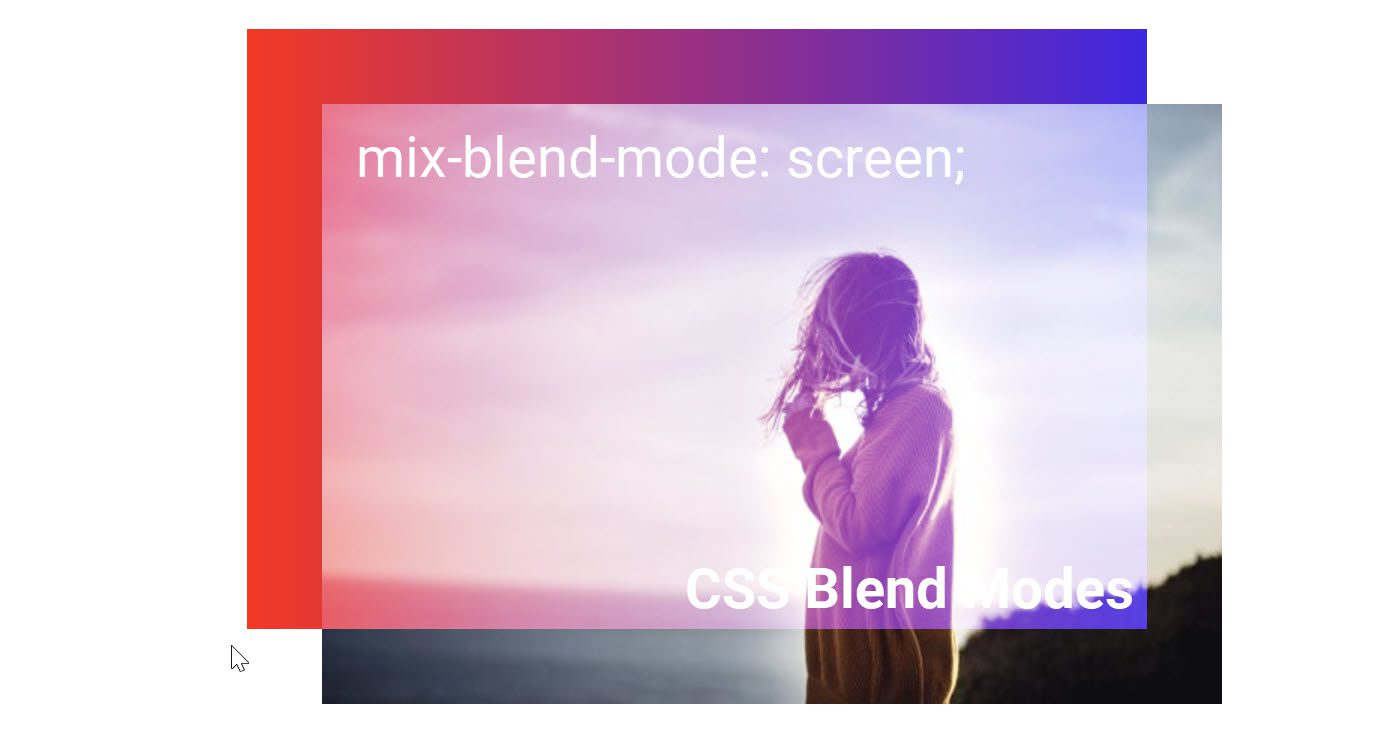
This allows the element to display not just one background, but a blend of all three! Here is a before and after of the image with and without the background-blend-mode:

Mix-Blend-Mode CSS Property
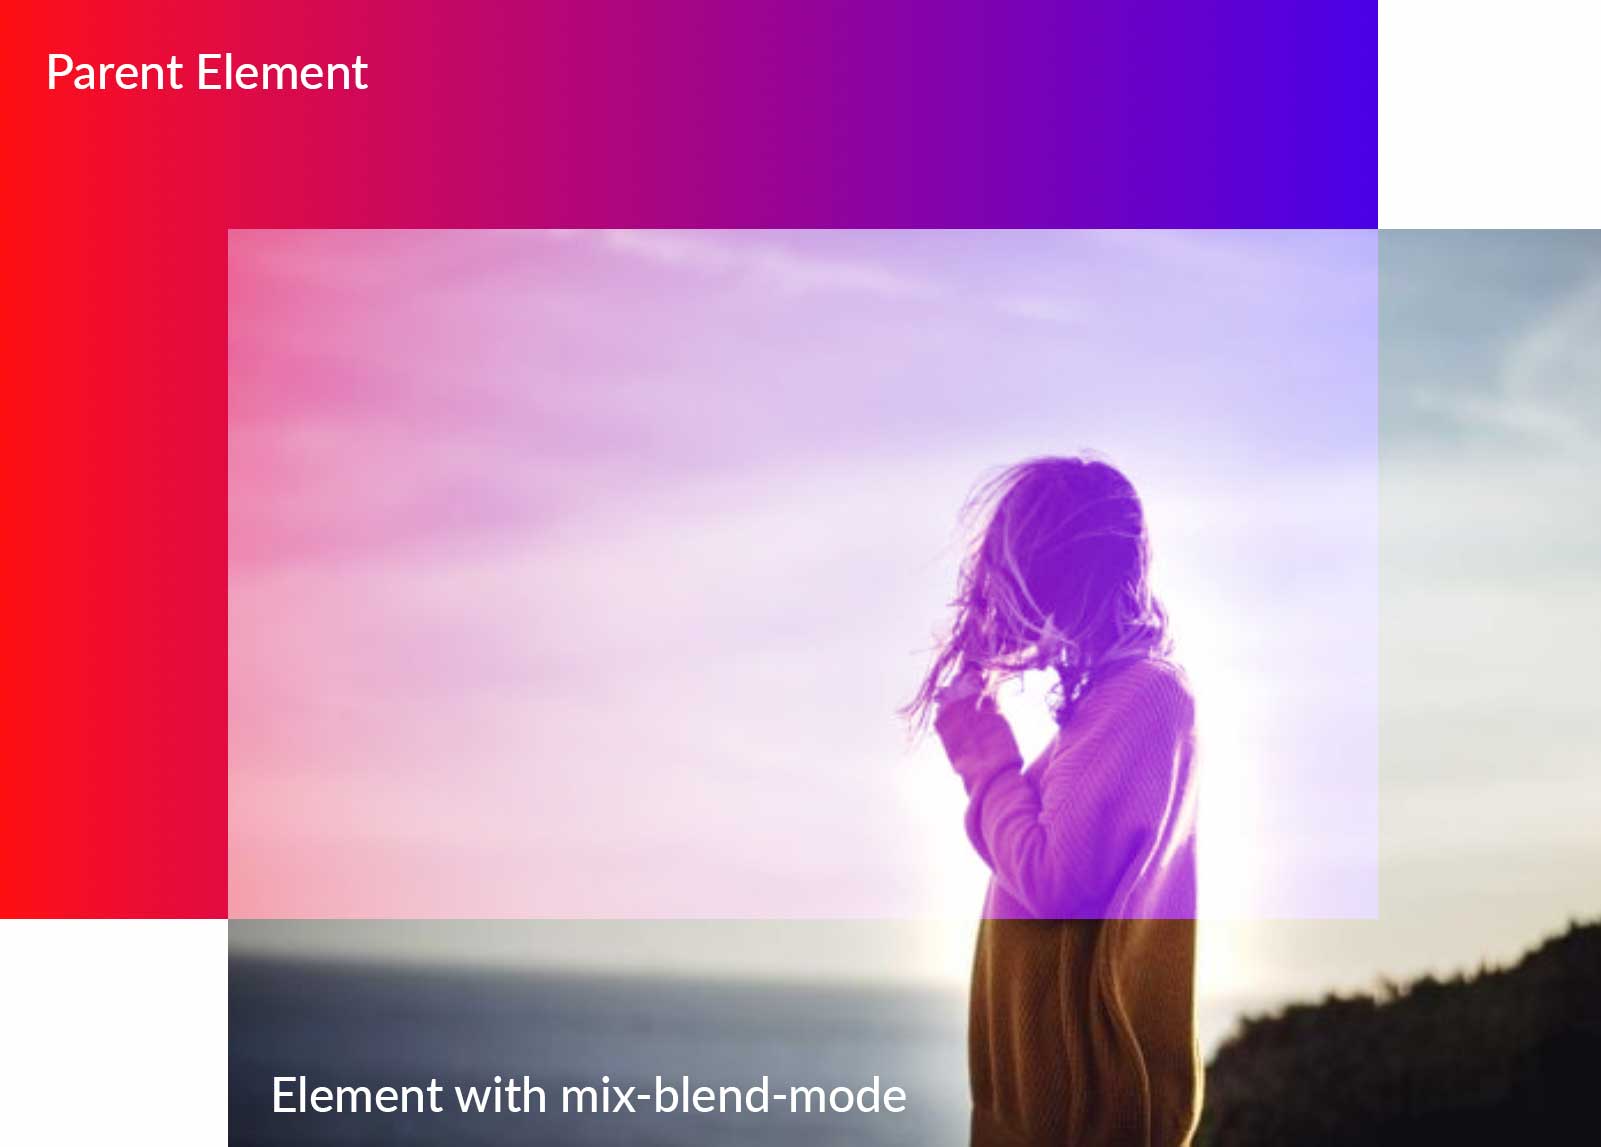
Mix-blend-mode is a CSS property used to add blend mode styling to multiple elements, not just to the backgrounds of a single element like background-blend-mode. It can blend an element with its parent element or with other overlapping sibling elements.
For example, below we have a div element inside a parent div element.
<div class="parent">
 <div class="element with-mix-blend"></div>
</div>
Using CSS, we can add a background gradient to the parent element and a background image to the child element. Then we target the child element using the “with-mix-blend” class to add the Screen mix-blend-mode.
.with-mix-blend {
 mix-blend-mode: screen;
}

.parent {
 background-image: linear-gradient(90deg, #ff0f0f 0%, #4a00e8 100%);
}

.element {
 background-image: url("/image.jpg");
}
The result is a blending of the backgrounds of both elements for a unique effect!
CSS Blend Modes Using Divi (An Easy No-Code Solution)
If you don’t want to take the time to code CSS for your WordPress site but still want to use blending modes, then Divi is the best option for you. Divi is the most powerful design tool you’ll ever need in a theme or page builder. In many ways, Divi is a website builder and a photo editor all wrapped up into one. Using the example above, we can apply the same blending mode effects without the need for any coding.
Divi has 16 built-in blending modes that allow you to blend layers of web elements (colors, background images, shapes, and multiple images) to achieve stunning designs. You can blend text into images, background images within rows and sections, and much more. Take a look at some of the tutorials offered on our blog to get a better idea of how you can incorporate blending modes into your designs.
Design Tools that Use Blending Modes
There are a variety of powerful design tools out there that allow you to use blending modes. The most popular are those from Adobe, but there are others that you might find useful (including some for video and web design). Here’s a list of some helpful blending mode design tools at your disposal.
-
-
- Photoshop: As a long-standing photo editing giant, Photoshop basically put blending modes on the map. As already mentioned, there are 27 blending modes in Photoshop that allow for a variety of effects when editing photos.
- Illustrator: Illustrator is one of the most popular solutions for graphic design. There are 15 blending modes available in Illustrator for applying effects to vector files to other design elements.
- Premiere ProPremiere Pro is one the go-to video editing software on the market. Blending modes are available in the timeline to blend clips to create different effects. Similar to Photoshop, Premiere Pro offers 27 blending modes.
- After Effects: The options in After Effects are identical to those used in Photoshop and Premiere Pro with one exception, which is dancing dissolve. Modes are used to blend layers containing animations. Also, these After Effects plugins can take your videos to a whole new level of creativity.
- Corel: Corel offers several programs that use blending modes including Paintshop Pro, Pinnacle Studio, and Corel Draw. There are 18 blending modes available.
- Figma There are 16 options in Figma for blending layers to achieve varying effects. Figma is a web-based program used for web and user interface design.
- Divi: As a full site editing WordPress theme, Divi has 16 blend modes included in the Divi Builder and additional filter effects that can be used in any element with color and background options.
-
Blending Mode Tips & Best Practices
Using blending modes is a great way to add interest to your photos and designs. That being said, there are some things you should consider when using them.
Adjust Fill and/or Opacity
Most of the blending modes work best when adjusting the opacity of the blending layer. However, there are a few that require adjusting the fill instead. As previously mentioned, there is a group of modes called the special 8. They are color burn, linear burn, color dodge, linear dodge (add), vivid light, linear light, hard mix, and difference. While you can adjust the opacity for the special 8, you’ll notice a radical difference when adjusting the fill.
Understand the Blend Mode Types
When using blending modes, get to know the categories. For example, if you are editing a photo that is too light, you will want to use a mode from the darken category. Using multiply to darken your photo will be better suited for that use, rather than the darken. On the other hand, if you have an image that is too dark, use a mode from the lighten category. Modes such as overlay may add too many light tones, so you might want to use pin light instead because it is more subtle. The point is that you should take the time to experiment with each mode to gain better knowledge of what each one does.
Use Filters with Blend Modes for Better Results
Use a High Pass Filter to Sharpen Images
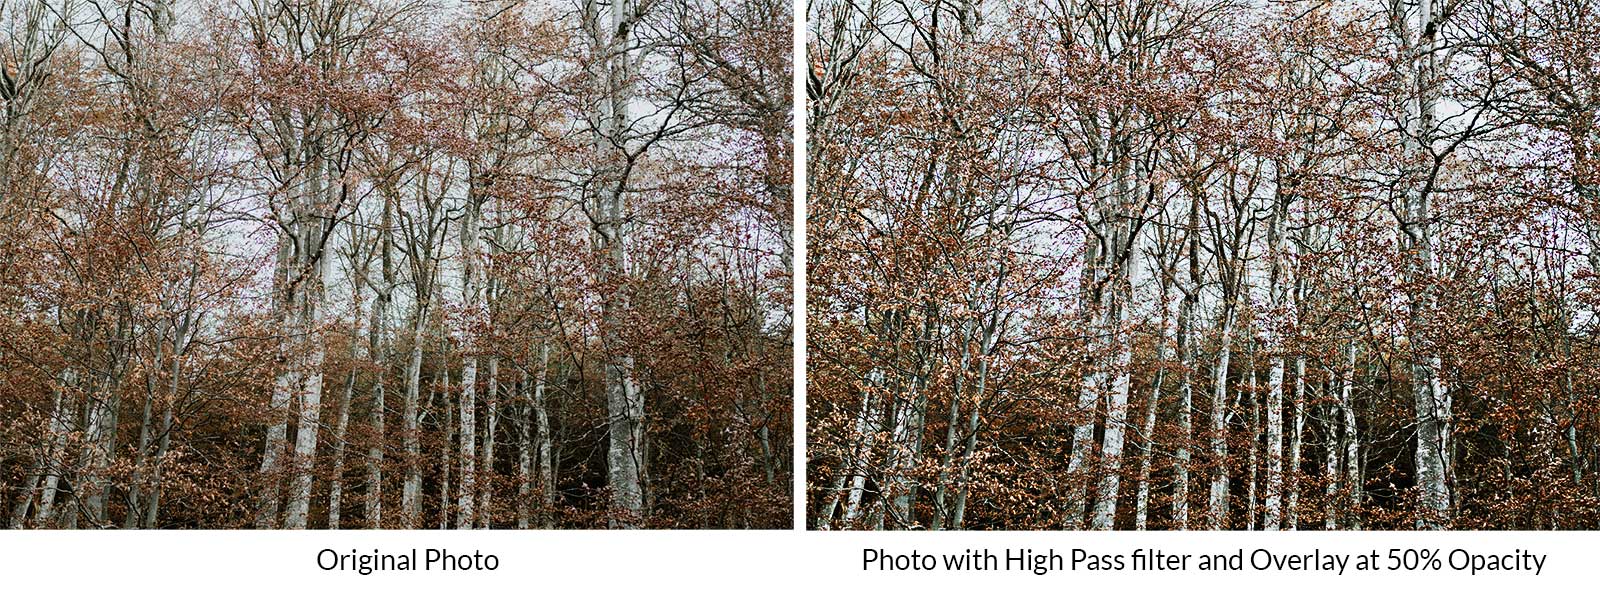
While high pass is not a blending mode, you can combine it with the overlay mode to sharpen images. Start with your chosen image as the background layer. Next, duplicate the layer. From there, select filter > other > high pass. Adjust the slider to choose your desired sharpness. Finally, set the top layer with the high pass filter applied to overlay. This is a quick and easy way to add sharpness to photos that may be a bit blurry.
Use the Lens Flare filter as a Focal Point
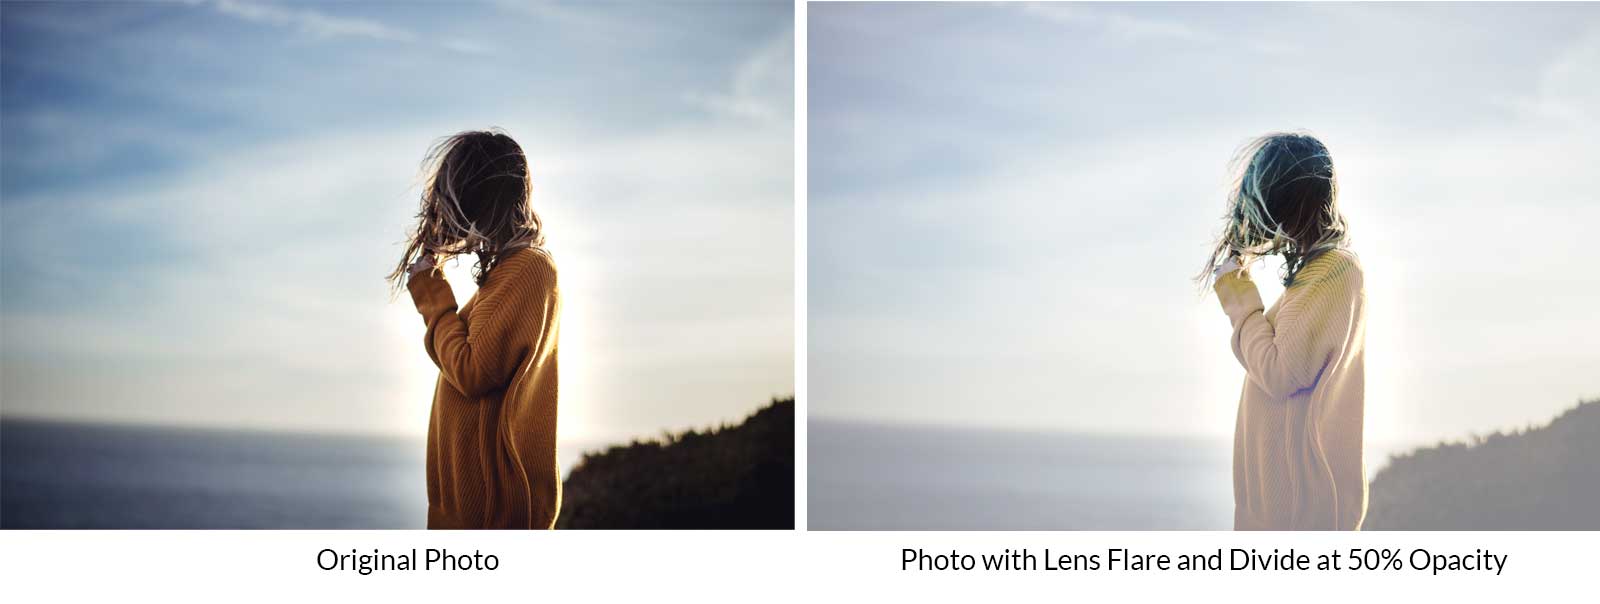
Another great filter to use is lens flare. When combined with divide at reduced opacity, it can provide a focal point on your image. Add a layer over the top of your photo layer. Fill it with black. Next, navigate to filter > render > lens flare. Adjust the location of your lens flare then click apply. Next, set the blending mode of the lens flare layer to divide, then adjust the opacity to 50%.
When to Use CSS Blend Modes instead of Photoshop Images in Web Design
Blending modes are most commonly used in Photoshop for designing images that are later uploaded to a web page. CSS blend modes work using CSS code that your browser uses to display the styles using the pixels on your monitor. This allows you to apply these designs to any element on the page in ways that you can’t do with images pre-designed in Photoshop. Here are a few ways to consider.
For Text Design
Important website content (especially text) should always be readable by search engines (for SEO). CSS blend modes allow you to add blending styles to text elements (like headings) to create beautiful text designs with much better quality.
For Hover Effects
CSS blend modes are also great for adding interactive hover effects using blend modes. For example, you can add a blend style to images on hover to boost the design of your photo gallery with a few lines of CSS.
For Effeciency and Performance
CSS blend modes make it easier to change the design of elements dynamically with a small adjustment to the code. This allows you to change the design of your website without having to go through the trouble of creating new images in Photoshop. Plus, in many cases, designs generated via CSS will load faster than large images.
Conclusion
Blending modes are great for adding special effects to images and designs in graphic and video editors, as well as web applications. Knowing how each one works helps explore new and exciting design possibilities. Plus, Photoshop isn’t the only design tool that uses them. When it comes to the web, CSS blend modes allow you to skip Photoshop altogether to apply blend modes directly to your website. And, with Divi, you don’t even need to know CSS to create stunning designs using blend modes. Hopefully, this guide will help you along your design journey, wherever that may be.
Which tool do you use to apply blending effects to your designs? Let us know in the comments section below.
h2 {scroll-margin-top: 80px;}


Leave A Reply