
The WordPress Block Editor features multiple embed tools that make it easy to incorporate external media into your WordPress page or blog post. For users who want to share their photography (or feature other photographers’ work, with permission of course) on their WordPress site, the SmugMug embed block is a fantastic tool. It’s a simple way to embed beautiful images right into your blog post or page in WordPress.
Interested in learning how to embed your SmugMug images on your WordPress site? In this article, we’ll talk all about how to get a photograph from SmugMug to display on your page or post. This is one of the many embed tools available to WordPress users via the Block Editor, and it’s great for adding a little flair to your site’s aesthetic.
As we get into the post, we’ll share step-by-step instructions on how to get your SmugMug embed incorporated into your site. You’ll also learn how to tweak and adjust the block’s settings within the Block Editor. Then, we’ll be sharing some best practices and frequently asked questions to move you in the right direction.
Are you ready to begin? Let’s jump in.
How To Add The SmugMug Embed Block To Your Post Or Page
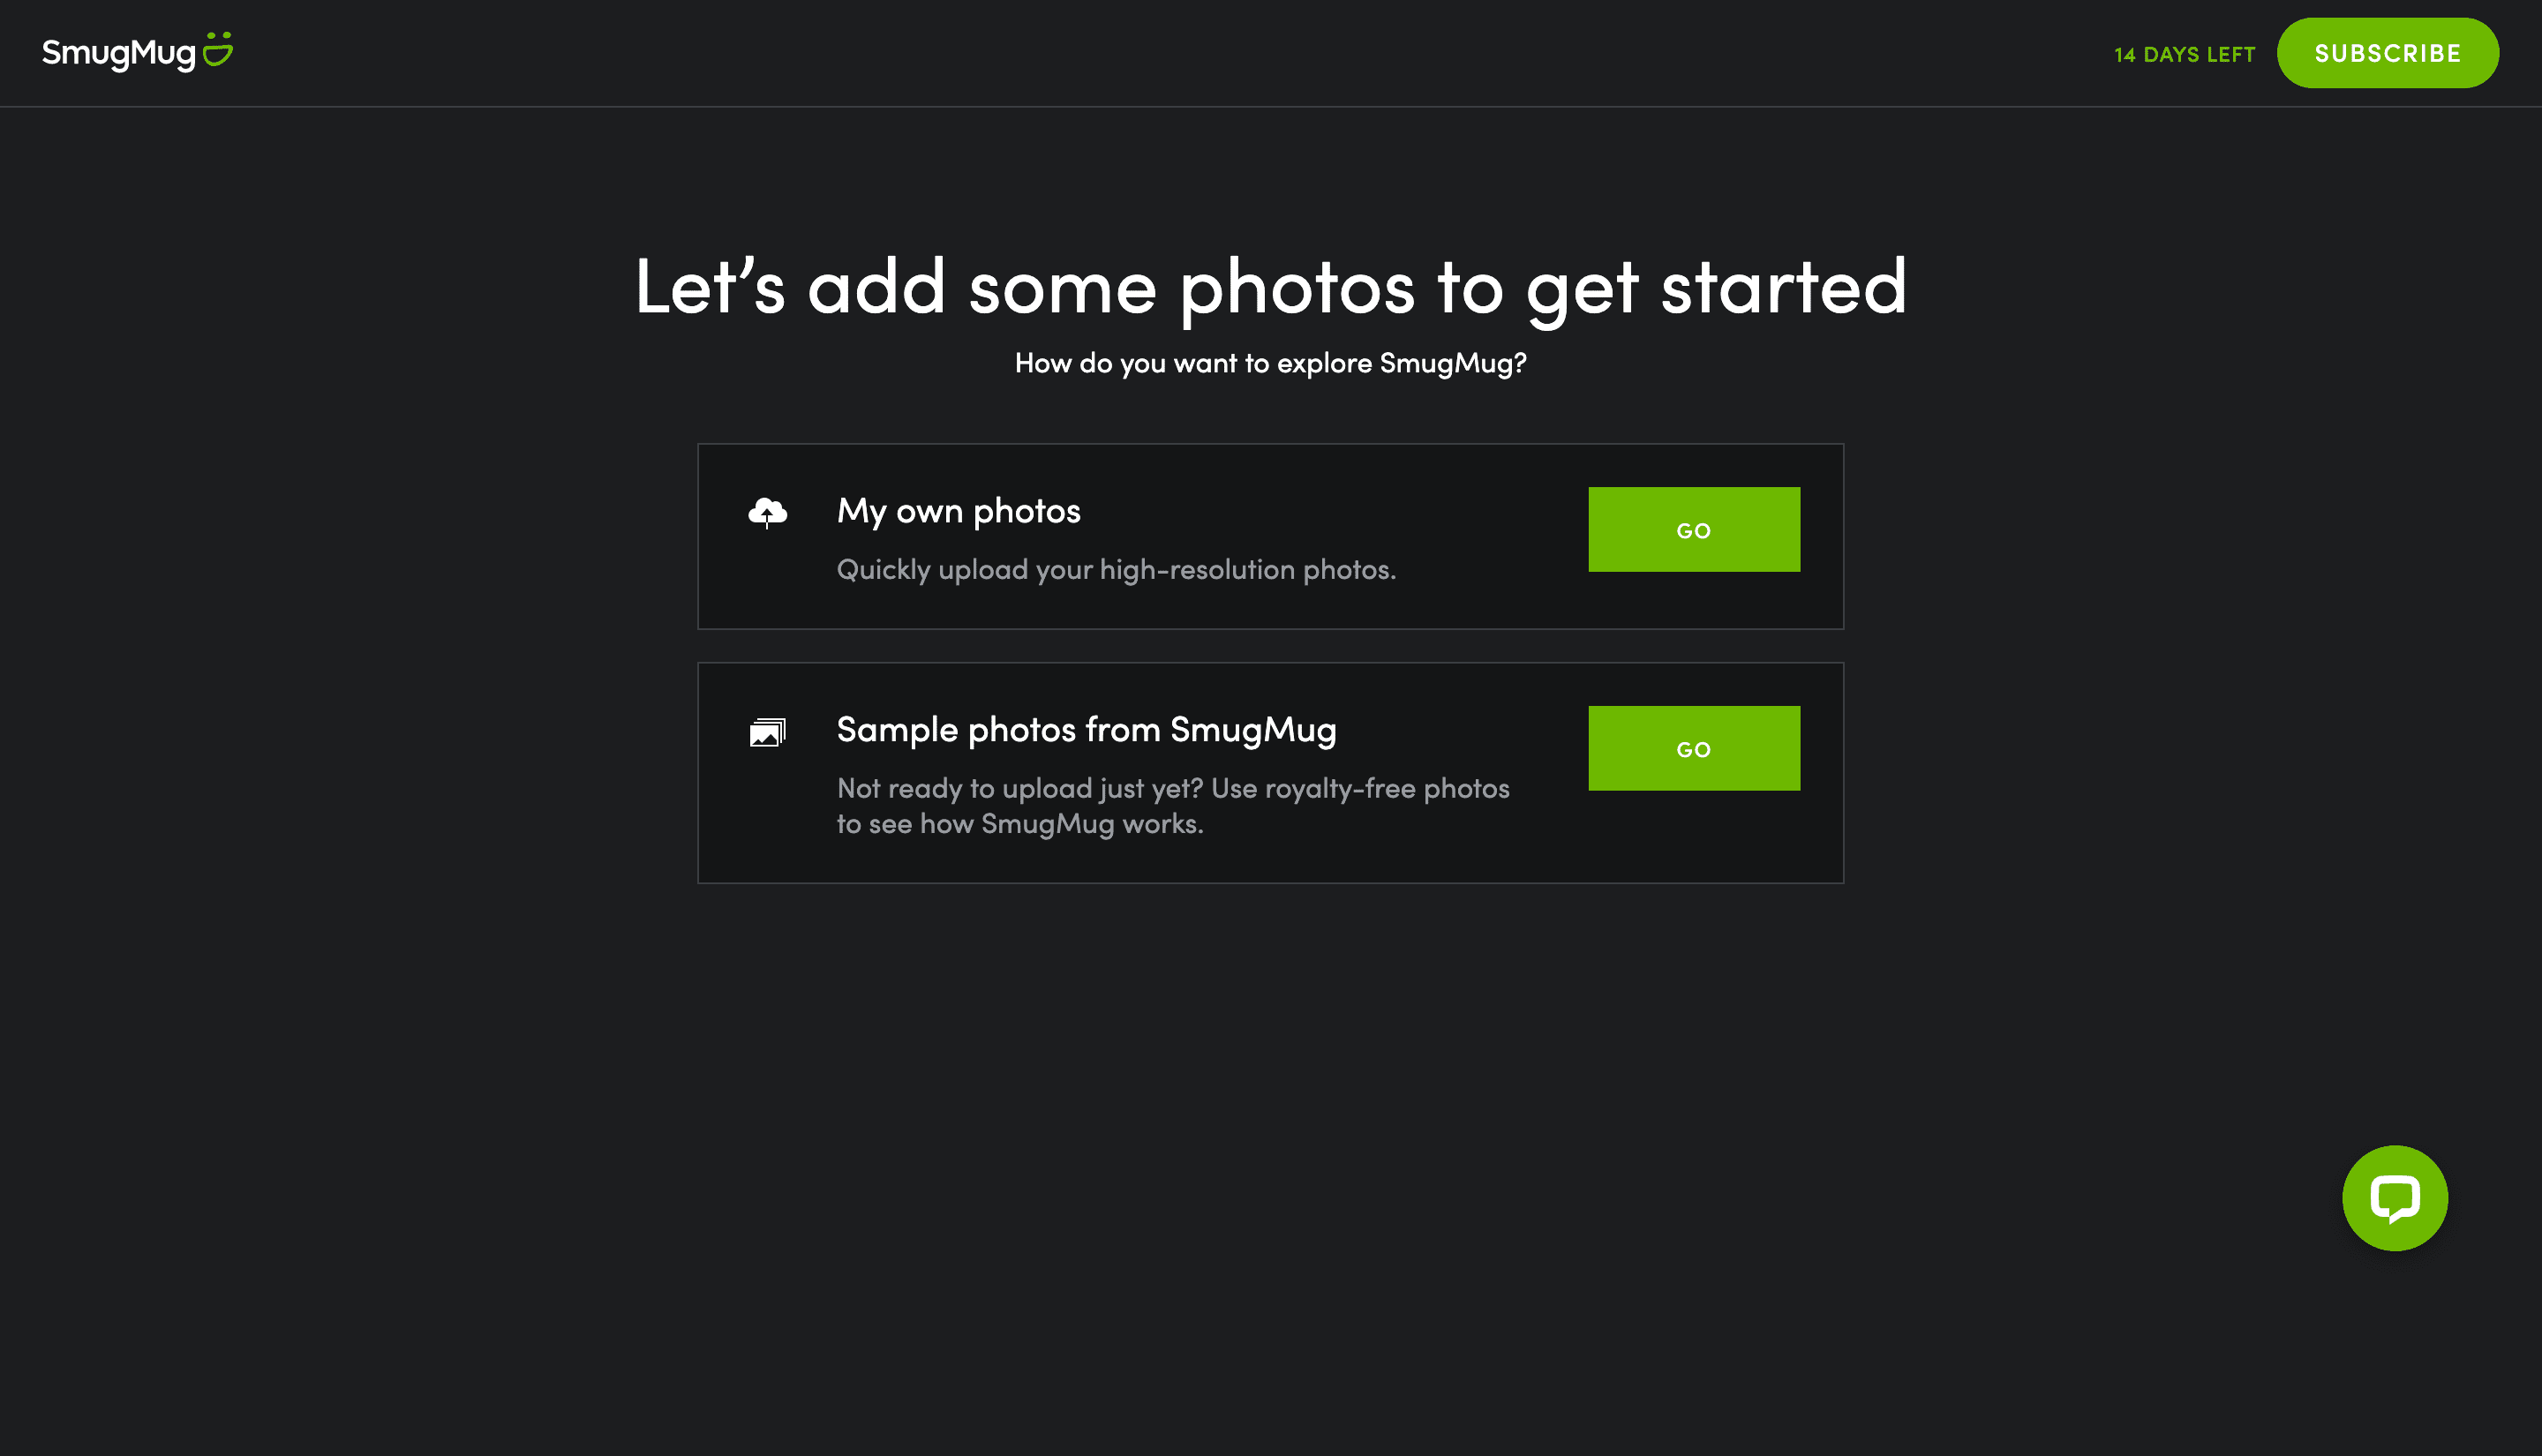
To get started with the SmugMug embed block, you will need to open your WordPress dashboard and start a new blog post or page draft. Once you’ve got your fresh draft ready, head over to SmugMug and log in to your account.
If you haven’t yet added images to your SmugMug account, you’ll have two options to do so. First, you can upload your own pictures to your account. Alternatively, you can use some of SmugMug’s royalty-free stock images to get started. In this case, I uploaded one of my own photos.
Adding The SmugMug Embed: Step-By-Step
When you’re done, return to the Block Editor and follow these steps:
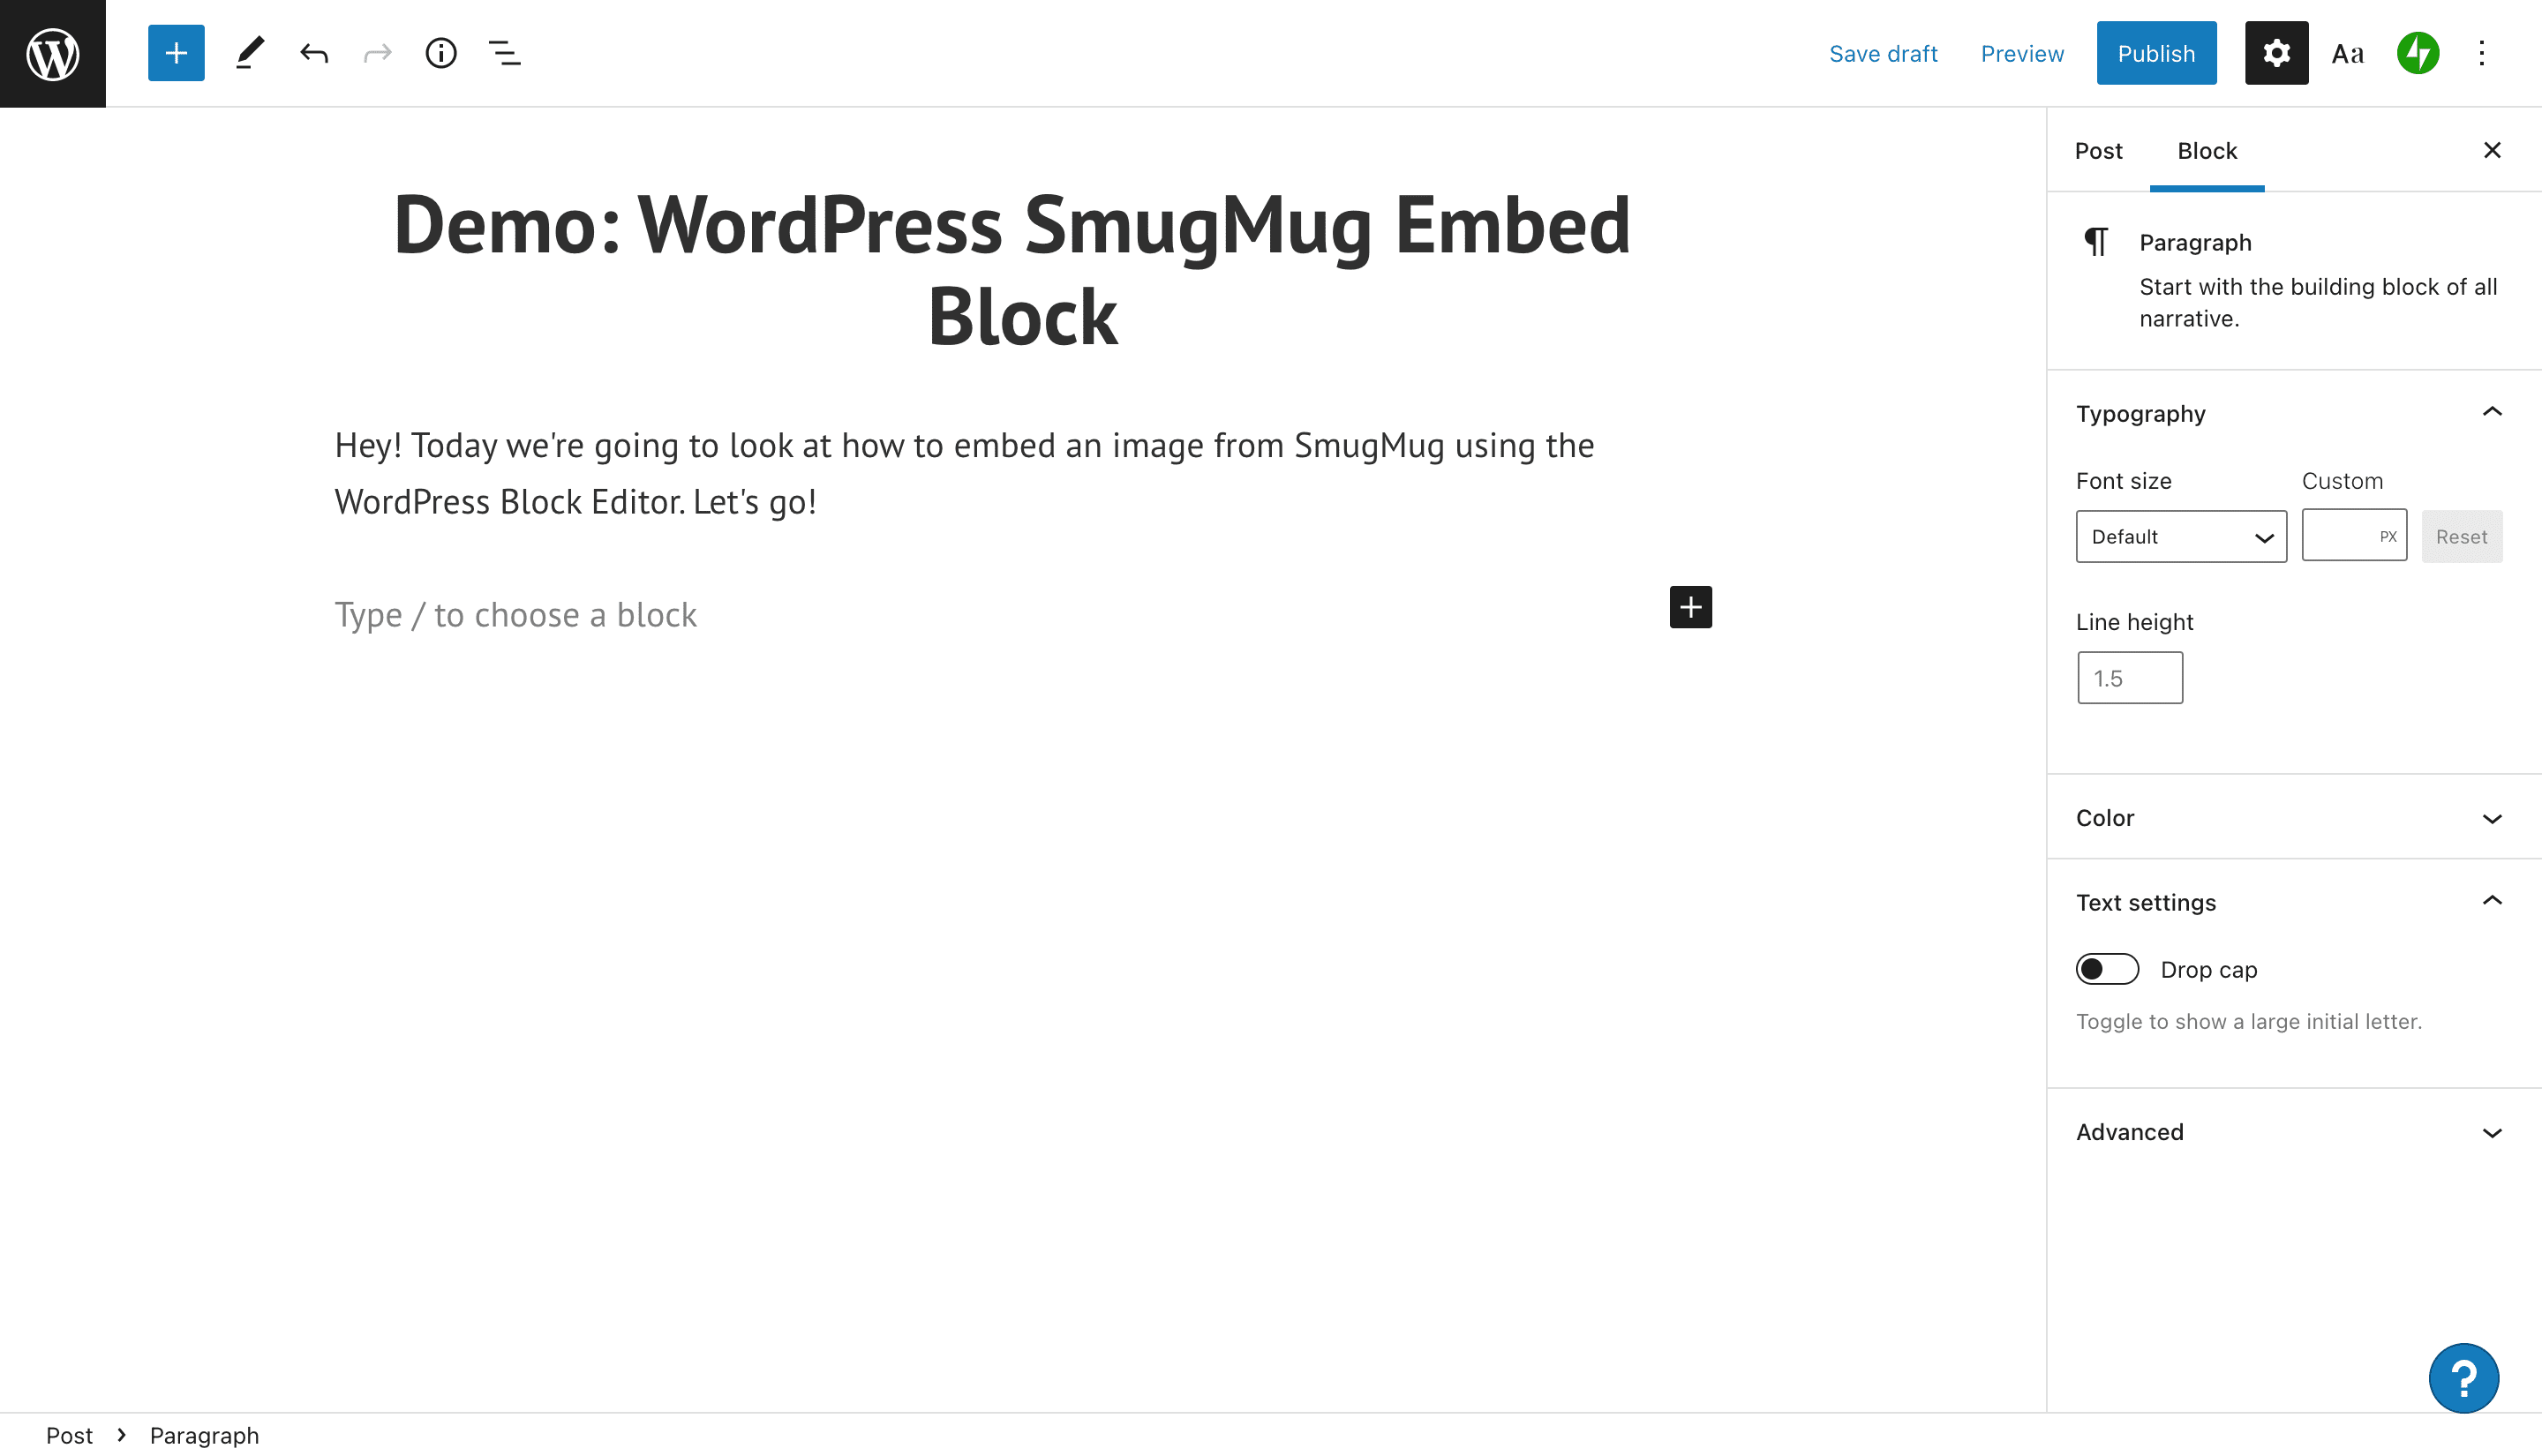
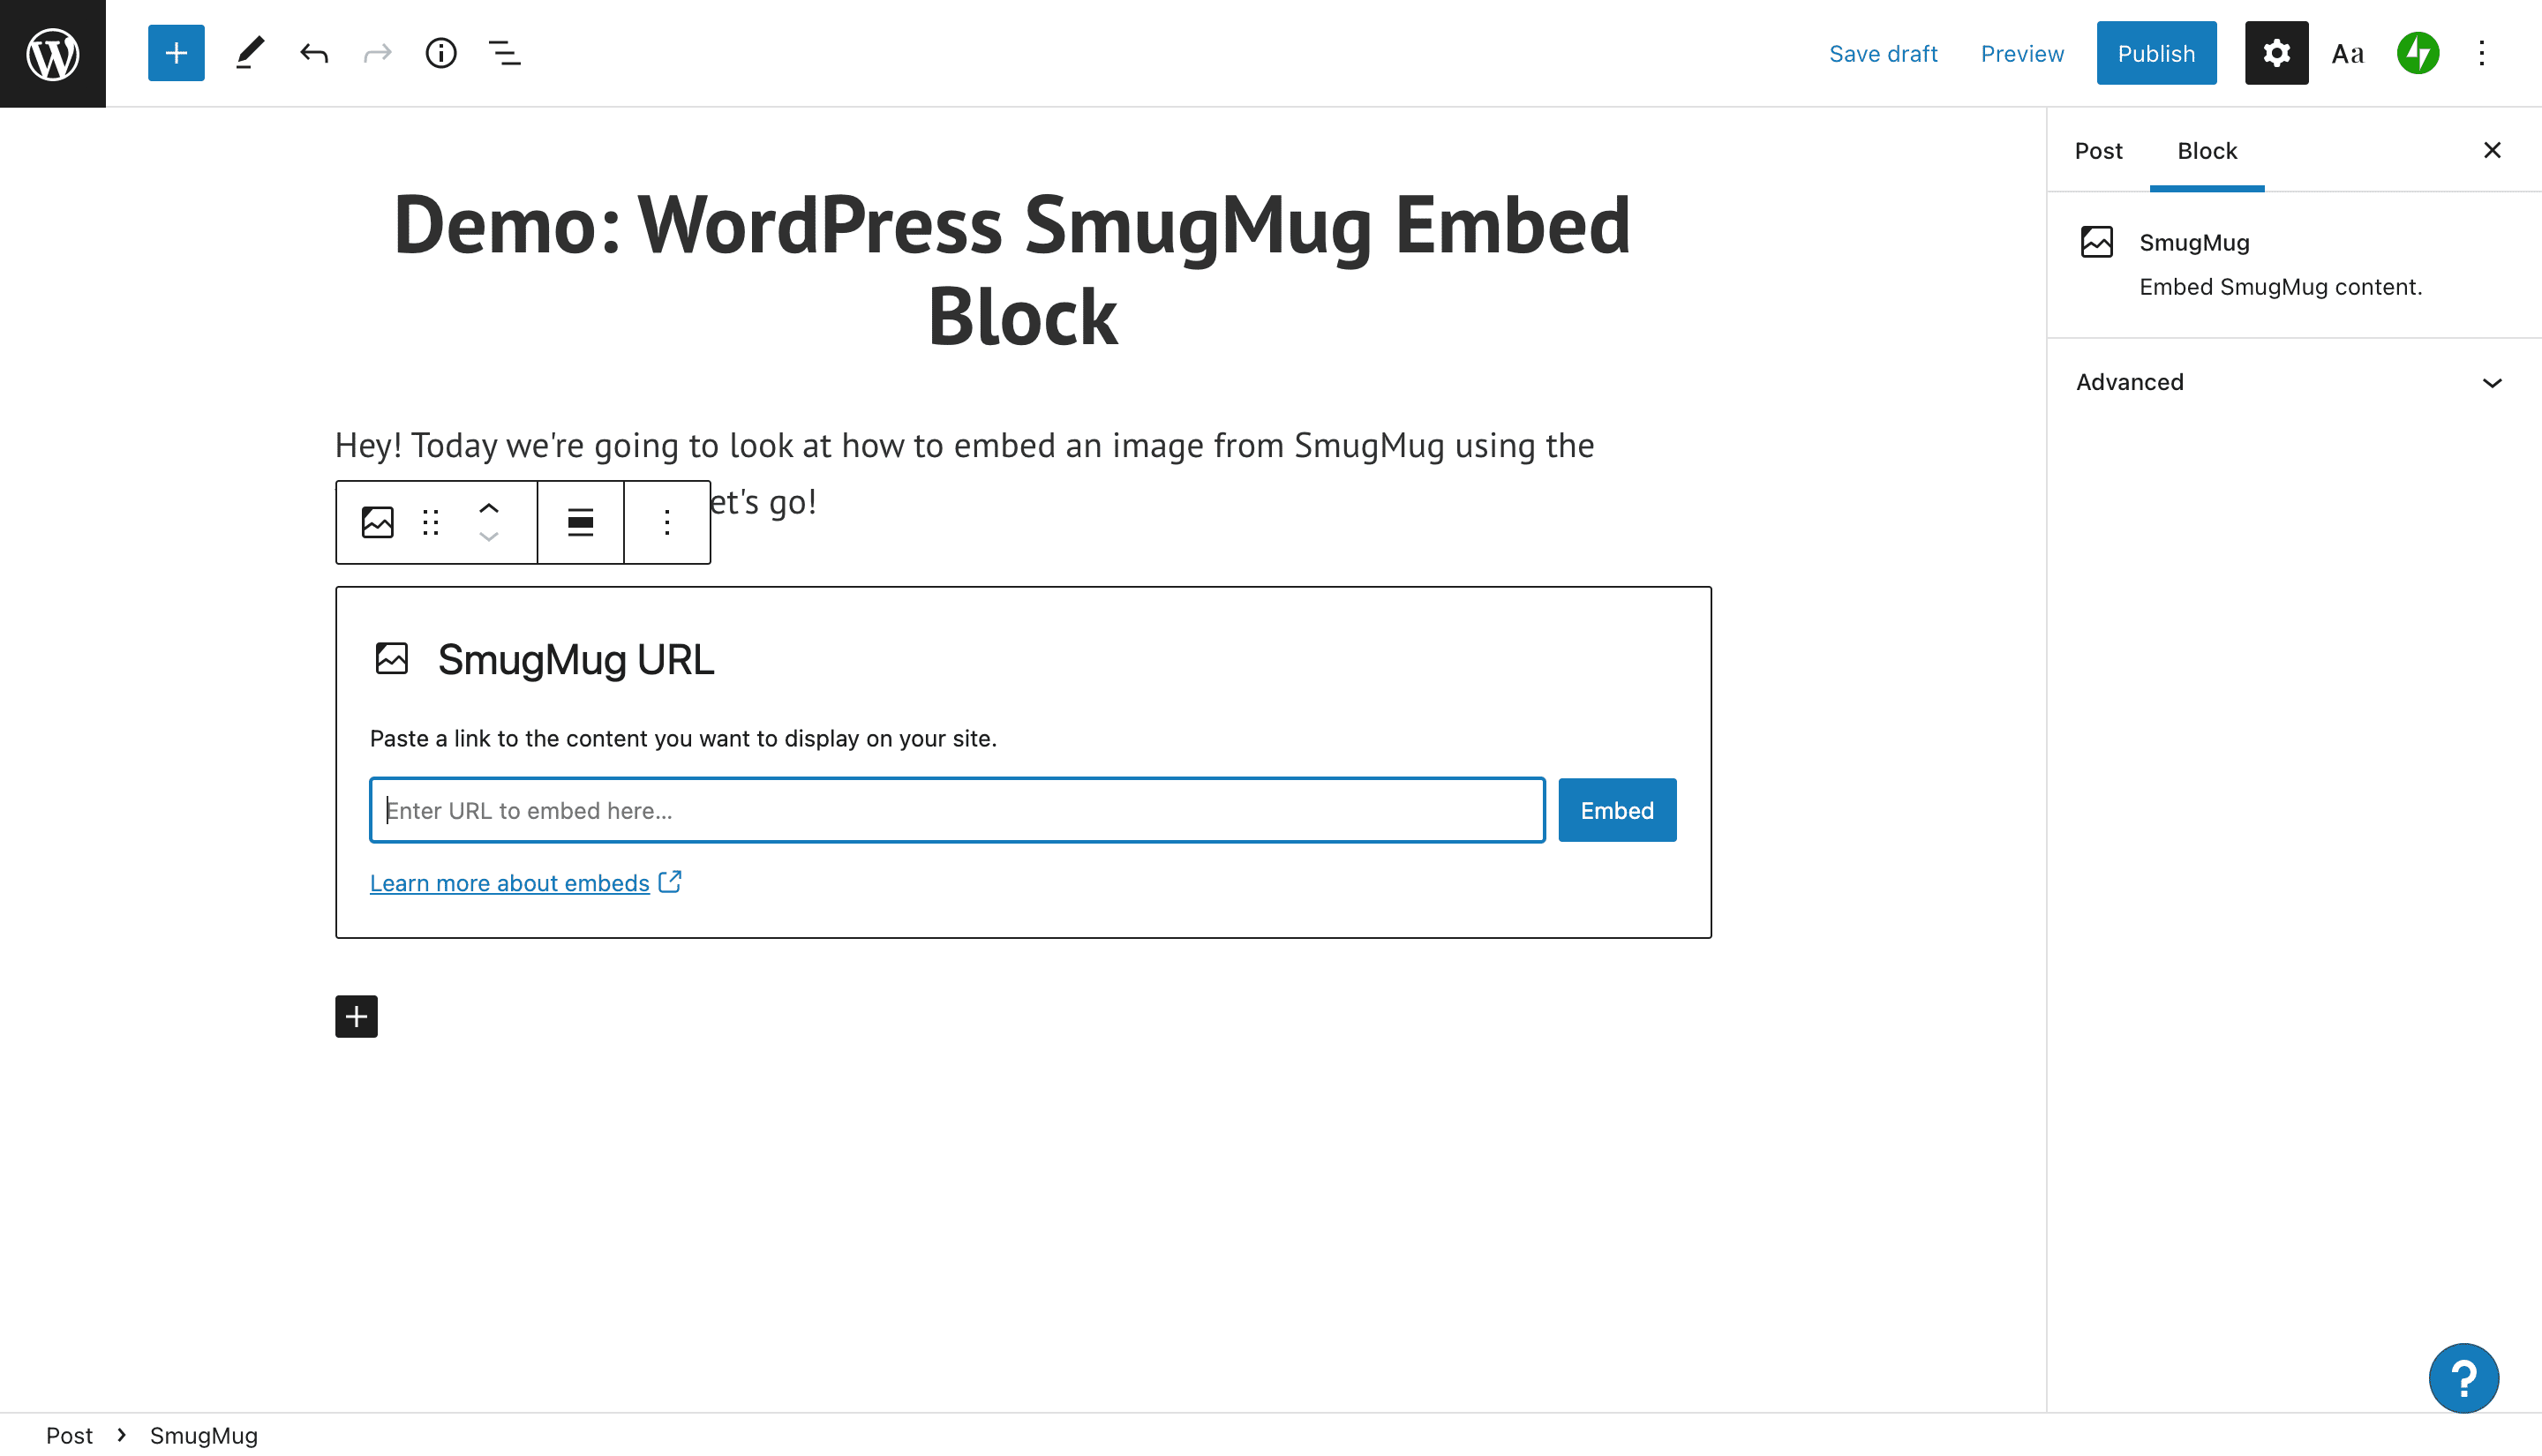
1. Click inside your Block Editor. A small, black box with a plus sign inside will appear on the right side of the editor screen.
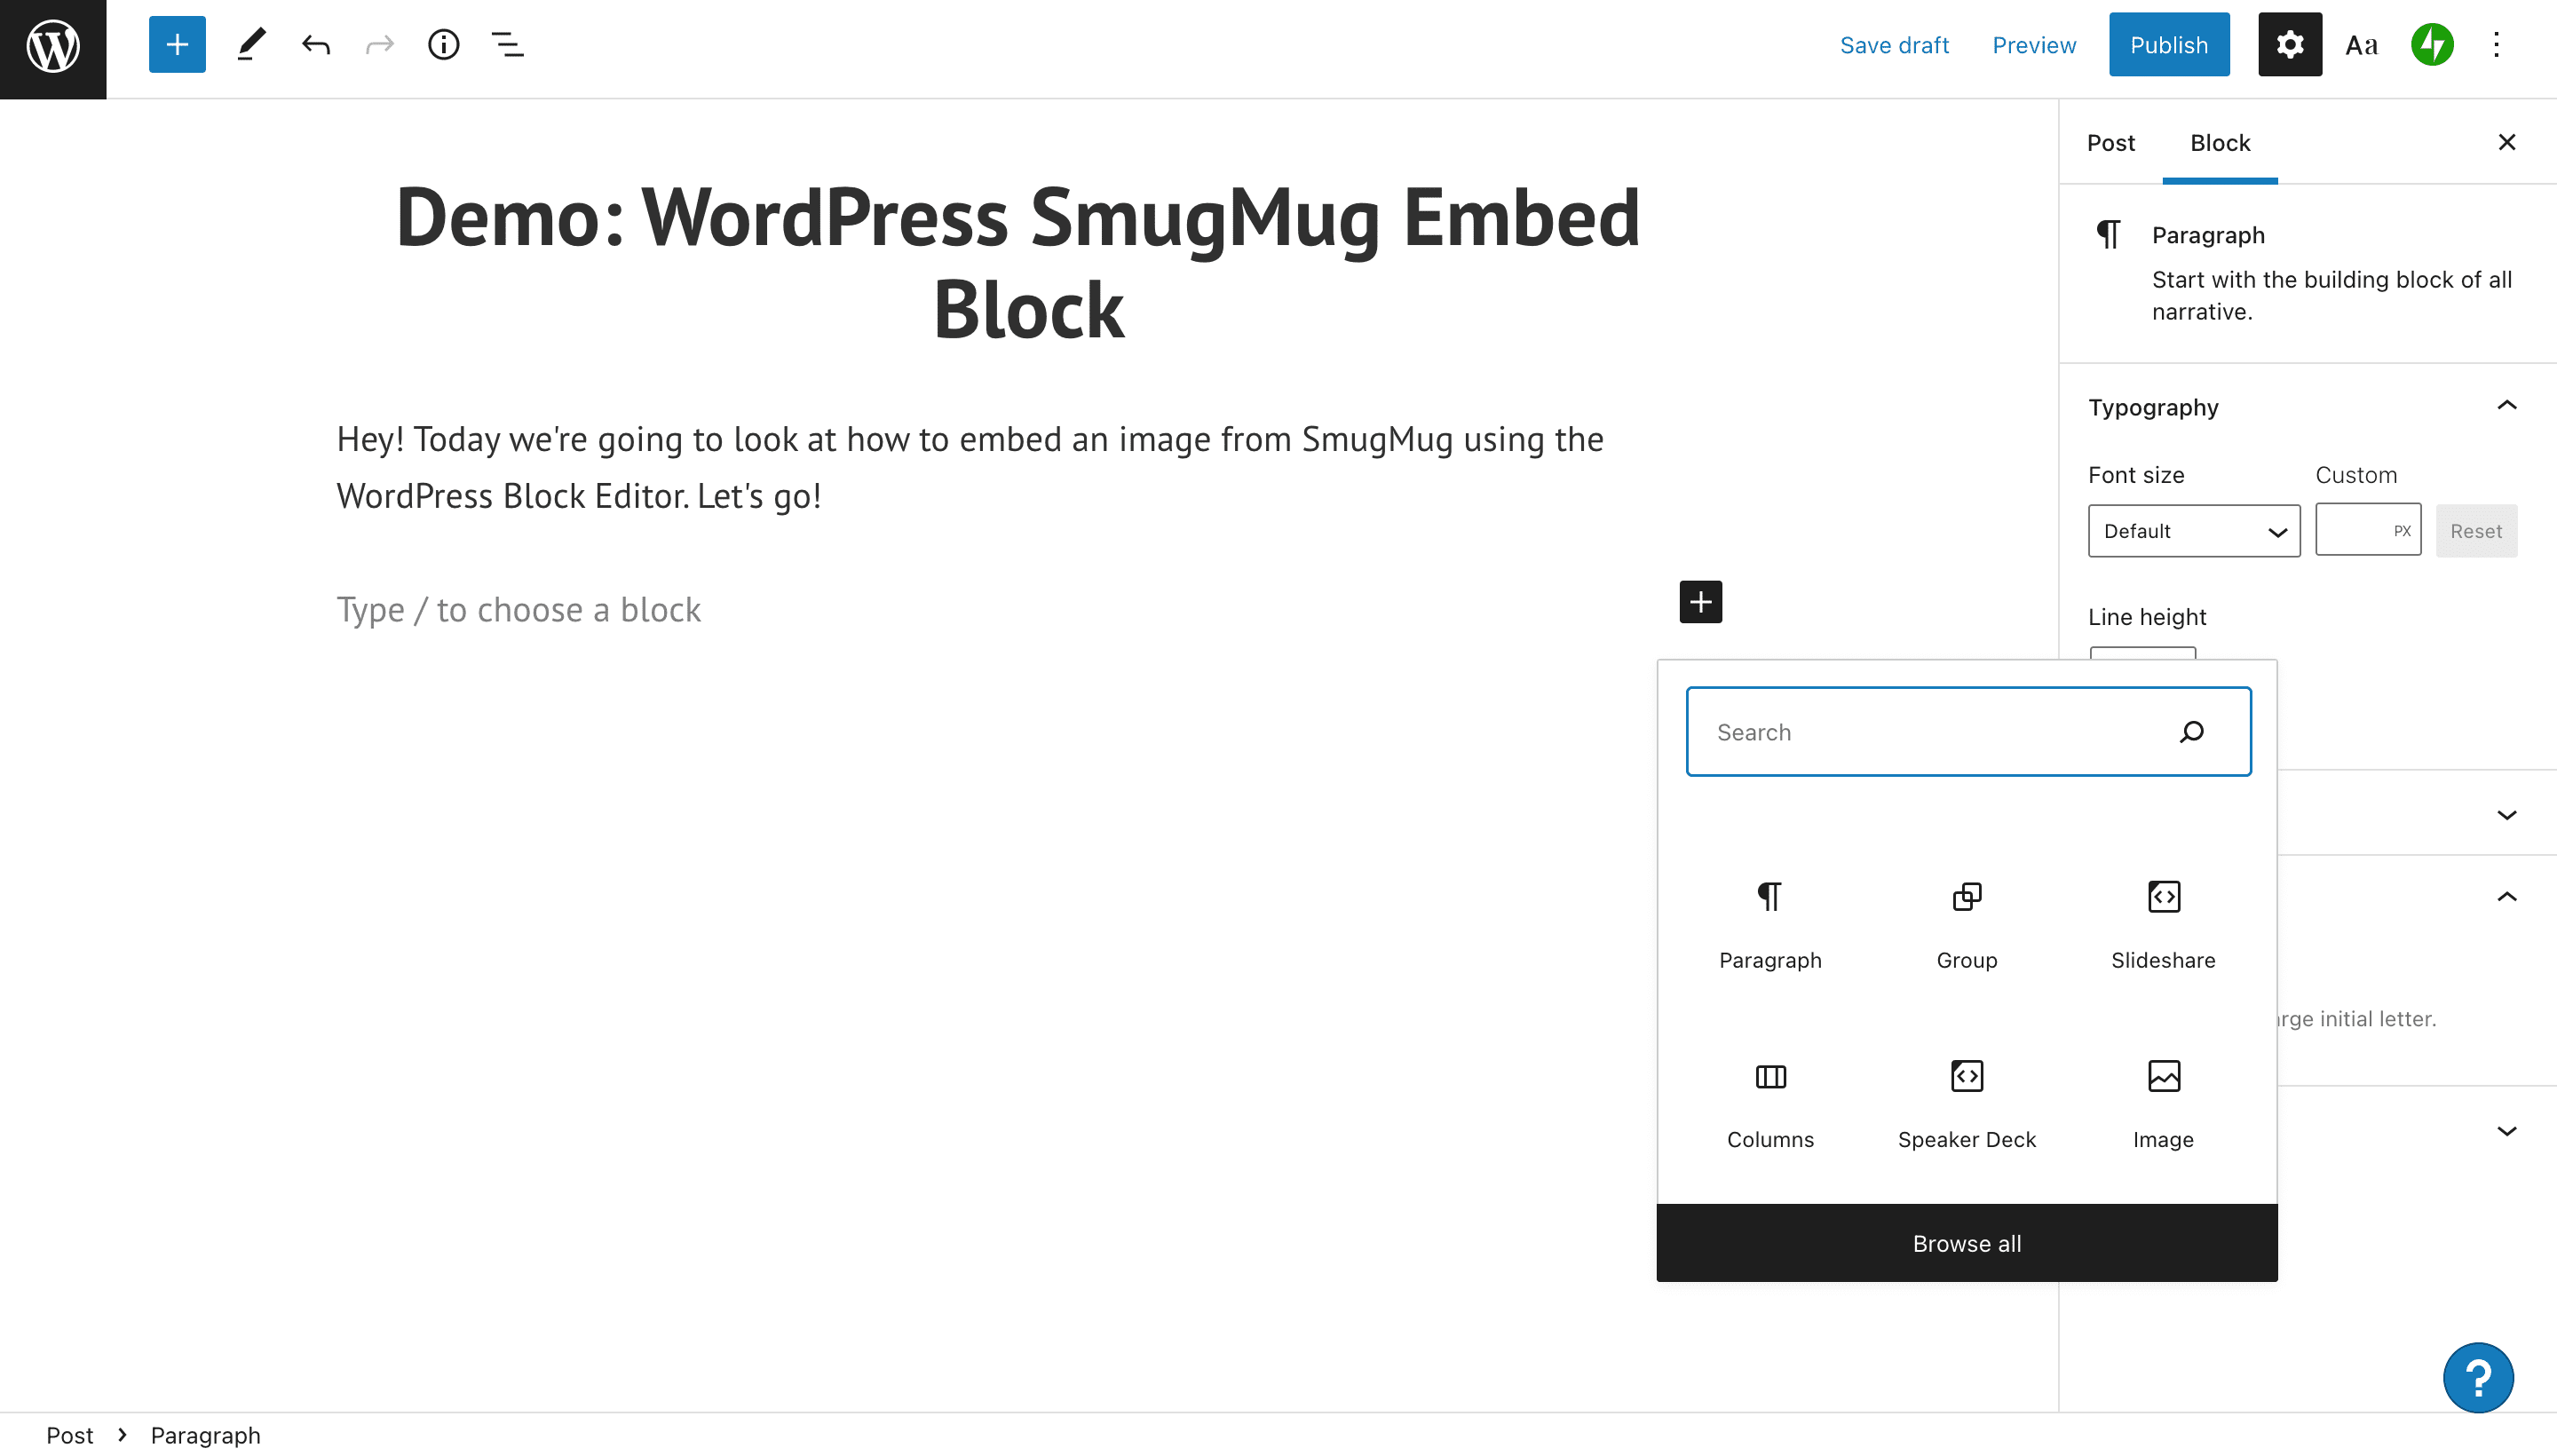
2. Click the plus sign, and you’ll see a popup window with multiple options for adding another piece of content. If you click “Browse all,” you will be able to see the entire list. Some of the visible options include adding a paragraph, group, image, or columns.
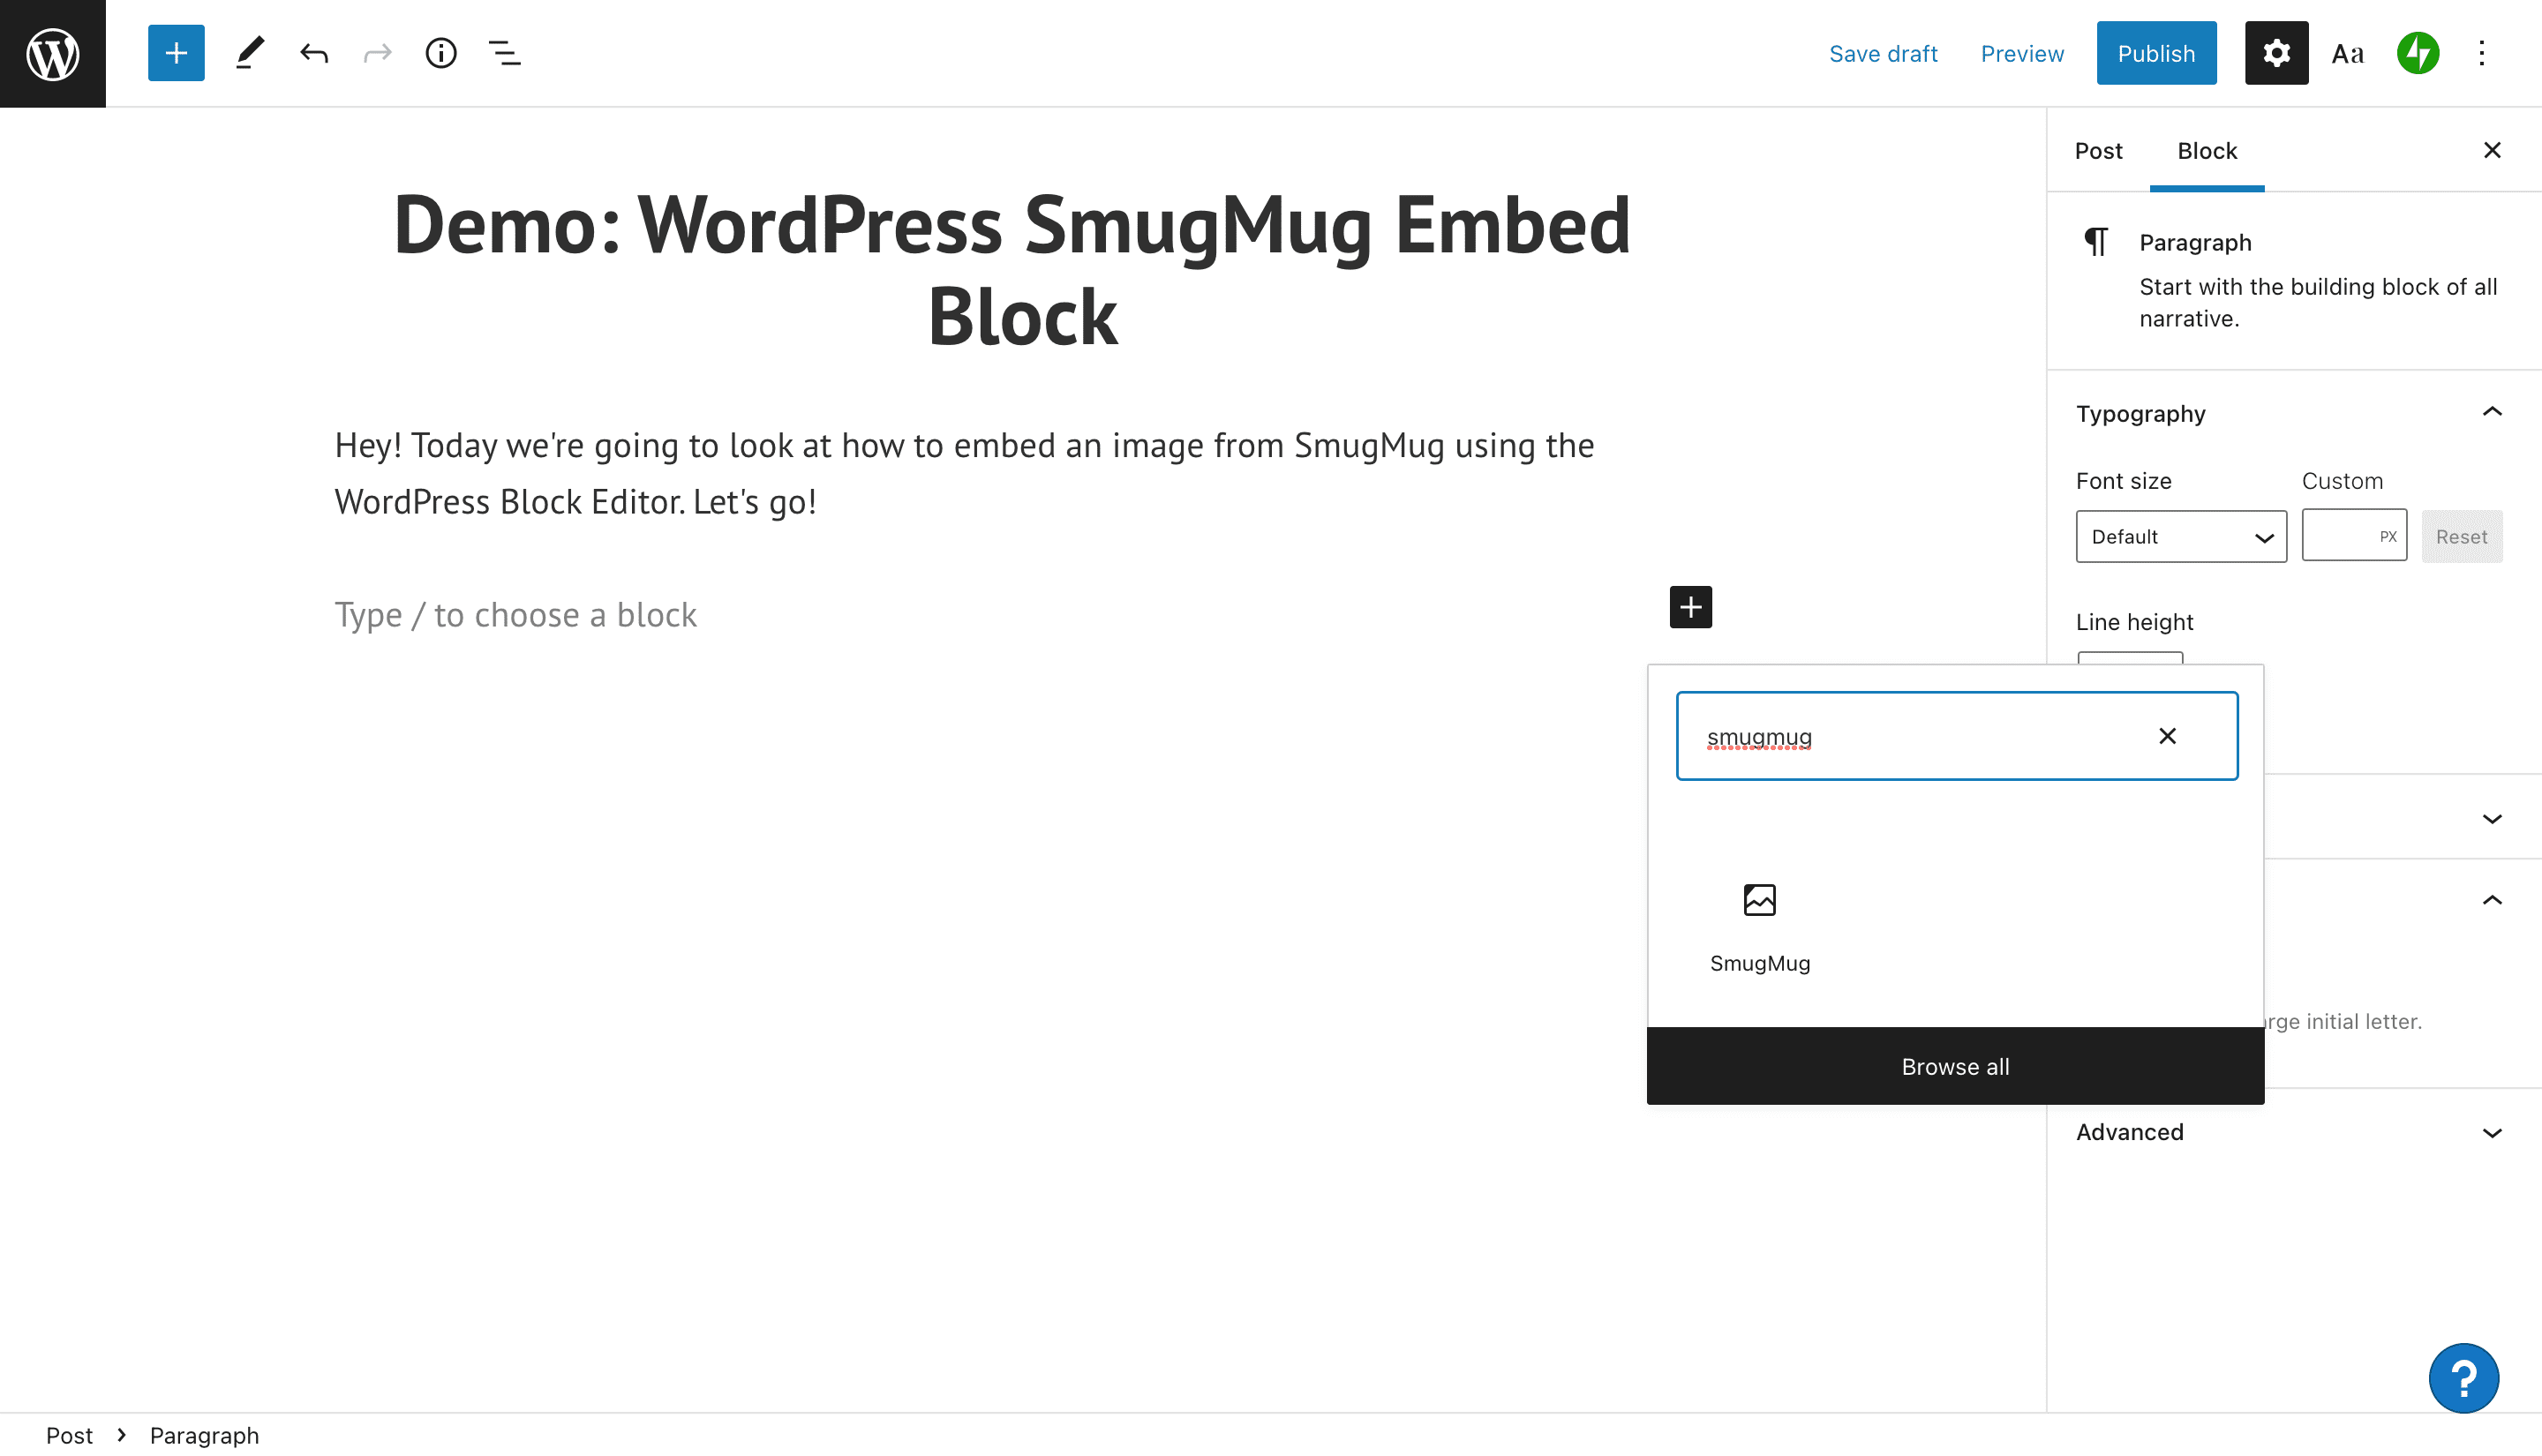
3. Type the specific embed block you want to use into the search bar. In this case, that’s “SmugMug.” Once you’ve found the block you want to add, click on it.
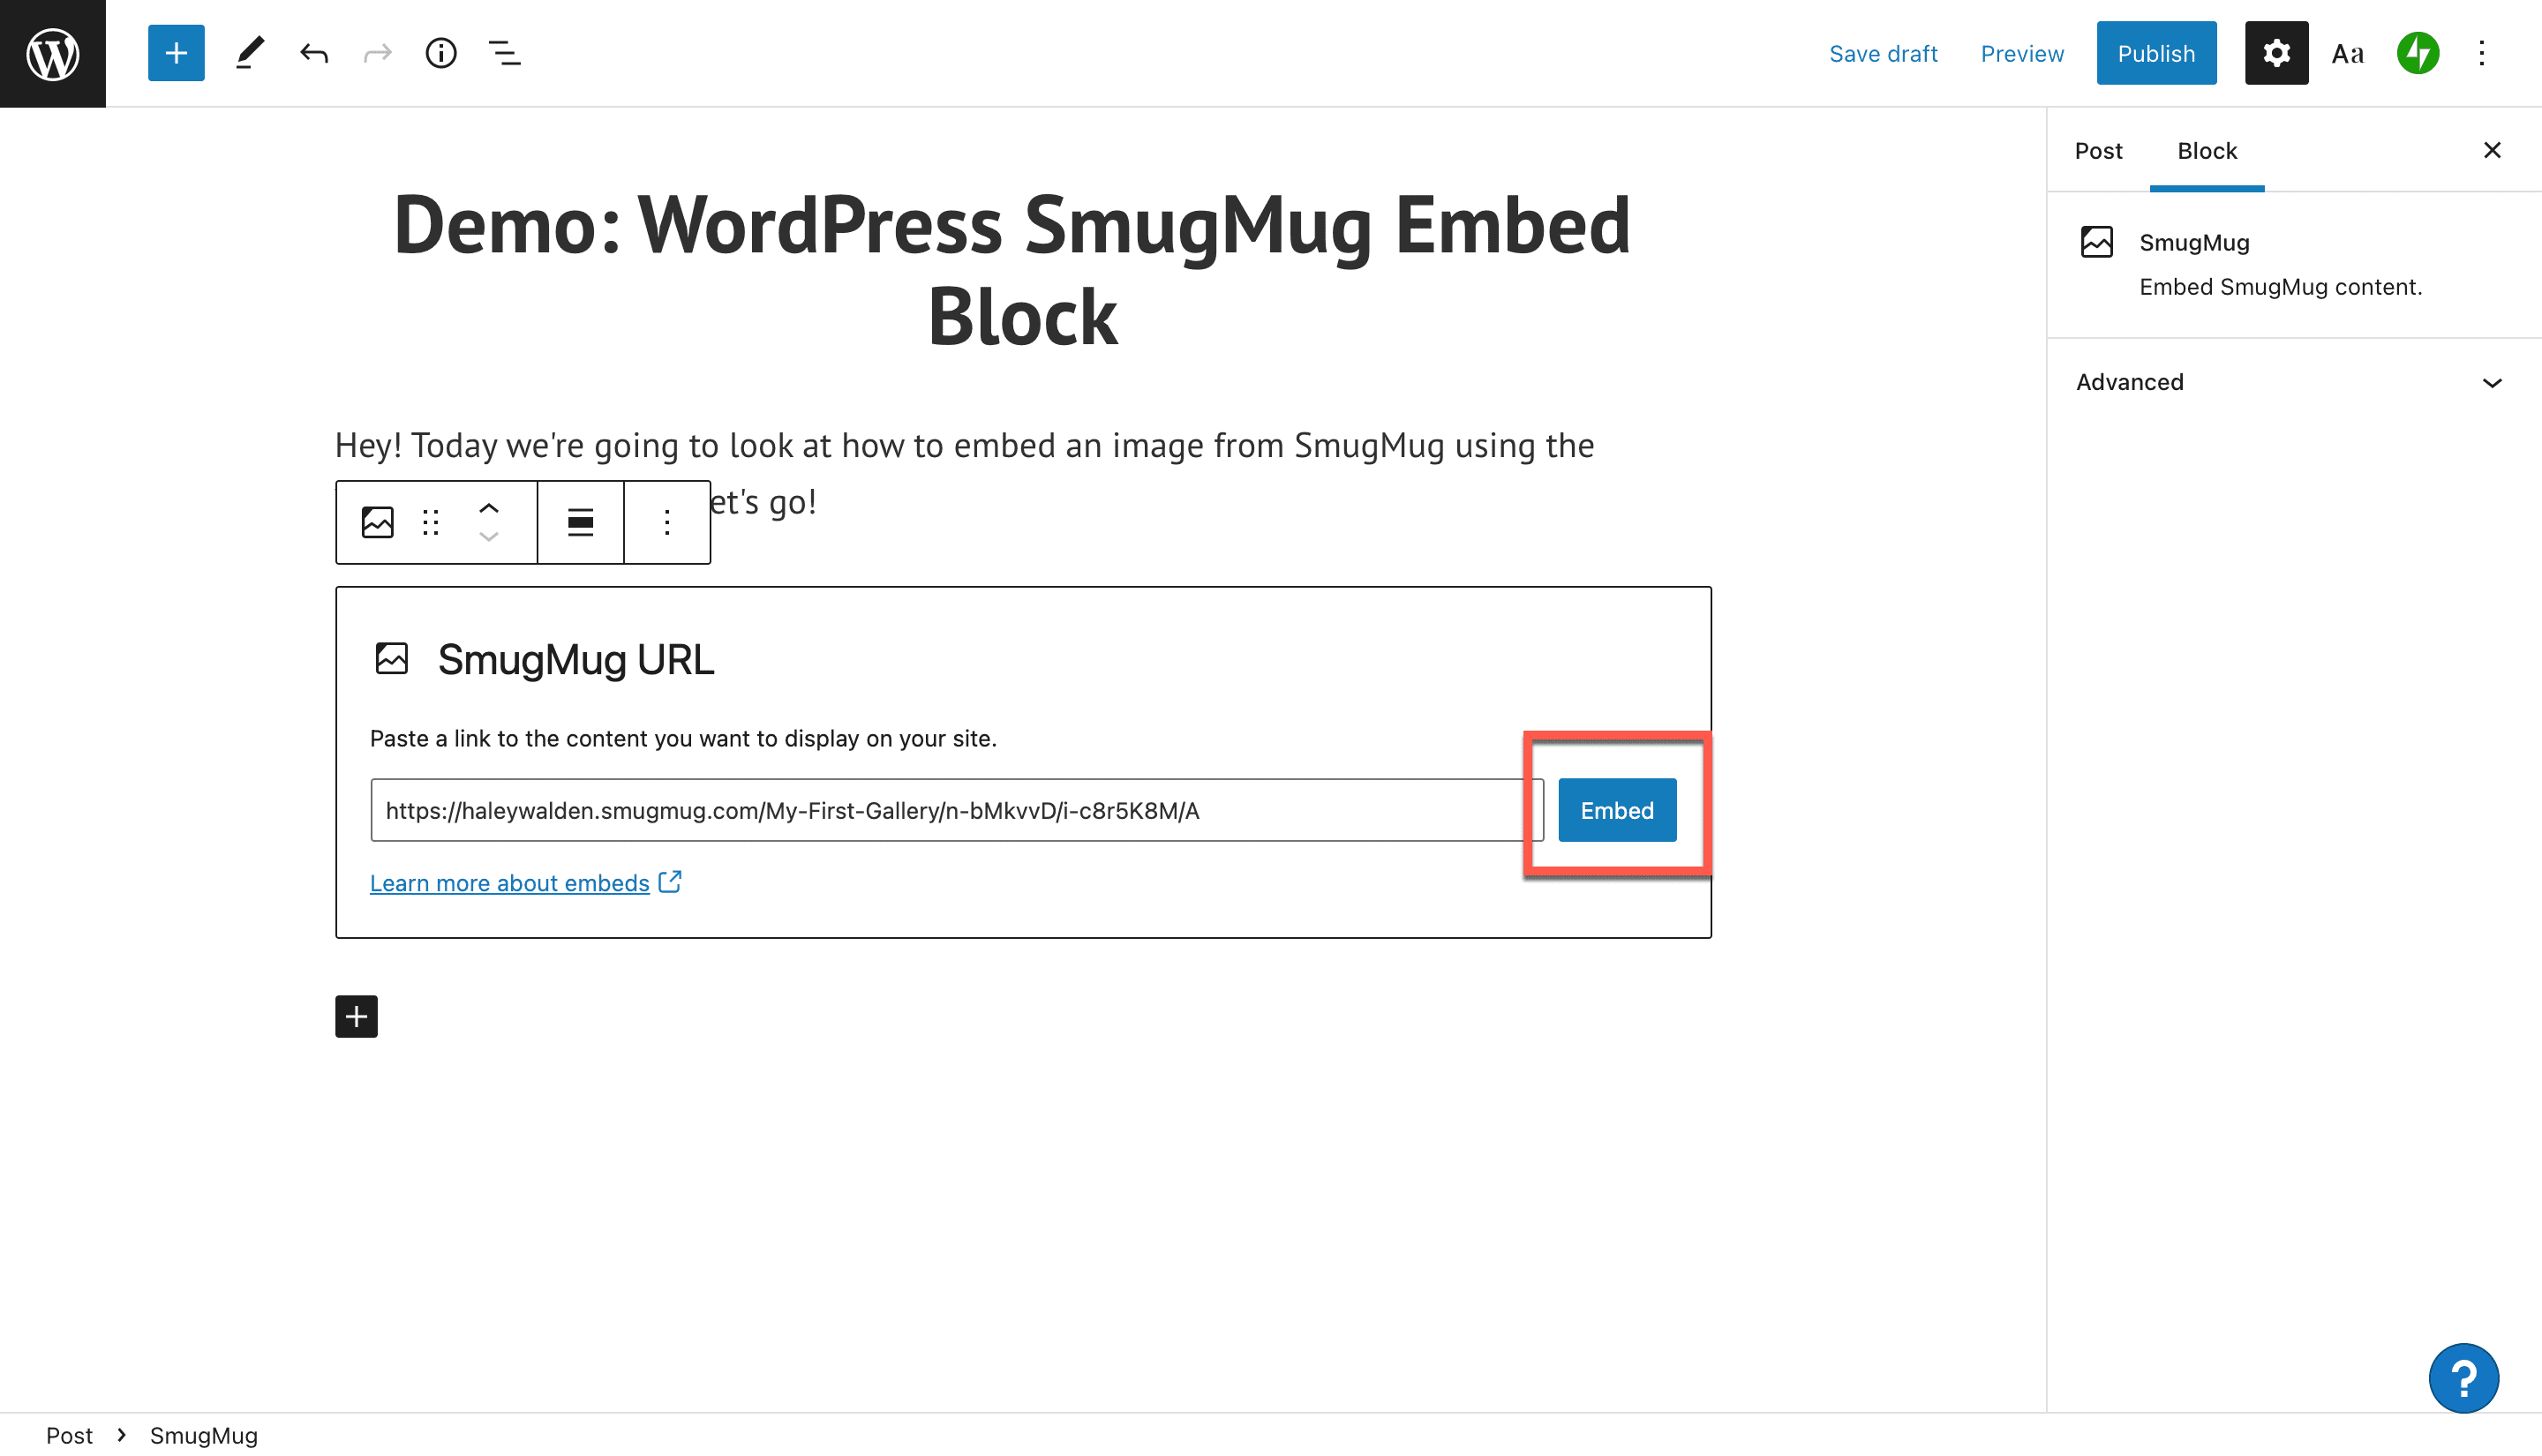
4. Now, the SmugMug block will appear in the WordPress editor. You’ll notice that there’s a place to enter the image URL.
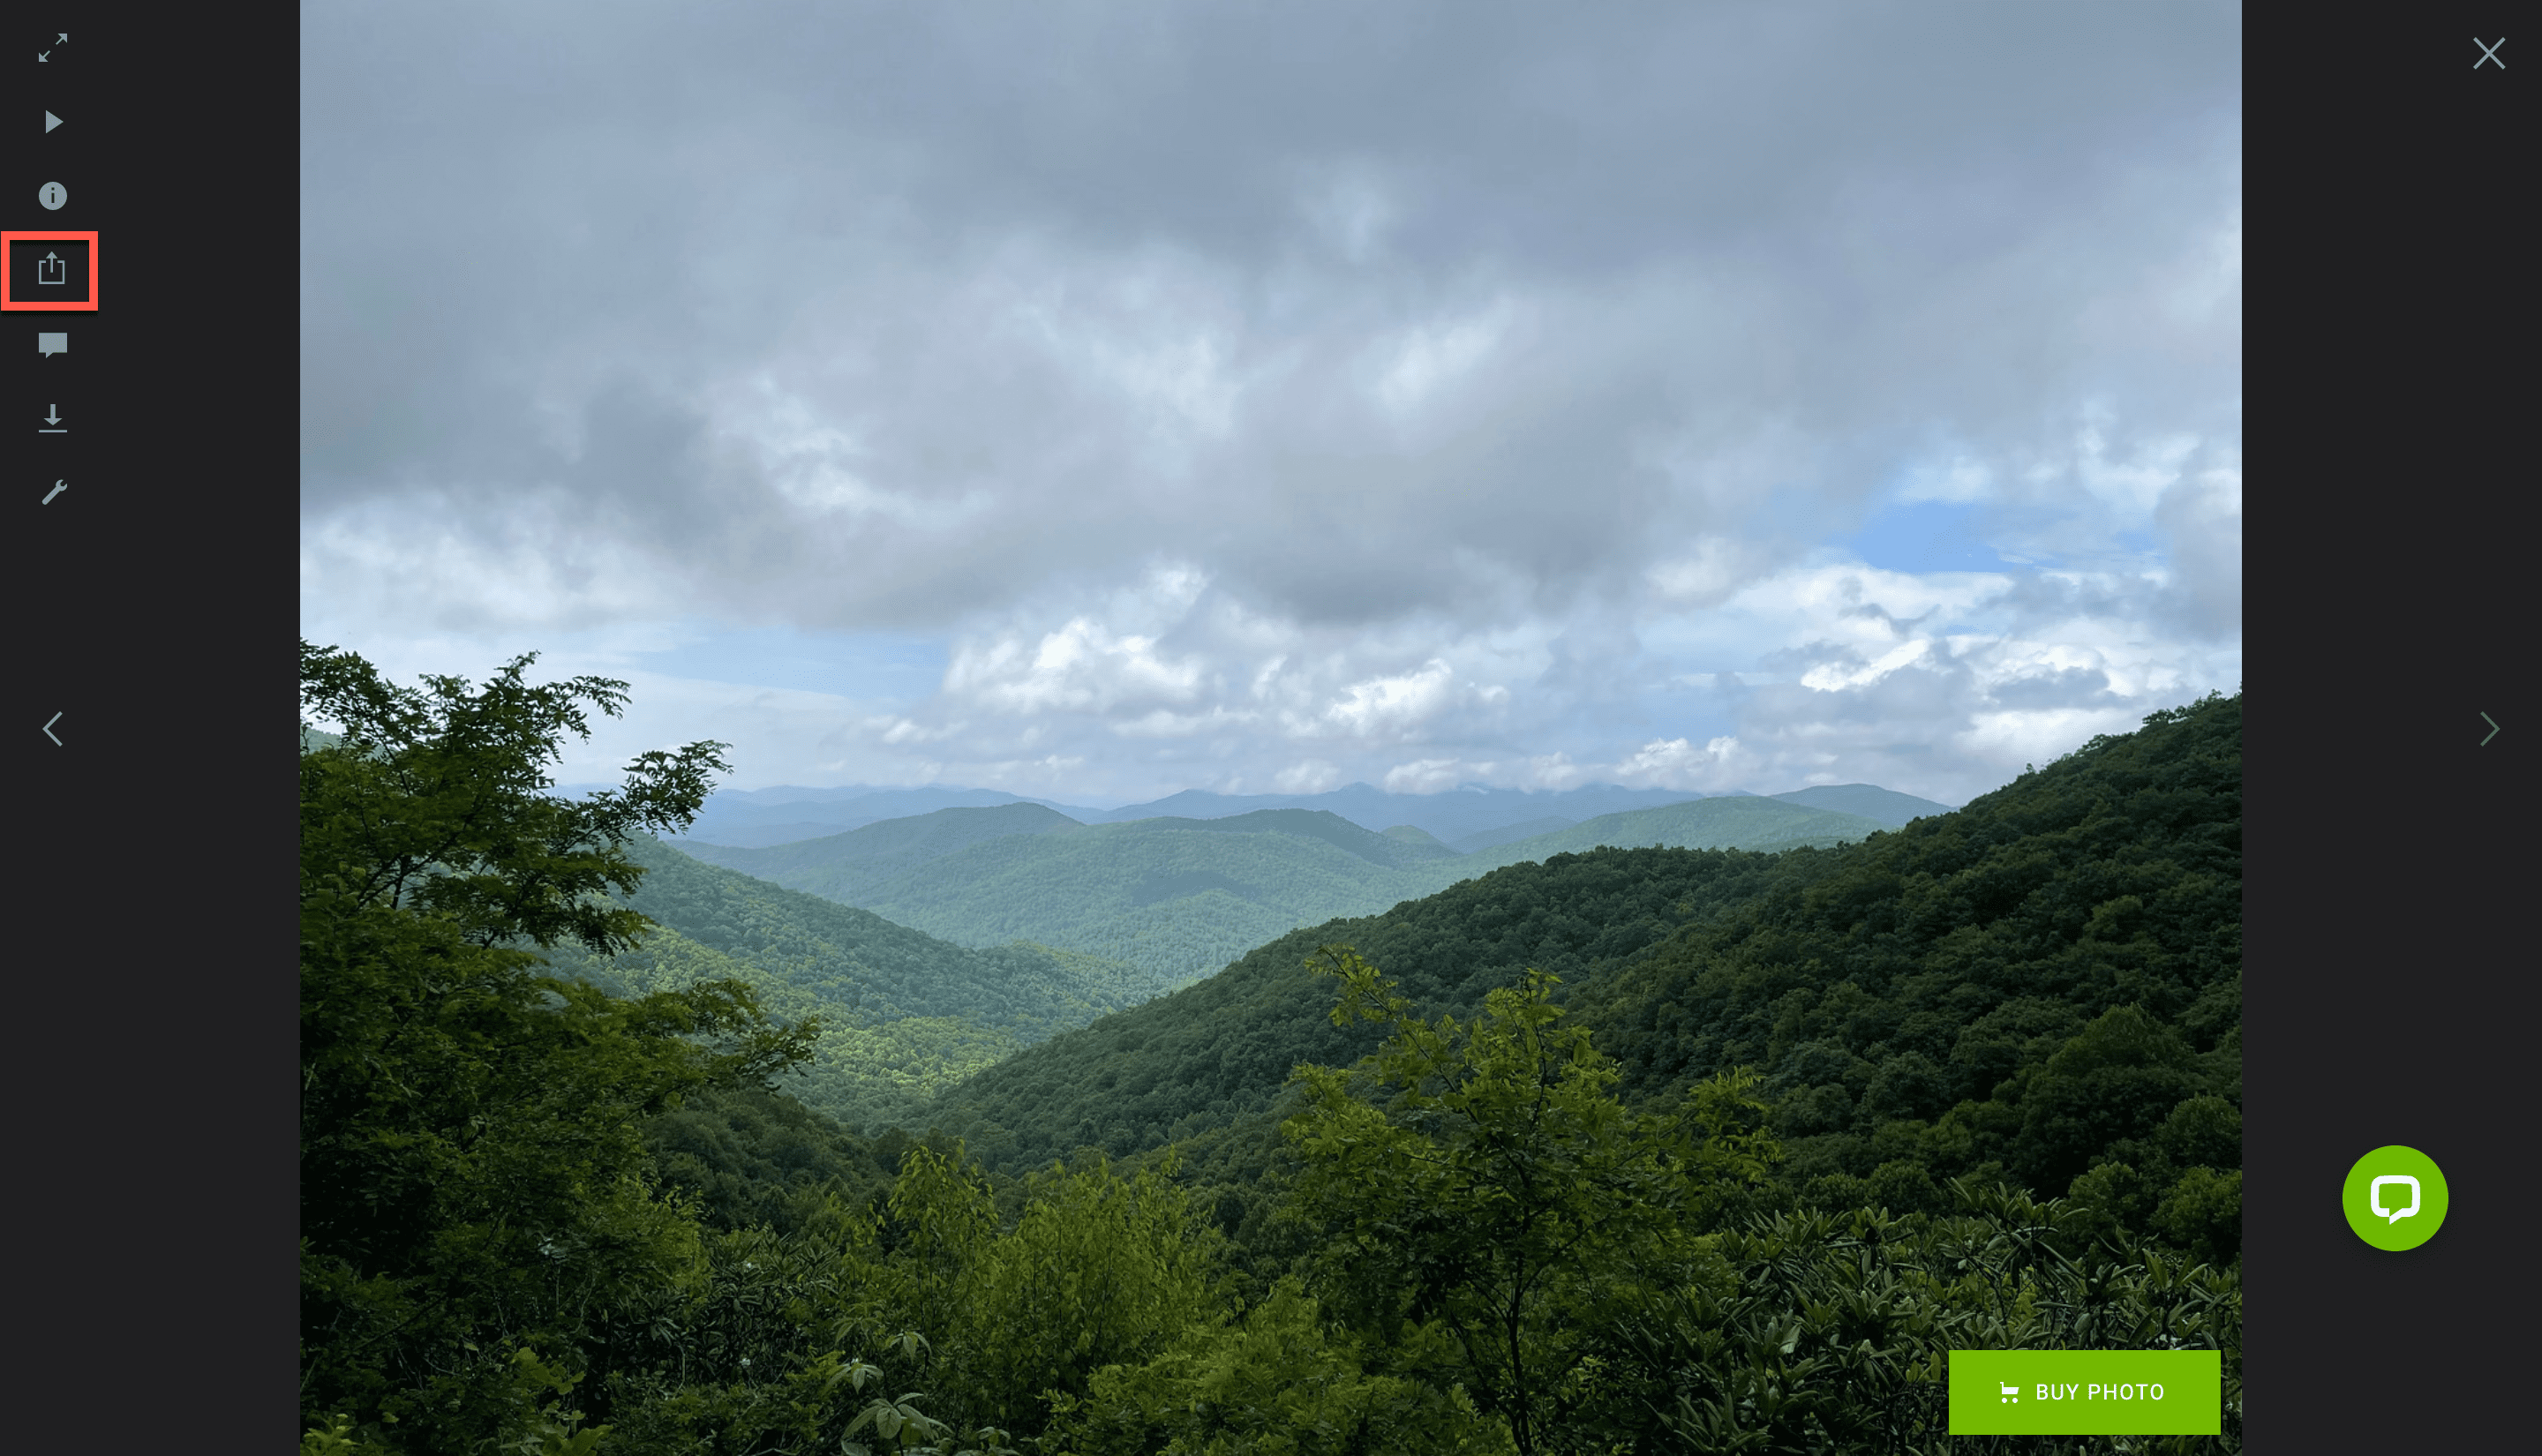
5. Navigate over to your SmugMug account to grab the URL for the image you’re planning to share. Once you’ve found the image, click the share button on the left-hand side of the screen.
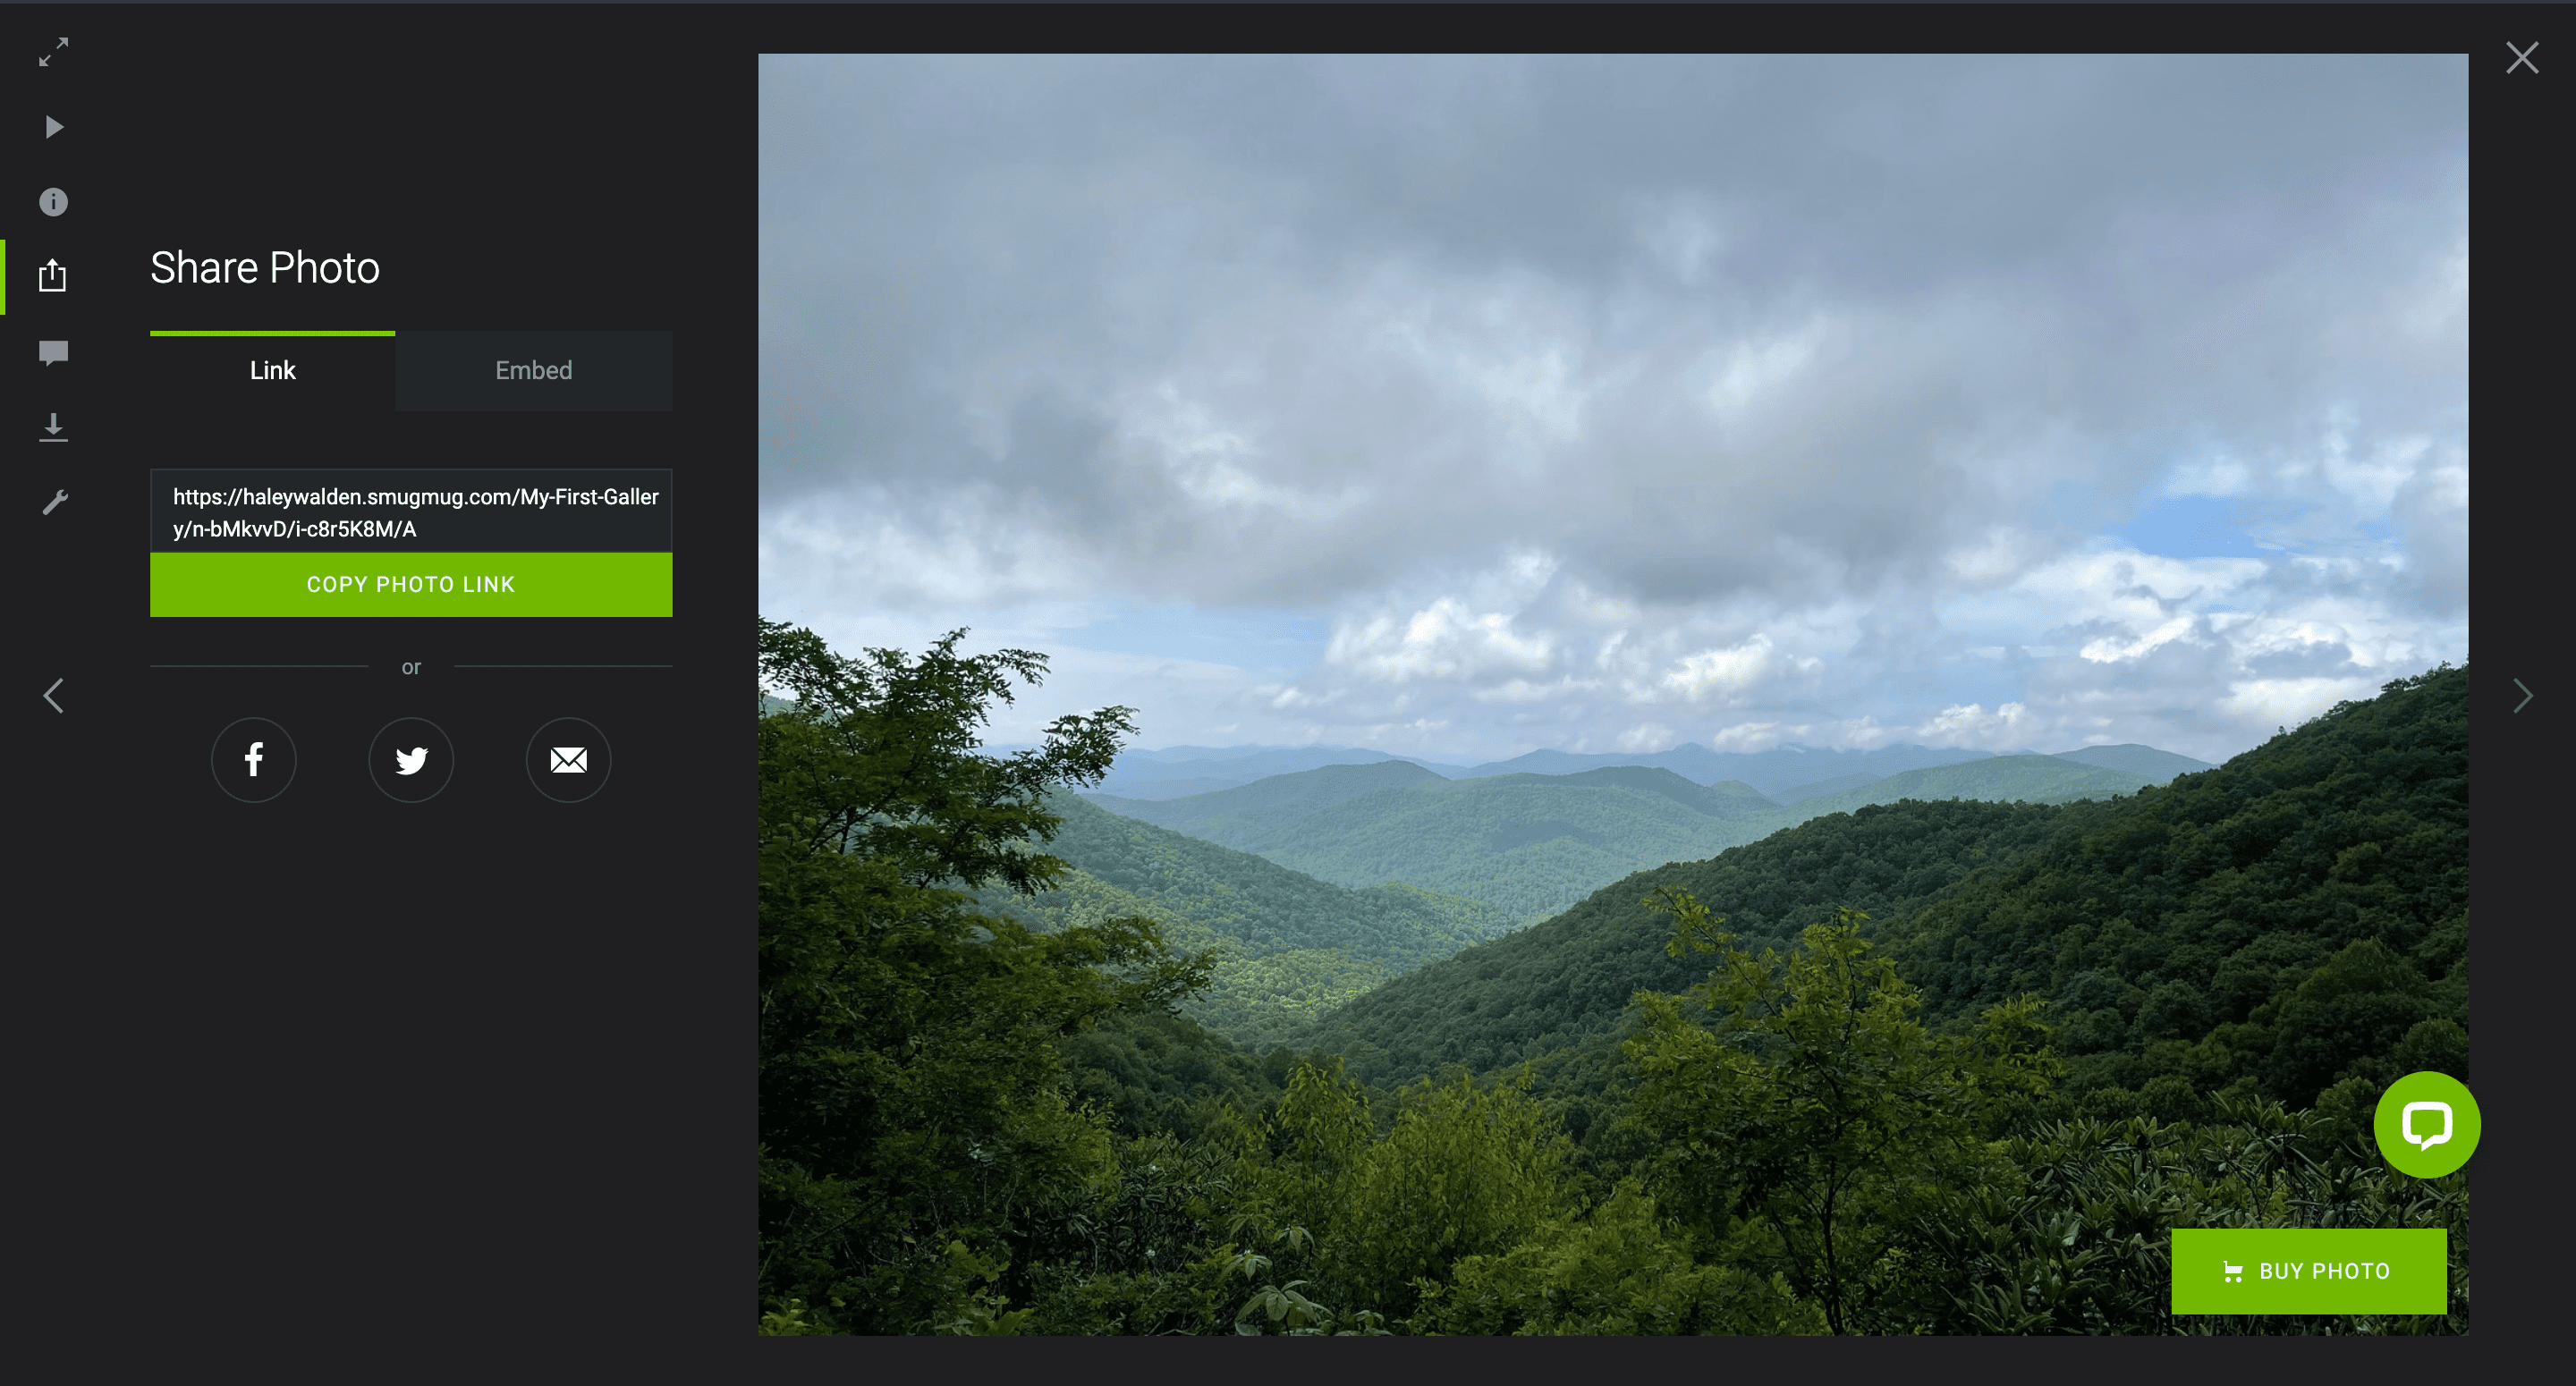
6. After you click the share button, you’ll be prompted to copy the image URL. Click the Copy Photo Link button.
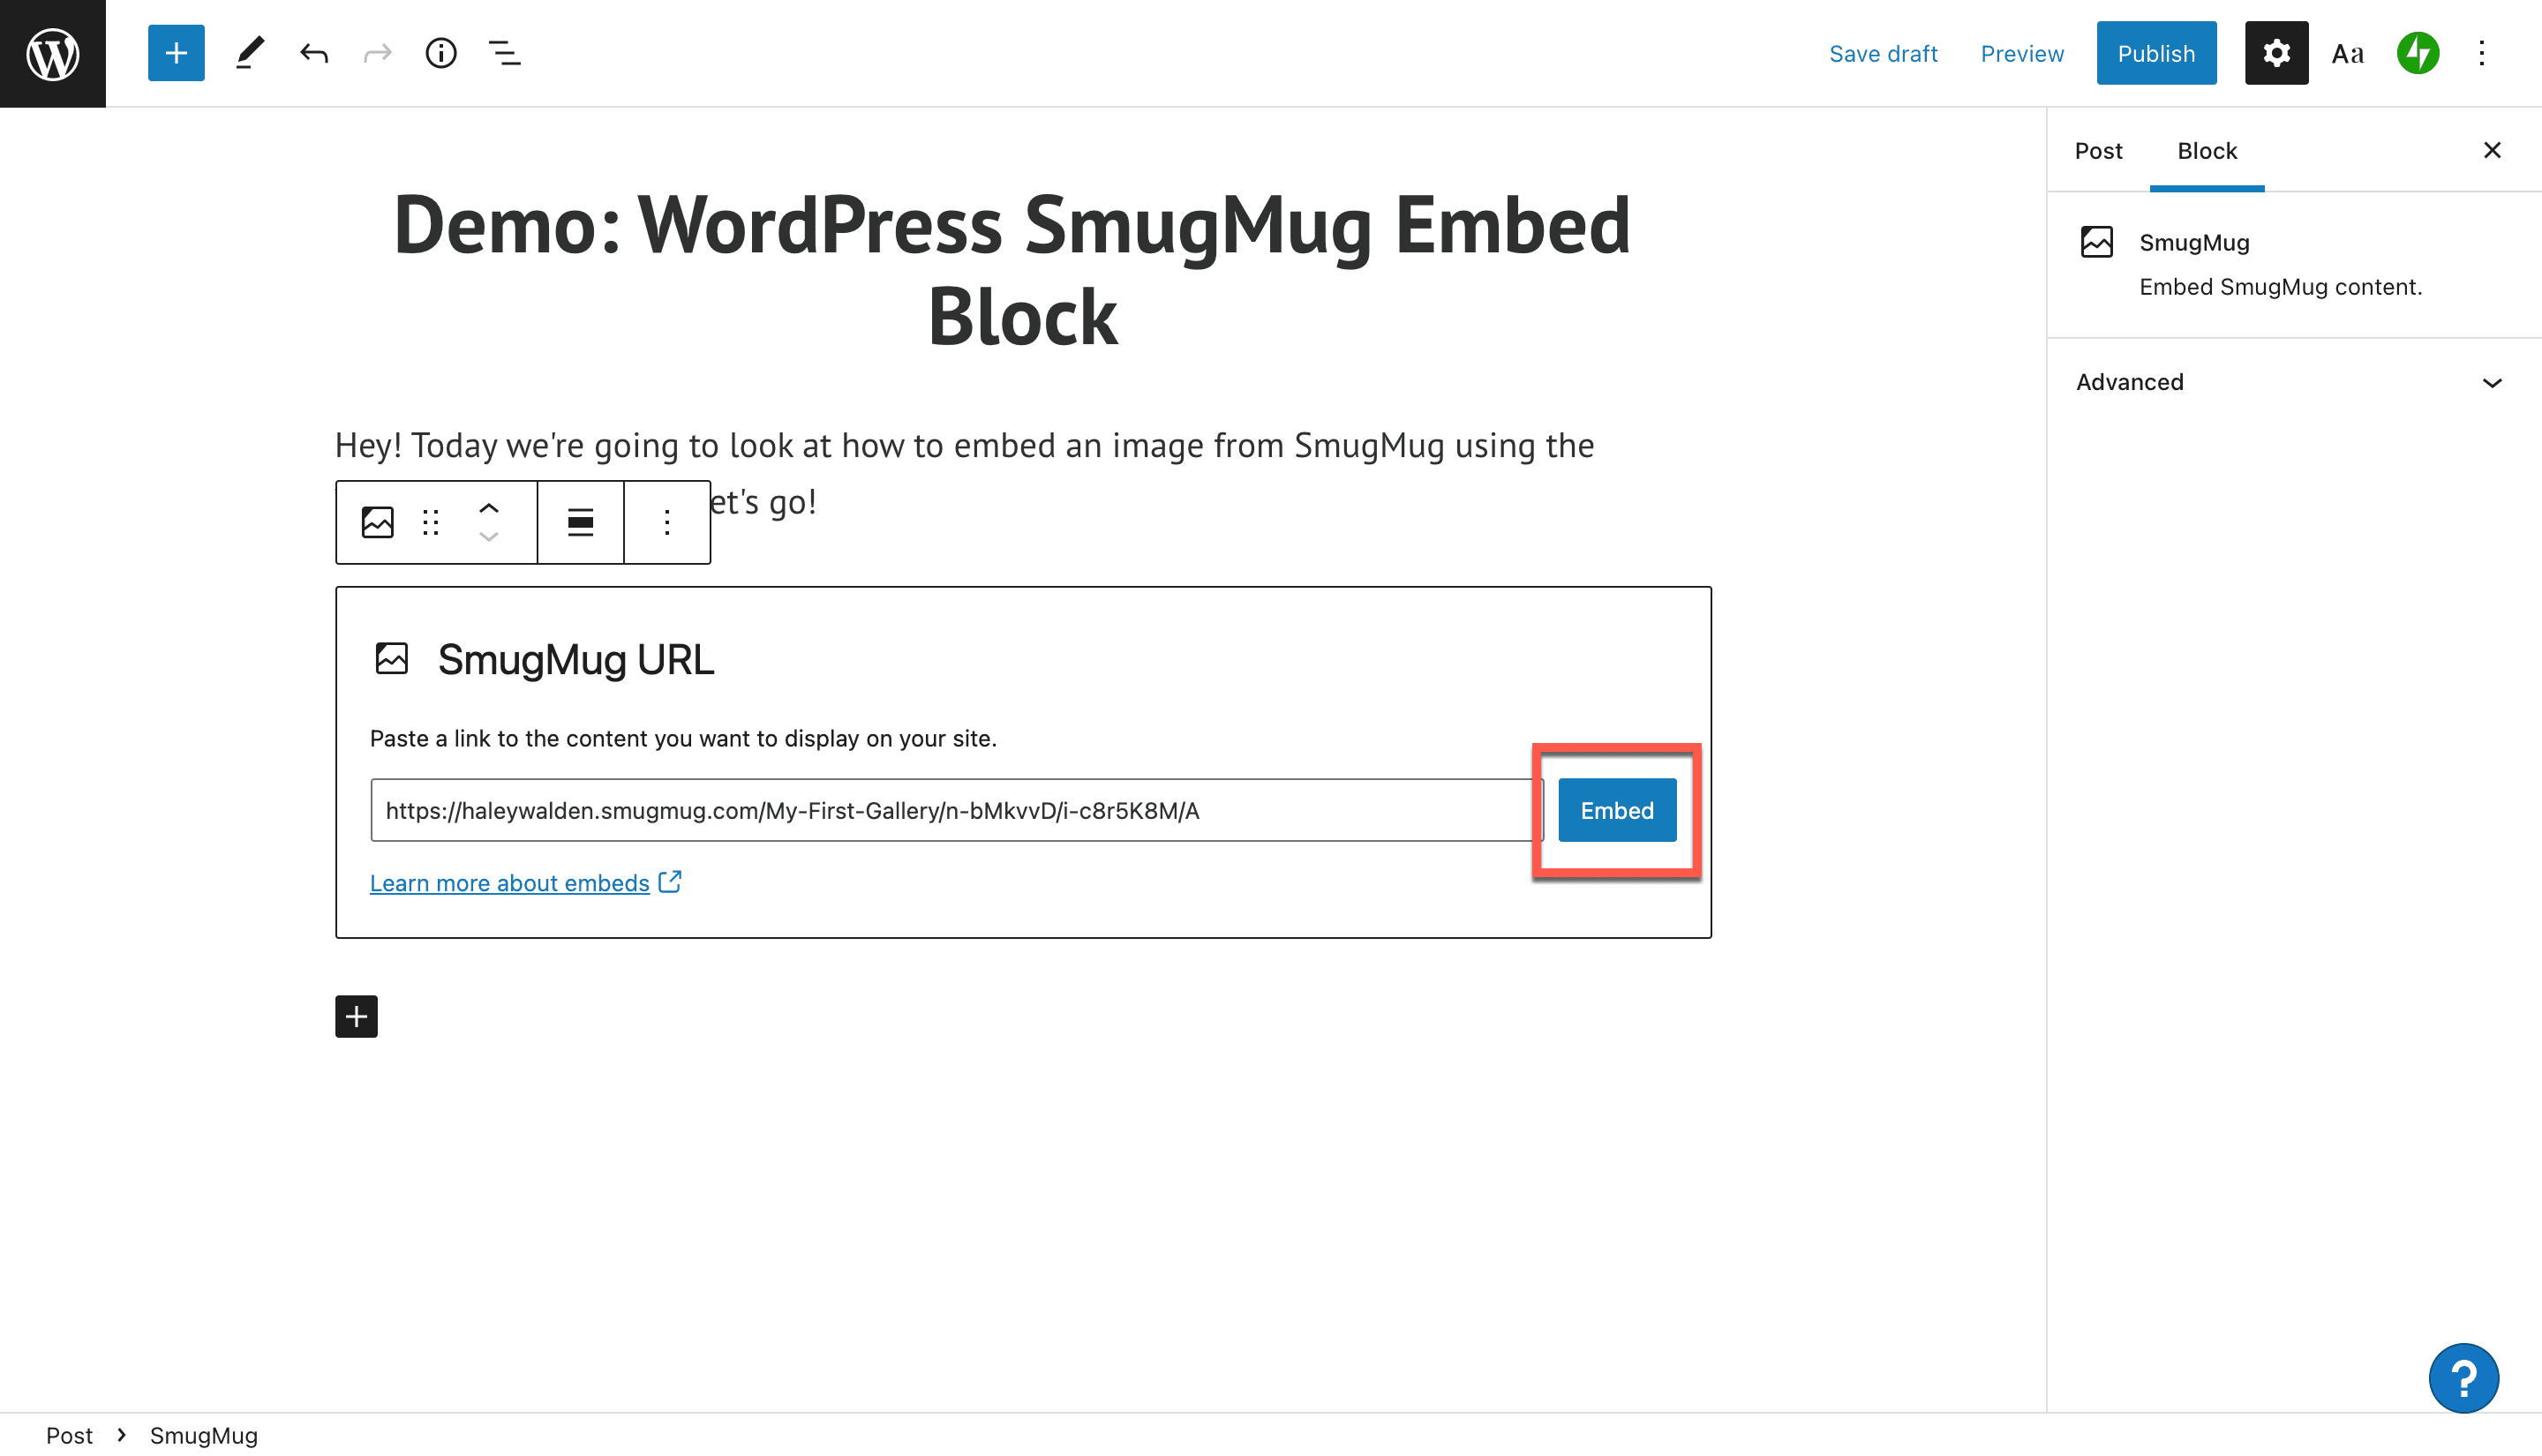
7. Go back to your WordPress Block Editor and paste the photo URL into the toolbar. Click on the blue Embed button next to the URL.
8. Your SmugMug embed won’t show up in your editor. Once you’ve embedded it, you’ll get a message that says, “Embedded content from smugmug.com can’t be previewed in the editor.”
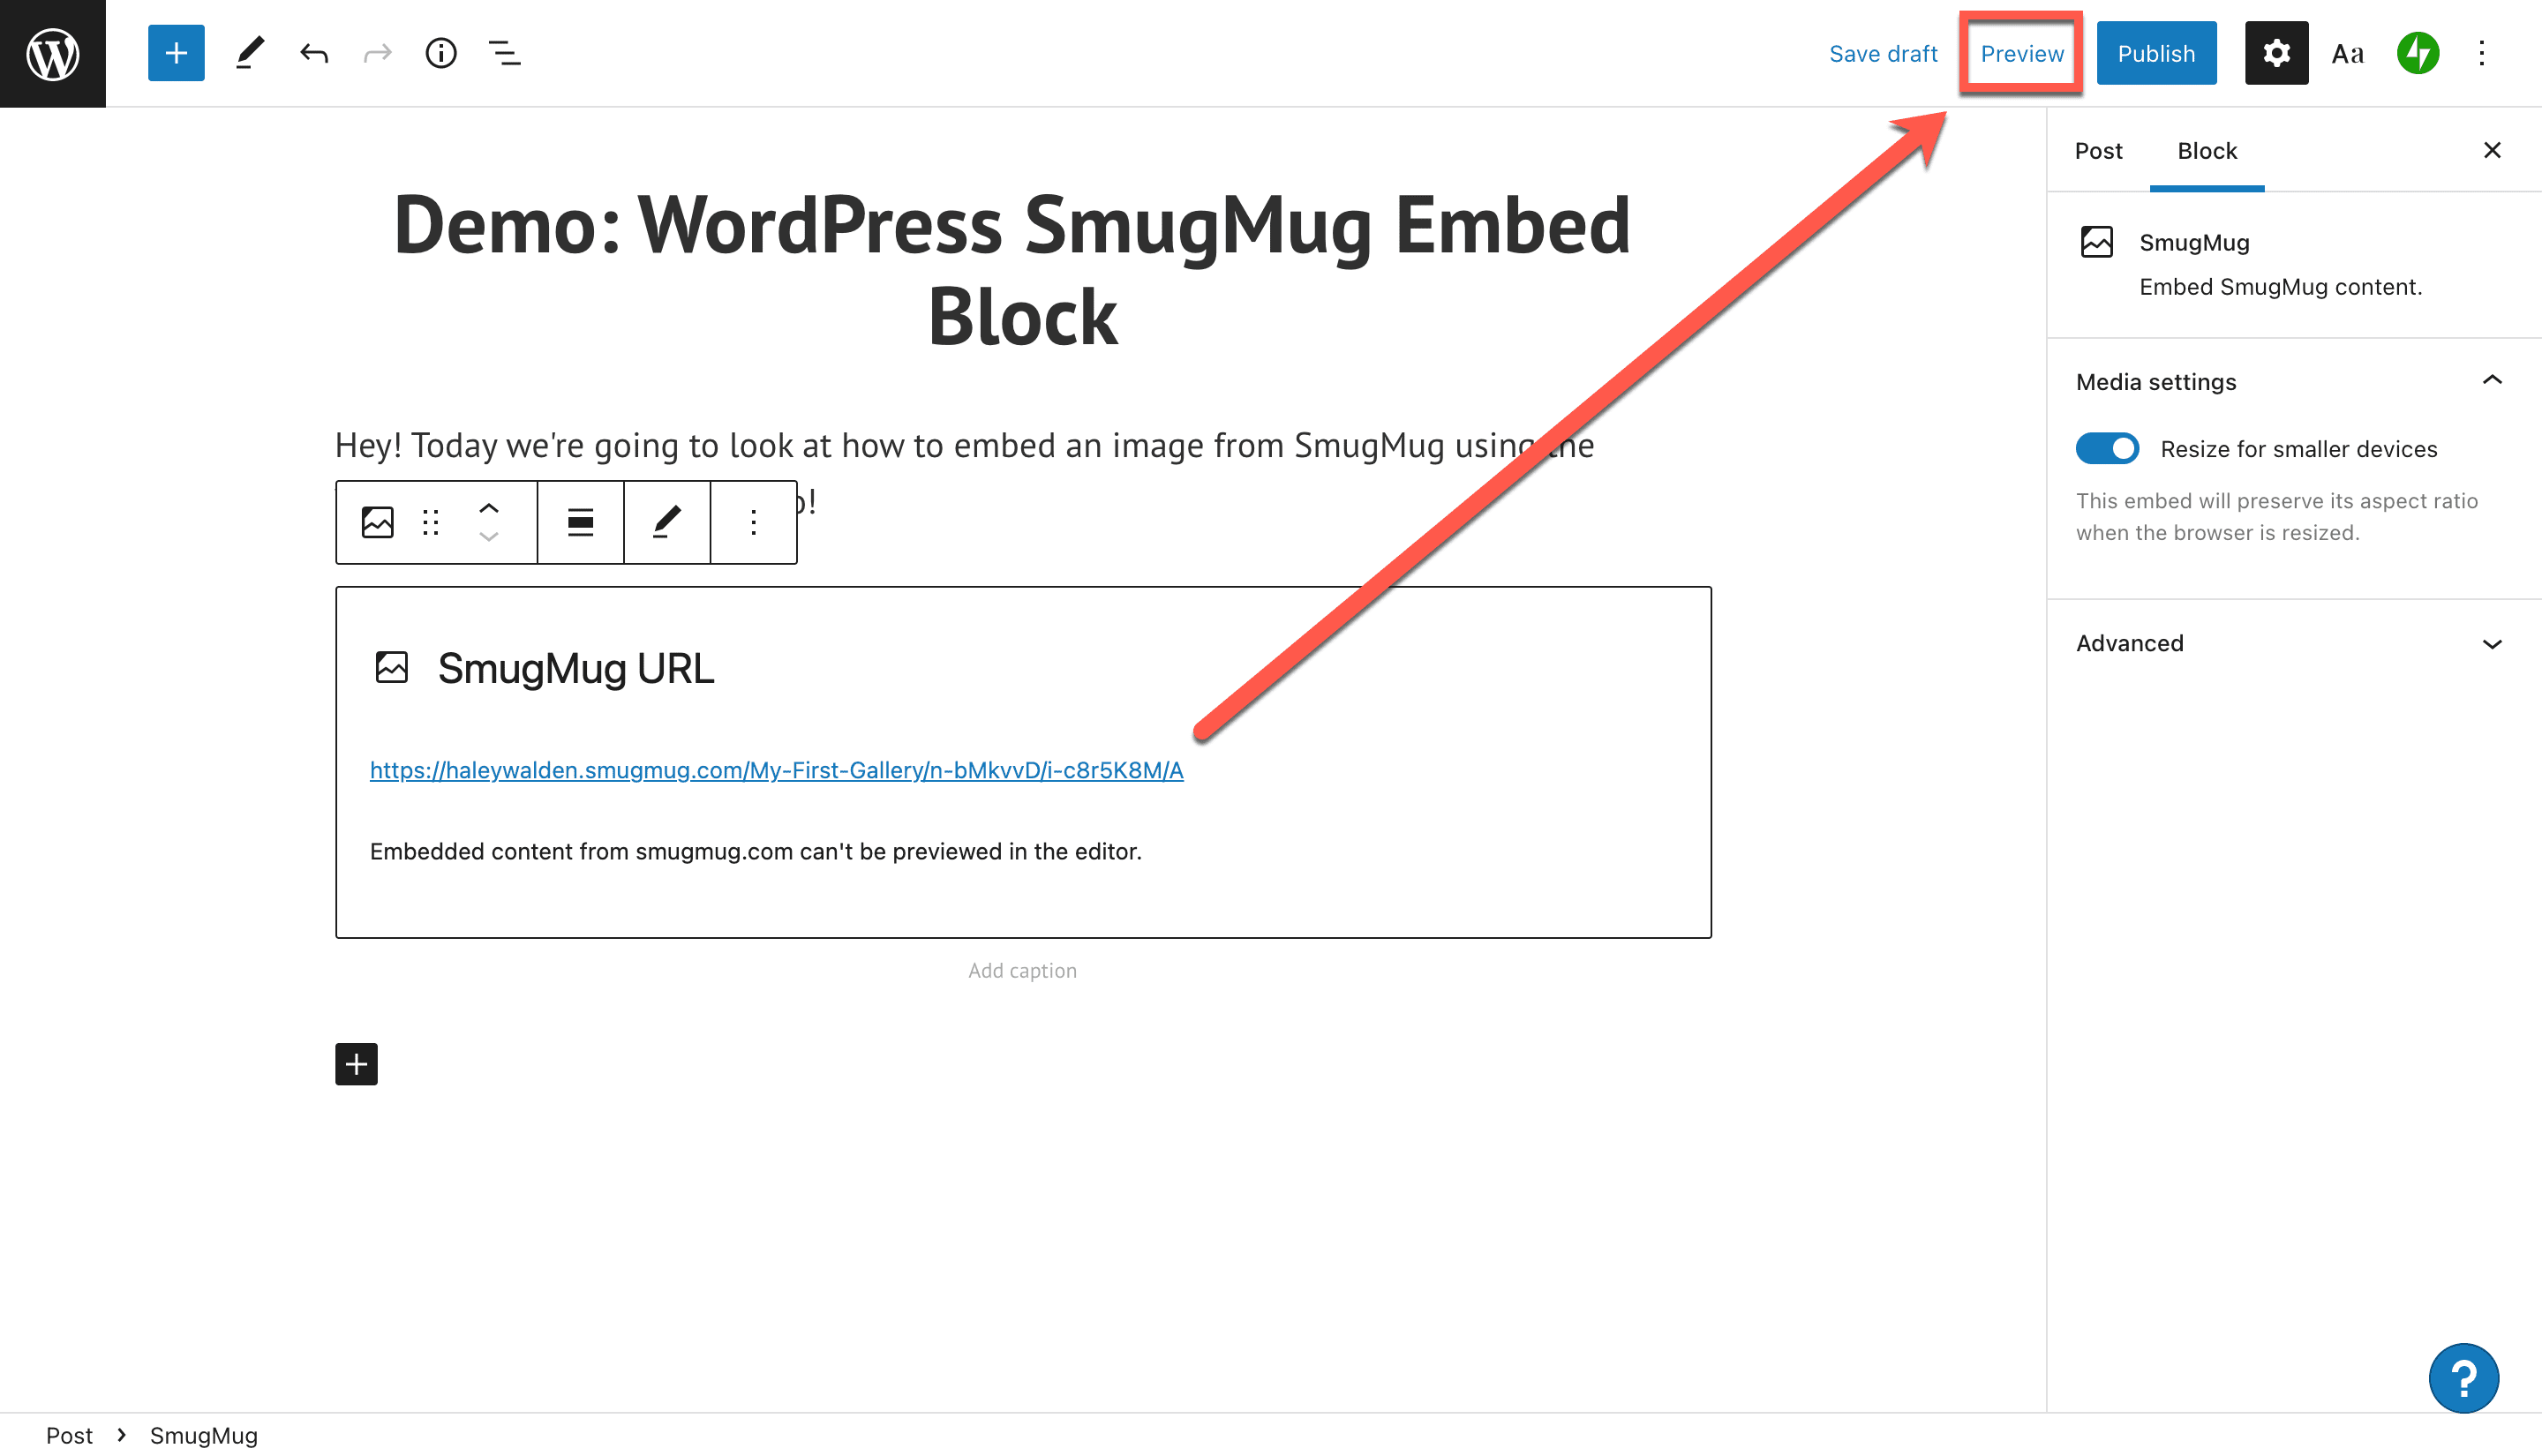
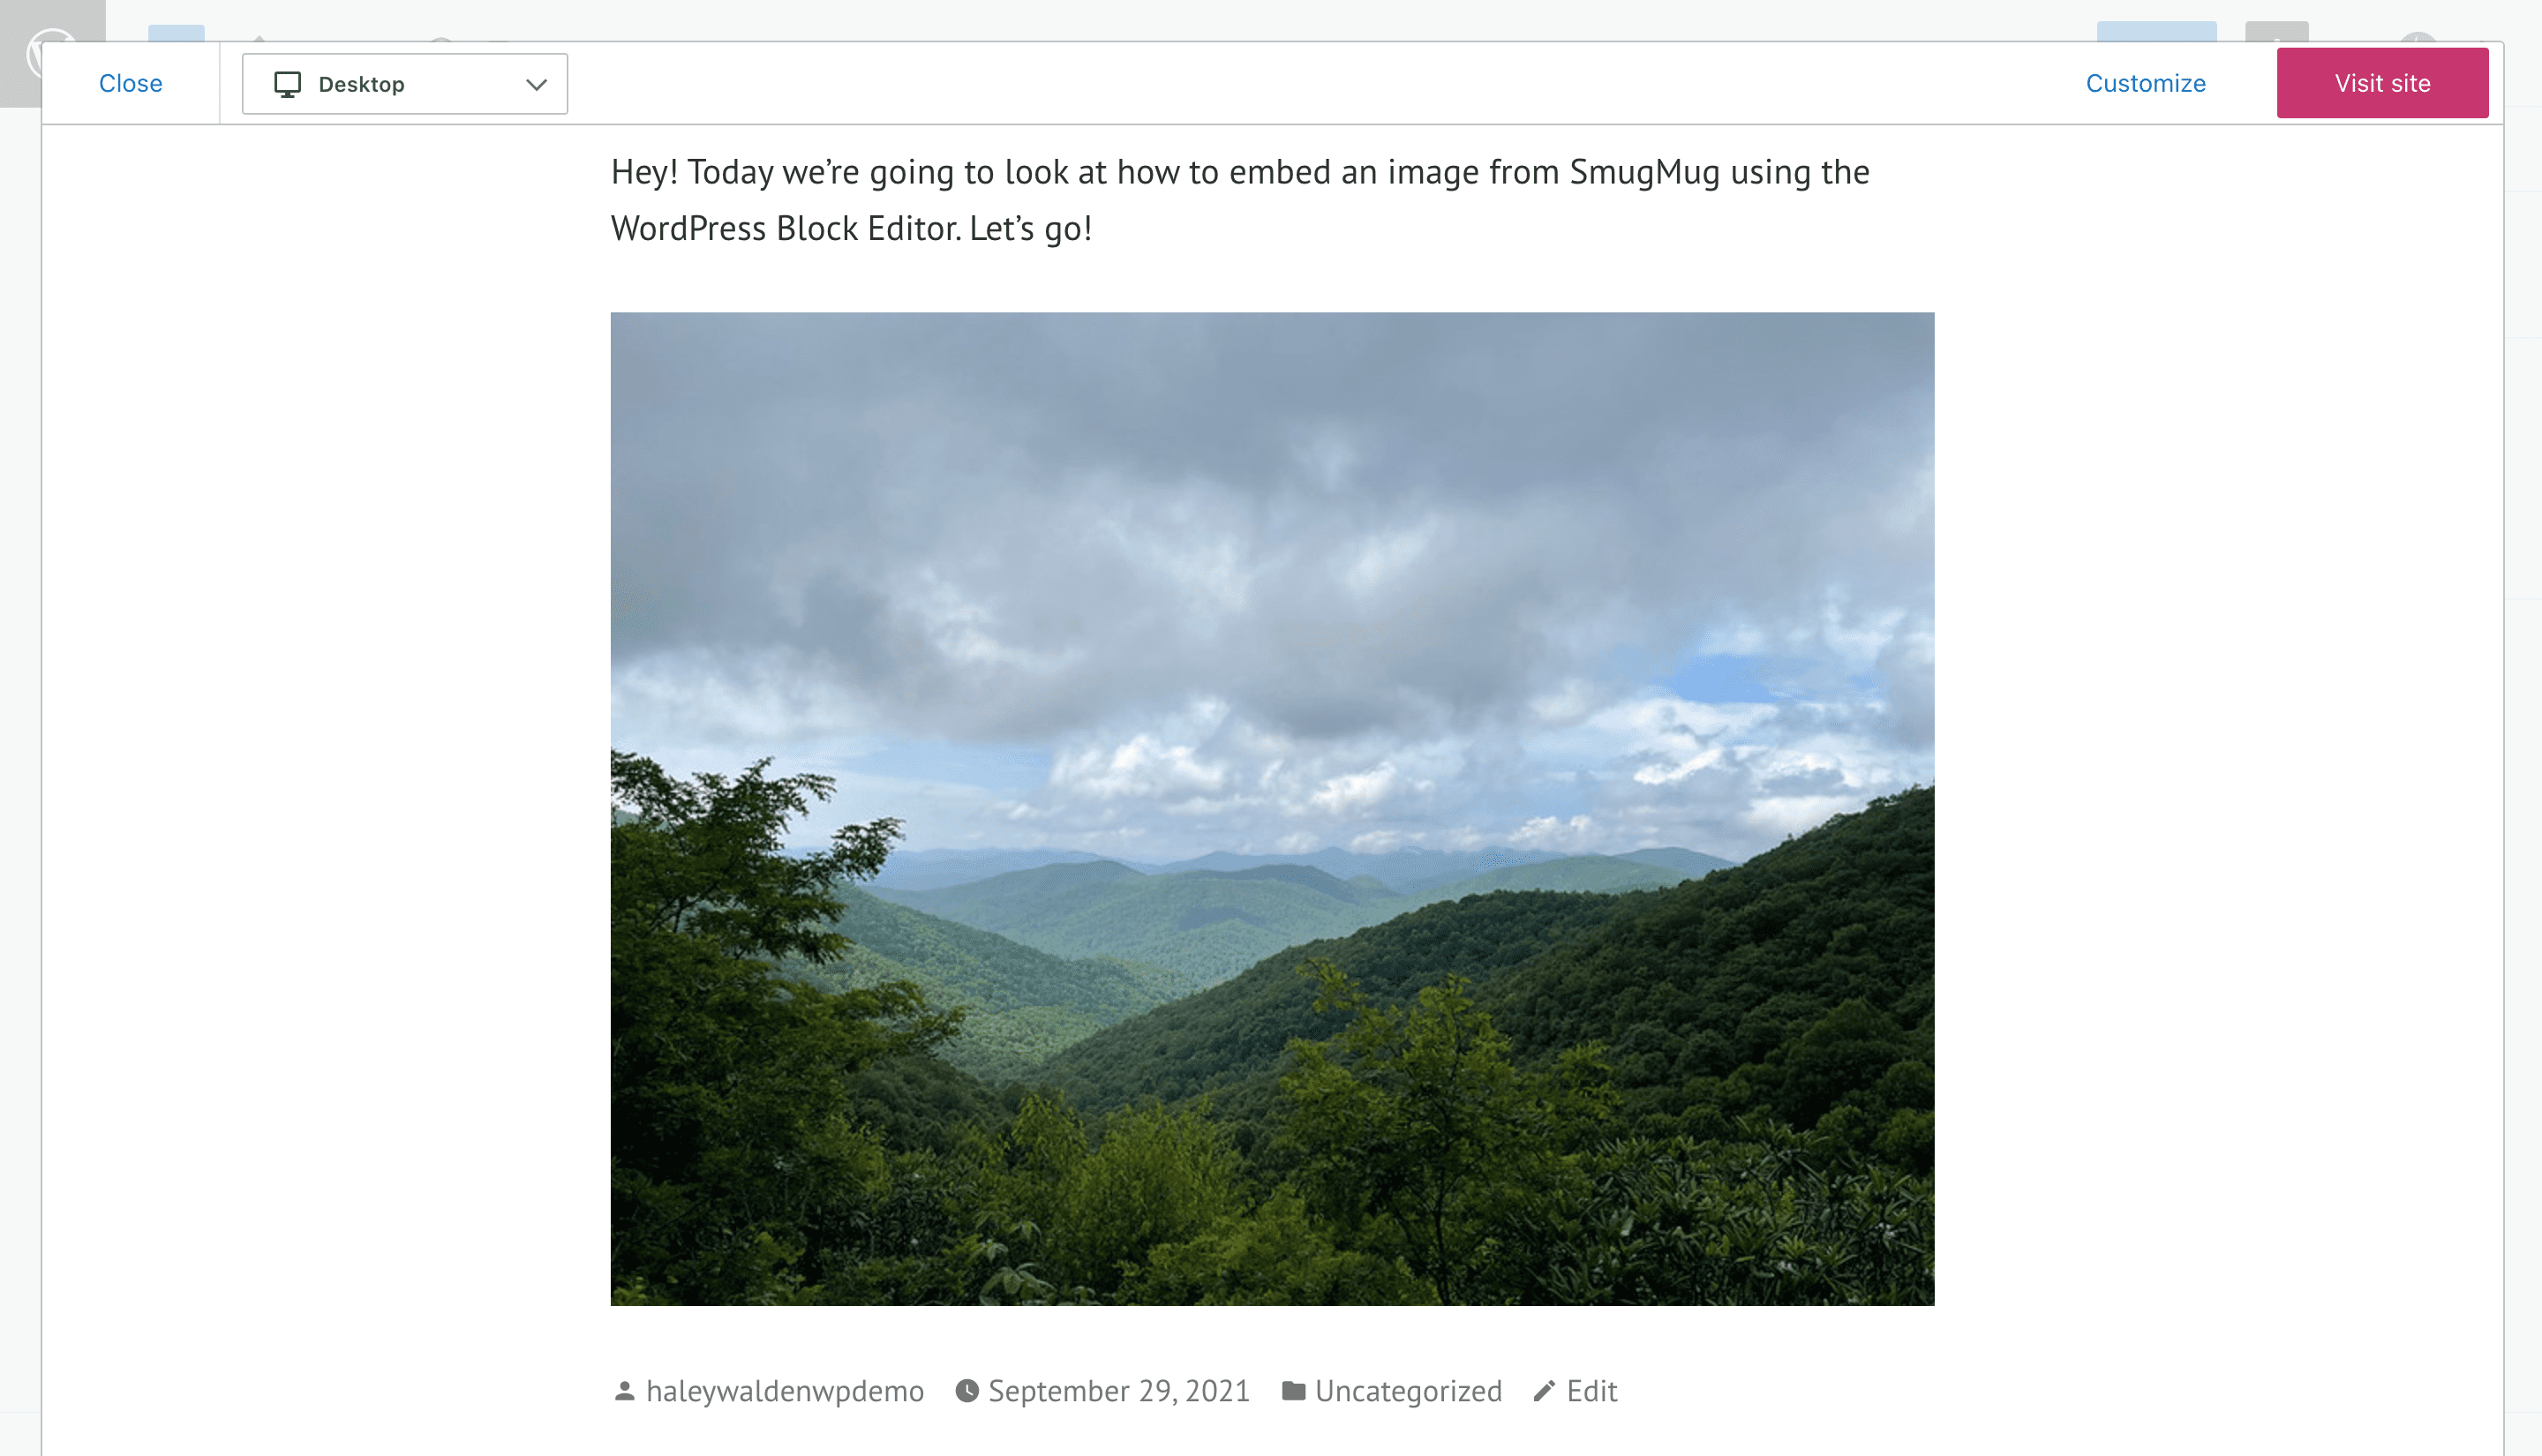
To see how your image looks in the post, click the Preview button in the upper right corner of your WordPress Block Editor.
SmugMug Embed Block Settings And Options
When it comes to editing your SmugMug embed, WordPress offers plenty of options. Take your time exploring the editing tools to see what works best for your image. Don’t be afraid to play with the settings until you’re happy with what you see.

Let’s look at the toolbar at the upper left corner of your block in the WordPress Block Editor. Mouse over each button to review your options for editing the way your image appears in your WordPress blog post or page. From here, you can:
- Change the type or style of your block
- Drag and drop your embed block anywhere in the post
- Move the SmugMug embed up or down by one space
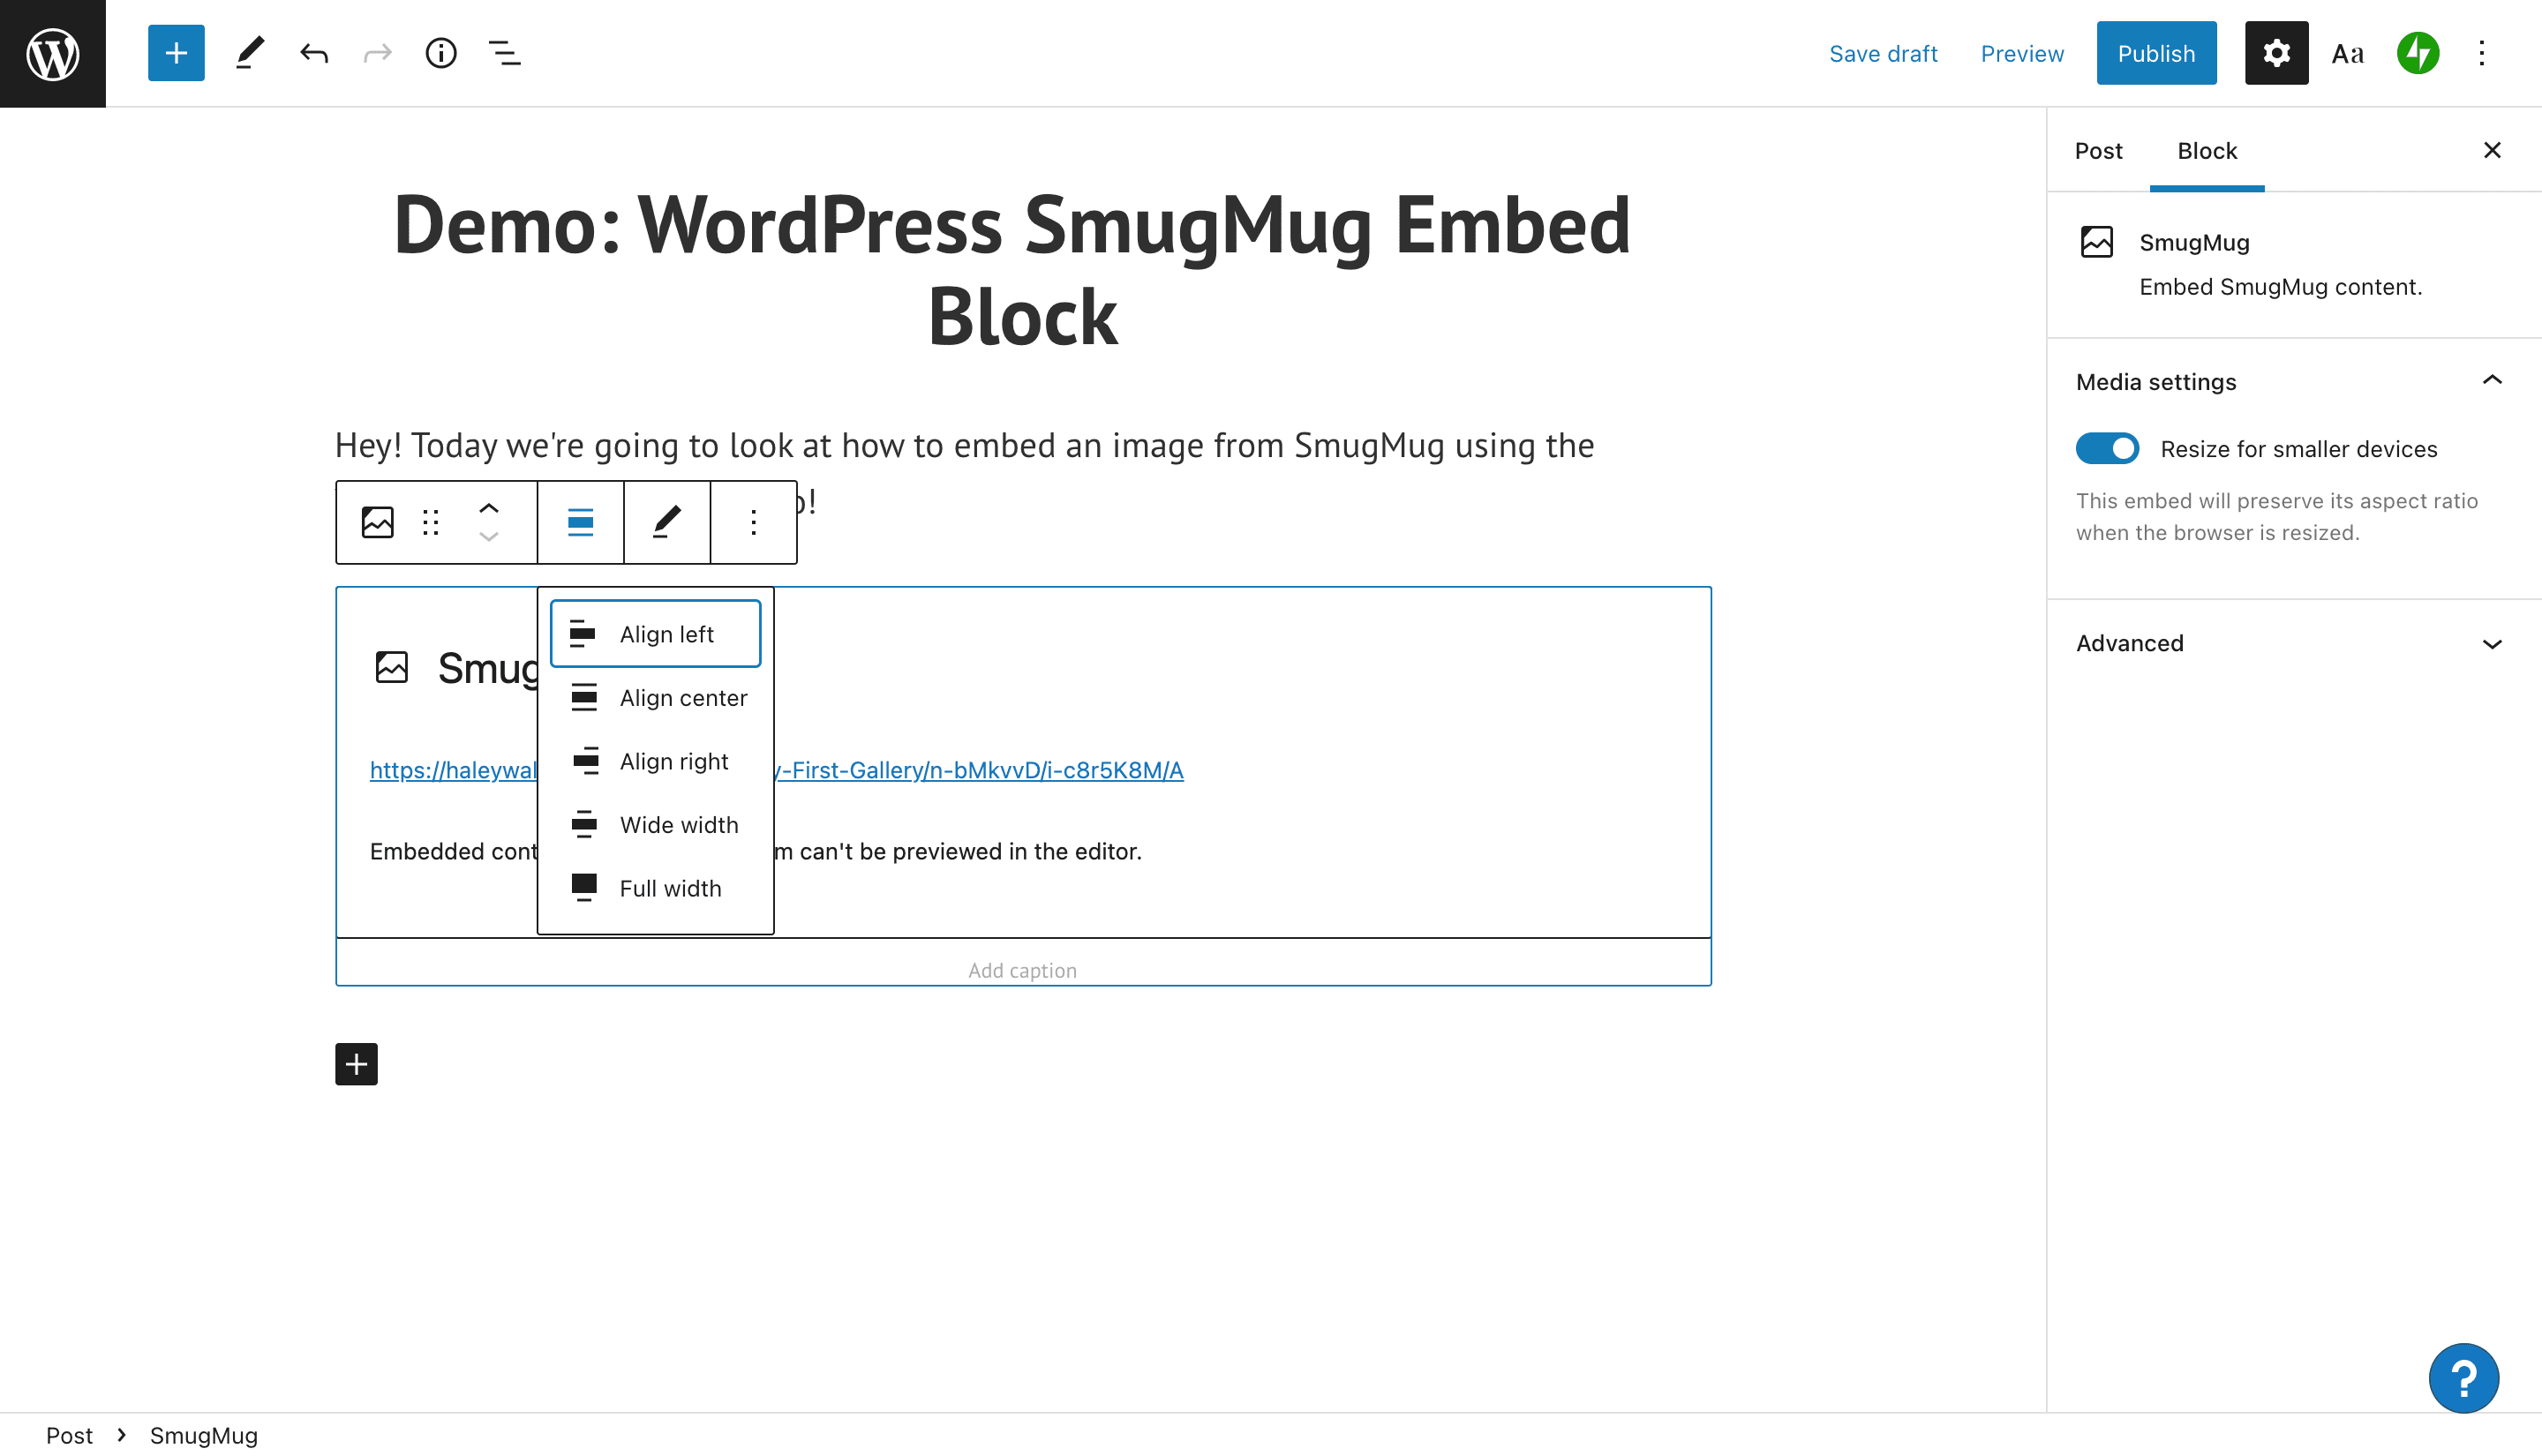
- Change the photo’s alignment
- Edit your SmugMug URL
- Select additional options
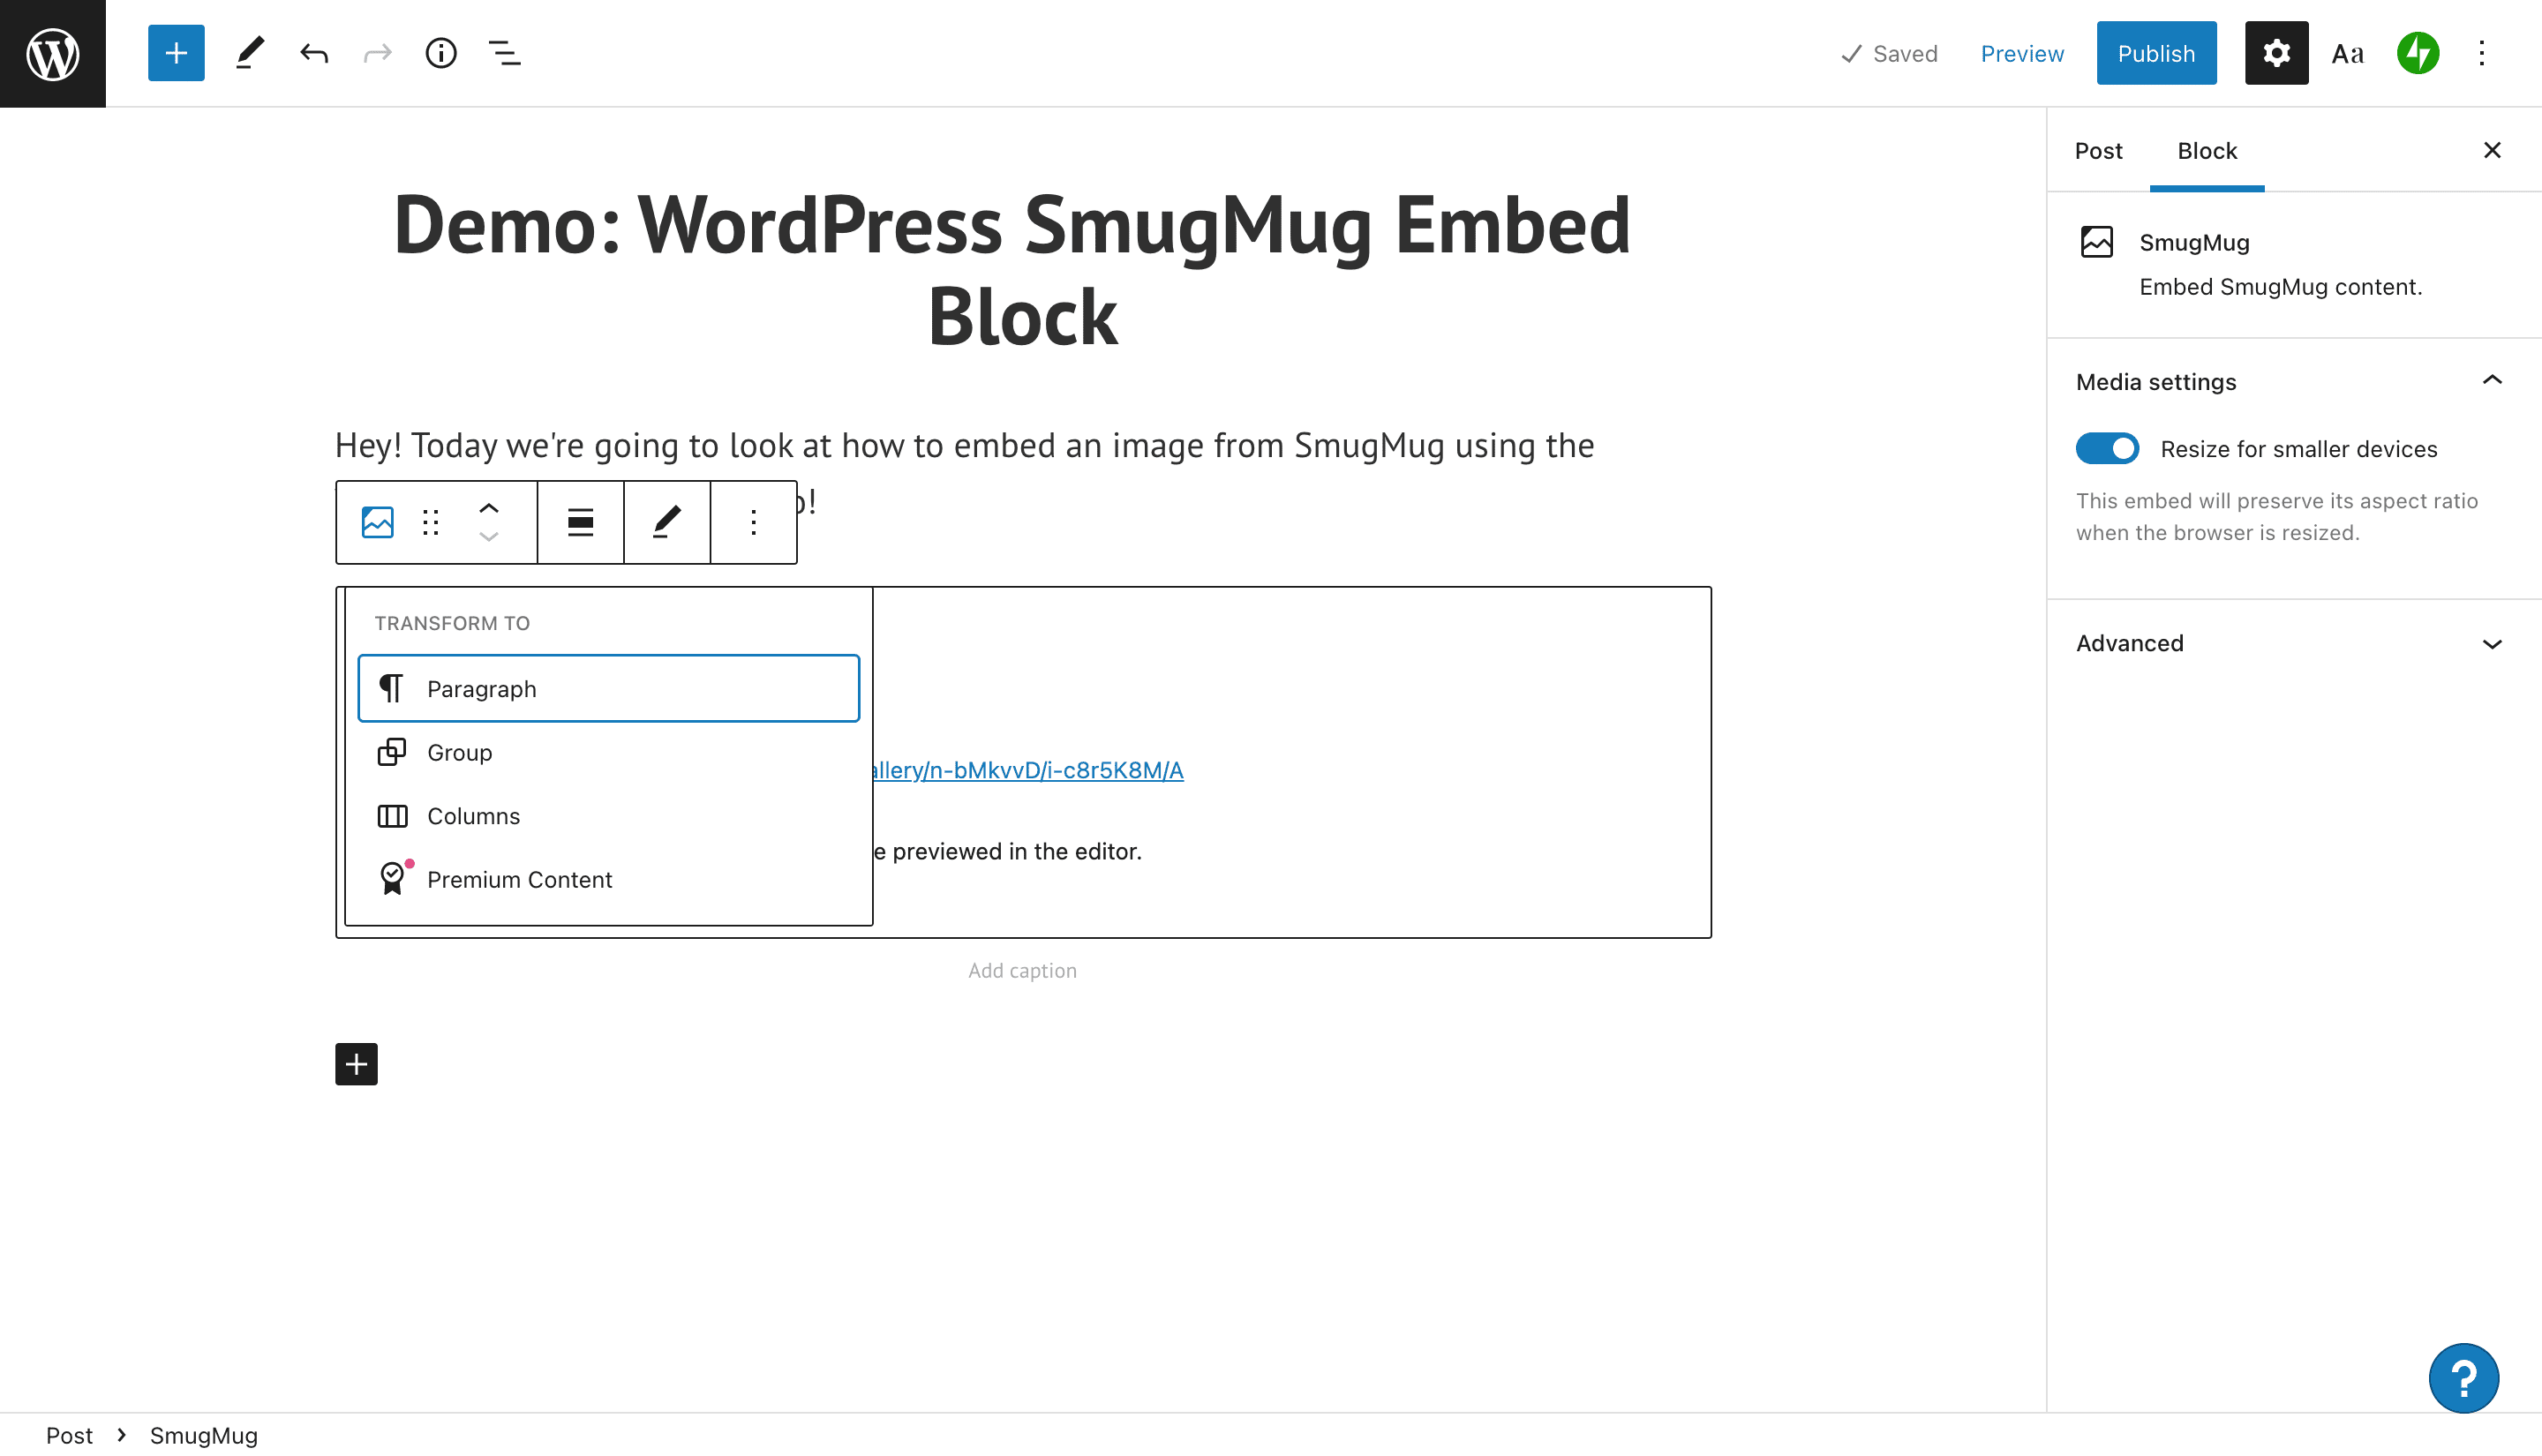
Transform Block Tool
To change your block type, click the Transform button on the far left side of your embed block toolbar. You can transform the block from the default Paragraph type to a column layout, a group, or Premium Content (this is paid content for subscribers only).
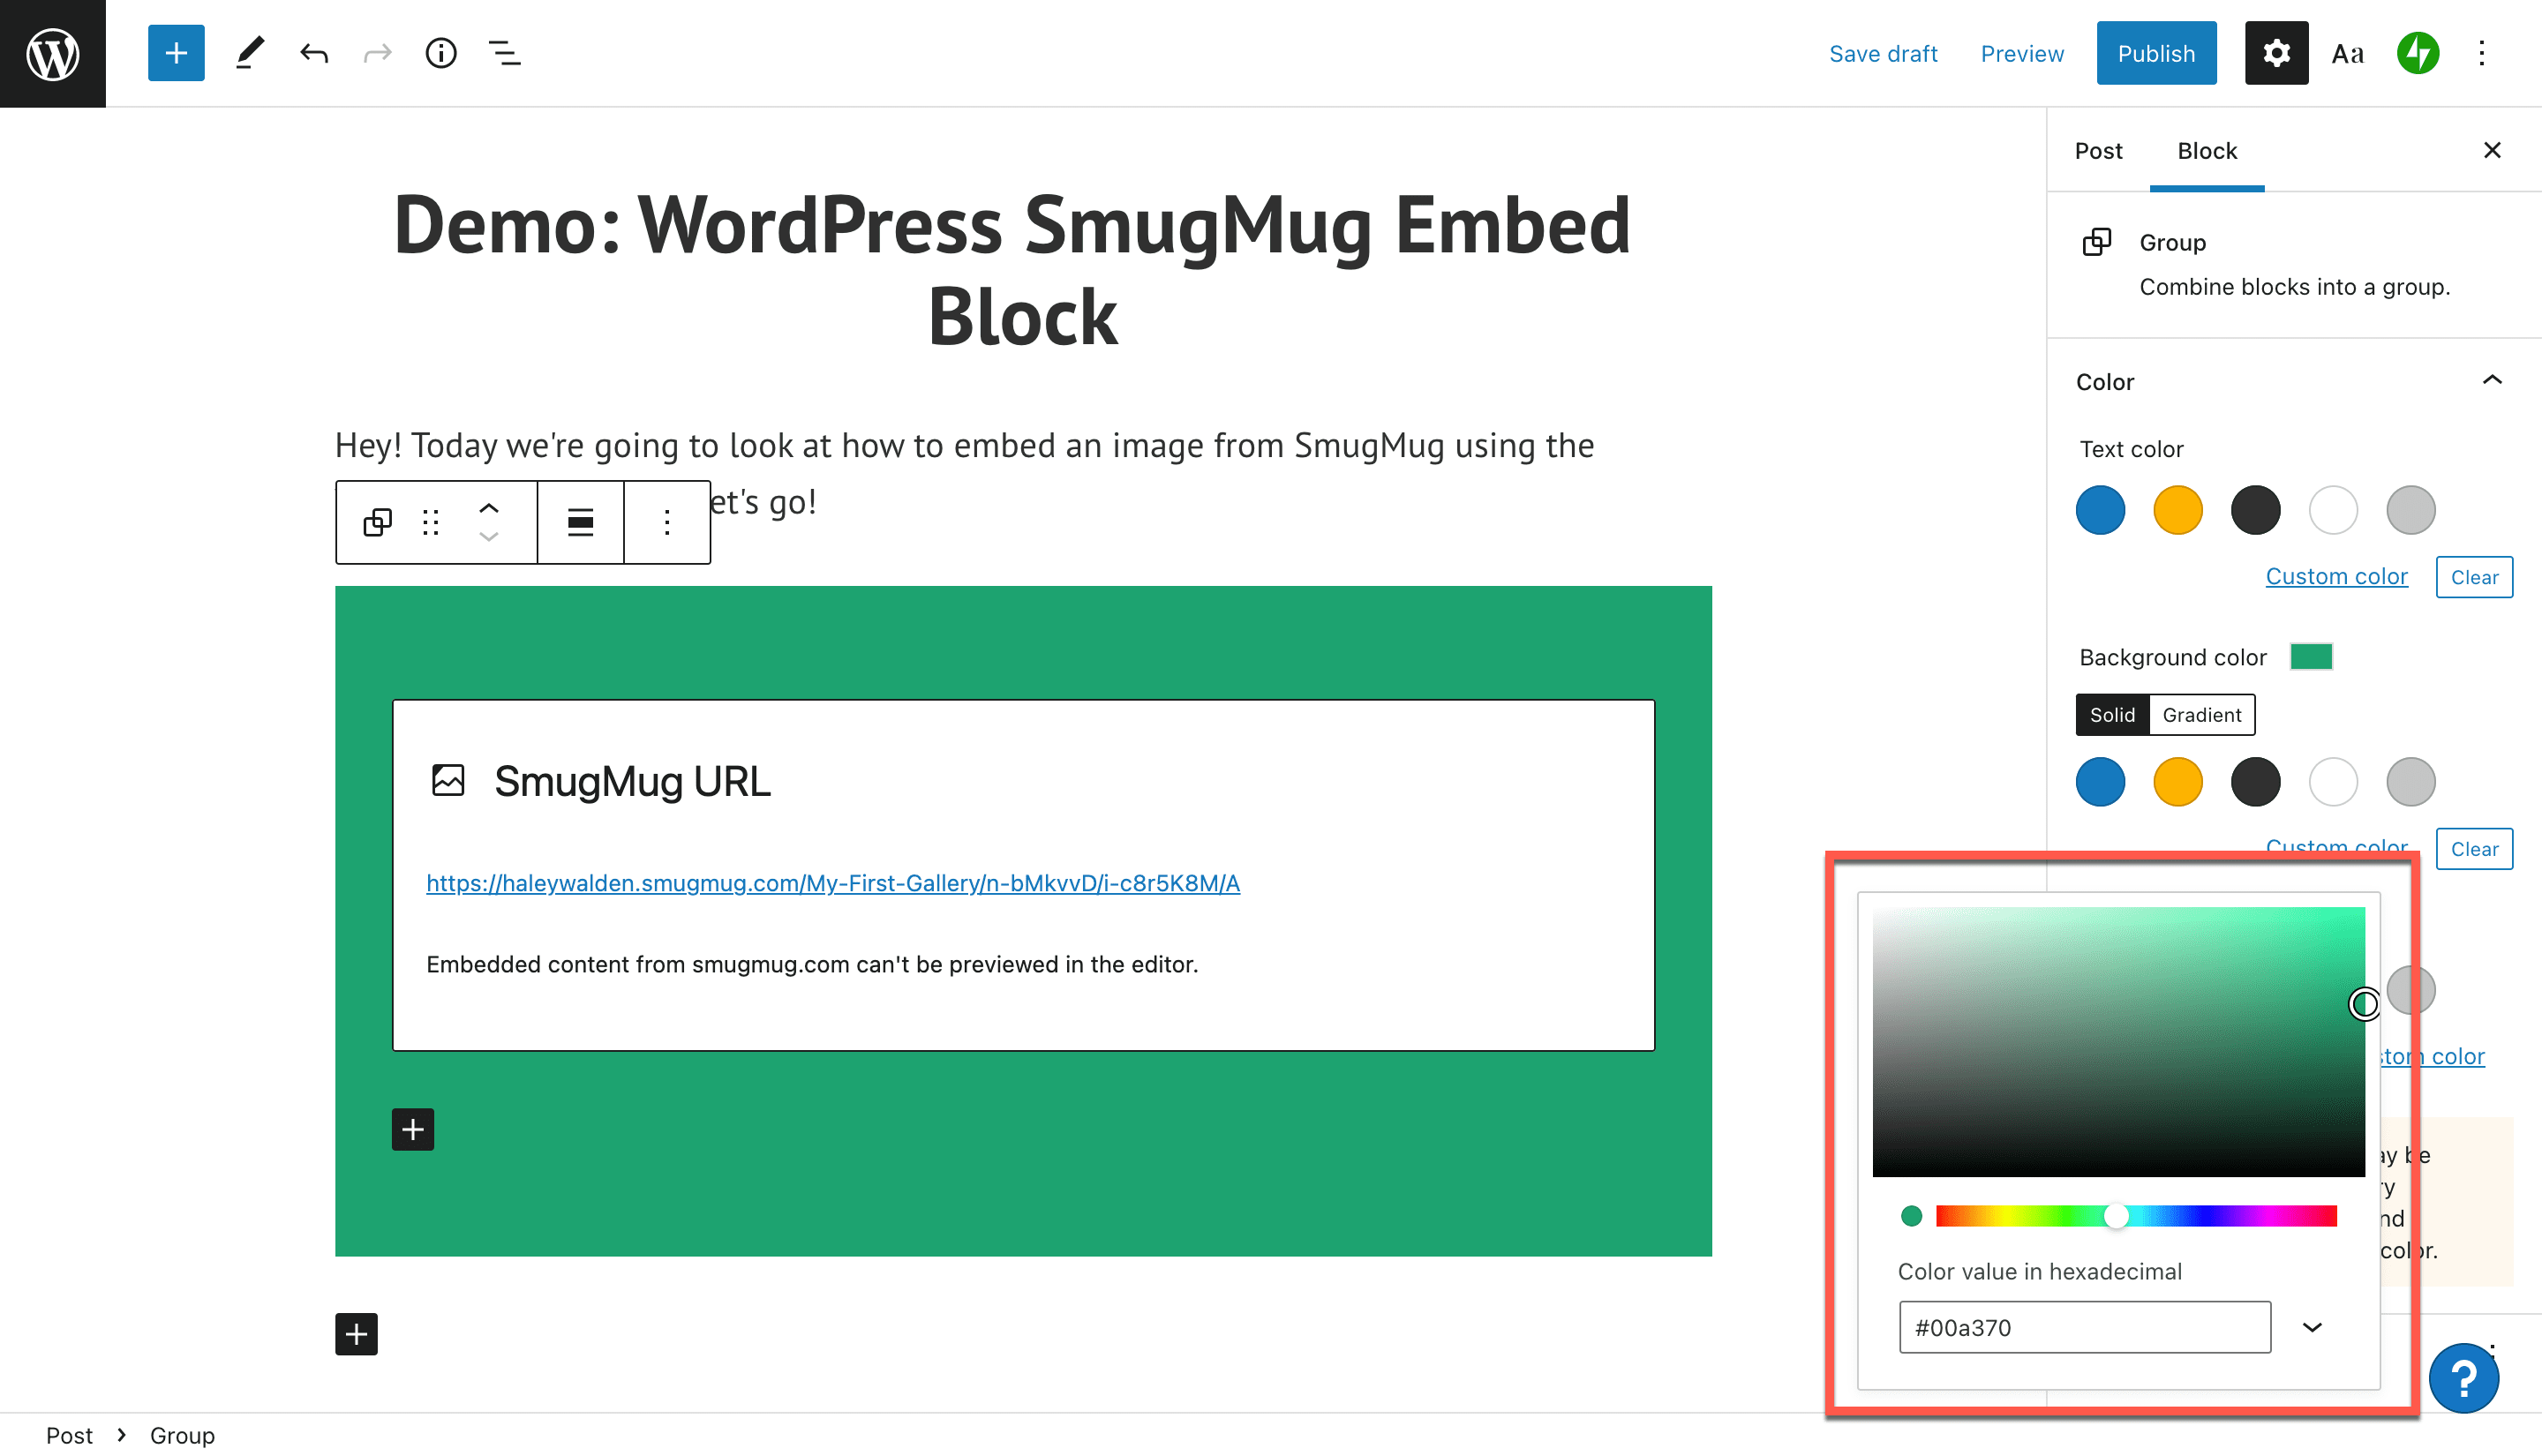
If you want to place a colored background on your block, which acts as a frame in your post or page, then you’ll need to select the Group option. Once you’ve done that, you’ll see a colors toolbar appear on the right-hand side of your WordPress Block Editor screen.
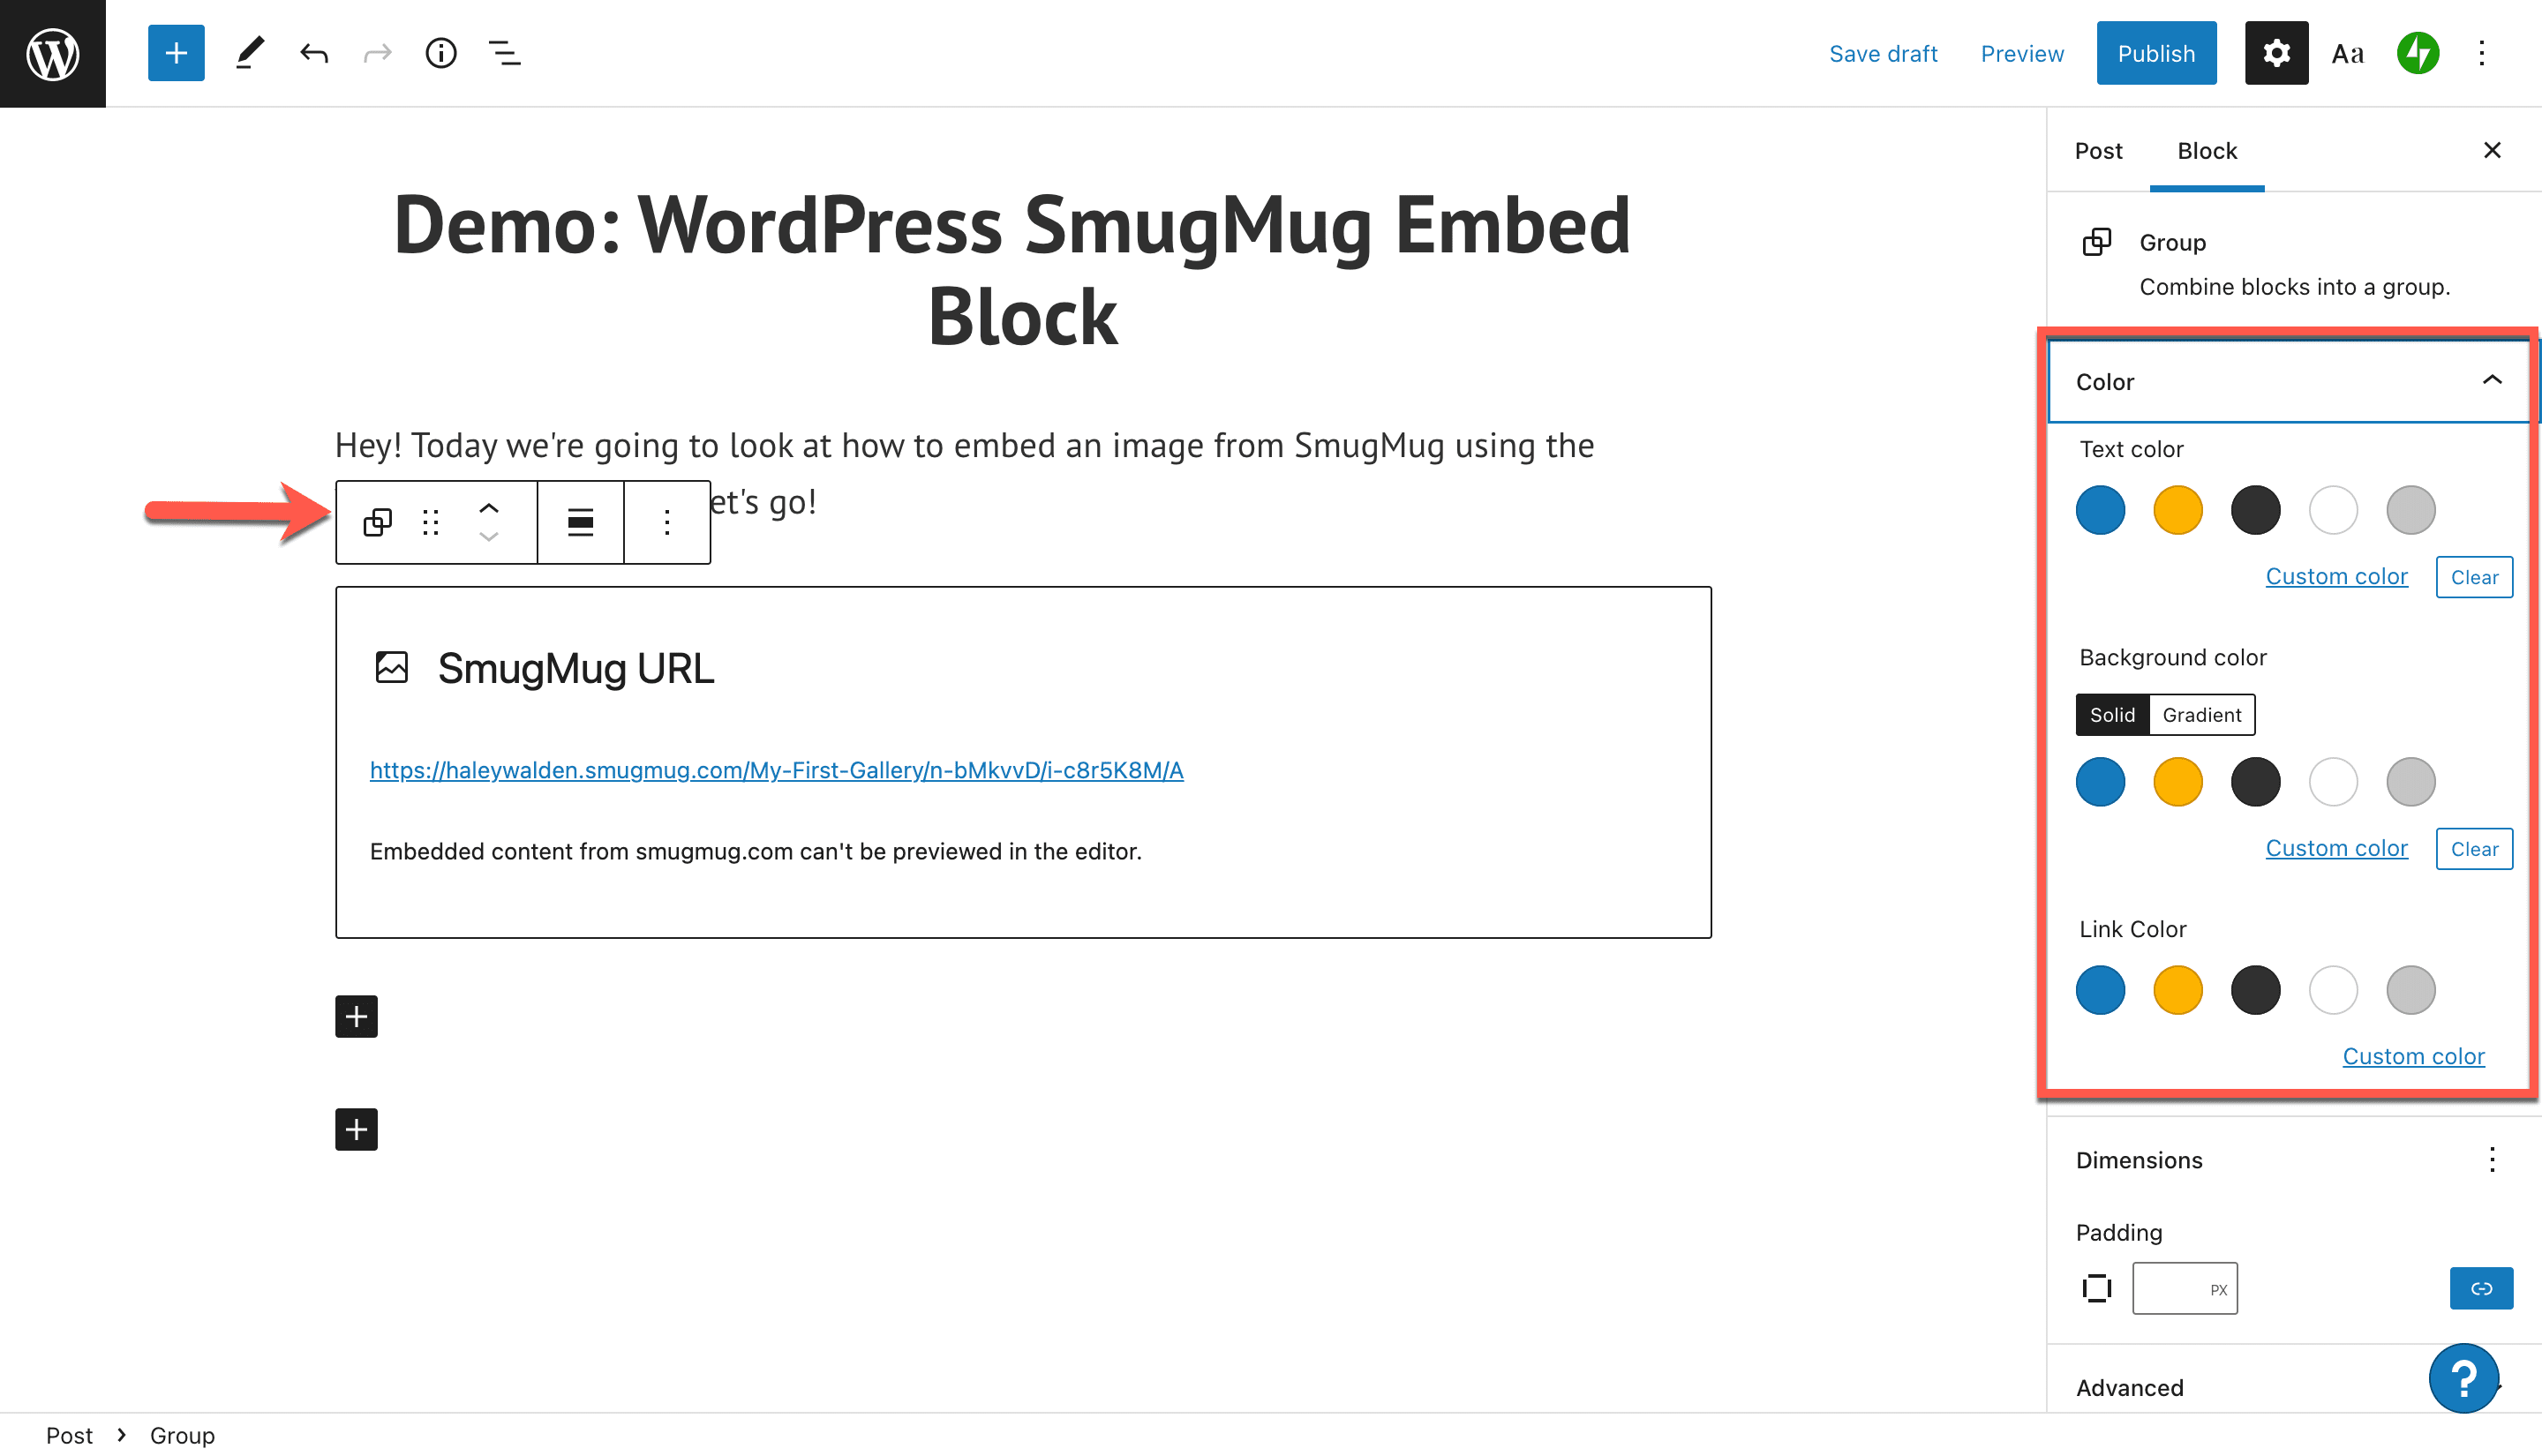
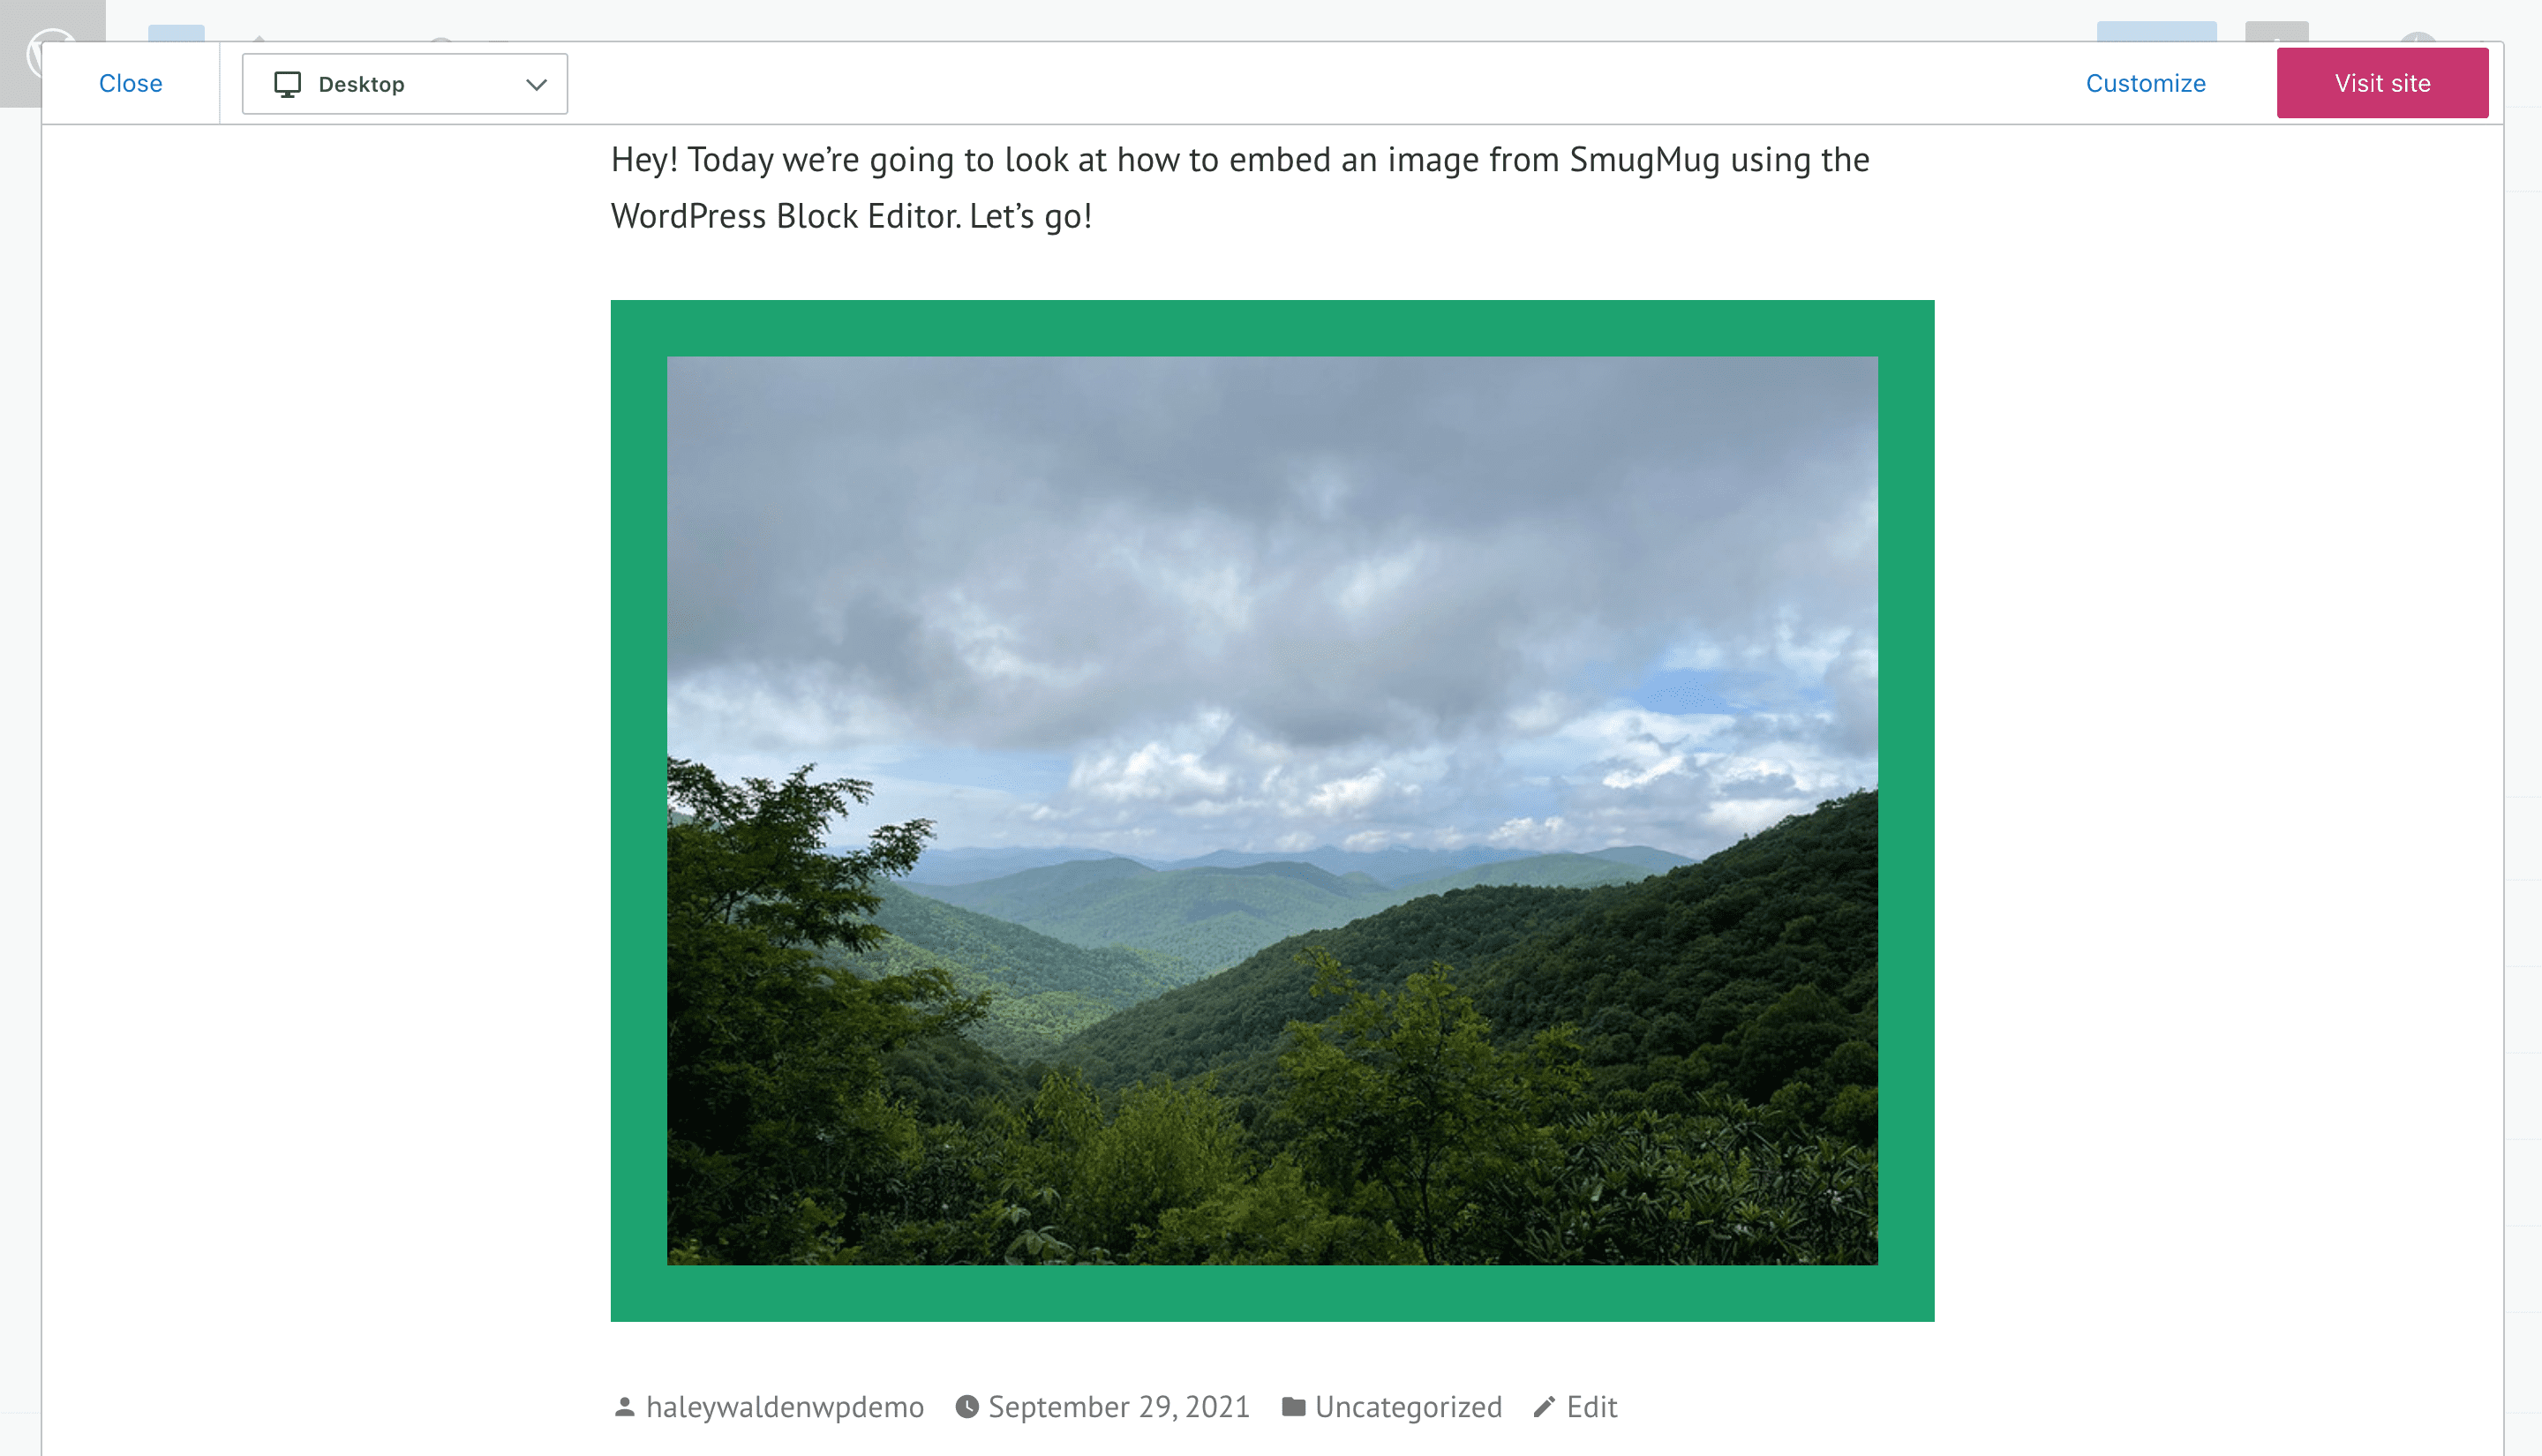
You can select a custom color, which will appear around the embed block. The image I chose from SmugMug has a lot of green in it, so we’ll try a custom green to see how it looks.
As long as you’re on the back end of your blog or website, you will continue to see the dialog box that reminds you the Smug Mug image isn’t viewable in the editor.
To view the colored frame around your image, click Preview. WordPress will then take you out to see what an end-user would view on the website.
Drag The SmugMug Embed Block
If you want to drag your SmugMug embed block around the post or page, then you need to use the drag button. This is the second button from left on the toolbar Just click, hold, and drag the block wherever you want it within the post or page itself. When you’ve decided where you want to put the block, just release the button.

Move The Embed Block Up Or Down
Use the third button from the left on your toolbar to bump the block up or down by one space. If you’d like move a paragraph block below the image, for example, just click the Move Up button to swap block spaces.
Adjust Your SmugMug Embed Block Alignment
To realign your embedded photo from SmugMug, click the Alignment button. Your options include aligning your image to the right, center, or left. Alternatively, you can set the block to wide or full width on your page or post.
Edit SmugMug URL
Having trouble with your SmugMug photograph, or want to use a different one? Check or edit the URL with the Edit URL button in your toolbar. You might need to navigate back to SmugMug to grab a new image link. When you’ve edited the URL, click the blue Embed button to incorporate the new (or corrected) image into your post or page.
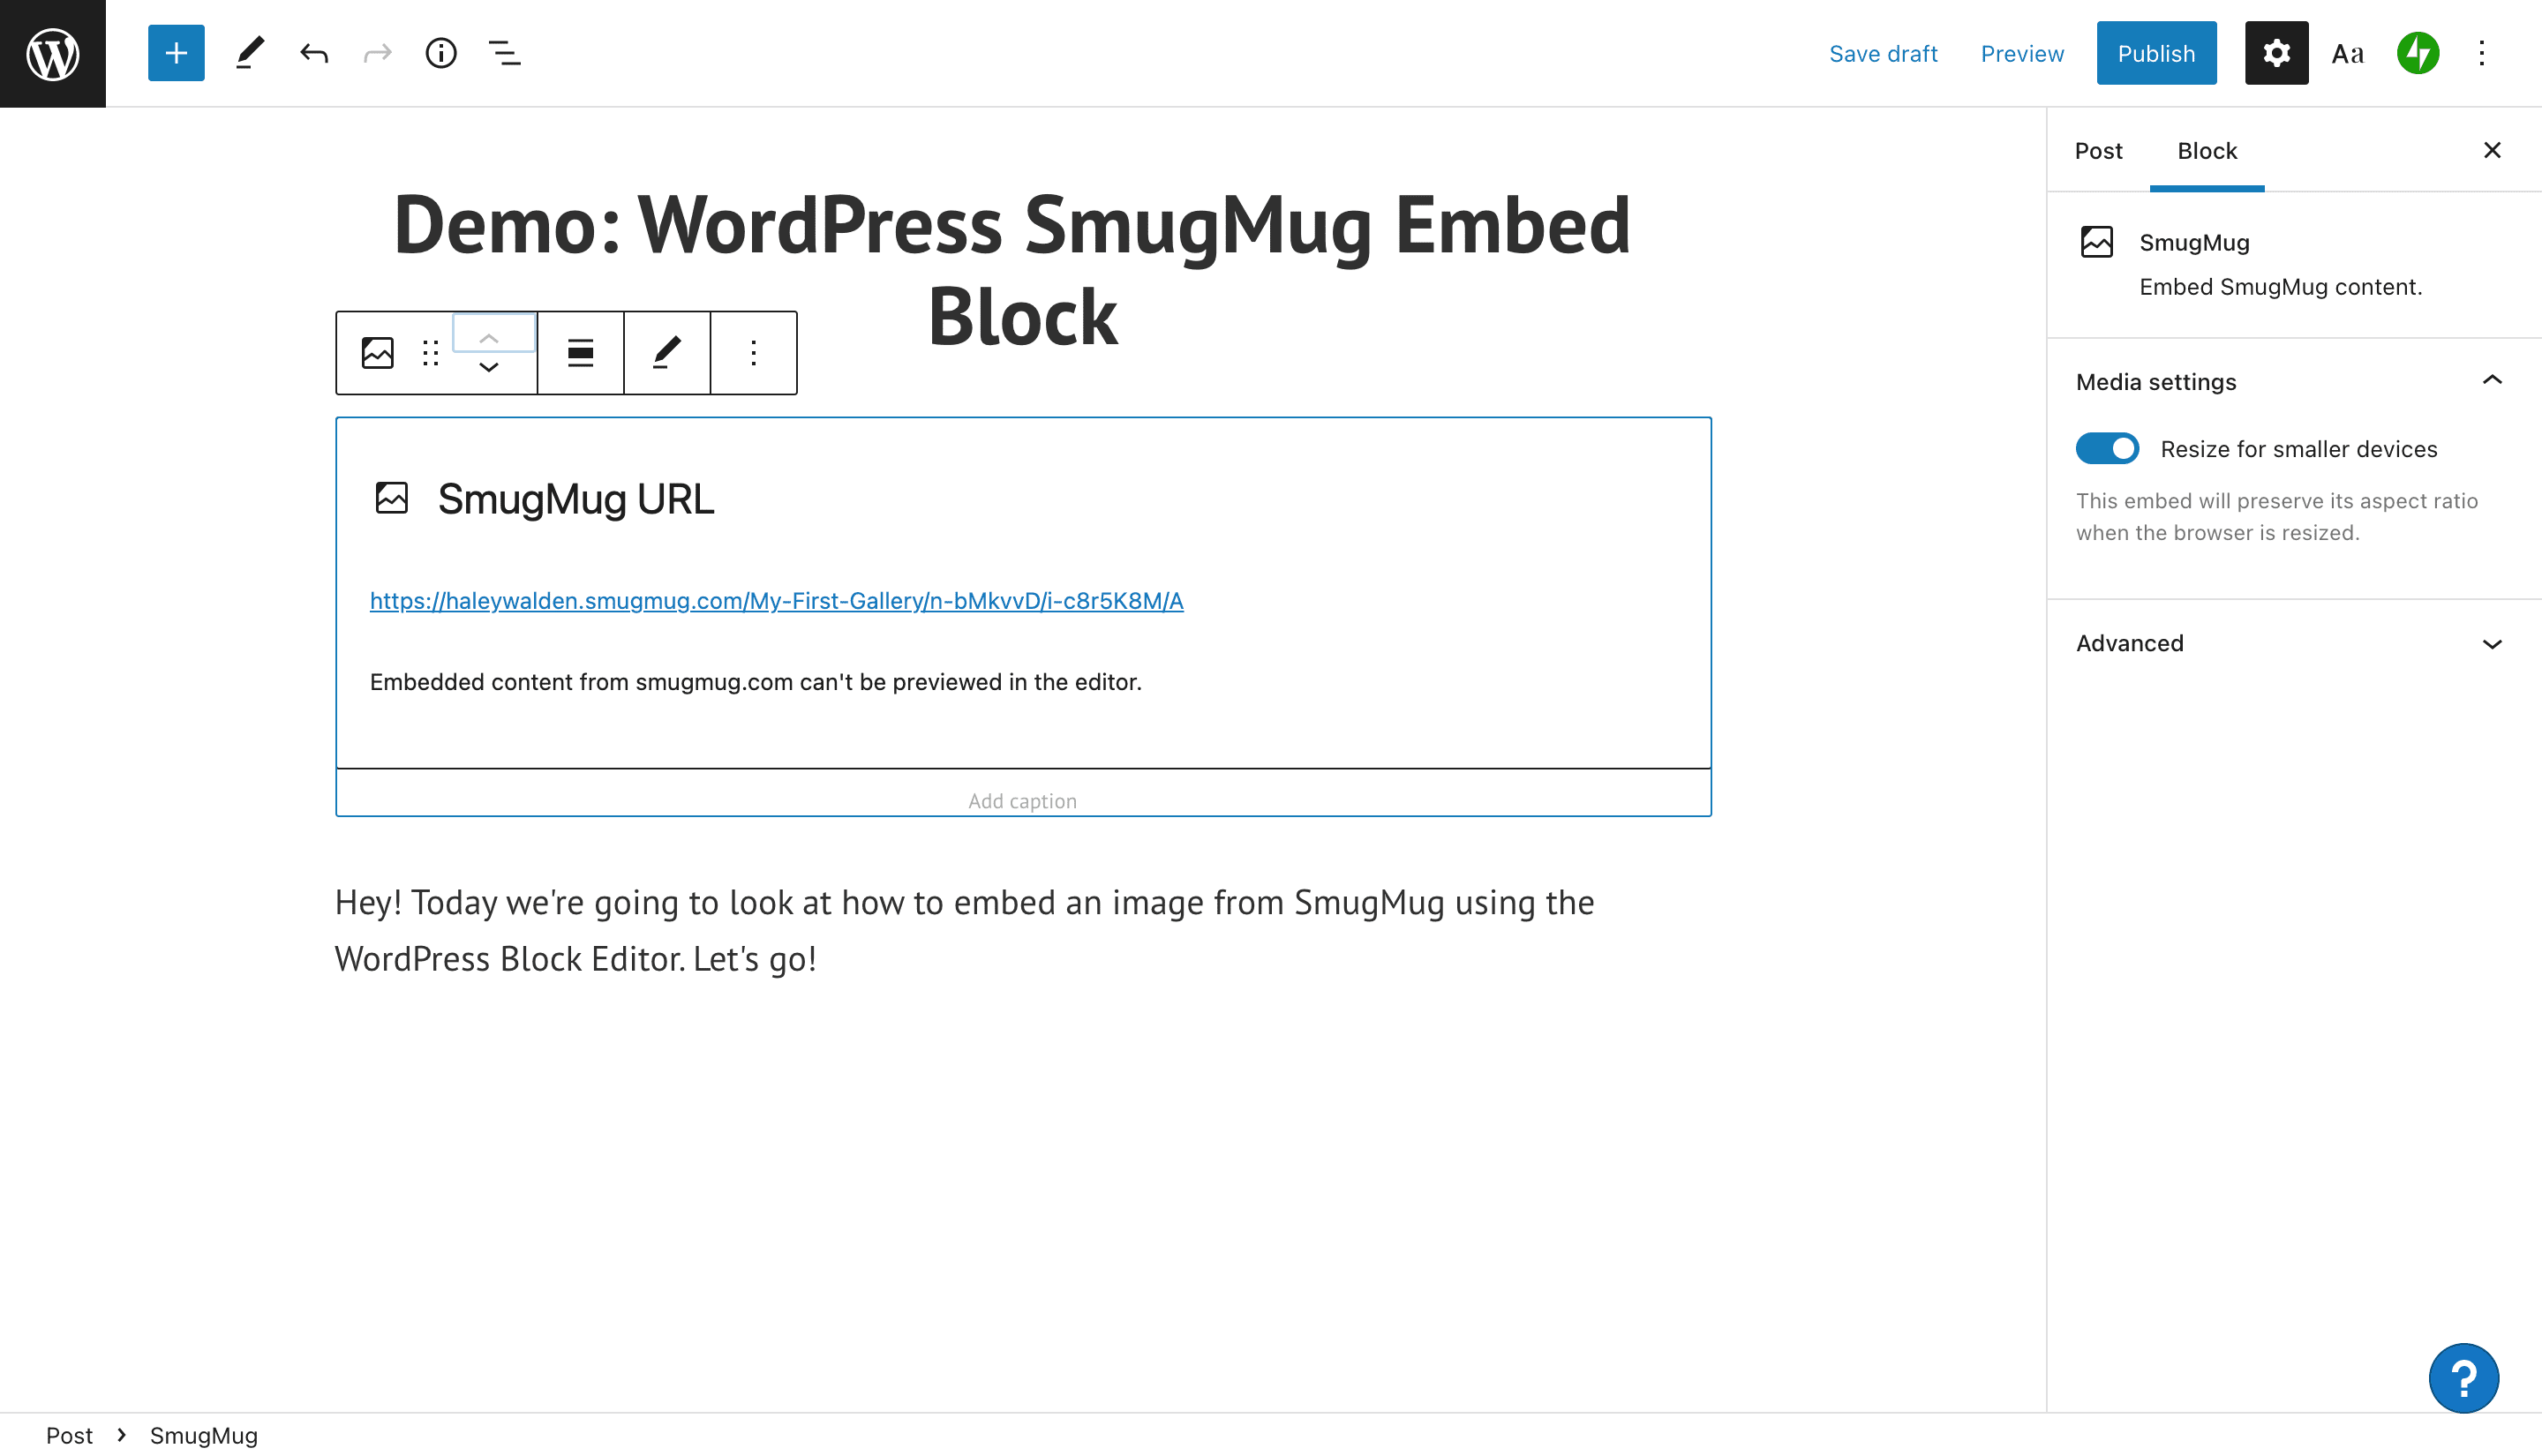
Additional Block Options and Media Settings
To see your other options for editing the SmugMug embed block, click Other on the far right-hand side of the toolbar. You’ll see a drop-down menu that includes your remaining settings.
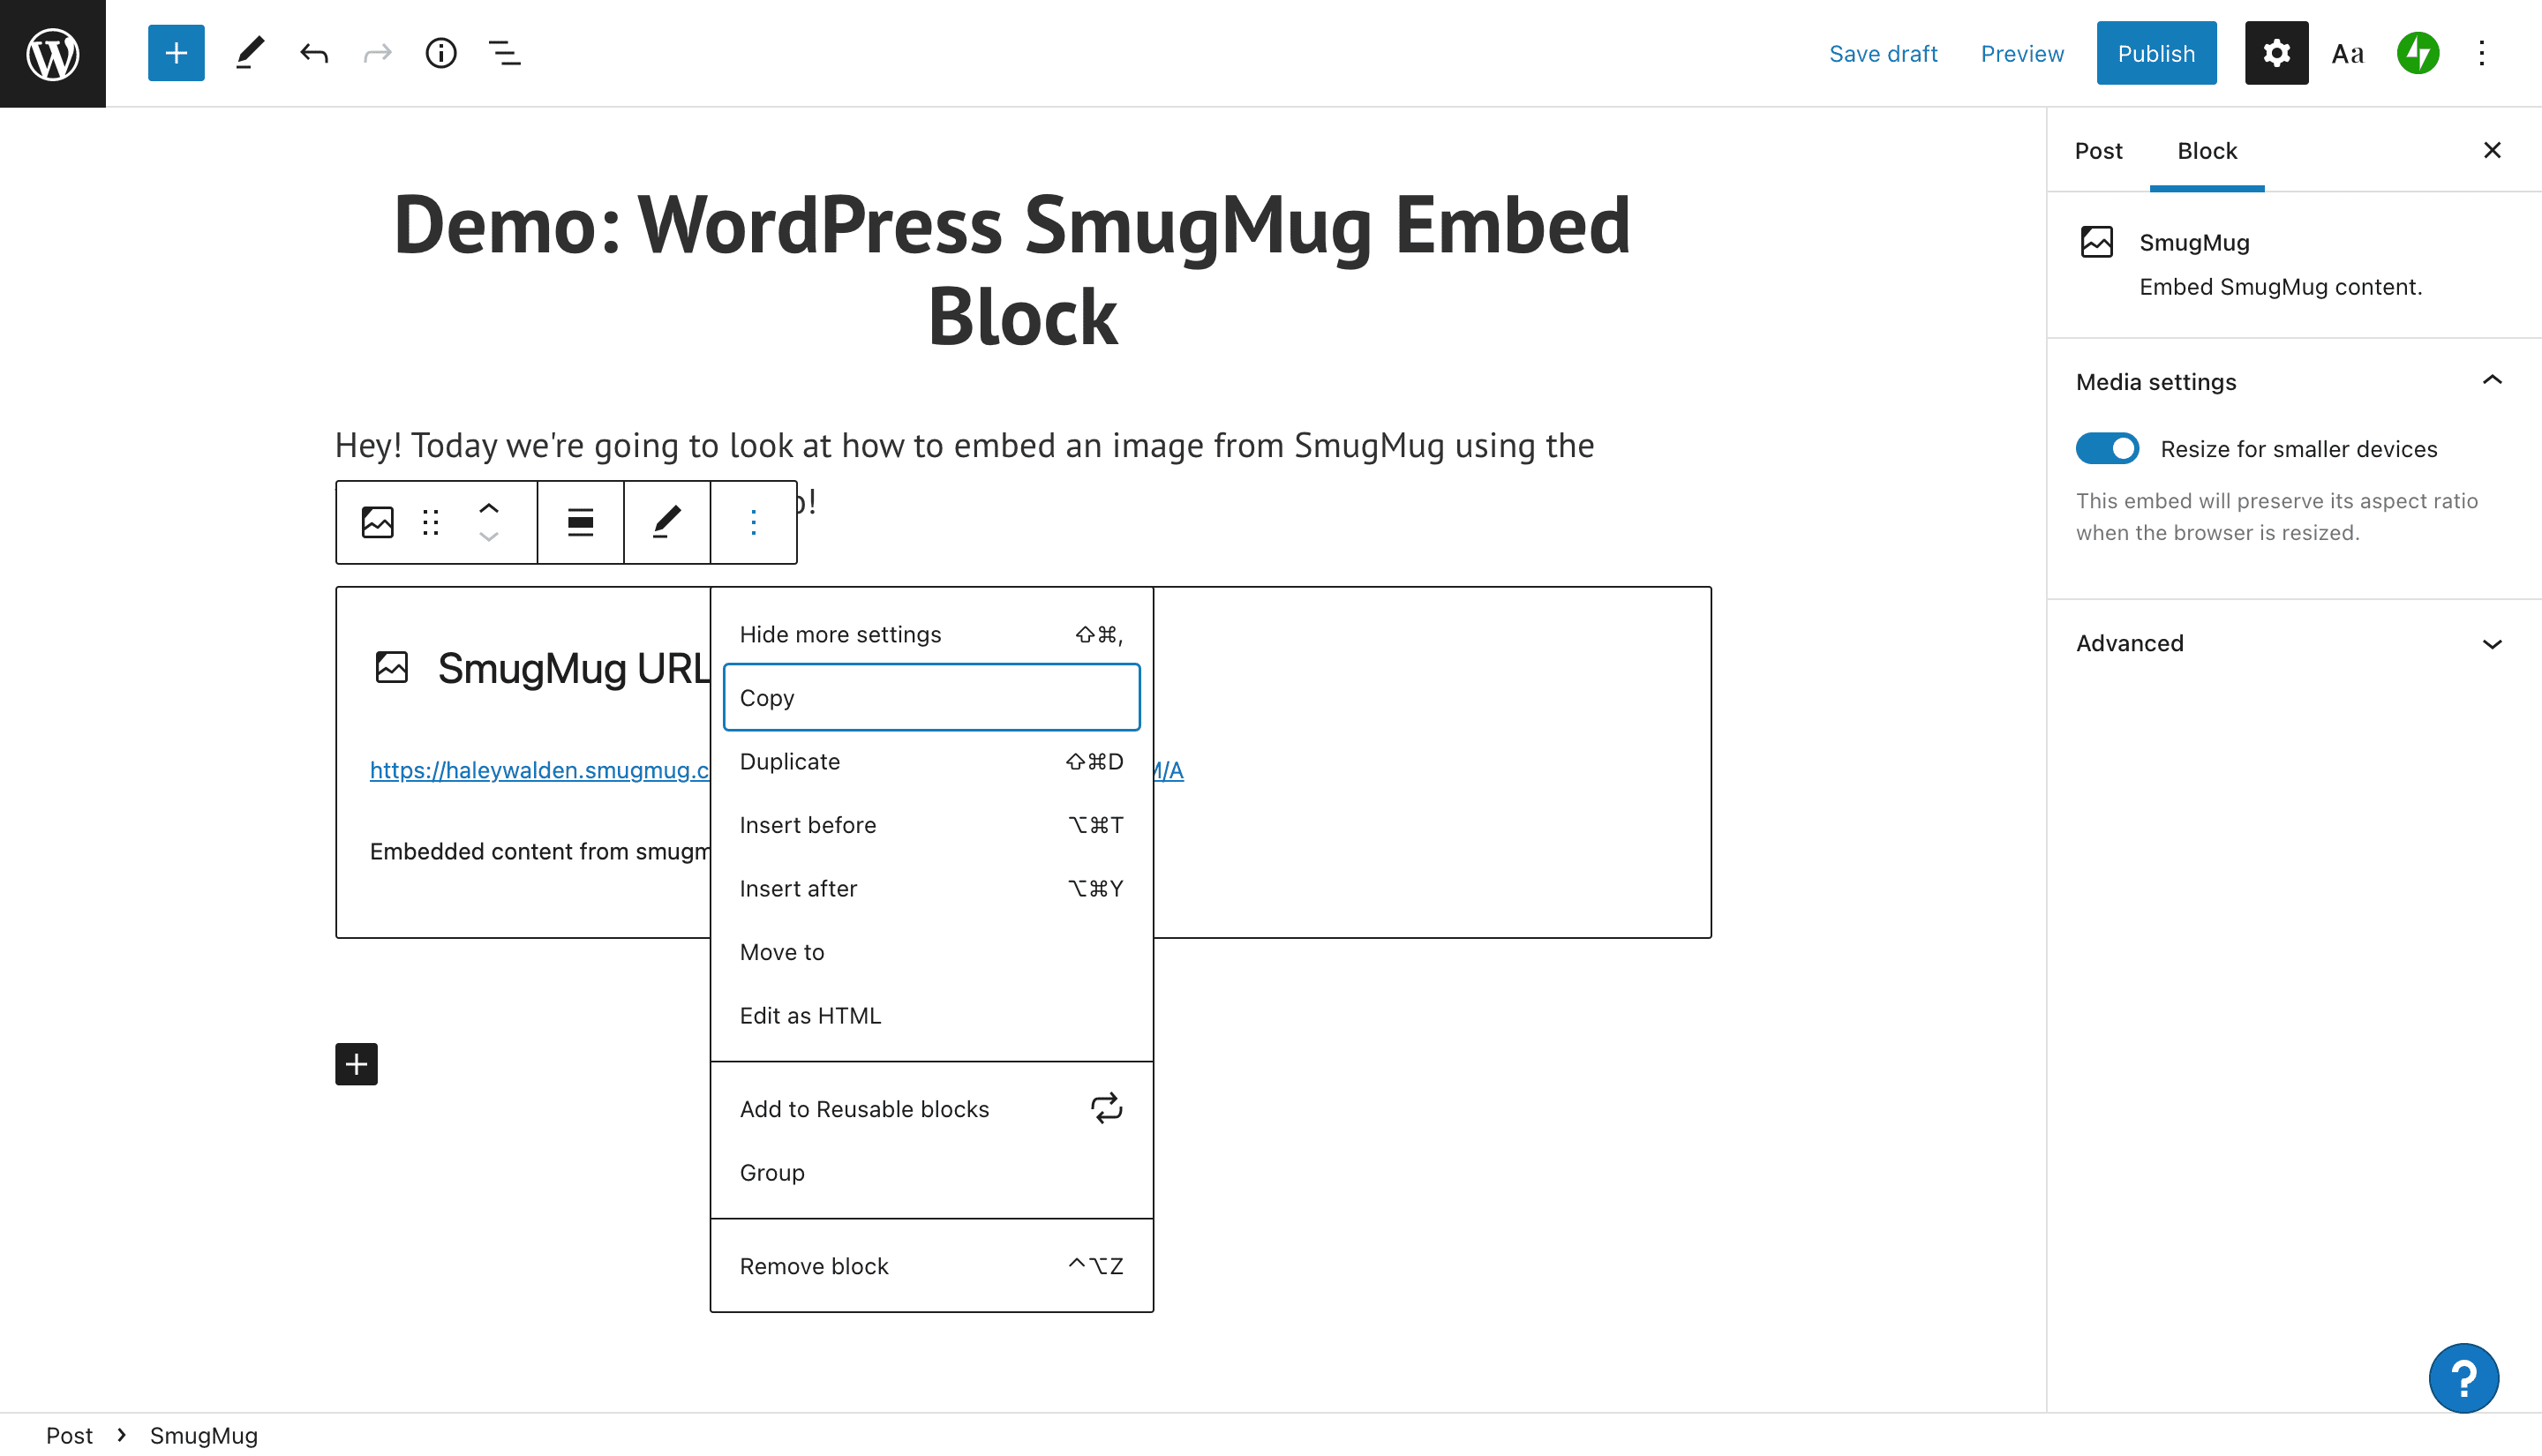
From here, you’ll be able to copy, duplicate, move, or remove the block. There are options to insert new embed blocks either before or after the one you’re currently using. You can edit the block HTML to further customize it, move it into a group, or turn it into a reusable block that you can return to at a later time.
On the far right side of the WordPress Editor page, you’ll see a Media Settings toolbar. From here, you can choose whether to allow your image to scale down for smaller screens.
Tips And Best Practices For Using The SmugMug Embed Block Effectively
Now that you’re ready to use the SmugMug embed block for your WordPress website, there are some best practices you’ll need to keep in mind. Take a look:
- Make sure you have permission to embed the image you’ve chosen. The image should belong to you, or it should be licensed to you. Alternatively, it could be a royalty-free photograph or an image you’ve obtained permission to use (always give proper credit to the creator).
- Select a high-quality image that will look great on your site. It should be a high resolution and should not be sized too small. Small images will look pixelated on your page or post.
- Be sure the image aligns not only with your brand aesthetic, but also with your brand’s message and tone. Site visitors will notice if an image has a glaring contrast to the rest of your brand aesthetic.
- Don’t use images that include offensive content.
Frequently Asked Questions About The SmugMug Embed Block
No, you don’t need your own account unless you want to share images that belong to you. Otherwise, you can use the share URL of a public image. Make sure you have the proper permissions to share the image you’ve selected.
What file types are accepted at SmugMug?
There are a number of acceptable file types you can upload to a standard SmugMug account for embedding. These include JPEG, PNG, GIF, and HEIC. According to SmugMug’s support site, PNG and HEIC files come with some limitations.
In addition to the image URL, SmugMug can generate several variations on an embed code. These include JPEG, HTML, and BBCode. When you create your embed code, SmugMug will prompt you to select what size you want your image to display. Once you’ve selected all your options, you should be able to copy and paste the embed code.
Conclusion
When it comes to incorporating relevant images into your website, WordPress offers some excellent options, such as the SmugMug embed block. The ability to embed a SmugMug image into your WordPress blog post or page is a great way to boost your site’s aesthetic. Use images that work well with your brand colors and message for a little extra pop.
Are you planning to use the SmugMug embed for your site? Let us know in the comments.
Featured image via vladwel / shutterstock.com


Leave A Reply