
The WordPress visual editor is a useful tool that gives you an idea of how your content will look once published. It’s equipped with features to help streamline the process of creating and formatting content for your site. However, while the visual editor is a valuable tool, it does have its limitations.
This article will show you how to get the most out of the WordPress visual editor, and point out some plugins and CSS tweaks that can further improve its functionality.
1. Make the Most of the Standard Visual Editor
Let’s start with the basics. If you already know the standard visual editor back to front, you can skip ahead and learn how to add custom functionality.
Visual Editor Vs. Text Editor
The WordPress edit screen is equipped with both visual and text editors. The text editor shows you raw text with HTML markup, making the text completely customizable if you’re comfortable with HTML:

Within the text editor itself, you can directly manipulate images and other media as an alternative to using the Add Media button.
The visual editor is a kind of What You See Is What You Get (WYSIWYG) editor. It gives you a much a better idea of what your content will look like once published, by applying text formatting and displaying images inside the editor. However, by default it doesn’t show you exactly how a page or post will look within your particular theme, nor things such as post width, text style, and hyperlink color.
Whether you are editing in the visual editor or the text editor, you are always editing the same block of content, just viewing it differently. Changes you make within the visual editor will change the HTML markup of your post, you simply don’t see the those tags in the visual editor as you do in the text editor.
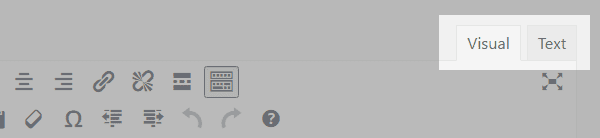
Since changes are occurring regardless of the editor you use, you can switch back and forth between them throughout the content creation process. Changing from the visual to the text editor (or vice versa) is as simple as clicking the appropriate tab in the upper right corner of the post editor:
By default, the visual editor displays one row of buttons. In order to display the second row you can hit the Toolbar Toggle icon, often referred to as the Kitchen Sink button. Each button in the toolbar shows an icon, but you can reveal a handy tooltip by hovering over it:
While the functions of most of the buttons are self-explanatory, others are less intuitive. Let’s take a look at the buttons you may not be familiar with.
Blockquote

The Blockquote button is used to display quoted text. The way this is actually displayed in the front end will depend on your theme. For example, this is how a blockquote looks by default in Divi’s front end:

Other themes might use a full color box or large quotation marks. It’s best to check that you like the look of the blockquote style before hitting publish. If you’re not happy with the way your blockquotes look, they can be customized. For more information on customizing blockquotes you can check out this post from our blog.
Insert Read More Tag

This button inserts a horizontal line as shown in the image below:
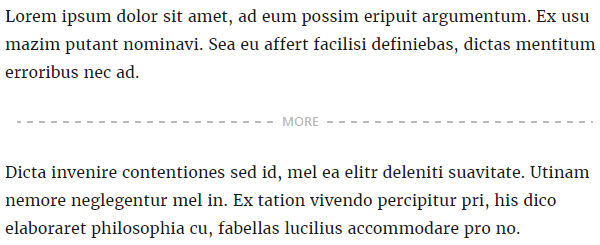
The Read More line is not rendered on the site front end when you publish the post. It simply controls the length of the excerpt that is shown in your post feed, and will stop wherever you place the line.
Paste as Text

The Paste as Text button is used to clean up text that you are pasting from other locations. When you simply copy and paste, the text may appear in a different format than what you expect. The Paste as Text button removes any special formatting and HTML tags.
Clear Formatting

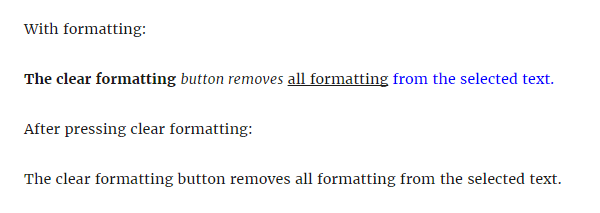
You can use this button to remove all formatting (including bold, italic, underline, and colors) from a highlighted section of text:
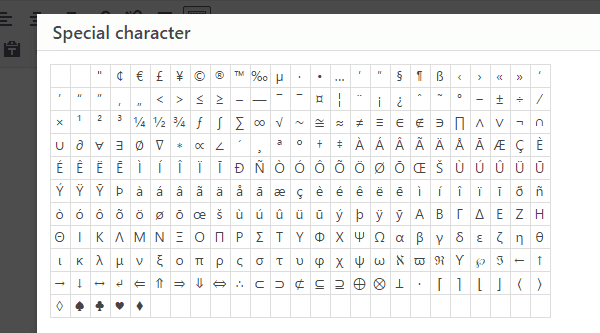
Special Character

The Special Character button enables you to insert characters that are not typically found on your keyboard, and when you click the button a popup window will appear:
Keyboard Shortcuts

Clicking the Keyboard Shortcuts button will display a popup window that shows you the shortcuts built into the editor. You can use them to speed up the process of completing certain tasks:
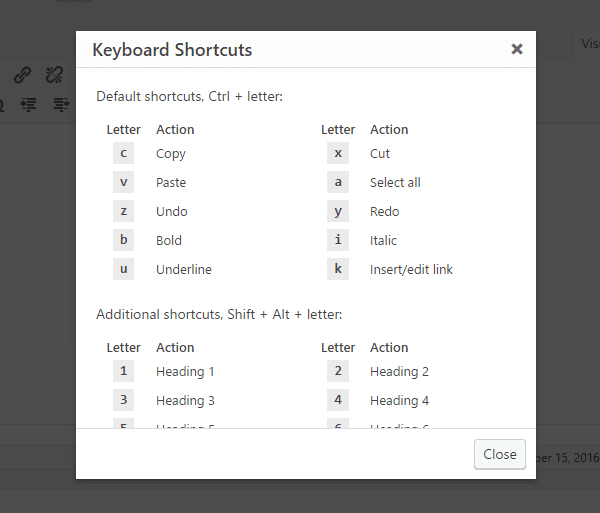
Shortcuts also offer some options that are missing in the toolbar, such as Copy, Paste, and Code. The Code shortcut is used for highlighting sections of code within your text:

Distraction-Free Writing Mode

For some people, the clutter surrounding the editor can be an unwelcome distraction. If you’d like a cleaner workspace, click on this button to get rid of the left and right sidebars so you can focus on your content.

2. Add Custom Functionality
The standard visual editor has all the basic features you need to create and format posts. However, there are lots of other ways you may want to format your content. You can do this in the text editor by marking up the text with the appropriate HTML tags. Of course, many people aren’t comfortable with code, while others just prefer to do their work in the visual editor.
Thankfully, it’s possible to add functionality to the visual editor quickly and simply using plugins. In this section, we’ll take a look at two great plugins for enhancing your visual editor.
Keep in mind that some of the features added depend on the plugin for their functionality. If you use features that are implemented with a shortcode, or that depend on the plugin to work, those features will cease to work upon deactivation. It means that you’ll have some formatting cleanup to do after you’ve removed the plugin.
TinyMCE Advanced
With over a million installs, TinyMCE Advanced is hugely popular among WordPress users. It is a lightweight and easy to use plugin that can dramatically overhaul your WordPress editing experience. This plugin allows you to add, rearrange, and remove buttons from your WordPress visual editor toolbar. It also enables you to configure up to four rows of buttons, and can be customized to meet your needs.
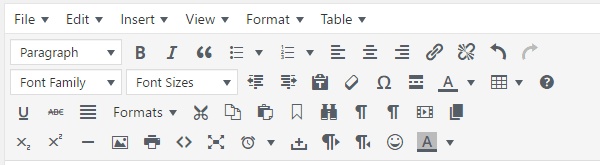
Additional buttons include Font Family, Font Sizes, Insert Date/Time, Page Break, and more. With TinyMCE Advanced, creating and editing tables is also much easier, and you also have more options to choose from when inserting lists. The plugin also lets you enable an editor menu, which offers even more options for the content creation and formatting process.
Note that the additional buttons will not show up automatically after install, so you’ll need to go into the plugin Settings screen to configure your new toolbar. Once set up, your editor screen will look like the following:
Key features:
- Drag-and-drop buttons to customize your toolbar.
- Create and edit tables.
- Additional options for inserting lists.
- Search and replace function.
- Justify text option.
- Ability to insert page breaks.
- Option to add emoticons.
Price: Free | More information
WP Edit
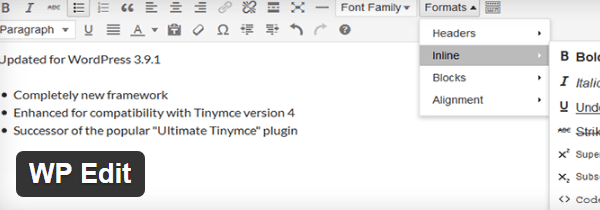
While not quite as popular as TinyMCE Advanced, WP Edit has over 100,000 active installs, and offers a whole host of features. The free version adds many features to the visual editor, and includes layout options that can be applied to both posts and pages.
The premium version, WP Edit Pro, includes two additional rows of buttons and premium features such as 80 predefined styles, Dropbox integration, and Google Fonts. You can also use custom fonts and create custom editor styles to be applied to any of your content.
Key features:
- Easily insert media such as images, videos, and clip art.
- Create and customize tables.
- Easy access to relevant shortcodes.
- Insert columns in content areas via shortcodes.
- Add custom editor to excerpt and profile descriptions.
- Allow shortcodes in excerpt and widget areas.
Price: The basic plugin is free, and the premium version starts at $17.50 | More information
3. Customize the Editor to Look Like the Front End
There is one major limitation with the WordPress visual editor that isn’t fully solved by the plugins we’ve covered. While the visual editor gives you an idea of what your content will look like, there are still discrepancies between what you see in the editor and how your content looks on your site’s front end. While using the Preview button to check the front end is an option, you may find it to be inconvenient.
Of course, it would be nice if the visual editor could show you your content as it would appear on the front end. If you’re comfortable with customizing your WordPress files, there are ways to adjust the look of the visual editor to better match your theme. To learn how to customize the visual editor to match your site’s front end, check out these articles from WPBeginner and WPMU DEV.
Another solution for code free editing is to use a front end editor such as the new visual interface in Divi 3.0. This intuitive editor enables you to edit any page or post element directly on your website front end, without code.
Conclusion
Although the WordPress visual editor is a useful tool, it does have its limitations. By applying the tips outlined in this article you can enhance the visual editor and improve the content creation process. Let’s recap:
- Make the most of the standard visual editor: The standard visual editor has a lot of functionality, especially if you’re familiar with the interface.
- Add custom functionality: Plugins such as TinyMCE Advanced and WP Edit can enhance the WordPress visual editor’s functionality.
- Customize the editor to look like the front end: If you’re comfortable with code, further customization is fairly straightforward. If you’d rather not mess with code, Divi 3.0 makes front end editing a reality.
Do you have any tips to customize the WordPress visual editor? Let us know in the comments section below, and subscribe to the conversation!
Article thumbnail image by mahfud21 / shutterstock.com


I love it! The custom functionality is perfect!
Thanks for sharing !
Hi!
Do you know how to make Tinymce Advanced “sticky” – that is, following the text when you are editing a long text in Divi text module?
Hello Bjarke,
I don’t I’m afraid. Maybe you could try contacting the developer for some advice?
Interesting tips.I wasn’t aware that TinyMCE advanced plugin.I will install this plugin asap on my blog.thanks for your visual editor tips
No problem, Gulu!
Love to find something that explains the new DIVI front end editor. I’ve seen the intro videos, but when I try to use it myself, I can barely get it to do anything.
Have you tried asking some questions in our forums (https://www.elegantthemes.com/contact/)? Everyone is always pretty helpful, and you may learn a thing or two!
Thanks.
I’ve used TinyMCE Advanced but I had never heard of WP Edit. Another option to test drive!
I’ve been using the freeWP Edit
I think it is good
Just have a little advertising
Just make sure you get some work done, Ernest. 😉
I wasn’t aware that TinyMCE advanced exists before, life is much easier with this plugin.
Thanks for sharing.
No problem – we’re glad your life is a little smoother now. 😉
Very good explanation!!! Day in an day out I use these editors but after reading your article I learnt few things which am unaware all these days.
Great stuff, Praveen! Glad we could help increase your knowledge. 🙂
I love it! The custom functionality is perfect!
Glad you’re happy, Jordan. 😀
Hi, I have used a Page Builder or lets say Visual Editor, but I have heard that it takes up a lot of resources and slows down the website to some extent.
Is it true ?
Well, for starters, a page builder and visual editor are two different things. The visual editor is an inherent part of WordPress’ design – as explained in this piece.
As for page builders, we’d say that if you’re using a well-coded solution – such as the Divi Builder 😉 – there’s no reason to worry.
Hope this helps!
Ummm….kinda an odd post for the ET Blog considering Divi doesn’t use the WP Editor.
Hi Ron,
Actually, Divi uses the WordPress Visual Editor for all it’s textarea fields. Its well integrated into the builder for a consistent user experience 🙂