A lot of people favor platforms such as Instagram over Pinterest, although the latter can be a fantastic source of traffic – particularly for image-heavy sites. However, without a verified website, people can share your content without others knowing where it came from.
If you verify your WordPress website on Pinterest, you may get more traffic back from the platform. In this article, we’ll talk about why that is, then teach you two methods to verify your website. Let’s get to work!
Subscribe To Our Youtube Channel
Why You Should Verify Your WordPress Website on Pinterest

Pinterest may look unassuming, but it’s a lot more popular than most people imagine.
When you add social sharing functionality to your website (which can be done easily using our Monarch social sharing plugin), this usually enables you to post your content to Pinterest. This can be a great way to get traffic back to your site since Pinterest is remarkably popular among several demographics.
By verifying your website on Pinterest, you get access to a few useful perks, such as:
- Your website’s profile picture displaying when someone shares ‘pins’ from it.
- Access to Pinterest-centric analytics that enables you to figure out how well your content is doing.
Of course, data that can help you grow your website’s popularity is important. With access to Pinterest analytics, you can zero in on the kind of content people are interested in, then create it. This effort can, in turn, lead to more traffic from Pinterest to your website. Considering the platform’s popularity, it’s definitely a traffic source you should be interested in tapping into.
2 Ways to Verify Your WordPress Website on Pinterest
If you’re ready to get your website verified, there are two ways you can tackle the process, depending on what approach you prefer. Let’s start with the simplest.
1. Add a Pinterest Meta Tag to Your Website
One way to verify your WordPress website on Pinterest is to add a meta tag provided by the social media platform to your site. Once added, Pinterest should be able to recognize it, which is enough to verify your website.
To get this tag, you’ll need to have a Pinterest account already set up. When you’re ready to get started, navigate to your Pinterest Settings tab and scroll down to the Claim section:

Here you can tell Pinterest what your website’s URL is to get the verification process going. Now Pinterest will ask you to choose which verification method you want to use. Go ahead and pick the Add HTML tag option to keep going:

Once you’ve copied the meta tag, click on the Next button. A notification will inform you that Pinterest will check your website for the tag within the next 24 hours. However, we can do this now.
If you’re a Divi user, adding meta tags to your site’s head tag is remarkably simple. Simply navigate to the Divi > Theme Options tab within your WordPress dashboard and jump to the Integration section. Inside, you’ll find a field reading Add code to the < head > of your blog:

Paste in the HTML code from Pinterest, then click on the Save Changes button. All that’s left is for you to wait until Pinterest checks your website to see if the code is there.
2. Add a Custom HTML File to Your WordPress root Folder
If you don’t feel comfortable adding code to your website’s head tag, there’s another approach you can use. Pinterest enables you to verify your website by uploading a file (provided by them) to your site’s root folder on your server.
As a WordPress user, you’ve probably already found your way to the platform’s root folder to make changes more than once, so this process should be a walk in the park. To get started, return to your Pinterest Settings screen and navigate once more to the Claim section.
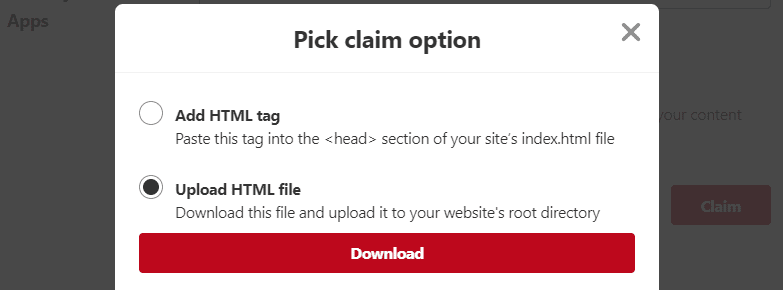
Add your website’s URL, and you’ll get to choose which claim option you want to use. This time, we’re going to go with the Upload HTML file option:

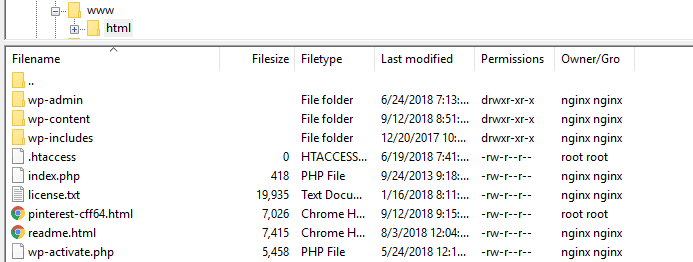
Download the file now, and then you’ll be able to hit the Next button. Similarly to the first step, Pinterest will give you 24 hours to upload the file to your WordPress root folder. To be clear, it’s a simple HTML file including the word pinterest in its name:

To upload the file, we’re going to use File Transfer Protocol (FTP). You’ll need a client to connect to your website using the protocol, so we recommend using FileZilla.
Once you have FileZilla set up, use your web host’s FTP credentials to connect to your website and navigate to your WordPress root folder. In most cases, the directory will be called public_html, www, or after your site’s name, although this can vary depending on your host.
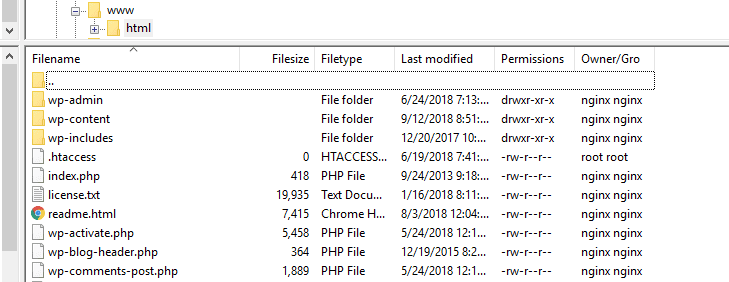
In any case, once you find your root folder, you should see a collection of files and directories like this one:

Now navigate to the folder where your Pinterest HTML file is located on your computer. Once you find it, drag-and-drop it into your WordPress root folder using FileZilla:

This will trigger an upload process, which should only take seconds since we’re talking about a small file. When complete, you can close FileZilla – at which point it’s all about waiting for Pinterest to check if the file is there.
Conclusion
Verifying your WordPress website on Pinterest is simple, and it can be a great way to start getting more traffic from the platform. Pinterest gets a lot more traffic than you might imagine, and if your website offers high-performing content for the platform, you’re missing out by not exploiting it.
As for how to verify your WordPress website on Pinterest, you can use either of these two approaches:
- Add a Pinterest meta tag to your site.
- Add a custom HTML file to your WordPress root folder.
Do you have any questions about how to verify your WordPress website on Pinterest? Ask away in the comments section below!
Article thumbnail image by Mary_ART_S / shutterstock.com.


Really good blog post as I was talking with another website owner why Pinterest is so important.
Thank you. Great to hear that you liked it. 🙂
Hi John
The link to your article signature does not work
I had already claimed the website long before I realized I should do this. Is there a way to get the meta tag once you’ve already claimed or am I out of luck? Thanks.
If you’ve claimed the site already, you shouldn’t need the meta tag. Once the site is claimed, you can even remove the tag or file. 🙂
same here. just read through and was about to claim my site and realized i already have 🙂