
Leveraging browser caching can improve your website’s loading times for repeat visitors. However, it also means that users might sometimes see outdated content when they visit your site.
The best way to avoid this issue is to implement ‘versioning’ for your WordPress content. That way, users will always get the latest version of your website, even if their browsers have cached the site. In this article, we’ll talk more about browser caching, versioning, and then we’ll teach you how to implement it in WordPress.
Let’s get to work!
What Versioning Is (And How It Impacts Browser Caching)
Browser caching is a process that saves files from your website on your visitor’s devices so that they don’t need to be downloaded when they revisit your site. This is a straightforward solution that helps to cut down on loading times.
When you leverage browser caching, you usually set expiry dates for the content you want to save. For example, you can configure your .htaccess file to store files on user’s computers for a specific period. When that time is up, their browsers will check for new versions of those files.
The problem is that you’ll often need to update files on your server before the cached versions expire. For example, the code above will automatically cache any png files. If your site’s logo is a png file and you make changes to it, those users might not see the new version until their cache expires.
Versioning, also known as ‘cache busting’, solves this problem by automatically forcing updates to the cache if a file has been changed. It’s a simple workaround that enables you to implement browser caching with long-lasting expiration dates without having to worry about displaying outdated content. However, it does require a bit to work to set up, which brings us to the next section.
How to Use Versioning to Update Your Cached WordPress Content (In 2 Ways)
We’re now going to show you how to set versions of different types of files to bust your users’ cache. Keep in mind – you might run into some issues using these methods if you’re using a caching plugin. If so, you’ll want to flush your site’s cache through whichever plugin you’re using, to ensure your site is serving the latest versions of each file.
1. Update Your Child Theme’s Version Using the wp_enqueue Function
If you’re using a child theme (which you should be!), you can force WordPress to load a new version of its stylesheet through the functions.php file. As you may know, you need to use the wp_enqueue_style function within the functions.php file to load a theme’s stylesheet. Here’s the format the WordPress codex suggests you use:
add_action( 'wp_enqueue_scripts', 'my_theme_enqueue_styles' );
function my_theme_enqueue_styles() {
    wp_enqueue_style( 'parent-style', get_template_directory_uri() . '/style.css' );
}
That snippet does the trick. However, it doesn’t include a cache busting function. In contrast, the code below enables you to include the child theme’s version number:
function my_theme_enqueue_styles() {
    $parent_style = 'parent-style'; // This is 'twentyfifteen-style' for the Twenty Fifteen theme.
    wp_enqueue_style( $parent_style, get_template_directory_uri() . '/style.css' );
    wp_enqueue_style( 'child-style',
        get_stylesheet_directory_uri() . '/style.css',
        array( $parent_style ),
        wp_get_theme()->get('Version')
    );
}
add_action( 'wp_enqueue_scripts', 'my_theme_enqueue_styles' );
This code pulls the version number from your child theme’s style.css file. When you initially set up your child theme, you had to to create a new stylesheet, including a snippet like this one:
/*
Theme Name:   Twenty Fifteen Child
Theme URI:    http://example.com/twenty-fifteen-child/
Description:  Twenty Fifteen Child Theme
Author:       John Doe
Author URI:   http://example.com
Template:     twentyfifteen
Version:      1.0.0
License:      GNU General Public License v2 or later
License URI:  http://www.gnu.org/licenses/gpl-2.0.html
Tags:         light, dark, two-columns, right-sidebar, responsive-layout, accessibility-ready
Text Domain:  twenty-fifteen-child
*/
All you have to do is update the number within the Version line each time you make a change to your child theme’s stylesheet. This will force WordPress to load the latest version of the file.
In case you need a reminder, you can update both these files by accessing your website via FTP. If you don’t have a client set up, we recommend using FileZilla. Navigate to the wp-content/themes directory and look for your child theme’s folder within. Both its functions.php and style.css files should be right within:
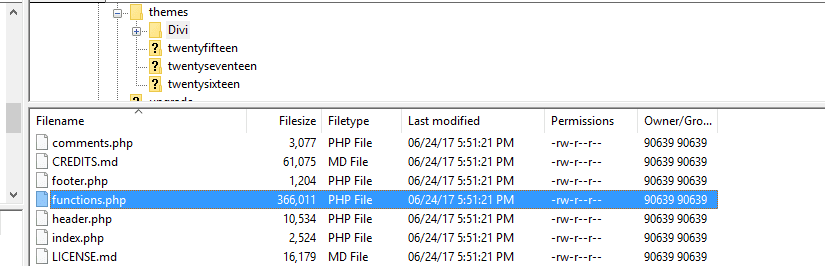
To edit either file, just right-click on it and choose the View/Edit option. This will open the file using your local default text editor, enabling you to make changes to the code.
2. Rename Your Static Files to Force a Cache Update
The previous method takes care of updating your child theme. However, depending on how you set up browser caching, your website is probably saving copies of a lot of other files. For example, during our guide to implementing browser caching, we provided you with a code snippet that should cache copies of your images, CSS, HTML, and JavaScript files:
<IfModule mod_expires.c>
ExpiresActive On
ExpiresByType image/jpg "access 1 year"
ExpiresByType image/jpeg "access 1 year"
ExpiresByType image/gif "access 1 year"
ExpiresByType image/png "access 1 year"
ExpiresByType text/css "access 1 week"
ExpiresByType text/x-javascript "access 1 week"
ExpiresDefault "access 1 month"
</IfModule>
We can use the same file to implement a new set of rules. Use the following code, and add it below the </IfModule> tag of the snippet we showed you previously:
<IfModule mod_rewrite.c>
RewriteCond %{REQUEST_FILENAME} !-f
RewriteCond %{REQUEST_FILENAME} !-d
RewriteRule ^(.+)\.(\d+)\.(js|css|png|jpg|jpeg|gif)$ $1.$3 [L]
</IfModule>
This tells WordPress to check if any files using those formats have appended numbers within their filenames, like so:
child-theme/style.201.css
In that example, we updated the style.css file and changed its filename to reflect that. The 201 within its filename represents the style.css’s version number. WordPress will still recognize it as your theme’s style.css file, but the changes we made to .htaccess enable you to indicate it’s a new version.
After adding that code to your .htaccess file, you’ll be able to set versions for all the file types you’ve included. For example, if you want to upload a new version of a png logo, you just have to rename the file to something such as logo.201.png before uploading it.
Conclusion
Implementing browser caching is an excellent way to ensure your site’s visitors enjoy fast loading times. However, this can also result in situations when you update your content, but users can’t see the changes.
The easiest way to tackle this issue is to use versioning for the content your user’s browsers cache. We’ve shown you the following ways to do this:
- Update your child theme’s version using the wp_enqueue function.
- Rename your static files to force a cache update.
Do you have any questions about how to implement file versioning in WordPress? Let’s talk about them in the comments section below!
Article thumbnail image by imdproduction / shutterstock.com


this is awesome.. the last few hours I’ve been searching for exactly the same. Its like you guys know what I needed for today.
Happy to help, Arun 🙂
The child theme cache busting function did not work for me. Setting $parent_style = ‘divi-style’; but I end up with a 500 error.
There is an error in the code, in function my_theme_enqueue_styles() line 7 should be:
wp_get_theme()->get(‘Version’)
Thank you Orlando, that made the difference!
I have a solution specifically for Divi:
https://github.com/web2033/divi-child-theme-css-v
Thanks, Eugene. That works perfectly. Appreciate the share!!
Thanks for the child theme setup Eugene. I’m definitely going to try it out.
This post came at the right time! I was just starting to research this. It’s so annoying how many times I have to refresh the browser and clear cache for the specific browser. Even in incognito/private mode, I have the same issue with changes now showing up right away.
Hi:
Just a little editor substitution error:
wp_get_theme()->get(‘Version’)
Should be:
wp_get_theme()->get(‘Version’)
Anyway, great solution to this problem!
hahahaha please fix my previous comment with the correct substitution.