
WordPress as a CMS has an incredibly robust set of features. The plugins and widgets draw people to the platform, but once inside, the real power comes from the WordPress editor itself. Regardless of what your goal is with the platform, you will be using the post/page editor in a major capacity. So we want to show you how to use the WordPress editor to the fullest extent so that your content shines and your site flourishes.
Subscribe To Our Youtube Channel
What is the WordPress Editor?
Technically, there are three WordPress editors you can choose from. With the release of WordPress 5.0, the editor changed from the then-default TinyMCE to the Block Editor that we have today. Amid that change, the Gutenberg editor plugin was released as a bridge to beta test new features for the Block Editor before making it into WordPress Core.
While the Block Editor is default in WP as of 5.0, you can choose to use any of the three you want. You can install the Classic Editor plugin to keep the TinyMCE of old, the Gutenberg plugin to keep the newest features (though potentially unstable) in your editor, or you can keep the default Block Editor.
Given the extra steps involved in using anything but the default editor (and the inherent instability and changing nature of the Gutenberg plugin), we’re going to focus solely on the default Block Editor in this post. However, you should note that the fundamentals are the same with Gutenberg, and the TinyMCE contained in the Classic Editor plugin has basic feature parity with any given rich-text editor or word processing software — not to mention any WP-specific functionality we discuss carries over, generally differing only in aesthetics, not function.
With all that said, let’s learn how to use the WordPress editor.
The Basics of the WordPress Editor
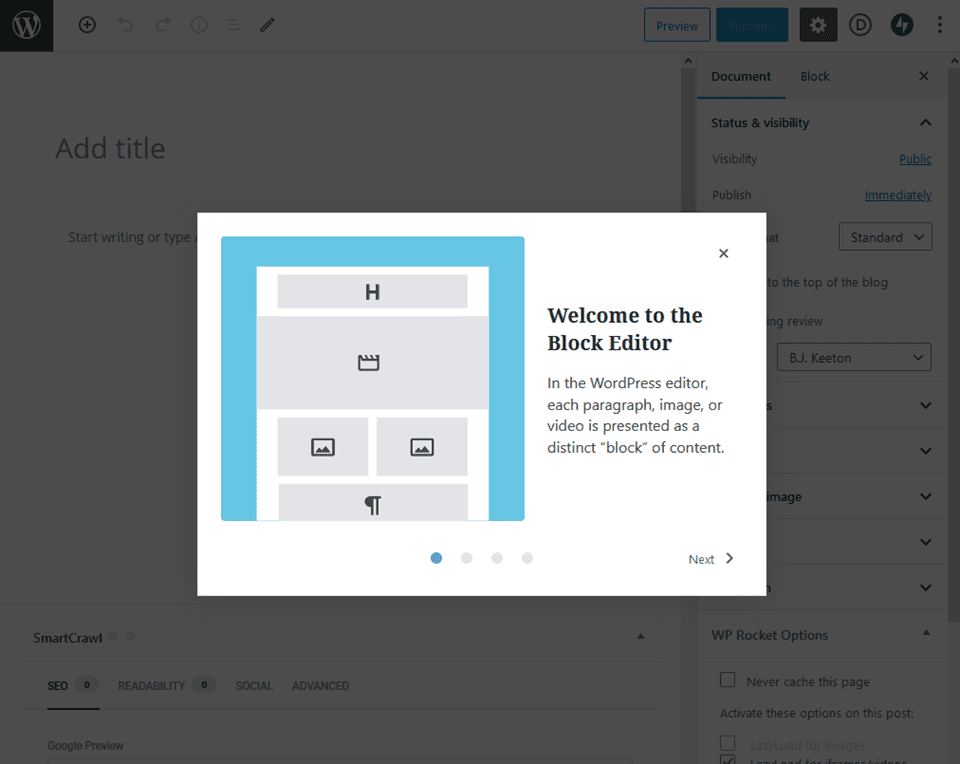
Anytime you create a page or a post (or a custom post type), you will use the Block Editor. You are presented with a tutorial modal on opening it up, and you can learn the basics by following it through the 4 slides it offers. Close it, and you can see the basic editor.
The basic WordPress Block Editor consists of 5 elements. More can be added by various plugins, but these provide the base functionality you will be working with day in and day out.
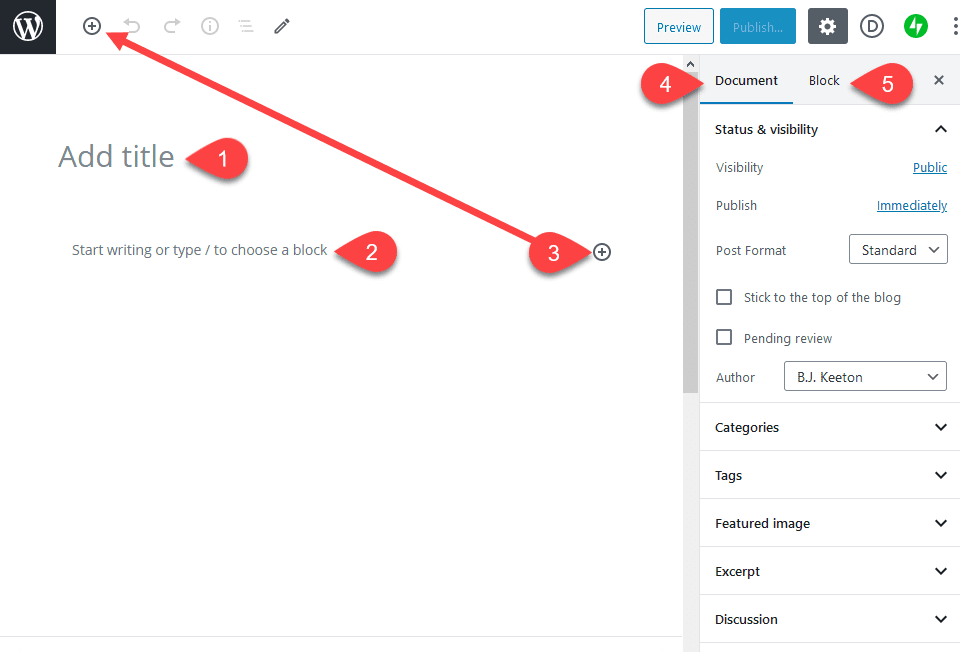
- Title block – Whatever you enter here will be displayed as the post/page’s primary H1 tag.
- Block/Content Area – This is the area in which you will add the various blocks that make up the content of your post or page.
- Add Block Button – Anytime you see a + in a circle, you can click it to add a new block. A dropdown will appear, from which you choose the type you want to insert. They all function exactly the same, so whether you click one to the right of a block, beneath a block, or in the corner of the screen, you get the same options.
- Document Options Tab – Under this tab, you will find everything from categories, tags, permalink, comments on/off toggles, and more. Plugins might add options here, but they always apply to the overall page or post itself.
- Block Options Tab – This tab handles the options for whatever block you highlight. If you click into a paragraph block, you edit the options for that block alone. No other blocks, nor the document itself change.
Below, we will walk you through the specifics of these areas and how you can use them to create the best content possible.
What are Blocks?
You have seen us mention Blocks in this post already, but just what are they? A Block is a single, customizable element of a page or a post. It can be a single paragraph, a list, an image or a gallery. These blocks can be moved around and adjusted as you like, customized individually, and give you granular control over your content in a way that a WYSIWYG editor simply cannot. (If you’re a Divi user, you’re already familiar with the concept because our Modules work the same way.)
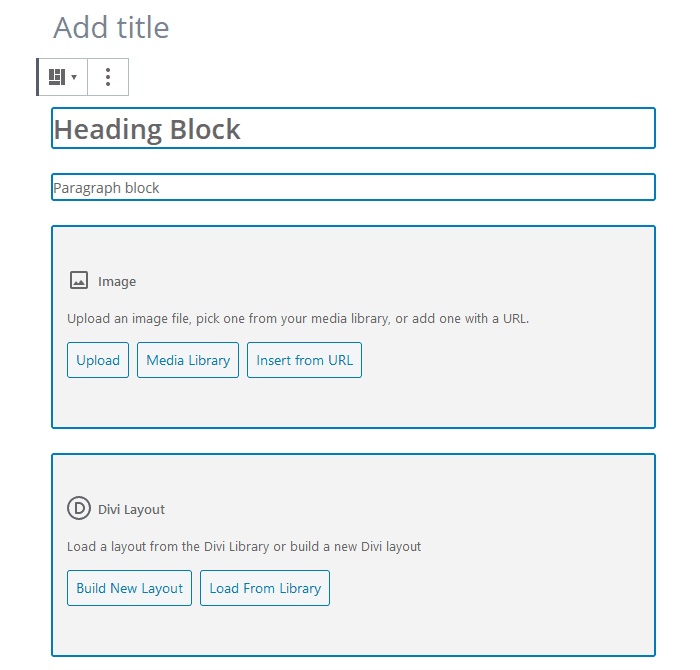
As you can see above, each element of the page is contained in its own block. You can see a full list of WordPress blocks in the WordPress support documentation.
How to Create a Group of Blocks
A Group of Blocks is a collection of blocks that you set to function as a single block. You move them and style them as though they were a single unit, but the Group is made up of multiple elements.
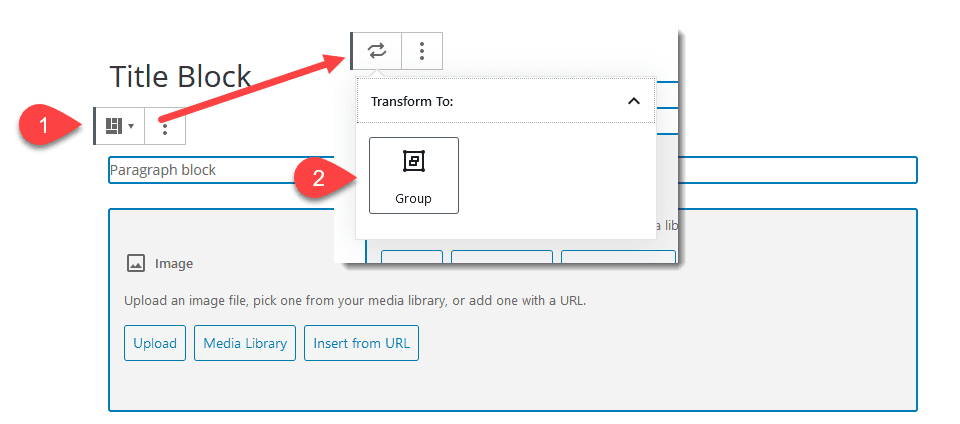
Creating a Group is easy. You just click on a block, then hold Shift or CTRL and click on another. If you want to group all the blocks in the post, you can press CTRL/CMD – A to select all. Then when you see the icon in the upper-left change to a square made up of small blocks, you can click it and select Transform to Group.
If you need to ungroup them, simply click the three-dots dropdown button and select ungroup.
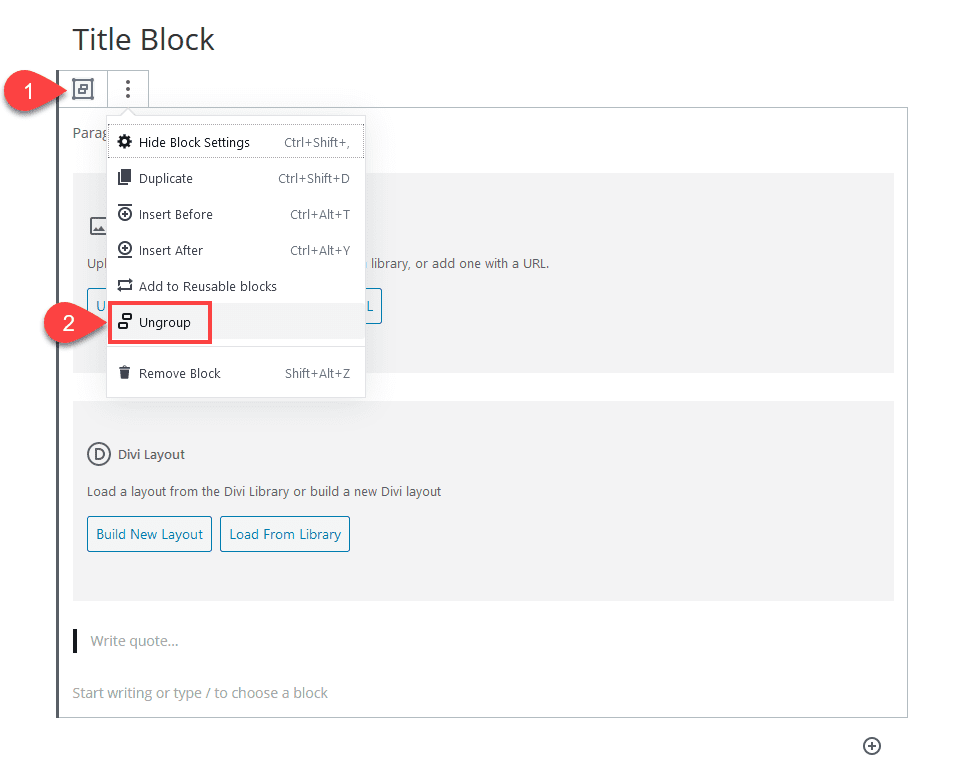
The blocks will now function as individuals once again.
What are Reusable Blocks?
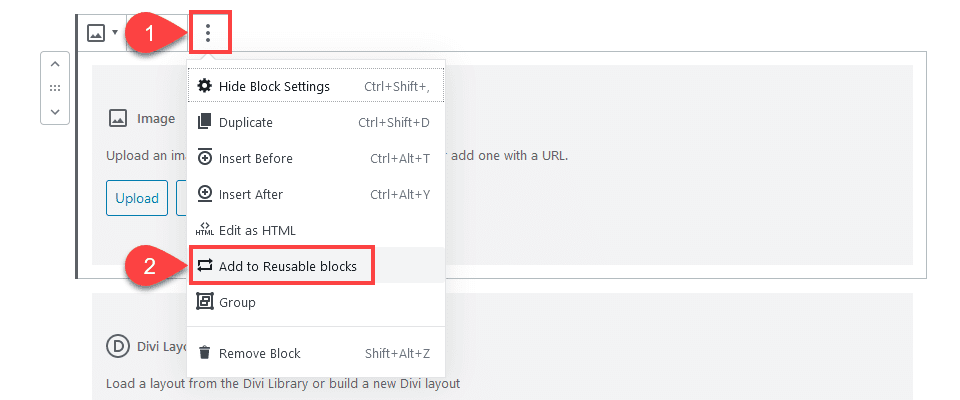
You can turn any block from a one-time block into a reusable block from the settings menu. A reusable block is not a template, but rather a global block for your site. You create a block or group of blocks, and then you click Add to Reusable Blocks.
Any changes or edits made to that reusable block is then reflected across the entire site, changing every instance of the block instead of just the one you edited. We have a complete guide to reusable blocks that you can check out for more information on the topic.
The Title Block

The title block as shown above is your post or page’s primary H1 tag. It will also generate the permalink slug for the post, but that can be edited once you have saved the post at least once. This will also be what CSS selectors such as .post-title and .entry-title pull from. (Your SEO plugins allow you to set what displays in search engines, however.)
This is the one block within the WordPress editor that you cannot remove or reposition. You must use CSS or external page-builder settings to adjust more.
Block/Content Area

Fundamentally, you can consider the content area to be where you type. If you want, you can begin typing, write out an entire post without ever even considering blocks at all. In all major ways, this replaces the simple WYSIWYG area of the TinyMCE and is the biggest change to the WordPress editor since…well…ever.
However, with the Block Editor, you can do so much more than that. Each time you hit “enter” or “return,” you will add a new Paragraph block. To add a different kind of block (of any kind), click on the + in a circle, and you will get a dropdown of every available block. Be sure to scroll because they are set up in different categories, too. You can also search for a specific block if you know what kind you want.
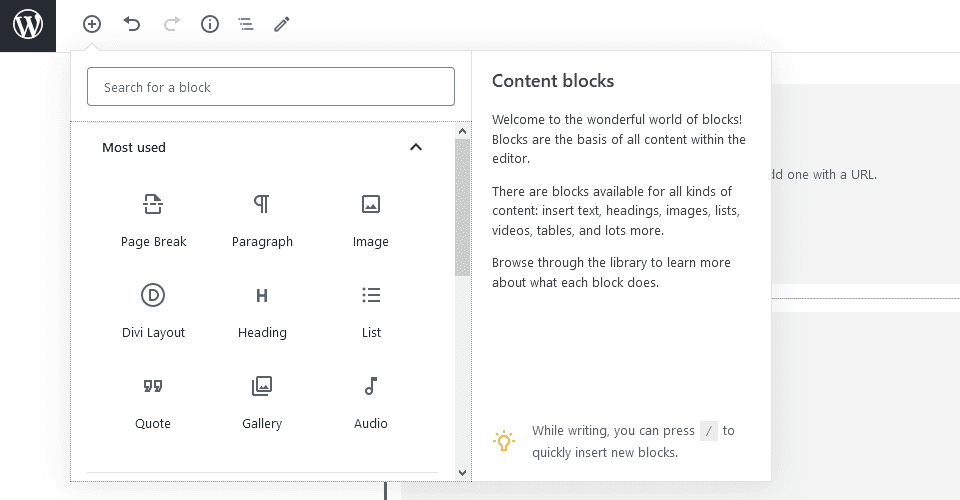
You can add YouTube video blocks, images, galleries, audio players, lists, quotes, and so much more. Each of them have their own settings and styling options. Plus, the more you use a block, the WordPress editor will recognize that as a commonly used one and list it under Most Used so that you won’t have to scroll or search for it anymore. Reusable Blocks and Groups of blocks can also appear under Most Used.
If you look at the images in this section, the (1) points to the reordering buttons that you get for each block when it’s selected (just click on it to select). The (2) points to the dropdown that lets you delete the block as well as edit it’s contents as HTML, clone it, or add new blocks around it.
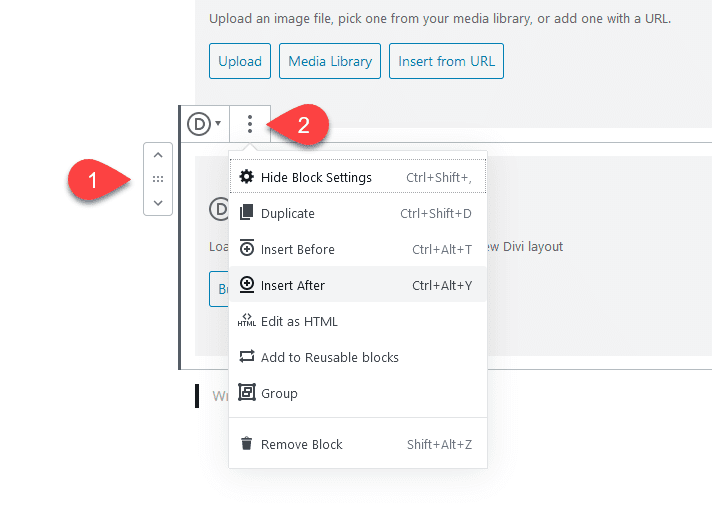
These options and settings, however, are different from the Block Options Tab in the upper-right corner of the screen we mentioned above and discuss in the next section below.
Document Outline, Word Count, and Other Info
In the top toolbar of the page, you have an i in a circle. Click it, and you are presented with a full rundown of what your document consists of.
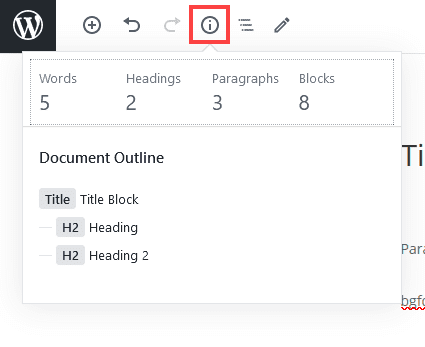
As long as you have used Heading blocks, you will have a Document Outline appear in addition to the word count, paragraph number, and block count. If you have no Heading blocks, that section will not be there. You can click on any of the elements of the Document Outline to be taken directly to that block. This feature is invaluable in longer documents.
If you click on the nested list icon next to that one, you see an ordered list of all the blocks in the post, too, rather than only headings for an outline.
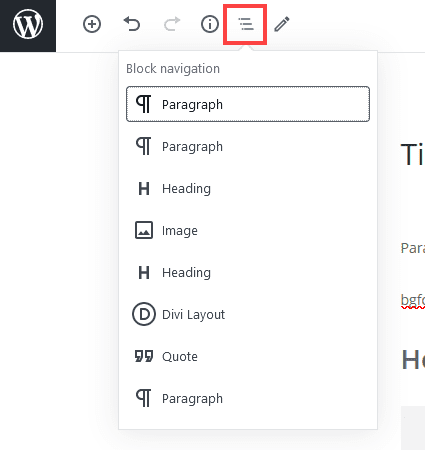
Again, you can click anything in the list to navigate directly to and select that block.
Block Options Tab
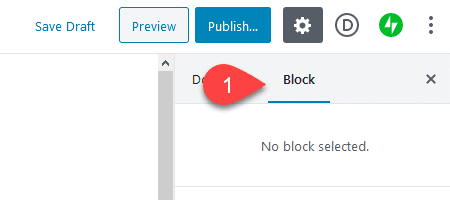
In the top-right corner of the WordPress editor, you will see a tab that says Block. As long as you have a block selected, you will get a contextual set of options for that block type. However, any changes you make will affect only the single block you have selected.
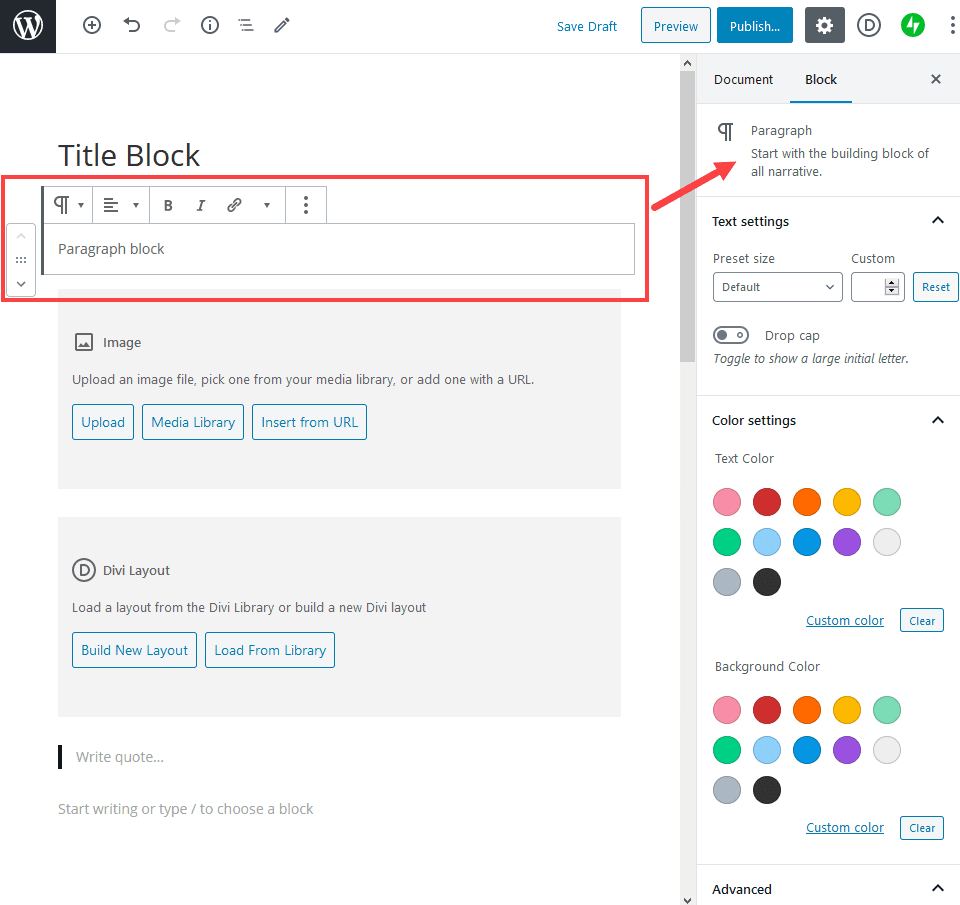
You might change thumbnail size of an image in this tab, add a color background to a paragraph to create an alert, or adjust font size in a heading, for instance. If you have the Block tab open, the options change to the specific block you select. If you have the Paragraph Block highlighted, you will see this.
Having an Image Block selected will change the Block tab to this.
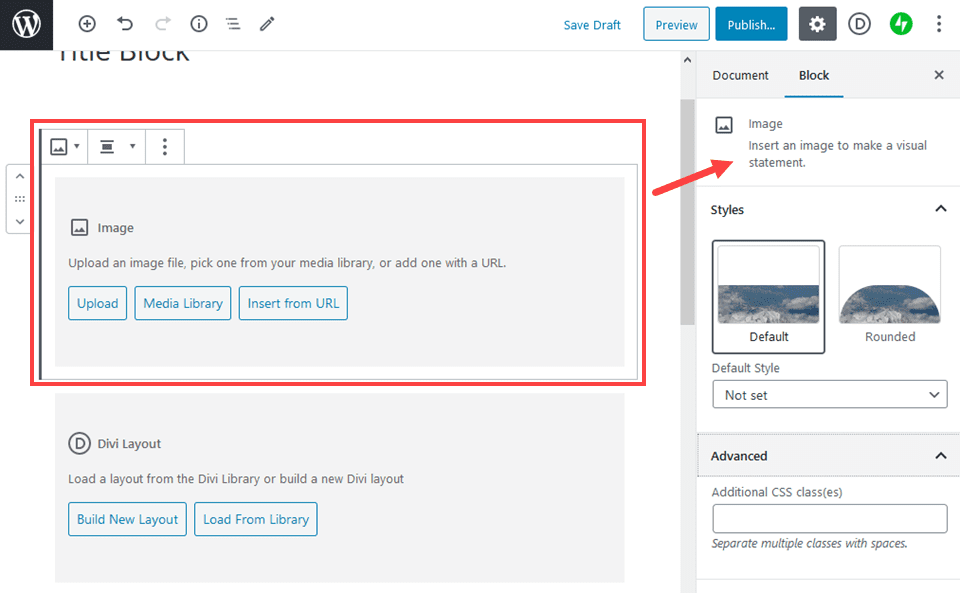
Each block will have specific options you can adjust within them that only apply to that type of block (and will only render in that specific block). Every block, however, has an Advanced section in the tab that lets you apply CSS classes to that block. You can then style them as you see fit using external stylesheets and code.
Document Options Tab
To the left of the Block Options tab is the Document Options tab. If you’ve used WordPress in the past, these will be familiar to you. In here, you will be able to adjust the categories of your post, the tags, add a featured image, adjust the permalink slug, add an excerpt for theme/SEO use, and enable or disable comments.
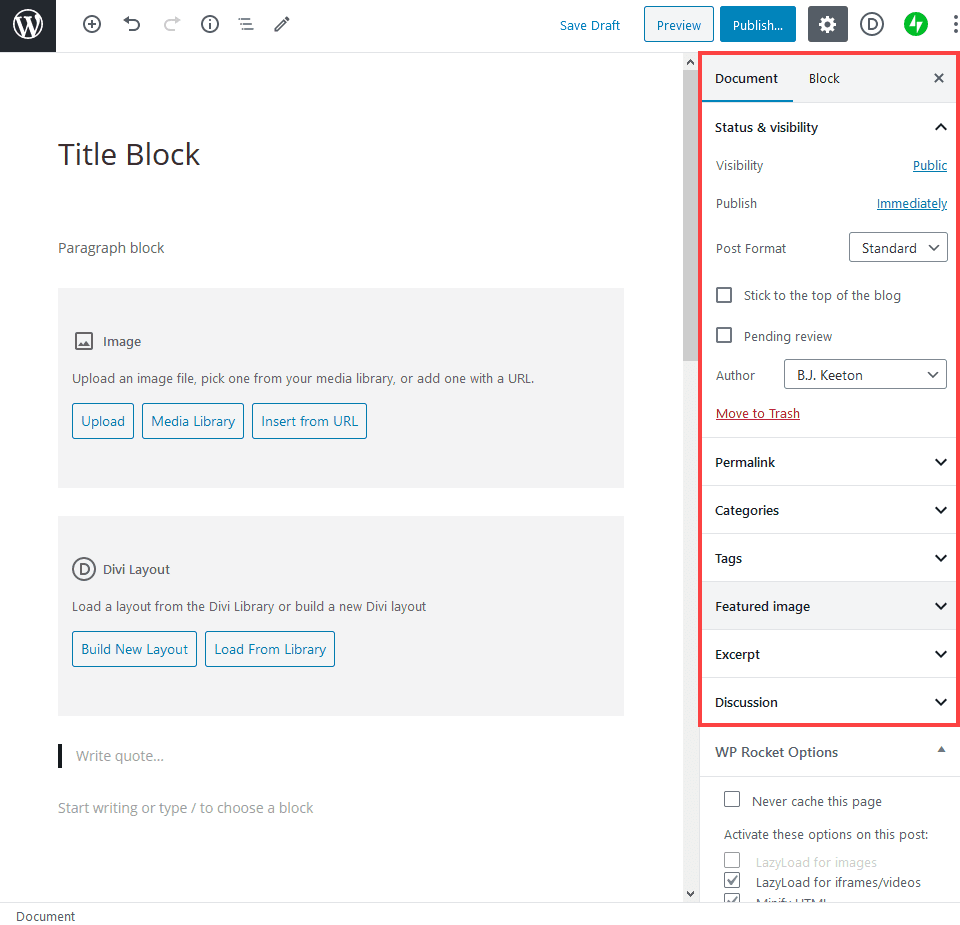
Each of these sections is pretty much identical to where and what they were in the TinyMCE WYSIWYG editor. They apply to the whole post or page and not to a single block or the whole site. Additionally, as you can see in the image above there is a WP Rocket Options box. Some plugins will apply boxes to this area, but they will always pertain directly to the document itself, not so much the content or the blocks.
Additional Post Metaboxes
The metaboxes for the post are where plugins will add in new options and capabilities for the content itself. They appear at the very end of the content area, below the blocks.
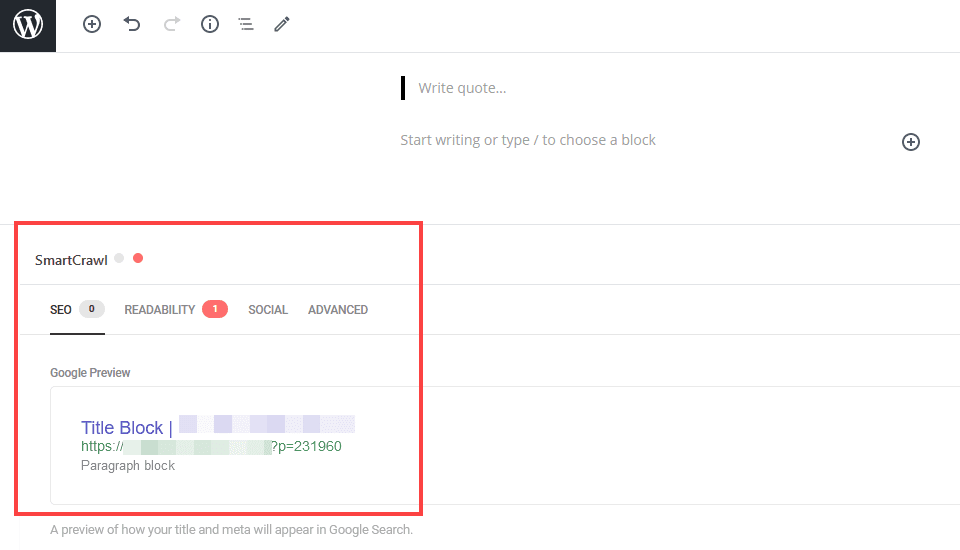
What appears in this section (if anything) will depend on what plugins you have installed (or any theme features that may make use of the area). SEO plugins take advantage of this area a lot, and anything else that will allow you to interact in some way with the content of the page, rather than the document details.
WordPress Editor Options Dropdown
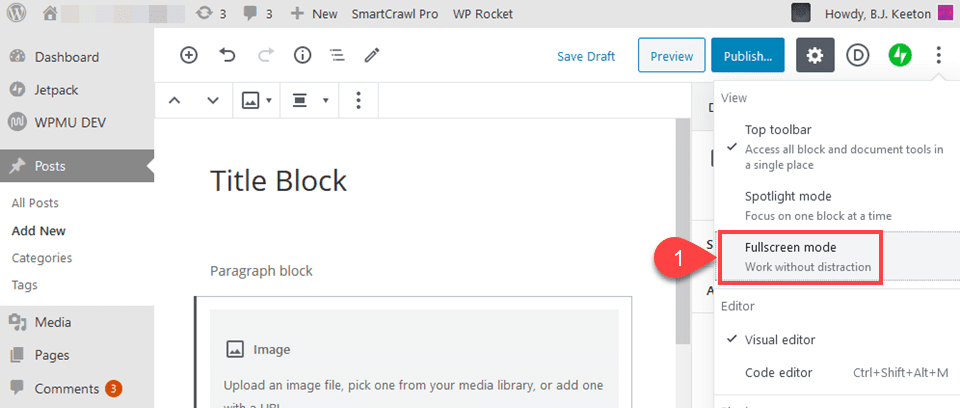
If you click the three-dots dropdown icon in the upper-right of the screen, a large vertical dropdown will appear. You can adjust a number of settings here, all of which apply to the editor itself, rather than the document, blocks, or content.
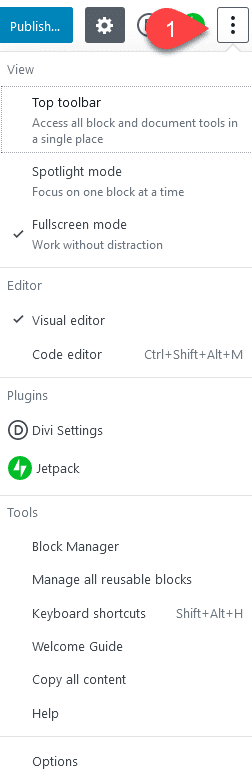
For the most part, they’re fairly straightforward options, such as managing your reusable blocks or providing a list of keyboard shortcuts or reopening the welcome guide we mentioned in the beginning.
Some of the most frequently used options, however, are near the very top. Specifically the toggles for Top Toolbar, Fullscreen Mode, and the Visual/Code Editor modes.
The Top Toolbar toggle means that rather than the options for a selected block appearing as a contextual menu near the upper-left of the block, as we mentioned above, it will be in a fixed area at the top of the screen.

Fullscreen Mode toggles the WordPress admin dashboard on or off. If you disable Fullscreen Mode, you will see the left-hand sidebar that includes the typical dashboard options such as Posts, Pages, Appearance, Settings, Tools, etc.
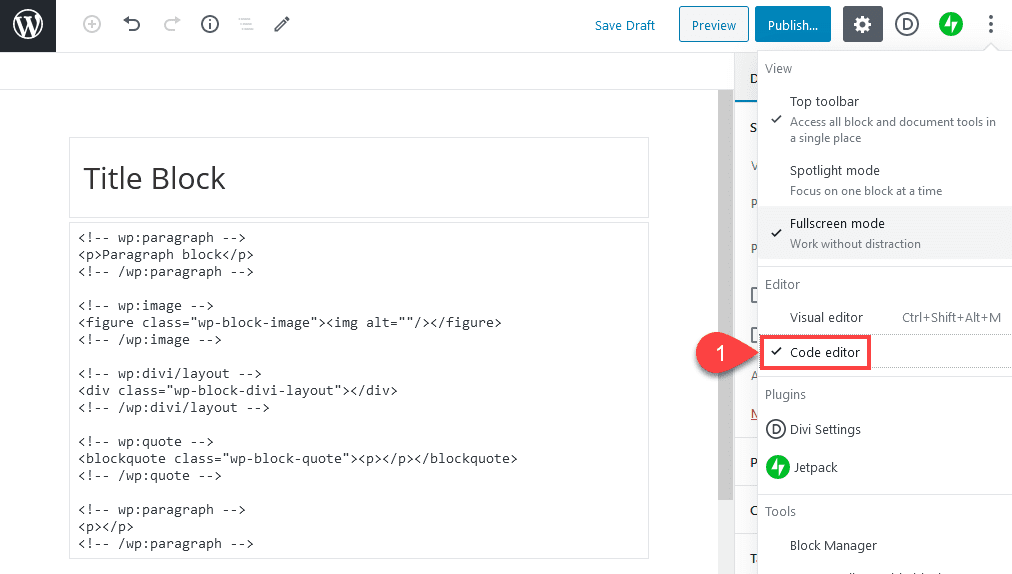
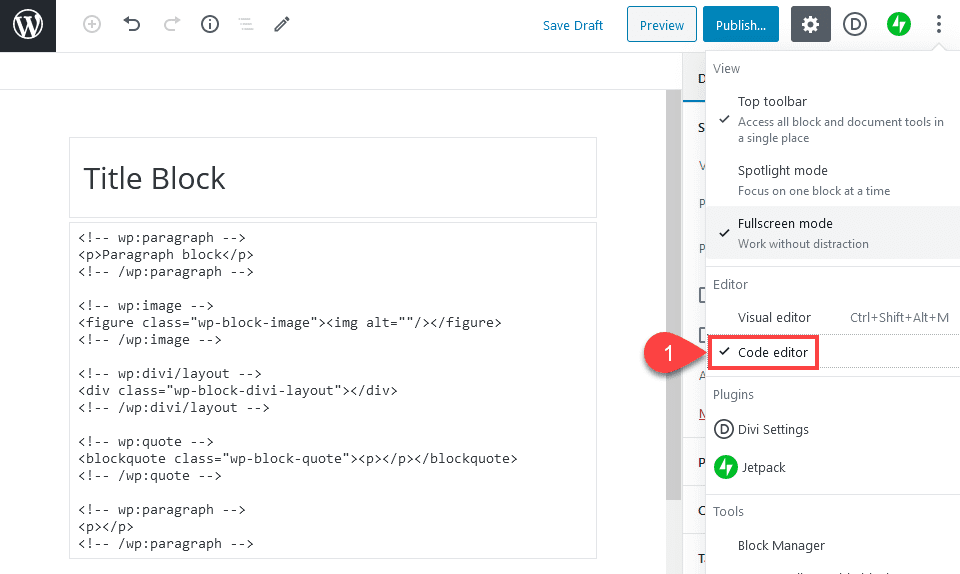
And the Visual/Code Editor toggles work exactly like in the TinyMCE editor. The examples in this post so far have been with the Visual Editor. That is, you see a visual representation of the post as you write it. You get buttons to press, context menus, and a real-time rendering of settings as you change them. However, the Code Editor is just that — code. You will have a simple text box in which you will write in plain text and HTML.
This is usually done to troubleshoot issues with the editor or to fine-tune a single area or block. Or to perhaps paste in content that was written in an external editor that wouldn’t format correctly across multiple blocks.
The block editor uses specific HTML tags to tell WordPress what kind of blocks to render, so make sure that you keep any code that looks like <!– wp:paragraph –> intact. Otherwise, things can get pretty messy.
Global WordPress Block Editor Shortcuts
The Block Editor also comes with its own set of nifty shortcuts, too. They are not all the same as the TinyMCE was, but they’re equally useful and just as important to learn. Committing the most useful ones to memory will save you a lot of time and trouble, speaking from experience. You can press Shift+Alt+H to display the following list of shortcuts in the WordPress editor itself.
Document Shortcuts
- Switch between Visual editor and Code editor – Ctrl+Shift+Alt+M
- Open the block navigation menu – Shift+Alt+O
- Show or hide the settings sidebar – Ctrl+Shift+,
- Navigate to the next part of the editor – Ctrl+` or Shift+Alt+N
- Navigate to the previous part of the editor – Ctrl+Shift+` or Shift+Alt+P
- Go to the nearest toolbar – Alt+F10
- Save your changes – Ctrl+S
- Undo your last changes – Ctrl+Z
- Redo your last undo – Ctrl+Shift+Z
Selection Shortcuts
- Select all text when typing. Press again to select all blocks – Ctrl+A
- Clear selection – ESC
Block Shortcuts
- Duplicate the selected block(s) – Ctrl+Shift+D
- Remove the selected block(s) – Shift+Alt+Z
- Insert a new block before the selected block(s) – Ctrl+Alt+T
- Insert a new block after the selected block(s) – Ctrl+Alt+Y
- Remove multiple selected blocks – del or backspace
- Change the block type after adding a new paragraph – /
Text Shortcuts
- Make the selected text bold – Ctrl+B
- Make the selected text italic – Ctrl+I
- Convert the selected text into a link – Ctrl+K
- Remove a link – Ctrl+Shift+K
- Underline the selected text – Ctrl+U
Wrapping Up
The WordPress editor has come a long way over the past decade, and the current Block Editor is definitely powerful enough to carry us through the next one. With the power of granularly controlling every element on the page, you can create content faster, easier, and far more efficiently than was possible before. However, if the current Block Editor isn’t for you, the Classic Editor plugin exists, and if you’re one to be on the cutting edge, the Gutenberg plugin stays a few releases ahead of the default editor in WordPress core. So no matter which way you prefer to create, WordPress has you covered.
Got any tips and tricks you’d like to share about the WordPress editor? Let us know in the comments!


This was an incredibly helpful tutorial.
Hello B.J. Keeton,
Actually, using the Gutenberg editor is not easy for a beginner but after going through this article anyone can easily use it because you have covered this topic very well.
Thank you for sharing this guide.
I’ve been wondering what specific benefit there is to using the WP block editor when I am designing / building with Divi modules.
Can you think of specific situations where the combination of both Divi modules and the block editor work together to solve a problem?
Thank you – this is a great article on how to use the block editor. Much appreciated.
Bill
Yes! I’ve found that it’s ideal to use Divi to create a blog post template but use the WordPress editor within that template For almost all pages I use Divi.
That is exactly how I use it. I build a blog layout in the Theme Builder, then use the Block Editor to create the content.
If I’m using Divi what’s the advantage of using this block editor?
I usually ignore it whenever I create a new page and go straight to the Divi builder option. I’d love to know if there are certain advantages of using this.
If you’re using Divi, the best use case for the WordPress Block Editor is often within your Divi Builder templates. Creating a blog post template, custom post type template, etc. with Divi and then filling in the actual content with the WordPress Editor is a great way to use them together.
Hi,
How can I add a “not so reusable” block for all editors of a magazine ? A block who just add a specific css class and in front office, I just have to change colors, size, etc…
Thanks !
That’s an interesting question, Beartrand. I can’t say I’ve run across that use case before, but if I were just trying stuff out, I would probably try the Code or Custom HTML blocks first. Add the classes to it in the block options, then add it to Reusable.
I’m not sure if that would work, like I said, but it would be my first try. Remember the two of them work a little differently. In my experience, the Custom HTML block is for rendering the HTML on the front end, while the Code block is for scripts and such that run without being visual. (I once added a Podcast embed from Anchor to the Code block by accident, and it made my layout BONKERS until I noticed.)
Have been using the block editor more and more in projects lately and once you get used to it, it’s a much better user experience that the old one in places. My favourite feature is that it updates asynchronously meaning no page reload. Save a bunch of time.
Two tips:
For layout you can get a myriad of plugins that are swift army knives that will have some sort of row/column structure but if you want something simple go for Automatic’s Layout Grid Block. Base on a grid system, you can use it for basic columns or push it for more advanced layouts.
Watch out for the version of the block editor that comes with WordPress 5.5. It is a big jump forward in terms of usability and the code editor is closer to a proper IDE in the form of code mirror. You can test drive all this with the latest version of the Gutenberg plugin. Just don’t use it on a live project, you will find incompatibilities with other plugins.
Great article, thanks.
Wordpress really is an easy all purpose website builder, and
it always amazes me that there are still so many things to learn.