
Fonts and typography set the tone for your site. Getting it right can help your brand and improve readability. Divi 5 makes working with fonts fast and easy. With Divi’s new features, like Design Variables and the Option Group Presets, setting up fonts becomes easy.
This post teaches you how to manage fonts and font sizes in Divi 5, creating responsive typography that scales beautifully across devices.
👉 Divi 5 is ready for new website builds, but we are putting the finishing touches on the backward compatibility system. In the meantime, hold off on updating sites built on D4. We’ll let you know when that change happens.
Considerations When Thinking Through Fonts For A New Website
When starting a new site, font choices shape the user’s first impression. Consider these points to ensure your typography supports your content:
- Readability: Choose clear fonts, especially for body text.
- Consistency: Limit your fonts — two or three work best, with at least one for headings and one for body text.
- Responsiveness: Ensure fonts adapt to different screen sizes (ideally from 320px to 1440px).
- Compatibility: Opt for web-safe or popular fonts to avoid display issues.
How To Manage Fonts And Font Sizes In Divi 5
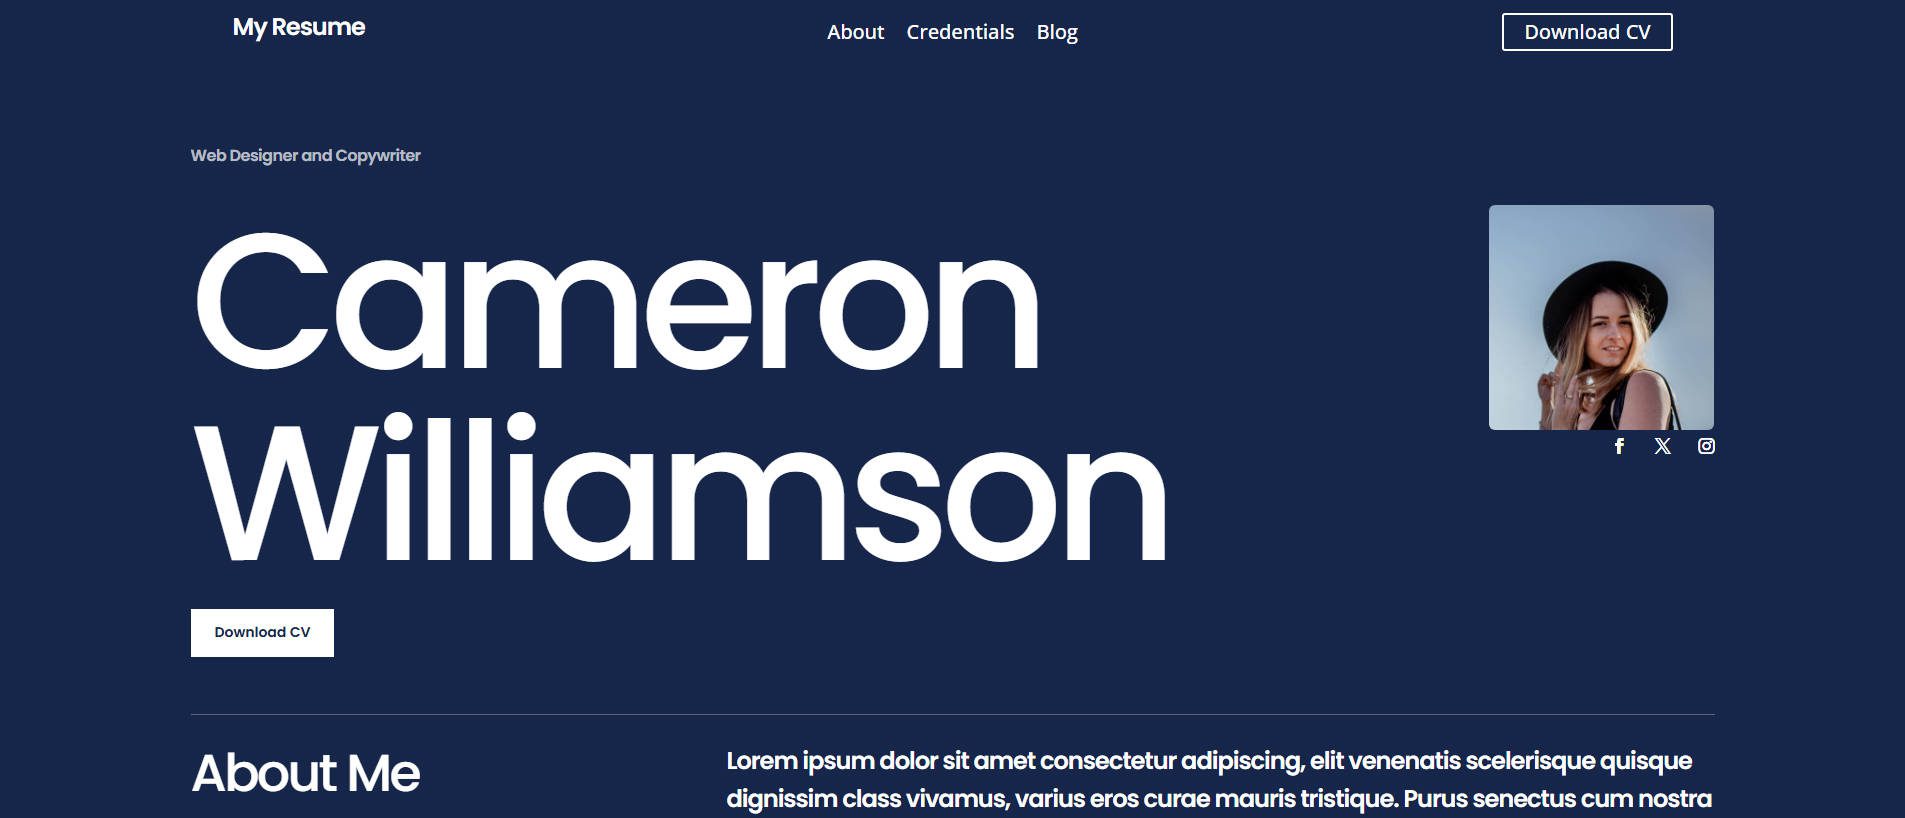
Let’s use a premade layout from Divi’s library. We’ll choose the Landing Page layout from the “Business CV” pack and revamp the typography using Divi 5’s new features. If you have an existing Divi 5 site but want to improve its typography, you can follow these same steps without using this layout.
Step 1: Choosing Font Pairings
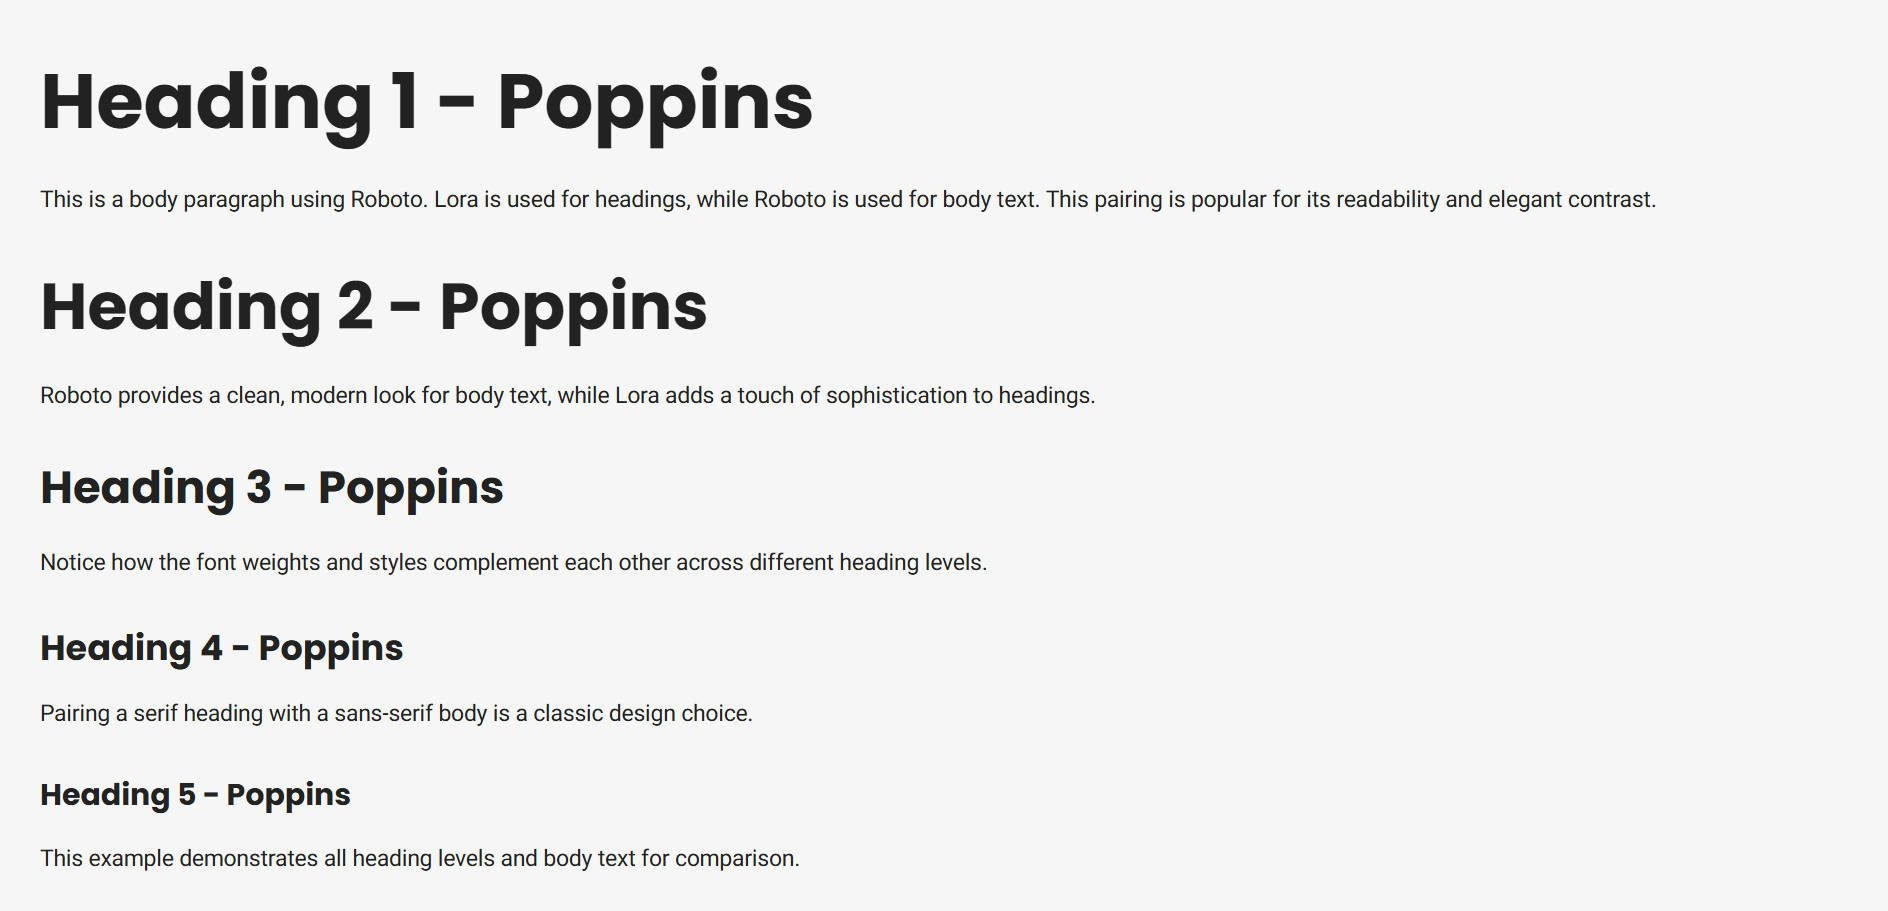
Good font pairings blend style and readability. Google Fonts are also a safe bet since they are built into Divi and easy to use.
In the examples below, we’ll stick with the Layout Pack’s use of Poppins for the headings and body text. You can try pairing Lora and Roboto as well.
Step 2: Setting Fonts For Primary Header And Body
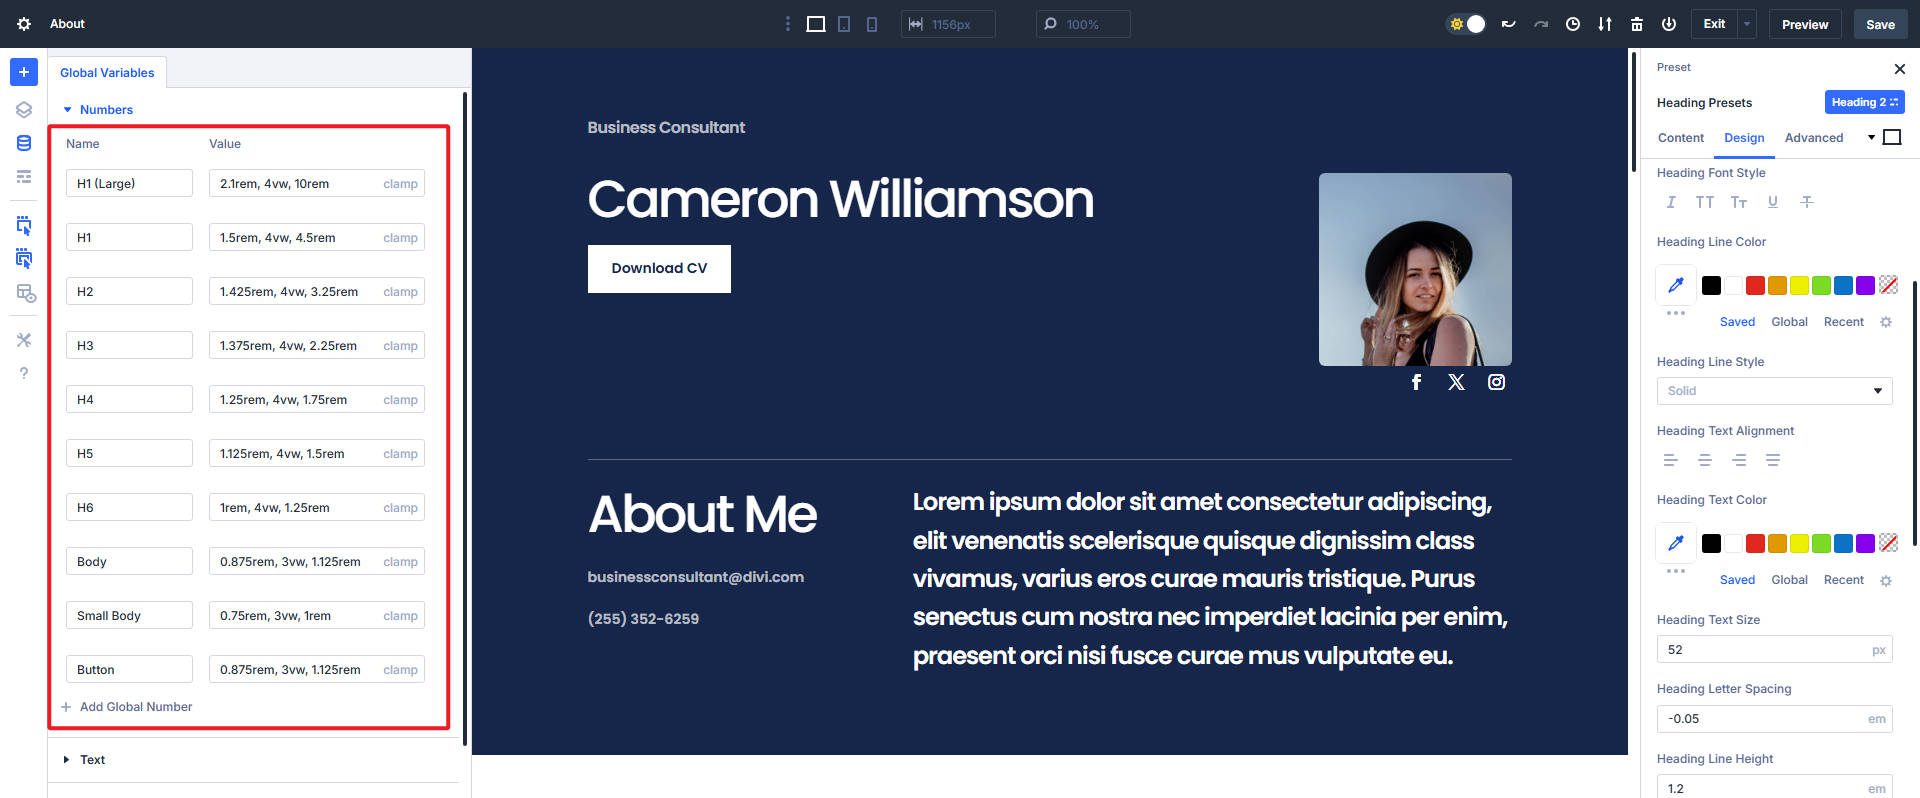
Now that you have chosen fonts, we can add them to the website using Divi. In the Visual Editor, open the Variable Manager at the top left. Divi’s Design Variables let you globally control fonts on your website.

There are two default font variables for your primary heading and body fonts. Go to the Fonts section, and set “Poppins” as the Heading font and “Roboto” as the Body font.
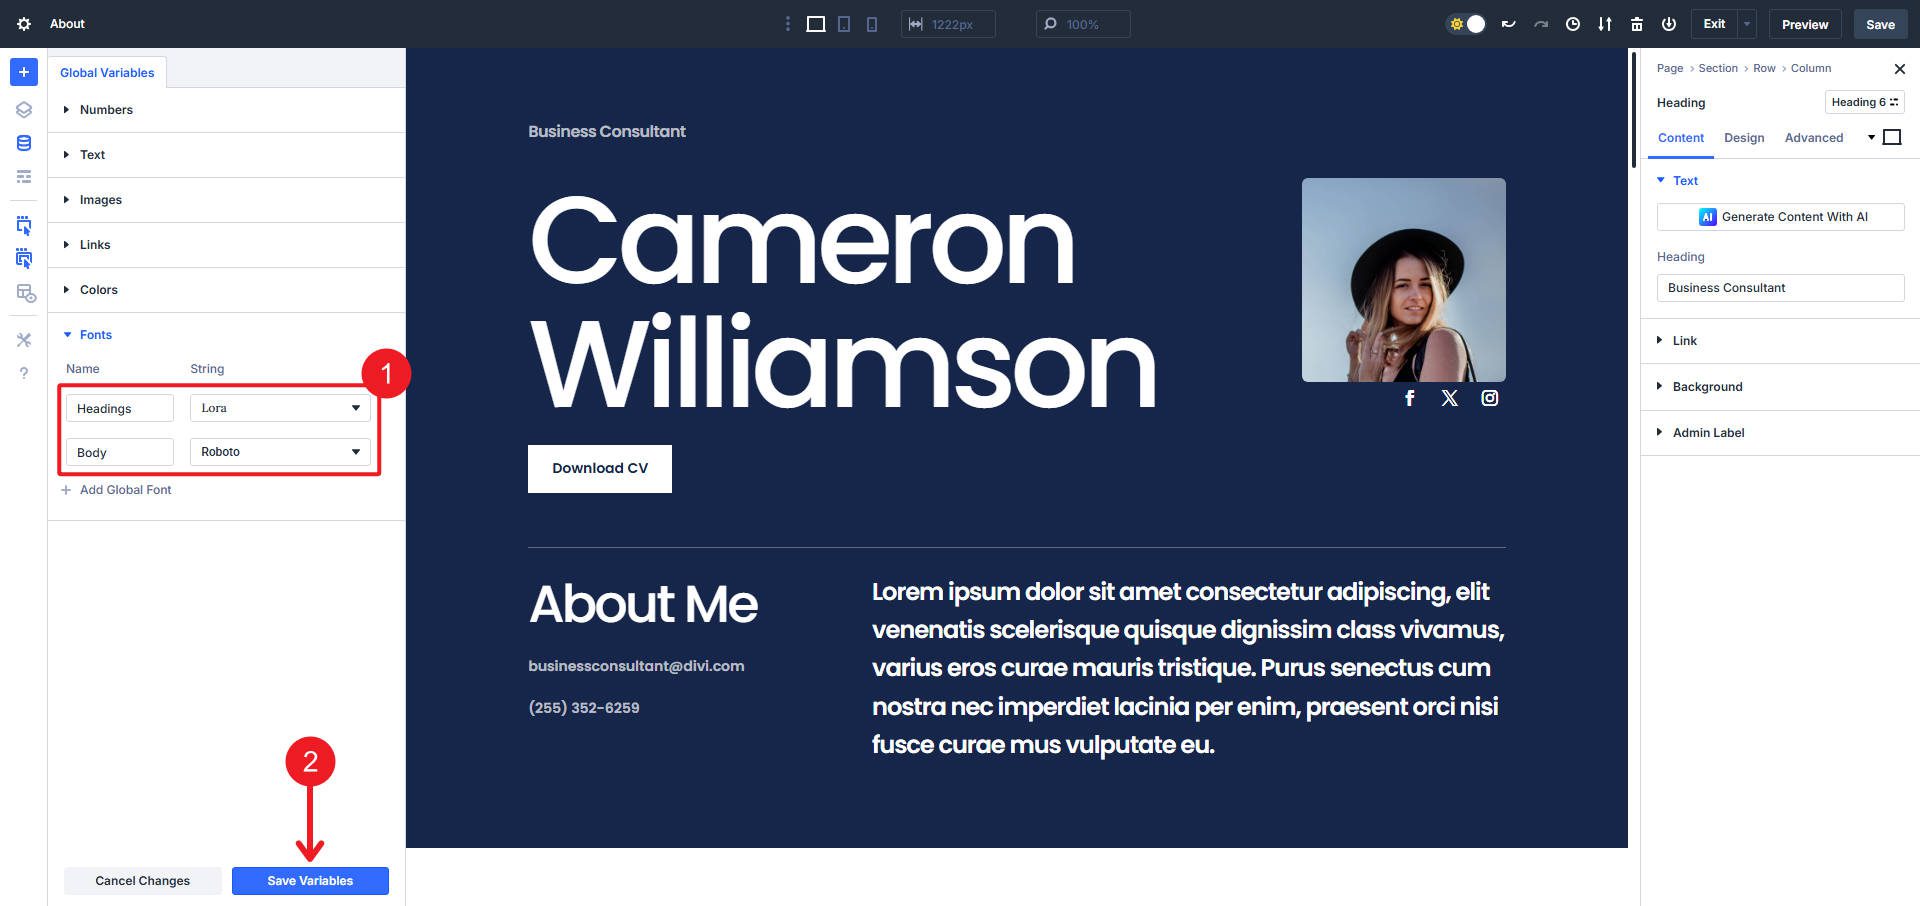
Set your fonts to whatever matches your design and brand requirements
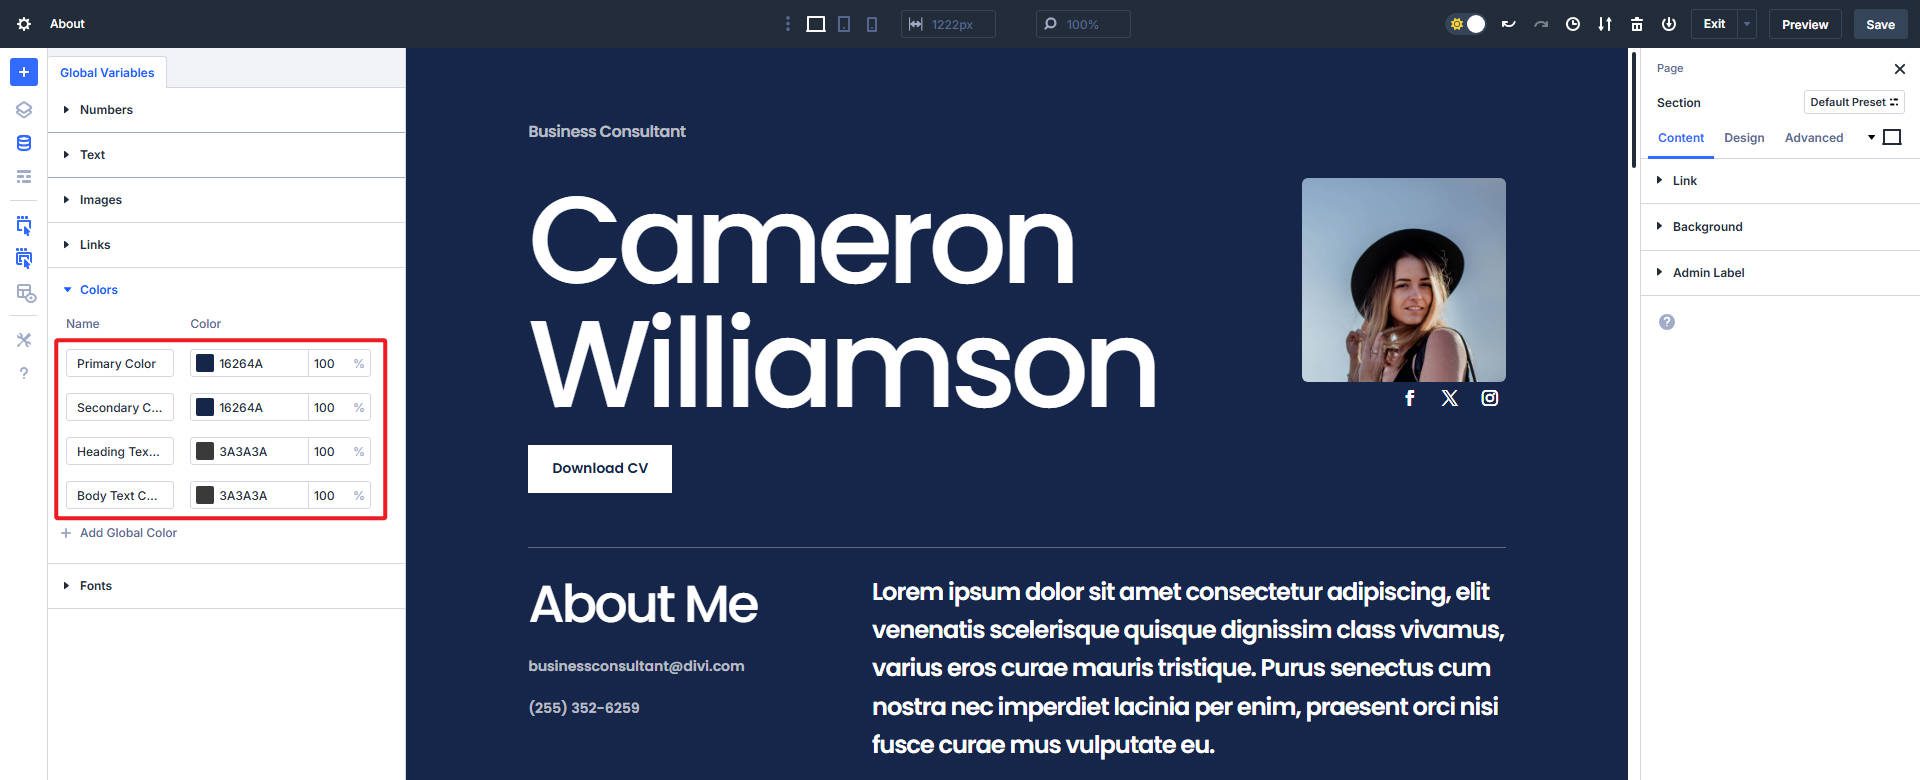
At this point, it might also be a good idea to make sure your brand colors are set as Design Variables, too, especially if you plan on using some of those colors in text.
Make sure to save your variables when done inputting them
Step 3: Creating Font Sizes
Now for the more involved part. It is best to think through how to make your typography look good on every device size. With Divi 5, you have two options. The first and preferred option is to use clamp(), and the second is to set the font multiple times at various breakpoints.
How you build your font sizing for each heading level, body text, and other text situations is entirely up to you.
Fluid Typogrphy With Clamp()
Clamp() lets you set a minimum value, a preferred value, and a maximum value. In another post, we go into depth about clamp() and provide an easy way to figure out those values. But here is an example:
| Size Name | clamp() Function |
|---|---|
| H1 (Large) | clamp(2.1rem, 10vw, 10rem) |
| H1 | clamp(1.5rem, 5vw, 4.5rem) |
| H2 | clamp(1.425rem, 4vw, 3.25rem) |
| H3 | clamp(1.375rem, 3vw, 2.25rem) |
| H4 | clamp(1.25rem, 2vw, 1.75rem) |
| H5 | clamp(1.125rem, 1.75vw, 1.5rem) |
| H6 | clamp(1rem, 1.5vw, 1.25rem) |
| Body | clamp(0.875rem, 1vw, 1.125rem) |
| Small Body | clamp(0.75rem, 1vw, 1rem) |
| Button | clamp(0.875rem, 1vw, 1.125rem) |
This layout has a default H1 size and a unique (and larger) H1 size for the person’s name in the first section. We carried over that same principle in the above sizing chart and added a smaller body font variation.
You can test your font sizing in a simple HTML document to see things in isolation (this can also be done inside Divi). Here is what the above font sizing looks like with the font pairing.
Once you are comfortable with your font sizes, you can add them as Design Variables. Give each a discernible name and paste the value on the right.
Fixed Units With Breakpoints
Clamp() is the most versatile option for font sizing, but many users still use fixed values like pixels or rem. You can use these alongside Divi’s Customizable Breakpoints to scale your font up and down as needed.
Since your number of values for a similar effect triples when using it this way (instead of 10 clamp() values above, this would be 30 individual values). It is not necessarily recommended to fill up the Variable Manager with these values, but you can if you want to,
| Size Name | Desktop | Tablet | Mobile |
|---|---|---|---|
| H1 (Large) | 10rem | 5rem | 2.1rem |
| H1 | 4.5rem | 3rem | 1.5rem |
| H2 | 3.25rem | 2.25rem | 1.425rem |
| H3 | 2.25rem | 1.8rem | 1.375rem |
| H4 | 1.75rem | 1.5rem | 1.25rem |
| H5 | 1.5rem | 1.3rem | 1.125rem |
| H6 | 1.25rem | 1.125rem | 1rem |
| Body | 1.125rem | 1rem | 0.875rem |
| Small Body | 1rem | 0.875rem | 0.75rem |
| Button | 1.125rem | 1rem | 0.875rem |
You can build your sizing structure for each breakpoint and carry it over to the next step. Instead of placing them as Design Variables, you can apply them directly to Option Group and Element Presets.
Step 5: Adding Font Sizes From Variable Manager To Presets
With your Number Variables set (or at least formulated), it is time to apply them to Presets. One of the best use cases for Option Group Presets is typography. You can create seven (7) Heading/Title Option Group Presets that you can use for any Module that uses the Heading/Title field (like Heading, Blurb, Accordion, and Person Modules, for instance).
The same is true for the Text Option Group. I can set two (2) Presets (one for my normal and one for my small body text), and any Module that uses the Text Option Group can use those styles. For heading and text styles, this is much more efficient than applying those styles as Element Presets to all the various Modules you might use throughout your whole website.
Assigning Fixed Values To Breakpoints
The video below shows the basic steps if you opted for the fixed values at multiple breakpoints. Click on a text module, go to the Design tab, hover over the text Option Group, click the OG Icon, create a new Preset, and apply your styles at each Breakpoint. Scroll to the bottom of the right sidebar and save your Preset (very important). Repeat this for as many text variations as you came up with (like small, regular, and large options).
Assign the OG Preset you expect to use the most as your default preset for that Option Group. If you see a Star next to it, that is your current default (this will apply across your site, assuming no other Module Styles or Element Presets are applied throughout).
Assigning Clamp() Functions (Easier)
The process is similar when using Design Variable with the clamp() function, but much easier. In the example video below, we’ve set two Heading sizes on the Option Group Level. The only difference from the above is that we are not pasting the values but using the variables we set up earlier. While setting up your OG Presets, make sure the default fonts are chosen and set the colors as you want. Some people like setting colors at the module level instead, but it is up to you.
You’ll set each H1-H6 headings level as a new Custom Option Group Preset.
Apply these presets to your layout’s headings using the Option Group Presets you created. The beauty of Option Group Presets is that they work across modules within that Option Group, such as the Text, Blurb, and Header modules.
Best Practices For Fonts In Divi 5
To maximize your typography, keep these tips in mind:
- Always set global font variables early.
- Use consistent spacing and sizes (yes, you can set letter spacing and line height as Design Variables too).
- Regularly preview responsive views across screen sizes.
- Avoid too many fonts or font weights.
Typography In Divi 5 Is A Breath Of Fresh Air
You now own a complete typography system thanks to Divi’s newest features.
Fonts live as Design Variables. Same with font sizes when you use clamp(). Or if you want to exercise all seven of those Customizable Breakpoints, you can take that route too.
Option Group Presets apply those choices effortlessly across your whole site. Tweaking font sizes throughout a build is extra easy since they are set as Design Variables. No matter what, your designs will stay sharp, and your build time will shrink.
Divi 5 has launched many new features that upgrade your Design System. Start building new sites in Divi 5 today to take advantage of all the latest features. We recommend waiting a bit longer to migrate existing websites to Divi 5.


Thank you, Christopher – very helpful article! But how can I setup a custom typeface to use across all the new divi builder menus? Fileformats woff and woff2…
That would have been my question too. In some European countries, fonts must be stored locally on the server; direct retrieval from Google is prohibited. Has handling custom fonts become easier now?
Hey, Mic! Divi 5 does not offer a built-in option to automatically host Google Fonts locally, as the integration still relies on external CDNs for font delivery. However, specific products like the OMGF (Optimize My Google Fonts) plugin, Divi GDPR & Google Fonts or google-webfonts-helper tool simplify self-hosting. These solutions allow you to download font files, store them on your server, and generate the necessary CSS to reference them locally, ensuring GDPR compliance and reducing reliance on third-party servers.
Will there be a cleaner way to integrate Adobe Fonts with Divi5?
Using Google’s built-in fonts is great, but whenever we want to get more creative with brand fonts it gets tricky with Adobe Fonts.
Hey, Evan!
There are no immediate plans to include Adobe Fonts as first class citizens, but the “classic” method of implementation and using third-party plugins (like this one) will still be fully supported.
Hello. The plugin you suggested has not been updated in 2 years and is considered abandoned. Can you suggest any actively updated plugins that work with Divi? I wish Divi would just use an API or the like with Adobe Fonts as they are critical for professional designs.
Thanks for the feedback, Stanford!
For locally hosting Google Fonts, OMGF is still a commonly used option and is designed to cache Google Fonts locally, reduce third-party requests, and help with GDPR-related font concerns. For Adobe Fonts, Fonts Plugin – https://wordpress.org/plugins/olympus-google-fonts/ – is worth looking at, as it supports Google Fonts, custom font uploads, Adobe Fonts/Typekit integration, and Divi 4 Builder support.
You can use Adobe Fonts in Divi 5, as well, but not through a native Adobe Fonts integration yet. The usual approach is to load the Adobe Fonts kit on the site, then reference the Adobe font family via custom CSS.
If you need assistance in implementing these solutions, feel free to reach to our friendy support via web chat. 👍
really helpful, thank you!