
Static lists of post content are fine if you are showing a selected and limited set of those posts. But often, you want users to access more content than your original loop shows. You want to decide how much content loads initially and give readers a clear way to move between batches. That’s where Divi 5’s Loop Builder and Pagination Module make a perfect pair.
This post will walk you through how each works, then show you how to connect them. By the end, you’ll know how to build looped layouts with proper pagination.
Meet Divi 5’s Loop Builder
The Loop Builder is one of Divi 5’s biggest upgrades. It gives you freedom that the old Blog Module never could. Any element can become a “looped” container. That means Divi will automatically repeat it for each post, product, or custom post type that matches your query.
Instead of being stuck with a pre-designed list of posts, you design one “template” item as the loop. Divi uses that for each result, swapping in dynamic content from the loop’s query. This could be:
- Titles pulled from post data
- Featured images
- Custom fields
- Links to full posts or products
You can use any module to display this data, not just a blog-specific one. Want a fancy Blurb Module showing your latest course listings? Done. Need a custom product card layout for WooCommerce items? Also done.
It’s flexible because you’re building the design and content structure yourself. Divi handles the repetition.
Switching from the Blog Module to the Loop Builder means moving from a standard template to a fully customizable layout system. I have really enjoyed building with it, and I know you will too!
Meet the Pagination Module
Pagination is a fancy way to say “split the results into pages.” Instead of dumping all items on a single page, you break them into smaller sets. That helps with:
- Page load times
- Readability
- Scanability
The Pagination Module in Divi 5 does exactly that, but with some smart integration. It’s not tied to blog posts only. Instead, it can connect to any loop you have built on the page.
It works by adding two navigation elements—previous and next links—whose labels you can customize. If there are older items past the current set, “Older” (or your chosen text) will be active. If there are newer items, “Newer” will be active.
Building a Loop + Pagination Layout
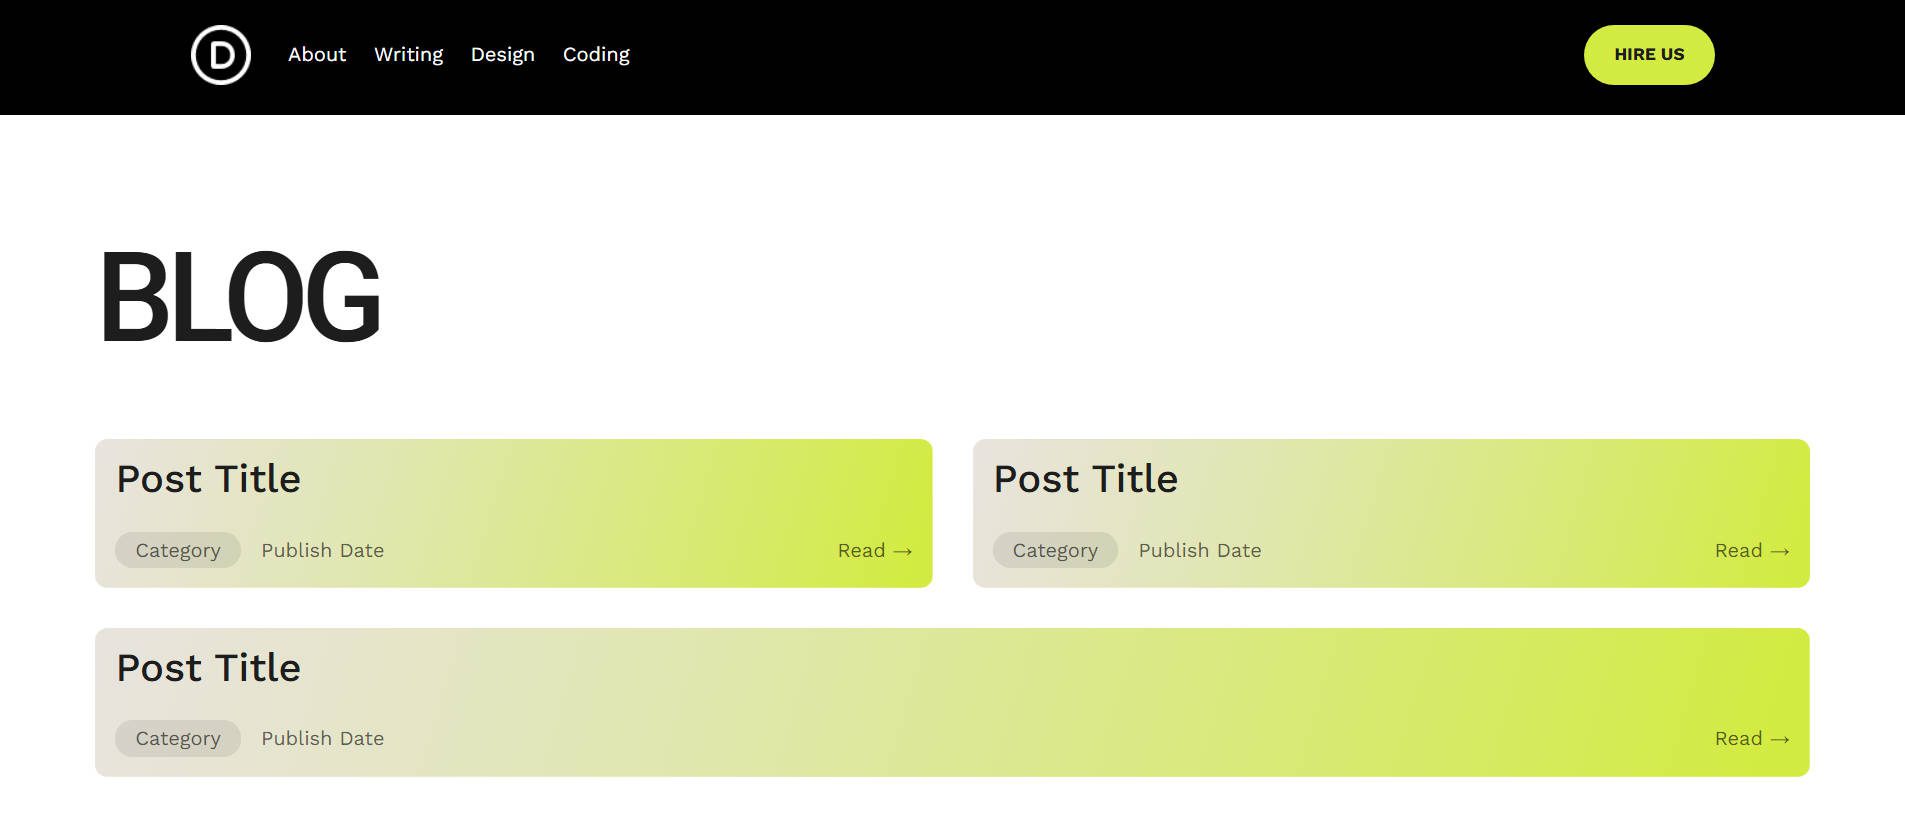
Let’s run through the full setup. This example assumes you want a custom loop with pagination under it. Here’s the flex layout I created that will display our loop. You can download the fully built layout below.
Note that the card is set to ~50% width and Flex-Grow, so when a looped card is in a flex-row by itself, it will become full-width inside its container.
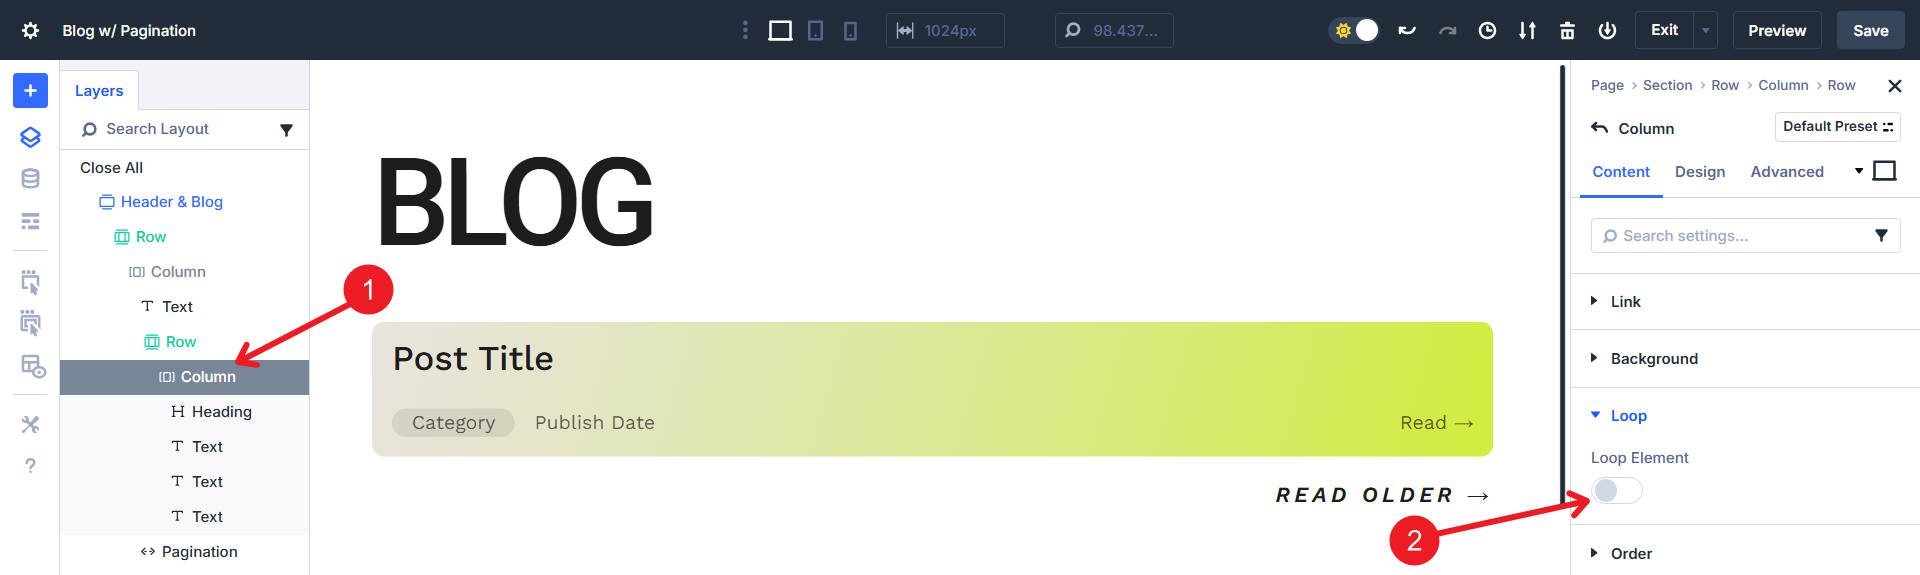
Step 1: Create the Loop Container
Add a Section to your page. Inside it, add the module(s) you want to repeat. This could be a single module (like a Blurb) or a more complex layout of multiple modules in a Column or Group.
With your container selected, open its settings and enable the Loop option.
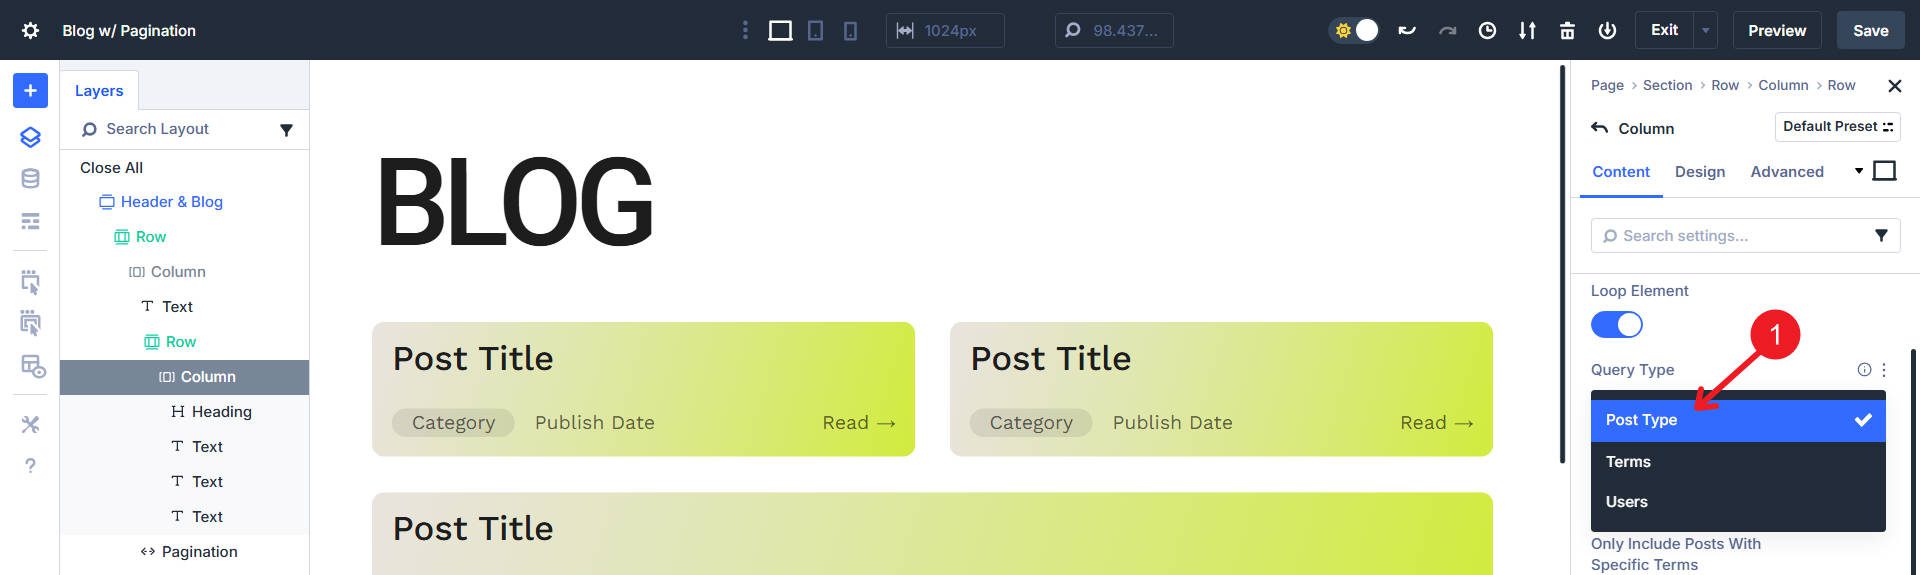
Choose your data source. This is the “query” the loop will run.
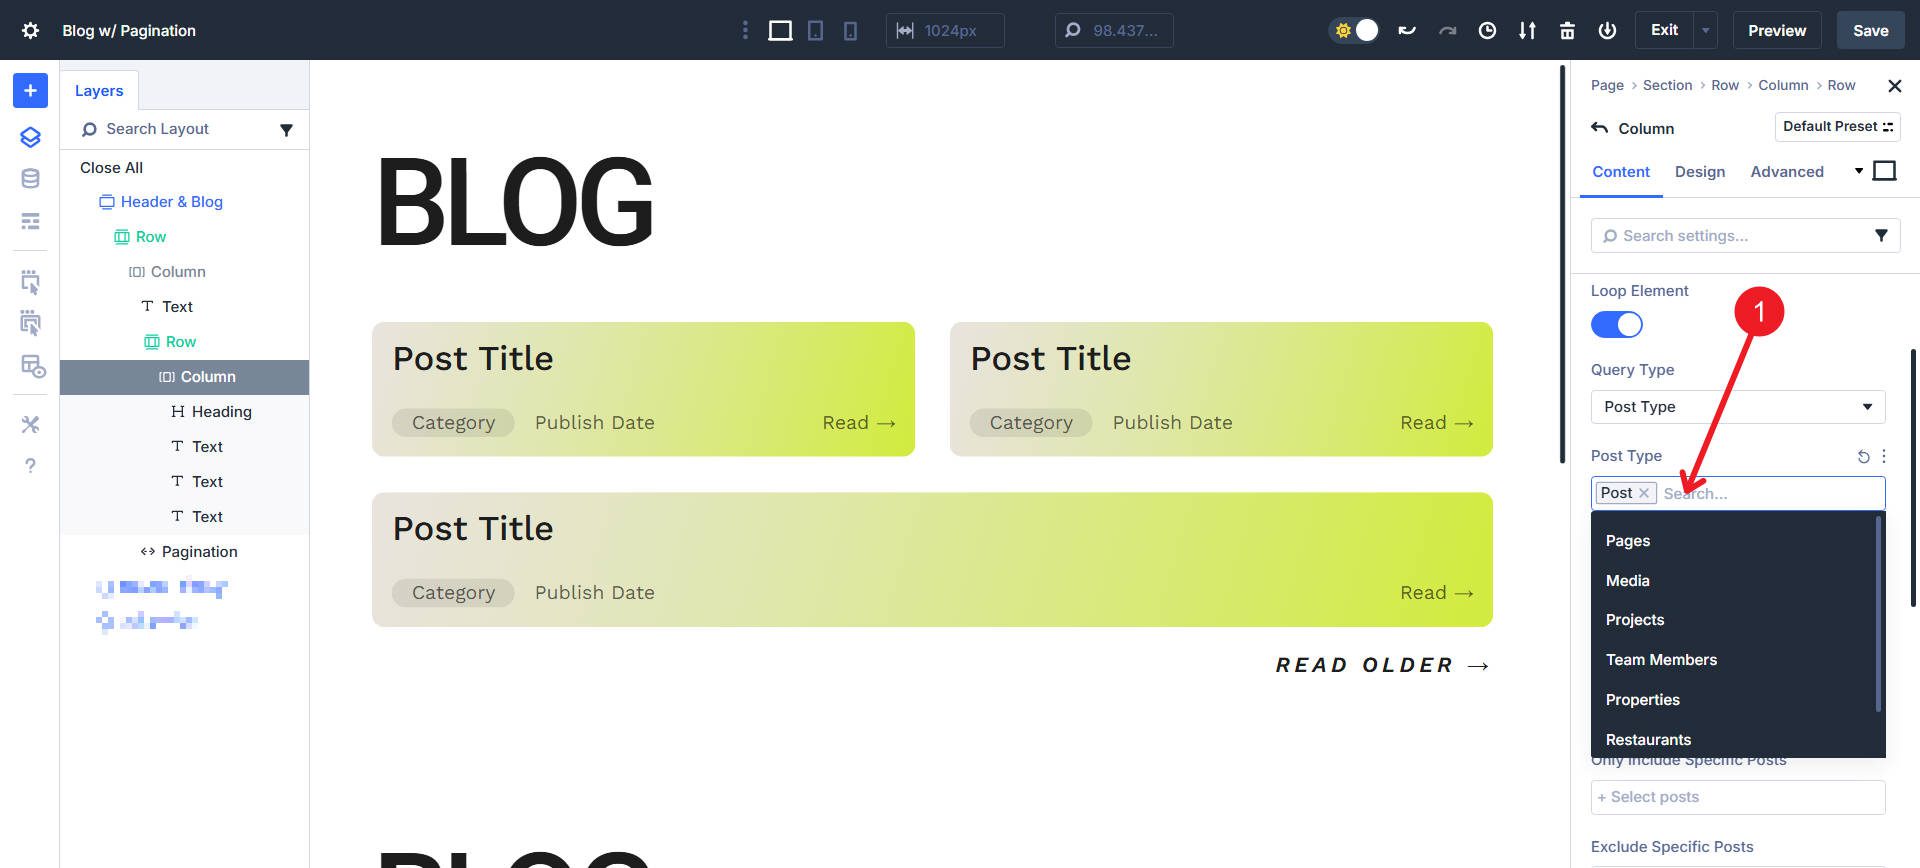
First, choose the Query Type. Depending on your website’s configuration, you might see these options:
- Post Type (like your blog posts or custom post types like ‘projects’)
- Terms (Categories and taxonomies)
- Users (Return a list of site users, like authors)
- Repeater Field (A custom field created by a plugin for creating a loop within a loop)
Next, depending on what type of Query you chose above, you will get the chance to be more specific. Selecting “Post Type” might allow you to use such post types as:
- Blog Posts
- Projects
- Products
- Whatever CPT you’ve custom-built for yourself
From there, you can get even more specific with what should appear in your loop. You can:
- Include items with a specific category or tag
- Exclude items with a specific category or tag
- Include specific items (by post ID)
- Exclude specific items (by post ID)
- Build your own Meta Query (useful for creating inclusions/exclusions based on custom field data)
- Set the Order of matching Queries (like alphabetical and descending)
- Items per page value controls how many show up in the loop
- Post Offset, in case you want to start your loop later in the cycle
- Ignore sticky posts
This is how our example looks at this point. We created the loop and assigned it to our blog post Post Type. I set the display limit to 3.
Now, we must assign the various text fields and items we want to hyperlink with Dynamic Loop Content.
Step 2: Add Dynamic Content Inside the Loop
Our next task is to click into each of the loop’s modules and replace static text or images with dynamic content fields. For example:
- In a Text Module, choose “Post Title” from the dynamic content picker
- In an Image Module, you can choose “Featured Image”
- In a Button Module, set the link to “Post URL”
- On the whole looped container, also set the link to “Post URL”
This tells Divi to pull the right content for each looped item.
Remember—anything inside the loop is repeated for each result. Keep non-loop content (like headings, ads, or CTAs) outside of it. If you have a piece of content in the loop that is not connected with dynamic data, every item in the loop will display that as-is (like the “Read →” text on the bottom right of the example card).
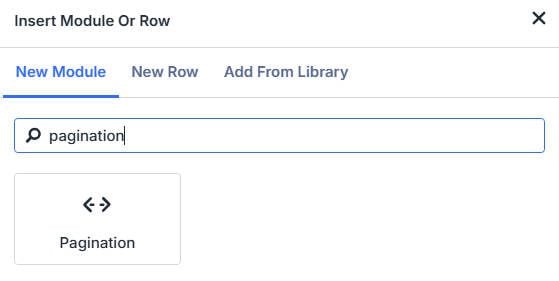
Step 3: Add the Pagination Module
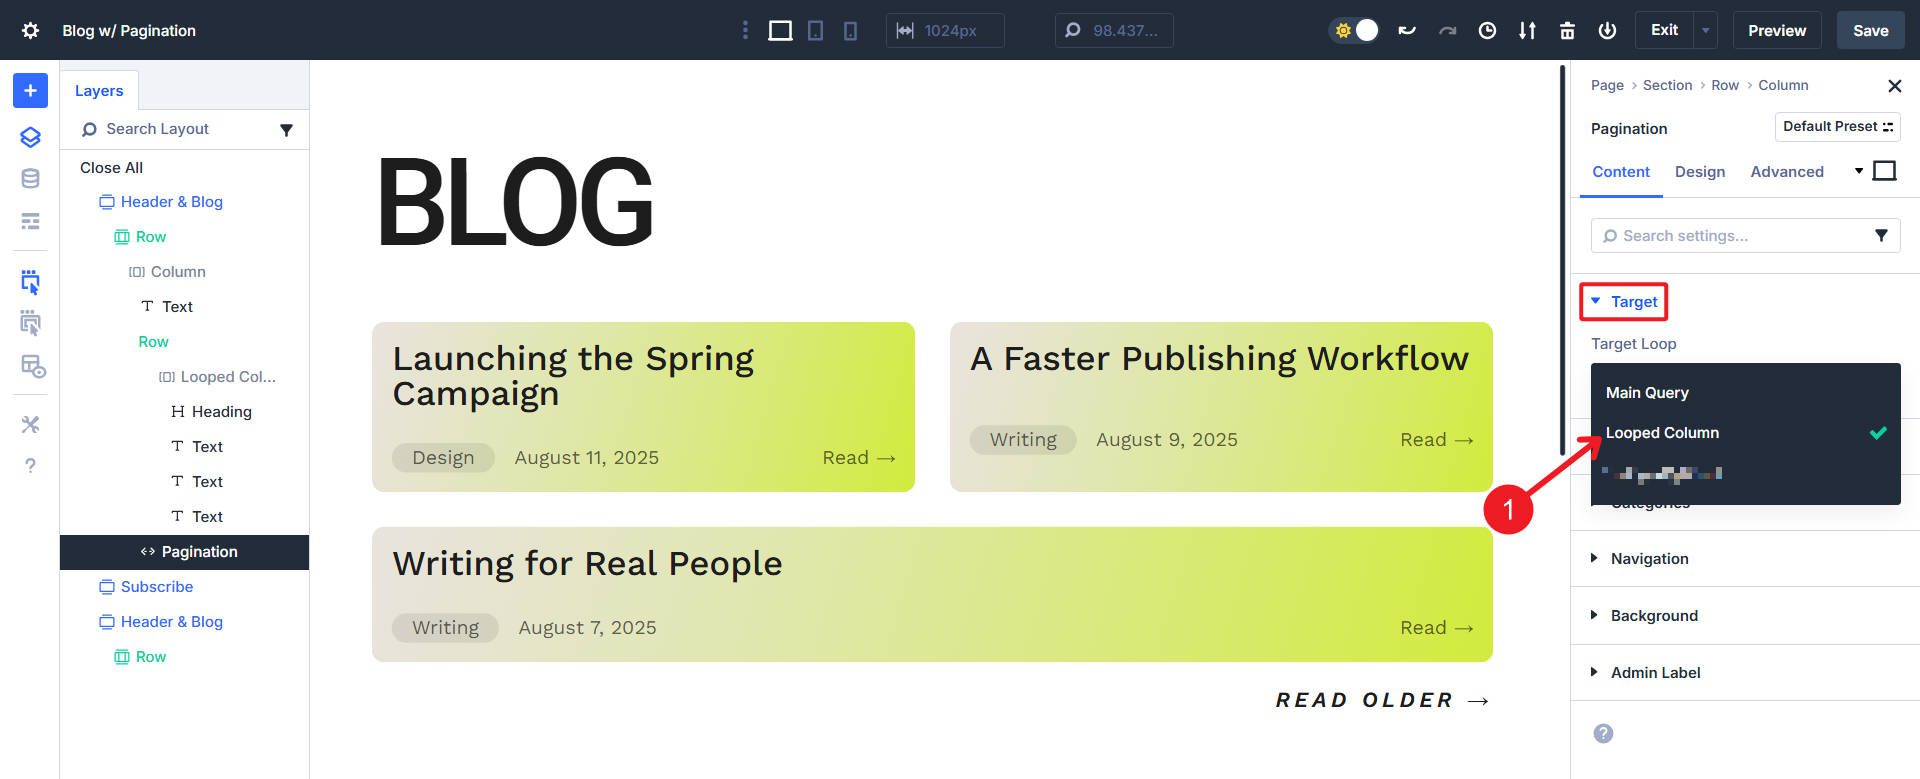
Below your loop section, add a new Row. Insert the Pagination Module. In the module’s settings, locate the Target field. Use it to select your loop from a dropdown list of loops on the page. This links the pagination controls to that specific loop. Pro tip: if you use Admin Labels, it’s easier to select the right target. This goes for interactions as well.
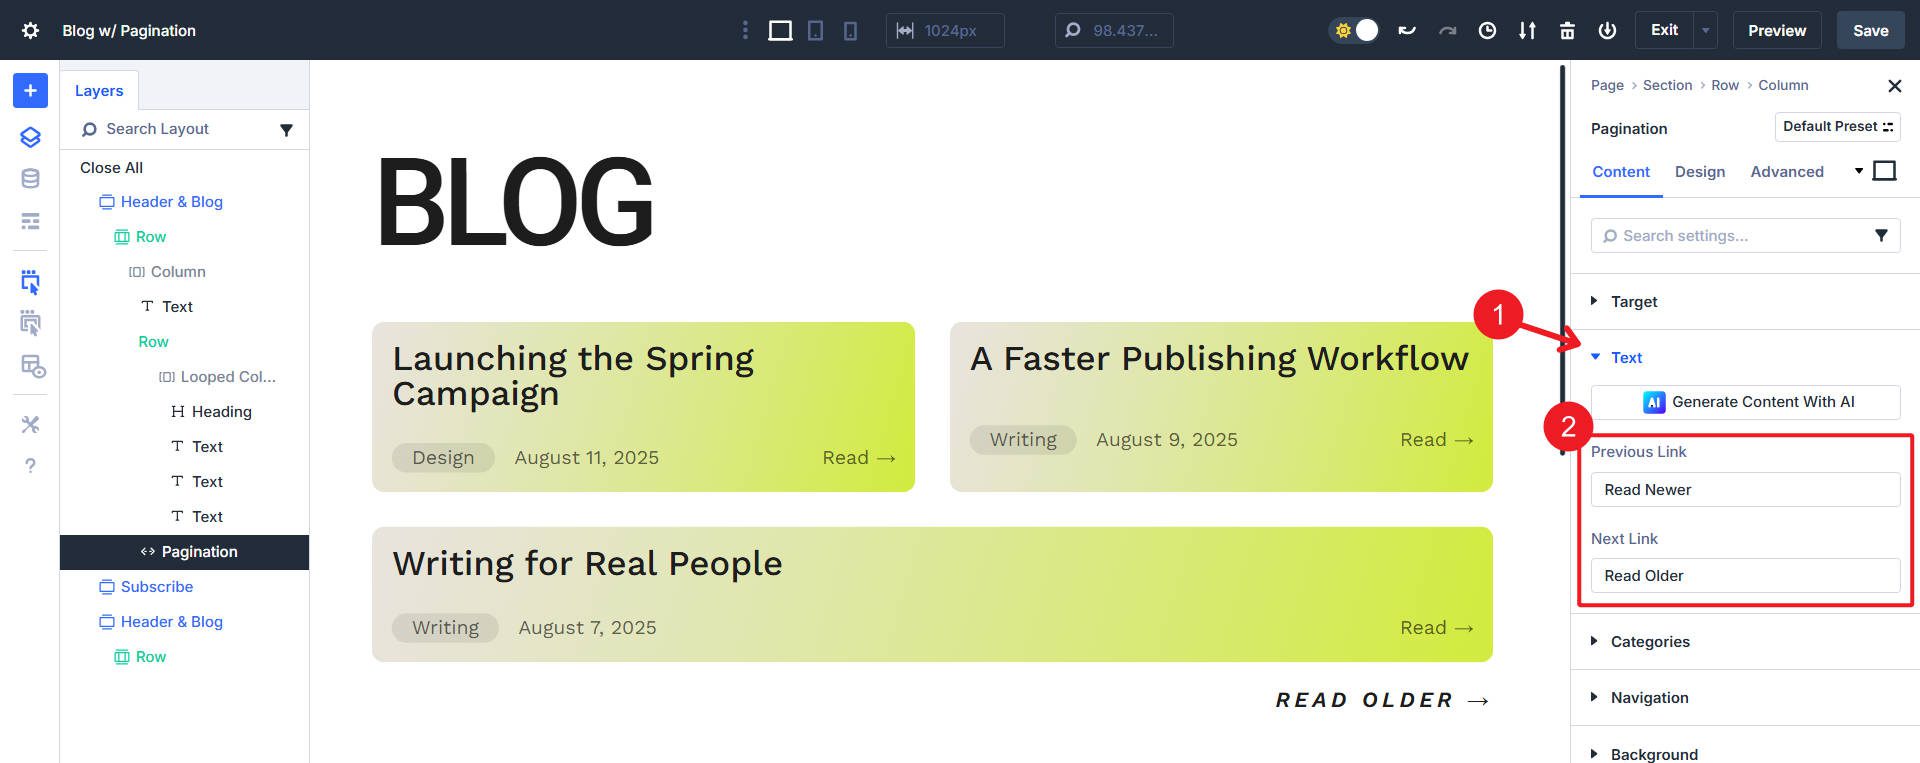
Customize the labels for “Previous” and “Next.” You could use “Older Posts / Newer Posts,” “Back / Forward,” or even “← / →” for a minimal style.
The key is that the Pagination Module must sit outside the loop it controls. That and making sure it is assigned to the right target (if you have multiple loops on the same page/template).
Step 4: Test the Interaction
Save your page and preview it. Click “Older” to go to the next set of loop items.
Note how the URL changes with a query parameter that identifies the loop’s page. Also note that only the loop content shuffles/changes—headers, footers, and sidebars should stay the same.
Get This Loop Layout
Want to dissect this layout and see how things are built for yourself? Download it here!
Once you unzip your folder, navigate to your Divi Library to upload the file. Once uploaded, you’ll be able to add the section to any page you’re working on.

Enjoy a More Dynamic Divi
Divi 5’s Loop Builder and Pagination Module are a big leap forward in flexibility. The Loop Builder frees you from the rigid designs of older modules, letting you build your own repeated layouts with dynamic content. The Pagination Module keeps those layouts fast and manageable by breaking them into user-friendly chunks.
The Loop Builder and Pagination Module, paired with other new Divi 5 features (Flexbox, Interactions, HSL Color Controls), is as powerful as ever. You can make some incredible page designs with all of this.
Once you’ve built your first paginated loop, you’ll see how easy it is to reuse the approach across blogs, product grids, portfolios, or any content type you need to organize.


It’s needed the refresh of the page?
When will the Loop Builder support more advanced query capabilities? I recently attempted to create a page that displays only the posts belonging to the currently logged-in user. However, with the current query options available, this functionality seems impossible to achieve. Essentially, I need a way to filter and show content that is specific to the authenticated user viewing the page.
Hey, Dom!
At this time, the Loop Builder’s query options provide great flexibility with basic filters like post types, categories, tags, IDs, and meta queries. However, more advanced query capabilities, such as filtering posts dynamically based on the currently logged-in user, are not yet supported natively.
That said, we are actively developing the Loop Builder, and more advanced query and filtering options are expected in future updates.
Hi !
I’m lost at the first step. Could you explain a bit mroe how do you “Create the Loop Container” itself ?
For instance, if i add a row with an heading, i can not select a “post title” as a dynamic content, i need to activate the loop first ?
Thx !
Hi,
this loop builder looks really good.
What’s the difference with Divi Filtergrid? I have the impression that they do the same thing…
If so, I’ll have one less plugin to use…
Can you confirm that this is the case?
Thanks
Hi, is there a way to get a filter on a page – so we can select to show only the posts of a category?
Can’t seem to find the best way to do this in Divi5
Hi Maarten, Thank you for your feedback! Currently, Loop Builder does not offer a dynamic filtering option for the frontend, but Loop Builder filters are on our roadmap. Stay tuned for updates! 😊
Hello, I have the following problem, I am using a loop to generate the repetition of a column, this shows the previews of my posts, the problem is that when I activate the loop, in the new page it shows me the columns without the styles applied to the loop.
Hey, Benjamin! Judging by your description alone, the cause appears to be a caching issue. We advice purging any site and server caching you have deployed, including the theme’s static CSS cache. In Divi 5, to clear the static CSS cache, use the “Clear CSS Cache” button on the top-right edge of the Theme Options panel.
If this doesn’t help, it would be best to reach out to our friendly support for a closer look: https://www.elegantthemes.com/members-area/help/
Thanks! 😊
why there are no options to show page numbers ? that is a very common item in any pagination .
Great question! Divi’s pagination offers Next/Previous navigation by default and does not currently include page number links. For numeric page numbers in pagination, a plugin like WP-PageNavi is recommended, which works automatically upon activation. The Pagination Module is designed to keep things simple and performant by focusing on core two navigation options, but combining it with a plugin will get you numbered pagination if needed. 😊
Frankly, I completely disagree with that. Everyone wants to use pagination by number. Having to install a plugin (which hasn’t been updated for over a year) for such a basic option is not what I call “keeping it simple.” That alone makes me want to forget about Divi and switch to another solution! (even though I’ve been using your Divi since 2014).
Hi – if I have a page with different loops (for categories e.g.) is there a way to target a pagination modul to a specific loop?
Thanks Heiko
Yes, the Pagination Module can be tied to one specific loop. 😊
In Divi 5, the Pagination Module has a Target setting where you choose which loop on the page it controls. That means if you have multiple loops for different categories on the same page, you can add a separate Pagination Module for each one and point each module to the correct loop.