
The Filterable Portfolio Module for Divi is a great module to display your WordPress projects. Projects are easy to create and manage within WordPress. Once you’ve created them, Divi’s Filterable Portfolio Module displays any number of projects based on your selections. Your website’s visitors can easily sort them by category to see the work that interests them.
In this post, we’ll see how to set up WordPress projects for Divi’s Filterable Portfolio module.
Let’s get started!
Subscribe To Our Youtube Channel
Filterable Portfoliio Module Preview
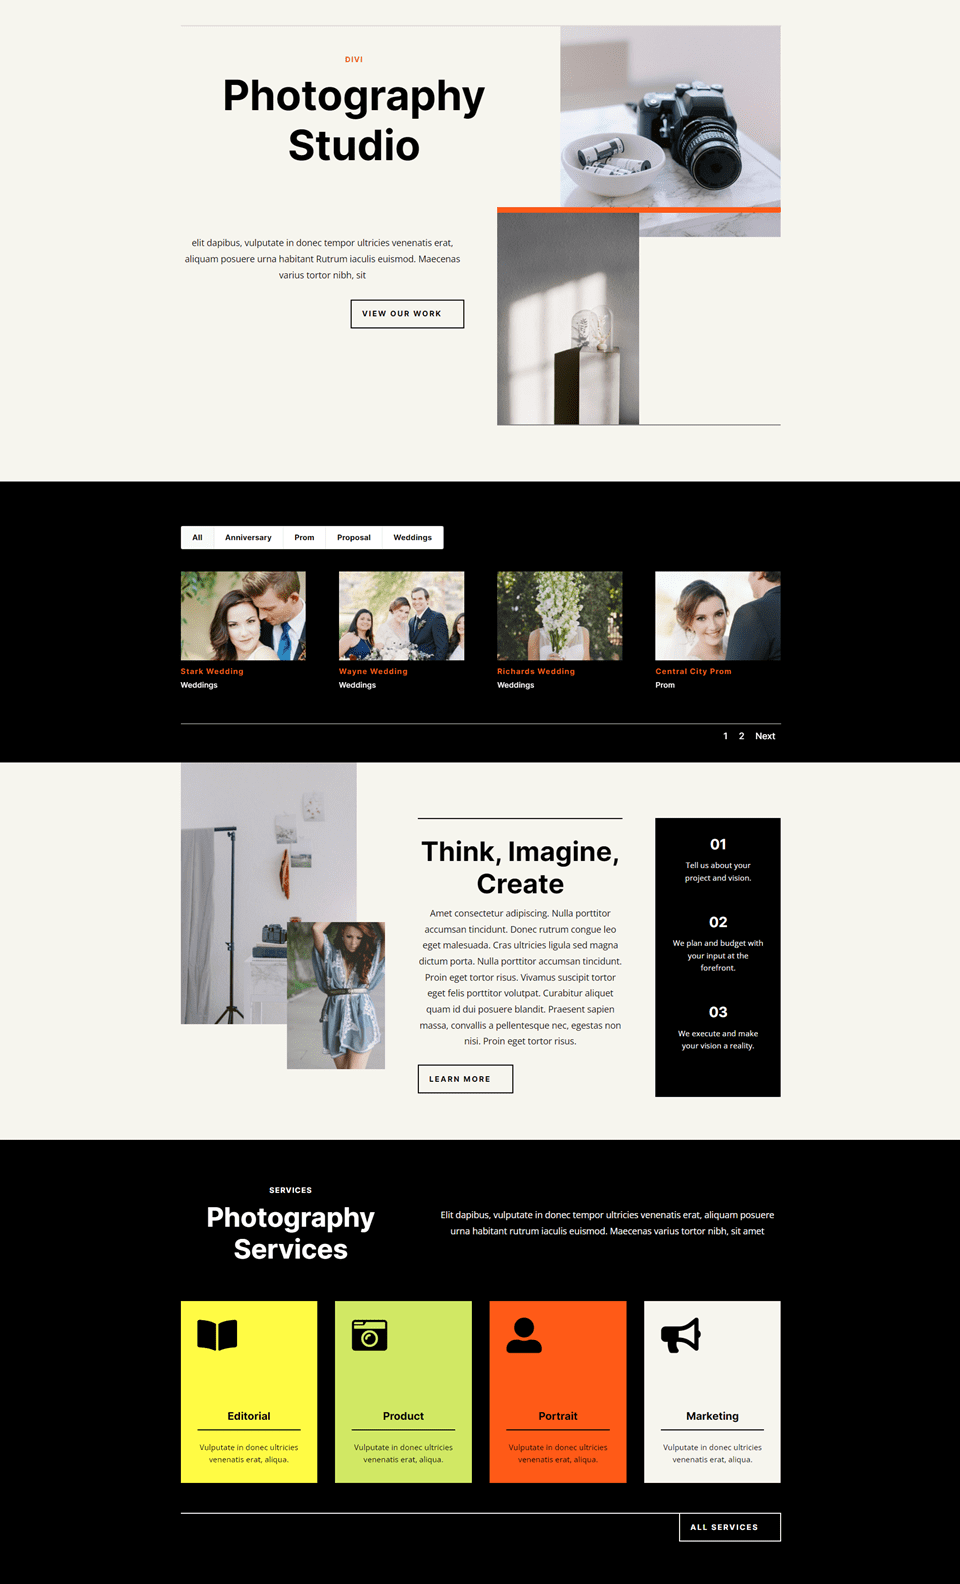
First, let’s see what we’ll build in this tutorial.
Desktop
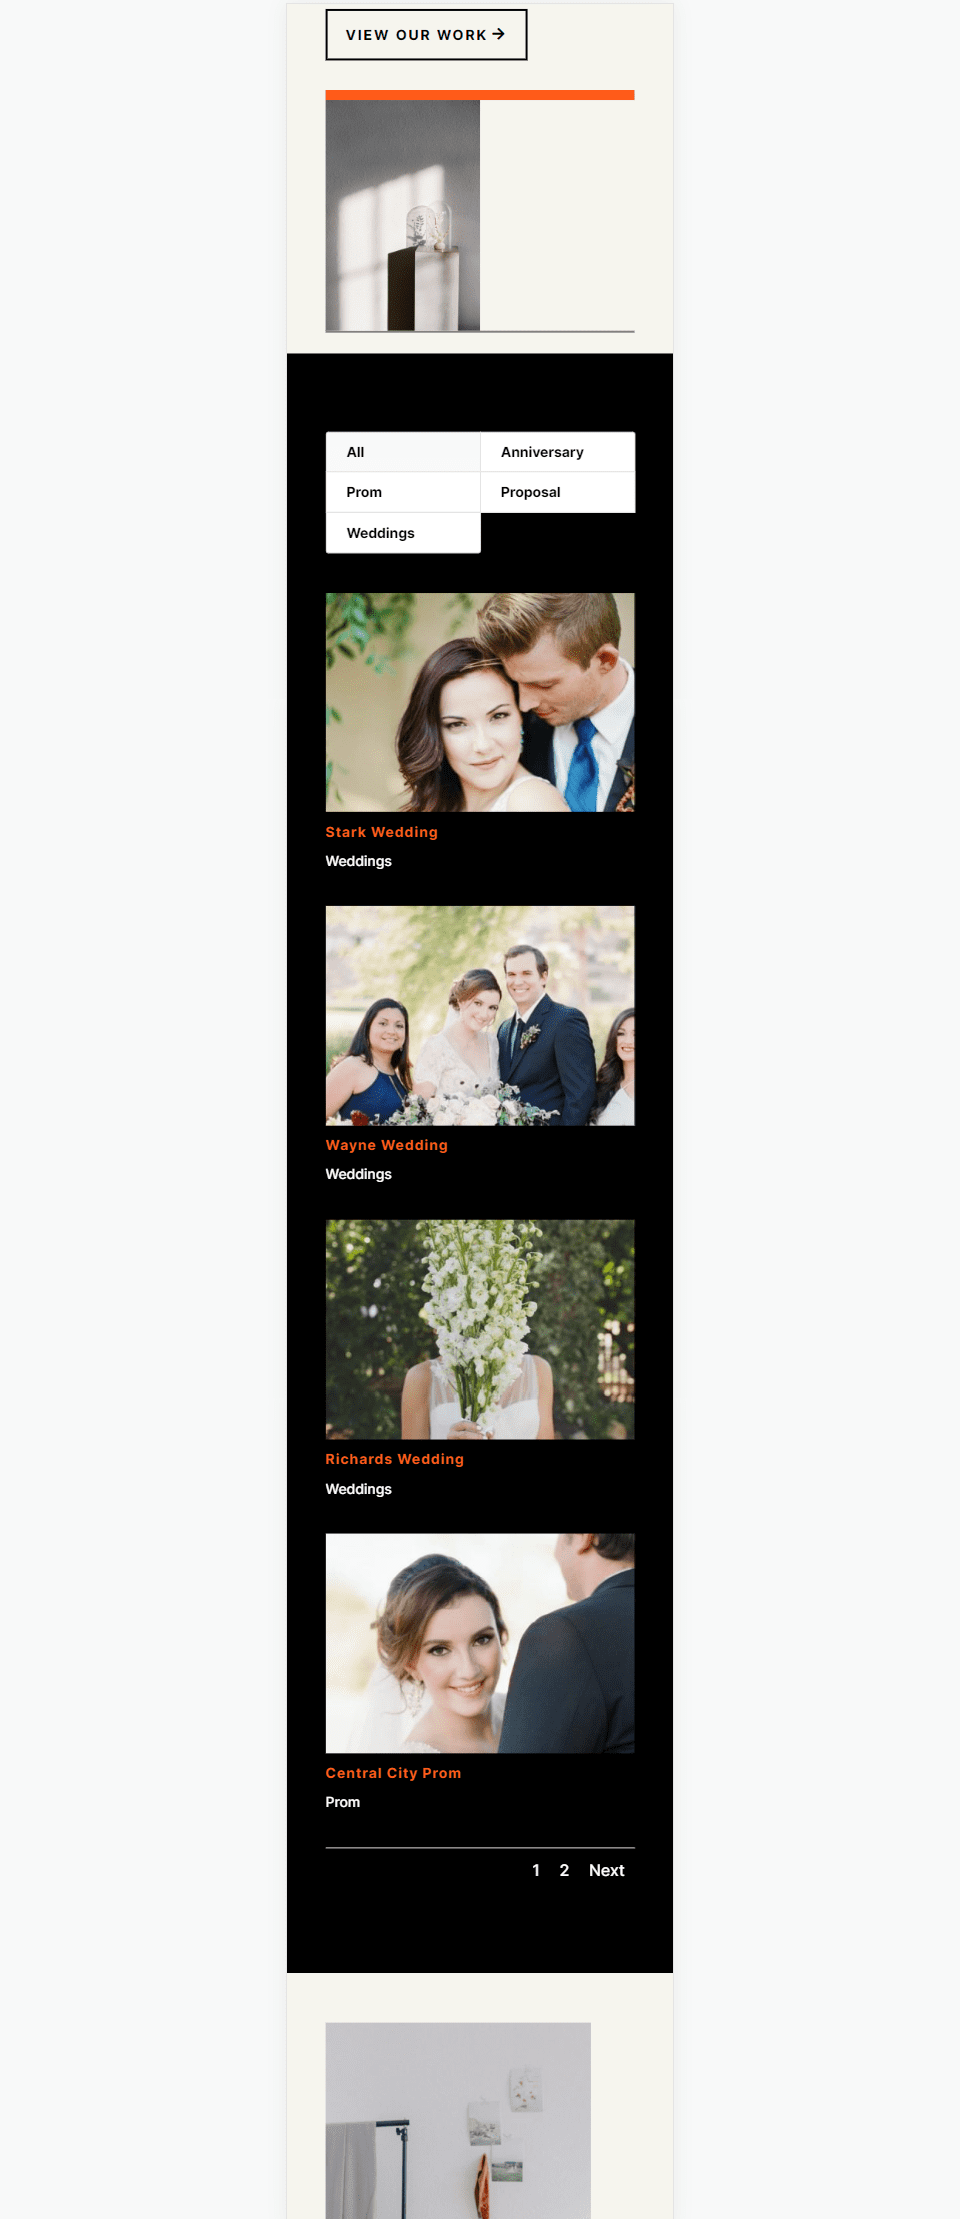
Phone
Setting Up WordPress Projects
Projects is a custom post type that’s built into WordPress. It works like any post type, but it has its own editor, list, categories, tags, etc. The Projects post type is great for creating portfolios to showcase your work. To use them properly, it’s important to know how to set them up with proper categories and tags.
To view or create projects, go to Projects in the WordPress dashboard. You’ll see a menu with All Project, Add New, Categories, and Tags. Let’s look at each one.
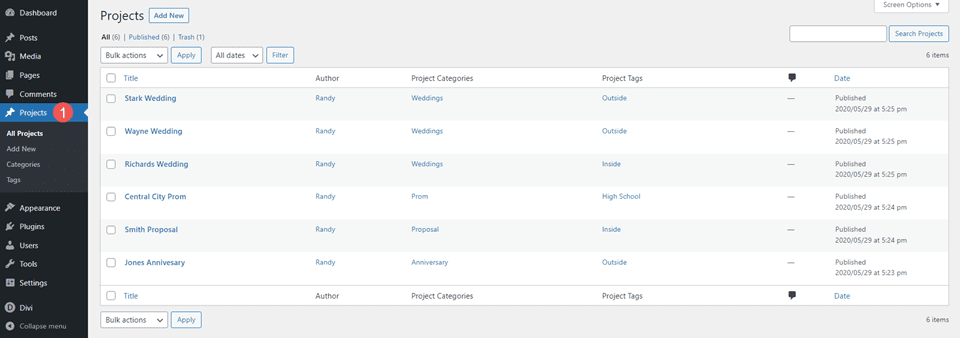
All Projects
The Projects menu includes several options. All Projects opens when you select the Projects link. This screen lists all your projects with the title, author, categories, tags, comments, and date. You can perform edits on each project individually, do bulk edits, and create a new project.
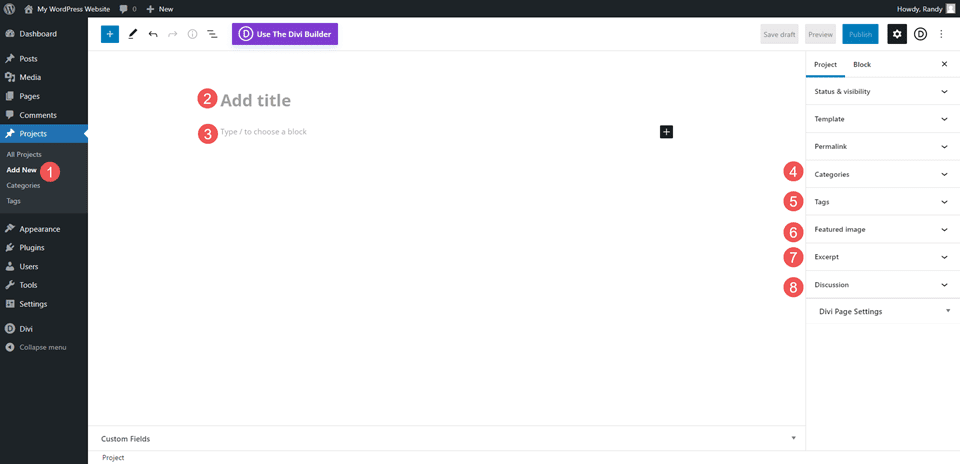
Add New
To create a new project, select Add New in either the All Projects screen or the Projects dashboard menu. This opens the project editor. It works the same as a regular post type and includes the title, body content, categories, tags, featured image, excerpt, and the discussion options.
Categories
Categories work the same as regular post categories, except they are specific to projects. The Projects post type is the only post type that will use these categories. Existing categories for other post types are not available to the project post type. You’ll need to create them specifically for the Projects post type.
When creating categories, be sure to use categories that are relevant to the project and provide a good overall description. Think of them as the broad topic the project would fall under. Don’t go too broad, though.
For example, if you were creating categories for home repair, you might have separate categories for electrical, plumbing, construction, etc. Home Repair wouldn’t be the category in this case, since it’s the topic of the website. Home Repair might be a topic for a larger company that did new construction, repaired old construction, worked with both industrial and residential construction, etc. So, the categories need to fit the website.
For my examples, I’ve created the categories to describe the types of photography this website would offer. They answer the question “what type of photography?”
For my examples, I’ve created the categories:
- Weddings
- Proposals
- Anniversary
- Proms
- Graduation
Each of these categories describes the specific type of photography the client might look for. Ideally, each project would fit into one category.
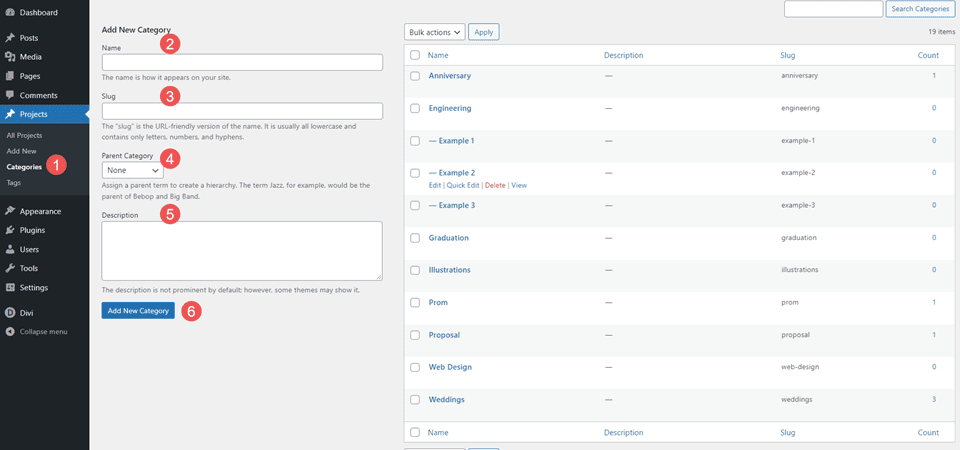
To create a category, simply fill in the fields and click Add New Category. Category fields include the name, slug, parent category, and description. You can also view and edit categories from the list.
Like categories, tags work the same way as regular post categories, but they’re created specifically for the Projects post type. Create tags that help describe the item within the category. They can help narrow down the topic.
For our Home Repair example, you might use Appliances as a category and Gas and Electric as the tags. Use as many tags as you need.
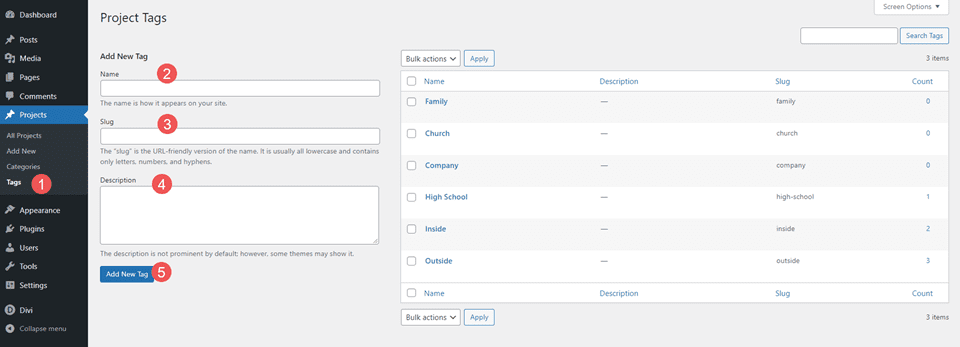
For my examples, I created six tags:
- Inside
- Outside
- High School
- Company
- Church
- Family
These tell the client a little more about each photo shoot. We could go even further if we wanted to describe the type of crowd as large or small, the type of photos as color or black and white, and lots more.
The tag editor includes the name, slug, and description. You can edit them from the list.
Projects Example
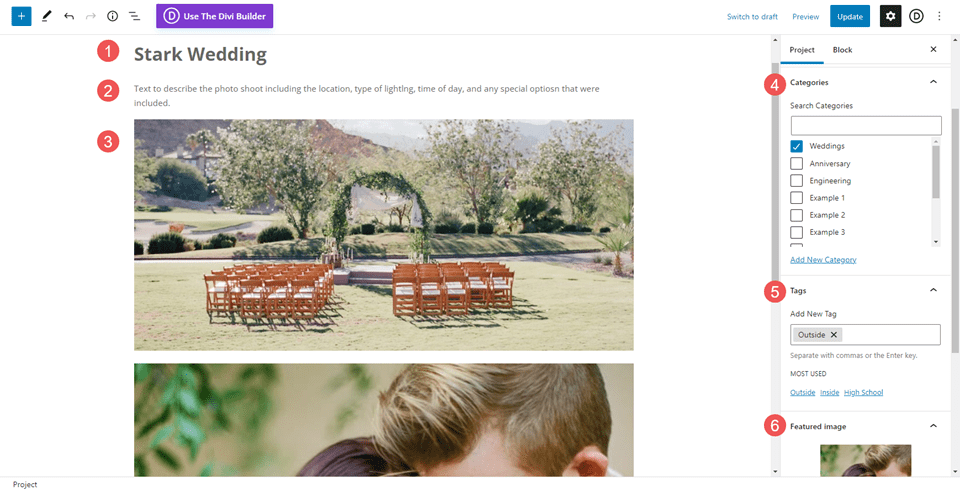
In this example, I’ve added a title, some body content including a description and photos, a category, a tag, and a featured image. I’ve selected Weddings as the category and Outside as the tag. I’m using the tag as a description of the wedding. I could add more tags if needed.
Divi’s Filterable Portfolio Module
Once you’ve created your projects, Divi’s Filterable Portfolio Module can display them. Users can filter the projects by categories to see the specific projects they’re interested in. You can select the categories, the number to display, and lots more. The module displays projects in fullwidth and grid layouts, so there are several designs to choose from.
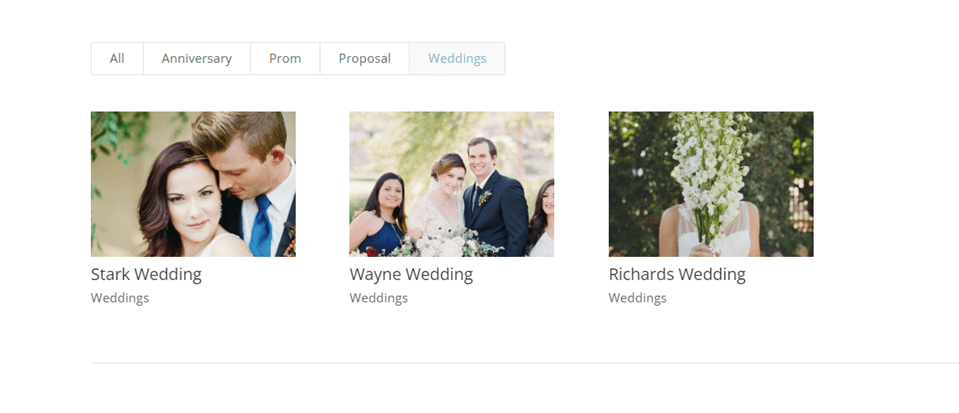
For this example, I’ve selected the grid layout, so all the projects are visible at once. It displays the filter with categories. Each project shows the featured image, title, and category.
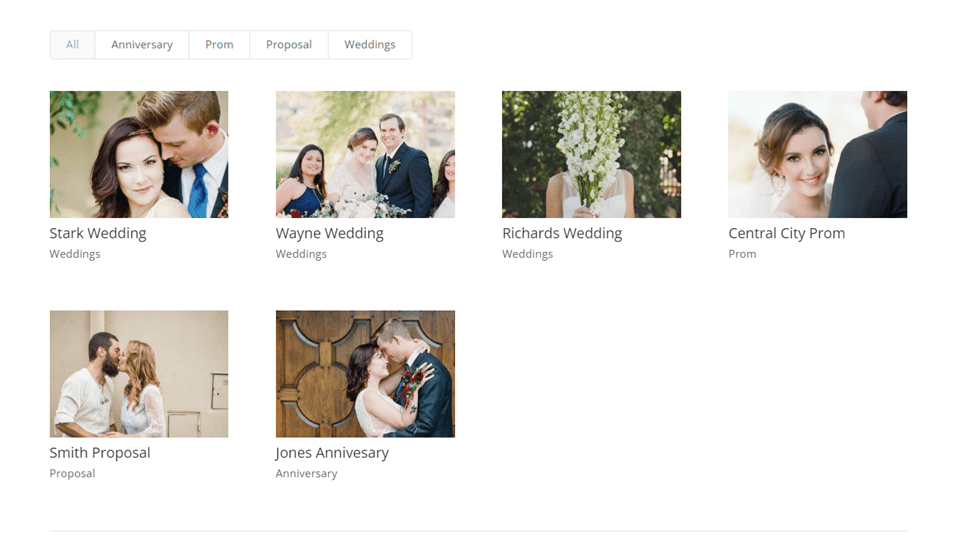
The Filterable Portfolio Module displays the filter at the top. The filter displays the categories and they’re clickable. Your visitors can view all categories or select a specific category. This example shows the Wedding category.
Styling Divi’s Filterable Portfolio Module
Next, let’s see how to style the Filterable Portfolio Module. For my examples, I’m adding a projects section to the landing page in the free Photography Studio Layout Pack that’s available within Divi.
Alternatively, you could style your project pages as a Divi Theme Builder template that you could assign to any project you wanted. For more information, see the post How to Create a Dynamic Portfolio Project Template with Divi & ACF.
Here are the first few sections of the layout. I’ll add the portfolio after the hero section. I’ll use design cues from the layout itself.

Add a Section
First, add a new Section under the hero section.
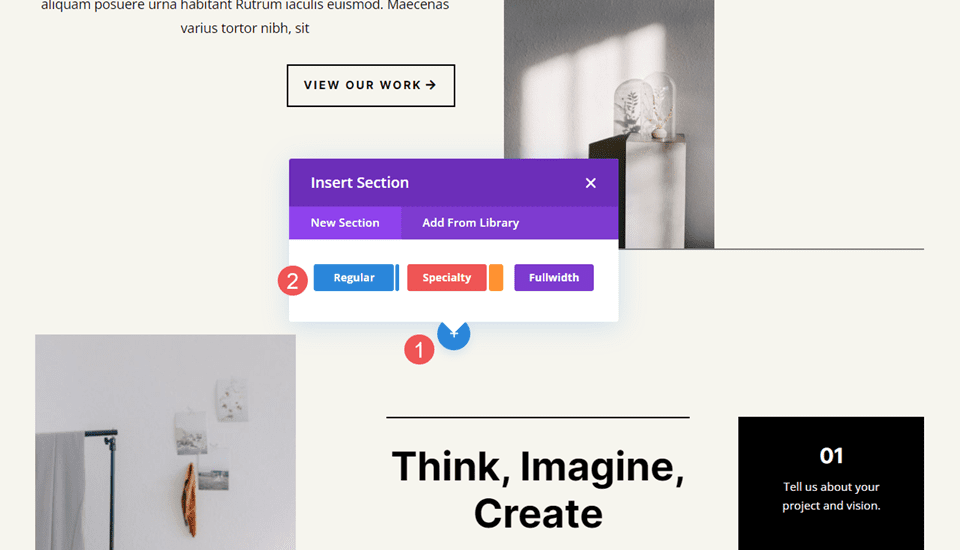
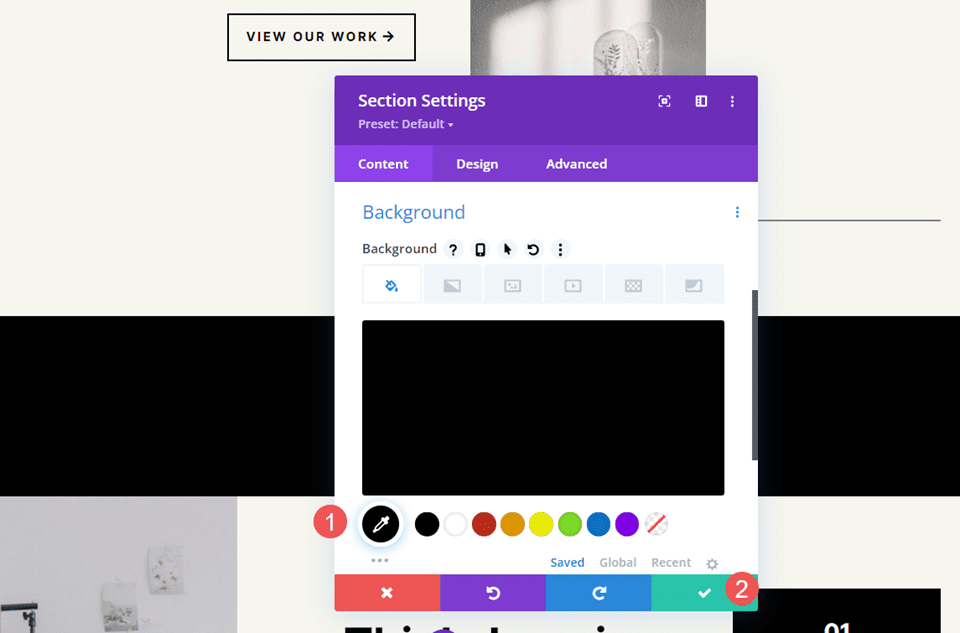
Open the Section’s settings, scroll down to Background, and change the Background Color to black. Close the Section’s settings.
- Background Color: #000000
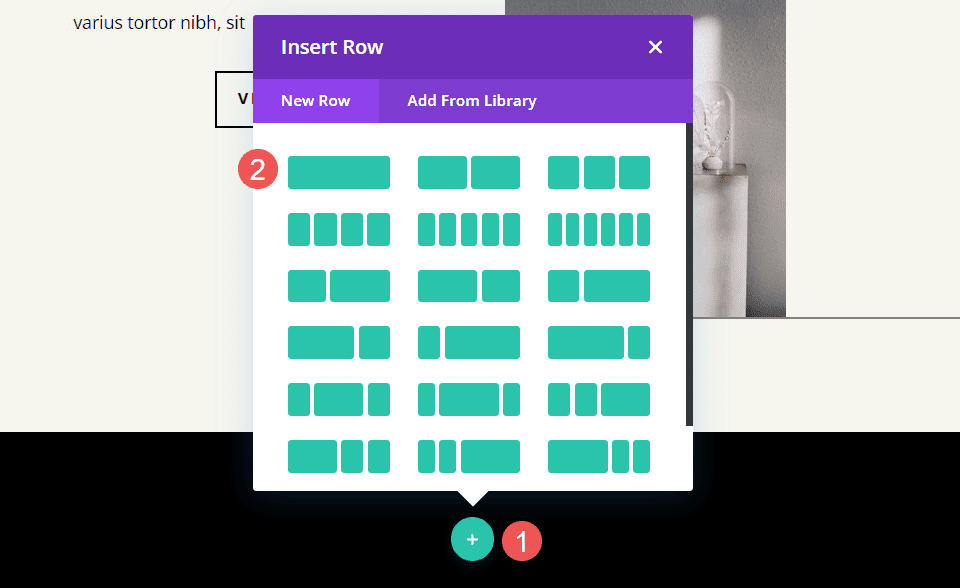
Add a Row
Next, add a single-column Row.
Add a Filterable Portfolio Module
Finally, add the Filterable Portfolio Module from the list of modules.

Filterable Portfolio Module Content
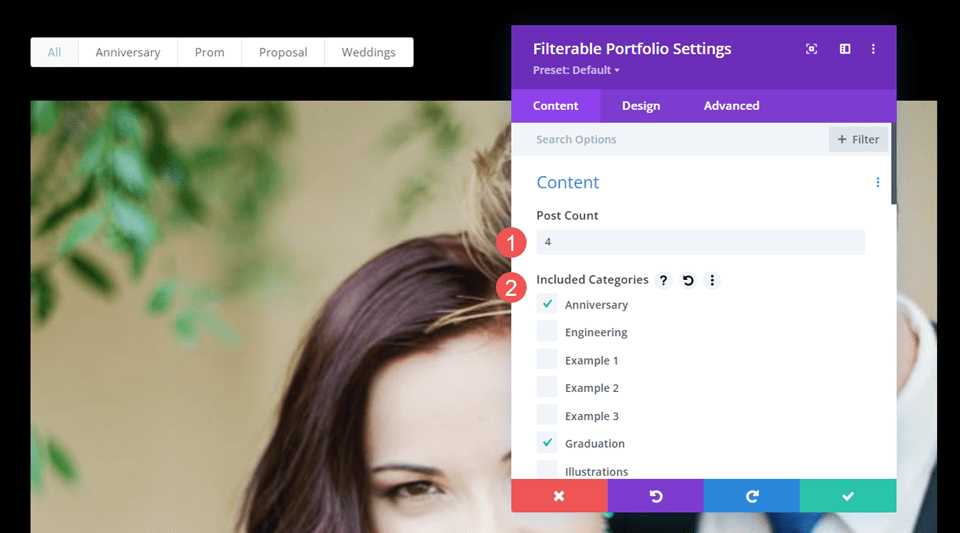
For the Post Count, enter 4 into the field. Next, select the Categories you want to display in the Filterable Portfolio Module. By default, the module shows the Title, Categories, and Pagination. I’m leaving these at their default settings.
- Post Count: 4
- Categories: desired categories
Filterable Portfolio Module Layout
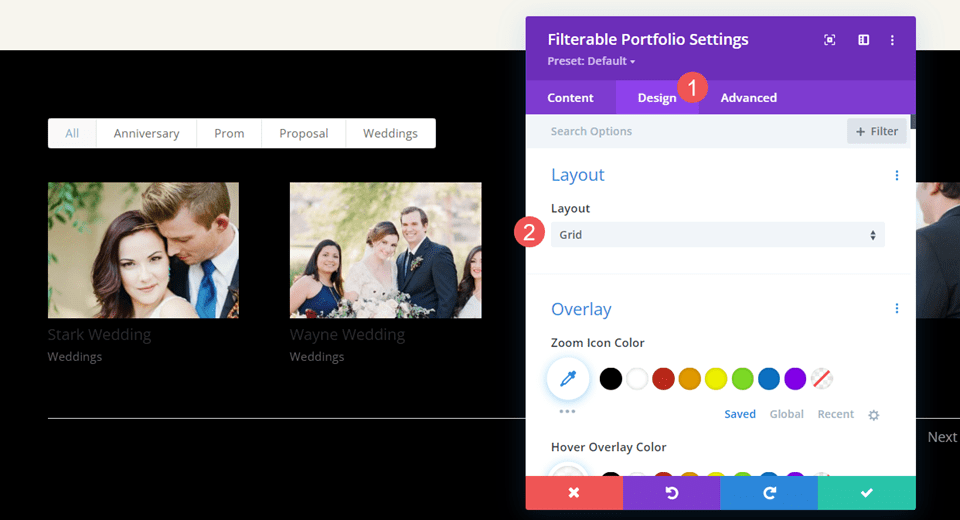
Next, go to the Design tab. The first section is Layout. The module displays in fullwidth by default, but I want to show the projects in a grid. Change the Layout to Grid. We’ll leave the image and overlay at their defaults.
- Layout: Grid
Filterable Portfolio Module Title Text
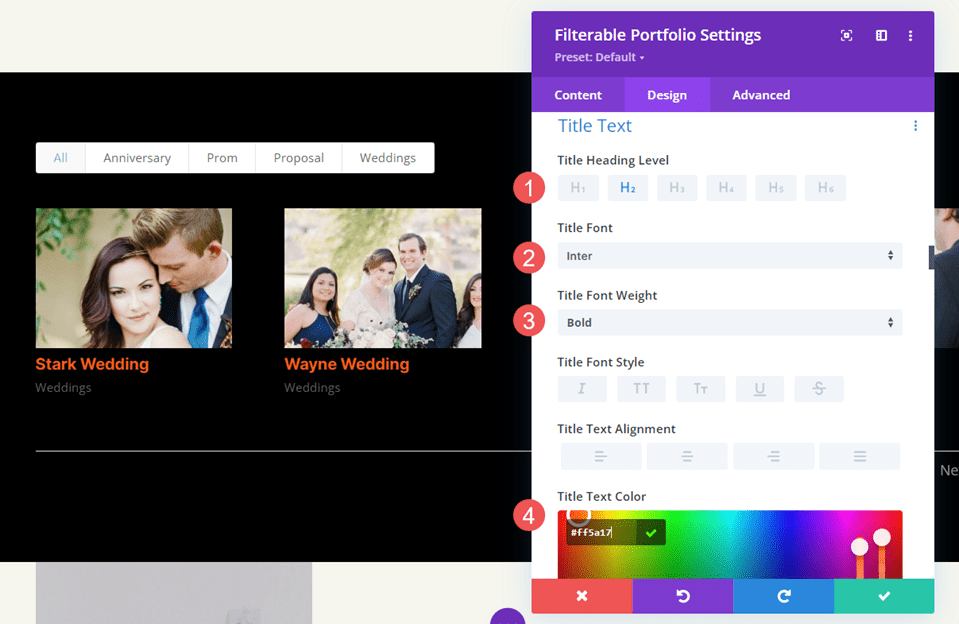
Scroll down to Title Text. Use H2 for the Heading Level and change the Font to Inter, the Style to Bold, and the Color to #ff5a17.
- Heading Level: H2
- Font: Inter
- Style: Bold
- Color: #ff5a17
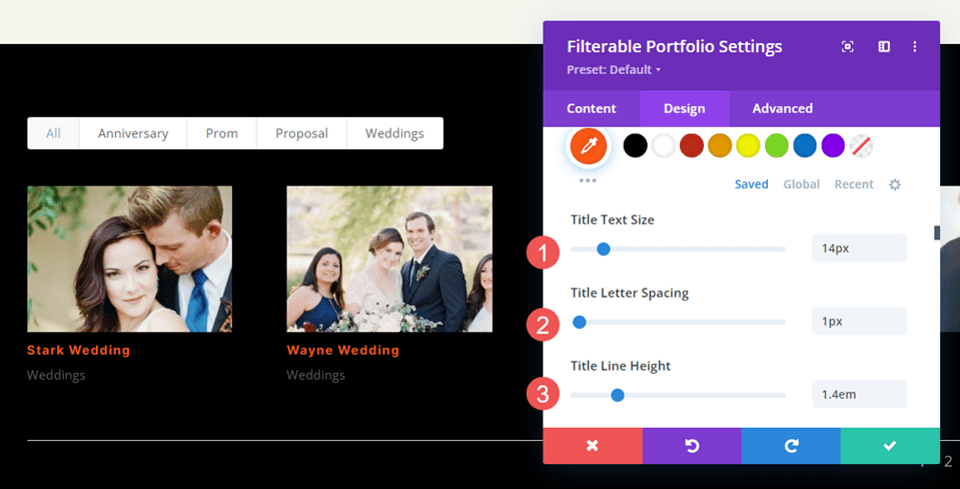
Change the Size to 14px, the Letter Spacing to 1px, and the Line Height to 1.4em.
- Size: 14px
- Letter Spacing 1px
- Line Height: 1.4em
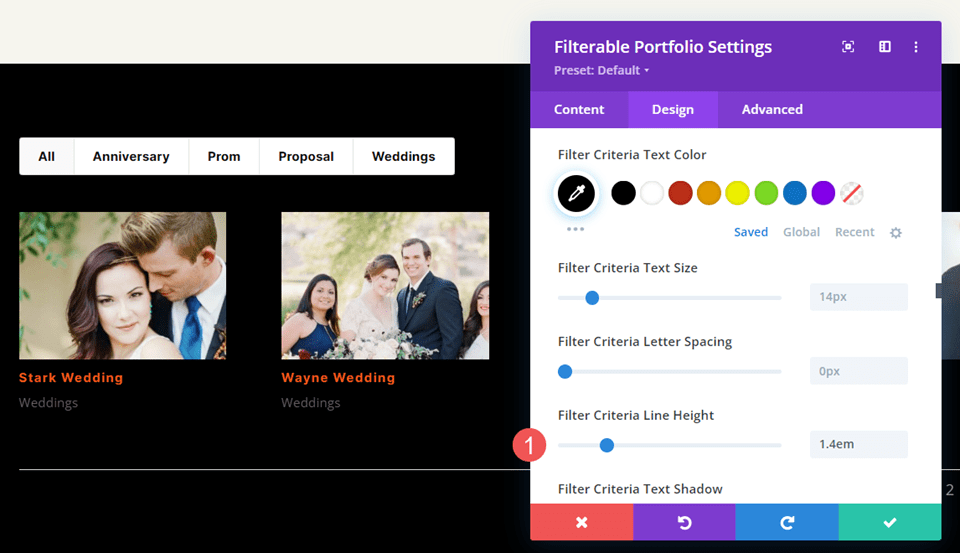
Filterable Portfolio Module Filter Criteria Text
Next, scroll down to Filter Criteria Text. Change the Font to Inter, the Style to bold, and change the Color to black. This gives the filter a style that matches the layout and stands out from the portfolio.
- Font: Inter
- Style: Bold
- Color: #000000
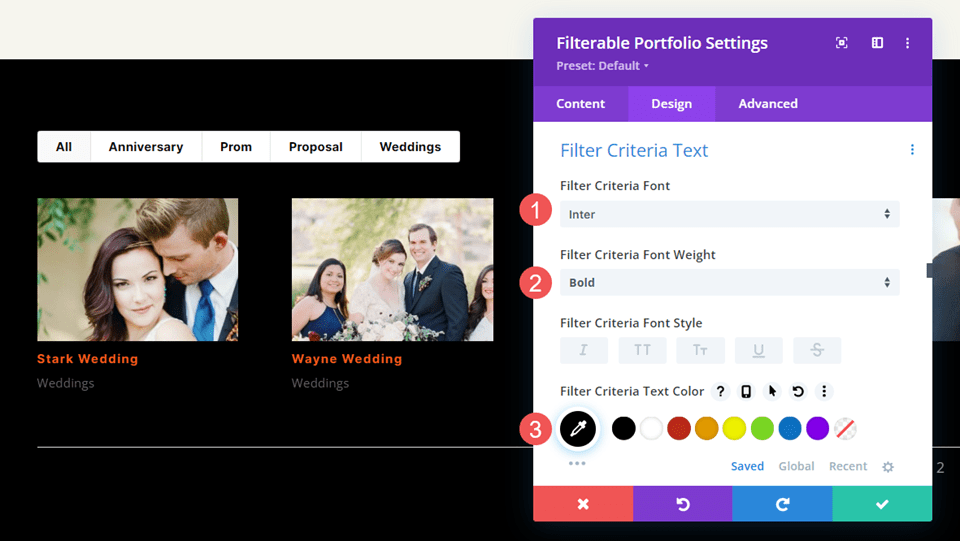
Leave the Font Size at 14, which is the default setting. Change the Line Height to 1.4em.
- Size: 14px
- Line Height: 1.4em
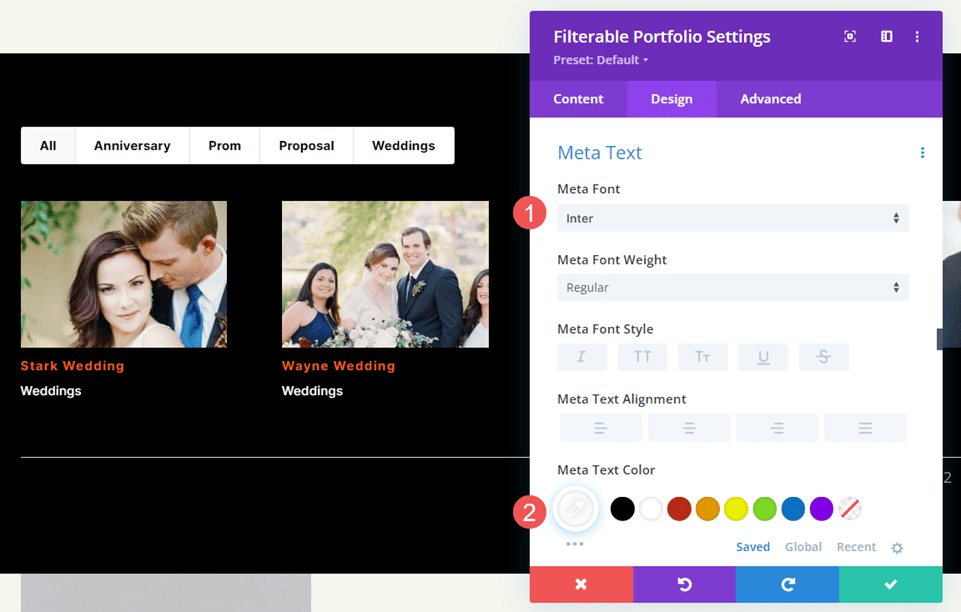
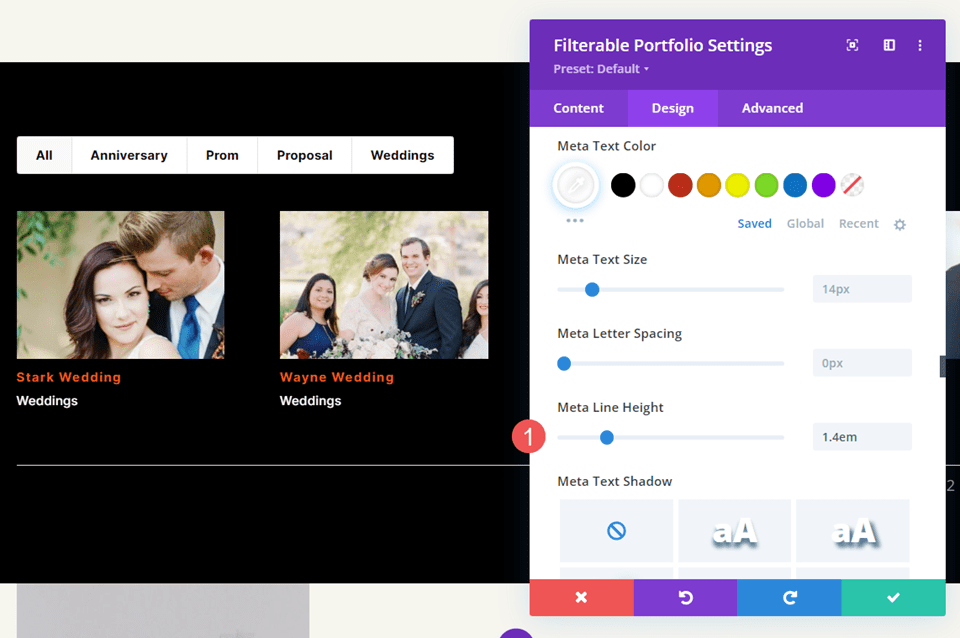
Filterable Portfolio Module Meta Text
Next, scroll down to Meta Text. Change the Font to Inter and change the Color to white.
- Font: Inter
- Color: #ffffff
Change the Line Height to 1.4em.
- Line Height: 1.4em
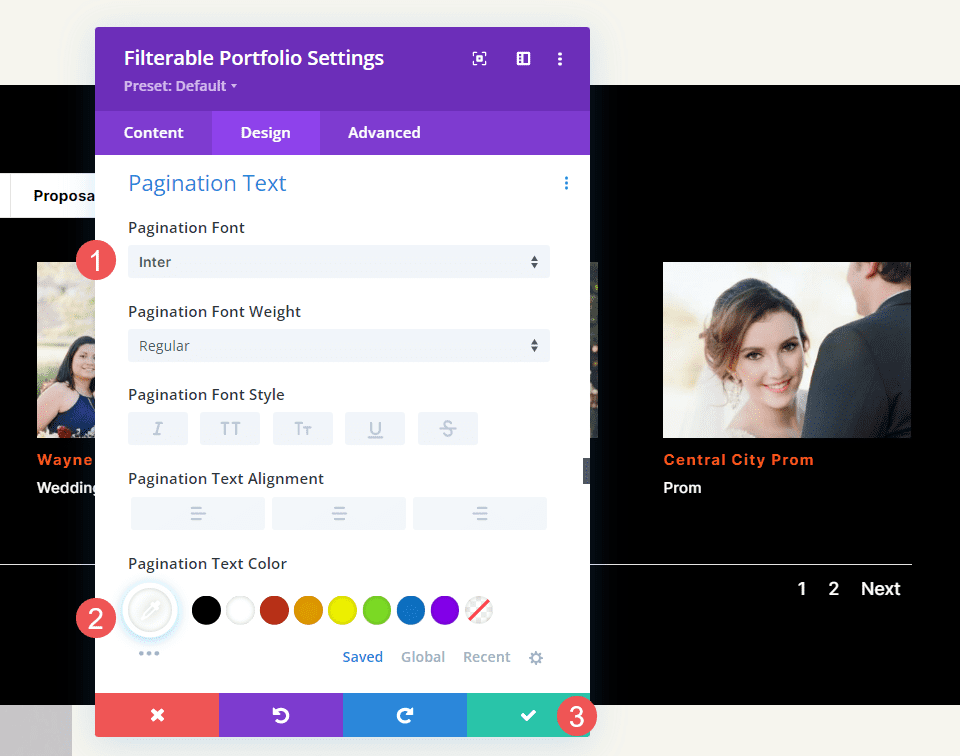
Filterable Portfolio Module Pagination
Finally, scroll down to Pagination. Change the Font to Inter and the Color to white. Close the module and save your settings.
- Font: Inter
- Color: #ffffff
Filterable Portfolio Module Results
We now have a filterable portfolio that looks great within the layout. Here’s a look at how it looks filtered to show one category. Following this, we’ll see how it looks within the larger image of the layout.
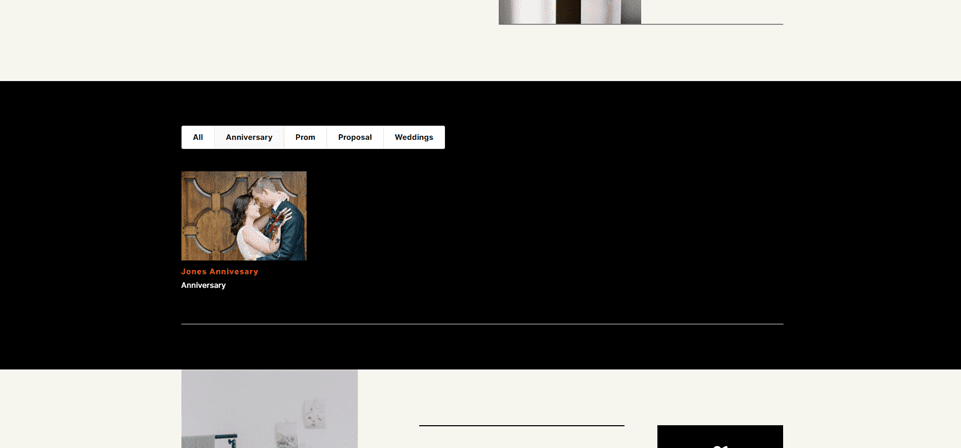
Desktop
Phone
Ending Thoughts on Setting up Divi’s Filterable Portfolio Module
That’s our look at how to set up WordPress projects for Divi’s Filterable Portfolio Module. Creating projects is as simple as creating any content in WordPress. Once you’ve created your projects, add Divi’s Filterable Portfolio Module to any page or template to showcase your work anywhere on your website. The filter provides an extra layer of usability for your visitors as they can quickly see the types of work they’re looking for.
We want to hear from you. Have you set up WordPress projects for your Divi Filterable Portfolio? Let us know about it in the comments.


Why do we talk about adding tags, but then do not have a way to filter by tags?
Hi, is it possible to increase the number of views per row from 4 to 5?
Hi there,
Is there a way to control dynamically which filter category are on when a user lands on a given page?
In my case, I have a couple hundreds of projects with 4 main categories (INDOOR, OUTDOOR, DECORATION, SOFAS) and approx 6 sub-categories for each category. For instance, INDOOR will have TABLES, CHAIRS, COFFEE TABLES, CONSOLES, etc.
When users navigate on the site, my goal is for them to choose one of the main 4 pages in the menu (for instance a users clicks on INDOOR) and then they land on the dynamically generated page with a Filterable Portfolio with the categories pre-checked of only TABLES, CHAIRS, COFFEE TABLES, etc.
If they were to click on SOFAS, they would land up on almost the same page, but with other categories pre-checked for the Filterable Portfolio.
I have created a Divi Theme for the four pages, but I can’t seem to customize dynamically the categories for each. That is: if i set the categories in one page to A1, A2, A3, A4, A5 et A6, it sets the same categories for all the other pages. I was hoping I could send the categories as parameters in the Edit section of each page, the same way I control other dynamic content like Excerpt, Featured Image, etc.)
Is it possible to just create the filterable portfolio, but the link for each project is dead. I don’t want the links to work.
Basically i just want to showcase my products that are available. To purchase, visitors will go to my ebay store.
Such a great and easy way to organise projects on a page. This works really well with case studies too.