
Divi’s built-in condition options allow us to display content based on a Page Visit condition. This allows you to display any Divi element only if the user has visited a specific page on your website. In other words, the content will remain hidden until the user has visited the page. This functionality is great for retargeting visitors with an announcement bar after they visit a landing page. Because the visitors have proven to be interested (they came back to the landing page), we can leverage this by displaying announcements (discounts, limited-time offers, promotions, etc.) to lead them in the right direction.
In this tutorial, we’ll show you how to retarget a landing page visit with an announcement bar in Divi by taking advantage of Divi’s built-in condition options. All it takes is a few clicks.
Let’s get started!
Sneak Peek
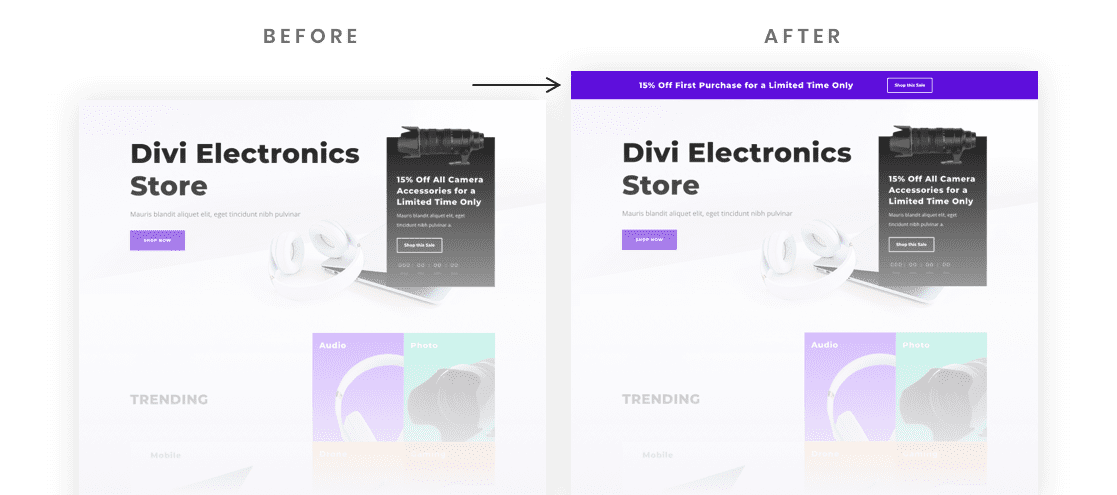
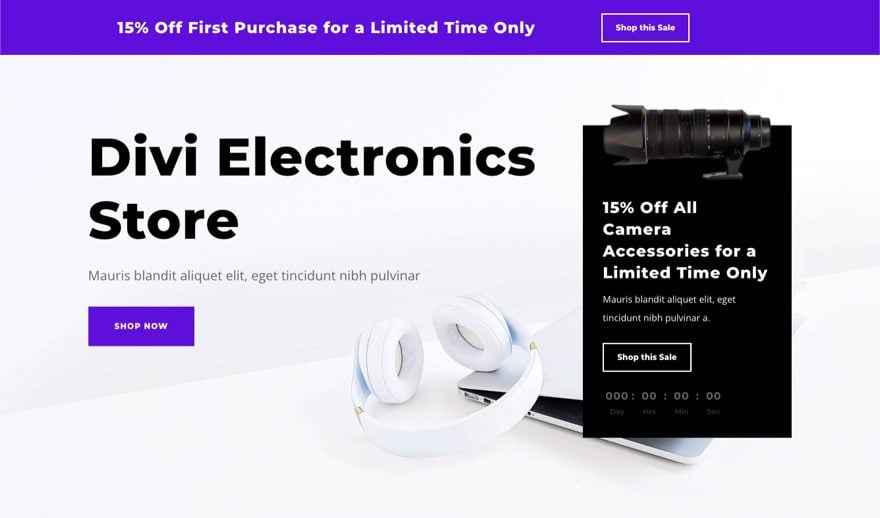
Here is a quick look at the design we’ll build in this tutorial.
This Announcement Bar will be displayed after a user visits the page.
Download the Layout for FREE
To lay your hands on the layout from this tutorial, you will first need to download it using the button below. To gain access to the download you will need to subscribe to our newsletter by using the form below. As a new subscriber, you will receive even more Divi goodness and a free Divi Layout pack every Monday! If you’re already on the list, simply enter your email address below and click download. You will not be “resubscribed” or receive extra emails.

To import the section layout to your Divi Library, navigate to the Divi Library.
Click the Import button.
In the portability popup, select the import tab and choose the download file from your computer.
Then click the import button.

Once done, the section layout will be available in the Divi Builder.
The Key Concept
How to Display a Section Only if a Visitor has Visited a Specific Page
As previously mentioned, Divi’s built-in condition options include a Page Visit condition that allows you to display any Divi element only if the user has visited a specific page on your website. In other words, the content will remain hidden until the user has visited the page.
Alternatively, you can choose to display a Divi element only if the user has not visited a specific page. In other words, the content will remain hidden to the user until they visit the page.
In this tutorial, we are going to use Divi’s condition options to display an announcement bar only if a user has visited the landing page. The announcement bar can be built easily using the Divi Builder to include any type of content or design you want. Once built, you can add the Page Visit condition to the announcement bar (which in this case is a Divi section) by doing these simple steps:
- Open the section settings for the section used to create the announcement bar.
- Under the advanced tab, click the plus icon under Display Conditions to add a new condition to the section.
- From the condition dropdown, select the Page Visit condition from the list.
- In the Page Visit condition settings popup, select the option to display only if the user has visited a specific page.
- Select the specific page from the list of pages from your website (which in this case would be the Landing Page).
That’s it! Once done the announcement bar (or section) will not appear to users until they have first visited the Landing page previously.
Now that you have a grasp on the key concept, let’s get to the tutorial, shall we?
What You Need to Get Started

To get started, you will need to do the following:
- If you haven’t yet, install and activate the Divi Theme.
- Create a new page in WordPress and use the Divi Builder to edit the page on the front end (visual builder).
- Choose the option “Build From Scratch”.
After that, you will have a blank canvas to start designing in Divi.
How to Retarget a Landing Page Visit with an Announcement Bar in Divi
Part 1: Loading the Electronics Store Landing Page Layout
Before we can retarget a landing page, we need to build one first.
To speed up the process, we are going to use the Electronics Store Landing Page Layout from Divi’s Electronics Store Layout Pack which is available from within the Divi Builder.
To load the layout to the page, click the Add From Library button (the plus icon) from the settings menu. Under the premade layouts tab, select the Electronics Store Landing Page layout and click the Use This Layout button.

You could, of course, use an existing landing page on your website, or choose to build one on your own. But for now, this will work.
Part 2: Creating a Section with The Page Visit Condition
In order to build the announcement bar, we are going to use a Divi Section. Go ahead and add a new regular section under the existing top section of the layout.

Once added, drag the section to the top of the page layout and add a three-fourths 0ne-fourth row to the section.

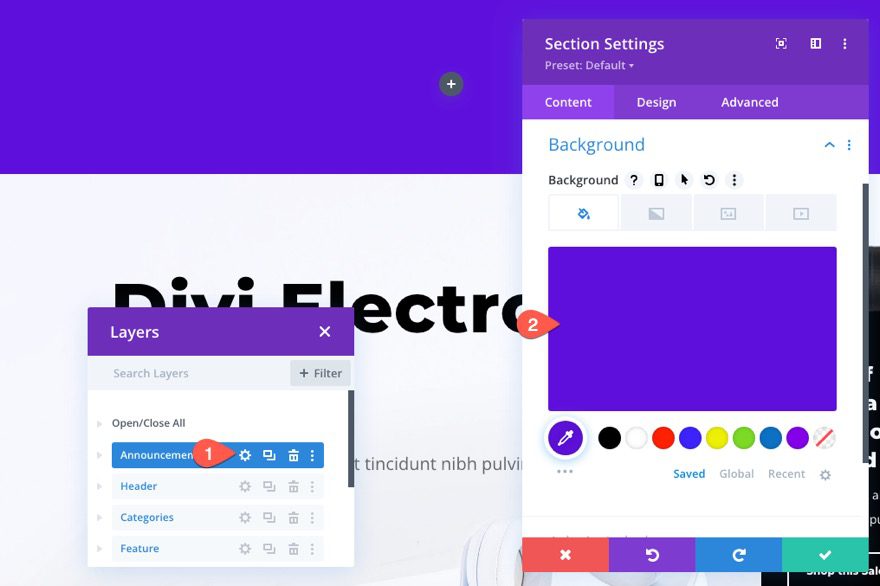
Open the section settings and add the following background color to the section:
- Background Color: #5e10da
Under the design tab, update the spacing and add an animation effect to the section as follows:
- Padding: 0px top, 0px bottom
- Animation Style: Slide
- Animation Direction: Down
- Animation Starting Opacity: 100%
This will shorten the height of the announcement bar as well as give it an eye-catching animation effect when the page loads.

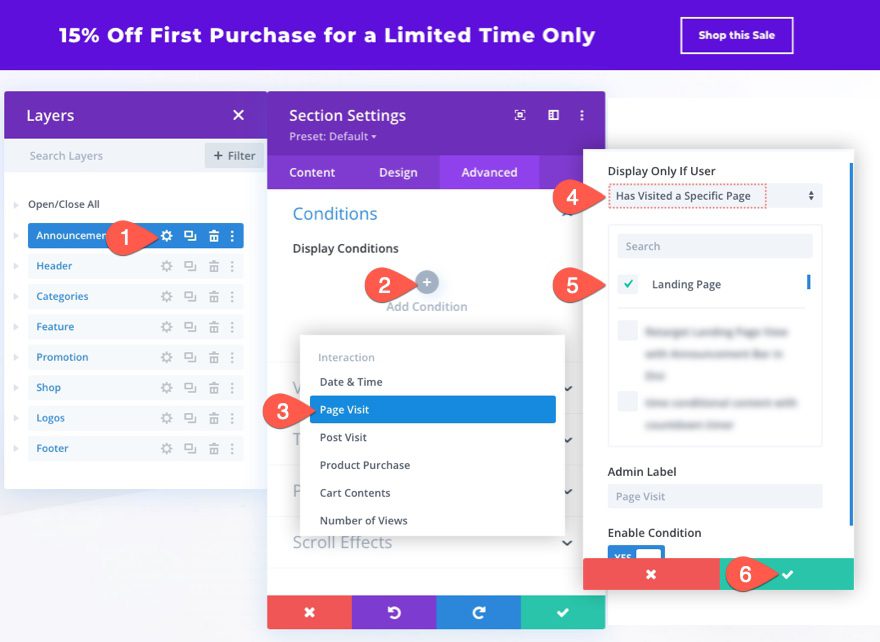
Under the advanced tab, add a new display condition by doing the following:
- Click the plus icon under Display Conditions to add a new condition to the section.
- From the condition dropdown, select the Page Visit condition from the list.
- In the Page Visit condition settings popup, select the option to display only if the user has visited a specific page.
- Select the specific page from the list of pages from your website (which in this case would be the Landing Page).
- Save Settings.

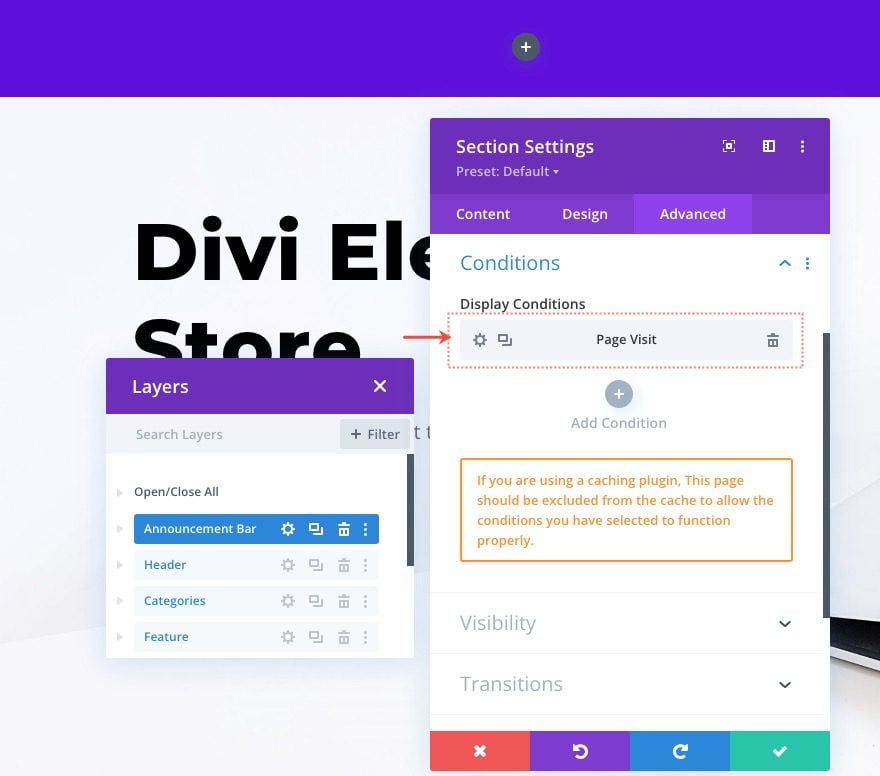
Now you will have a new Page Visit display condition for the section.
Note: If you are using one of the many popular WordPress caching plugin, this page should be excluded from the cache to allow the display condition to function properly.
Part 3: Creating the Announcement Bar Content
At this point, we have the section and row for our announcement bar in place. And our section has the Page View display condition active. So, any content we add inside the section will inherit the display condition of its parent container (the section). All we need to do now is fill the section with content to finish the creation of the announcement bar.
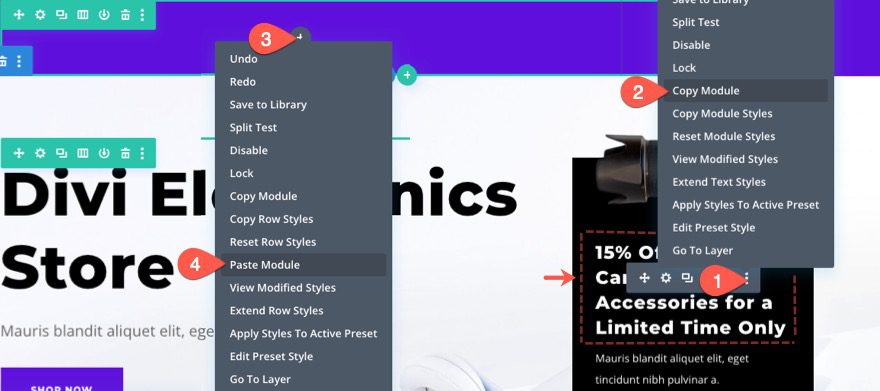
The first piece of content will be the announcement bar text. To add the text, copy the text module below the camera image in the right column of the row in the existing header section of the layout. Then paste the text module inside the left column of the row in the announcement bar section.
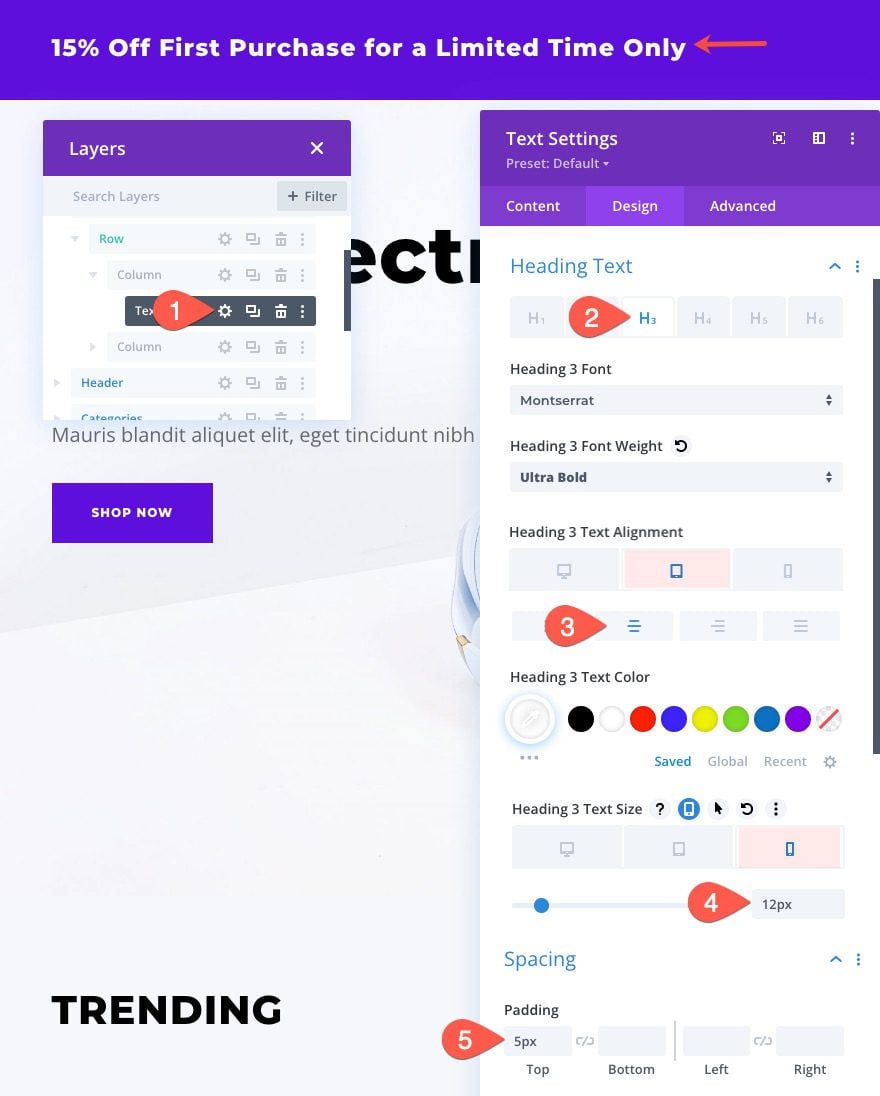
Once the new text module is added, open the text settings and update the following:
- Heading 3 Text Alignment (tablet and phone): Center
- Heading 3 Text Size (phone): 12px
- Padding: 5px top
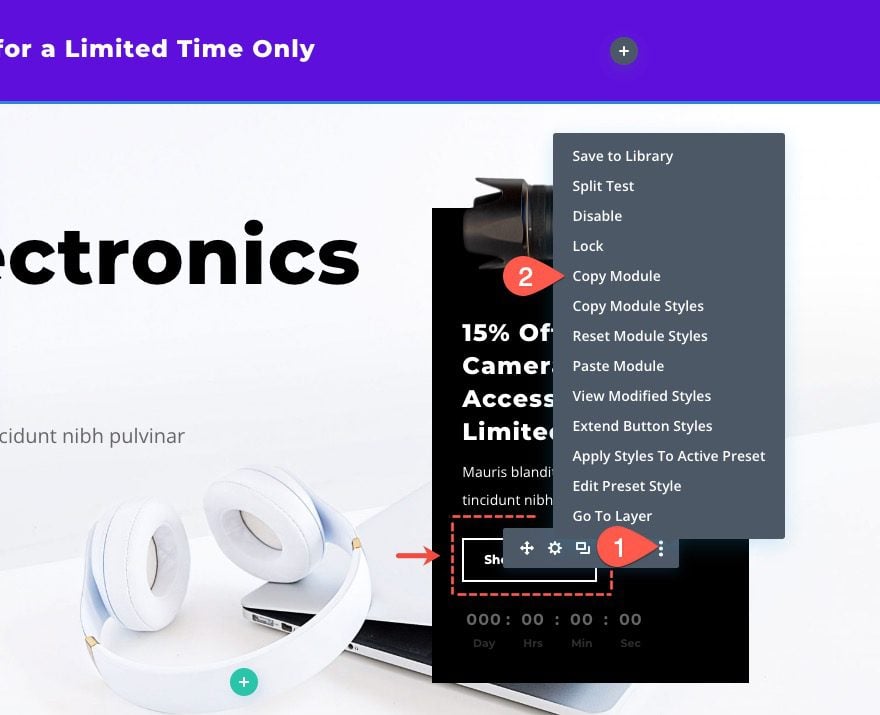
In the right column of the announcement bar, we are going to add a button. To do this, copy the existing button module above the countdown timer in the right column of the row in the existing header section of the layout.
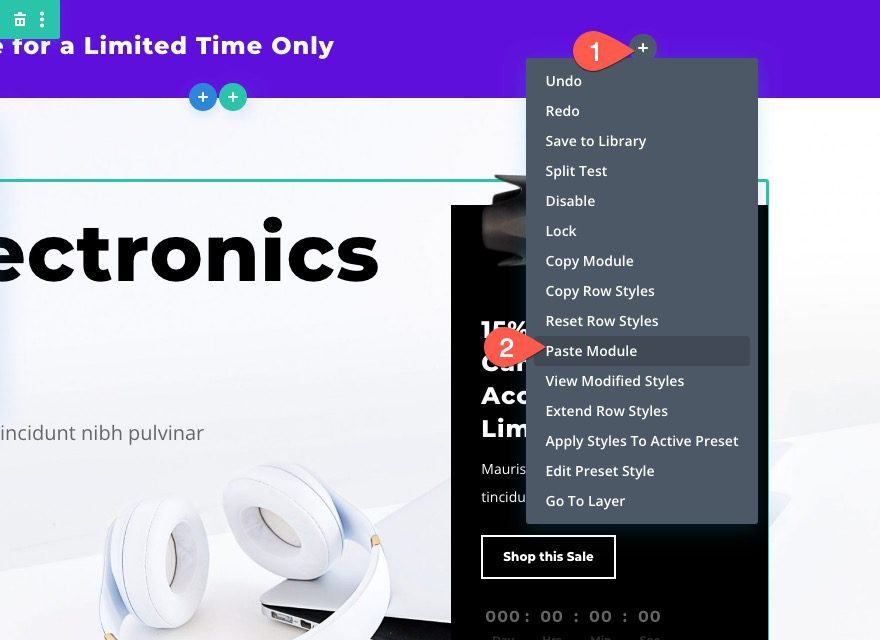
Then paste the button module inside the right column of the row in the announcement bar section.
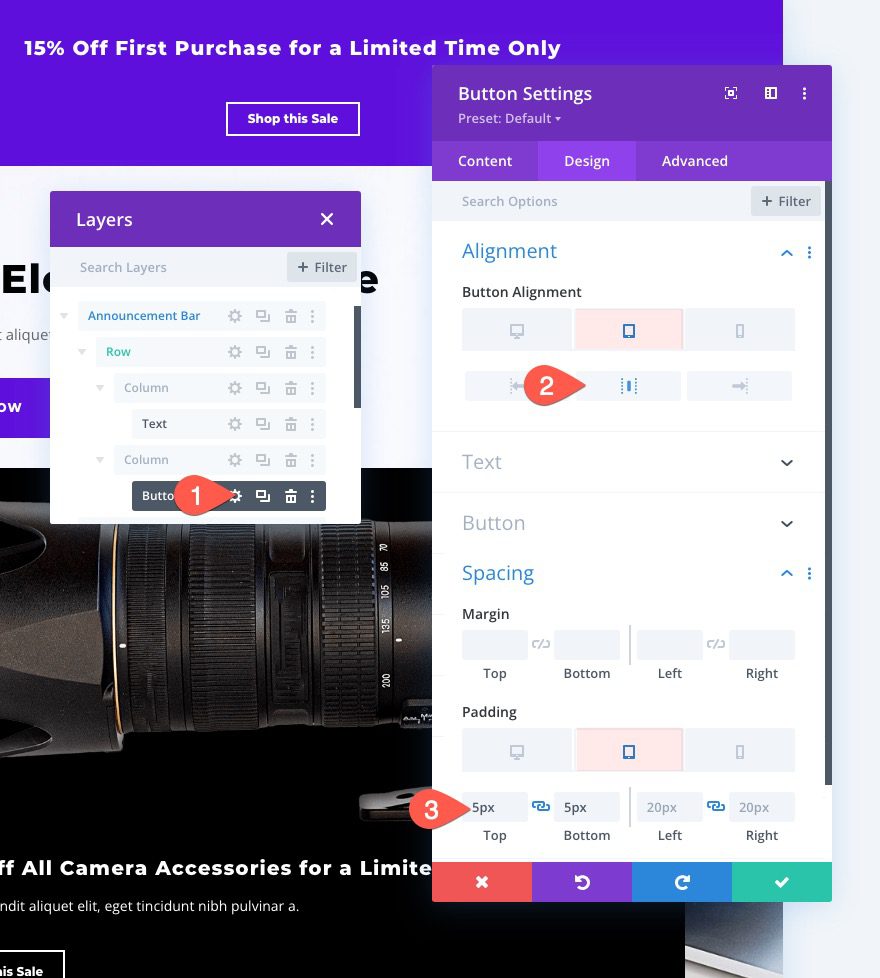
Once added, open the settings for the button module and update the following:
- Button Alignment (tablet and phone): Center
- Padding (tablet and phone): 5px top, 5px bottom
Part 4: Adjusting the Row Settings
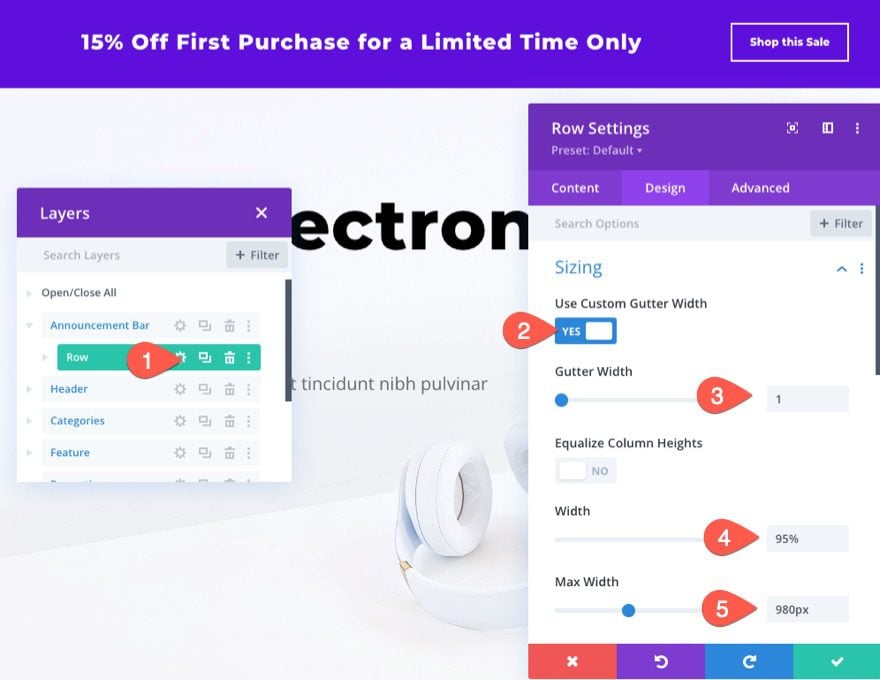
To put the final touches on the design of the announcement bar, open the settings for the row and update the sizing options as follows:
- Gutter Width: 1
- Width: 95%
- Max Width: 980px
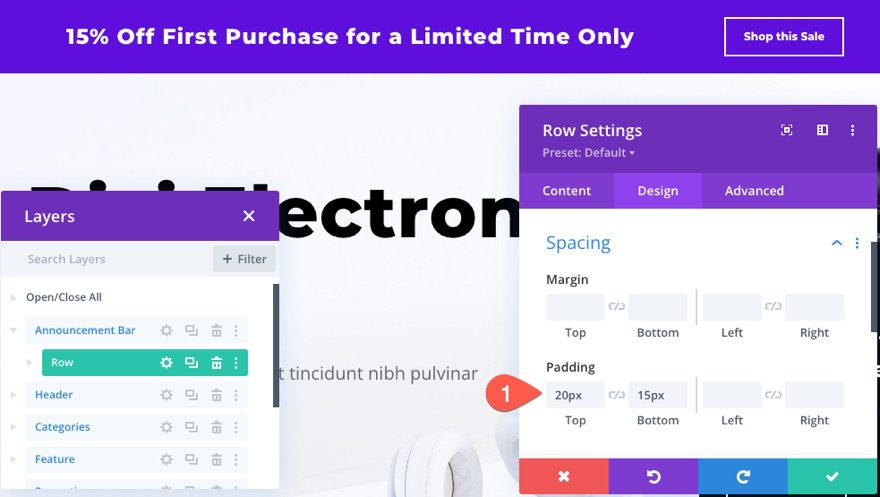
- Padding: 20px top, 15px bottom
Final Result
That’s it! To check out the result on the live page, remember that you will not see the announcement bar until you visit the landing page (or whatever page you selected for the Page View condition).
Here is what the announcement bar will look like once it does appear.
And here is the animation of the announcement bar on page load.
Final Thoughts
The Page View display condition highlighted in this tutorial is only one of many condition options available in Divi. Feel free to combine the page view condition with other conditions that make sense for an announcement bar. For example, you could also include the Product Purchase condition to offer a first-time purchase discount only to visitors who have not made a purchase. Plus, you can also experiment with displaying other content besides an announcement bar such as a countdown from a plugin or the countdown module. Have fun!
I look forward to hearing from you in the comments.
Cheers!


Thank you, Jason! Great Post
Retargeting provides additional points of contact with your product and more largely your brand, increasing the likelihood that those people who know you will convert. With the ever-changing landscape of digital advertising, the fight for your audience’s attention has to be won with not just quantity but also quality. Thanks for sharing this guide, it is really useful. Cheers!
You’re welcome, Andrew! Glad you liked it.