

If you have ever built an e-commerce site or membership site with Divi, you have probably run into the challenge of matching the design or your Divi site with the account pages generated by your plugin to handle membership or e-commerce functionality. These Account pages (also called front-end pages or reserved pages) handle things like…
- a member’s account information
- purchase history
- registration
- Login
- and more…
Most of the account pages for third party plugins like WooCommerce use shortcodes (or have shortcodes available) to generate this kind of plugin-specific information. In this tutorial, I’m going to share some tips on how you can use the Divi Builder to design those front-end account pages by taking advantage of those shortcodes.
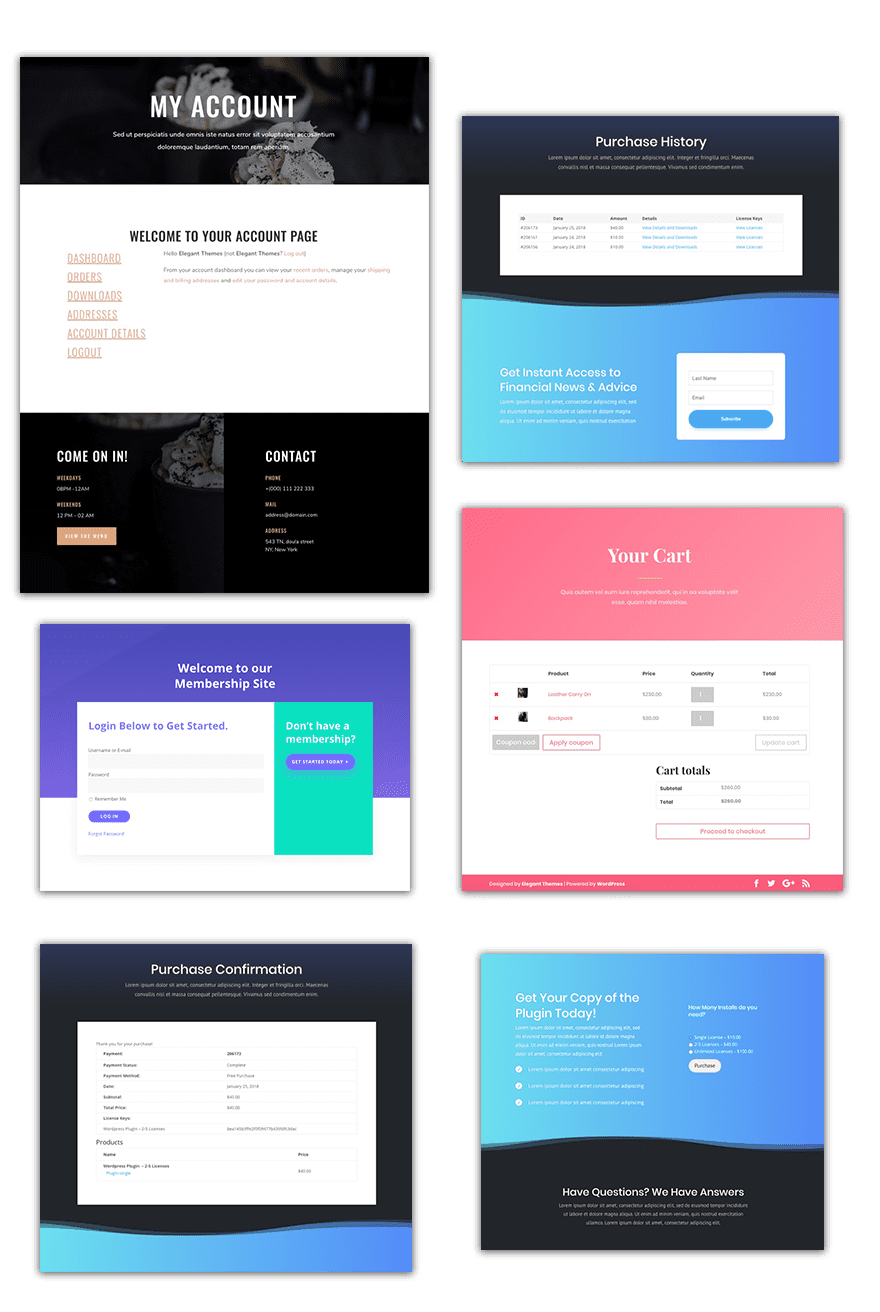
Sneak Peek
Here are a few examples of custom account pages you can create with Divi.
General Tips for Designing Account Pages
Theme Customizer Settings
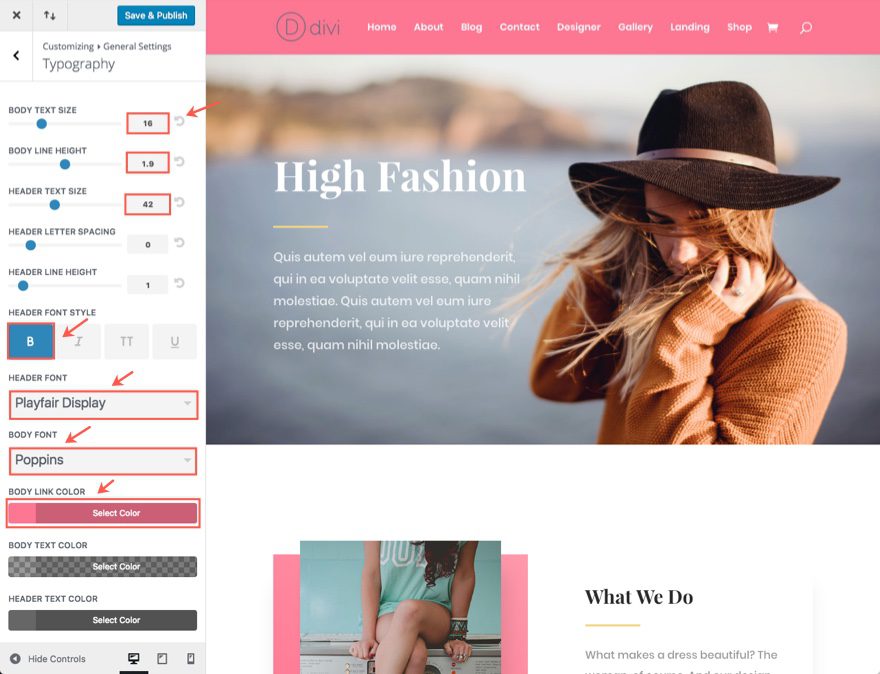
The first step in customizing those account pages is to set the default styles for the Divi Theme in the Theme Customizer because these pages will normally inherit these style settings. The content of these account pages normally include text, form fields, links, and buttons. The theme customizer can make sure you have the right typography settings to style the text and links in these pages, but the form fields and buttons may require some custom CSS.
Use Shortcodes to Display Account Pages Whenever Possible
Normally, plugins will supply the user with an option to deploy account information using a shortcode rather than use the designated account page generated by the plugin. This allows users more flexibility with organizing page content throughout their site and also allows this content to work on page builders like Divi.
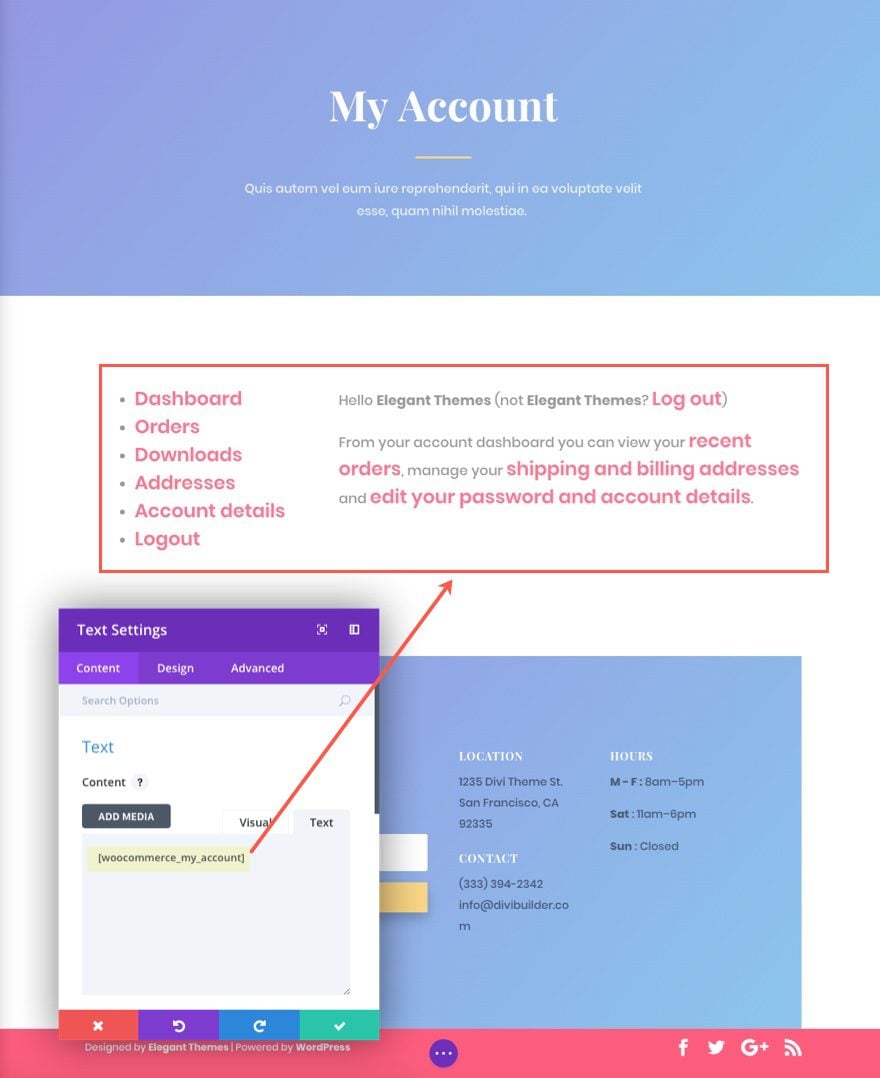
For example, if you are building a site with WooCommerce, you will have designated WooCommerce Pages to handle account information. One of these pages is called the My Account page. The page contents are deployed using the shortcode [woocommerce_my_account].

So if you wanted to, you can use that shortcode on another page or within a module using the Divi Builder. All you have to do is add the shortcode to a module using the Divi Builder and add any other design elements you want to the page.
Depending on the plugin, your front-end account pages may not be able to deploy the Divi Builder like with WooCommerce. But, that doesn’t necessarily mean there aren’t shortcodes available that will help build a custom page on your own.
For example, when using MemberPress, every time you create a new membership, the plugin automatically creates a registration page for that membership. These auto generated registration pages cannot deploy the Divi Builder. But you can, however, use a shortcode to generate a registration form for that membership. So, all you would need to do is create a new page, add the registration form shortcode to a text module using the Divi builder, and finish creating your custom registration page.
At times, you may have to look a little deeper for a Divi friendly solution for designing these pages. But in most cases, there is a shortcode to help you.
This is the basic strategy for designing these type of pages with Divi.
Use Shortcodes within Text Modules for More Design Options
Normally, I would suggest adding shortcodes to a code module in Divi, but not in this case. Shortcodes that generate account information contain headers, body text and links that can all be further customized using the Design option of the text module.
The best way to check if this content can be designed by the text module is to test it. In some cases, you may not be able to see the design changes in real time using the visual builder like normal. You may have to save the settings first and view them on the live page to see the effects.
If you are familiar with html, you can even do a quick inspection of the shortcode output using your browser developer tools to see if your text has any headers (h1, h2, etc.) that you can target with design.
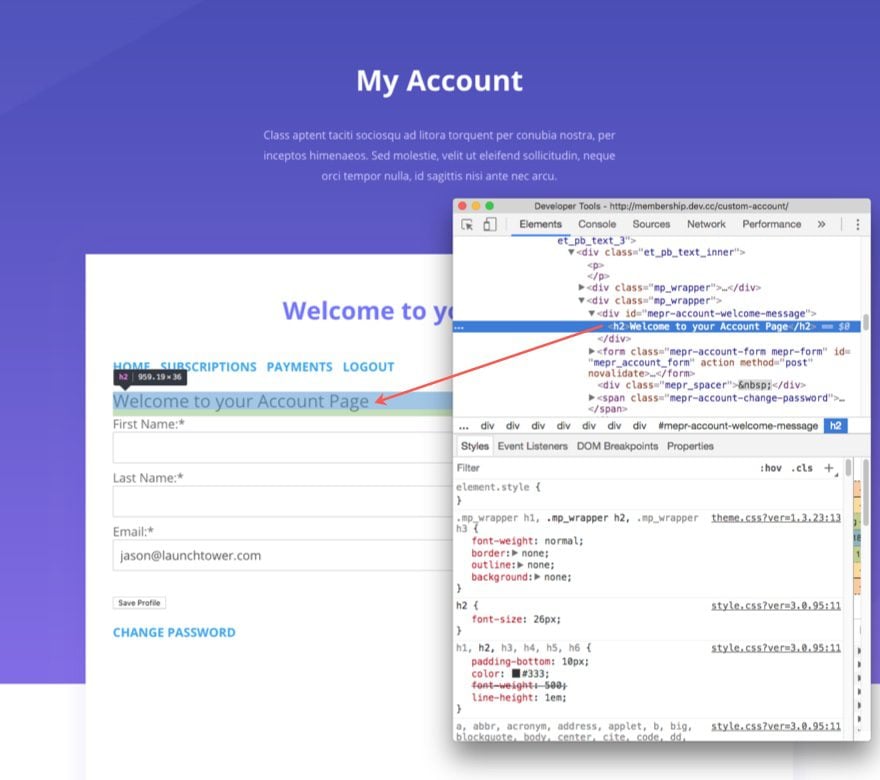
Tip: To inspect an element on your page in Chrome, simply right click on the element and select “Inspect”.
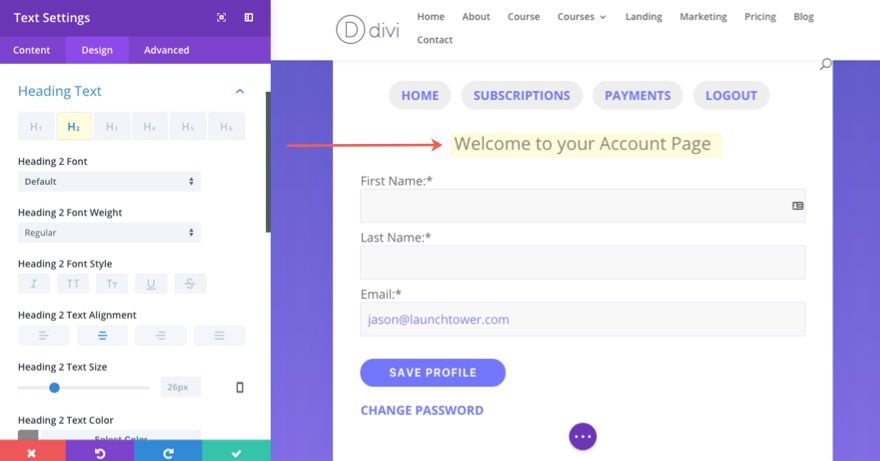
Once you know that a header is being deployed by the shortcode, you can target that with the text module Design settings.
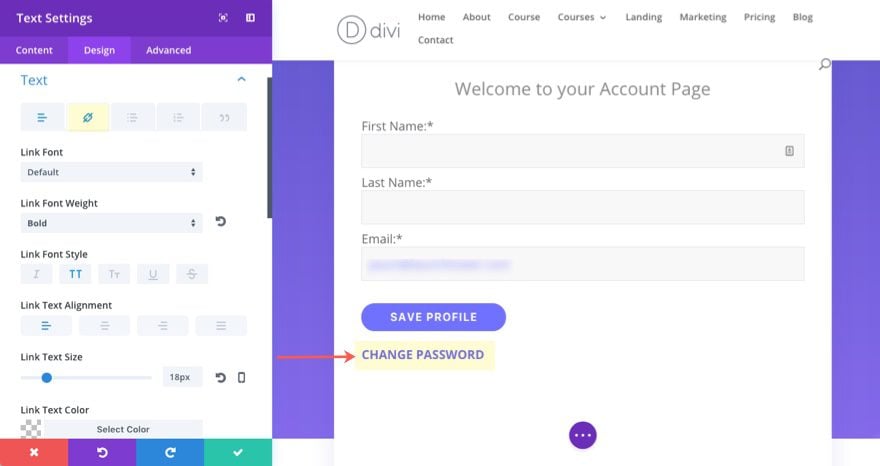
You can do the same for links as well.
Customize a Page Layout to Hold Your Shortcode
Now that you have the ability to use a shortcode within a text module, you can design the rest of the account page content with any custom layout you want with the Divi Builder.
If you need help with this, check out these steps to using a Divi Layout for your website.
Depending on the layout pack you are using you will need to find the page layout that best fits your needs for the shortcode content.
In general, I would look for a blog page, a contact page, or an about page layout. These page layouts usually have a standard header that can be easily adjusted and a fullwidth content section that can easily hold a shortcode.
Preferably, you will want to use an existing text module so that the shortcode content will inherit the design of the existing module.
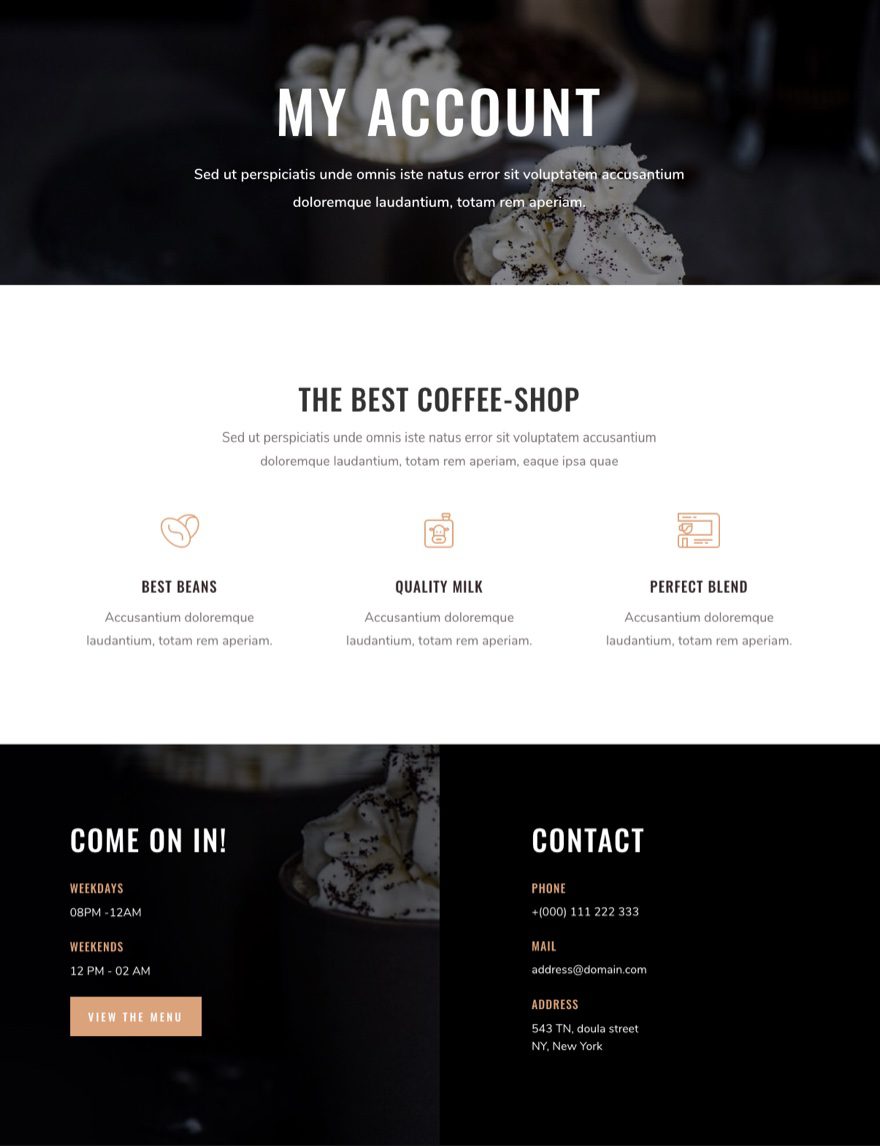
For example, here’s how you would use the Coffee Shop Layout Pack to create an account page for WooCommerce.
Copy the existing shortcode within the WooCommerce My Account Page. Deploy the Divi Builder then the Visual Builder to edit the My Account Page. Open the Settings menu and select Load from Library and
select the Coffee Shop – About layout from the list of premade layouts.

Change the Header Content to say “My Account” instead of “About Us” (You can use the inline editor for that. Very easy stuff.)
Then delete everything on the layout except the first and second sections and the footer section.
Now delete the second row of the second section (the one containing the three blurbs). This leave you one row in the middle section with a one column row holding a few text Modules. This is a perfect setup for the shortcode.
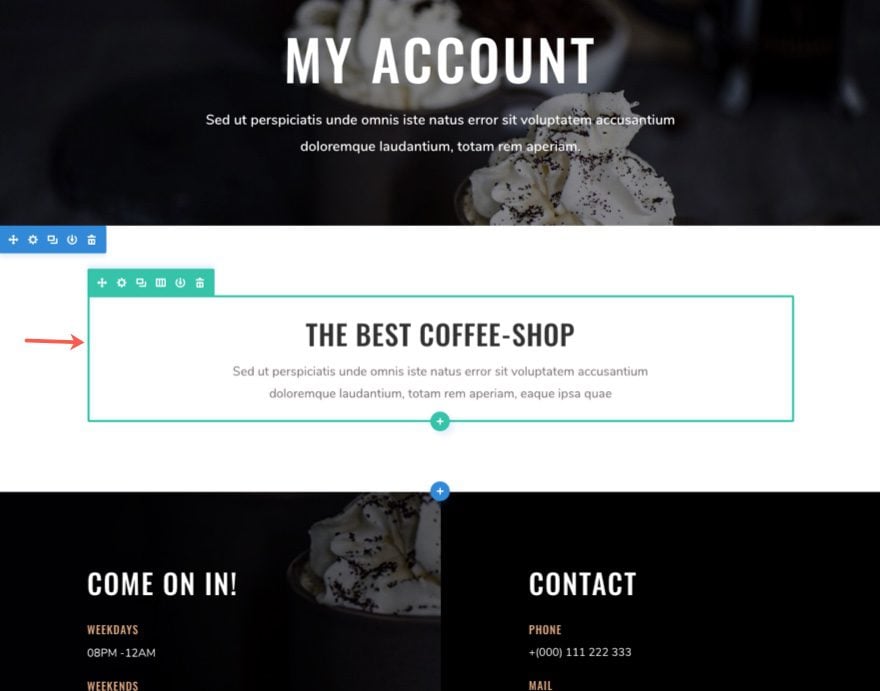
In the top text module holding the headline “The Best Coffee-Shop”, Change this to “Welcome to your Account Page”.
The only thing left is to add our shortcode to the text module underneath. Simply erase the dummy text that is there and replace it with the shortcode [woocommerce_my_account].

Update the Design tab settings as follows:
Text Orientation: Left
under unordered list text tab
Unordered List Font: Oswald
Unordered List Font Weight: Light
Unordered List Font Style: Uppercase (TT), Underline (U)
Unordered List Underline Style: Solid
Unordered List Text Size: 32px
Unordered List Letter Spacing: 2px
Unordered List Line Height: 1.8em
Unordered List Style Type: None
Sizing: 100% (default)
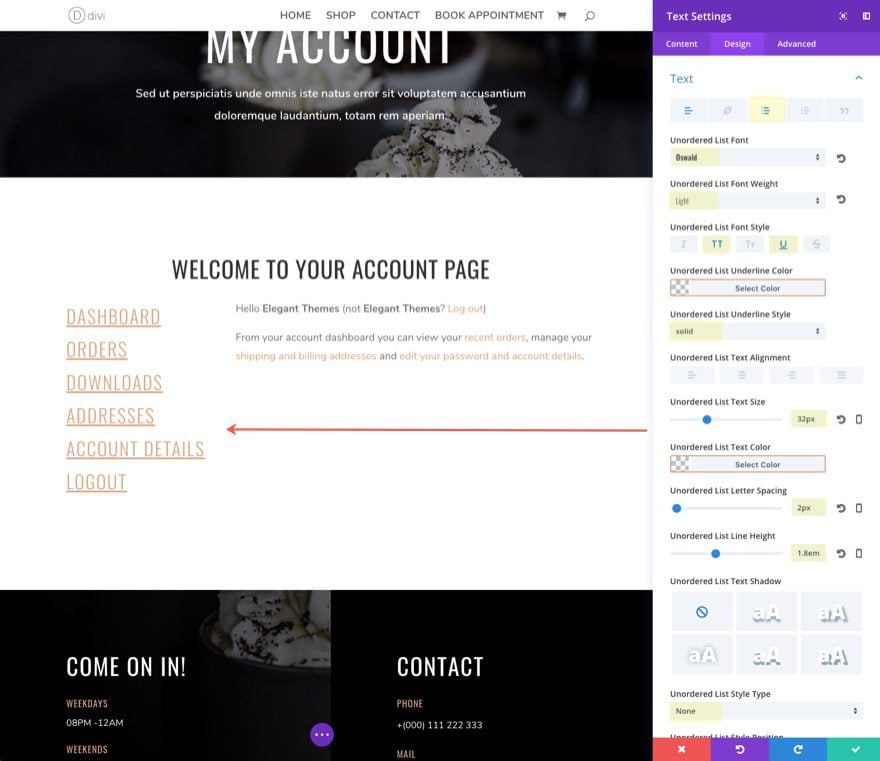
This is a great example of how you can target content within your shortcode. Since WooCommerce uses an unordered list to display the vertical navigation for the account info, I can target the unordered list from within the text module settings. So cool!
There Are Limitations
Unfortunately, there will be times when certain pages cannot be designed with Divi at all. Normally, this is because the plugin is using custom post type archives. A good example of this is the WooCommerce product page.
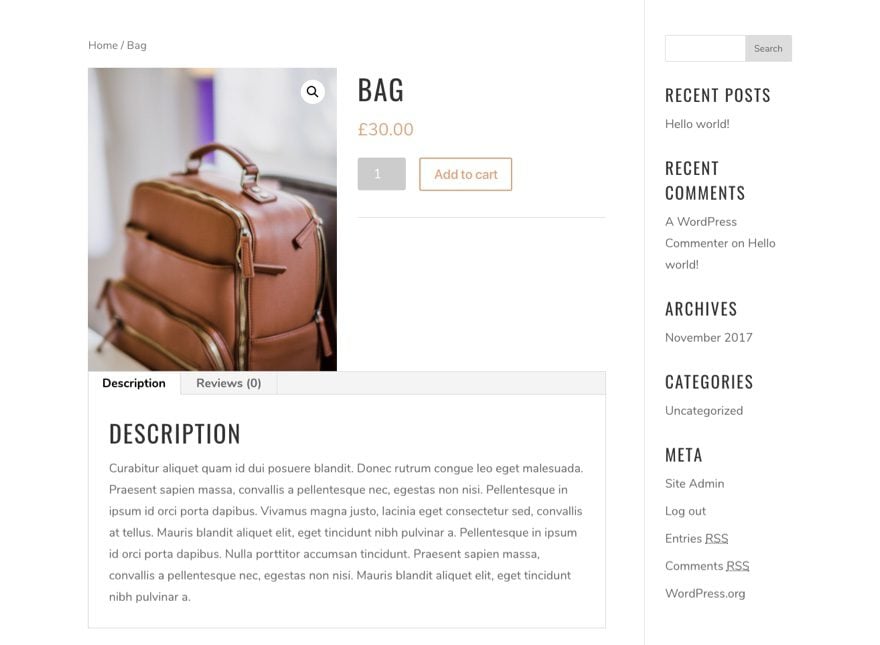
Because this is a custom post type, the page template isn’t able to deploy the Divi builder, nor can we use a shortcode to display the product page. Therefore we are limited to what we can control with the Theme Customizer and Custom CSS.
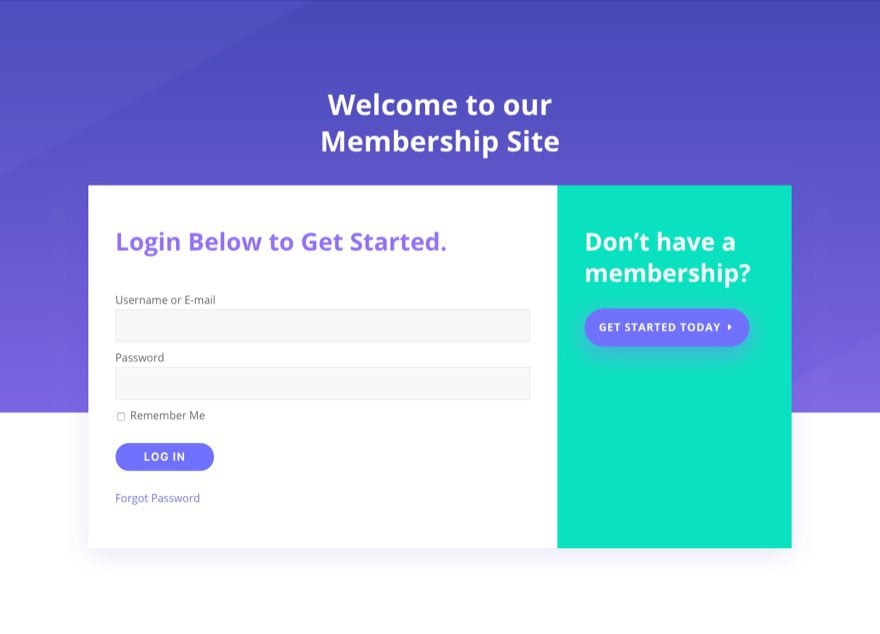
Designing Memberpress Account Pages with Divi
MemberPress Login Page
You can designate any page you want to be your login page from within MemberPress Options. Once you select the page to be your MemberPress Login Page, a shortcode will become visible whenever you edit the page.
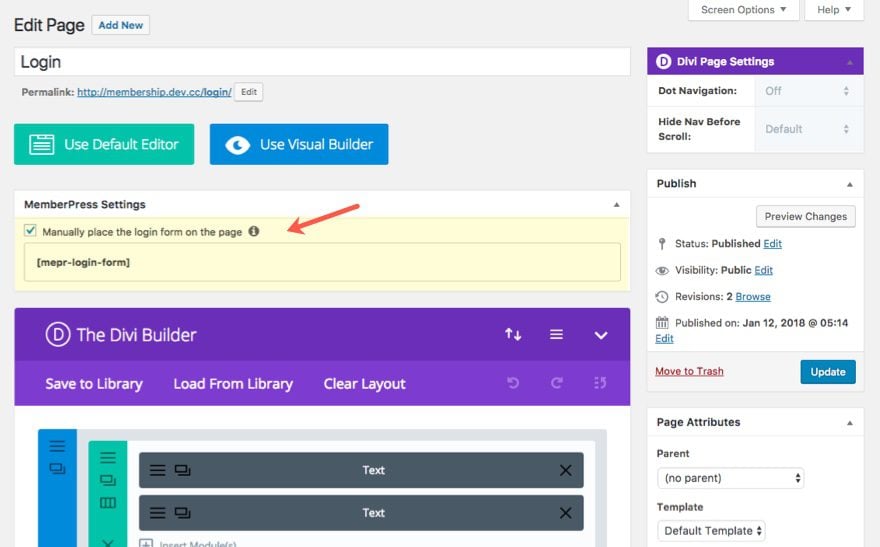
Simply copy that shortcode, deploy the Divi Builder, and you are on your way.
MemberPress Account Page
Just like the login page, you can designate any page as your MemberPress Account Page. However, the shortcode needed for the account page info is not easily found within the MemberPress Options. I had to find it within their list of available shortcodes.
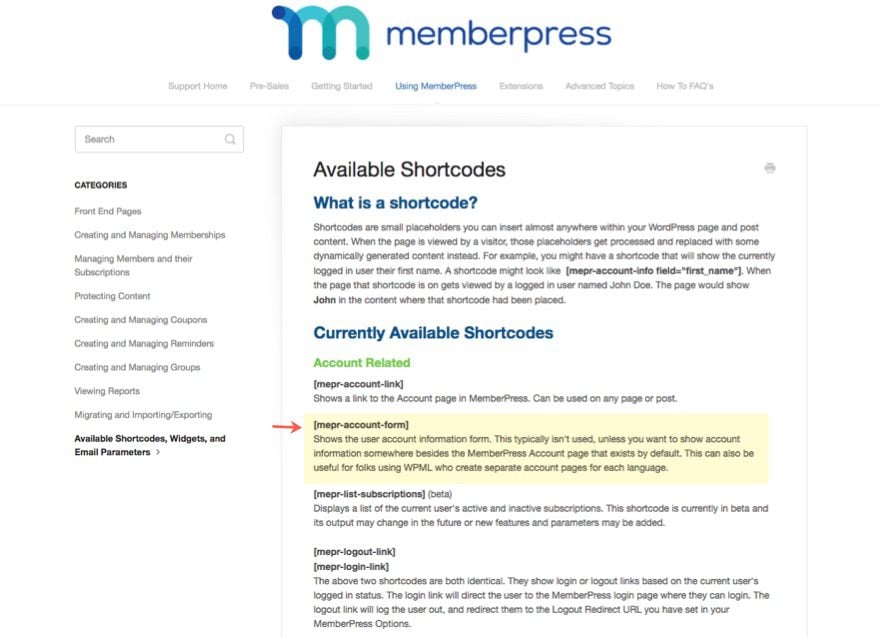
Sometimes the shortcodes you need aren’t going to be easy to find so you may need to look a little harder.
MemberPress Thank You Page
The MemberPress Thank You Page you designate can be any page with any content. So no design restrictions here. You can use the Divi Builder like normal.
Setting the page as your MemberPress Thank You Page simply tells MemberPress that this is the page you want to redirect users to after registration.
Designing WooCommerce Pages with Divi
WooCommerce generates its own set of WooCommerce pages automatically when you install the plugin. These include the following:
Shop – which is a placeholder for a post type archive for your products.
Cart – which uses the shortcode [woocommerce_cart] to generate the cart contents
Checkout – which uses the shortcode [woocommerce_checkout] to show the information.
My Account – which uses the shortcode [woocommerce_my_account] to show specific customer information related to their account.
Since I already covered how to build a custom My Account Page earlier, I’m going to leave you with some useful design tips for each of these WooCommerce Pages.
Let’s take a look at the Cart page first. Here is what it looks like before we do anything to it.
If you update your global accent color, the links and buttons on the Cart page will match the color scheme for your layout. And, if you update the typography settings in the Theme Customizer, the headers and body text should also match as well.
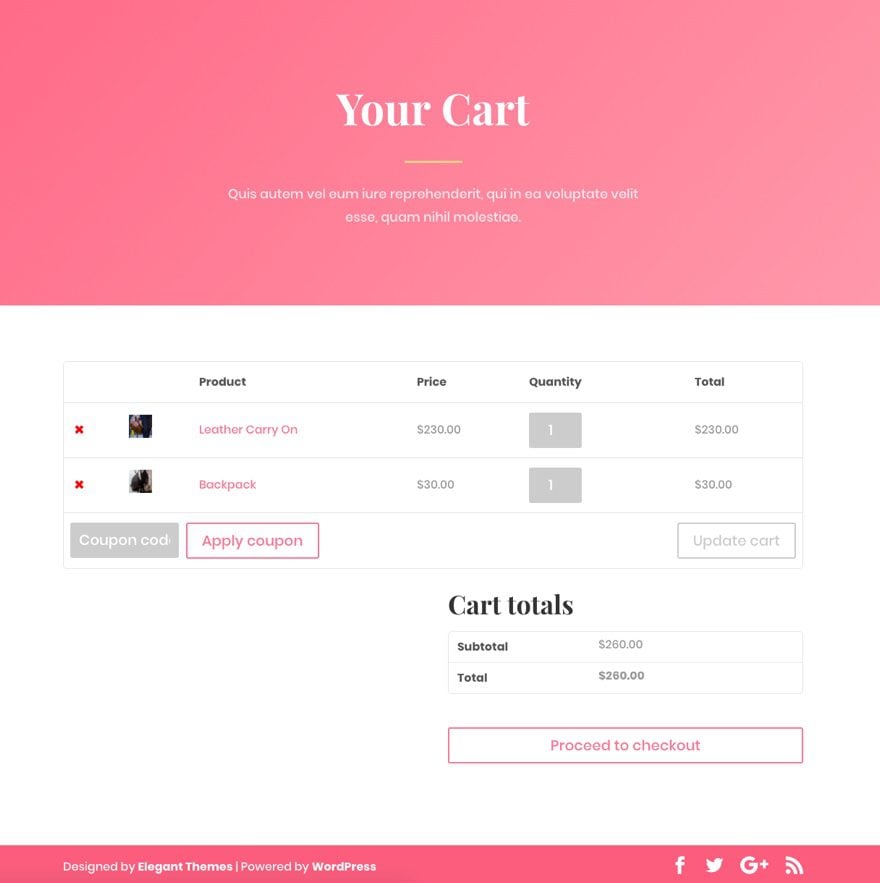
But we can do a little better than this with just a few clicks. Now go edit your cart page. Copy the shortcode [woocommerce_cart]. Import a layout from the Divi Library and add the shortcode to one of the text modules inside the layout. Make sure it is a one-column row so the content of the cart has room to display. Then delete all of the sections, rows, and modules you don’t need.
Here is an example of what this cart page looks like using the Fashion layout pack.
Shop Page and Archive Pages
You can create a custom shop page for your WooCommerce sight by using Divi’s Shop Module. However, since this page won’t share the custom post type archive of the default shop page, you will be forced to use the post type archive page template if you want to search products by category for example.
Product Pages
The Product Pages aren’t able to be designed with Divi but should inherit the Theme Customizer settings at least. You can also add some Custom CSS to the Theme Customizer to target elements on this page.
How to Design Easy Digital Downloads Account Pages using Divi
Here is where you set the default front-end pages EDD uses to manage your store. The following pages will be auto-created for you and will be accessible under your wordpress pages.
Checkout Page – has the title “Checkout”
Success Page – has the title “Purchase Confirmation”
Failed Transaction Page – has the title “Transaction Failed”
Purchase History Page – has the title “Purchase History”
Note: These pages all use shortcodes to deploy the information for the page. So you will be able to use the Divi Builder to customize each of these pages and insert the shortcode anywhere you want within a Divi Module. This will allow you to keep your design consistent throughout your site.
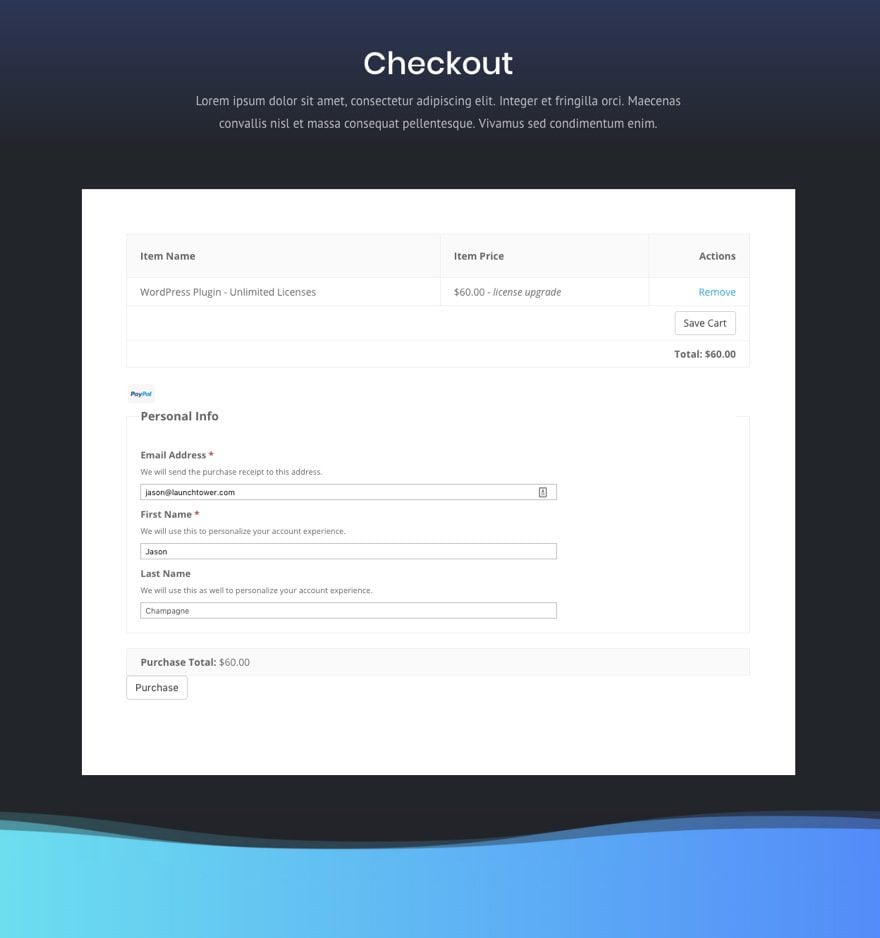
Checkout Page
You can use the checkout page shortcode [download_checkout] to design your custom checkout page using the Divi Builder.
Here is an example of a checkout page using the blog page layout from the Digital Pricing Layout pack. Because of the dark background, I had to give a white background to the row containing the text module with the shortcode.
Failed Transaction Page
Any page can be designated as the Failed Transaction page. EDD will simply redirect the user to this page if ever a transaction fails upon checkout. Just create any page with any content you want using the Divi Builder.
Here is an example using the same blog page layout from the Digital Pricing Layout Pack:
![]()
Purchase History Page
You can use the [purchase_history] shortcode to create the Purchase History page with the Divi Builder. Here is an example of what this page would look like using the Blog page layout from the Digital Pricing Layout pack:
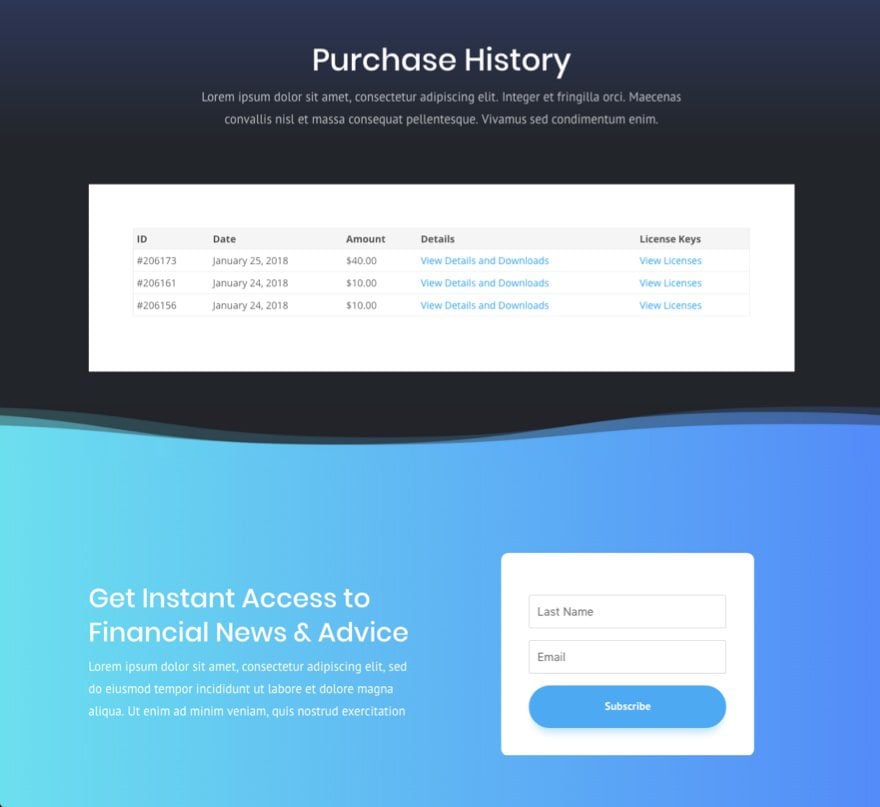
Even though the purchase history page has a shortcode that can be used with the Divi Builder, the built in functionality of clicking the link to view from the list of purchased items will break the layout.
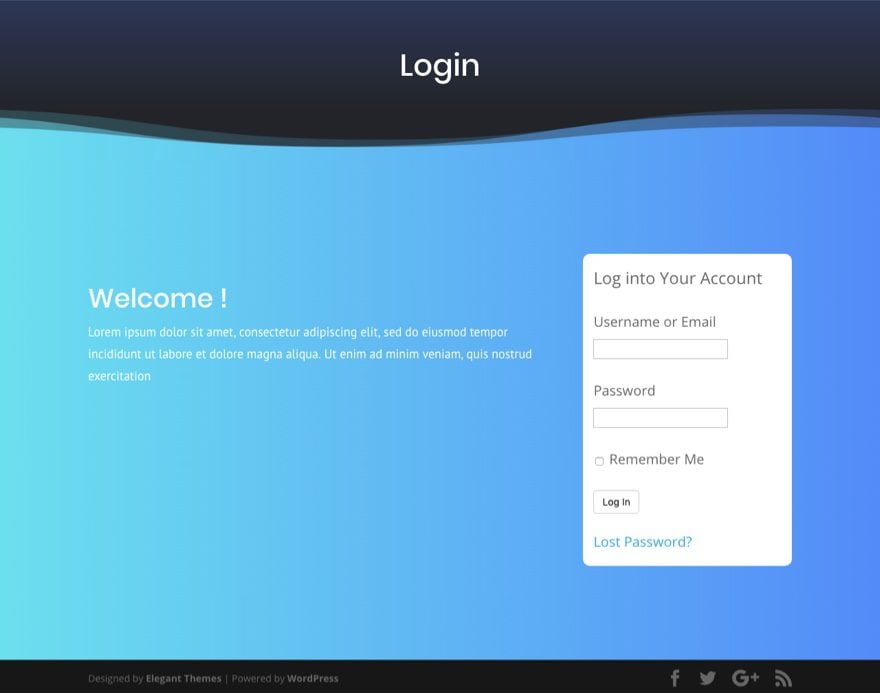
The Login Page
The Login Page isn’t auto-created for you since it uses the WordPress default login. But you can create your own login page using the [edd_login] shortcode..
Here is an example of login page created using the Blog page layout of the Digital Payments Layout pack:
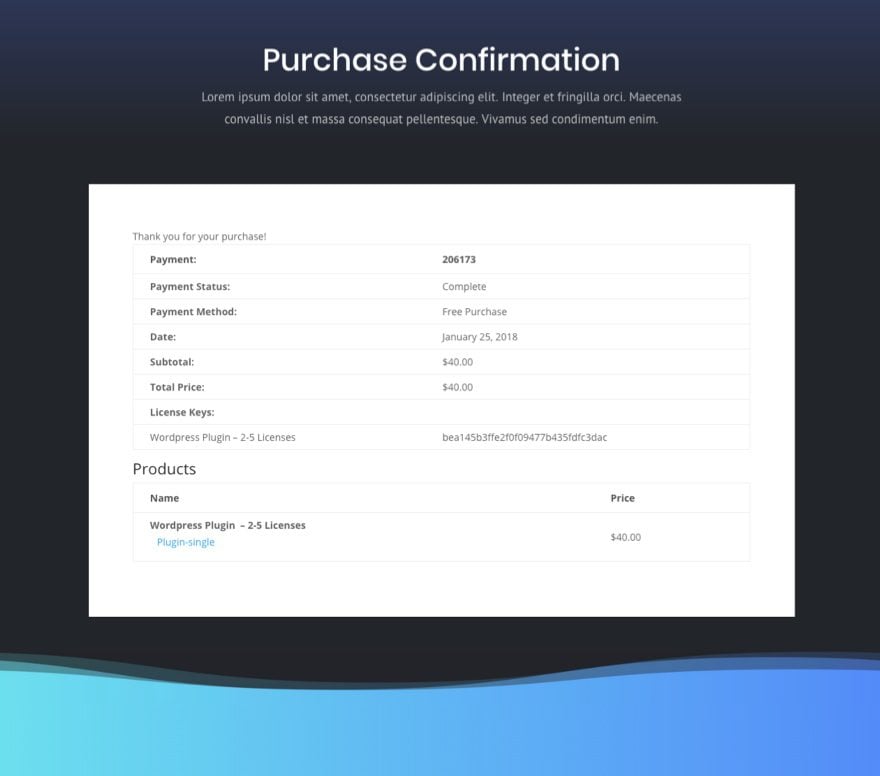
To create the Purchase Confirmation page, you can repeat the same process of adding the blog layout to the page and adding the text module with the shortcode needed in place of the blog module.
Here is an example of the Purchase Confirmation page (or Success Page):
More on Easy Digital Download Pages
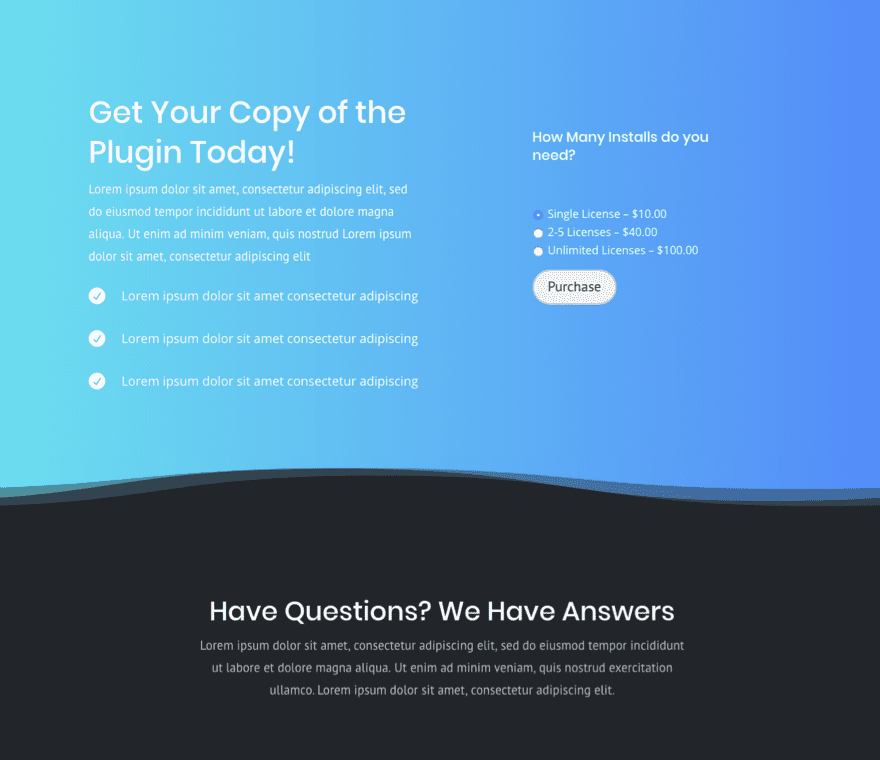
EDD also provides purchase shortcodes for each download product. This allows you to create a custom page with Divi to showcase your product by adding this purchase shortcode to a text module on the page. This functionality is a bit more flexible than WooCommerce Products.
Here is an example of a Product Page using the Purchase Shortcode:
Final Thoughts
Even with Divi, sometimes you need plugins. That is why it is important to know how to merge the power of Divi (as a design tool) with the power of third party plugins. So if you are building an e-commerce site with WooCommerce, a Membership site with MemberPress, or if you are having a challenge integrating account pages with the Divi Builder, keep an eye out for those shortcodes.
My goal in this article is to help you maximize the Divi Builder as design tool when working with third party plugins. But for those CSS lovers out there, you may opt for a complete child theme approach to these account pages. In most cases this is only way to control all aspects of design.
Let me know if you have had similar experiences with using Divi with other plugins. I’d love to hear them. Let me know in the comments below.
Cheers!


Hi,
This is great. But I am unable to apply this to my woocommerce store. Trying to create custom “purchase confirmation” page which can replace standard thank you page. I tried text module with shortcode [woocommerce_thankyou] to build a custom page. I am using latest woocommerce. I figured that after building a page, I had to redirect new orders to this custom thank you page. Doing that with “wc custom thankyou” plug-in. It goes to new custom page, but doesn’t behave as intended. Am I following the right path?
Great article. Does anyone know how to apply custom CSS to buttons and links (like shown in the MemberPress Forms section of the above article) ONLY within a section, and not on the entire page?
a:link{} and .buttton{} references work when I apply to the page CSS but are generating an RBRACE error when applied only to a section setting, and I wish only to apply the CSS styles to the memberpress form data not my entire page.
Thanks so much for this – but a quick question… I’ve set up a woocommerce “my account” page for a new site I’m working on – using the case study template from the software marketing pack. Looks great, however when you click on a link such as “my orders” or “my downloads” the page reloads in the browser and you then have to manually scroll down to view the content. Is there any way around this? Thanks in advance!
Hi! Im working in doing a kind of listing page, what i want it´s a directory of photographers, but giveing thme the hability to enter through member pass and be able to changue their info and their gallery pictures! Any tips or ideas, thanks!
thanks Dear, I like your post
Hi ! Thank you a lot for every posts 🙂
It will be possible to share some tips about “How to design a checkout page (memberpress or woocommerce) ? ” ?
I know these kind of pages are auto generated by the plugin and can’t be designed easely by the divi builder :/
Thank you, Ben.
Benjamin! Have a look at Woo Layout Injector plugin! With it you can build every woo page (single product page, archive, shop) with Divi Builder. I have it and use it.
Thanks for the tip.
@Benjamin, it works the same way with checkout pages as in the article using WooCommerce and then you go into WooCommerce and set the checkout page you made.
Thanks for the help Matthew!
Thanks for this article. Iy was so timely for me. I will use for a project i am having now
I’m all over this, thanks Jason.
Jason, this is great! How did you know that I was thinking about how to do this today? 🙂
IDK. I just knew. haha
Everyday you guys are pushing me to get the lifetime membership! Please don’t change DIVI!!
i love it so much really nice article thanks elegant 🙂