
Are you looking for a clean and minimal product page design for your online shop? Today we’ve got a design inspired by the Japanese aesthetic. This is a common style for minimal Japanese magazines and websites. It makes it easy to read the text, see the products and not get distracted. Follow along the tutorial below to recreate this template for your own products. You’ll be able to download the template JSON file for free as well!
Let’s get to it.
- 1 Preview
- 2 Download The Product Page Template for FREE
- 3 Download For Free
- 4 1. Add/Open Woocommerce Product
-
5
2. Recreate Japanese Style Design
- 5.1 Add New Section
- 5.2 Add 1st Row
- 5.3 Add Woo Breadcrumb Module
- 5.4 Add 2nd Row
- 5.5 Column 1 + 2 Settings
- 5.6 Add Woo Images Module to Column 1
- 5.7 Add Woo Title Module to Column 1
- 5.8 Add Woo Description Module to Column 1
- 5.9 Add Woo Price Module to Column 1
- 5.10 Add Woo Add to Cart Module to Column 1
- 5.11 Add Woo Additional Info Module to Column 2
- 5.12 Add Woo Gallery Module to Column 2
- 6 3. Convert to Template for Divi Theme Builder
- 7 Preview
- 8 It’s a Wrap!
Preview
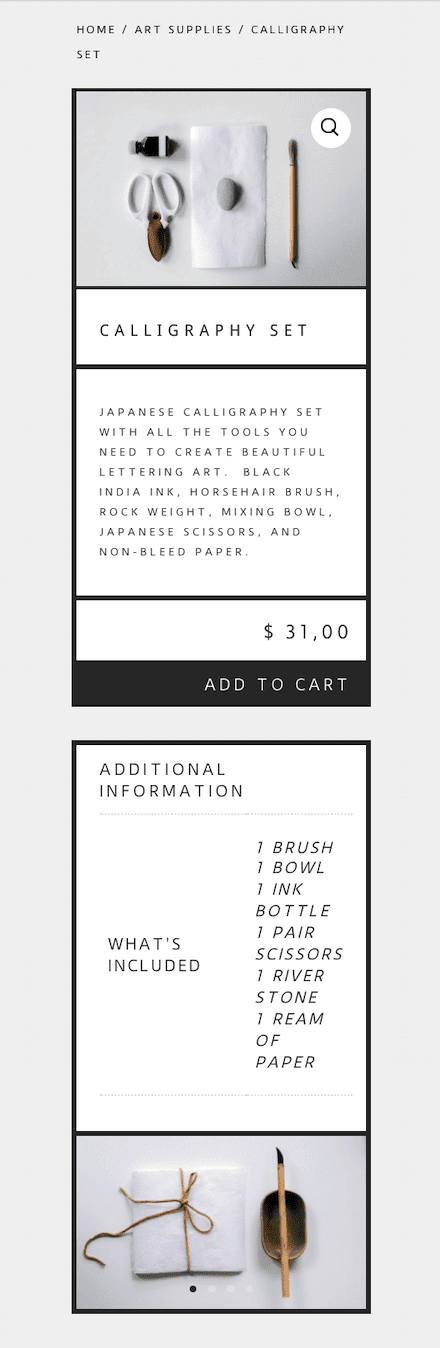
Before we start, let’s take a look at how the design looks across different devices.
Desktop

Mobile
Download The Product Page Template for FREE
To lay your hands on the free product page template, you will first need to download it using the button below. To gain access to the download you will need to subscribe to our newsletter by using the form below. As a new subscriber, you will receive even more Divi goodness and a free Divi Layout pack every Monday! If you’re already on the list, simply enter your email address below and click download. You will not be “resubscribed” or receive extra emails.

1. Add/Open Woocommerce Product
Product Data
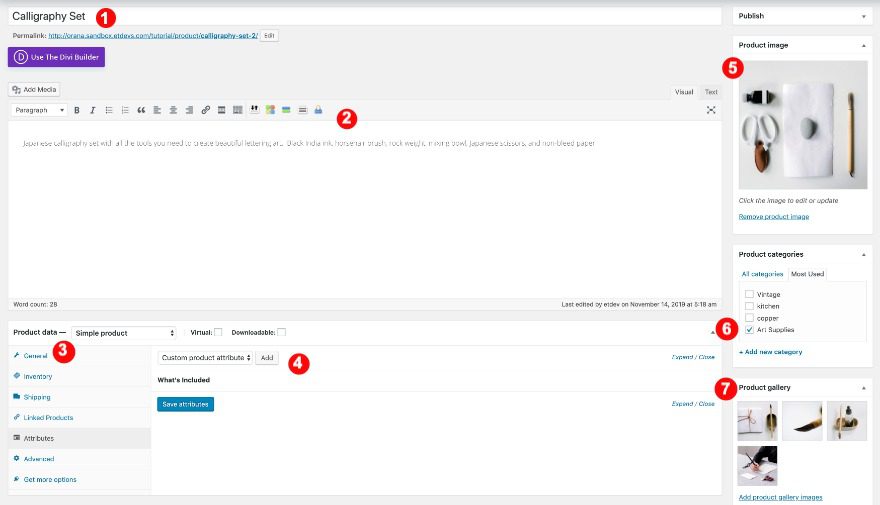
Open or create a new WooCommerce Product. To recreate this Japanese aesthetic inspired product design, you’ll need to have the following details filled in:
- Title: Calligraphy Set
- Description: Japanese calligraphy set with all the tools you need to create beautiful lettering art. Black India ink, horsehair brush, rock weight, mixing bowl, Japanese scissors, and non-bleed paper.
- Price: 31
- Category: Art Supplies
- Featured Image: A landscape image of the product.
- Gallery: 4 landscape images in the same dimensions
- Attributes: See below
The attributes tab holds the information for the woo additional information module. To add this information, select the attributes tab and create one custom attribute as follows:
- What’s Included:
- 1 Brush
- 1 Bowl
- 1 Ink Bottle
- 1 Pair scissors
- 1 River Stone
- 1 Ream of Paper
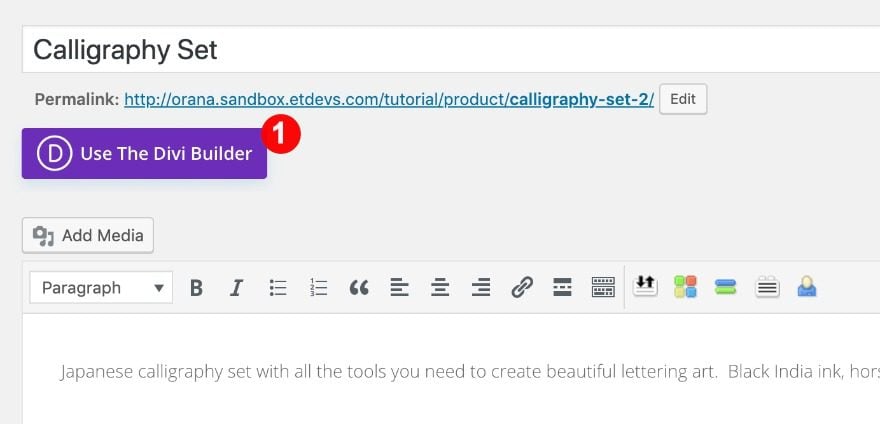
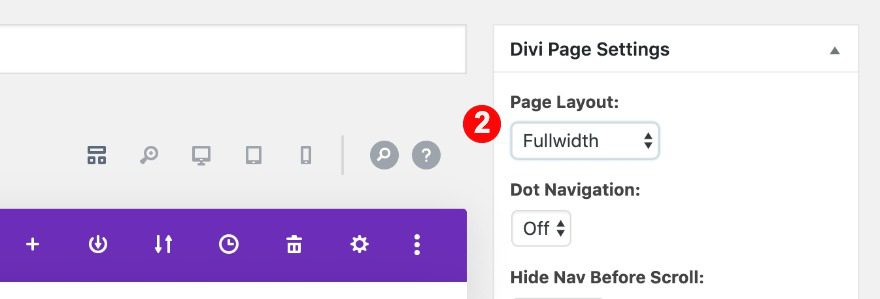
Enable Divi Builder & Modify Page Settings
When all the product data is ready, enable the Divi Builder and change the page layout to ‘fullwidth’.
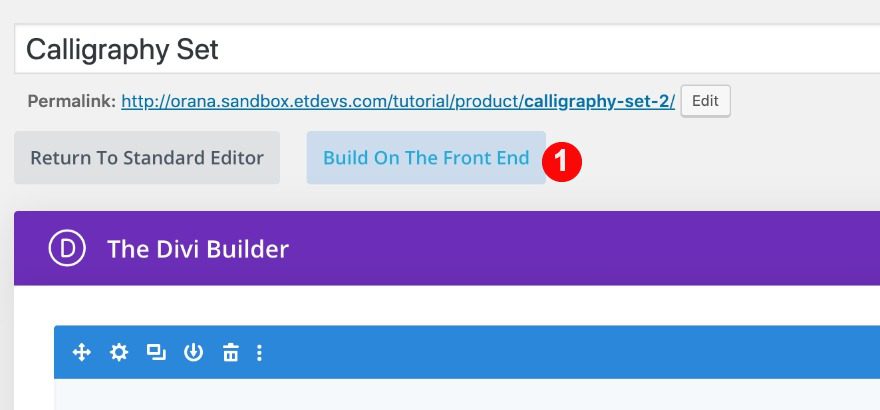
Switch to Visual Builder
Now, switch over to the visual builder. Click on the button that says ‘build on the front end’.
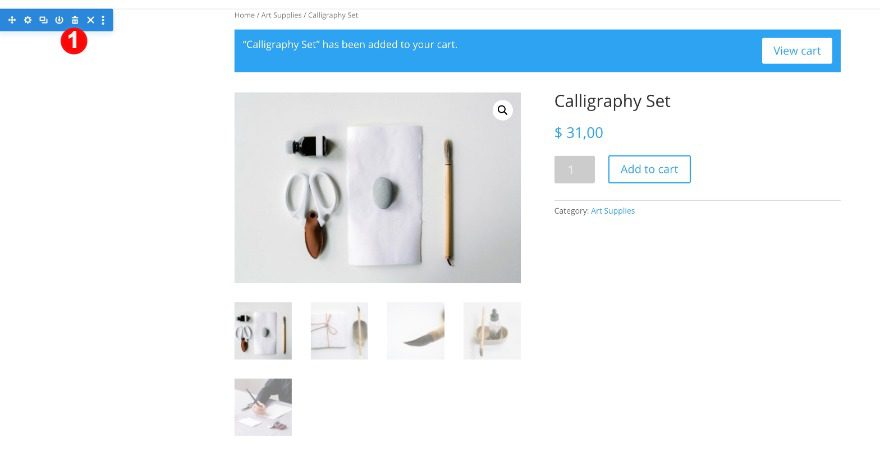
Delete Default Product Section
Since we want to design this product page from scratch, delete the entire default section. This will give you a blank canvas to work on.
2. Recreate Japanese Style Design
Add New Section
Let’s start recreating the Japanese aesthetic product page! Add a new regular section.
Background
Open the section settings and change the background color.
- Background Color: Very Light Grey #f2f2f2

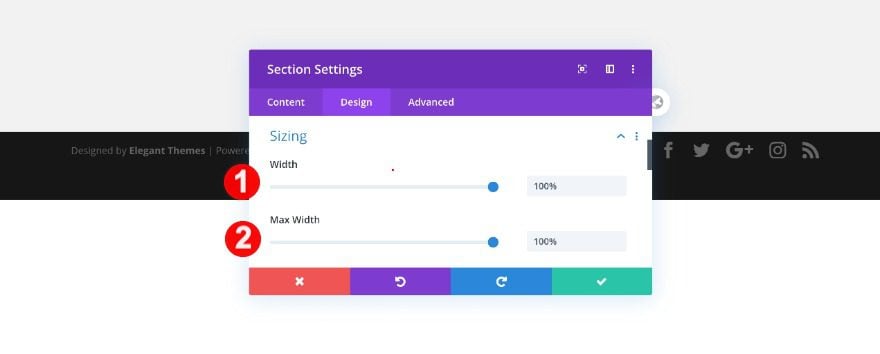
Sizing
Next, adjust the sizing.
- Width: 100%
- Max Width: 100%
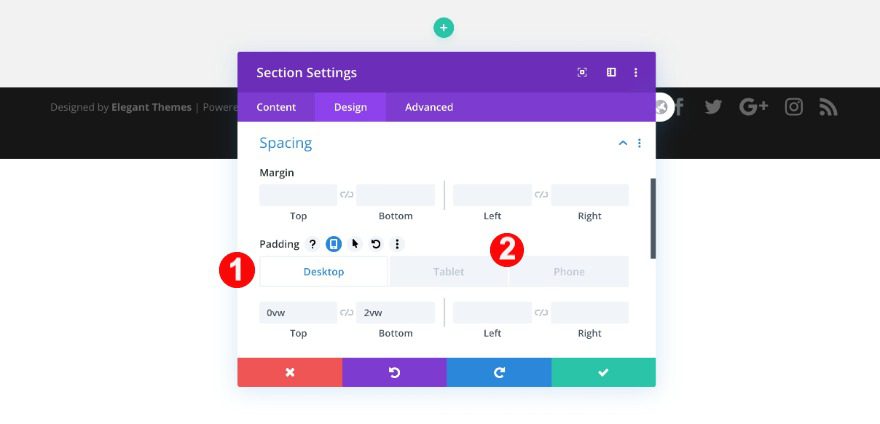
Spacing
Then, the spacing values as follows:
- Top Padding:
- Desktop: 0vw
- Tablet + Phone: 2vw
- Bottom Padding:
- Desktop + Tablet: 2vw
Add 1st Row
Column Structure
Add a new row and select the following column structure:
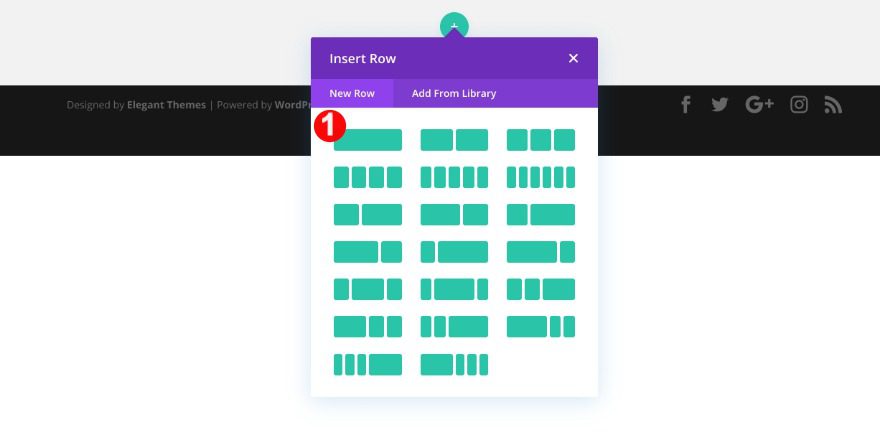
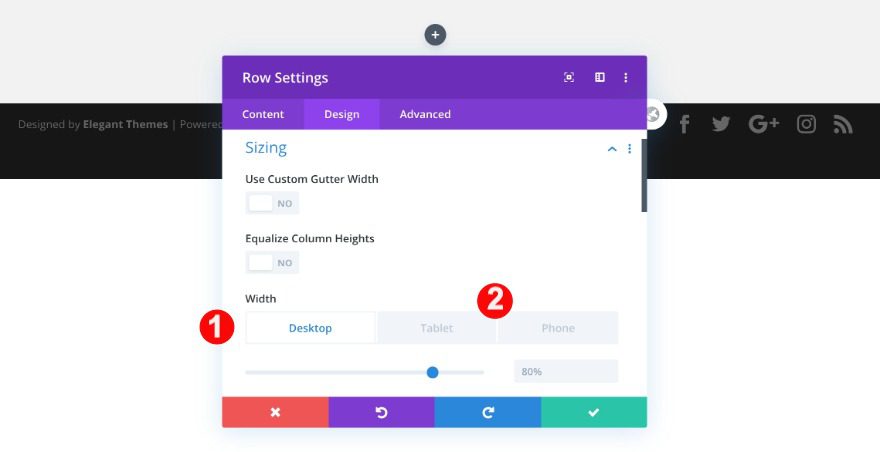
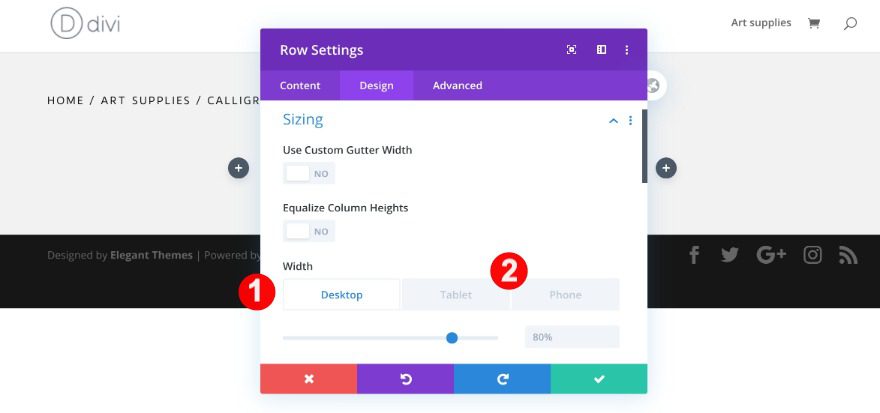
Sizing
Before adding any modules, adjust the row’s sizing settings as follows:
- Width:
- Desktop: 80%
- Tablet + Phone: 63%
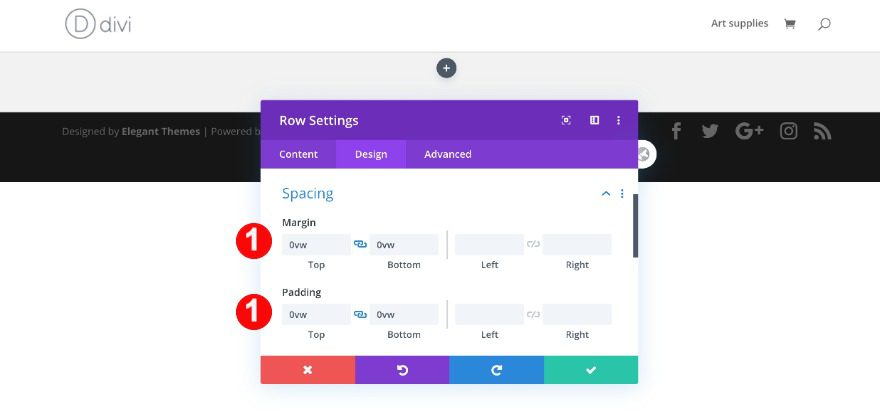
Spacing
Also, adjust the spacing values.
- Top + Bottom Margin: 0vw
- Top + Bottom Padding: 0vw
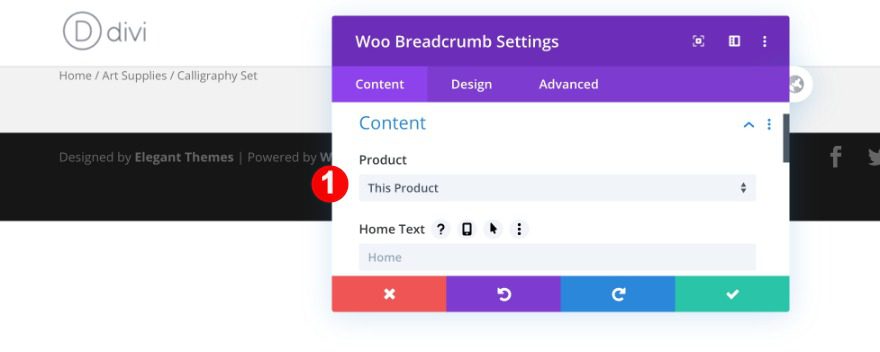
Content
Now, add the first module; the woo breadcrumb.
- Product: This Product
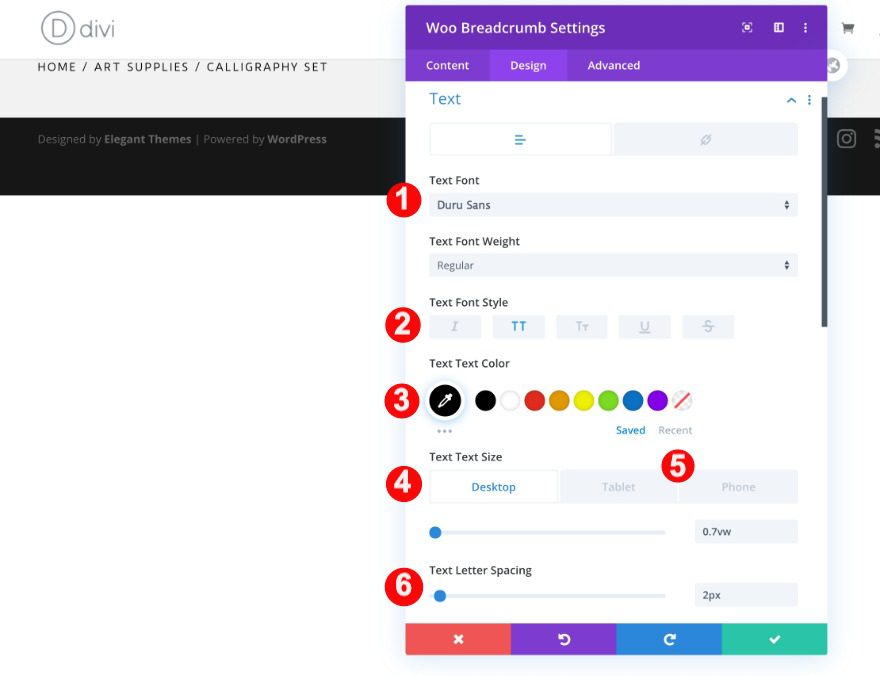
Text
In the design tab, style the text as follows:
- Font: Duru Sans
- Font Style: TT
- Color: Black #000000
- Size:
- Desktop: 0.7vw
- Tablet: 1.5vw
- Phone: 1.7vw
- Letter Spacing: 2px
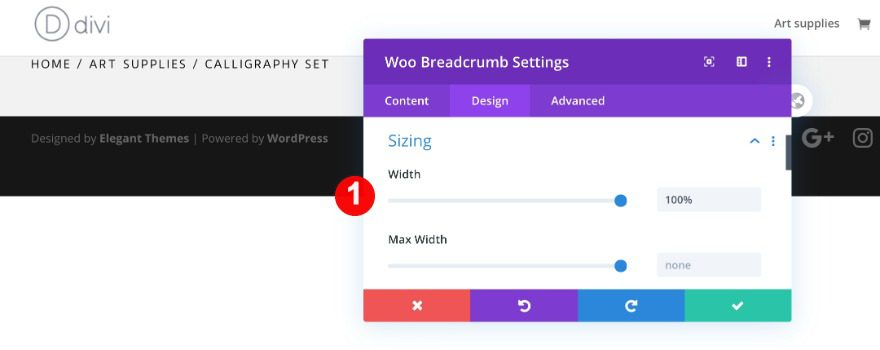
Sizing
Then, adjust the sizing.
- Width: 100%
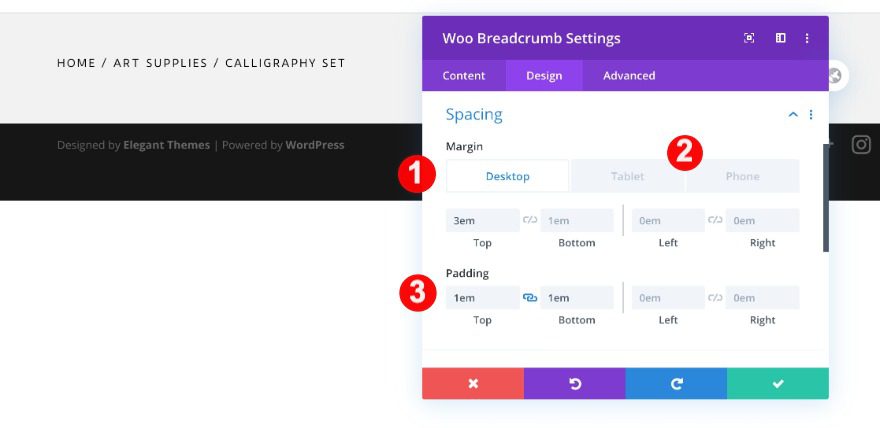
Spacing
Finally, adjust the spacing.
- Top Margin:
- Desktop: 3em
- Tablet + Phone : 0em
- Bottom Margin:
- Desktop + Tablet: 1em
- Phone: 0em
- Top + Bottom Padding: 1em
- Left Padding: 2em
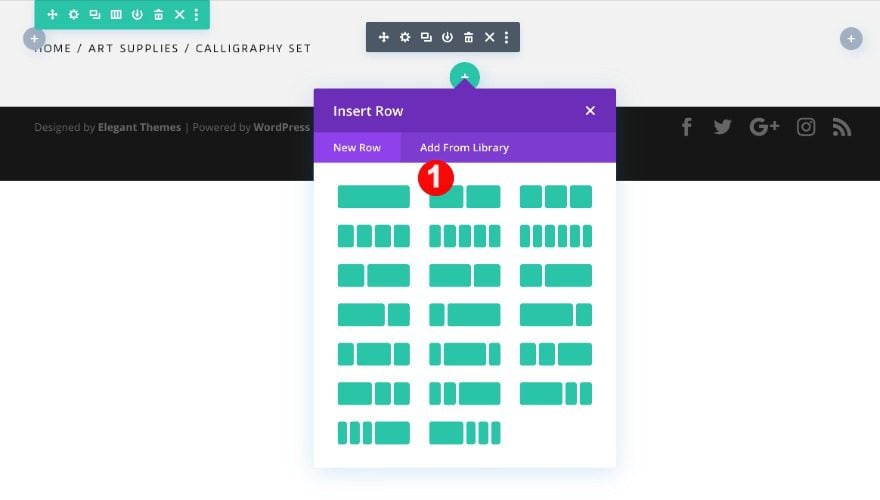
Add 2nd Row
Column Structure
Add a second row using the following column structure:
Sizing
Open the row settings and change the width across different screen sizes.
- Width:
- Desktop: 80%
- Tablet + Phone: 65%
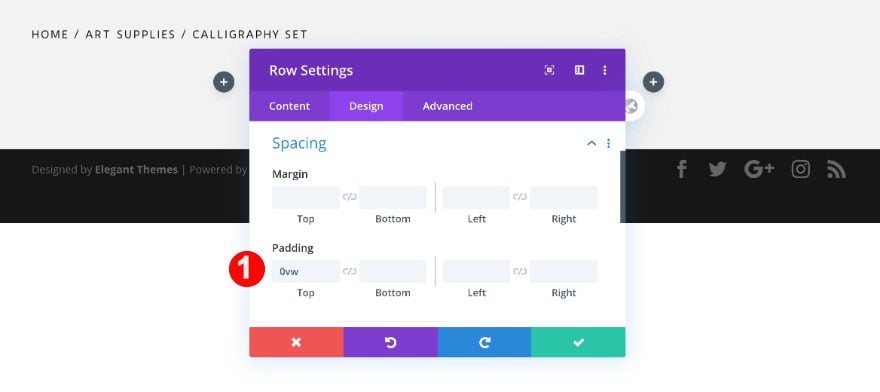
Spacing
Adjust the spacing as well.
- Top Padding: 0vw
Column 1 + 2 Settings
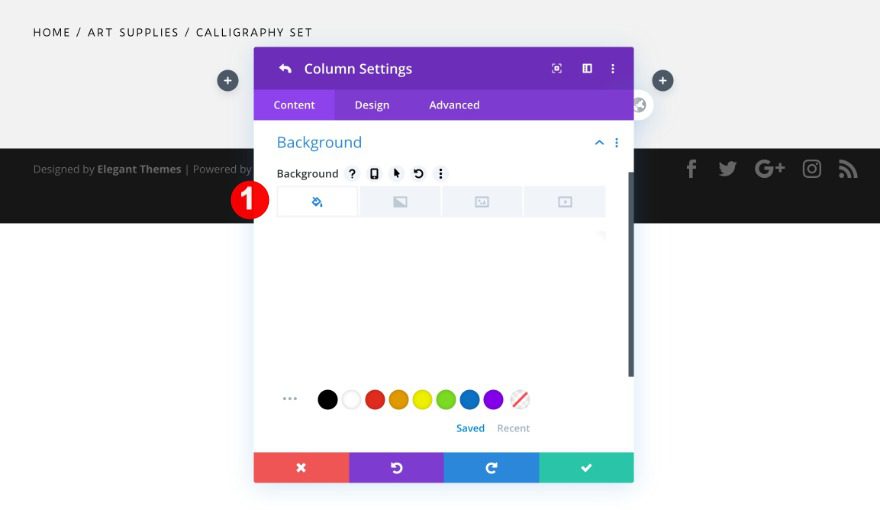
Background
Continue with the column settings. Both columns 1 and 2 are styled the same. Start with the background.
- Color: White #ffffff
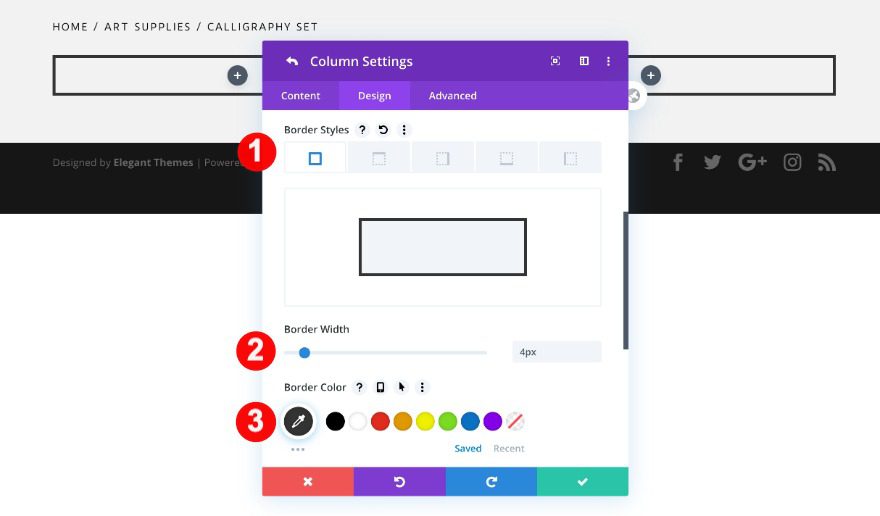
Border
And add a border style to both columns as well.
- Border Styles: All four sides
- Border Width: 4px
- Color: #333333
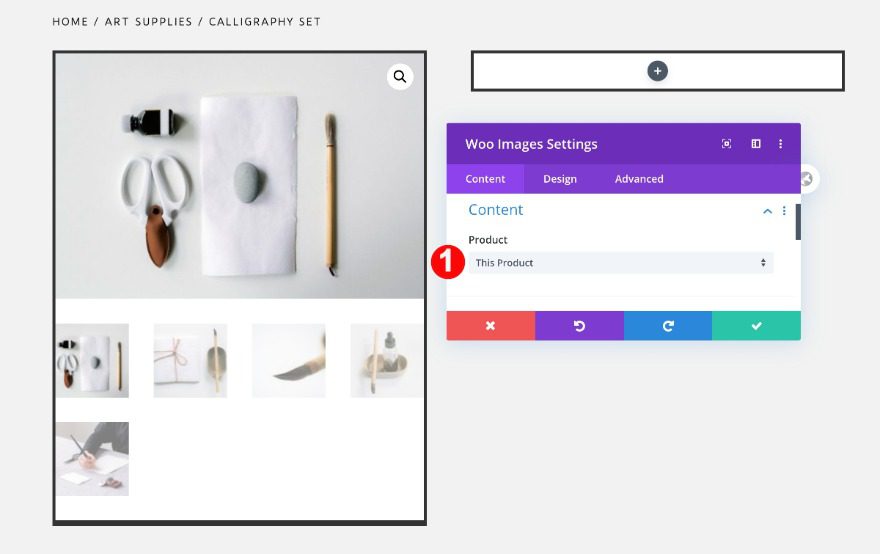
Add Woo Images Module to Column 1
Content
Time to start adding modules! We’ll need a woo image module in column 1.
- Product: This Product
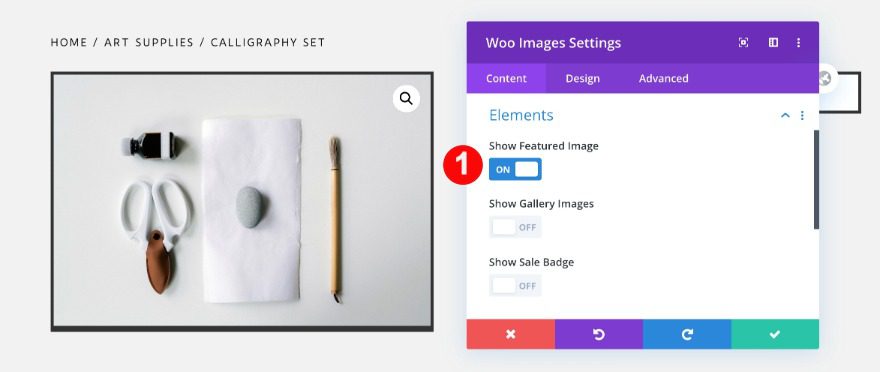
Elements
Adjust the toggles in the elements tab as follows:
- Featured Image: On
- Show Gallery Images: OFF
- Show Sales Badge: OFF
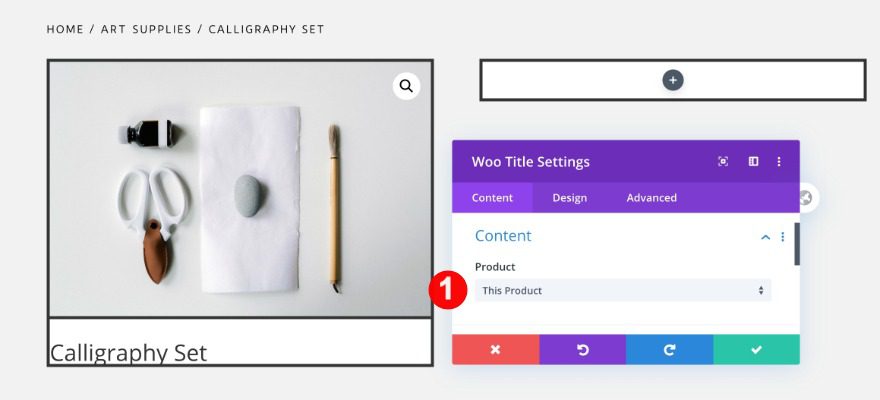
Add Woo Title Module to Column 1
Content
Below the image, add a woo title module. Select the content.
- Product: This Product
Title Text
In the design tab, style the text.
- Title Heading Level: H1
- H1 Font: Droid Sans
- H1 Font Style: TT
- H1 Color: Very Dark Grey #333333
- Letter Spacing: 5px
- Line Height: 1em

Spacing
Then, adjust the spacing values.
- Top Margin:
- Tablet + Phone: 0vw
- Top Padding: 0vw
- Bottom Padding:
- Desktop: 1.5vw
- Tablet: 3.5vw
- Phone: 6vw
- Left Padding:
- Desktop: 2vw
- Tablet + Phone: 5vw
- Right Padding:
- Desktop + Tablet: 0vw

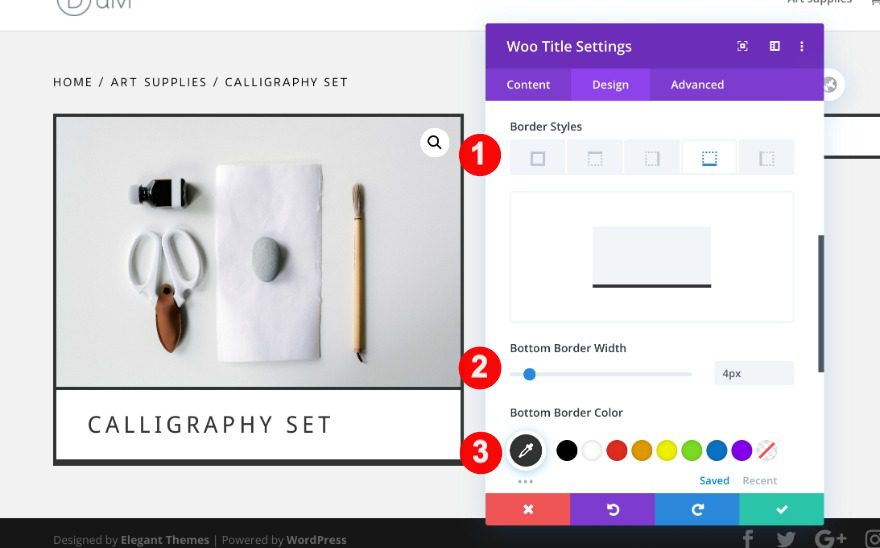
Border
Complete the module’s settings by adding a border.
- Border Styles: Bottom Border
- Width: 4px
- Color: Very Dark Grey #333333
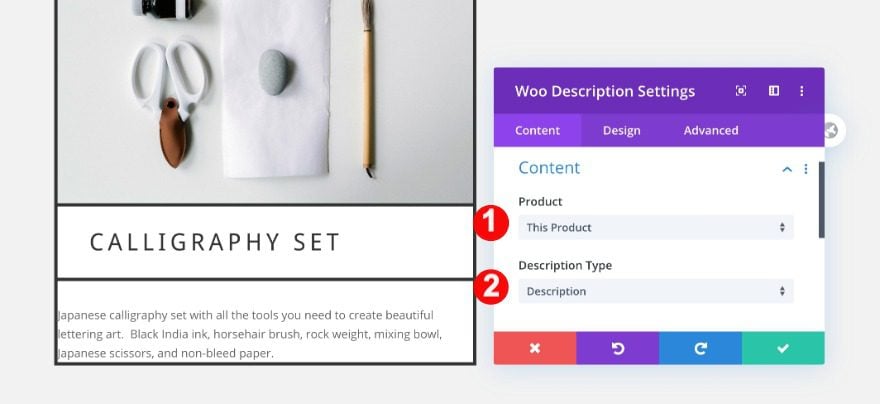
Add Woo Description Module to Column 1
Content
Moving on, add a woo description module. Select the content and description type.
- Product: This Product
- Description Type: Description
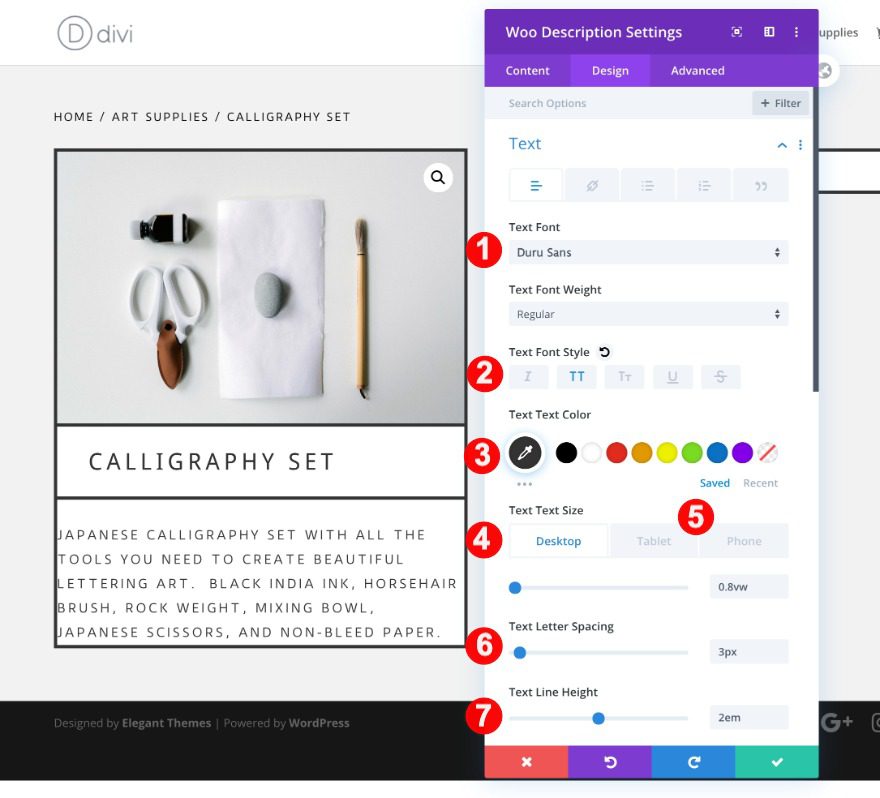
Text
Then, style the text as follows:
- Font: Duru Sans
- Font Style: TT
- Color: Very Dark Grey #333333
- Size:
- Desktop: 0.8vw
- Tablet: 1.4vw
- Phone: 1.8vw
- Letter Spacing: 3px
- Line Height: 2em
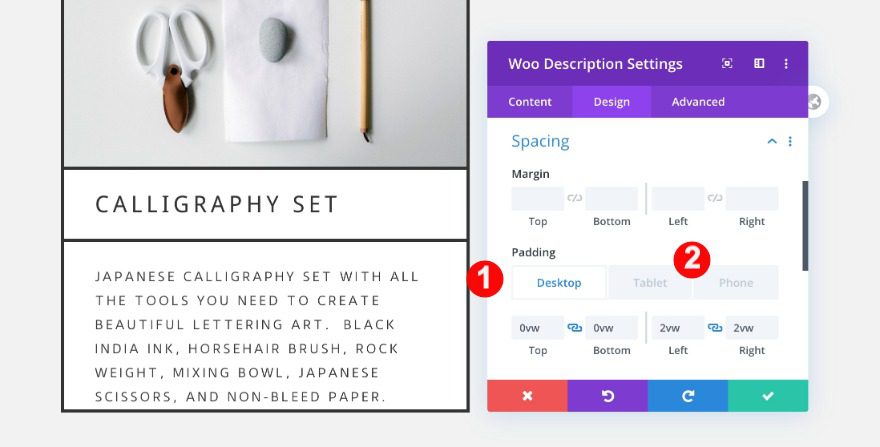
Spacing
Complete the module settings by adding some custom padding across different screen sizes.
- Top + Bottom Padding: 0vw
- Left + Right Padding:
- Desktop: 2vw
- Tablet + Phone: 5vw
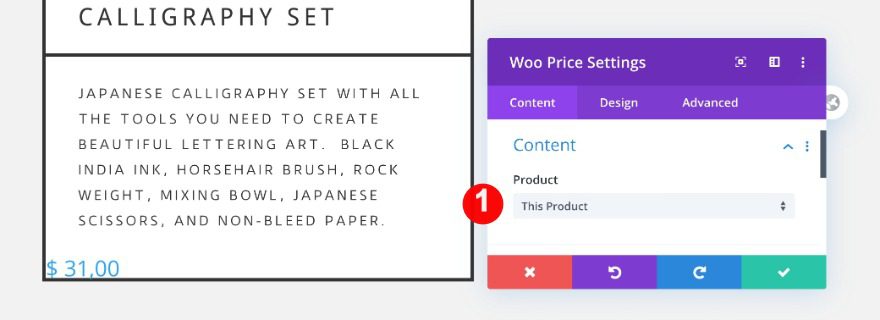
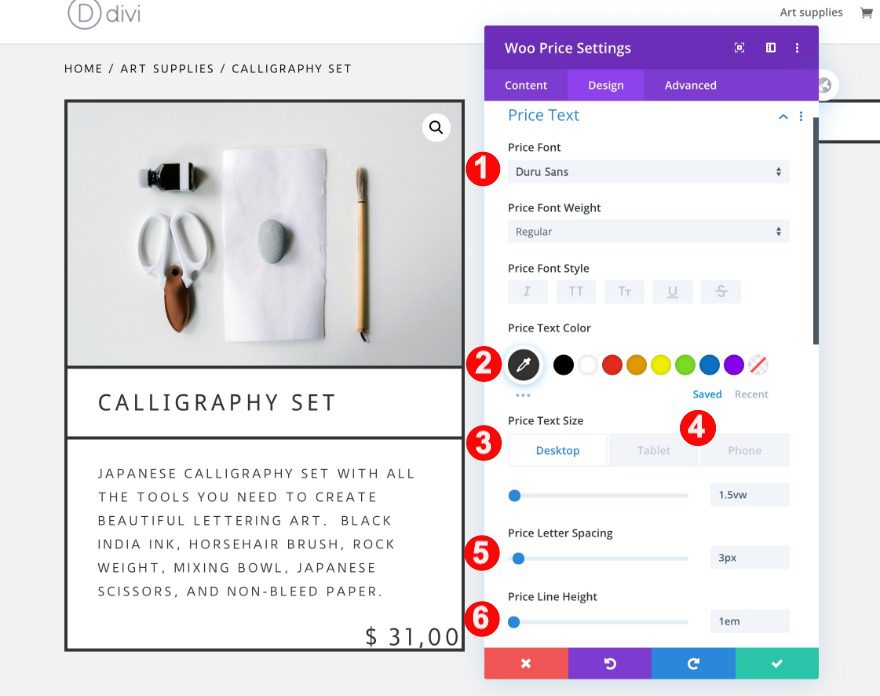
Add Woo Price Module to Column 1
Content
Next, add a woo price module to the column and select the product.
- Product: This Product
Price Text
Style the price text as follows:
- Font: Duru Sans
- Color: Very Dark Grey #333333
- Size:
- Desktop: 1.5vw
- Tablet: 3.2vw
- Phone: 4vw
- Letter Spacing: 3px
- Line Height: 1em
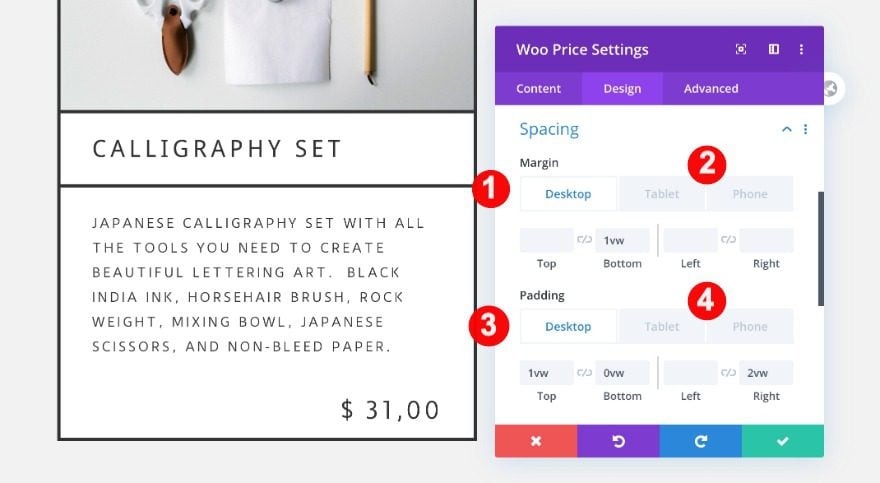
Spacing
Adjust the spacing settings as well.
- Bottom Margin:
- Desktop: 1vw
- Tablet: 3vw
- Phone: 4vw
- Top Padding:
- Desktop: 1vw
- Tablet: 3.3vw
- Phone: 5vw
- Bottom Padding: 0vw
- Left Padding:
- Tablet + Phone: 5vw
- Right Padding:
- Desktop: 2vw
- Tablet + Phone: 3vw
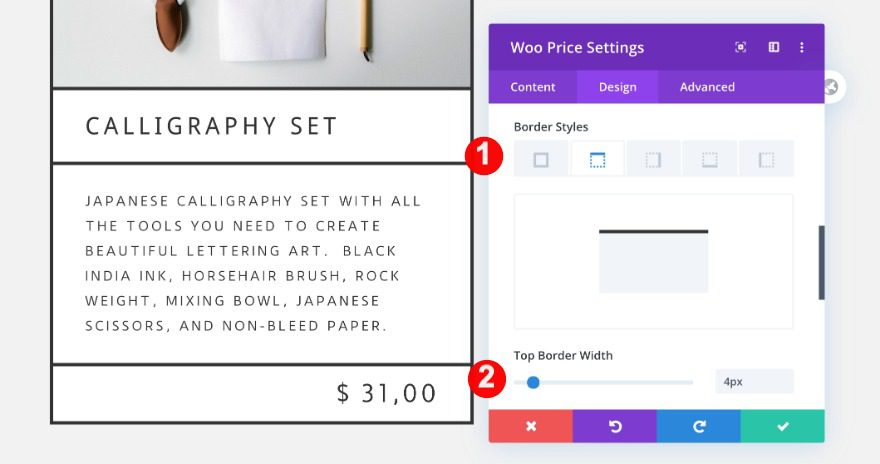
Border
Lastly, add a border.
- Border Styles: Top Border
- Border Width: 4px
- Color: Very Dark Grey #333333
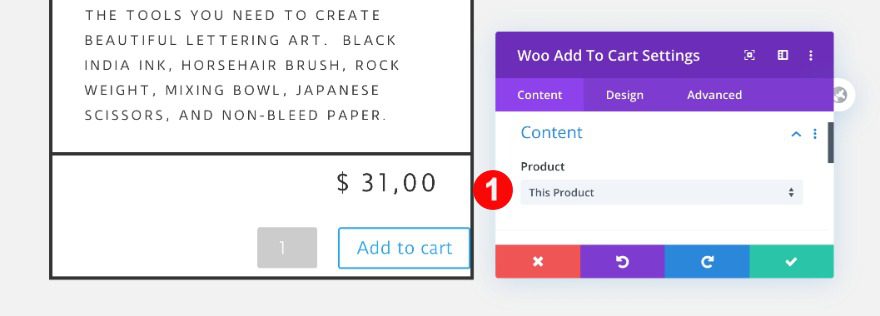
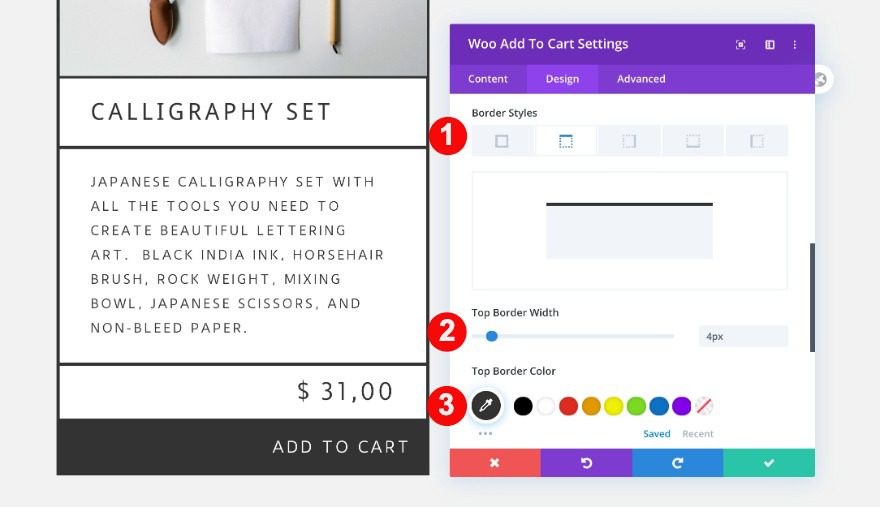
Add Woo Add to Cart Module to Column 1
Content
Below the price, add an add to cart module and select the product.
- Product: This Product
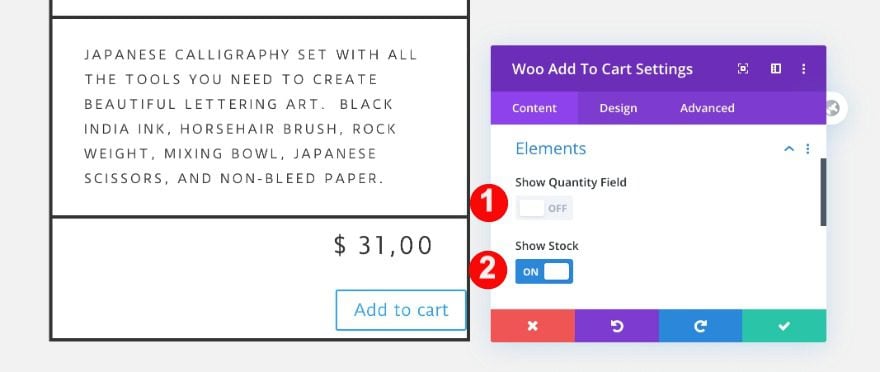
Elements
Toggle the elements as follows:
- Show Quantity Field: OFF
- Show Stock: ON
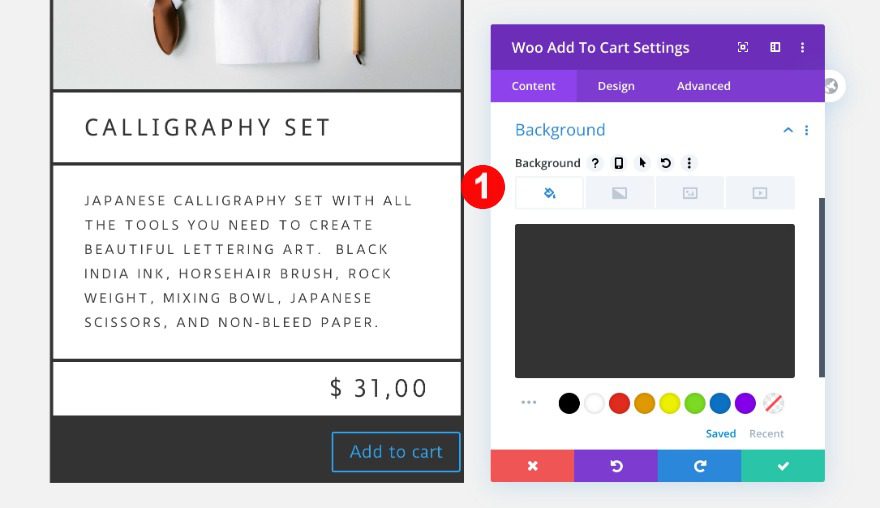
Background
Add a background color as well.
- Background Color: Very Dark Grey #333333
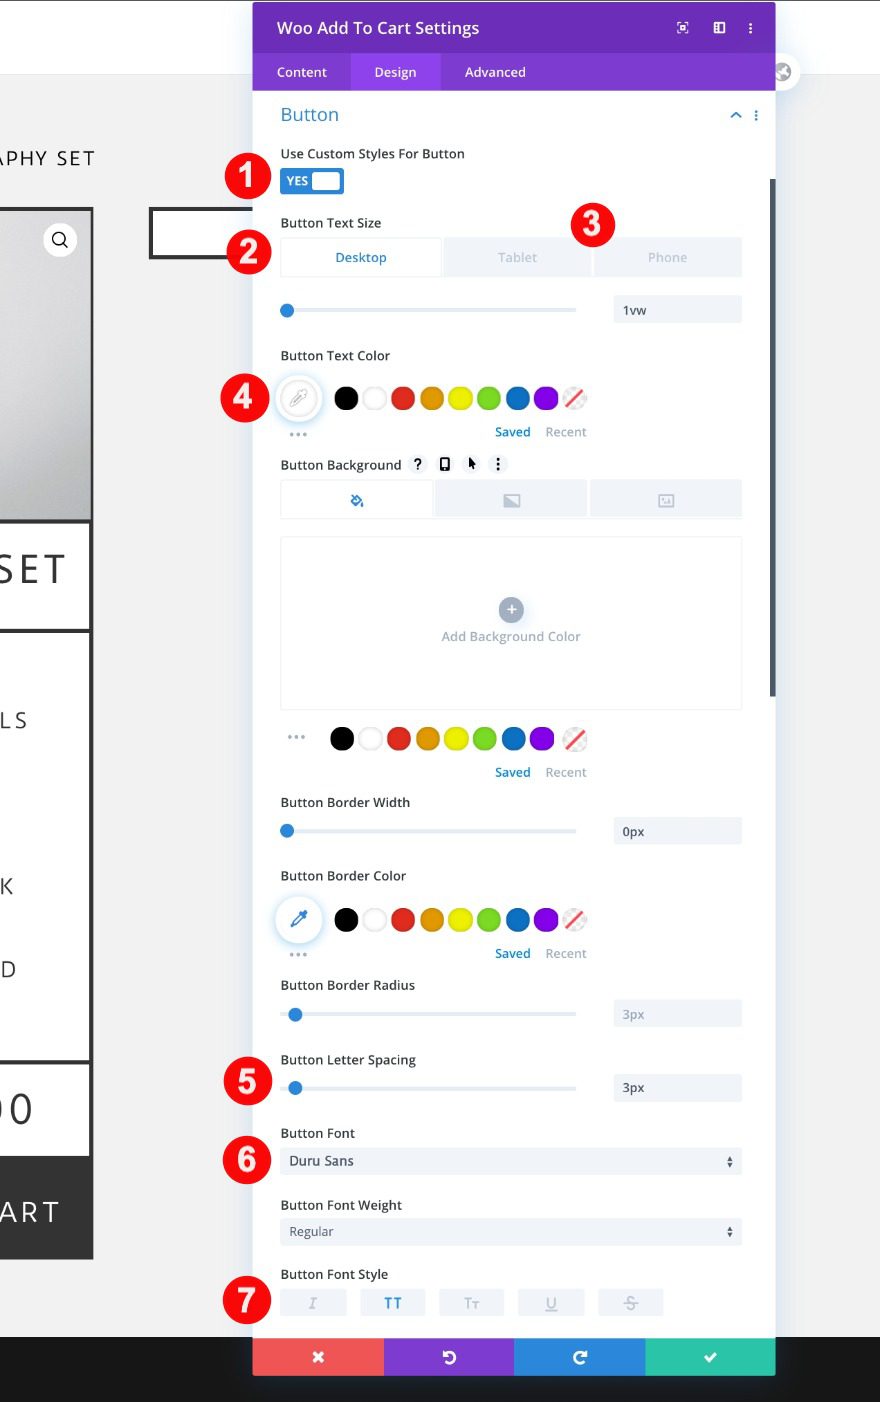
Button
In the design tab, style the button as follows:
- Text Size:
- Desktop: 1vw
- Tablet: 2.6vw
- Phone: 3.1vw
- Color: White #ffffff
- Border Width: 0px
- Letter Spacing: 3px
- Font: Duru Sans
- Font: TT
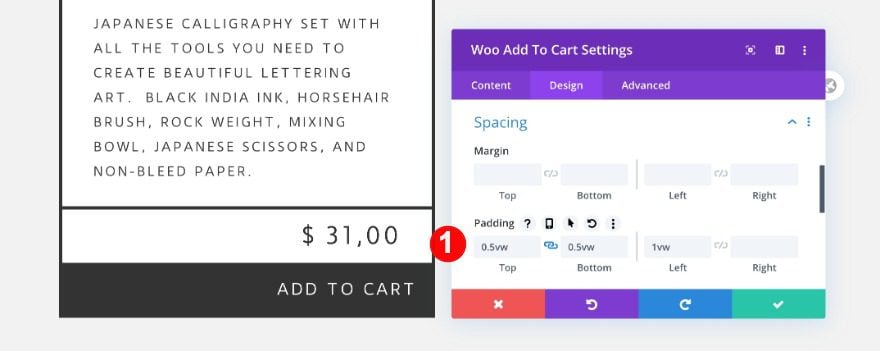
Spacing
Next, adjust the spacing.
- Top + Bottom Padding: 0.5vw
- Left Padding: 1vw
Border
Finally, add a border.
- Border Styles: Top Border
- Width: 4px
- Color: Very Dark Grey #333333
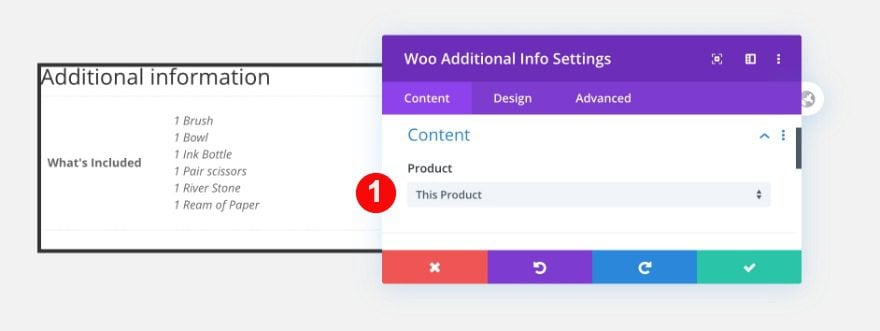
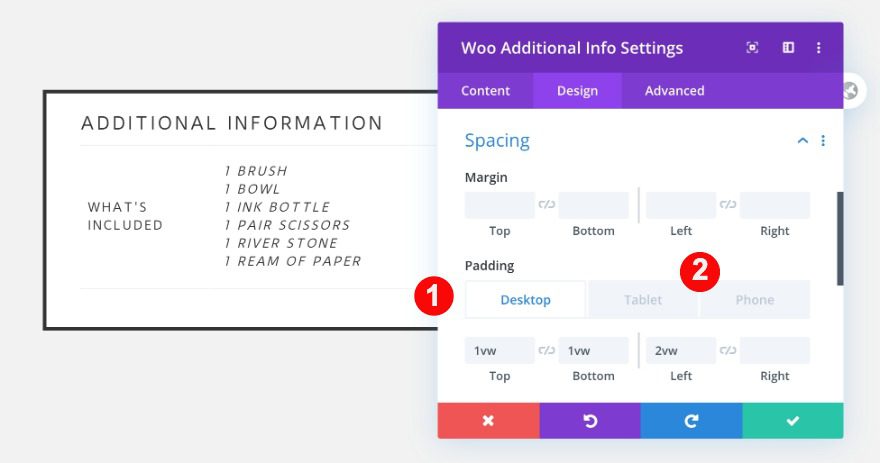
Add Woo Additional Info Module to Column 2
Content
Move on to the second column and add a woo additional info module. Select the product.
- Product: This Product
Elements
Toggle the elements settings as follows:
- Show Title: ON

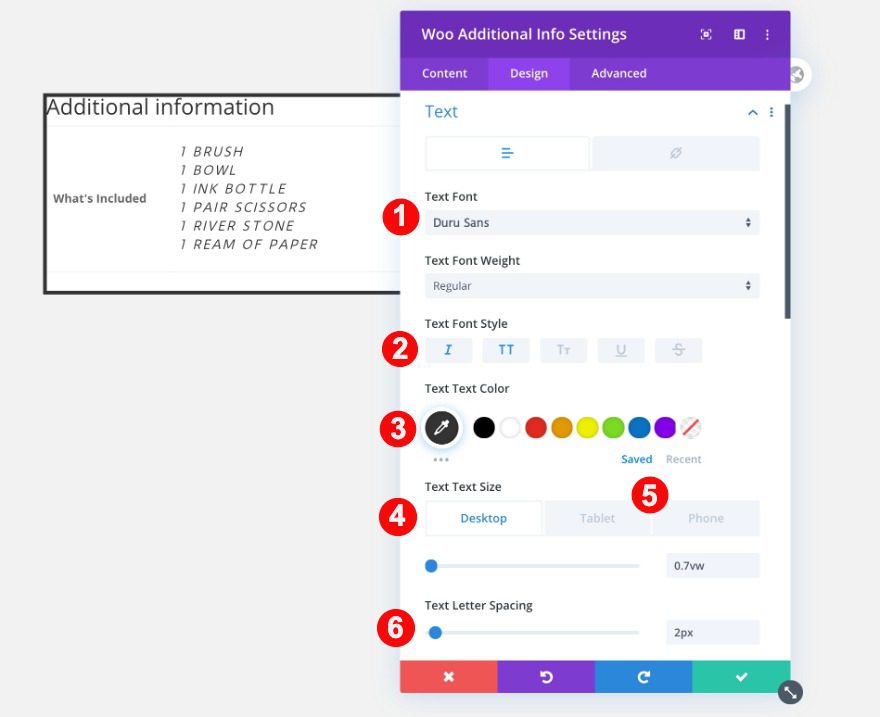
Text
In the design tab, style the text.
- Font: Duru Sans
- Font Style: I + TT
- Color: Very Dark Grey #333333
- Size:
- Desktop: 0.7vw
- Tablet: 1.5vw
- Phone: 2.4vw
- Letter Spacing: 2px
- Line Height: 1.5em
Title Text
Style the title text next.
- Font: Duru Sans
- Font Style: TT
- Color: Very Dark Grey #333333
- Size:
- Desktop: 1vw
- Tablet: 2vw
- Phone: 2.2vw
- Letter Spacing: 3px
- Line Height: 1.5em

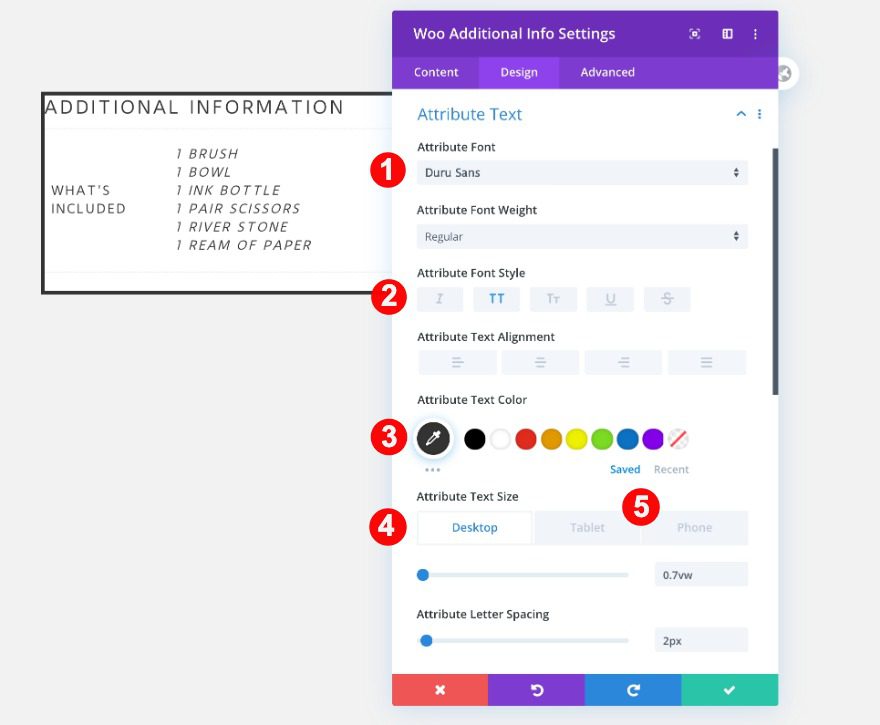
Attribute Text
Don’t forget to style the attribute text too.
- Font: Duru Sans
- Font Style: TT
- Color: Very Dark Grey #333333
- Size:
- Desktop: 0.7vw
- Tablet: 2vw
- Phone: 2.4vw
- Letter Spacing: 2px
Spacing
Then, adjust the spacing.
- Top Padding:
- Desktop: 1vw
- Tablet + Phone: 3vw
- Bottom Padding:
- Desktop + Tablet: 1vw
- Left Padding:
- Desktop: 2vw
- Tablet + Phone: 5vw
- Right Padding:
- Phone: 3vw
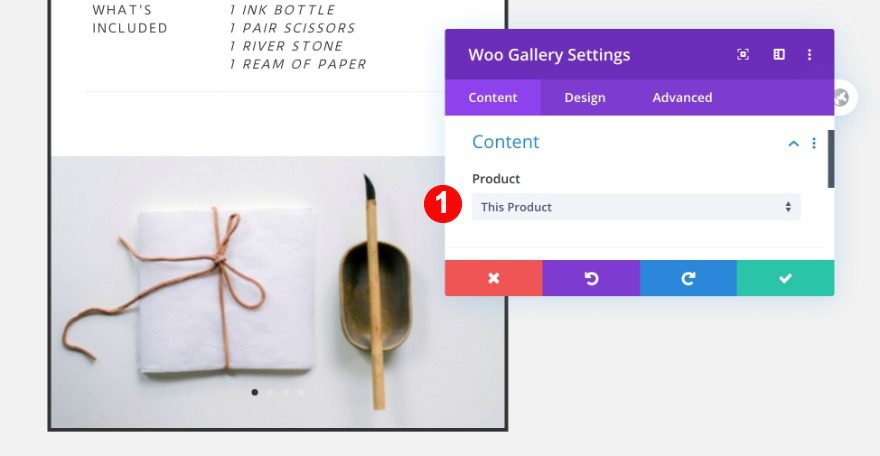
Add Woo Gallery Module to Column 2
Content
The last module we need to complete the design is a woo gallery module. Select the product.
- Product: This Product
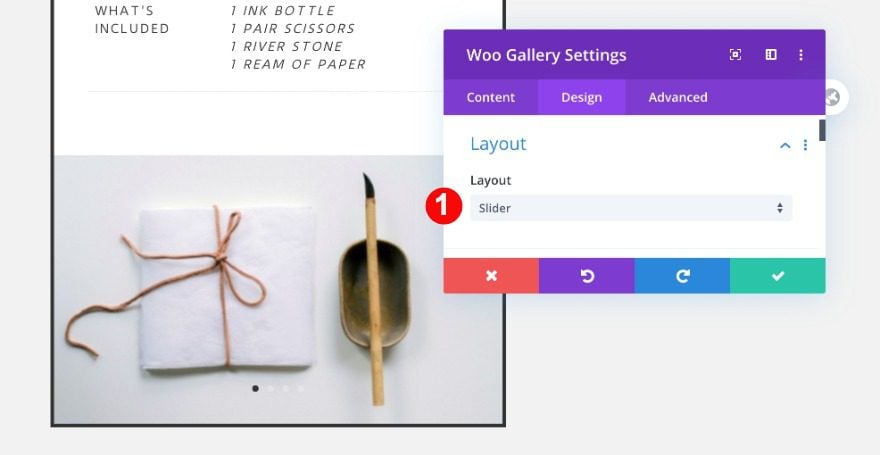
Layout
Move on to the design tab and change the layout.
- Layout: Slider
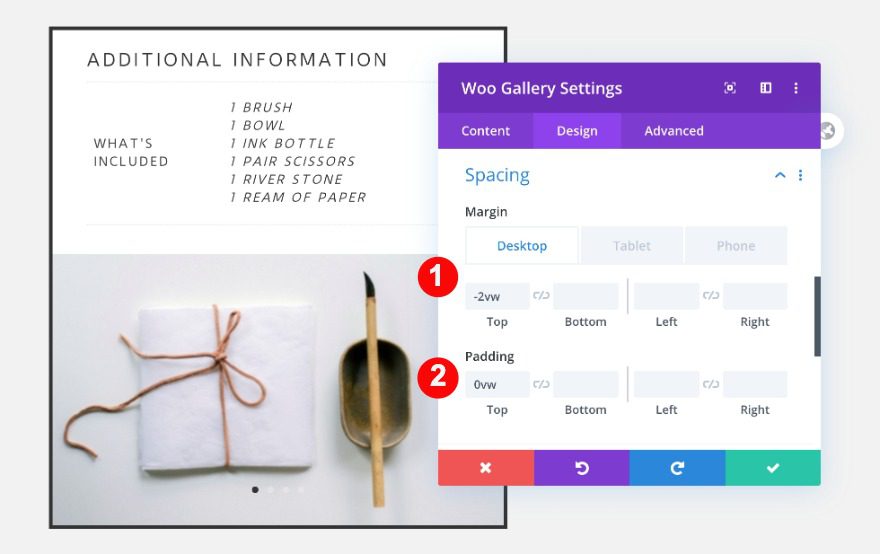
Spacing
Then, adjust the spacing settings as follows:
- Top Margin:
- Desktop: -2vw
- Tablet: -4vw
- Phone: -6vw
- Top Padding: 0vw
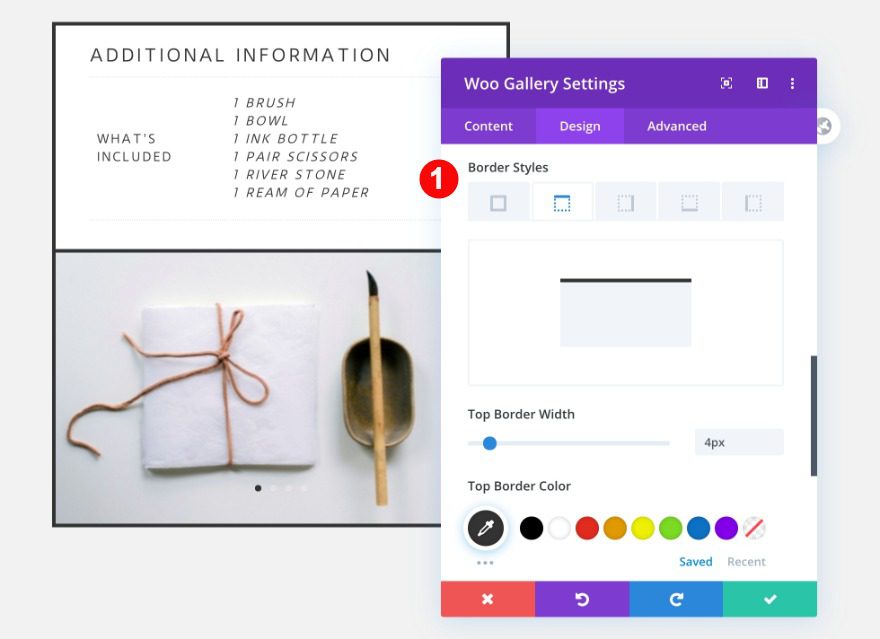
Border
Finally, add a border.
- Border Styles: Top Border
- Width: 4px
- Color: Very Dark Grey #333333
3. Convert to Template for Divi Theme Builder
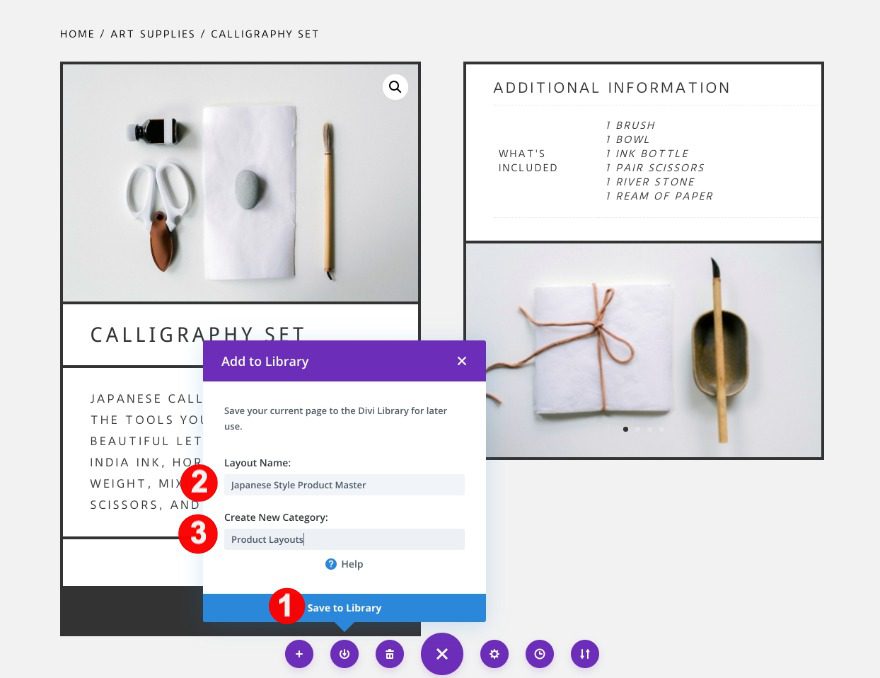
Save to Divi Library
Now that we’ve completed the design, it’s time to save our product page layout to the Divi Library. If you don’t have a category for your product layouts, create one.
- Save As: Layout
- Name: Japanese Style Product Master
- Category: Product Layouts.
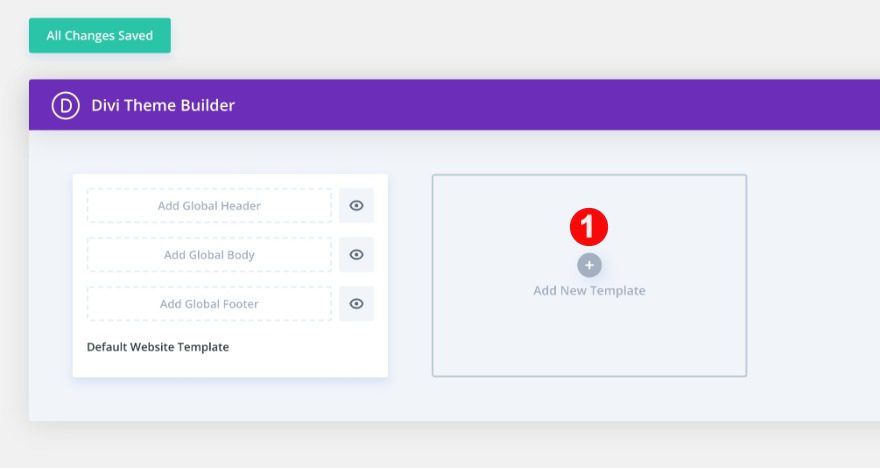
Open Divi Theme Builder and Create New Template
In order to use this design on all your product pages, you need to create a template for it in the theme builder. Inside the theme builder page, add a new template. Select ‘all products’ from the dropdown menu. If you want to use this design for only some of your products, you can adjust the settings.

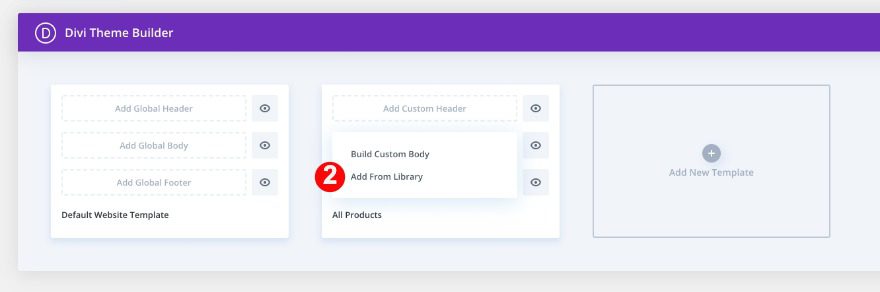
Add Custom Body From Divi Library
Click on ‘add custom body’ and select ‘add from library’ in the drop menu.

Find Layout in Saved Layouts and Apply
In the layouts window, click on saved layouts and look for the one we just created.


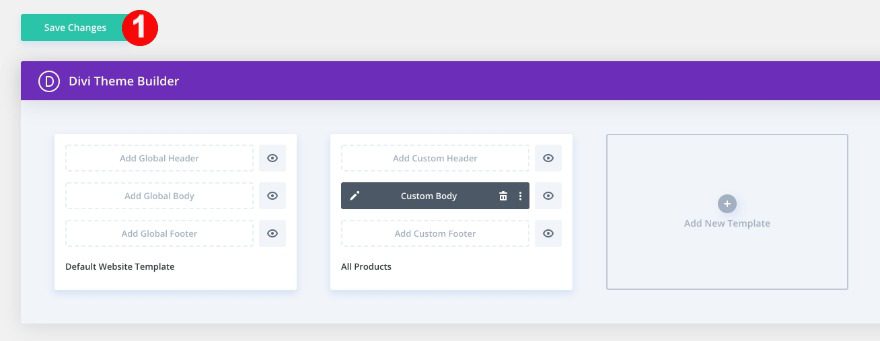
Save Changes to Theme Builder
Don’t forget to save the changes to the theme builder.
Preview
The template will now apply to all the products on your website. Let’s take a final look at the outcome across different screen sizes.
Desktop
Mobile
It’s a Wrap!
In this post, we showed you how to create a Japanese aesthetic inspired product page. The style is clean-cut and minimal, perfect for showcasing delicate or handmade products. We also showed you how to turn the layout into a template with the Divi theme builder. Try out this design with your new Divi + WooCommerce project and tell us what you think.


Hi there. What’s the font?
Hi David. It’s Duru Sans. It has quite a bit of letter spacing in my design, FYI.
Will this work if your products are variable products?
You can use this design with all your products as long as you turn it into a template in the Theme Builder. The instructions are in the post.
Thanks Orana
OK, now this is a pretty creative use of the theme builder and it looks great.
Thanks PK! 🙂