
We all know that a good website makes it easy for visitors to find what they are looking for quickly and efficiently. And, it always helps if you can make your content more engaging. In this tutorial, I’m going to show you how to design a 3D sign post that will engage users and make it easy for them to find what they are looking for in a unique way. To do this, we’ll be using Divi’s transform options and the perspective css property on multiple blurb modules to create the 3D effect of signs rotated on a post.
Let’s get started!
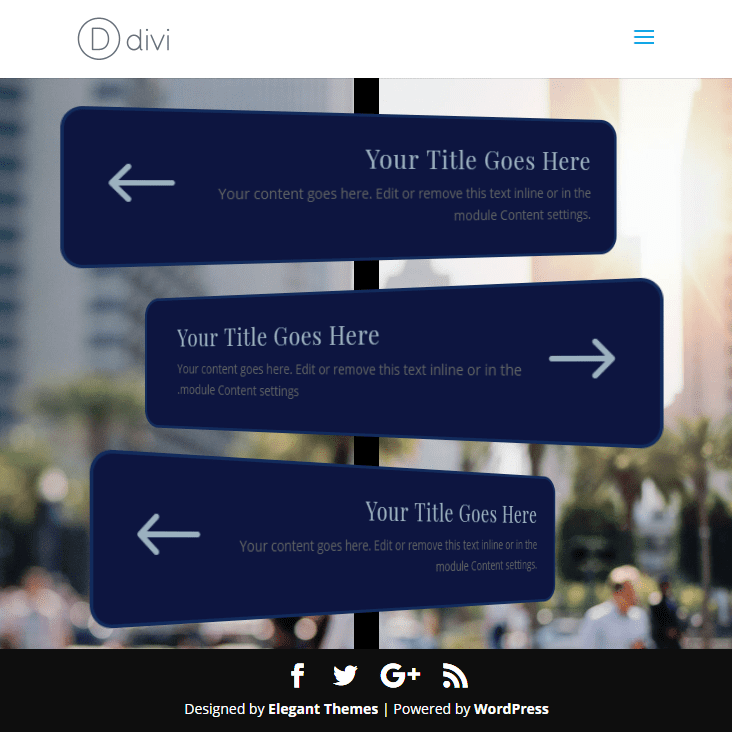
Sneak Peek

Download the 3D Sign Post Layout for FREE
To lay your hands on the 3D Sign Post design from this tutorial, you will first need to download it using the button below. To gain access to the download you will need to subscribe to our newsletter by using the form below. As a new subscriber, you will receive even more Divi goodness and a free Divi Layout pack every Monday! If you’re already on the list, simply enter your email address below and click download. You will not be “resubscribed” or receive extra emails.

To import the layout to your page, simply extract the zip file and drag the json file into the Divi Builder.
Let’s get to the tutorial shall we?
Subscribe To Our Youtube Channel
What You Need to Get Started
To get started, You will need the following:
- Make sure you have the Divi Theme installed and active on your WordPress site.
- If you want to create your own post image, you will need a photo editor like Photoshop, Gimp, or Sketch. Or you can use the image provided in the free layout download for this design above.
- Other than that, we will be building everything from scratch on the front end of the Divi Builder.
Creating the Image for the Sign Post
The easiest way to create a sign post for this design is to create a small repeatable image block that we can add as a background image that repeats vertically down the section or row of the page. If you want to skip this step, you can import the json layout included in the free download above to get started. But if you want to create your own with a custom color of your choice, here is how to do it.
For this example, I’m going to use Photoshop, but the process is very similar for other popular photo editors as well.
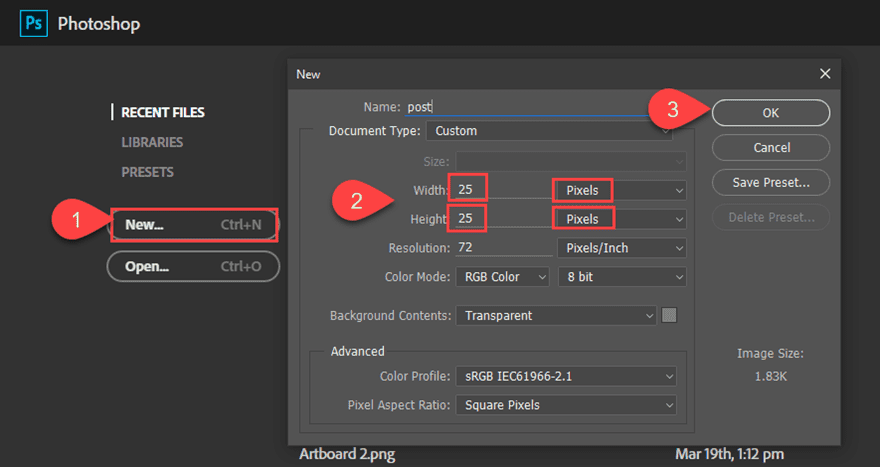
In Photoshop, click to create a new document with a custom height and width of 25px.
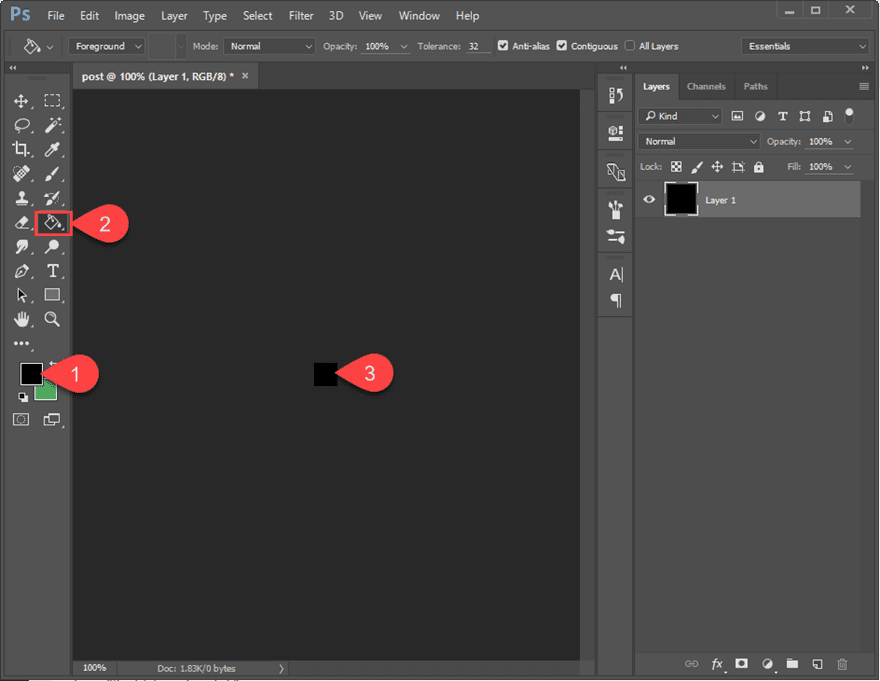
Set the foreground color to black (#000000) or whatever color you want.
Then select the paint bucket tool and click inside the empty square layer to paint the square black.
Then save your image as a jpeg to your computer. This is the image we will use in the design to create the post for our 3D sign post design.
Implementing the 3D Sign Post Design in Divi
Once you are ready, make sure to create a new page, give you page a title, and deploy the Divi Builder on the front end. Select the option “Build From Scratch”.
Your blank canvas awaits!
Now create a new regular section with a one-column row.
Customizing the Row
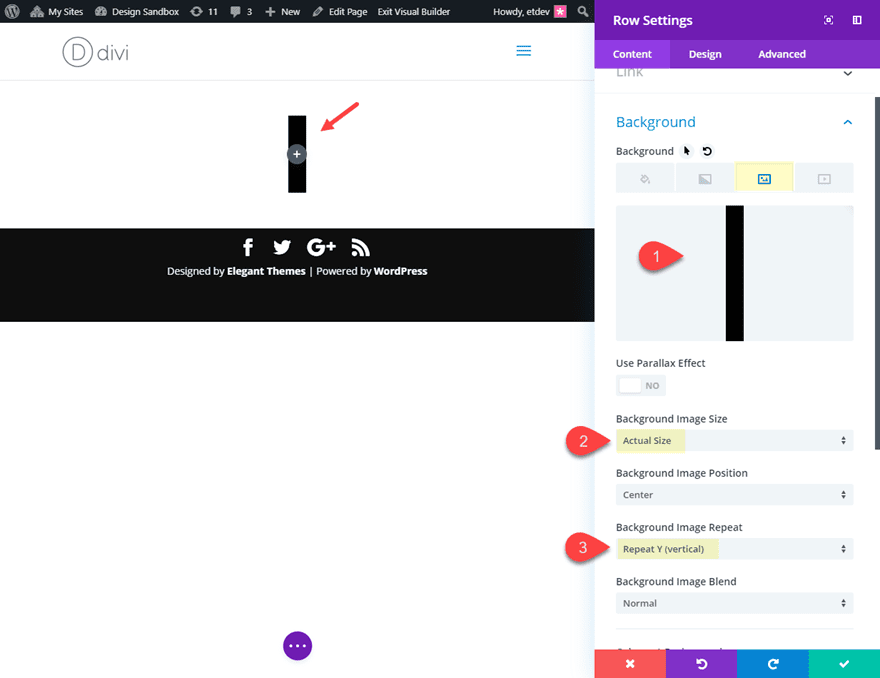
Before we add a module, open the row settings and update the following:
Background Image: [insert custom square image for post]
Background Image Size: Actual Size
Background Image Repeat: Repeat Y (vertically)
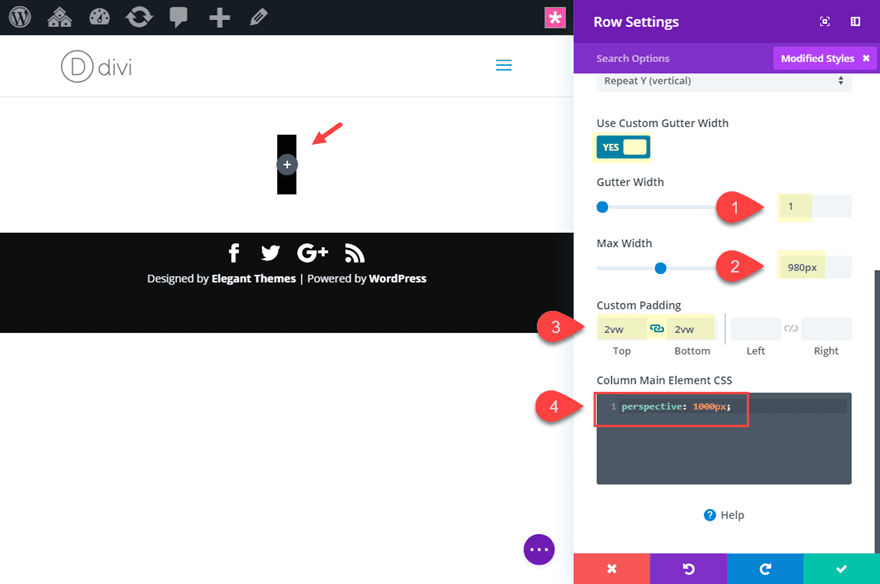
Then update the following:
Gutter Width: 1
Max Width: 980px
Custom Padding: 2vw top, 2vw bottom
Then we need to add the following custom CSS to the Column Main Element as follows:
perspective: 1000px;
This perspective css property is necessary to get the 3D effect of the sign (or blurb) whenever we rotate it with the transform options.
For more info on this, check out how perspective works with Divi’s transform options.
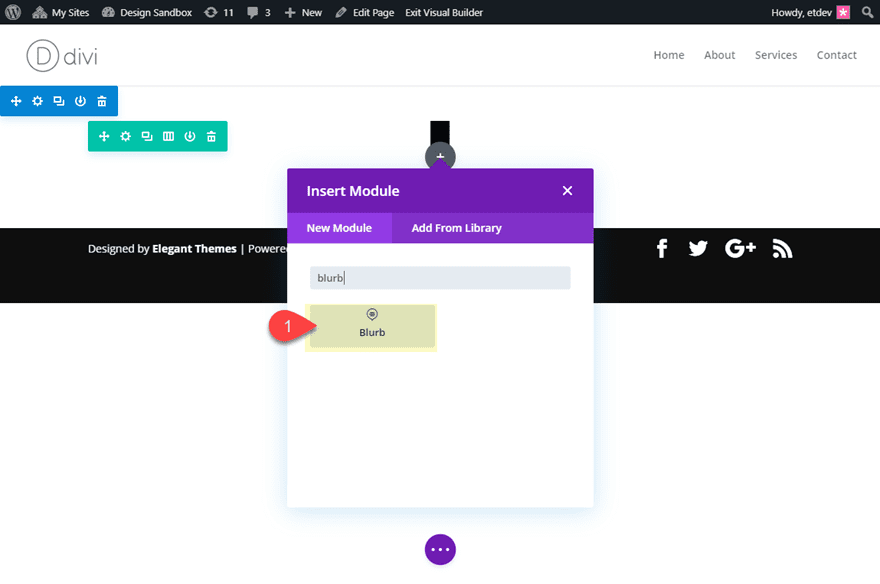
Creating a Sign with a Blurb Module
To create our first sign on our 3D sign post, we will use a blurb module. Go ahead and add a blurb module to the row.
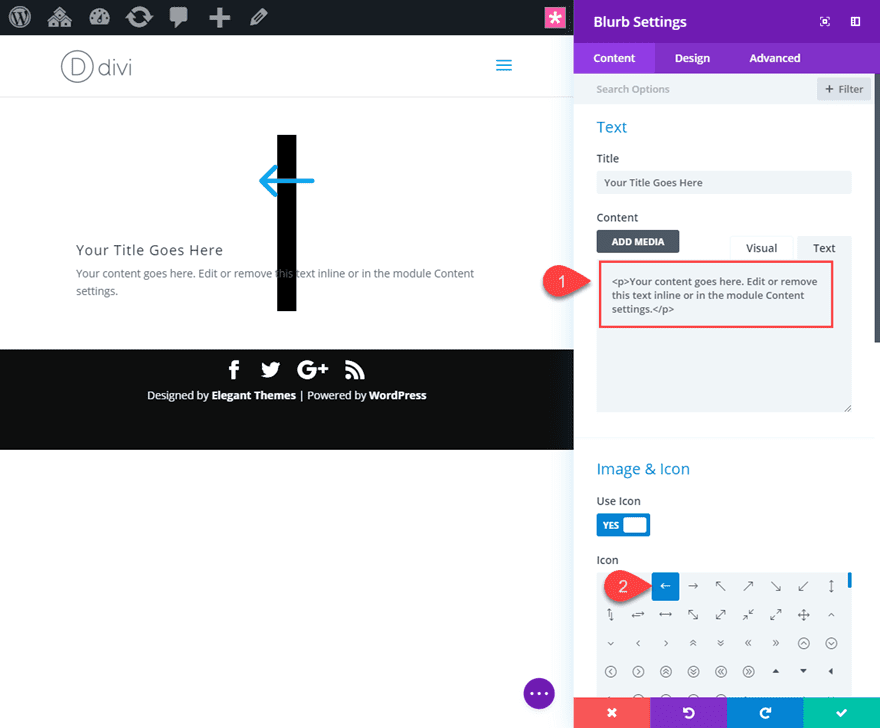
Then open the blurb settings and update the content of the blurb as follows:
Decrease the mock content to include only a couple of lines of text.
Use Icon: YES
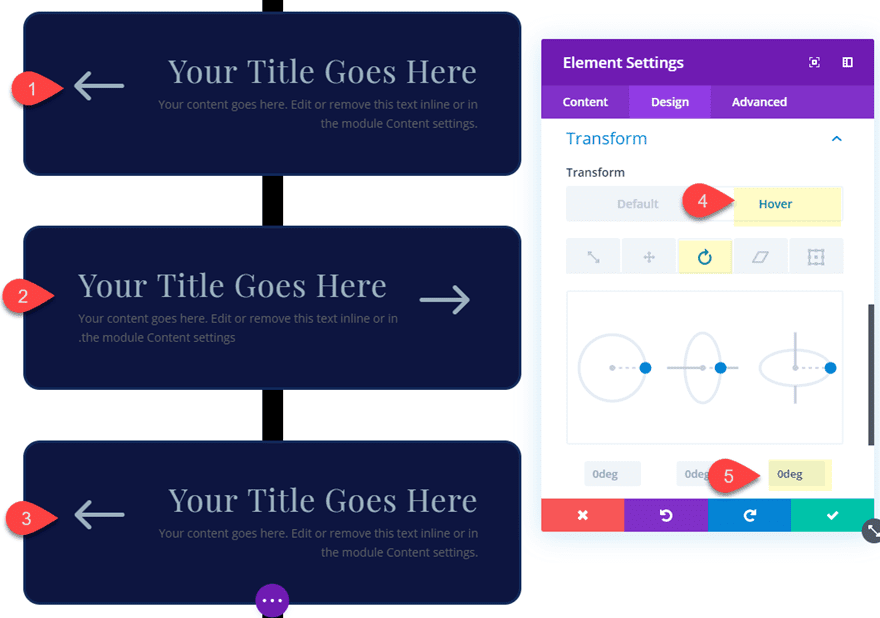
Icon: left arrow (see screenshot)
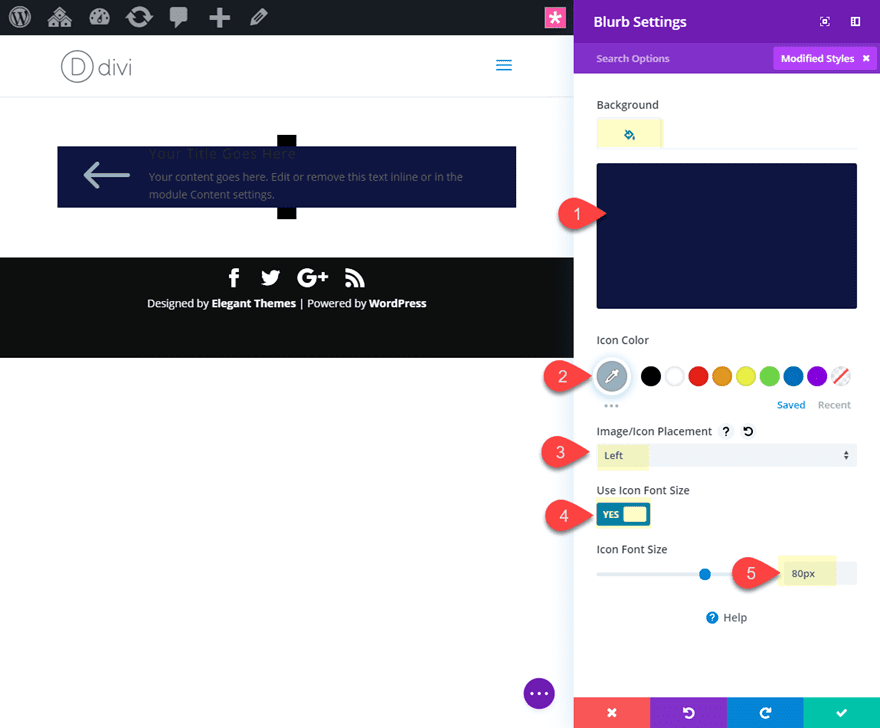
Background Color: #1a233f
Icon Color: #9eb3c2
Image/Icon Placement: Left
Use Icon Font Size: YES
Icon Font Size: 80px
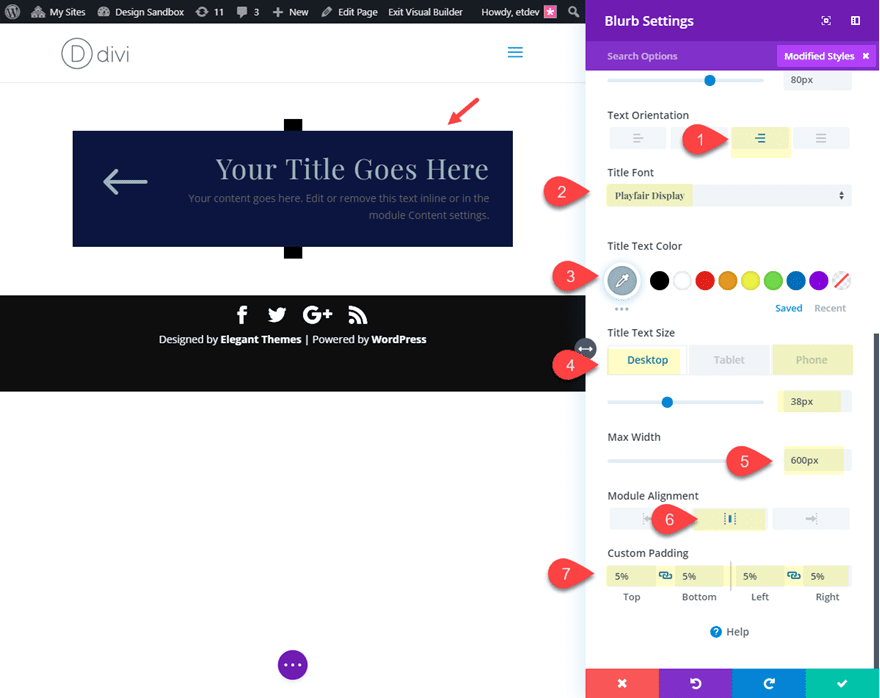
Text Orientation: center
Title Font: Playfair Display
Title Text Color: #9eb3c2
Title Text Size: 38px (desktop), 26px (phone)
Max Width: 600px
Module Alignment: Center
Custom Padding: 5% top, 5% bottom, 5% left, 5% right
Rounded Corners: 20px
Border Width: 3px
Border Color: #21335e

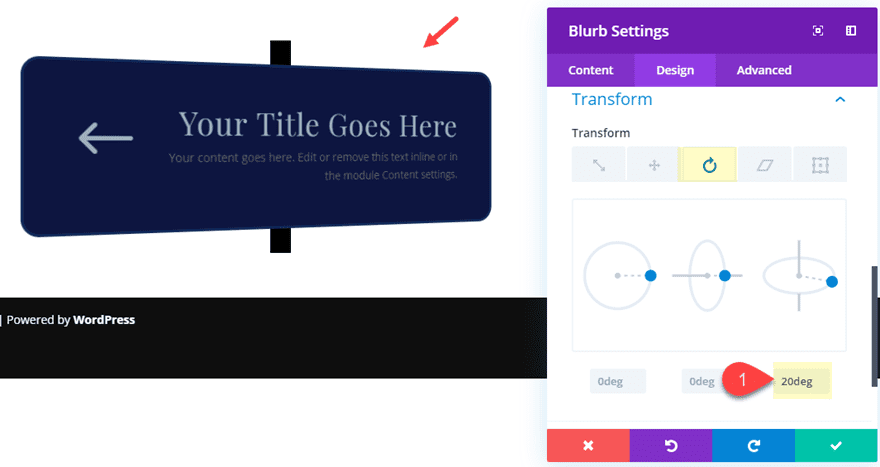
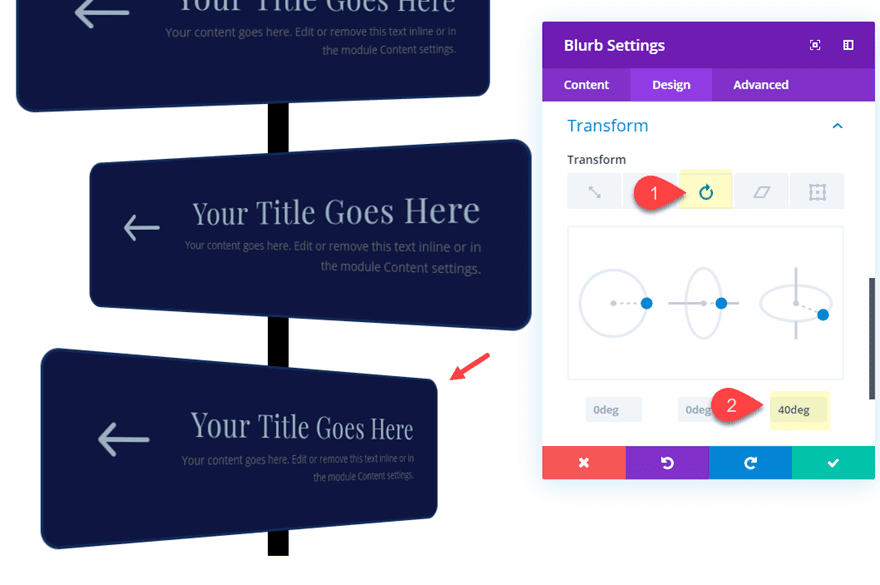
That takes care of the styling of our blurb module, but to get our 3D effect, we need to use the transform options to rotate our blurb module. To do this update the following:
Transform Rotate X Axis: 20deg
Duplicate the Row for More Signs
Now that we have one of our sign designs completed, we can duplicate the row to make more. Each time we duplicate the row, we will simply need to update the transform rotation so that the signs rotate at different degrees around the post.
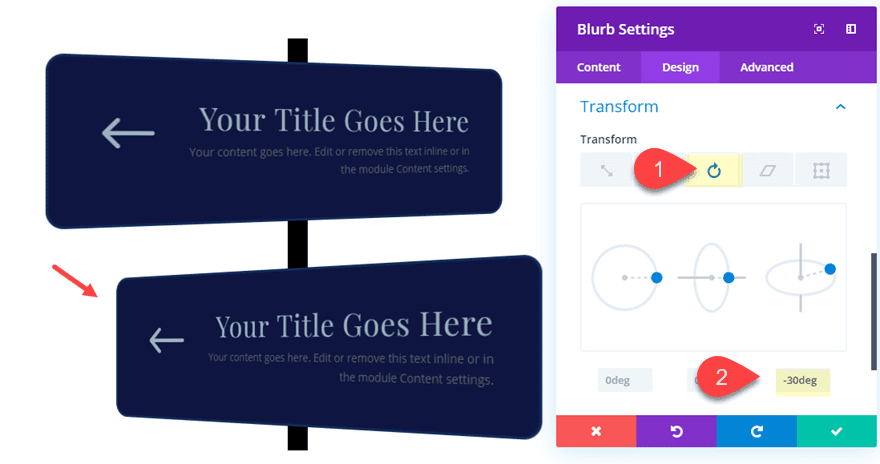
Go ahead and duplicate the row and update the blurb module in the new row as follows:
Transform Rotate X Axis: -30deg
Duplicate the row to create a third sign and update the blurb module in that new row as follows:
Transform Rotate X Axis: 40deg
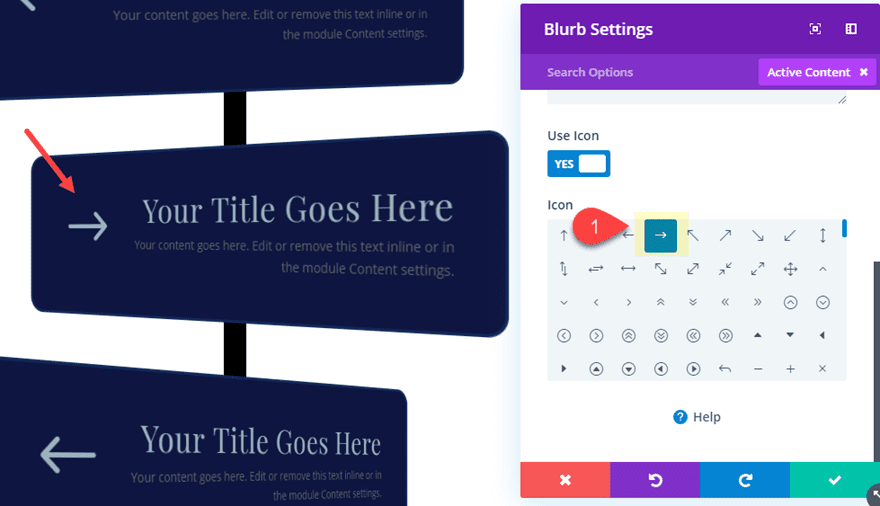
Changing the Direction of the Second Sign
Right now all of the arrows are pointing in the same direction. To change the direction from left to right, we need to update the blurb module settings a bit.
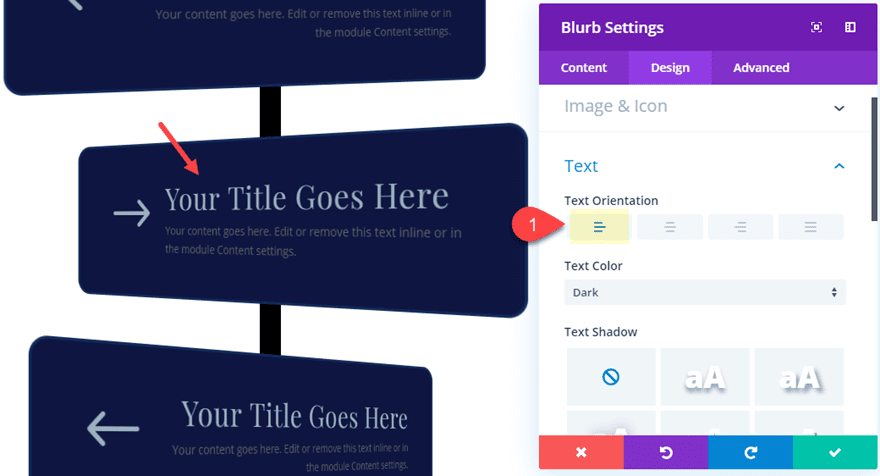
Open the settings of the blurb module in the second row (the middle one) and update the following:
Icon: right arrow (see screenshot)
Text Orientation: Left
We can flip the order of the blurb content so that the text is on the left and the icon is on the right. To do this we need to add a single line of custom CSS to the Main Element as follows:
direction: rtl;
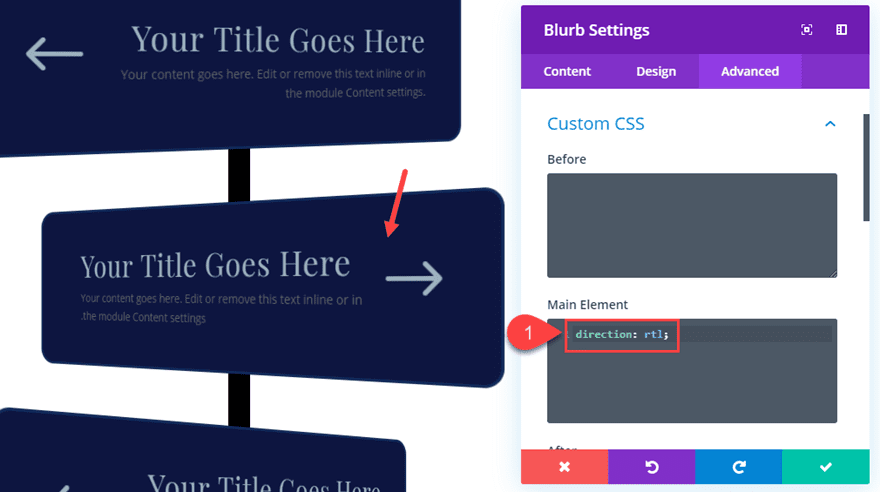
Now the blurb content is reversed and you have a sign pointing in a new direction!
Rotate the Signs back to Original State on Hover
One of the cool things about this setup is that you can easily add a hover state to bring the rotated module back to the original (0deg) rotation. This allows the user to engage with the content and have a clear view of the text when hovering over the module.
Since we want to add the same hover state to all three blurb modules, use multiselect to select all three blurb modules and open the settings of one of the modules to bring up the element settings modal. Then update the following:
Transform Rotate X Axis (hover): 0deg
Save settings and that’s it!
Now Check out the design and functionality so far.
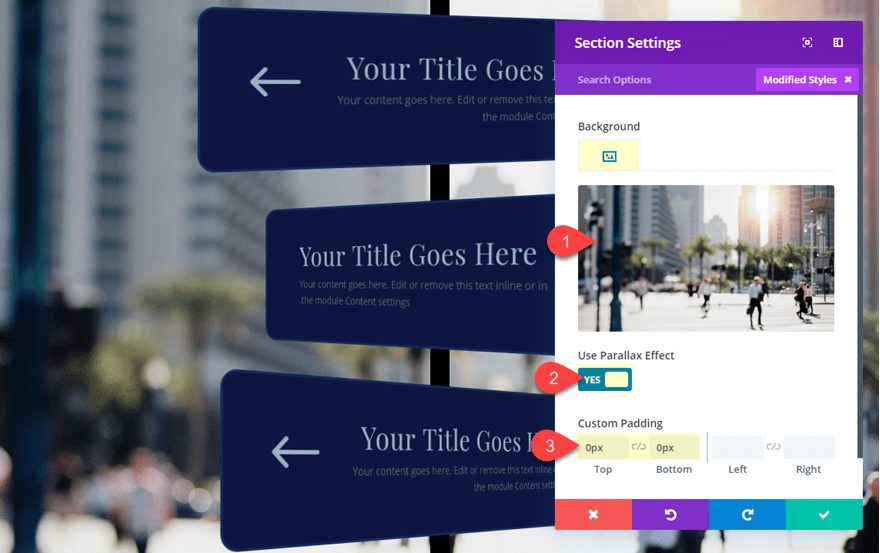
Customizing our Section with a Background Image
For our last step, we can add a new background image to our section. This is optional of course, but the right image can look really cool especially if you use the parallax effect.
Open the section and add a new background image. (I’m using an image from our Agency Layout Pack)
Then update the following:
Use Parallax Effect: YES
Custom Padding: 0px top, 0px bottom
Final Result
Final Thoughts
Creating a 3D sign post really does add a creative and engaging design element to your site that can really make your content pop out (literally). And the hover effect allows the user to view the content without the 3D effect for a nice fallback. Don’t forget you can easily add a link URL to the blurb module so that it can serve as a clickable navigation element if you want. Anyway, I hope this gives you some inspiration for your next project.
I look forward to hearing from you in the comments.
Cheers!


This is such an original section layout. Great work
Good Creative work Jason!?
This is great! Thanks
Thanks! really liked this one.
This is one of the best tutorials yet!
Your tutorial style is the best I’ve seen anywhere… so easy to follow each step, and the descriptions that go along with them.
Now I need to find an appropriate place to use this on one of my own or clients’ websites!
Go DIVI!
Thanks, Stephen. Appreciate the comment and support. Glad you like it!
Wow!!
I am Going To try This now
Thumps Up
Super! Thank you!
Good stuff!!!
just one question…..
I did set on one of the signs one anchor link pointing to the footer (#main-footer) and when i click the sign it jumps right to the footer, no smooth scroll.
Every other anchor link on the website behaves correctly…….any clue?
Thanks
Angelo
Angelo,
I’ll make the dev team aware of the issue. In the meantime, you may need to reach out to support for a solution. Nothing comes to mind. Sorry about that.
Looks great. But when I go to upload the json file into the DIVI Builder, it says ‘This file should not be imported in this context’. I’m trying to import it into my DIVI Library. Is there some other way I’m supposed to be importing it? Thanks.
Thanks, Amalia. This json file should be imported from the Divi Builder portability option. Or you can simply drag the file into the divi builder. Once the layout is loaded, you can then save it to the Divi Library if you want. Sorry for the confusion.
This is really cool – going to try this out now…
Beatiful and free. Thanks
Great
Thanks once again.
Thumbs up