
When you’re busy setting up all pages you want to include on your website, chances are high you’ll want to include a contact form at the end of each page to make your visitors’ journey easier. With Divi, you can, of course, add a contact form to the page itself, but if you’d rather streamline the process, that’s possible as well. In today’s Divi tutorial, we’ll show you how to automatically add a bottom-page contact form to all your pages at once. We’ll also automatically add a fixed bottom-right icon with an anchor link that’ll automatically redirect people to the contact section of the page they’re on. You’ll be able to download the page template for free as well!
Let’s get to it.
- 1 Preview
- 2 Download The Page Template for FREE
- 3 Download For Free
- 4 Tutorial Overview
- 5 1. Set up Website Pages Using Layout Pack of Choice
- 6 2. Go to Divi Theme Builder & Add New Page Template
- 7 3. Add Page Content to Template Body
- 8 4. Add Bottom-Page Contact Form to Template Body
- 9 Bonus: Add Fixed Bottom-Right Anchor Icon to Template Body
- 10 6. Save All Theme Builder Changes & Preview Result
- 11 Preview
- 12 Final Thoughts
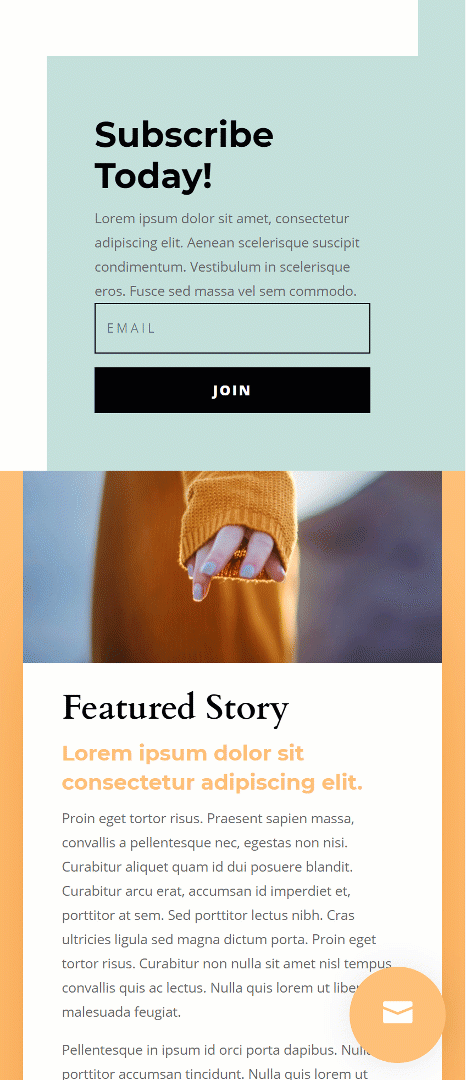
Preview
Before we dive into the tutorial, let’s take a quick look at the outcome across different screen sizes.
Desktop

Mobile
Download The Page Template for FREE
To lay your hands on the free page template, you will first need to download it using the button below. To gain access to the download you will need to subscribe to our newsletter by using the form below. As a new subscriber, you will receive even more Divi goodness and a free Divi Layout pack every Monday! If you’re already on the list, simply enter your email address below and click download. You will not be “resubscribed” or receive extra emails.

Tutorial Overview
- Set up the pages on your website using a layout pack of your choice
- Once your page design style is set, you can reuse the design style in the bottom-page contact form
- To add the bottom page contact form, you’ll first need to create a new template dedicated to all pages
- Once the template has been created, you can start building the template’s body using Divi’s visual builder
- To make sure all unique page content shows up on each page, we’ll add the post content module
- The post content module contains your entire dynamic page design
- Below the post content module, we’ll add another section for our contact form
- We’ll design the contact form and make sure we add a unique CSS ID to the section, we’ll use this CSS ID to create an anchor link
- Bonus: we’ll add a fixed icon in the bottom right corner of each one of our pages and link the icon to the contact section of that particular page
1. Set up Website Pages Using Layout Pack of Choice
The approach we’re taking on works on any kind of website you build. But for this particular tutorial, we’re using the Magazine Layout Pack‘s design style. If you’re using this approach on any other website, feel free to tweak the design to your needs.
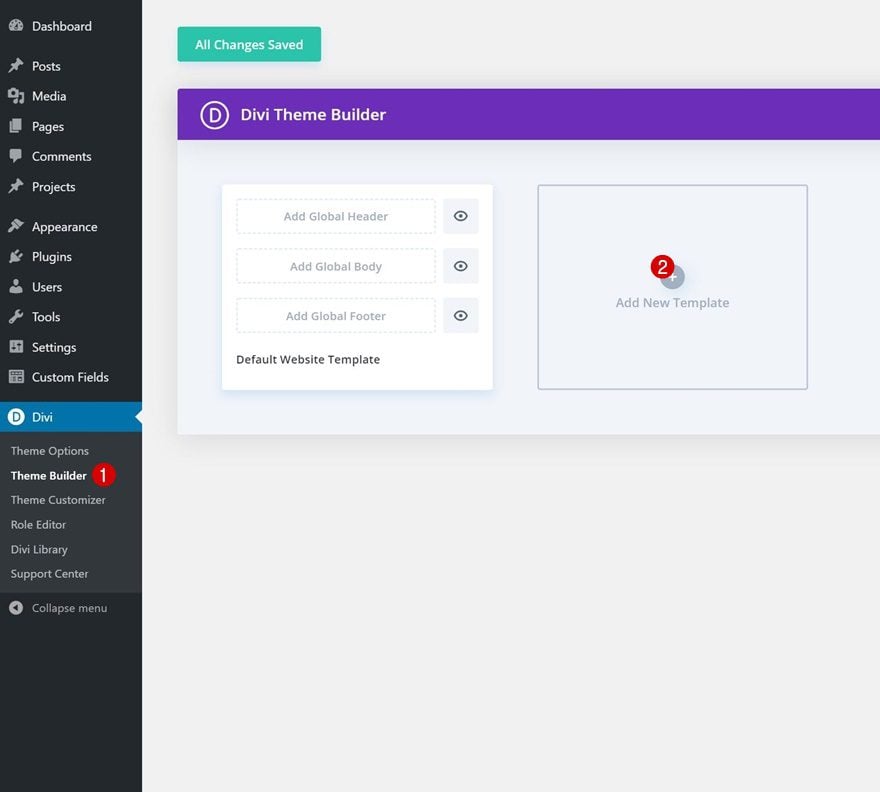
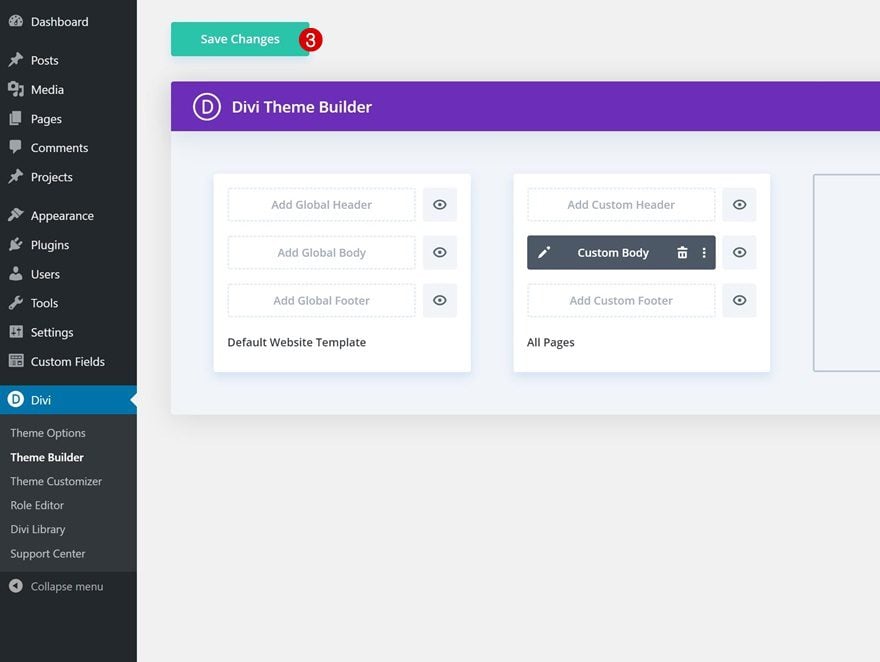
2. Go to Divi Theme Builder & Add New Page Template
Go to Divi Theme Builder & Add New Page Template
Go to the Divi Theme Builder on your website. There, add a new template.
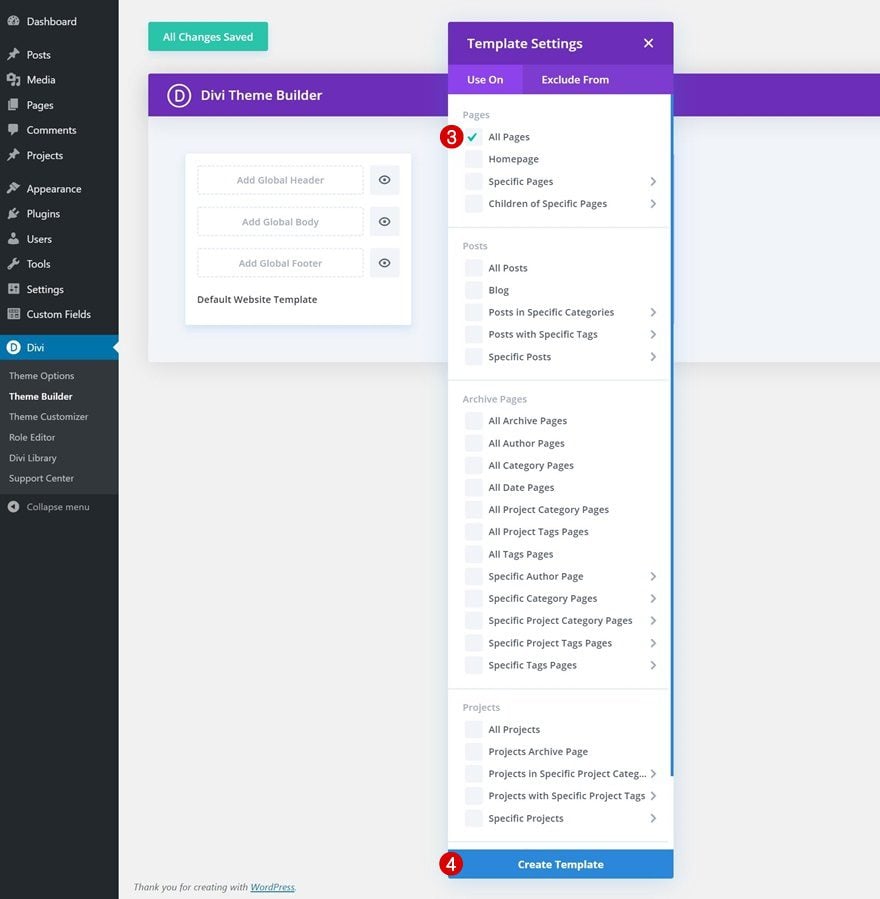
Use this new template on all pages if you want the bottom-page contact form to appear on all pages. You can make it appear on specific pages too and/or exclude it from certain pages.
- Use On: All Pages
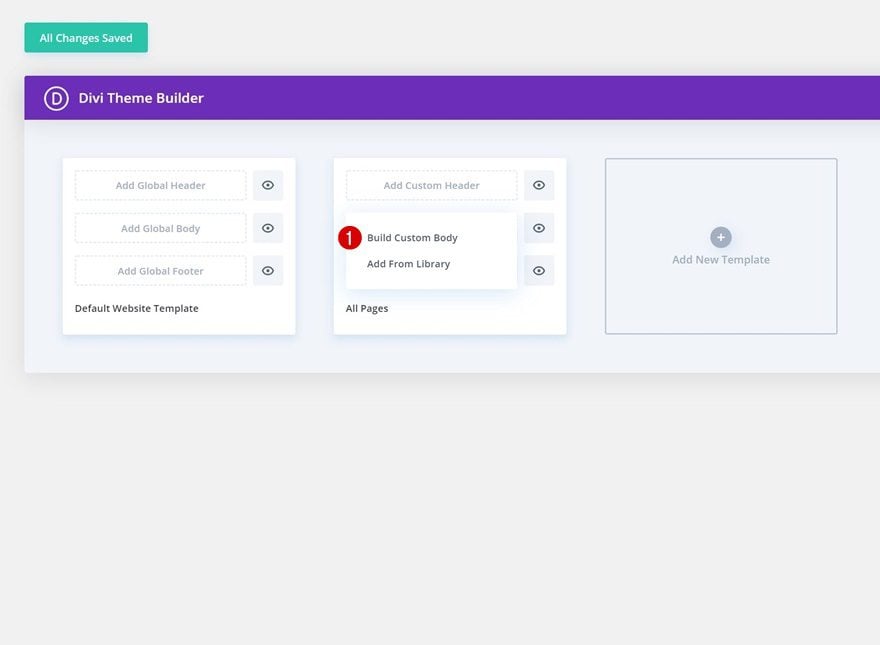
Start Building Template Body
Once you’ve created the new template, you can start building the custom body.
3. Add Page Content to Template Body
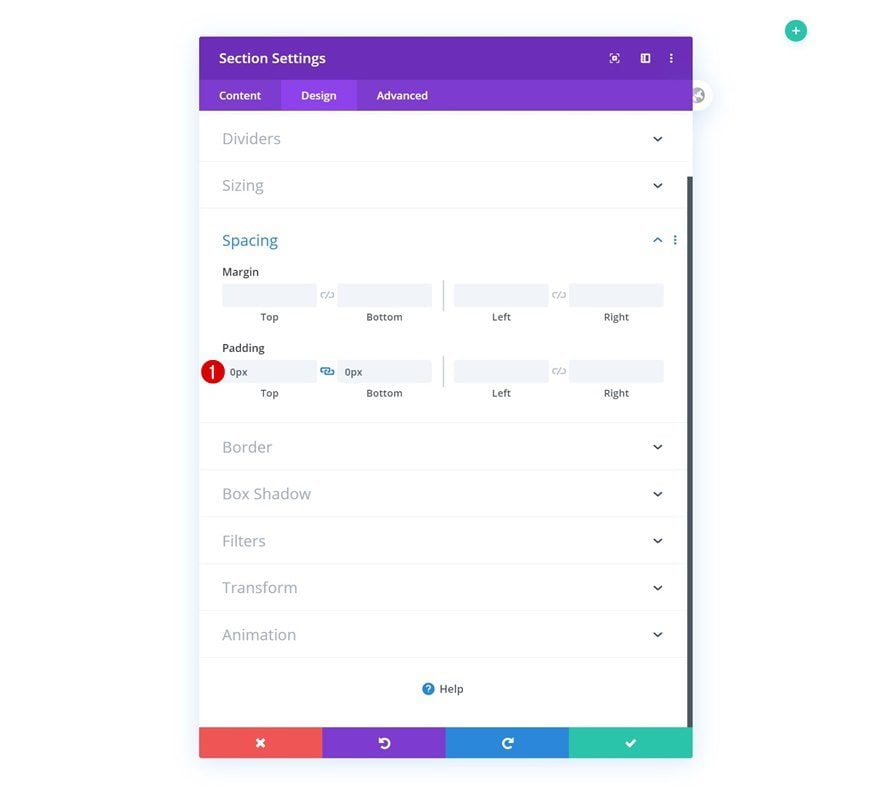
Section Settings
Spacing
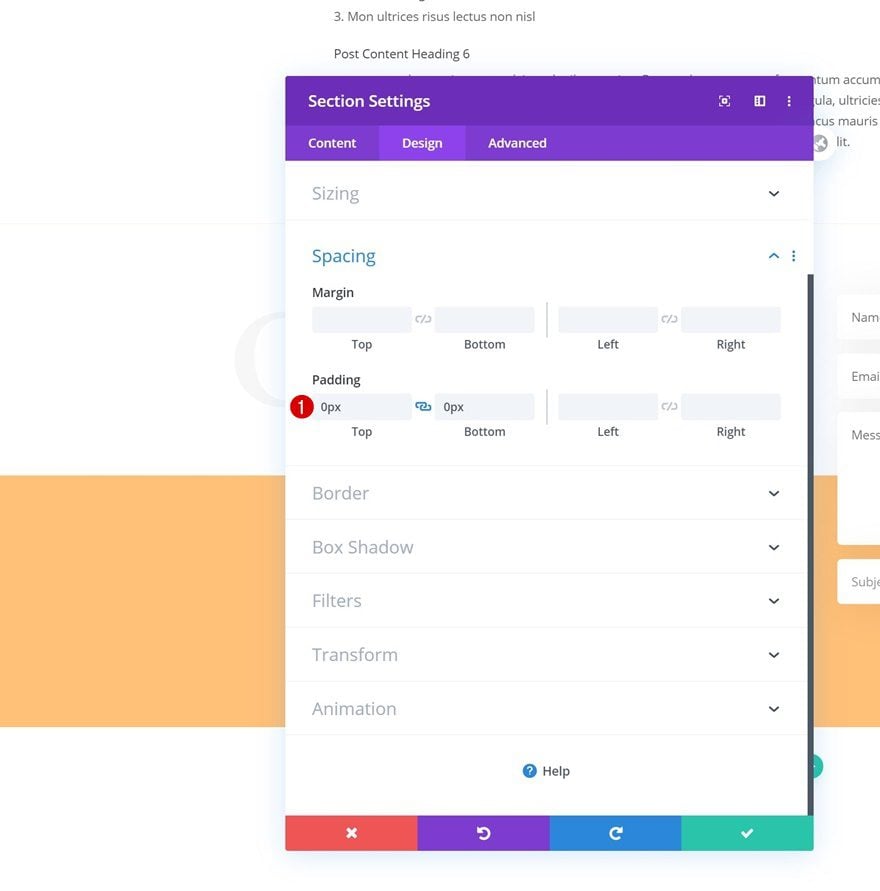
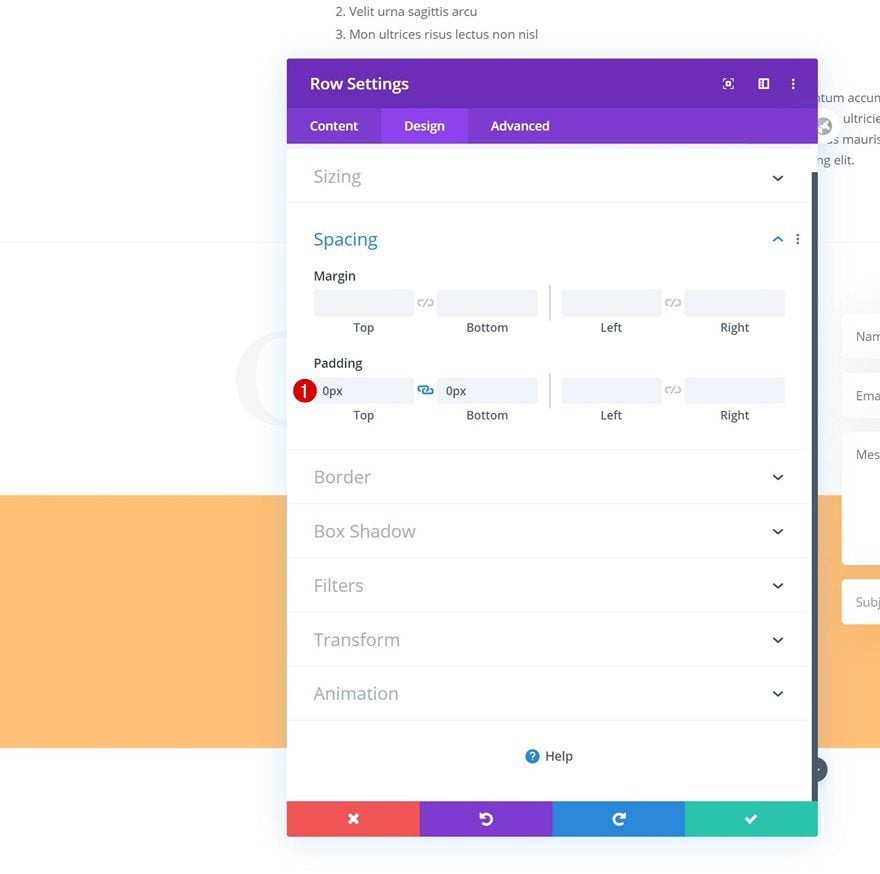
Inside the template editor, you’ll notice a section. Open that section and remove all default top and bottom padding.
- Top Padding: 0px
- Bottom Padding: 0px
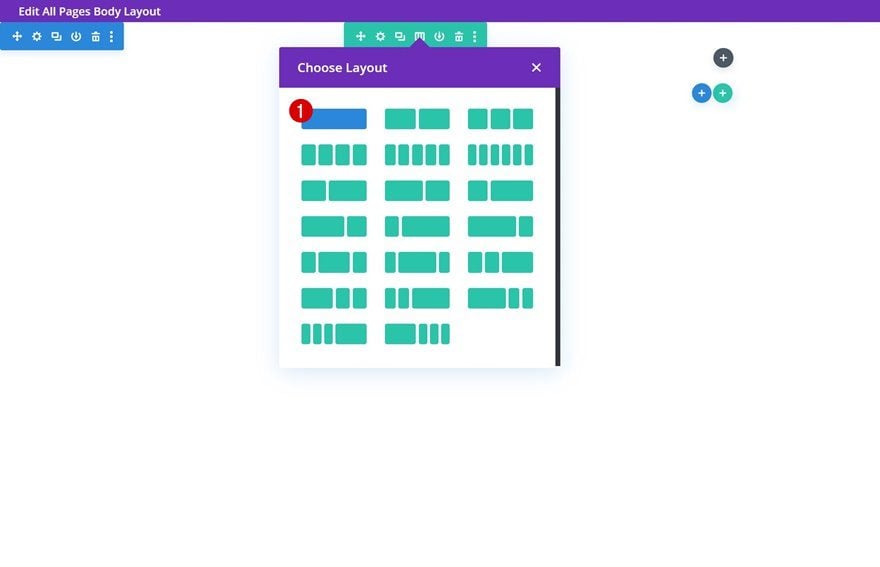
Add New Row
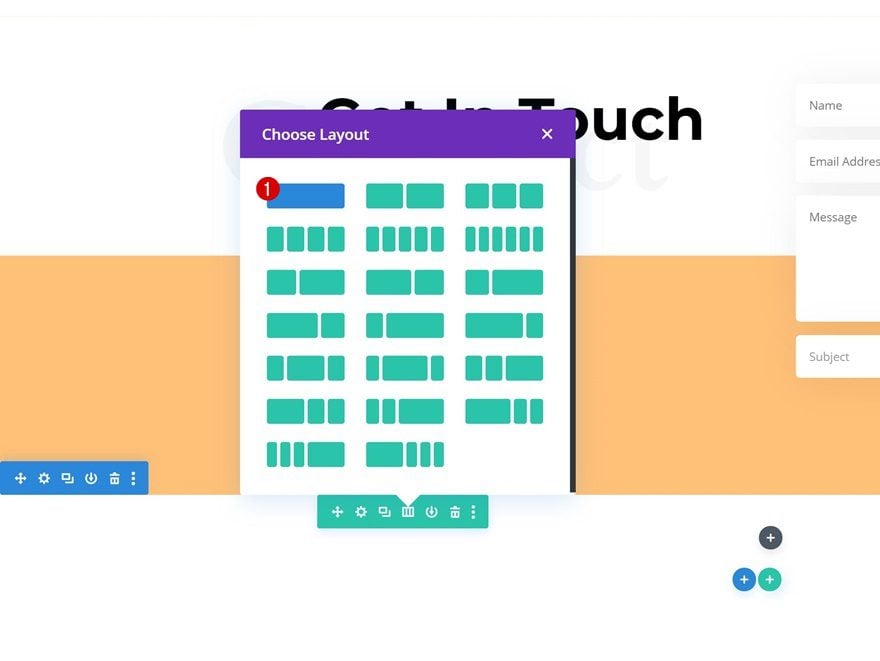
Column Structure
Continue by adding a new row using the following column structure:
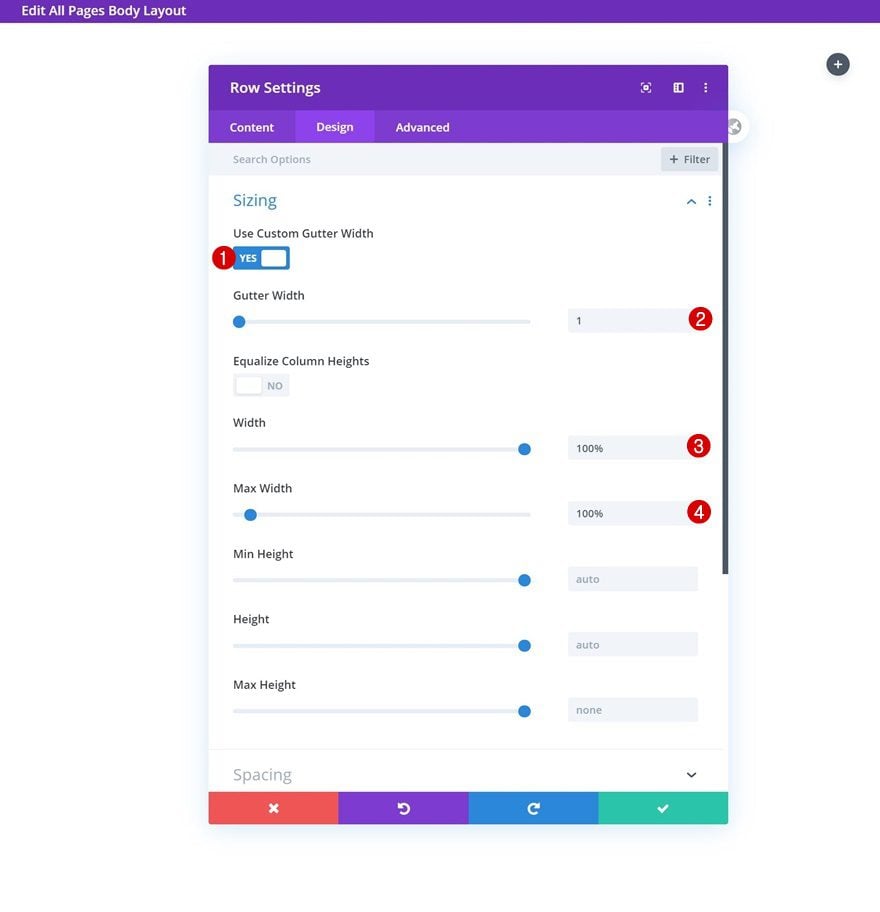
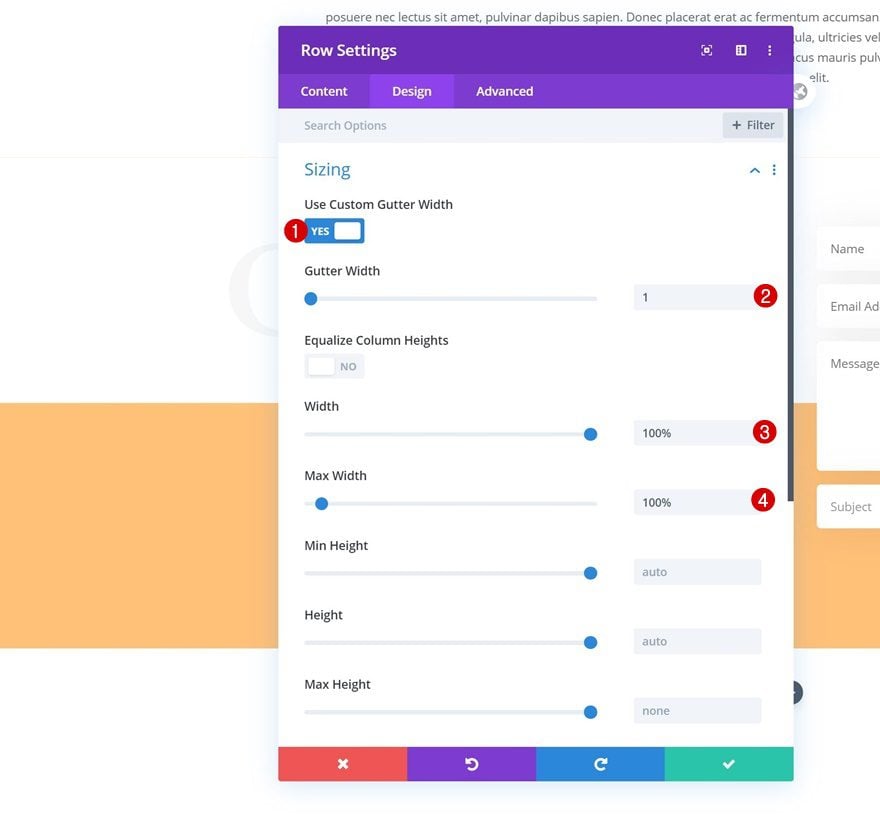
Sizing
Without adding any modules yet, open the row settings and allow the row to take up the entire width of the section container.
- Use Custom Gutter Width: Yes
- Gutter Width: 1
- Width: 100%
- Max Width: 100%
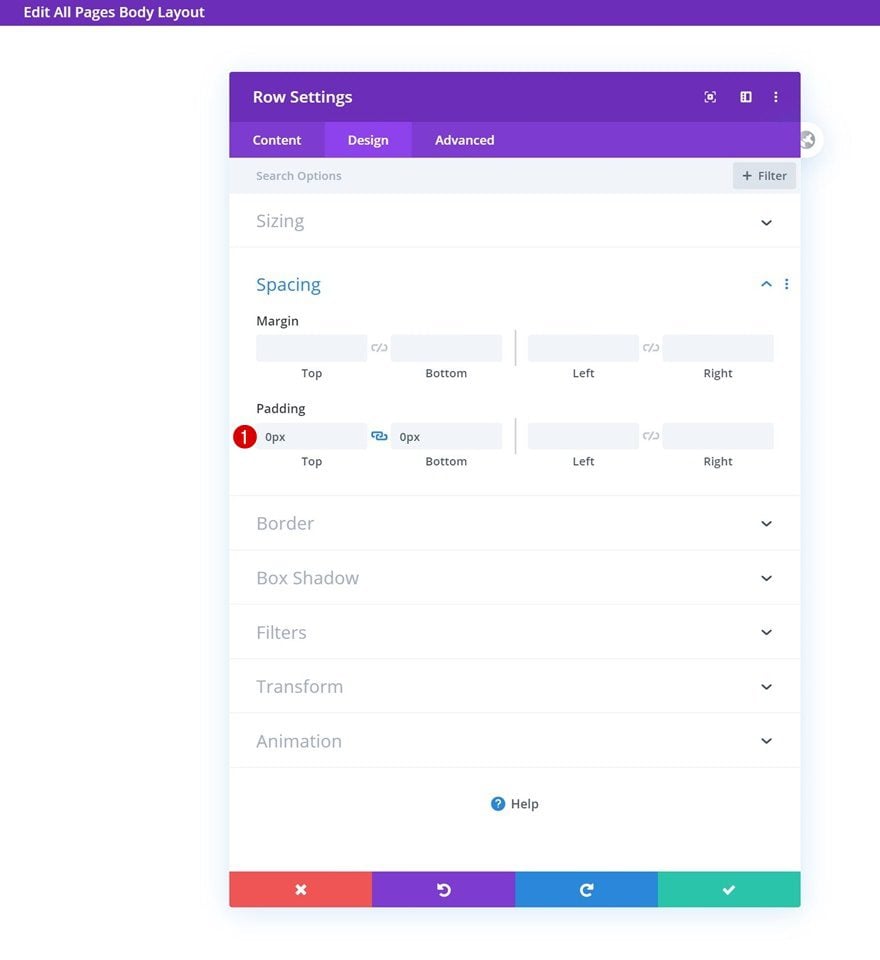
Spacing
Remove all row’s default top and bottom padding too.
- Top Padding: 0px
- Bottom Padding: 0px
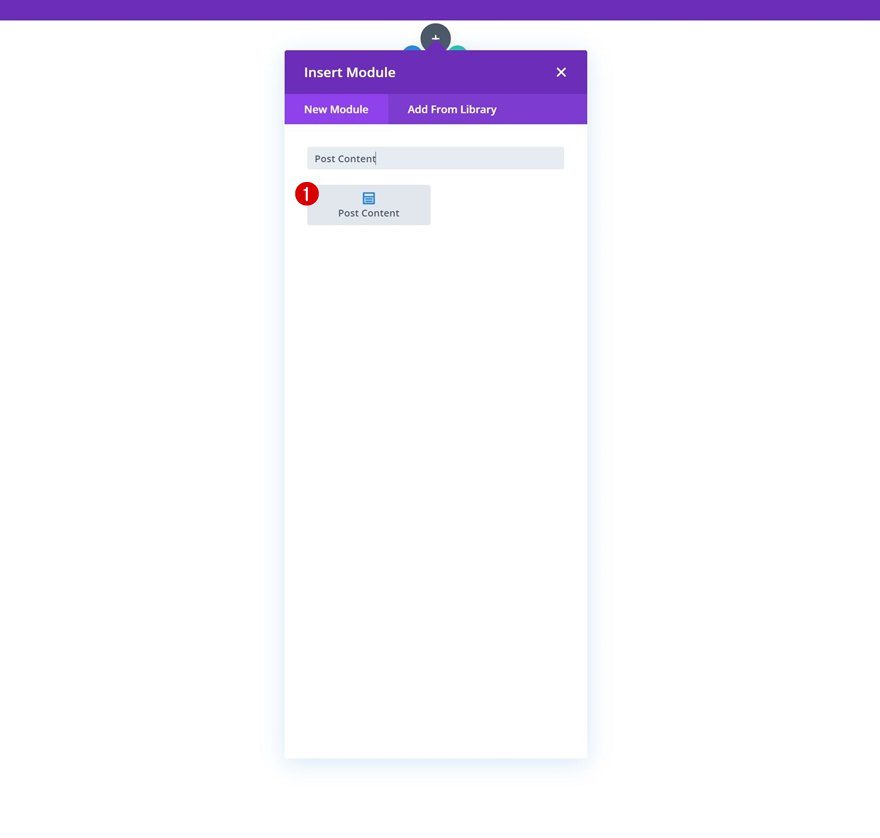
Add Post Content Module to Column
Continue by adding the Post Content Module to your row’s column. This module represents all dynamic page content you’ve created.
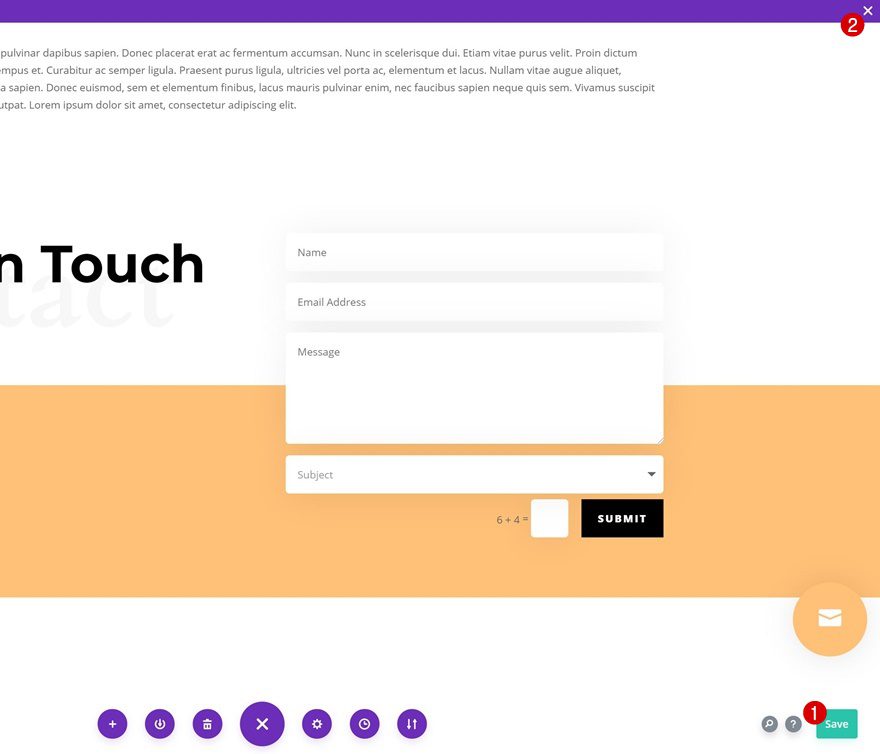
4. Add Bottom-Page Contact Form to Template Body
Add New Section
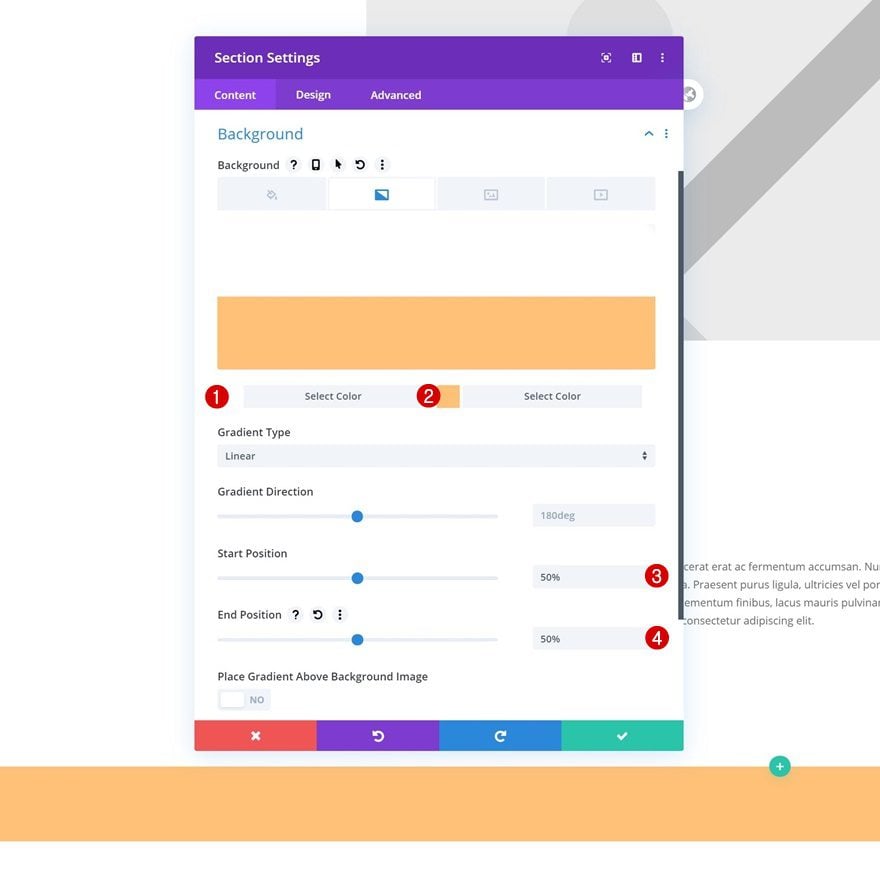
Gradient Background
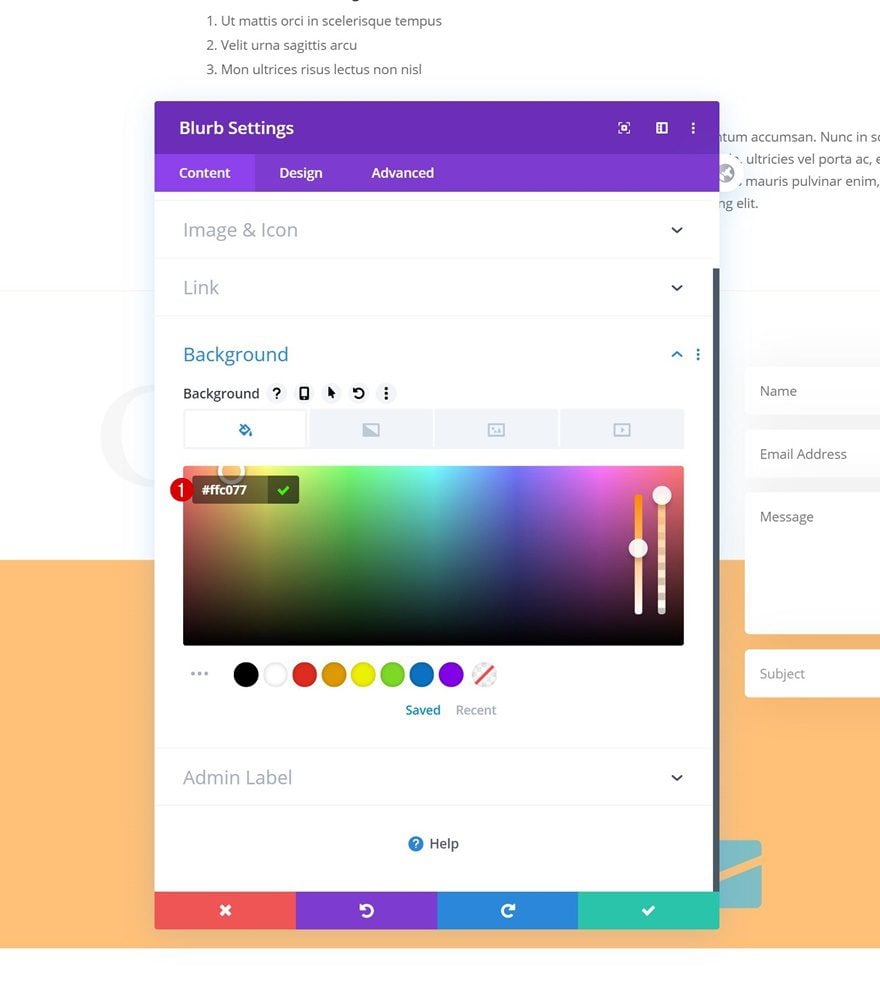
Below the section containing the Post Content Module, we’ll add another regular section. This section will be dedicated to the contact form. Open the section settings and add a gradient background.
- Color 1: #ffffff
- Color 2: #ffc077
- Start Position: 50%
- End Position: 50%
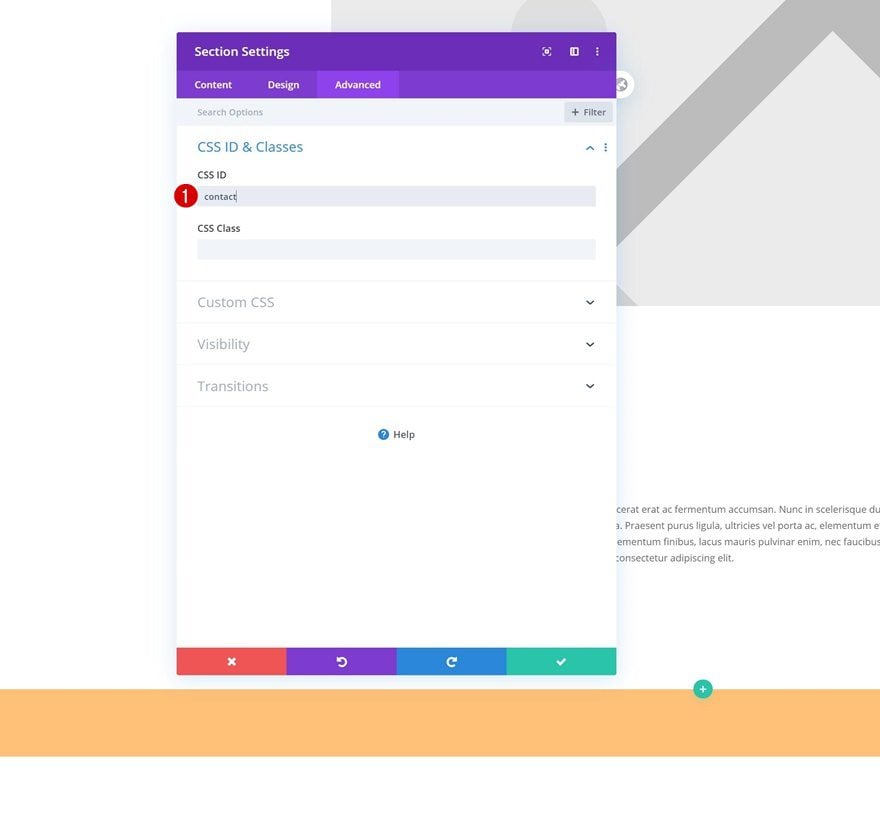
CSS ID
Include a CSS ID as well.
- CSS ID: contact
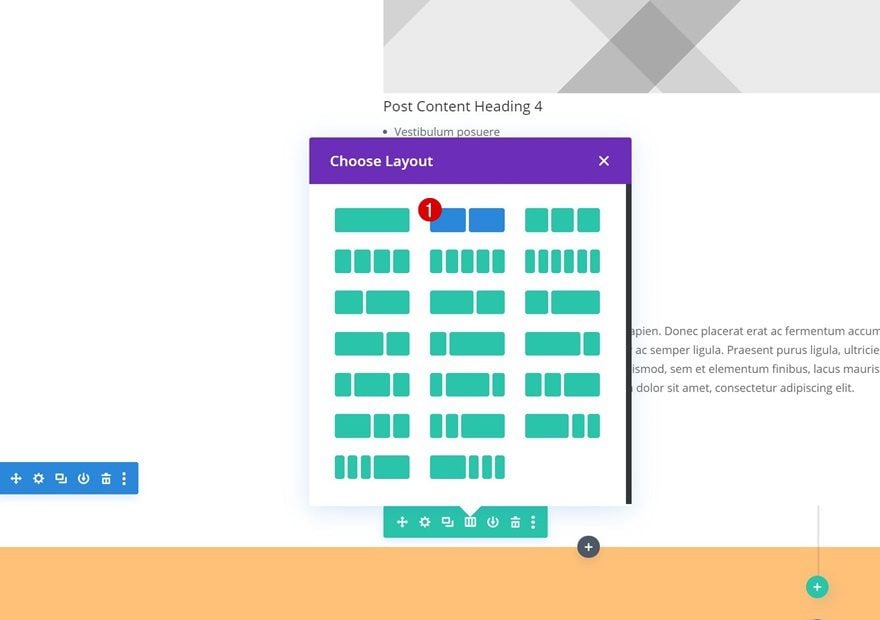
Add New Row
Column Structure
Continue by adding a new row to the section and use the following column structure:
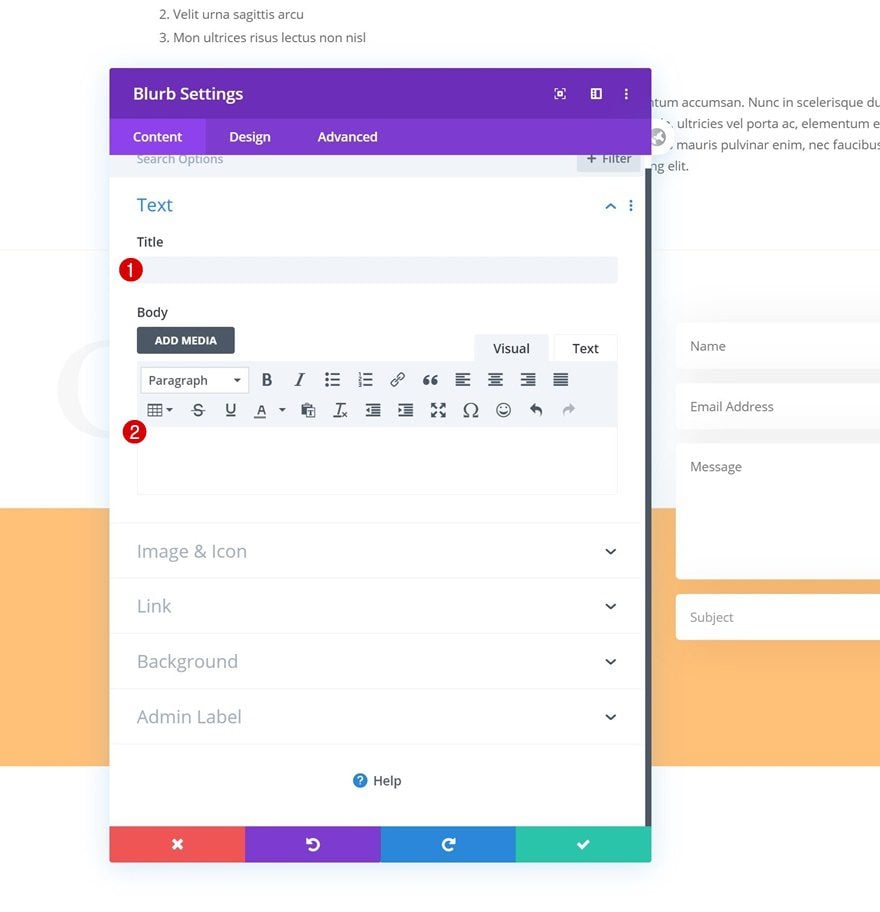
Add Text Module #1 to Column 1
Add H2 Content
The first module we need in the first column is a Text Module. Enter some content of your choice.
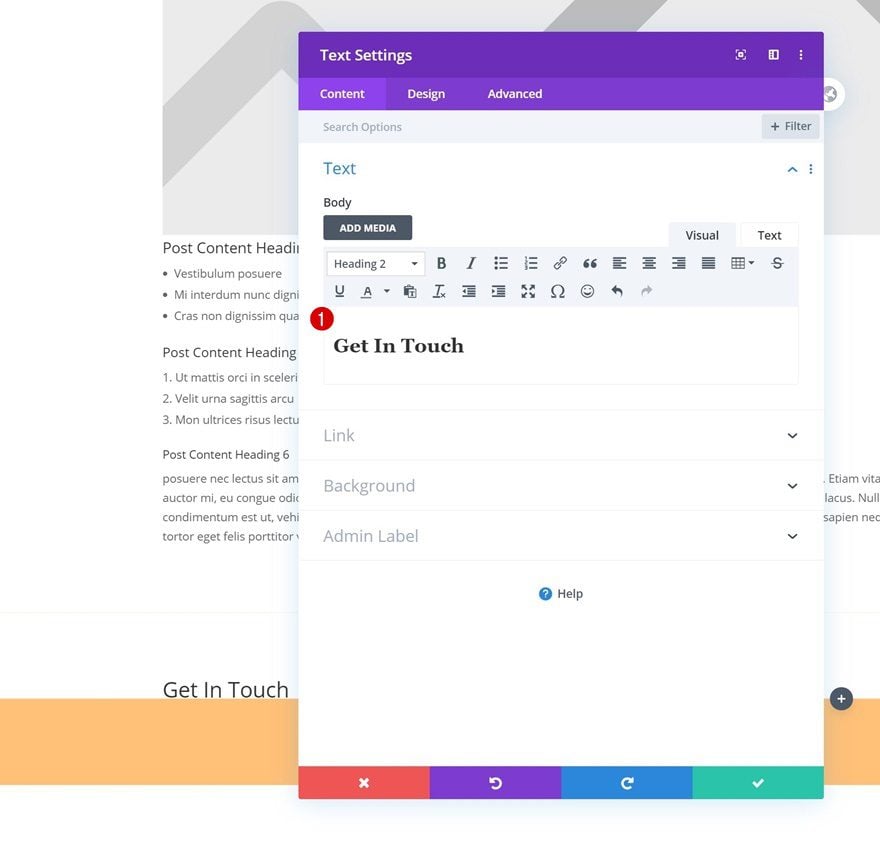
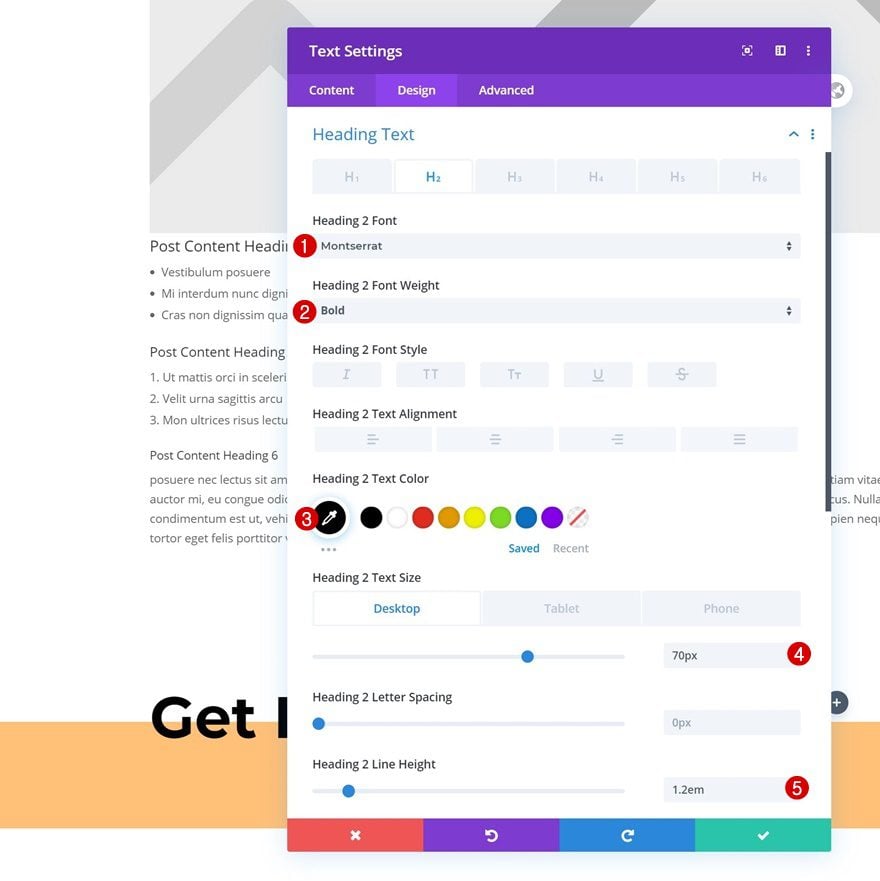
H2 Text Settings
Move on to the module’s design tab and change the H2 text settings as follows:
- Heading 2 Font: Montserrat
- Heading 2 Font Weight: Bold
- Heading 2 Text Color: #000000
- Heading 2 Text Size: 70px (Desktop), 48px (Tablet), 36px (Phone)
- Heading 2 Line Height: 1.2em
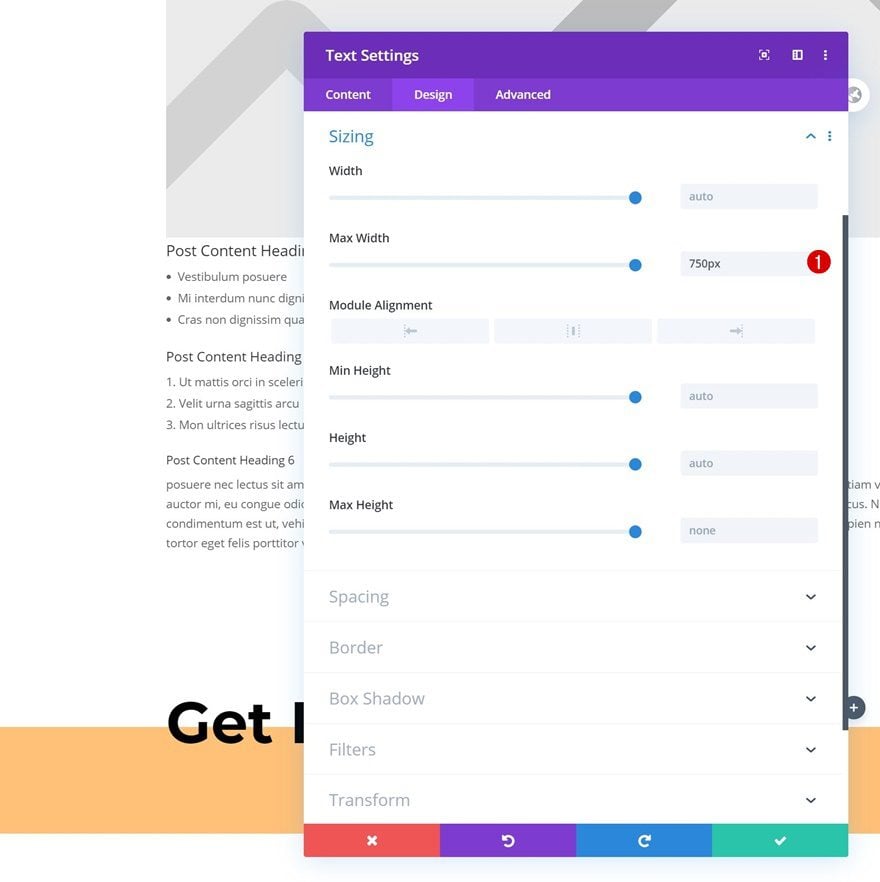
Sizing
Add a max width as well.
- Max Width: 750px
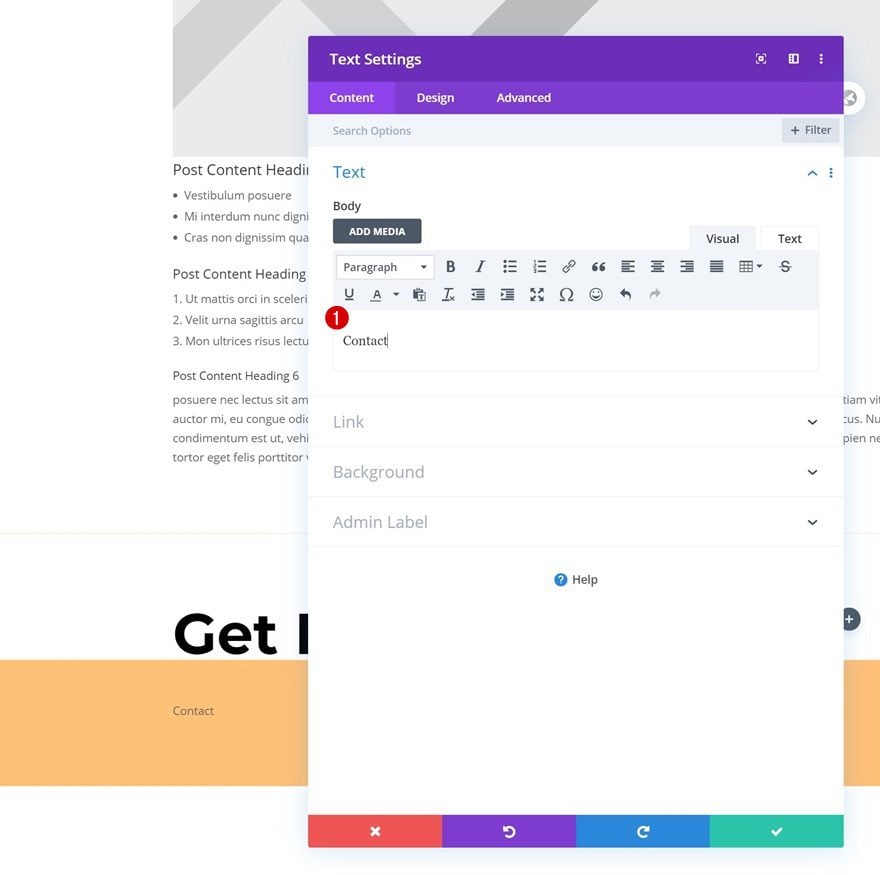
Add Text Module #2 to Column 1
Add Content
Add another Text Module to column 1 with some content of your choice.
Text Settings
Change the module’s text settings as follows:
- Text Font: Cardo
- Text Font Weight: Bold
- Text Color: rgba(0,0,0,0.03)
- Text Size: 150px (Desktop), 100px (Tablet), 60px (Phone)
- Text Line Height: 1em
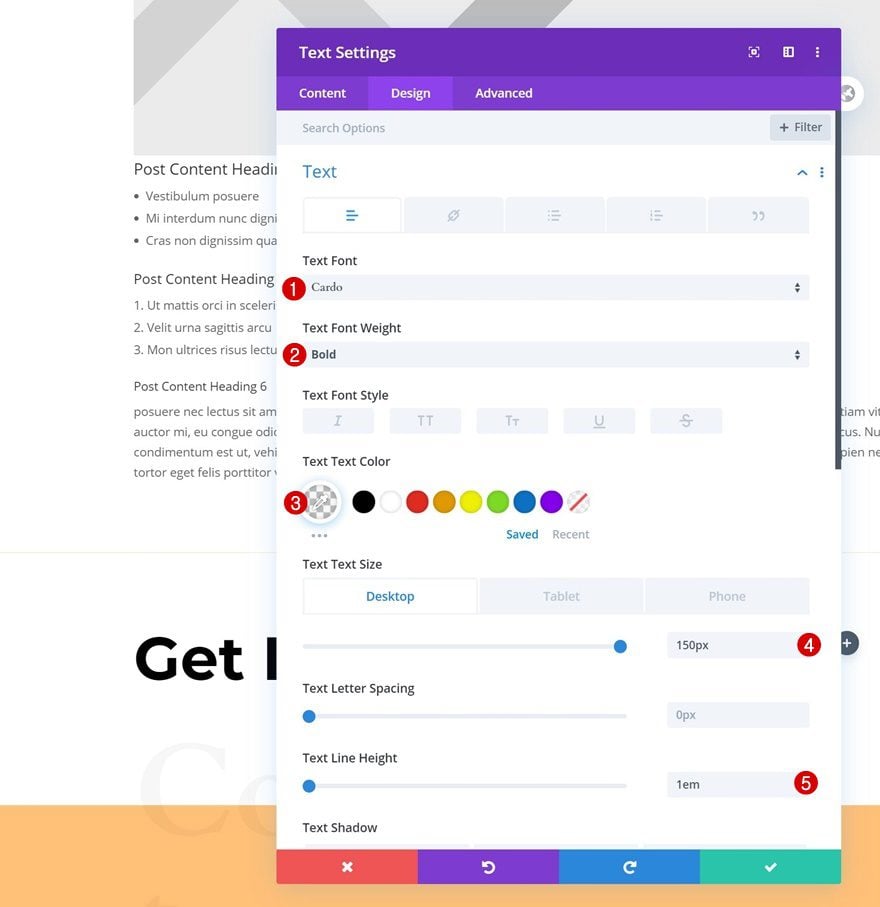
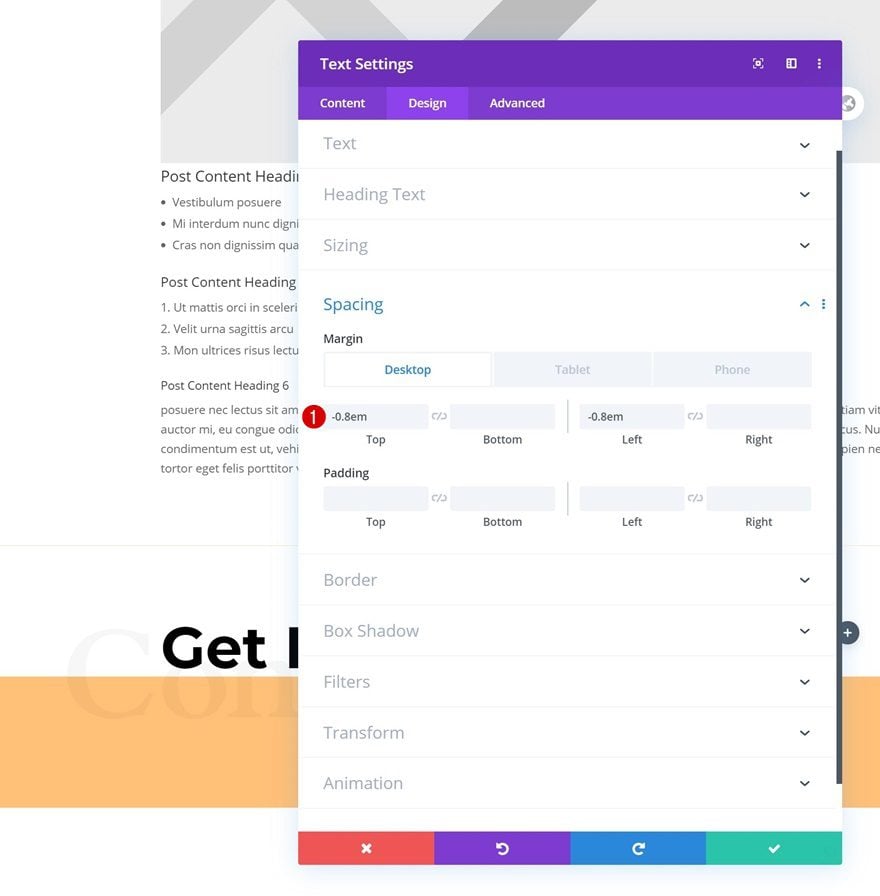
Spacing
And play around with the spacing settings across different screen sizes.
- Top Margin: -0.8em (Desktop), -100px (Tablet), -80px (Phone)
- Left Margin: -0.8em (Desktop & Tablet), -60px (Phone)
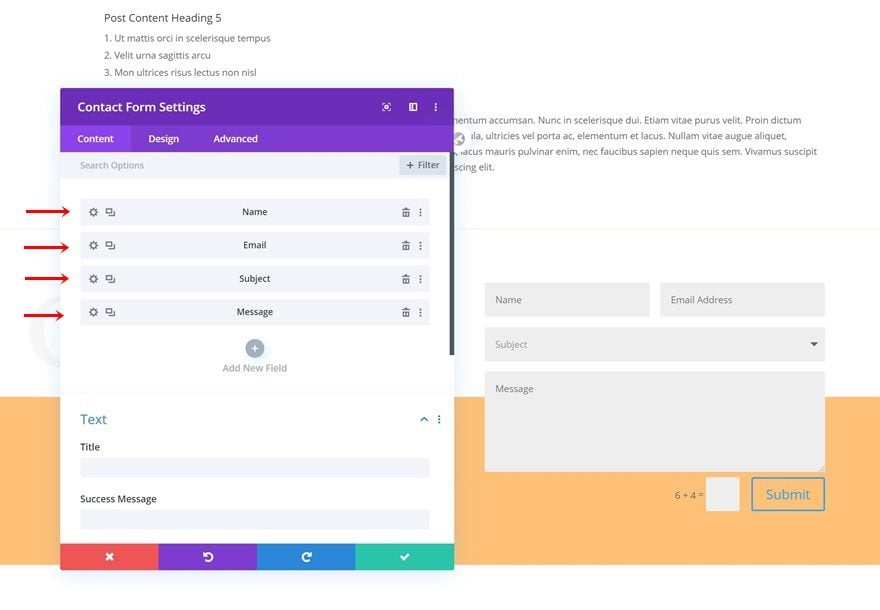
Add Contact Form to Column 2
Add All Needed Fields
In the second column the only module we need is a Contact Form Module. Add as many fields as you need and link your email account to the module as well.
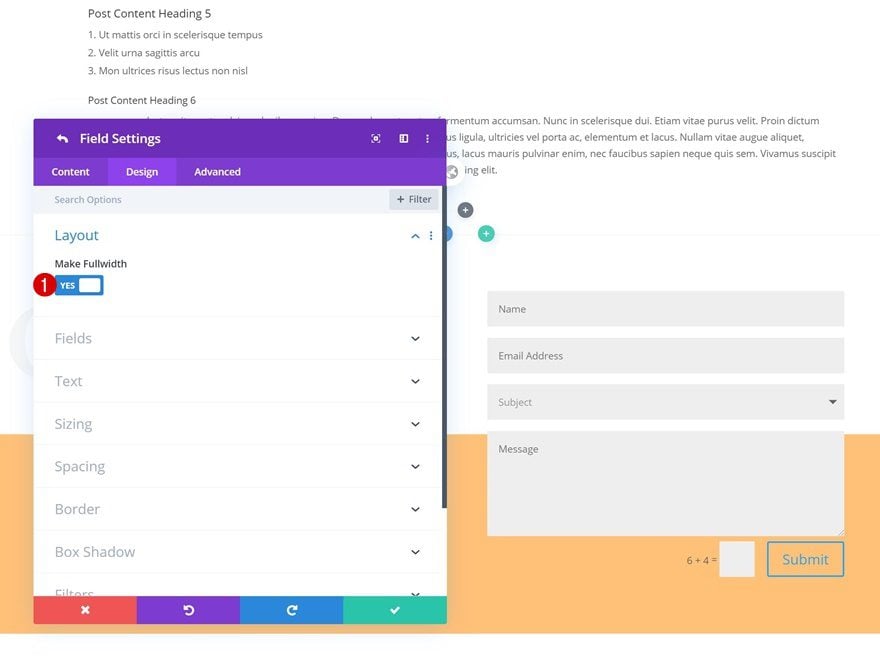
Turn Name & Email Fields Fullwidth
Continue by turning the name and email address fields fullwidth.
- Make Fullwidth: Yes
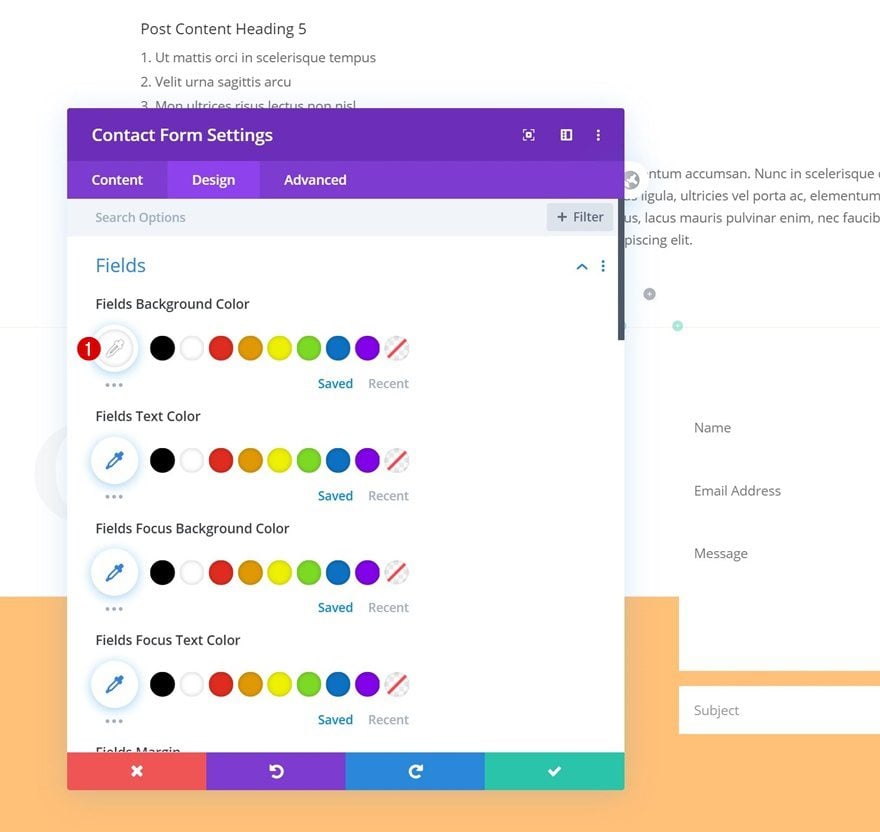
Fields Settings
Go back to the general contact form settings and change the fields background color.
- Fields Background Color: #ffffff
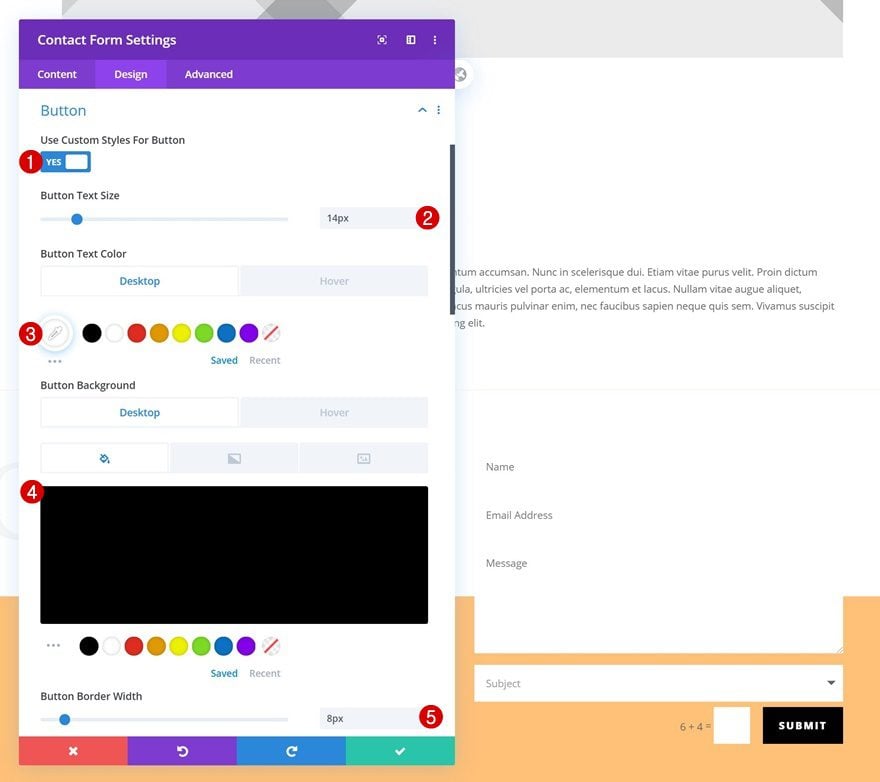
Button Settings
Modify the button settings next.
- Use Custom Styles For Button: Yes
- Button Text Size: 14px
- Button Text Color: #ffffff
- Button Background Color: #000000 (Default), #ff2a38 (Hover)
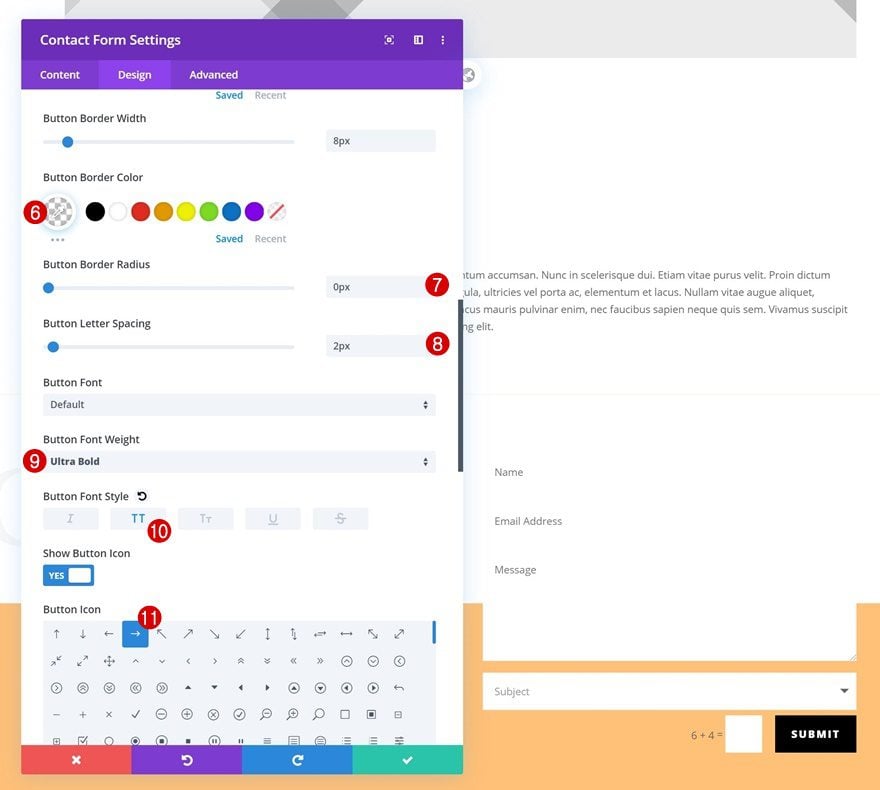
- Button Border Width: 8px
- Button Border Color: rgba(0,0,0,0)
- Button Border Radius: 0px
- Button Letter Spacing: 2px
- Button Font Weight: Ultra Bold
- Button Font Style: Uppercase
- Button Icon: Find in List
Border
Add some border radius too.
- All Corners: 5px

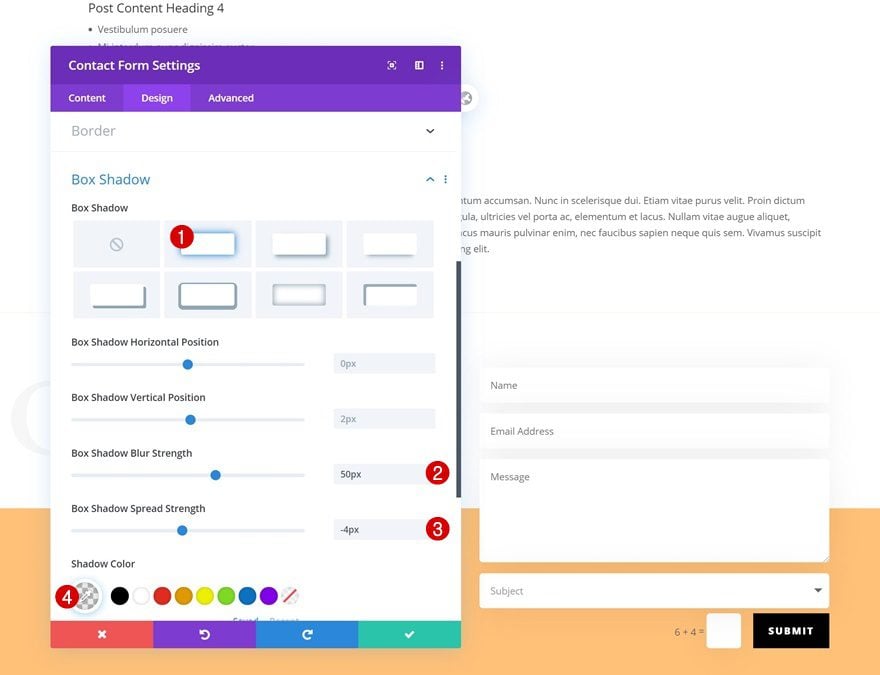
Box Shadow
And complete the module’s settings by adding a subtle box shadow.
- Box Shadow Blur Strength: 50px
- Box Shadow Spread Strength: -4px
- Shadow Color: rgba(0,0,0,0.08)
Bonus: Add Fixed Bottom-Right Anchor Icon to Template Body
Add New Section
Spacing
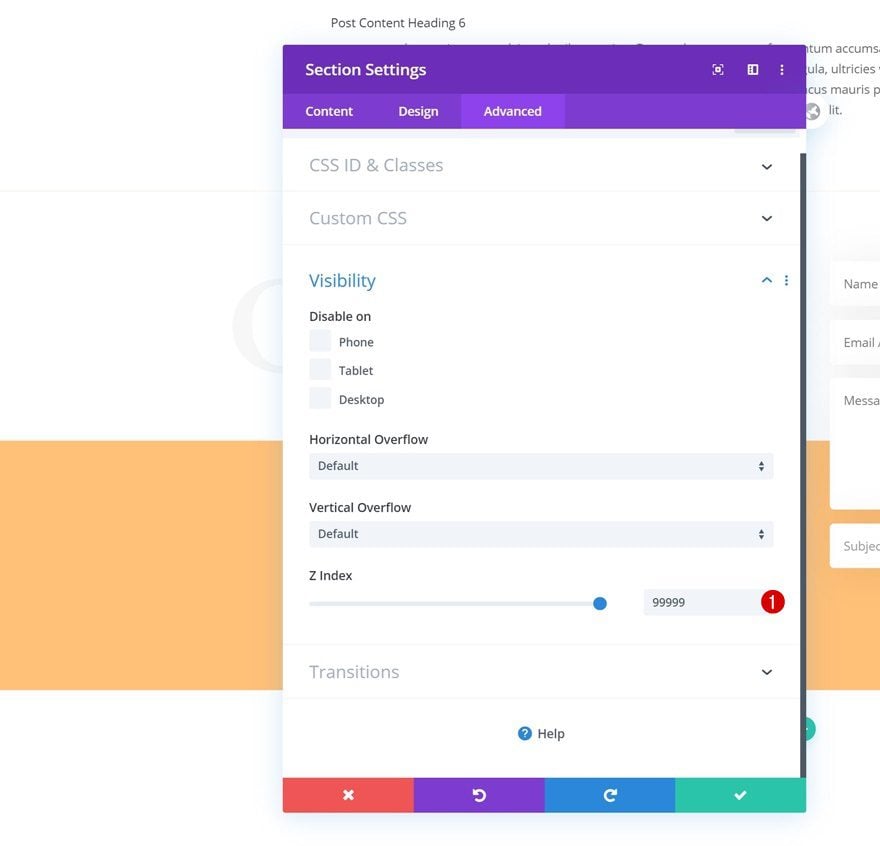
Now, to add the bottom-right fixed icon to each page, we’ll need to add another regular section. Open the section and remove all default top and bottom padding.
- Top Padding: 0px
- Bottom Padding: 0px
Z Index
Increase the section’s z index too. This will ensure that the icon will remain on top of all page content.
- Z Index: 99999
Add New Row
Column Structure
Add a new row to the section using the following column structure:
Sizing
Open the row settings and allow the row to take the entire width of the section.
- Use Custom Gutter Width: Yes
- Gutter Width: 1
- Width: 100%
- Max Width: 100%
Spacing
Remove all default top and bottom padding as well.
- Top Padding: 0px
- Bottom Padding: 0px
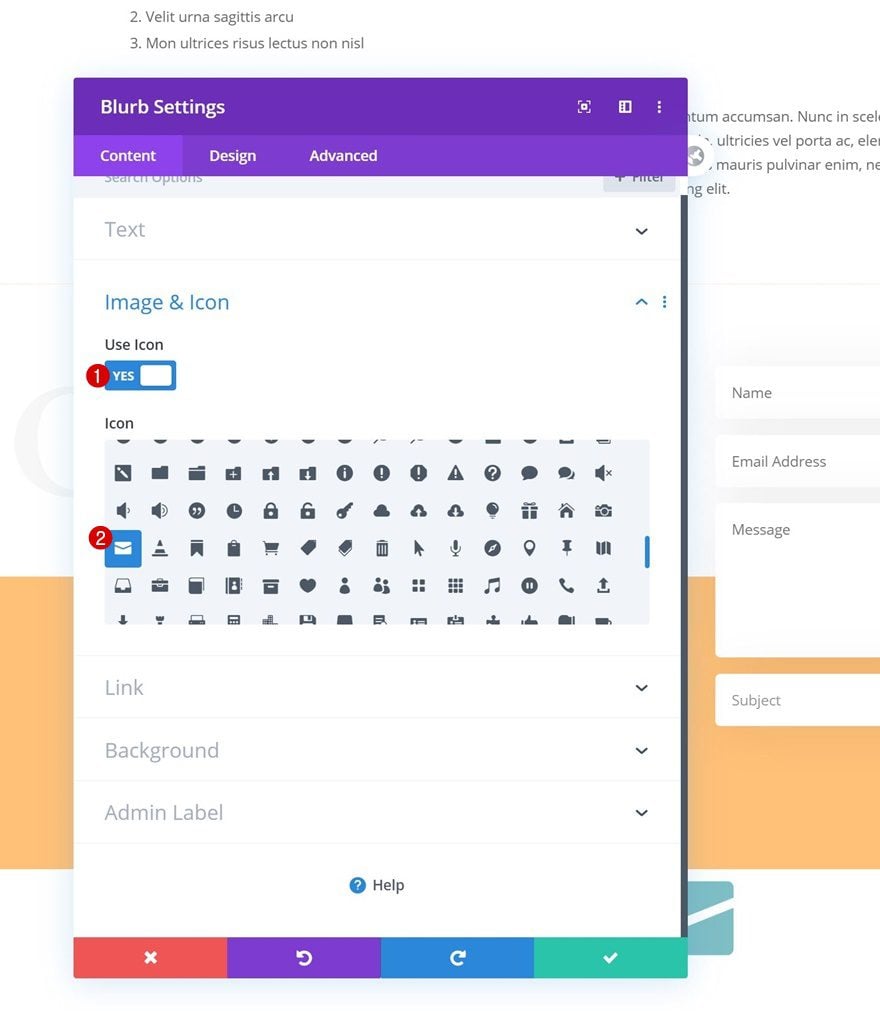
Add Blurb Module to Column
Leave Title & Content Box Empty
To display the bottom-right icon, we’ll use a Blurb Module. Make sure you leave the title and content box empty.
Select Icon
Then, select an icon of your choice.
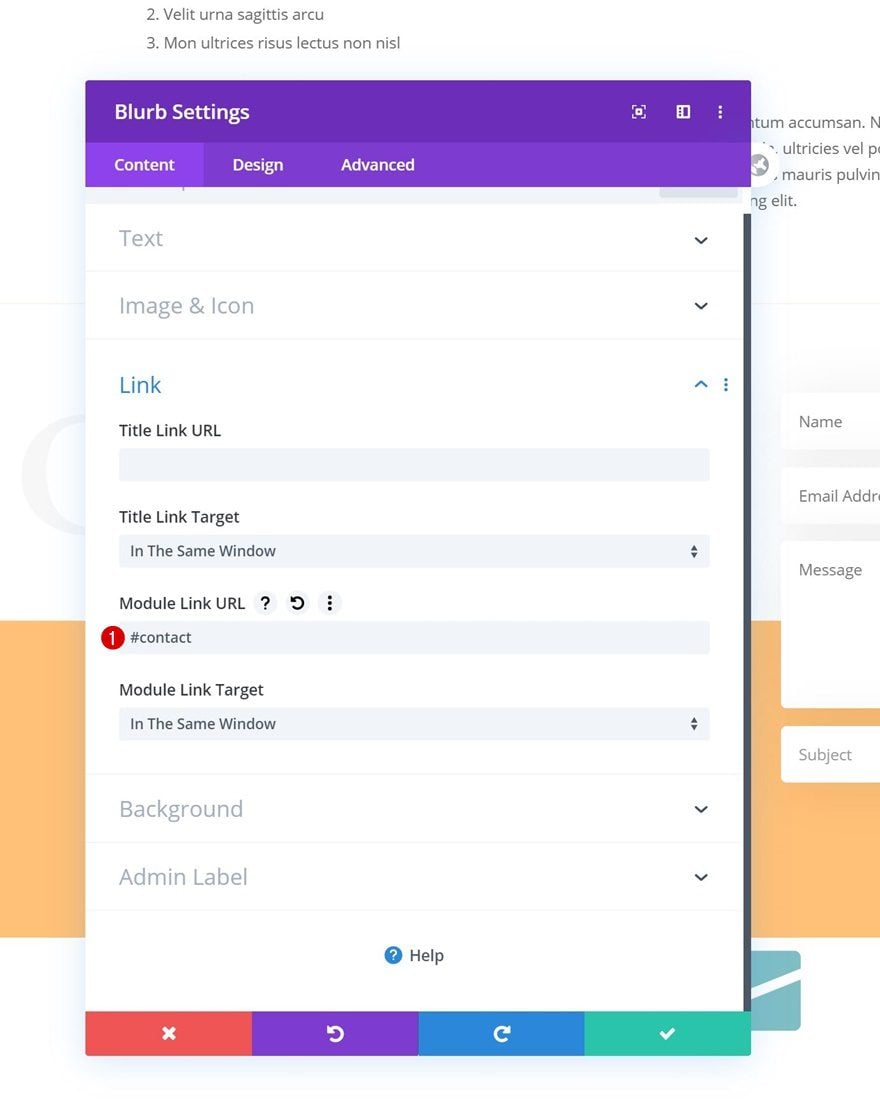
Link
Link the icon to the contact section by adding the ID to the module link URL.
- Module Link URL: #contact
Background Color
Change the module’s background color too.
- Background Color: #ffc077
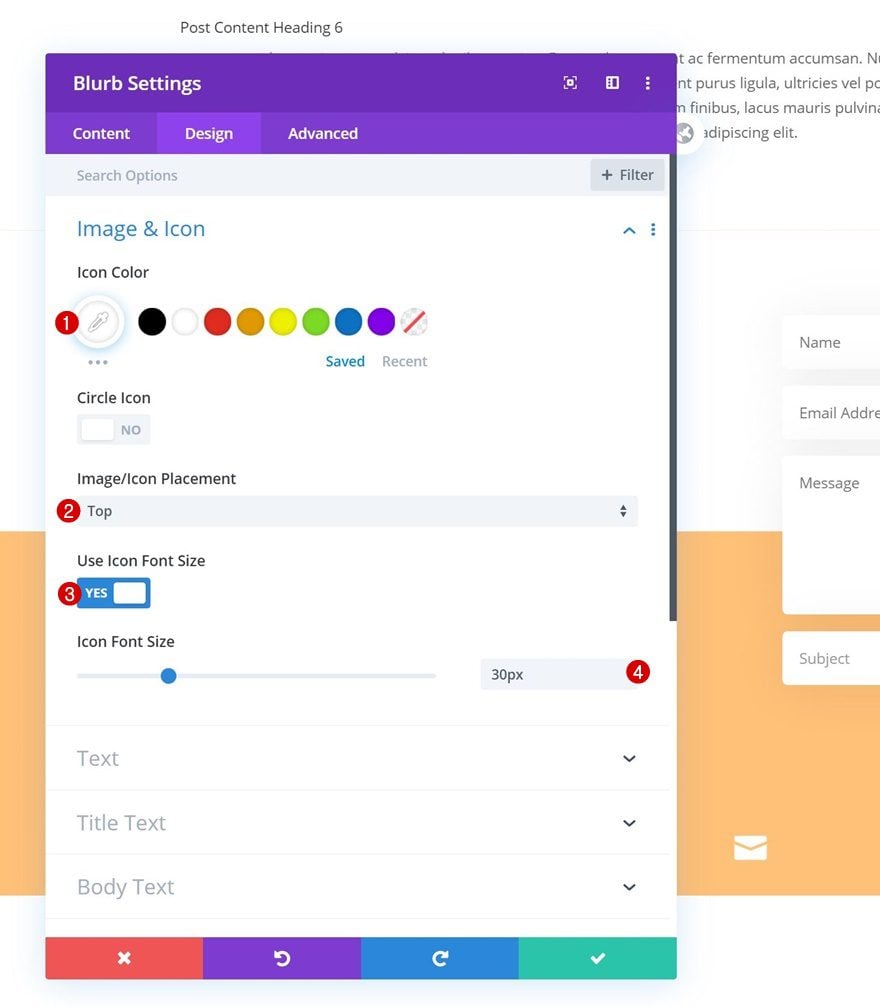
Icon Settings
Move on to the module’s design tab and change the icon settings as follows:
- Icon Color: #ffffff
- Image/Icon Placement: Top
- Use Icon Font Size: Yes
- Icon Font Size: 30px
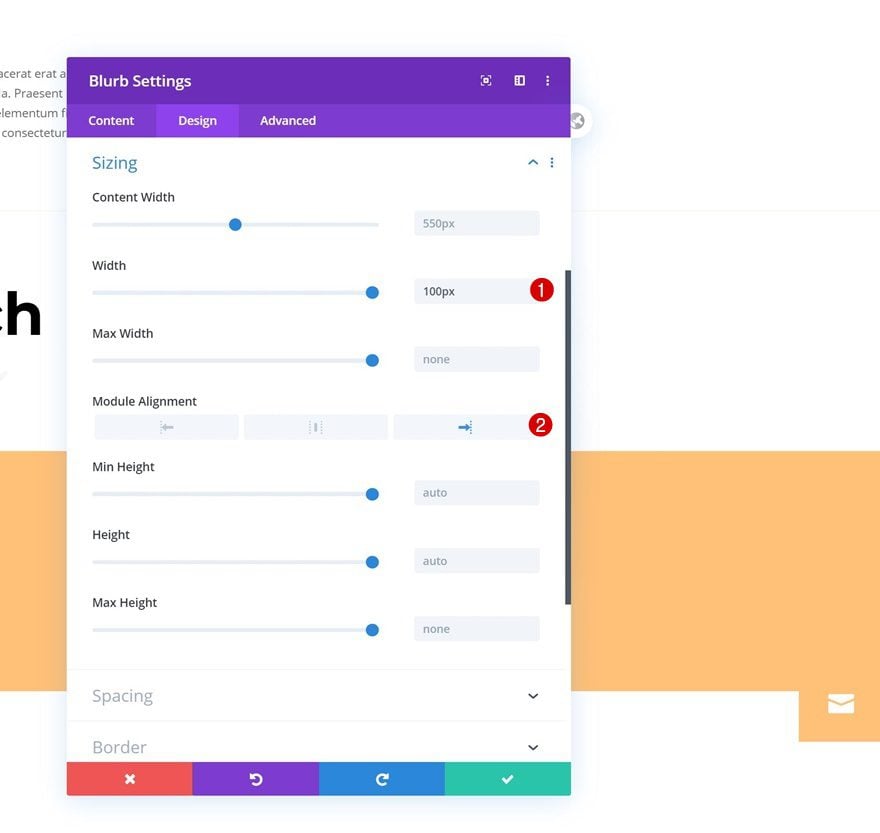
Sizing
Modify the module’s sizing settings as well.
- Width: 100px
- Module Alignment: Right
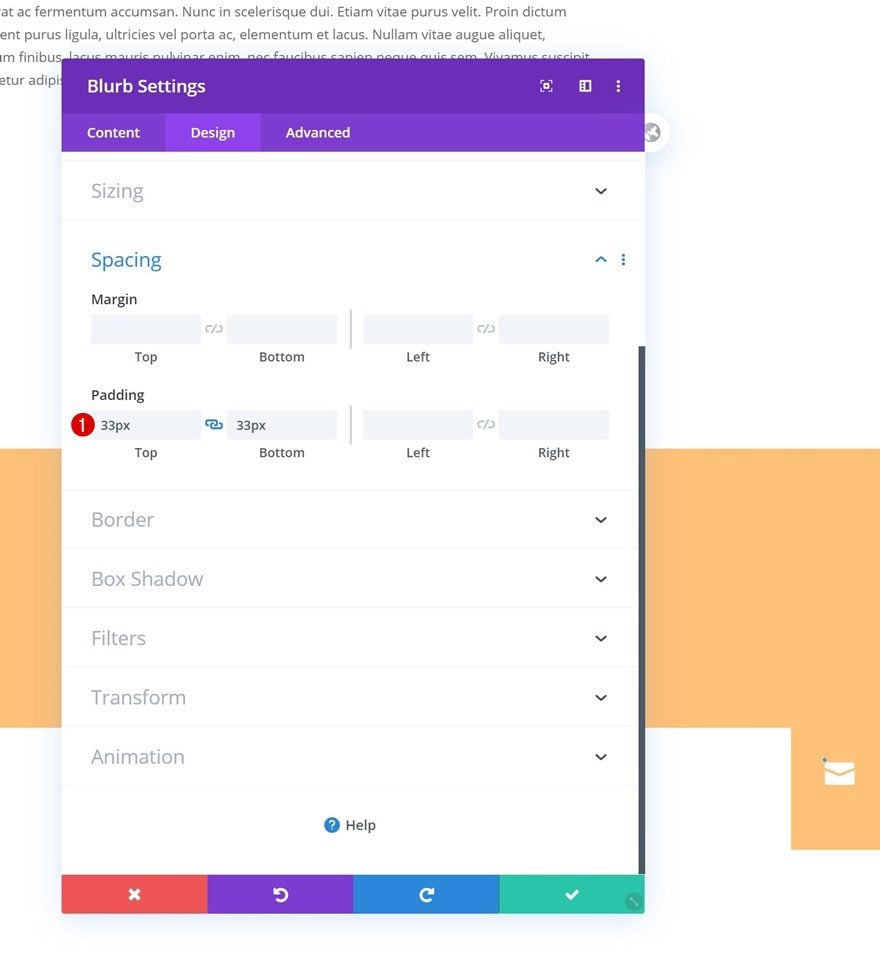
Spacing
And add some custom top and bottom padding.
- Top Padding: 33px
- Bottom Padding: 33px
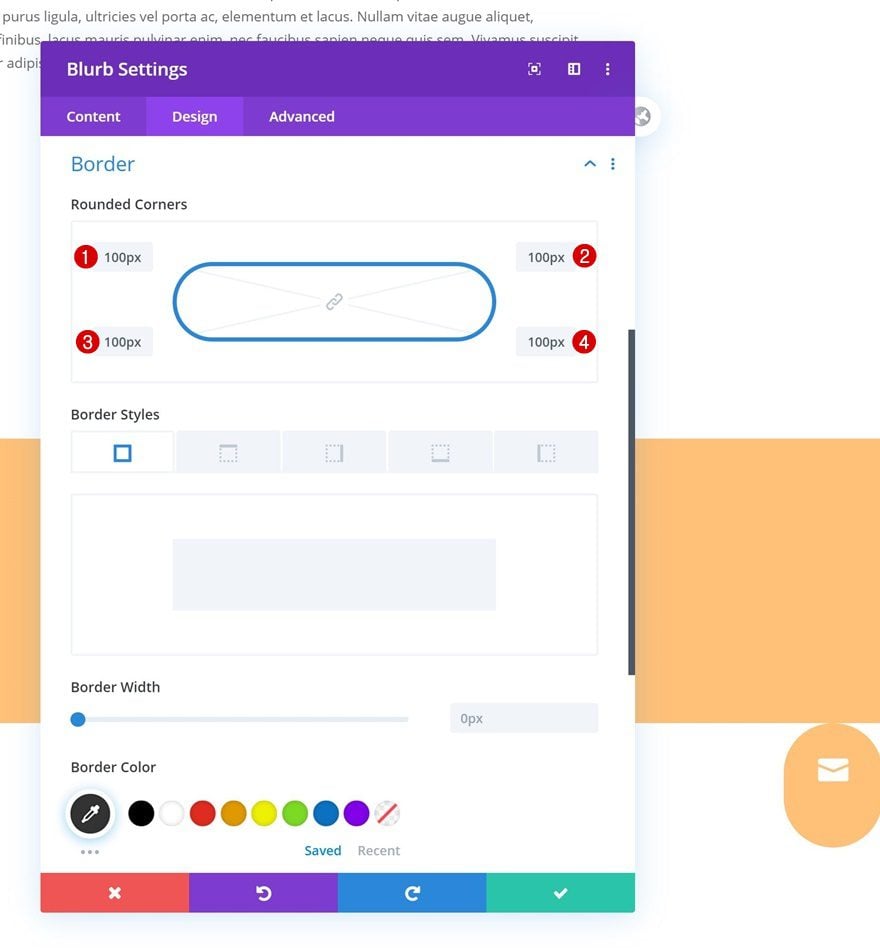
Border
Then, go to the border settings and add some rounded corners.
- All Corners: 100px
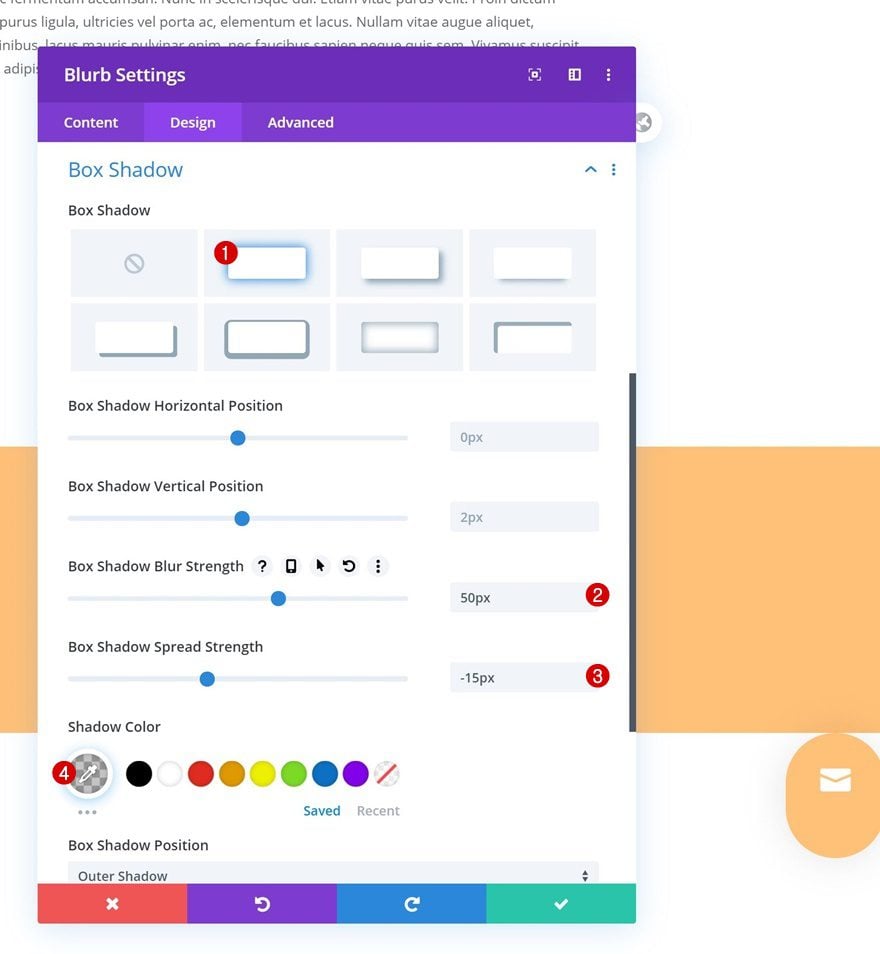
Box Shadow
Add a box shadow as well.
- Box Shadow Blur Strength: 50px
- Box Shadow Spread Strength: -15px
- Shadow Color: rgba(0,0,0,0.23)
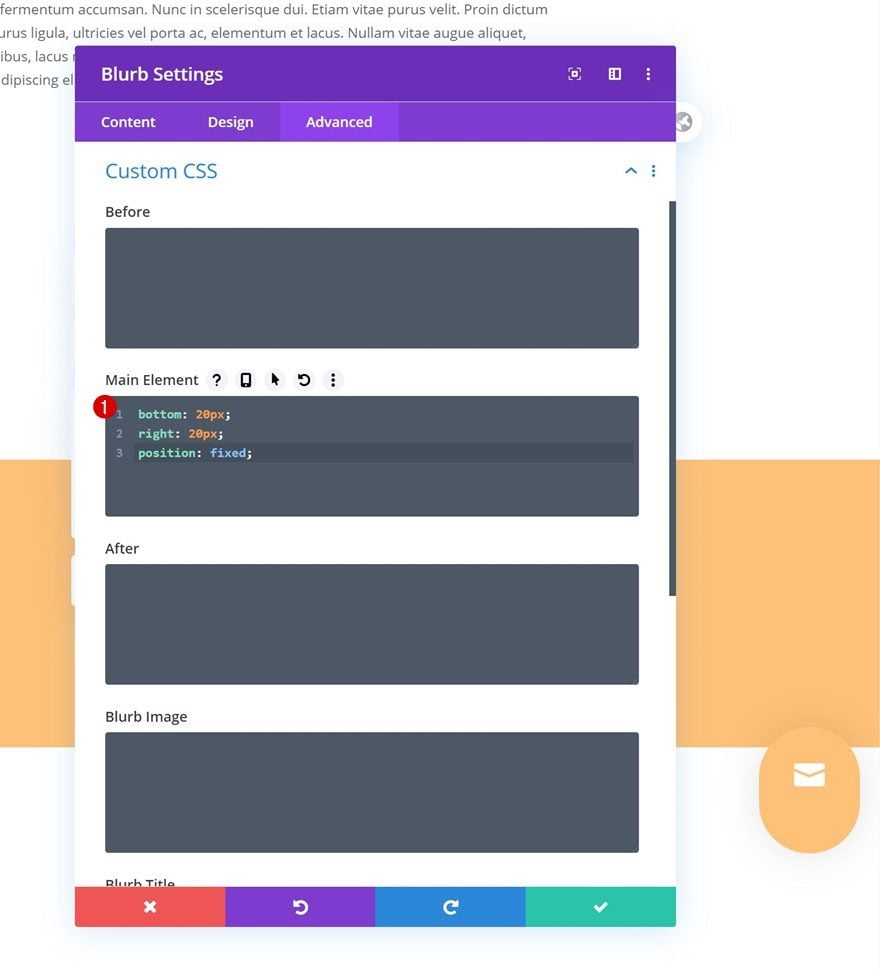
Main Element CSS
To make the icon fixed, we’ll apply three lines of CSS code to the module’s main element in the advanced tab.
bottom: 20px;
right: 20px;
position: fixed;
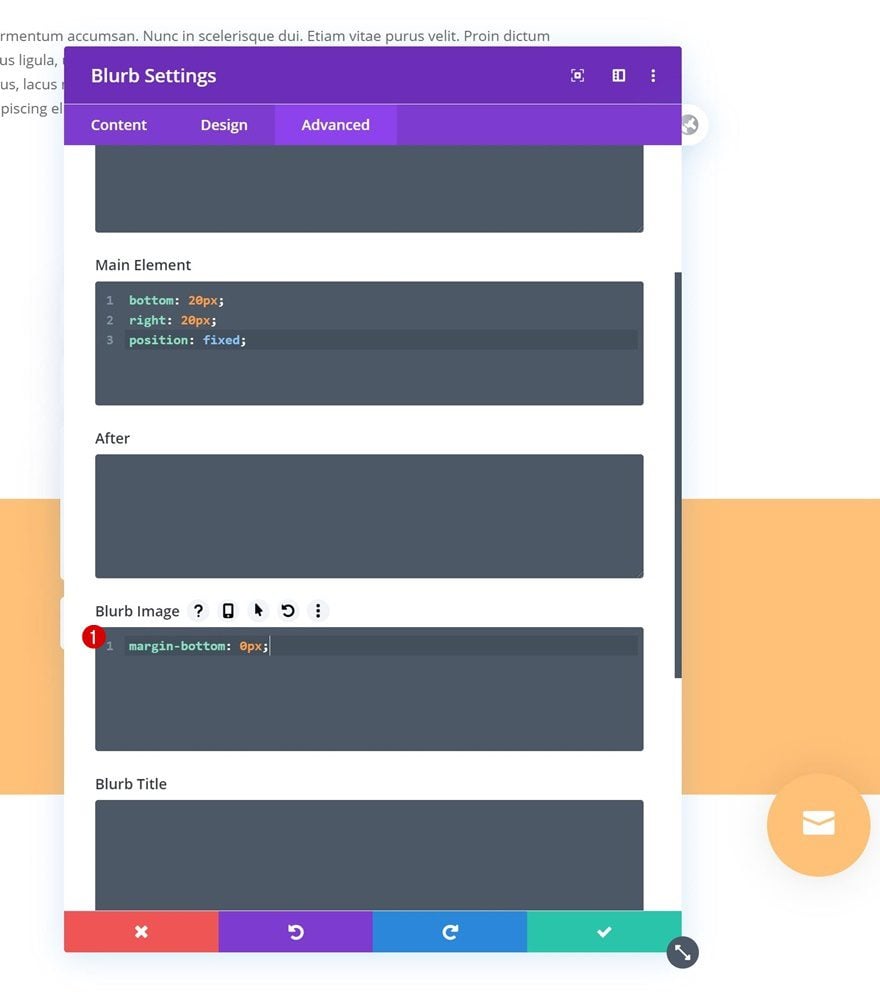
Blurb Image CSS
And remove the module’s image default bottom padding as well.
margin-bottom: 0px;
6. Save All Theme Builder Changes & Preview Result
Once you’ve completed the body of your page template, you can save all changes, exit the Theme Builder and view the outcome on all your pages!
Preview
Now that we’ve gone through all the steps, let’s take a final look at the outcome across different screen sizes.
Desktop
Mobile
Final Thoughts
In this post, we’ve shown you how to add a bottom-page contact form to all your pages at once. To accomplish this, we’ve set up a new page template, included the Post Content Module and added a contact section at the end of the template. We’ve also included a fixed bottom-right icon with an anchor link that’ll redirect visitors to the contact section of the page they’re on. You were able to download the page template JSON file for free as well! If you have any questions or suggestions, feel free to leave a comment in the comment section below.
If you’re eager to learn more about Divi and get more Divi freebies, make sure you subscribe to our email newsletter and YouTube channel so you’ll always be one of the first people to know and get benefits from this free content.


Does this contact form solution work even when there is an ARCHIVED PRODUCTS module in the page? I have pages where I use both ARCHIVED PRODUCTS module and CONTACT FORM module and I was told that the CF module does not work (at the moment) with the AP module in the same page. Thanks for any advice you can give.
Looks brilliant but …
Is there a simpler way of doing this using the footer module?
Sorry, I should have said is there a simpler way of doing this using the theme builder to create a footer template?
Nice!
Any way to pass the URL of the current page? With a global contact form like this, it would be great to know which page the lead is coming from.
Thank you!
This! Already used global forms, but no way to know on which page the form was being send.
This is really great. So well detailed. Honestly I have never tried Divi but always thought of giving it a try. Well your post just made me put my wish in my 2020 checklist.