
Presets are how you stop rebuilding the same design choices over and over in Divi 5. Once you’ve defined your buttons, text styles, or card layouts, the real advantage is being able to move those decisions into new projects instead of starting from zero.
Divi 5 lets you export presets and import them into another site, so your preset library can travel with you. In this post, we’ll export a set of presets, import them into a new project, and look at what transfers cleanly, and what still depends on the setup of the receiving site.
What Are Presets In Divi 5?
Presets in Divi 5 are saved style settings you can reuse on multiple elements. You create a preset once and apply it multiple times, so you don’t have to style the same thing from scratch again. When you update a preset, every module using it updates too. And since presets are organized by module and option group, a Button preset affects only Button Modules, and a text-related preset affects text-based styling options.
Divi 5 also supports Option Group Presets for things like typography, spacing, and borders. Together with Design Variables, presets help you build a consistent design system across your entire site. Learn everything about presets in this ultimate guide.
Managing Presets With The Preset Manager
Once your preset library starts growing, keeping track of everything becomes tricky. The Preset Manager is Divi 5’s answer to that.
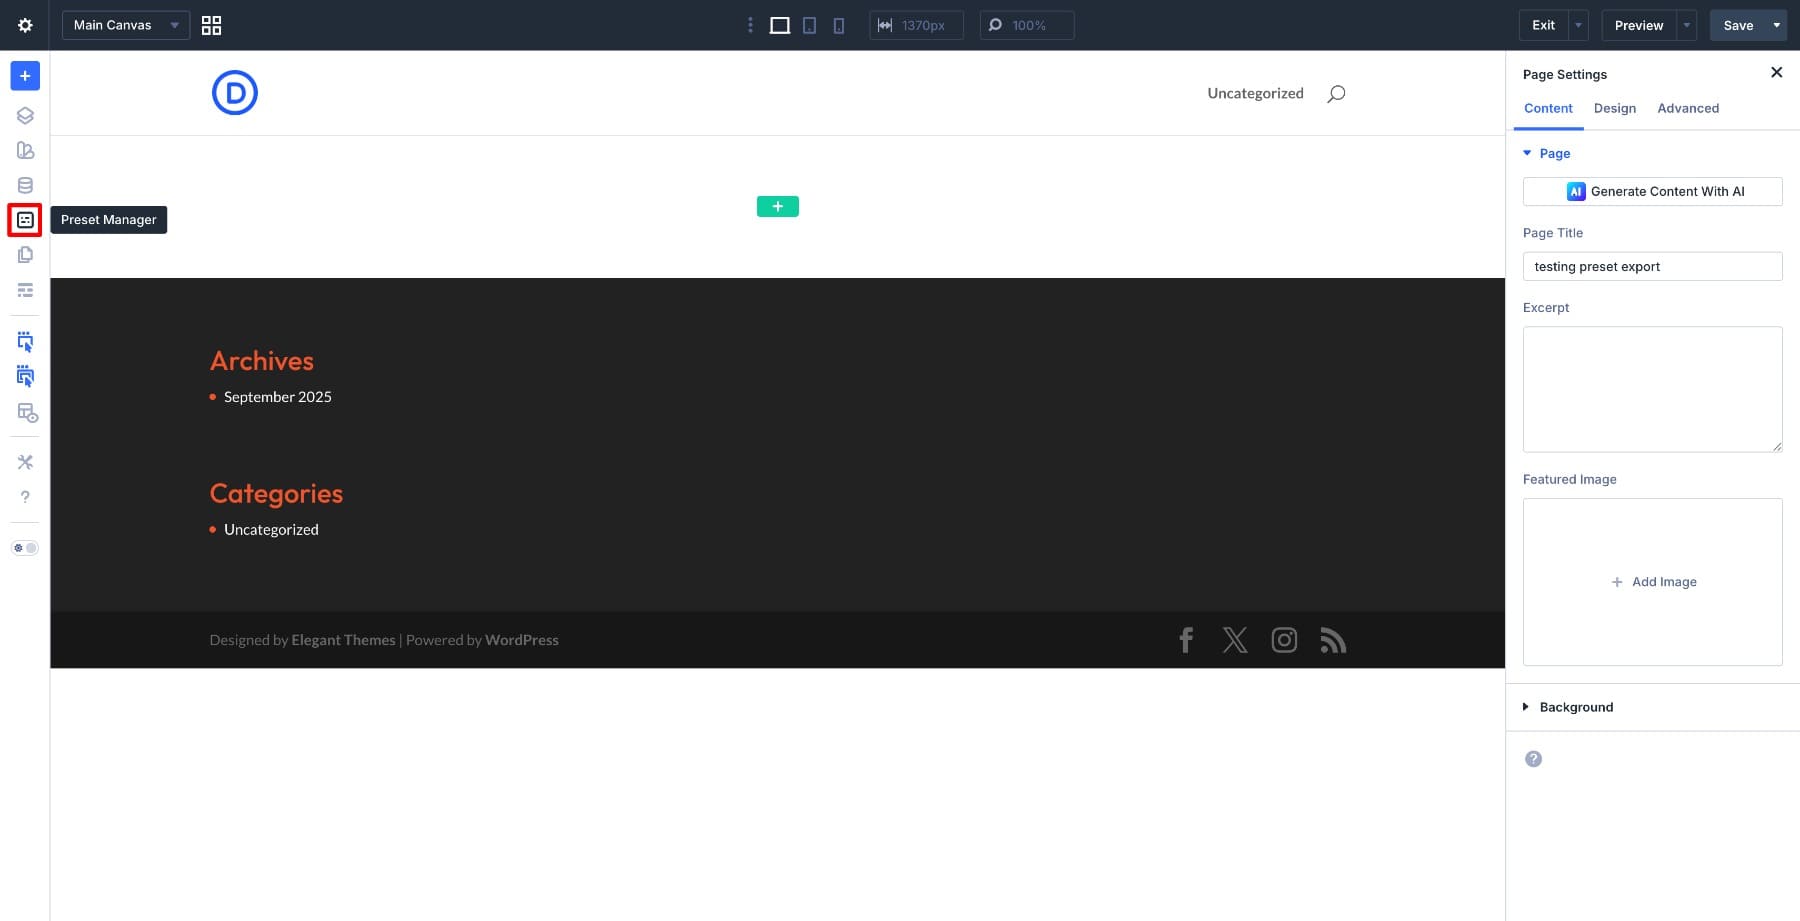
You’ll find it as a dedicated icon in the left sidebar of the Visual Builder. Open it to see a single view of every preset and option group on your site. The list is searchable and filterable, so finding a specific preset in a large library takes seconds.
The Preset Manager also includes a preview panel. When you open or edit a preset, a live preview renders it on a sample element right inside the panel, while your actual page stays untouched.
You can also preview the preset against different background colors. Those colors are pulled from your site’s own color variables, so you’re viewing the preset in a context that matches your design.
From inside the manager, you can do everything you need with presets in one place. Editing a preset here triggers a global update across every element that uses it.
You can duplicate a preset to build on it, delete ones you’ve outgrown, or set any preset as the default for its module type, so new elements pick up that style automatically. Reordering works too, and the order you set here is the same order you’ll see when selecting presets while building a page.
In the Preset Manager panel, you’ll also see the Import/Export icon. (The same icon is available in the Variable Manager, which means you can export presets and Design Variables separately.)
![]()
Clicking it opens the export window, where you can export all your presets at once. The import window works the same way in reverse, letting you bring presets in from a JSON file saved on your computer.
One thing worth knowing before we get into the steps: the exported file contains your preset definitions only. Layouts, page content, and templates don’t come along for the ride. Design Variables are also managed separately, since they have their own export in the Variable Manager. (That said, if presets reference design variables, those dependent variables are included during import. We’ll test that in a later section.)
So what you’re moving between sites is the styling logic, and everything else stays where it is.
Why Import And Export Presets?
Think about how often you start a new site from scratch. The layout changes and the content changes, but the core styling decisions usually stay similar. How your buttons behave, how your headings are spaced, how your cards are bordered. Without preset export, you rebuild all of that every time. With it, you export your preset library from one project and drop it into the next, so you can start with proven styling decisions instead of rebuilding from zero.
This matters even more once a site leaves your hands. When you hand off a project to a client or another designer, the styling needs to stay consistent going forward. A site built with presets helps with that because the rules are already defined and ready to apply. Whoever picks it up next doesn’t have to guess at spacing, colors, or typography. They can keep building using the existing presets.
And if you’re working across multiple projects for the same brand, preset packs become a real asset. Define the brand’s components once, export them, and bring them into every new site that shares the same identity. The visual language stays consistent without rebuilding it from the ground up each time.
How To Export Presets In Divi 5
To keep things simple, this walkthrough uses a small preset set: three button presets, one background-related preset, and one image element preset. Option Group Presets for things like typography or spacing are created and exported the same way.
Start by creating a single button preset and applying it to a Button Module. This preset defines the button’s color, border, and spacing.
Once that one is saved, create the rest. Add your remaining button presets, the background-related preset, and the image element preset by following the same steps.
With your presets in place, open the Preset Manager and click the Import/Export icon.
![]()
This opens the export panel. Give the file a clear name so it’s easy to recognize later, then export it as a JSON file.
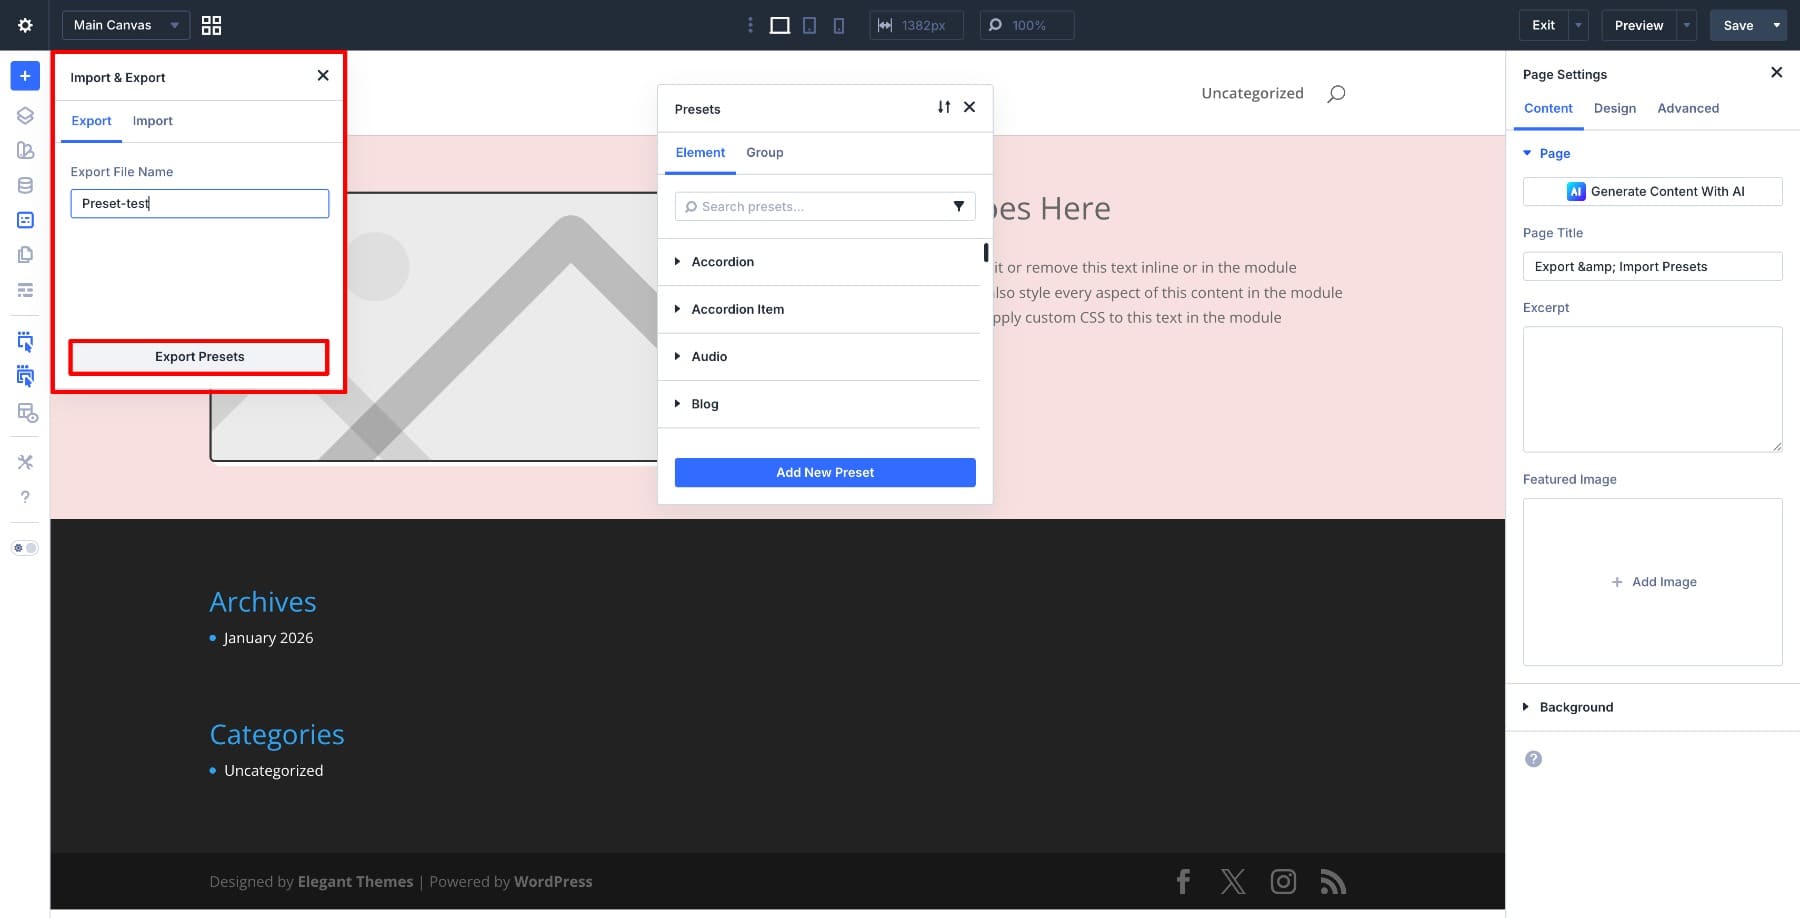
Here’s how to do it step-by-step:
How To Import Presets In Divi 5
You have a site with presets already built out. Now it’s time to bring them into a new project.
Before you begin, make sure the new site is running a Divi 5 version that supports Preset import and export (Divi 5 Public Beta 7 or newer). Using compatible versions on both sites helps prevent missing preset groups or import errors.
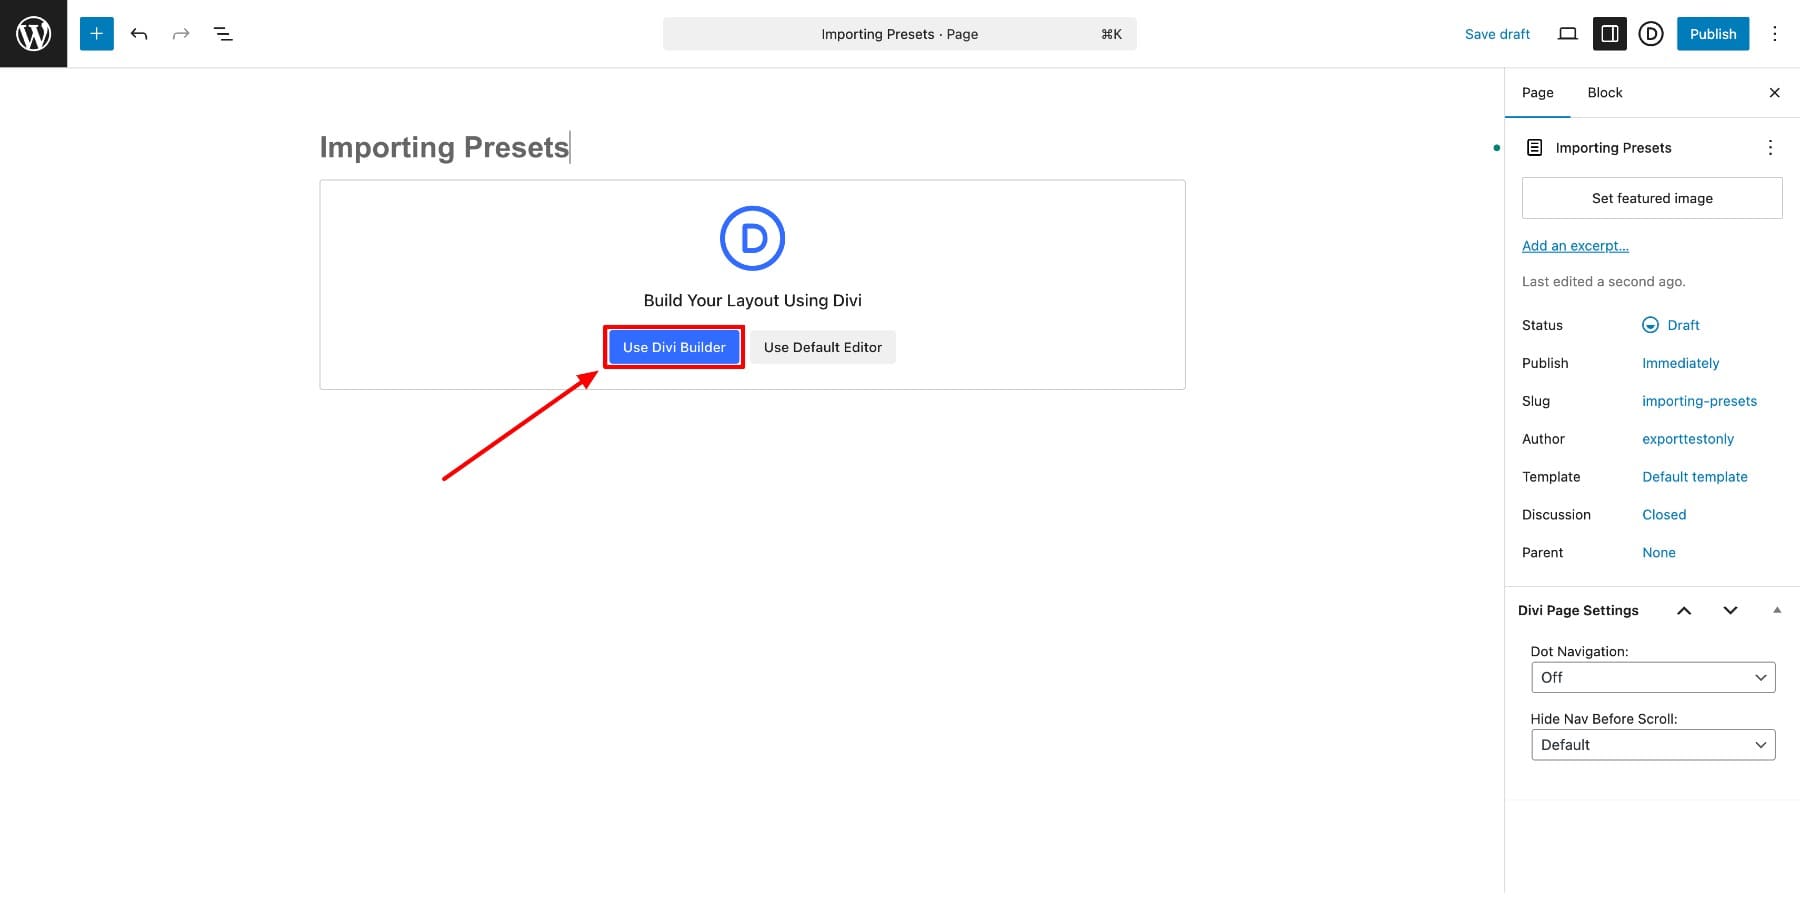
Add a new page and click Use Divi Builder to open the Visual Builder.
Open the Preset Manager and click the Import/Export icon.
![]()
Switch to Import and upload the JSON file you exported from the original site.
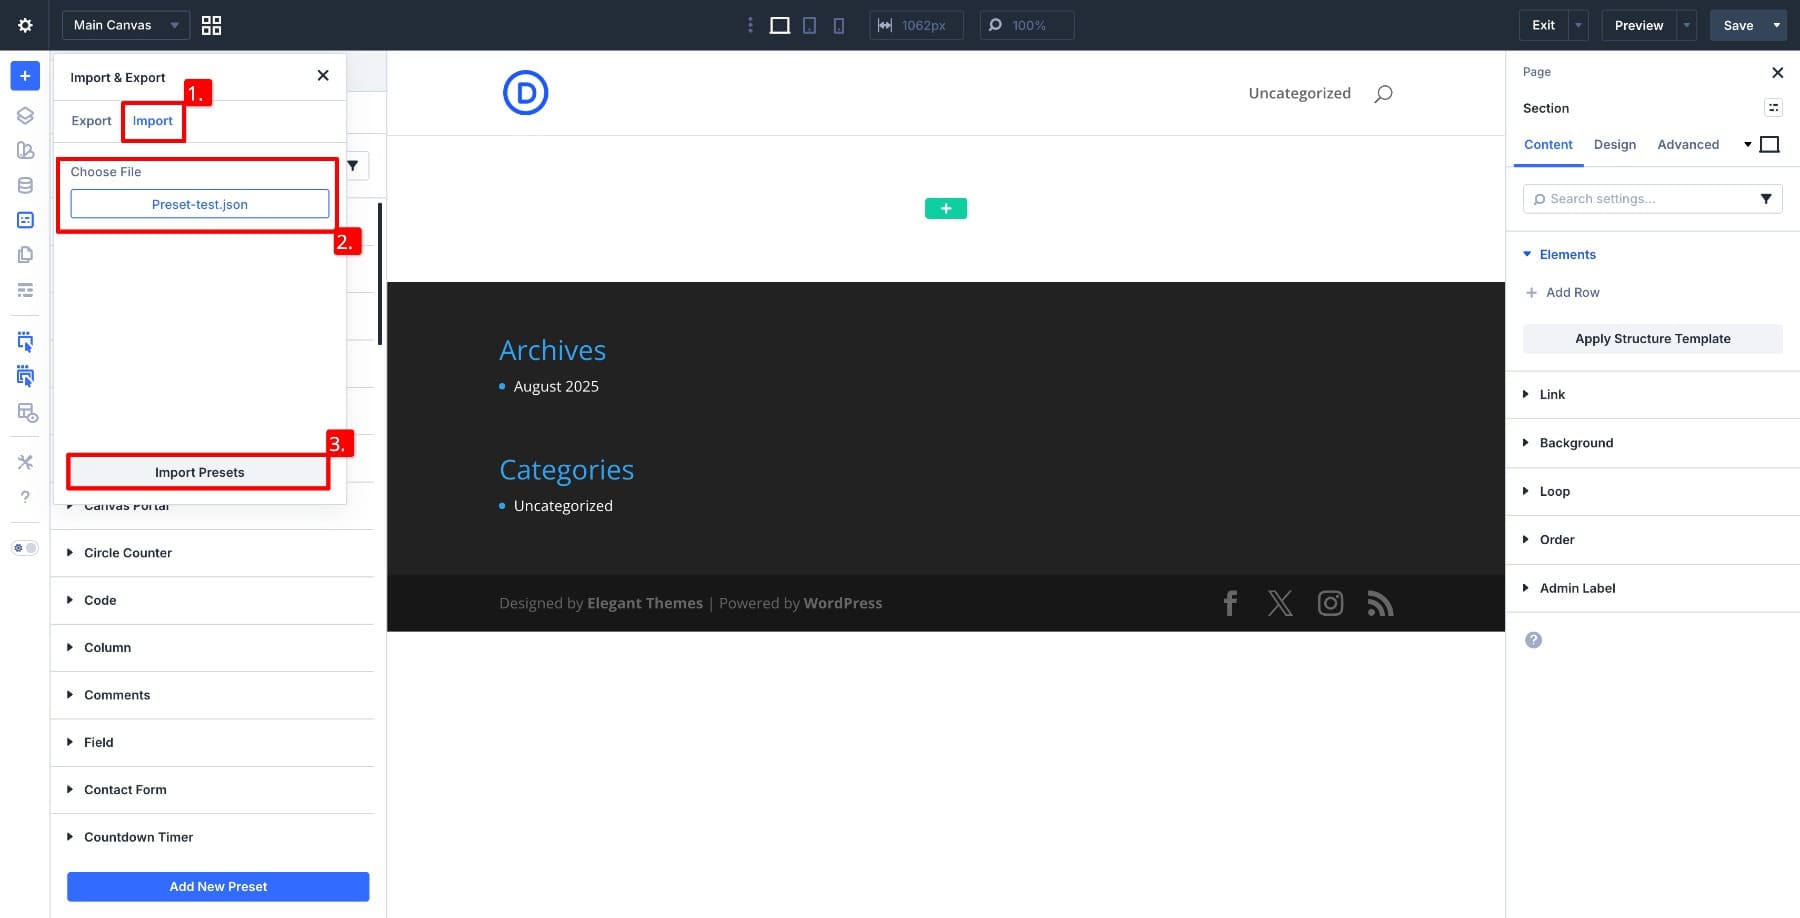
Divi reads the file and sorts the presets into the right places automatically.
Once the import is done, verify everything by opening the Preset Manager and checking each module’s preset list.
Now let’s put them to use. We’ve added a simple layout with Heading, Text, Button, and Image modules to test with.
Open any module and look for the imported presets in the Element or Option Group dropdown. Select one and the styles apply right away. You can keep going and apply presets across the rest of the layout the same way.
From here on, these presets behave like ones you created on this site. Edit them, duplicate them, set them as defaults, or swap them out later by importing an updated file.
What Happens If Your Presets Use Design Variables?
In most real projects, presets don’t rely on fixed values. They reference Design Variables for things like font sizes, spacing, and colors. So the obvious question is: what happens when you import presets that depend on variables?
At a minimum, the preset will still import, and it will still reference the variable names. To get the same results on the new site, you typically need the same Design Variables available there as well.
In our test, importing the preset file also brought over the Design Variables those presets referenced. After import, we could see the presets in the Preset Manager and the related variables in the Variable Manager.
Let’s test two presets:
- A Heading 1 Big preset that uses the H1 Desktop Big number variable for its font size.
- A Pattern Background preset that uses color variables for its background styling.
After importing the preset file into a new site, both presets worked immediately.
When we opened the Heading 1 Big preset, the font size was still connected to the same number variable, not converted into a hard-coded value. The variable itself appeared inside the Variable Manager on the new site.
The same happened with the Pattern Background preset. Its background colors were still referencing color variables, and those variables appeared on the new site after import.
This means you’re not just moving styling rules between projects. In many workflows, you’re also preserving the design logic that makes those presets flexible.
Best Practices For Preset Packs
Presets work best when they’re treated as part of a system, not just one-off styles. A few simple habits can make preset packs easier to reuse, update, and move between projects.
Start with how you name and organize things.
- Use A Clear Naming Pattern: Name presets based on what they do, not how they look. A structure like Brand / Component / Variant, for example “Studio / Button / Primary,” makes them easy to find and reuse across layouts and sites.
- Store Preset Files With Your Project Assets: Save exported preset files alongside your layouts or design variables. That way your styling system stays portable and you’re not digging for files when you need them later.
Then, think about how you group your exports.
- Keep A Base Preset Pack: Maintain one core pack for typography, buttons, and spacing that you use on every project. This gives you a consistent starting point when creating new sites.
- Export Presets In Small Groups: Create separate packs for Buttons, Text, or Cards rather than exporting everything at once. Smaller files are easier to manage, replace, and test without affecting unrelated styles.
- Separate Project-Specific Presets: Export styles that are unique to a single site into their own pack. This keeps one-off designs from becoming permanent defaults in future projects.
Finally, keep the system healthy over time.
- Test Presets After Import: Apply at least one preset to a module and confirm that spacing, colors, and typography behave correctly. Catching small issues early saves a lot of backtracking later.
- Update Existing Presets Instead Of Duplicating: When a style changes, modify the original preset and re-export it. A handful of near-identical presets makes the library harder to maintain over time.
Try Presets In Divi 5 Today!
Once you start exporting and importing presets in Divi 5, the way you approach new projects changes. You’re no longer starting from a blank slate each time. The styling decisions you made on your last build are already sitting in a JSON file, ready to bring into the next one.
Over time, this becomes more than a convenience. As your preset packs grow and your naming conventions settle in, you end up with a reusable library that speeds up every new build while keeping your work consistent. Export the presets you trust, import them where you need them, and start each project with your design system already in place.


Leave A Reply