
Scalable Vector Graphics, or SVGs, work differently from regular image files. A PNG or JPEG stores pixels. An SVG stores vector instructions, which is why a logo, icon, or illustration can stay sharp on a phone screen, a desktop monitor, or a large display.
That flexibility makes SVGs useful for more than crisp image quality. Since SVGs are built from paths and shapes, you can often adjust their fill, stroke, size, and animation without opening a design tool. Divi 5‘s new SVG Module brings that workflow into the Visual Builder. You can paste SVG markup directly, upload an SVG file when your WordPress site supports it, and style the graphic with Divi’s design controls.
What Is Divi 5’s SVG Module?
The SVG Module is a dedicated Divi 5 module for adding scalable vector graphics to a page.
Divi has long included an Image module, but SVGs are not quite the same as standard image files. They are vector-based graphics made from markup, paths, and shapes. That means they can scale without losing quality and can be styled in ways a flat image file cannot.
That distinction matters.
The Image module can display image files. The SVG Module is built for SVG-specific workflows. It lets you add SVG markup directly or use an uploaded SVG file, then control key SVG styles such as Fill and Stroke from inside Divi.
Where The SVG Module Works Best
Use the SVG Module when the graphic needs to stay sharp, scale cleanly, or match your design system.
- Logos and brand marks: Keep branding crisp across screen sizes and high-density displays.
- Icons: Add custom icons and style their fill or stroke to match your site’s palette.
- Decorative shapes: Use dividers, blobs, flourishes, and background accents that scale without blur.
- Custom illustrations: Paste SVG markup for graphics you want to style directly in the builder.
For photos, screenshots, and raster artwork, the Image module is still the right choice. For vector graphics that need styling control, the SVG Module is the better fit.
How To Use The Divi 5 SVG Module
The workflow is simple. Add the module, choose the SVG source, then style the graphic in the Design tab. No custom code is required for the module itself. The only extra setup you may need is WordPress SVG upload support, and only when you want to upload SVG files to the Media Library.
Add The SVG Module To Your Page
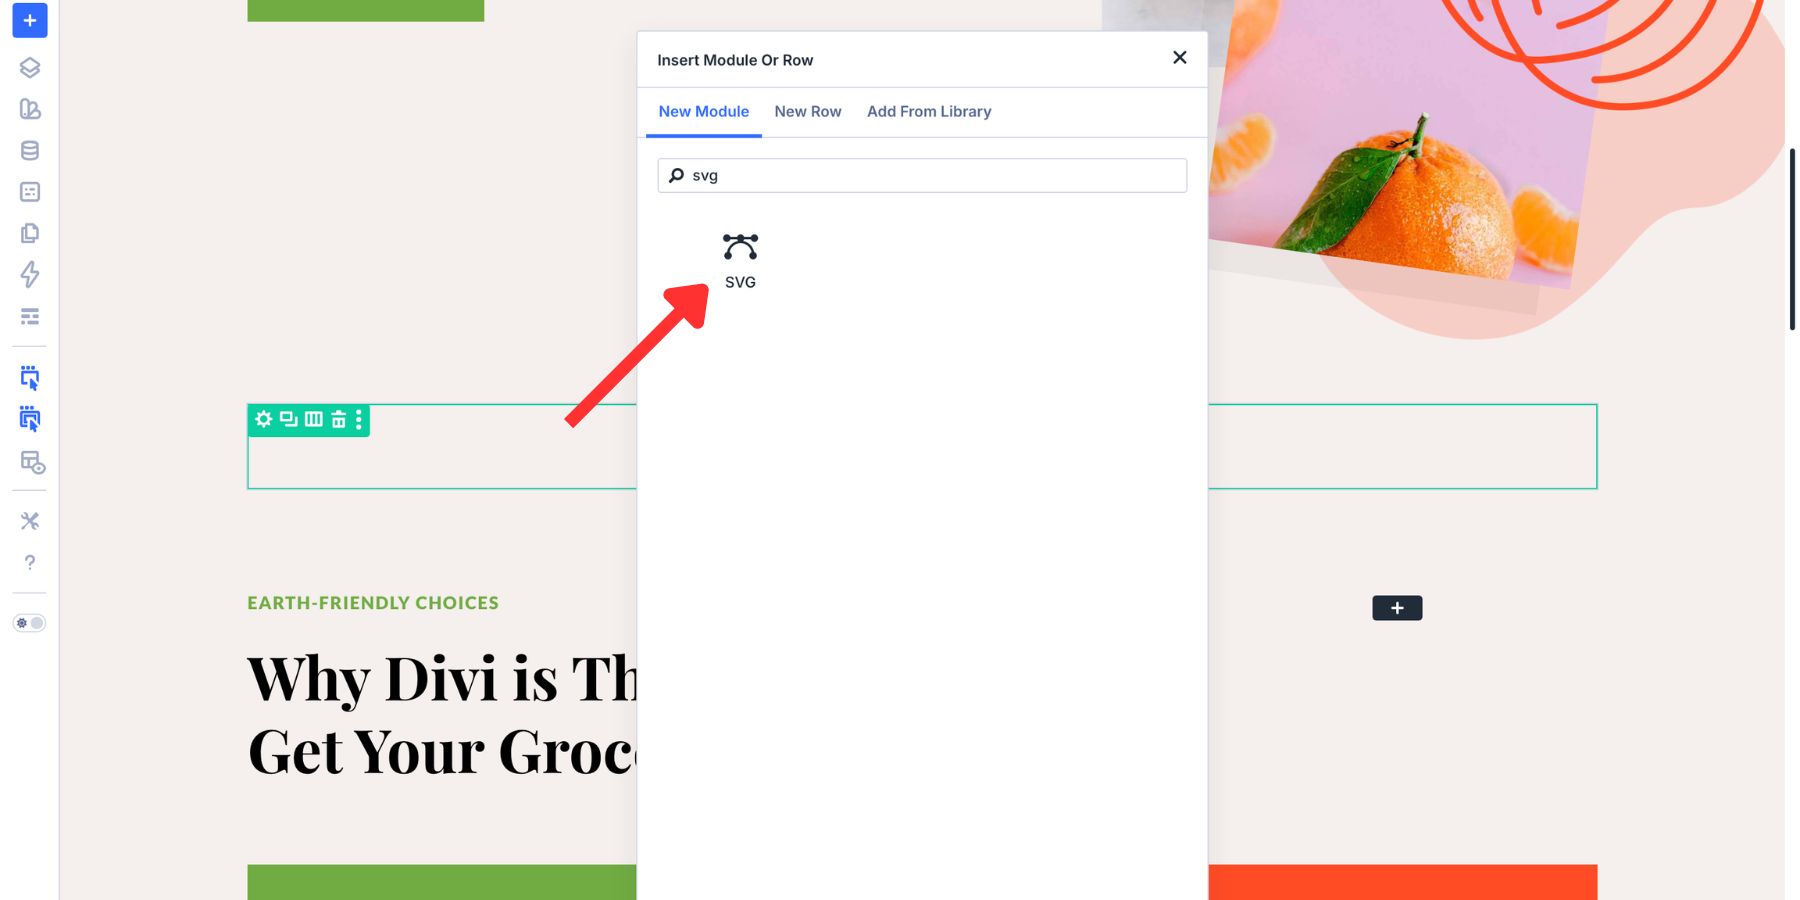
Click the gray plus icon inside any Row to open the module list. Type SVG in the search bar, or scroll until you find the SVG Module. Click the module to add it to your page.
The module loads and opens its settings panel. You can place it anywhere a standard Divi module works, including single-column rows, multi-column layouts, nested rows, Flexbox layouts, and Grid layouts.
Choose Your SVG Source
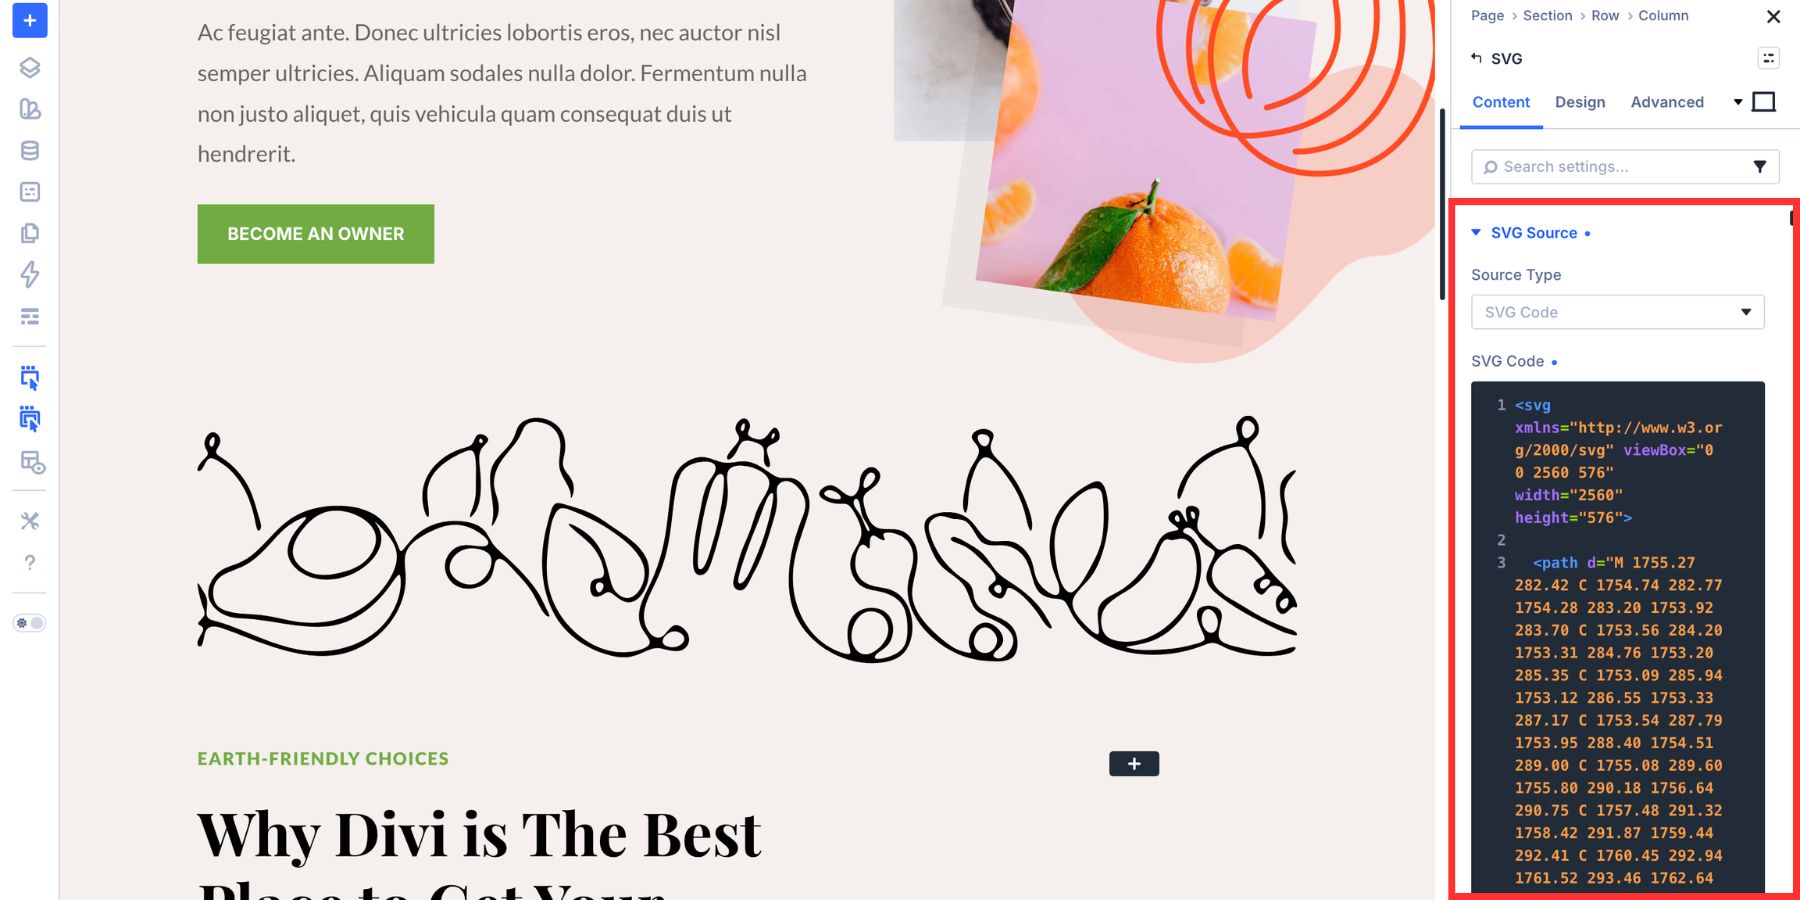
In the Content tab, the SVG Source setting gives you two ways to add your graphic:
- SVG Code: Paste valid SVG markup directly into the module.
- Uploaded SVG: Select an SVG file from the WordPress Media Library.
Both options can display the same graphic. The better choice depends on how you want to manage the asset.
Option 1: Paste SVG Code
Choose SVG Code when you want the fastest workflow and do not need to store the SVG as a separate Media Library file. Paste the full SVG markup into the field. The markup must be a valid <svg> element. Partial or broken SVG code will not render correctly.
This option does not require WordPress SVG upload support because you are not uploading a file to the Media Library. You can get SVG markup from tools like Figma, Adobe Illustrator, or icon libraries that offer copyable SVG code. Clean, simple SVGs usually work best because they are easier to style with Fill and Stroke.
Option 2: Upload An SVG File
Choose Uploaded SVG when you want to manage the graphic as a reusable file in the WordPress Media Library. This workflow is useful for shared brand assets, client-editable graphics, or SVGs that appear across multiple pages.
There is one important WordPress detail to know first: WordPress blocks SVG uploads by default for security reasons. That does not stop the SVG Code option from working. It only affects the Uploaded SVG workflow.
Do You Need To Enable SVG Uploads?
Not always. If you paste SVG markup into the SVG Code field, you do not need to enable SVG uploads in WordPress.
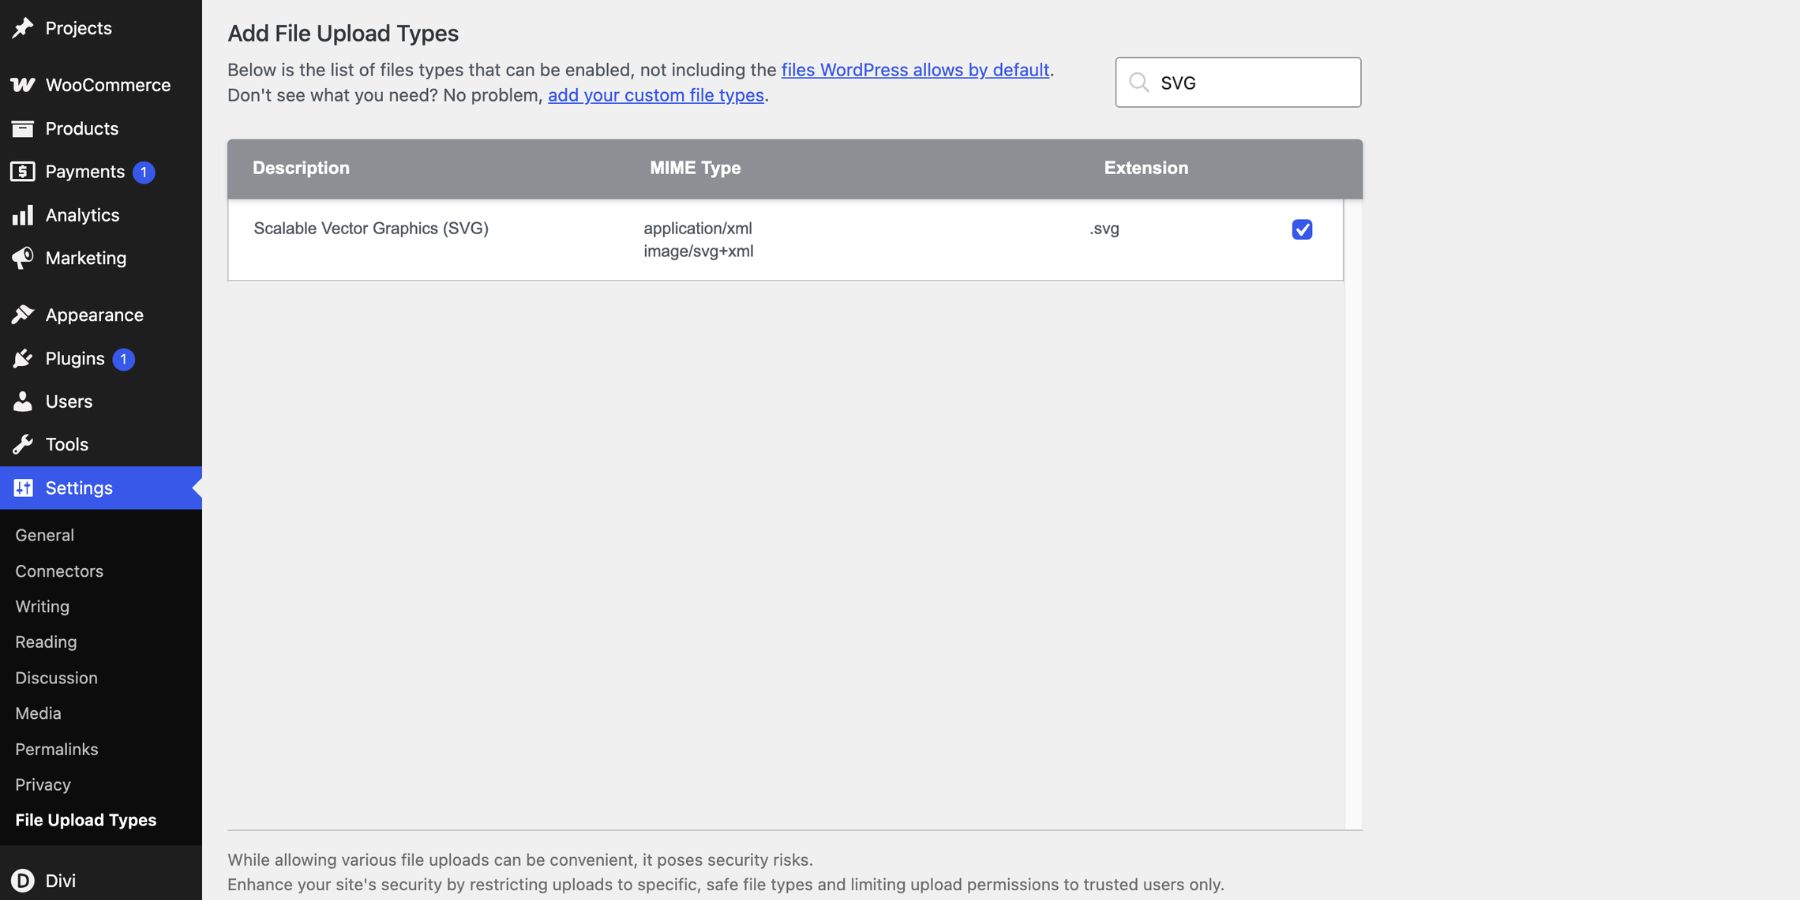
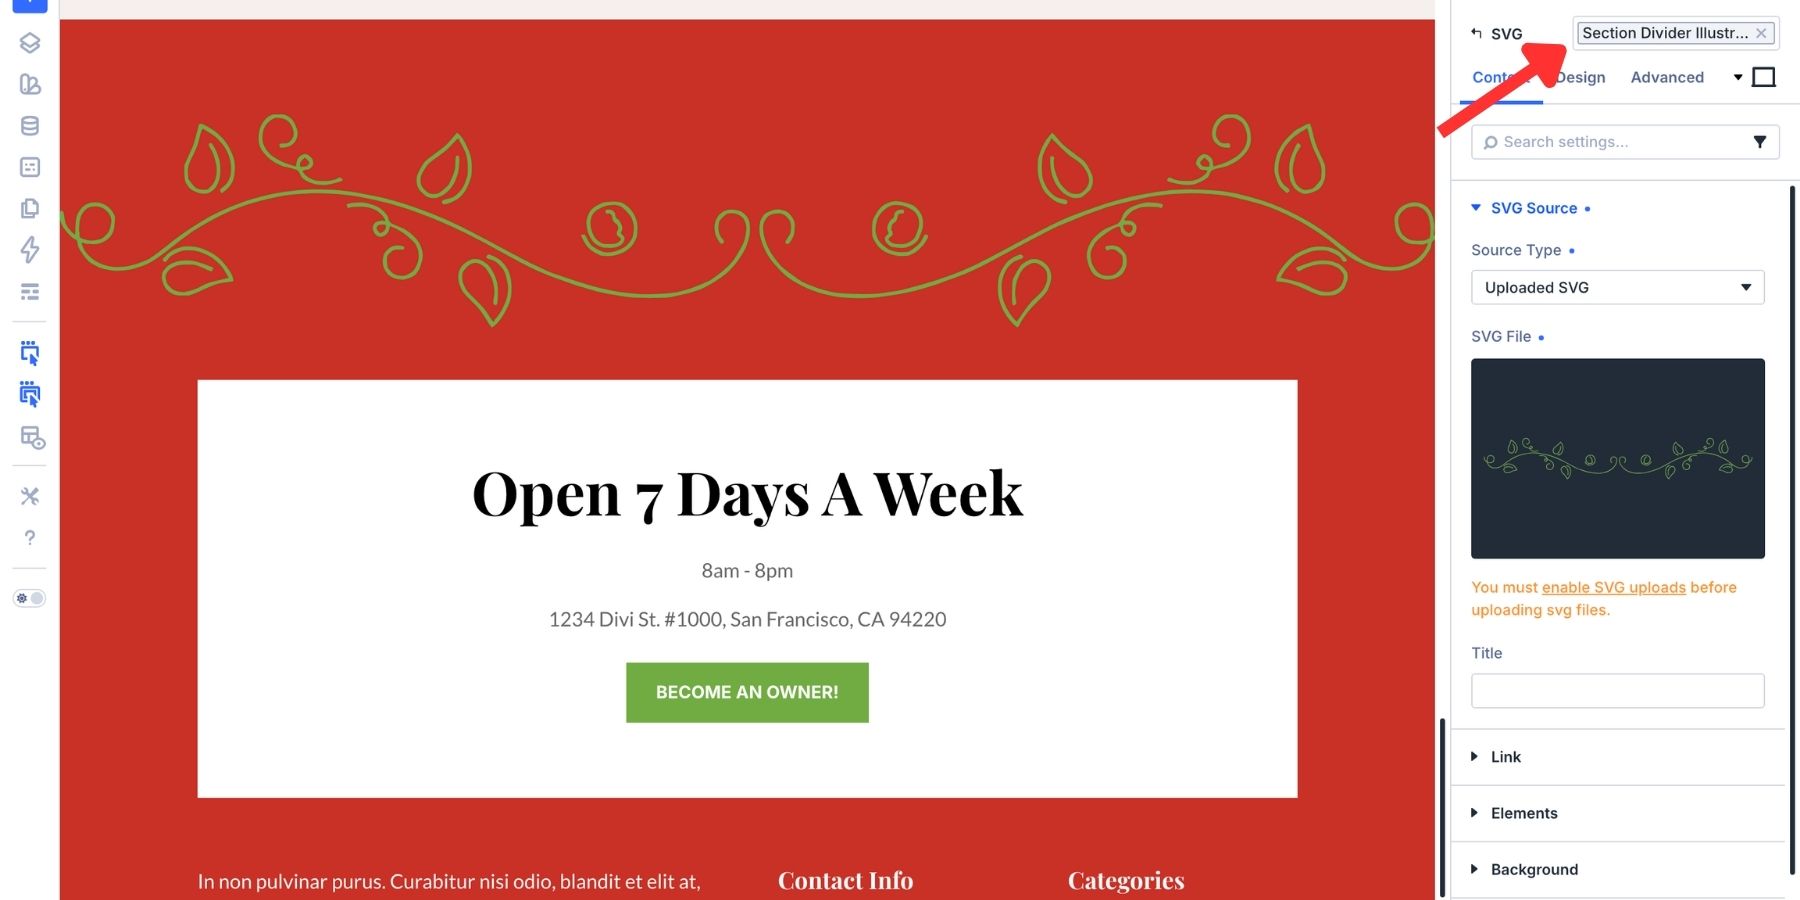
If you want to use Uploaded SVG, then your site must allow SVG uploads. The safer no-code path is to use a trusted plugin instead of adding custom PHP to your theme files. The screenshot below uses the File Upload Types by WPForms plugin to enable the SVG file type. After installing and activating it, go to Settings > File Upload Types, search for SVG, check the SVG option, and save your settings.
Use this only if your workflow needs SVG files in the Media Library. SVG files can contain scripts if they are not cleaned properly. Only upload SVGs from trusted sources, and use a plugin or workflow that sanitizes SVG files before they are added to your site.
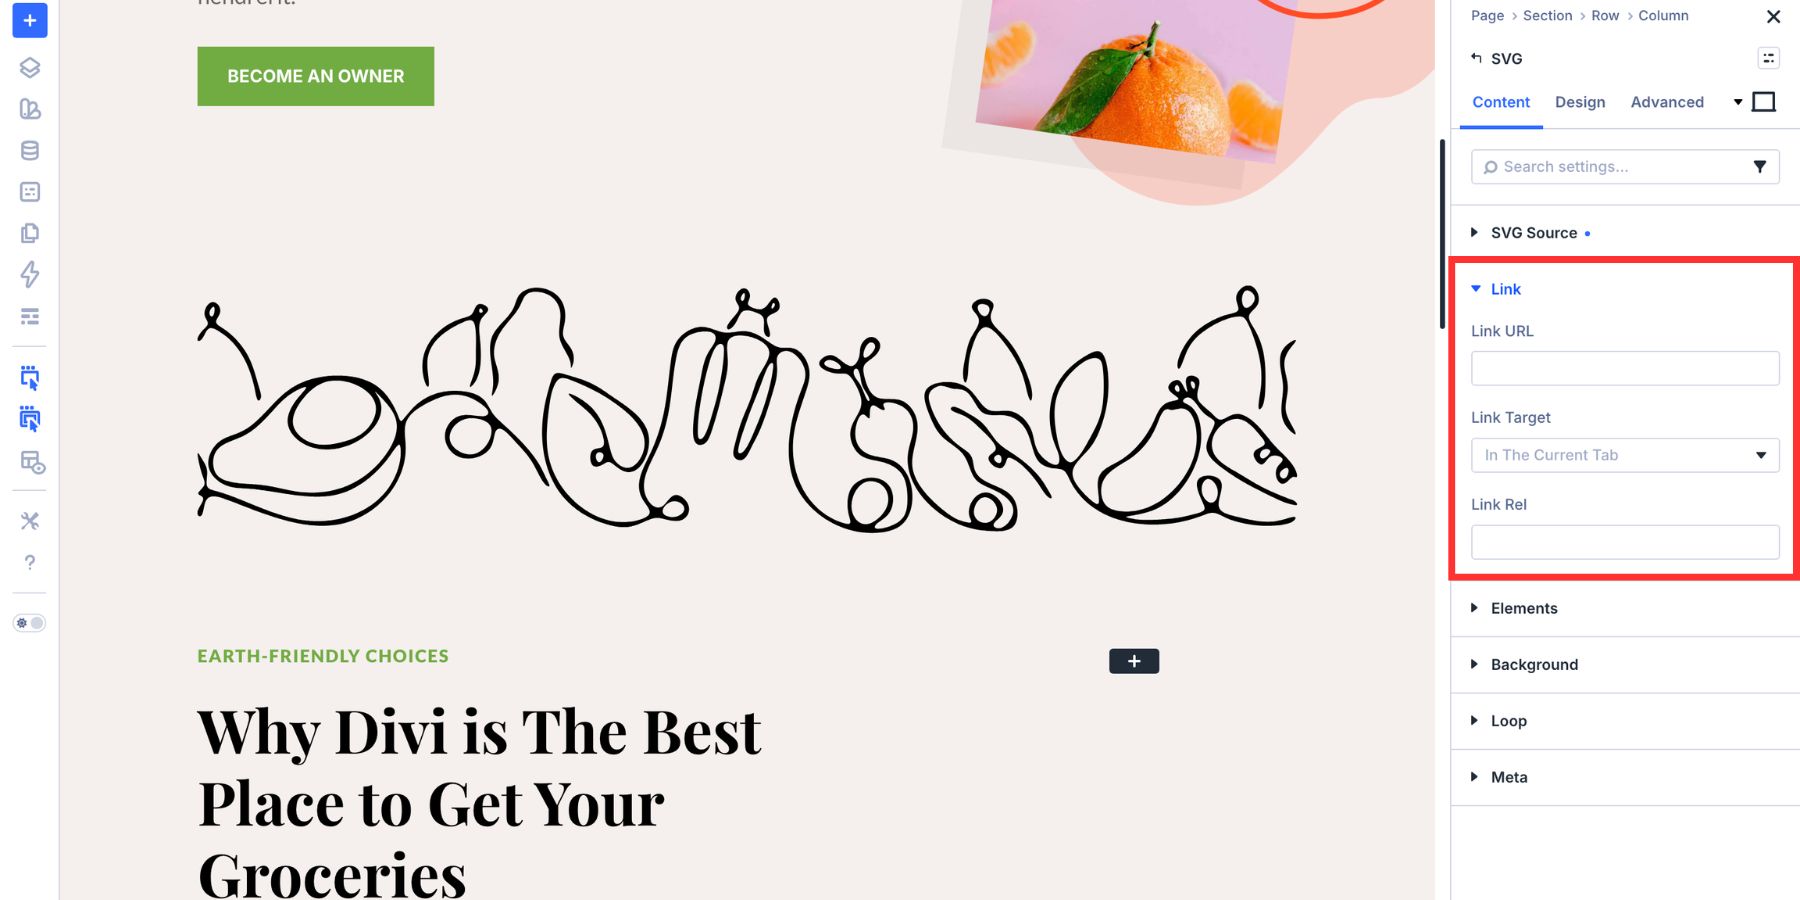
Add A Title And Link When Needed
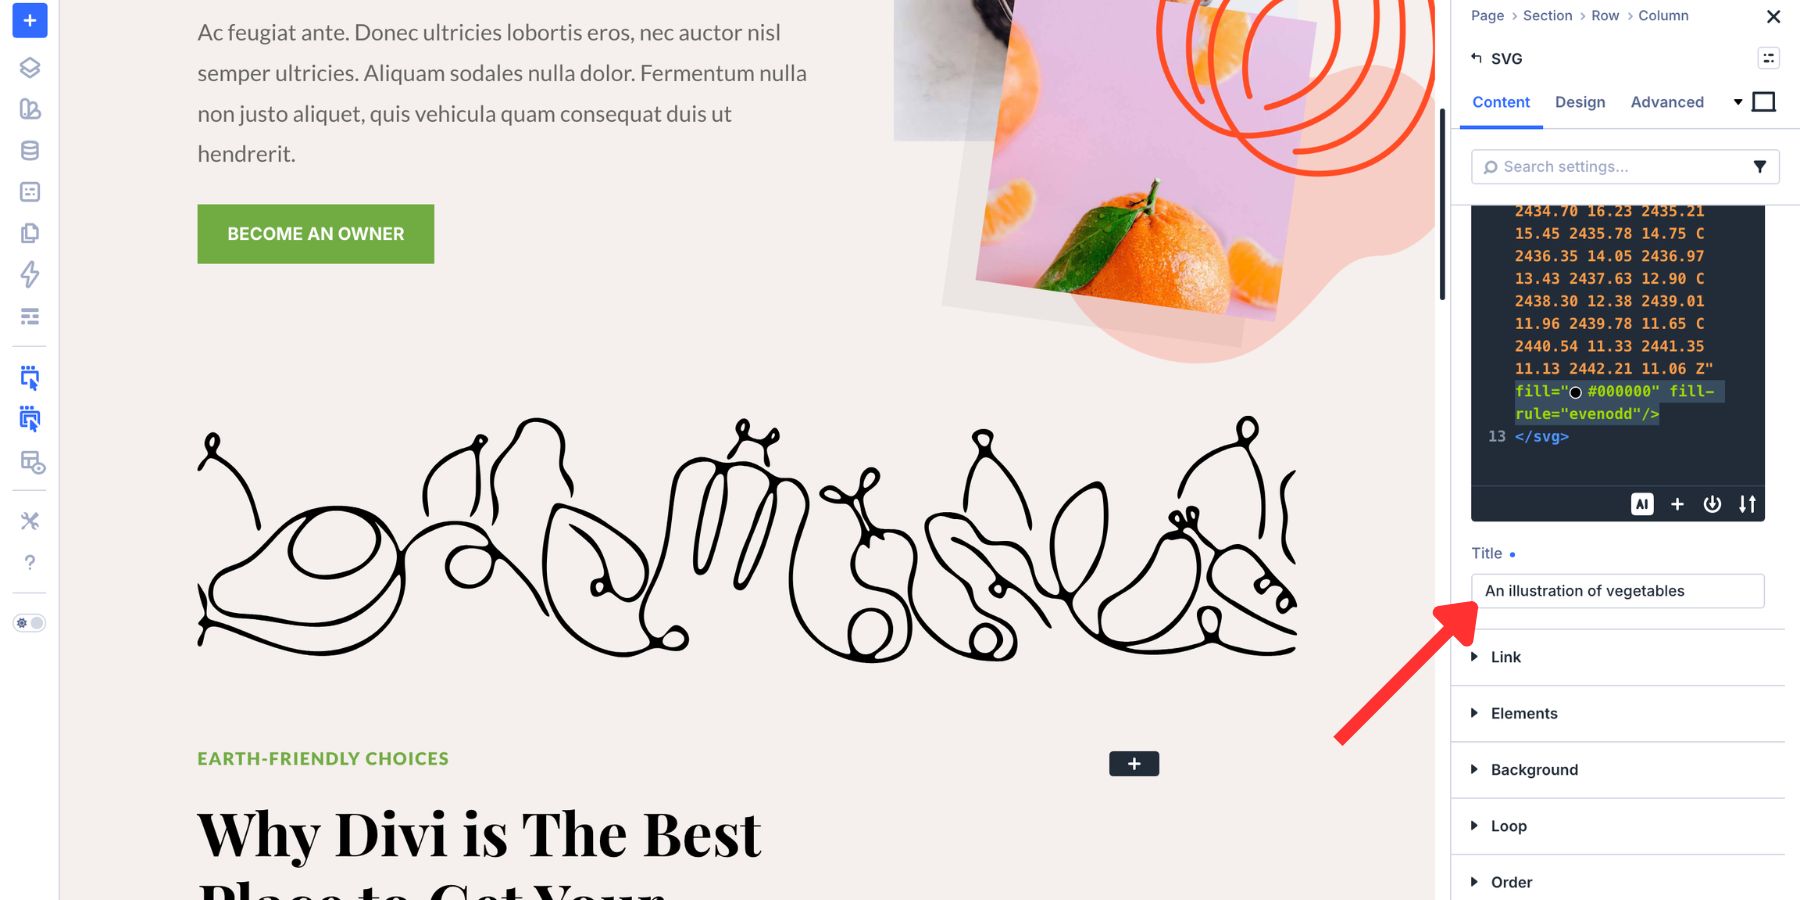
The Content tab also includes a Title field. Use it when the SVG communicates meaning, such as a logo, icon, or illustration that supports the content. The title can help with accessibility and may appear as a tooltip when someone hovers over the graphic.
The SVG Module also includes Link settings. Use them when the whole SVG should be clickable, such as a logo that links to the homepage or an icon that links to a social profile.
The SVG module is incredibly versatile. It can be used basically anywhere as a decorative component. Cards, hero section, highlights, and more. For this example, we are using a vegetable line art SVG as shown as a section divider.
And for that effect, it needs to go across the page. So, we went ahead and set the row’s width and max-width to 100vw, so it remains flush on both sides.
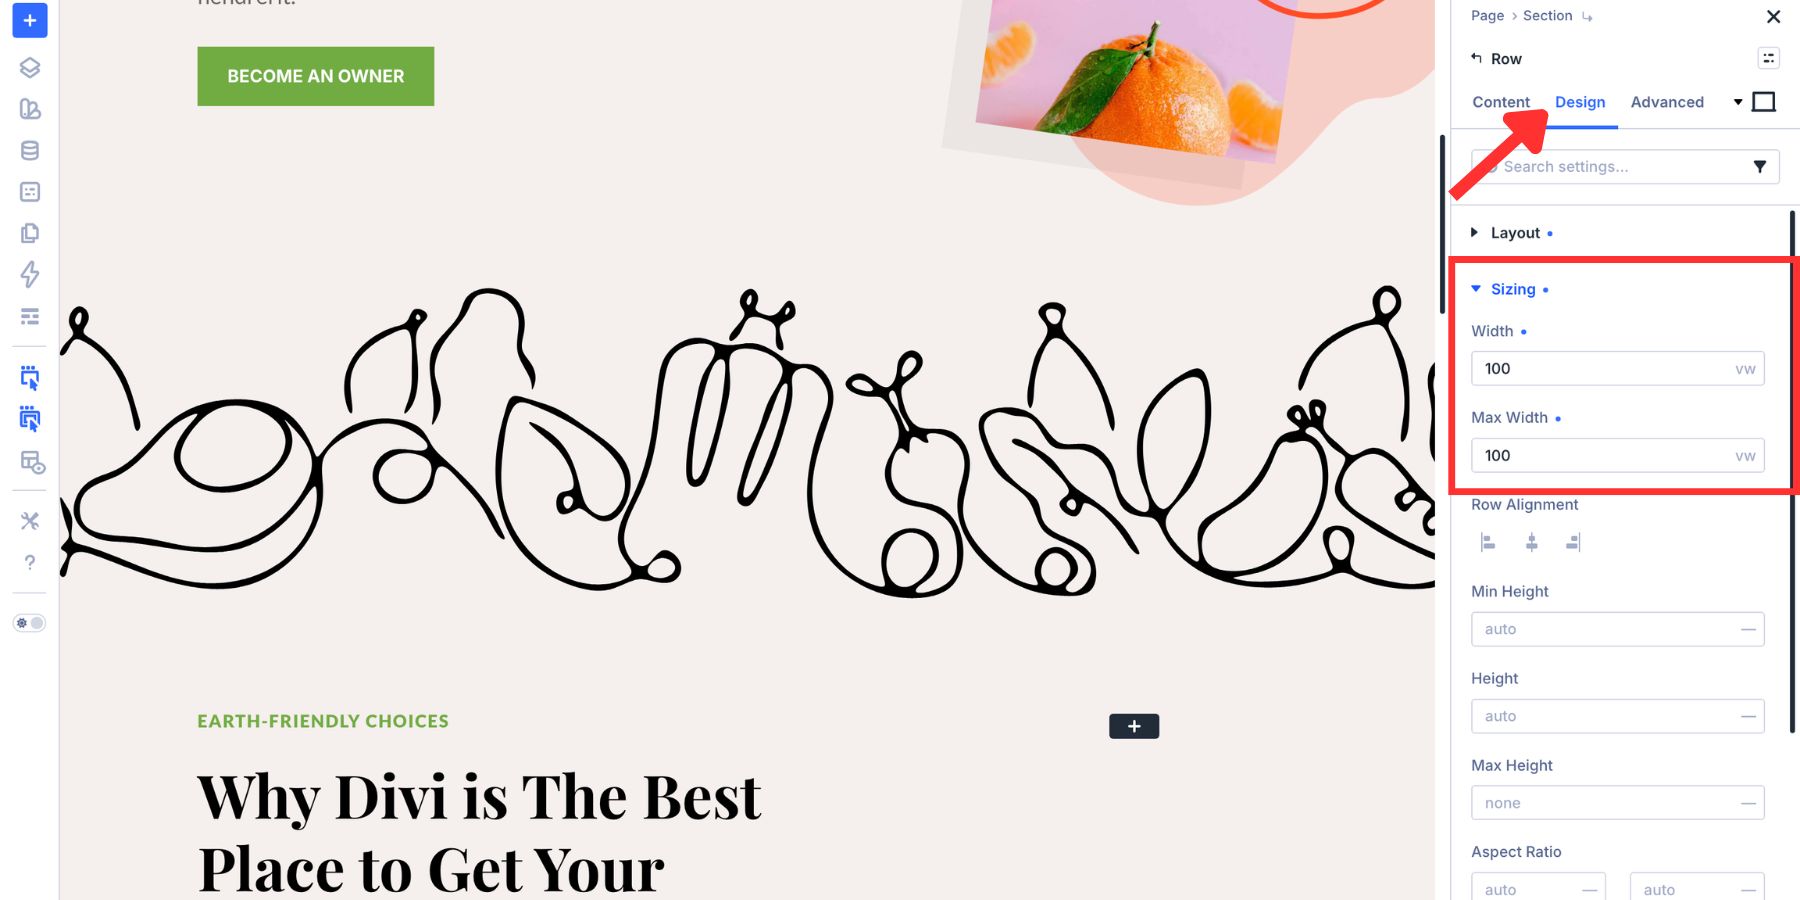
And because it is an SVG file, it will easily adapt to the size change without pixelating. Now, let’s dive into the design options available for the SVG itself.
Style SVGs In The Design Tab
After adding the SVG, open the Design tab. This is where the module becomes more useful than a static image. You can control SVG-specific styles like Fill and Stroke, then use standard Divi design settings for sizing, spacing, filters, transforms, and animation.
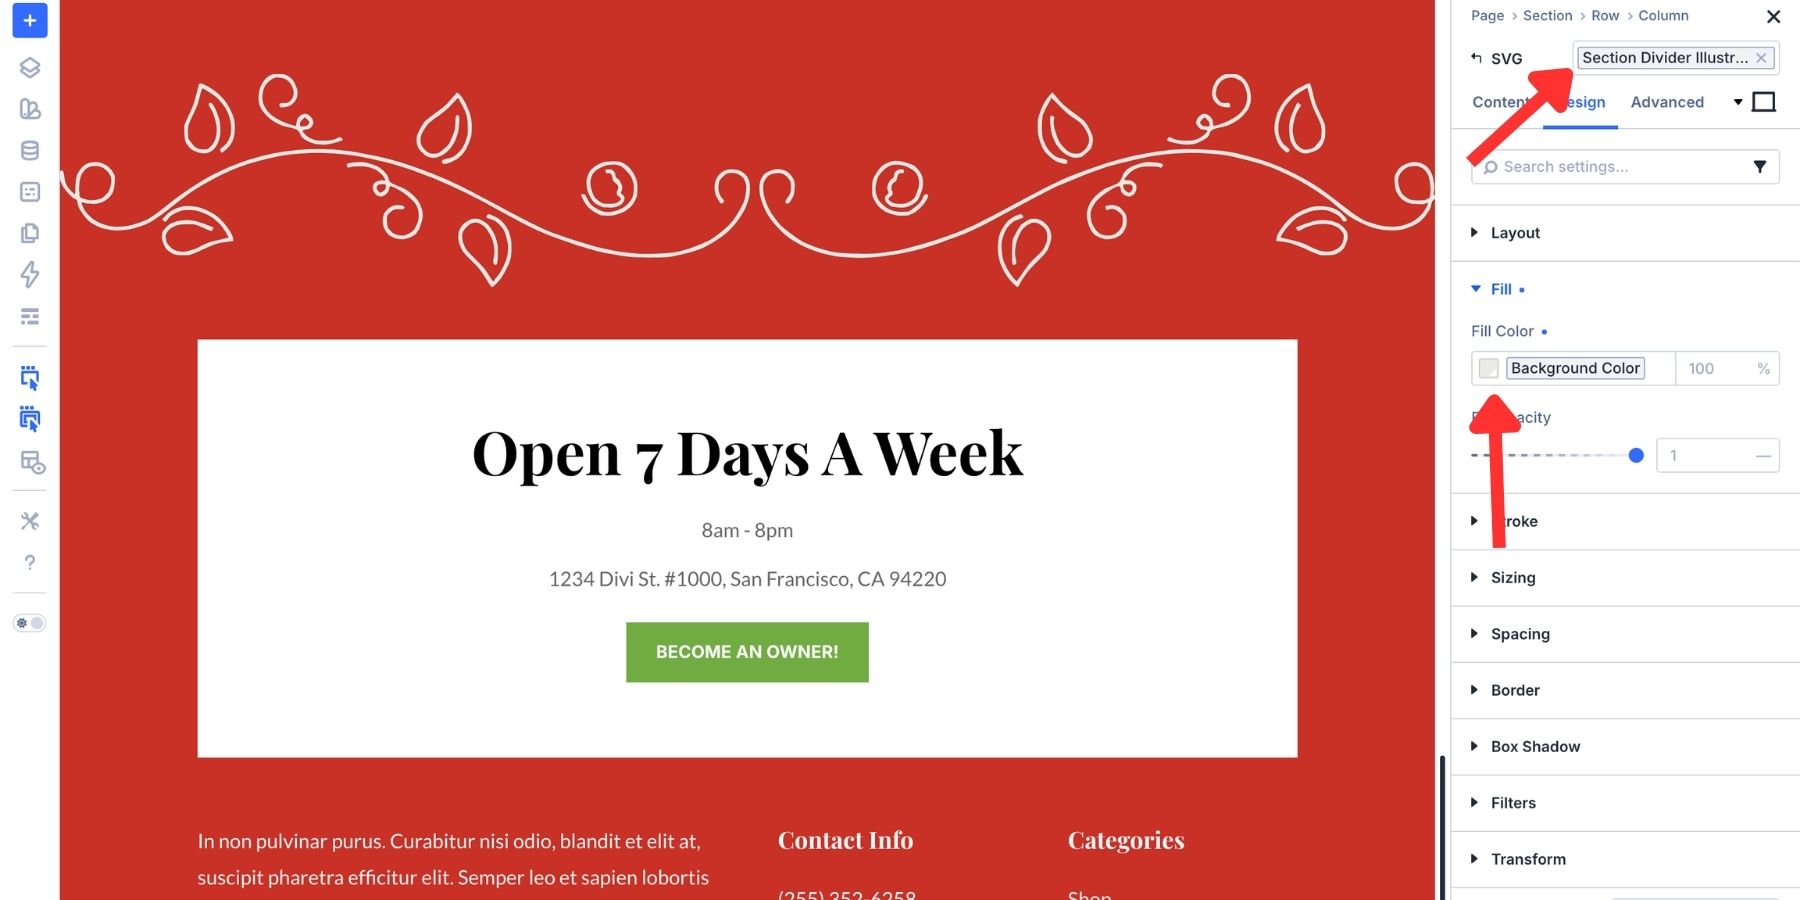
Control Fill
Fill controls the color inside closed SVG shapes. When you set Fill in the module, Divi can override fill values already defined in the SVG markup. This makes it easier to match the graphic to the page design without editing the original file.
For one-off graphics, a static color is fine. For a scalable design system, connect Fill to a color from your Design Variables. That keeps the SVG tied to your global color system.
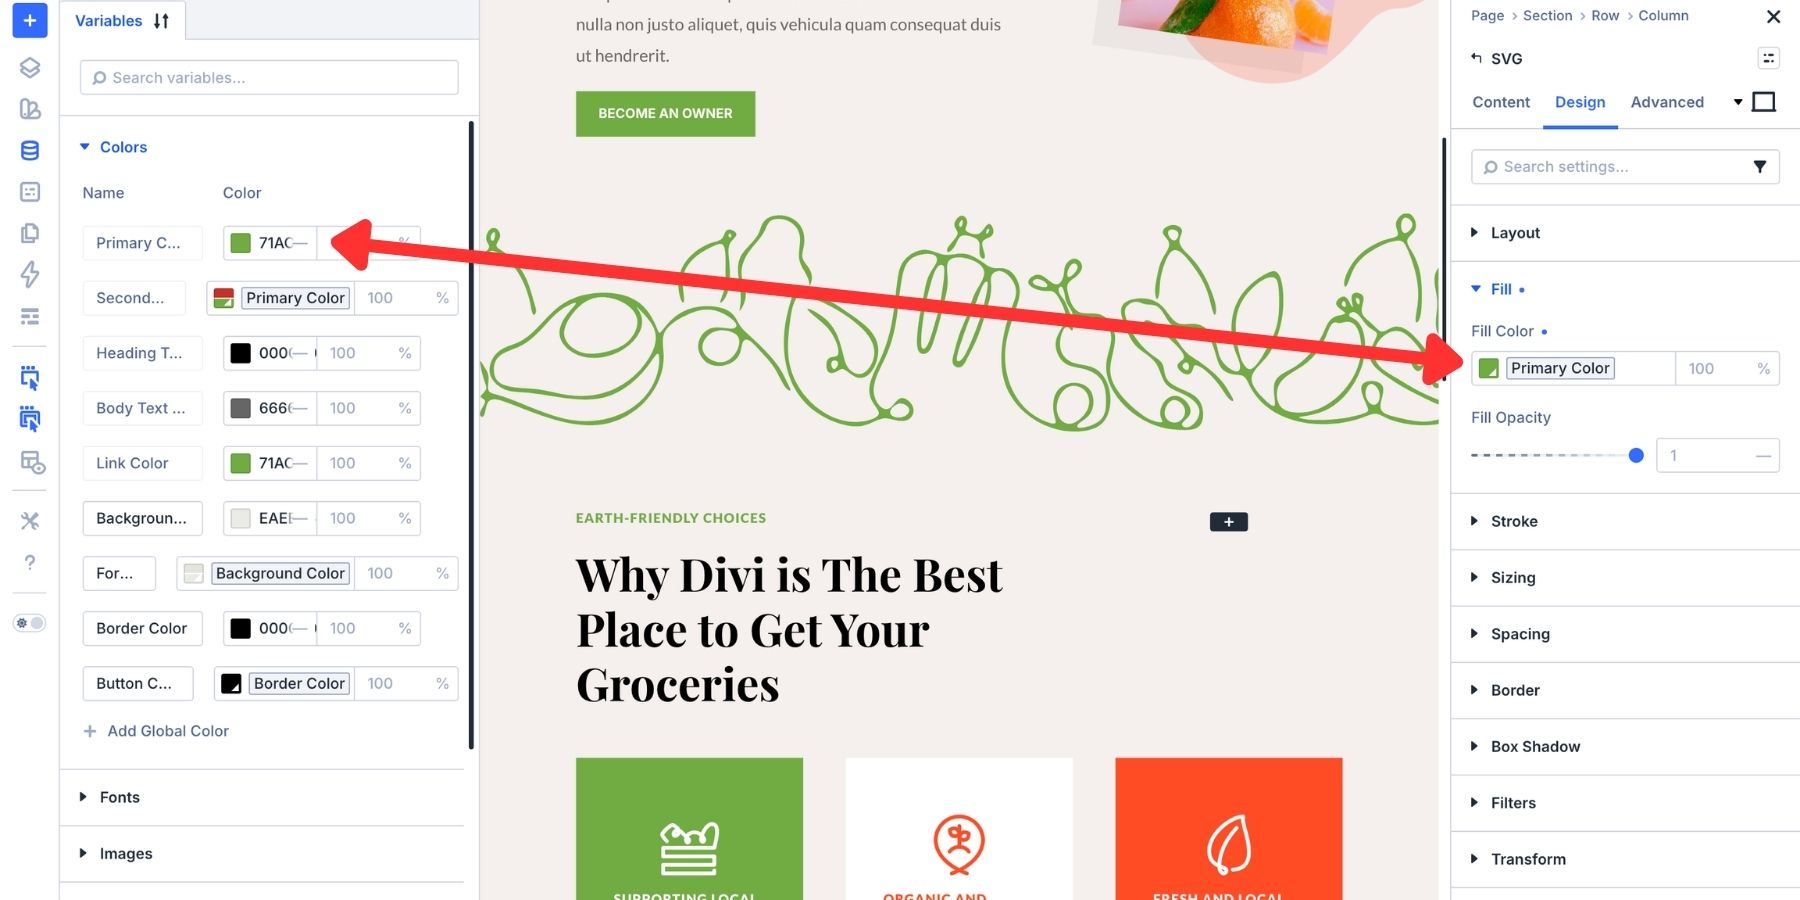
When the variable changes, any SVG using that variable can update with it.
Control Stroke
Stroke controls the outline drawn along the SVG’s paths. The SVG Module gives you controls for stroke color, stroke width, and stroke style. Use these settings for line icons, outlined logos, illustrated details, and decorative graphics that need a consistent outline.

Stroke color can use a color variable, just like Fill. Stroke width can also be tied to a number variable. That turns the outline thickness into part of your design system instead of a one-off value.
Since we are using a simple line art illustration, we skipped applying a stroke.
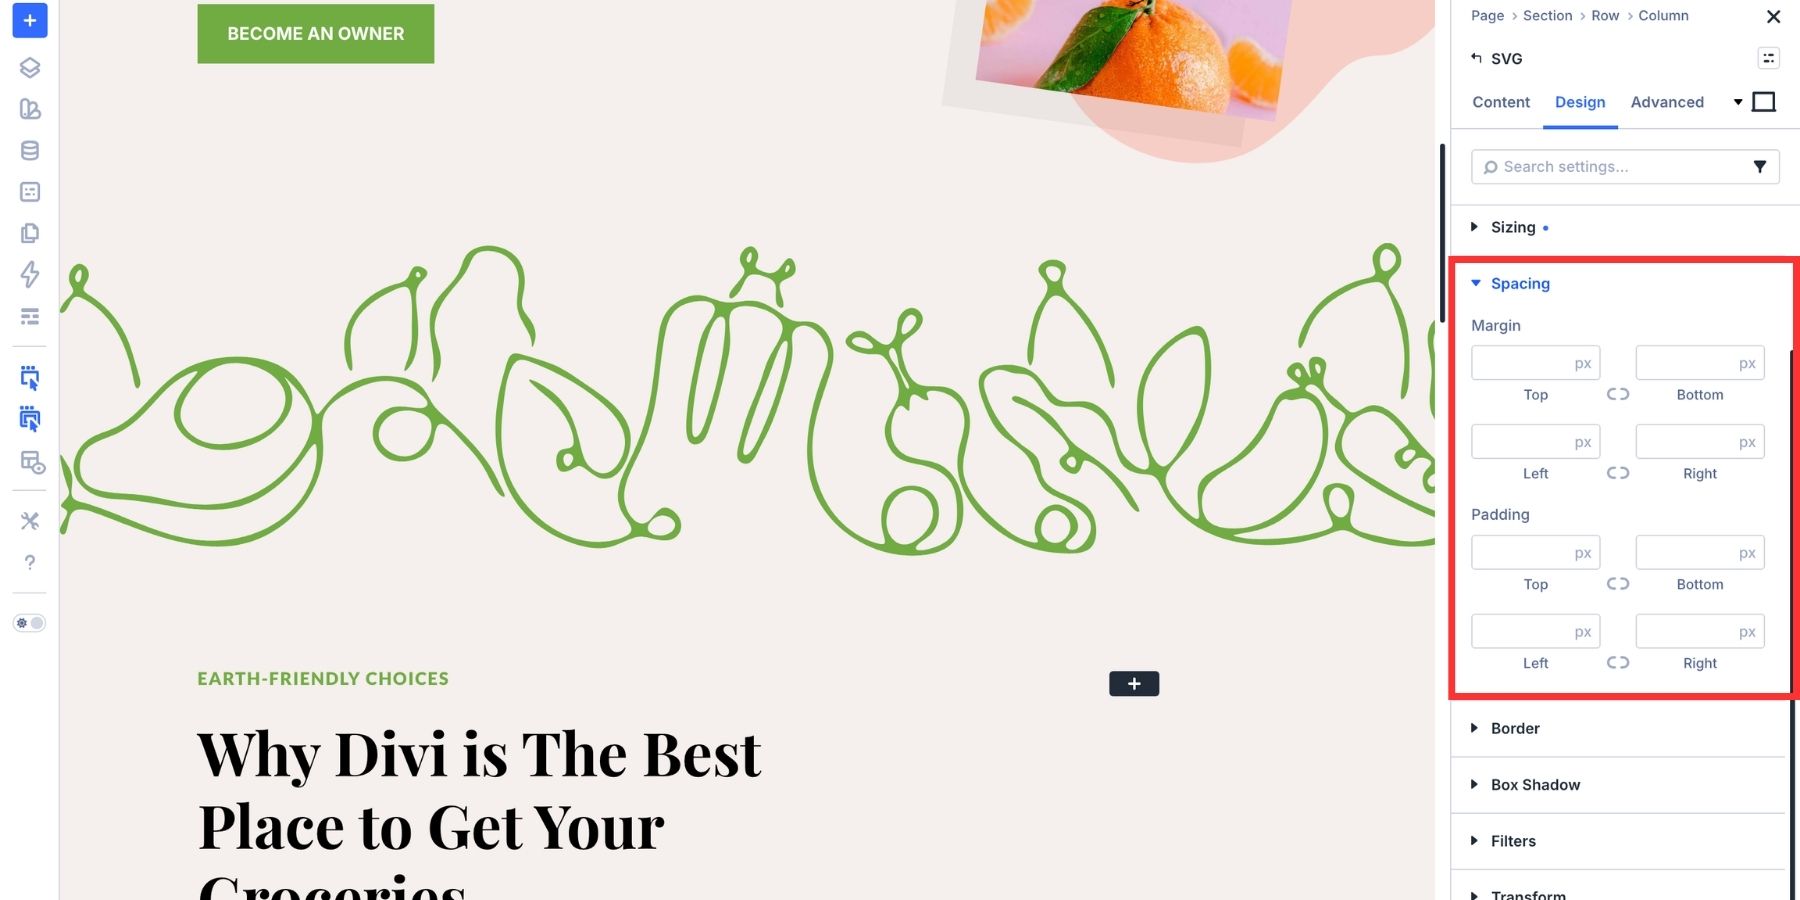
Adjust Sizing And Spacing
The Sizing group controls the SVG module’s width, height, and responsive sizing behavior. Use fixed values for simple icons. Use percentages or advanced units when the SVG needs to scale with its container.
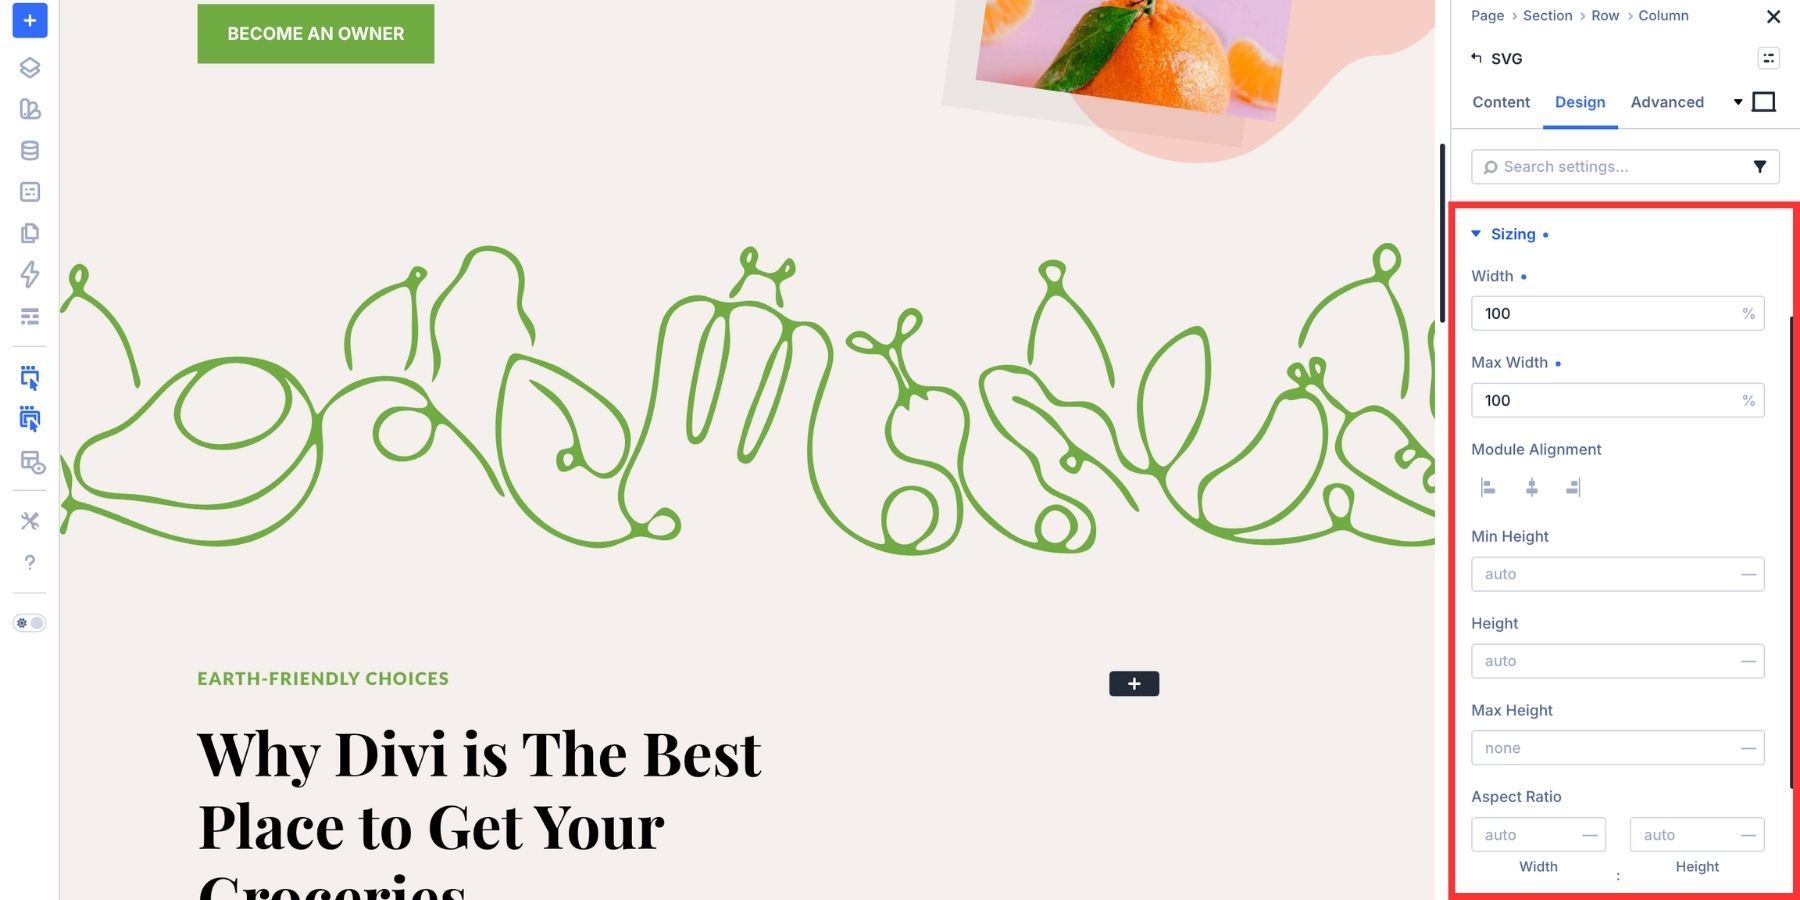
The Spacing group controls margin and padding around the module. Use spacing to give logos, icons, and decorative shapes room to breathe without changing the row or column settings.
Use Filters Carefully
Filters let you adjust the visual output of the module. Common options include hue rotation, saturation, brightness, contrast, and blend modes. These can be useful for decorative SVGs placed over colored backgrounds or layered sections.
Use filters carefully for logos and brand marks. A filter can change the appearance of a brand asset in ways that no longer match the original identity.
Transform The Module
Transform settings change the module’s presentation on the page. You can scale, rotate, skew, or move the SVG module without editing the SVG file itself. These controls affect the module wrapper, not each internal SVG path.
This works well for decorative shapes, background accents, and icons that could use a stronger overflow effect.
Add Animation
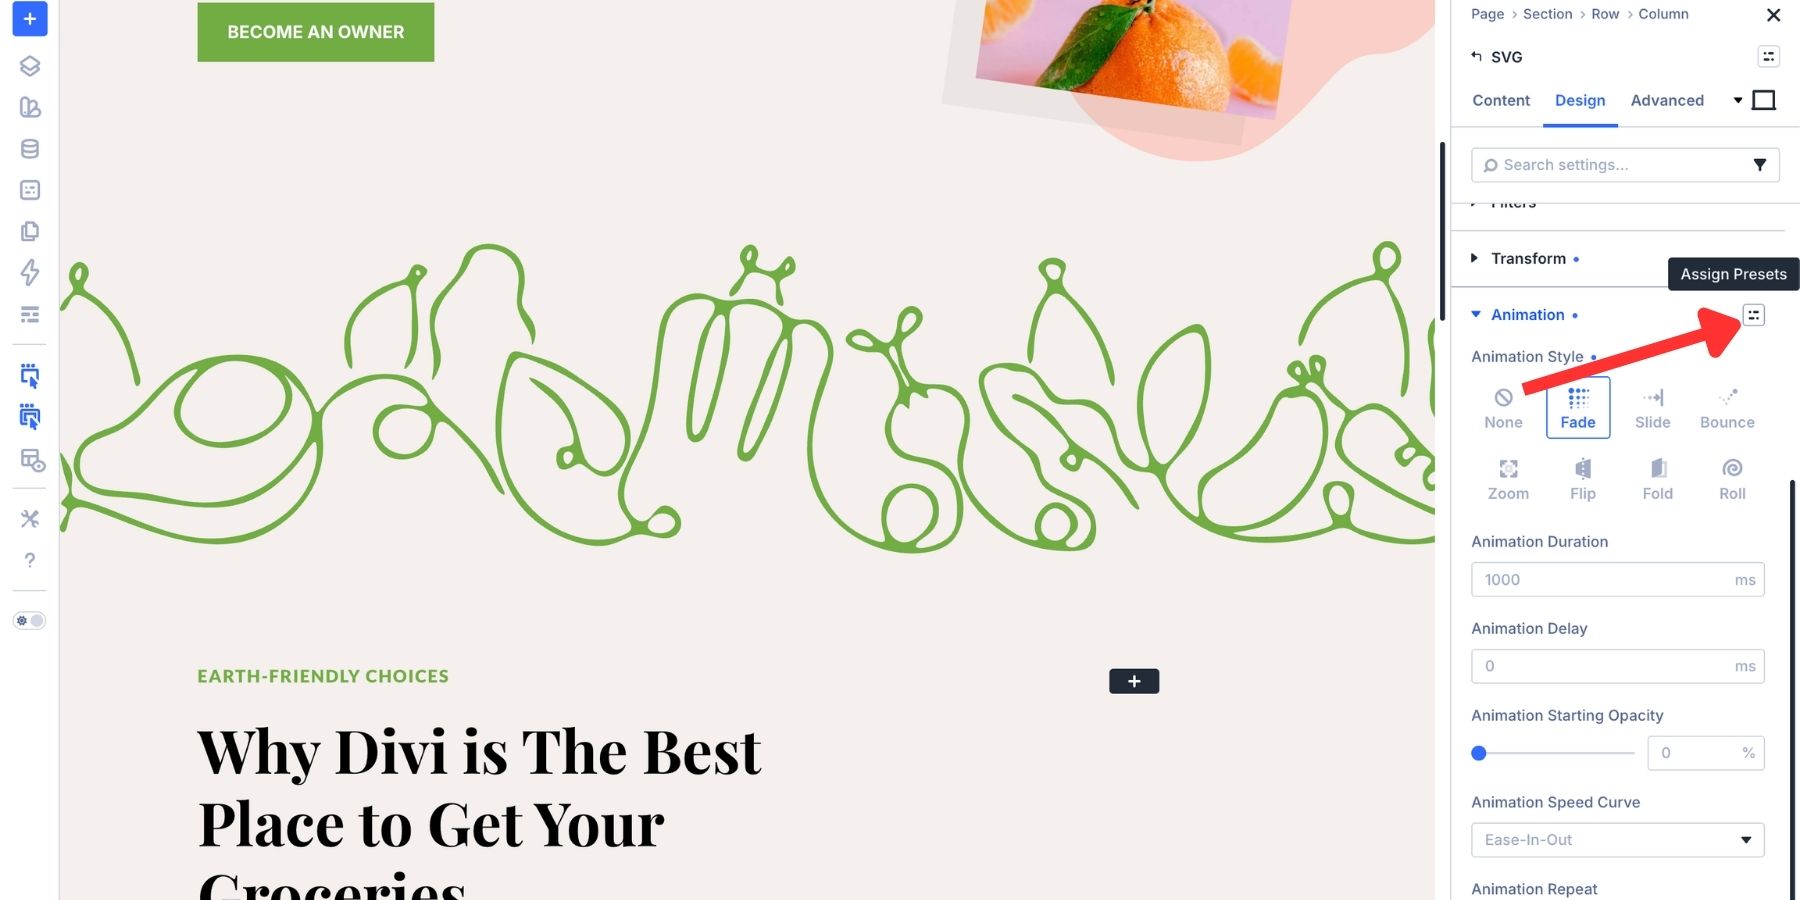
Animation adds entrance effects to the SVG module. You can choose effects like fade, slide, fold, roll, flip, bounce, or zoom. Then you can adjust timing, direction, delay, and duration.
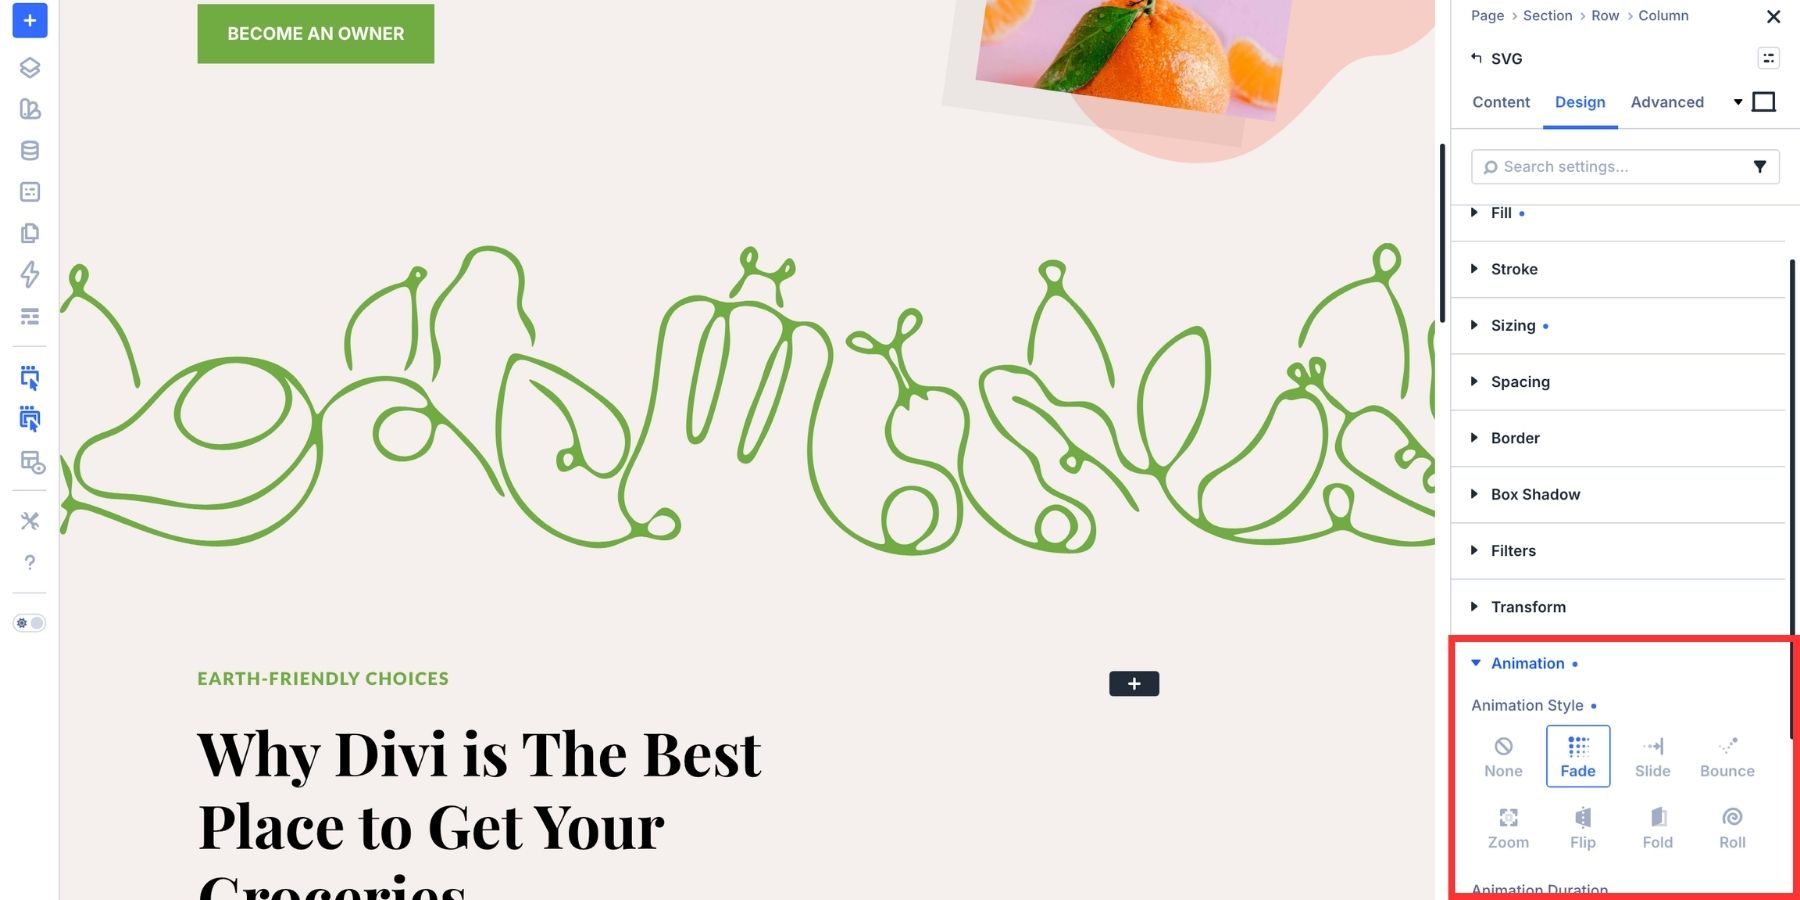
This can help add subtle motion to UI icons and brand elements, as well as to larger decorative shapes, adding pizzazz to the site whenever needed.
Reuse SVG Styles With Presets
Once you have the SVG styled the way you want, save the work as a preset. Divi 5 gives you two useful preset workflows here: Option Group Presets and Element Presets.
Use Option Group Presets
Option Group Presets save one group of settings at a time. For example, you can save a Sizing preset, Spacing preset, Box Shadow preset, Filter preset, or other shared option group. Then you can reuse that same group in any module that supports it.
To create one, hover over the option group header in the Design tab. Click the preset icon, choose New Preset From Current Styles, name the preset, and save it. This is useful when you want the same spacing, sizing, filters, shadows, or border styles across different modules.
To reuse it on any module, simply select the preset from the same icon.
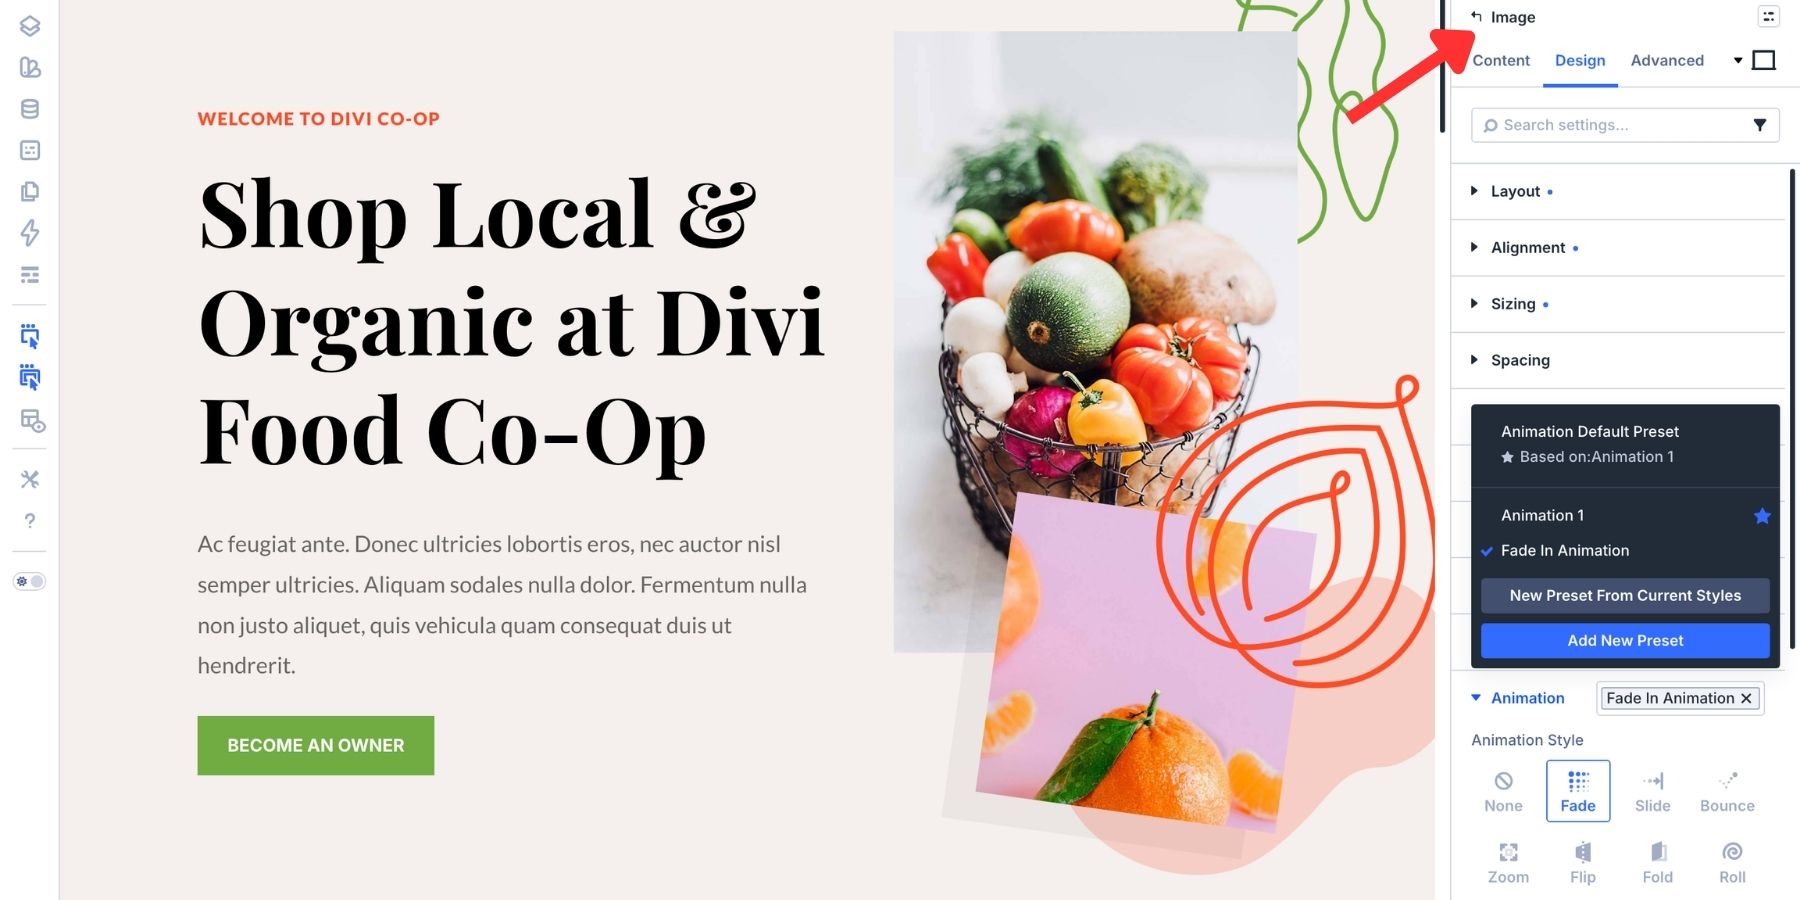
Use Element Presets
Element Presets save the full SVG Module design. That includes Sizing, Spacing, Filters, Transforms, Animation, and any option presets already used inside the module.
To create one, click the preset menu at the top right of the module settings panel. Choose New Preset From Current Styles, name the preset, and save it.
![]()
Every new SVG Module can then load that full design with a single click. To use it, click the same icon and select the preset you just created.
Handle Local Overrides
A preset does not mean every SVG has to look identical. If one icon needs a different Fill color, set that value directly on the module. The override applies only to that SVG. The preset can still control the other settings.
When the same override appears on several SVGs, save it as a new preset. That gives you a reusable variant instead of a collection of one-off edits.
This workflow uses both Design Variables and Presets. Design Variables store the raw values, such as brand colors, stroke widths, and spacing values. Option Group Presets reuse groups of settings that reference those values. Element Presets save the complete SVG Module design.
That creates a clean chain. Change a Design Variable, and the update can flow into the presets and modules that use it. This is much faster than editing each SVG manually across a large site.
Try The SVG Module In Divi 5 Today!
SVGs are ideal for logos, icons, line art, decorative shapes, and custom illustrations that need to stay crisp at any size. The SVG Module in Divi 5 gives those graphics a dedicated home in Divi 5. You can paste SVG markup directly, upload SVG files when your site supports them, style Fill and Stroke in the Visual Builder, and reuse the design with presets.
You do not need custom PHP to use the module. You only need WordPress SVG upload support if you want to use uploaded SVG files from the Media Library. For many workflows, pasting SVG code is enough. For asset libraries and client-managed graphics, use a trusted plugin to enable safe SVG uploads.


Like many other situations like this, I think it would be great for Divi to include a toggle in the settings for “Allow SVG Uploads” instead of making people rely on a 3rd party plugin. Especially since you now have an official SVG module. Don’t make us download another plugin to do things like this. The fewer plugins we need to deal with, the better.