
WooCommerce is an ecommerce tool for WordPress that lets you sell digital and physical goods. If you’re selling physical goods, it’s important to understand all of the shipping options available to you and how to configure them to suit your needs. There are a lot of shipping options and perks with WooCommerce, such as real-time cost calculations, extensions to make checking out easier, and at-home label printing.
In this post, we’ll walk you through the shipping options in WooCommerce core, including how to configure them, and then point you toward the extensions you’ll need if your shop requires something more.
Subscribe To Our Youtube Channel
WooCommerce Shipping Options
WooCommerce has three main types of shipping options, and extensions help with further customizations. Let’s go over the three core shipping options:
1. Flat Rate Shipping
Create a standard rate per item, order, or shipping class. Later on, we’ll get into shipping classes some more.
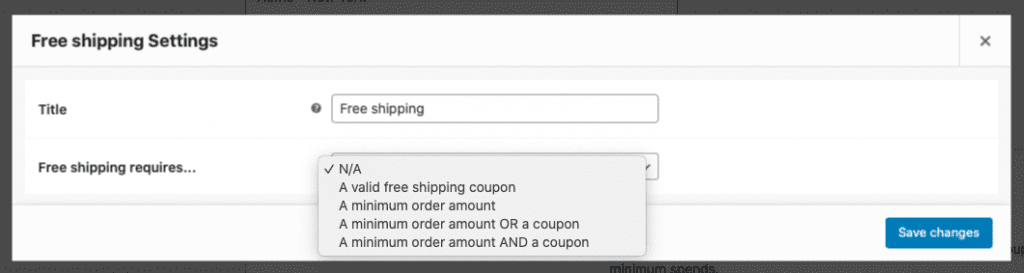
2. Free Shipping
If you choose free shipping, you can offer free shipping on any order or set the “Free shipping requires…” field:
Furthermore, you can create a coupon for free shipping. Under “WooCommerce” in the left sidebar, click “Coupons.” When you create your coupon, check the “Allow free shipping” box.
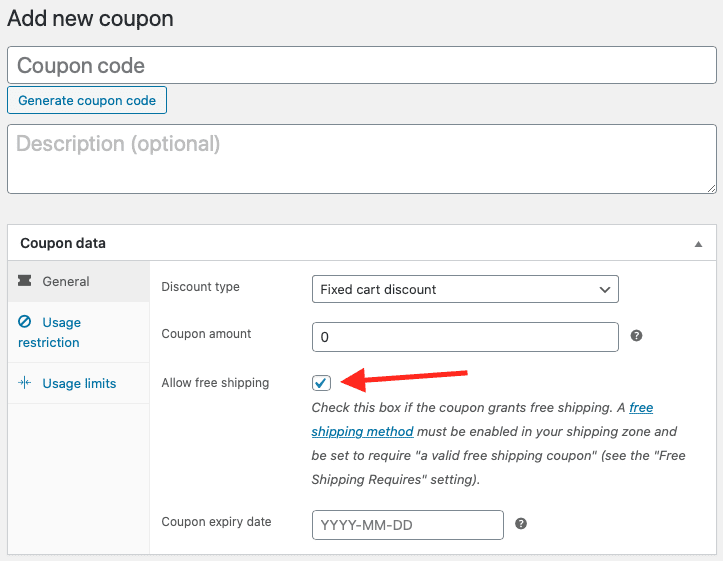
We’ll discuss setting up a shipping zone later, but when you get there, you’ll want to select “A valid free shipping coupon” from the “Free shipping requires…” dropdown.
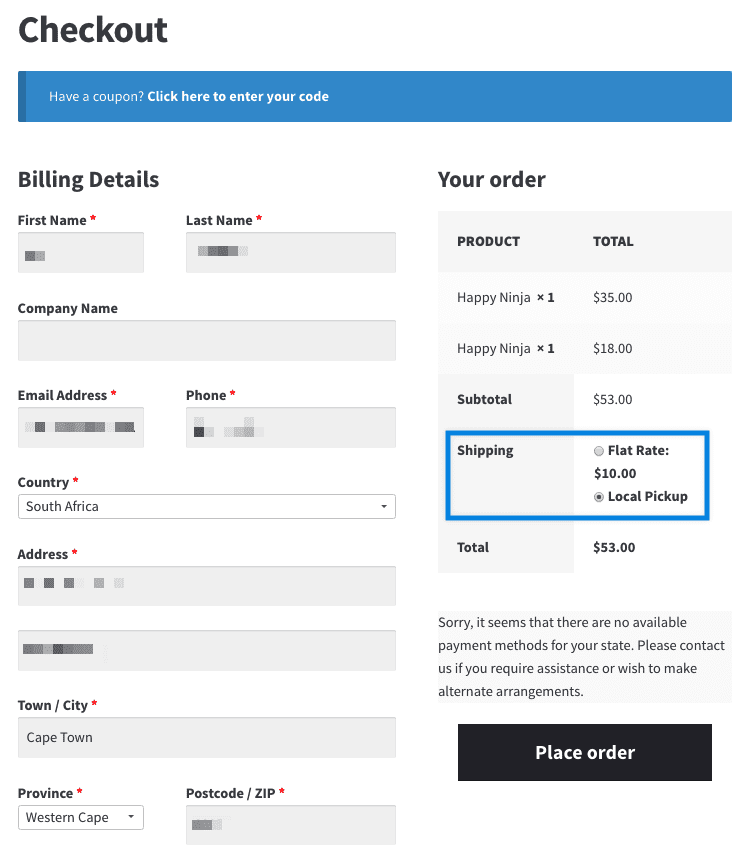
3. Local Pickup
You can give customers the option to pick up their products at no cost instead of having them delivered. Here’s what checkout will look like to the customer:
Source: WooCommerce
Source: WooCommerce
Getting Started with WooCommerce Shipping
When you install and activate the WooCommerce plugin, you’ll fill out a few pages of information to get your account set up. One of those pages is Shipping. You can make tweaks and add extensions later, but you’ll set basic shipping zones and product weight and dimension parameters for now.

Basic Shipping Zones Setup
There are two zones that are automatically created: the United States and everywhere else. Under the United States and “Locations not covered by your other zones” sections, you can select flat rates and fill in the amounts or select free shipping. On the other hand, you can turn off the “Set a fixed price to cover shipping costs” button. If you’d prefer to offer live rates from a specific carrier, there are extensions you can add. Which we’ll cover in another section below.
Weight and Dimensions
This page is also where you’ll set how you measure products. For product weight, you can choose kilograms, grams, pounds, or ounces. Similarly, for product dimensions, you can choose meters, centimeters, millimeters, inches, or yards.
Advanced WooCommerce Shipping Settings
Once you’re finished with the initial WooCommerce setup, you can go into your settings (in the left sidebar under “WooCommerce”) to set shipping zones, classes, and other options. Here’s the difference between a shipping zone and a shipping class:
- Shipping Zone: Geographic region with a specific set of shipping options. WooCommerce will show shipping methods to a customer based on their shipping address.
- Shipping Class: Shipping based on product type; applied to products grouped by similarity.
Shipping Zones
To start, WooCommerce shipping only gives you US and non-US zones. However, this section is where you can create additional zones within the US and abroad. For example, you could do something like this:
- You live in New York, so you can offer free shipping in New York State. In the same vein, you allow people to pick up products from a specific New York location.
- For the rest of the country, you charge a flat rate of $10 for shipping.
- To send a package to Australia, the flat rate shipping cost is $25.
- For everywhere else not specified in shipping zones, the flat rate shipping cost is $15. (This is set under “Locations not covered by your other zones.”)
Here’s what it looks like to fill out each zone and what shipping zones look like when they’re done. Unfortunately, you can’t see the specific flat rates in this view:
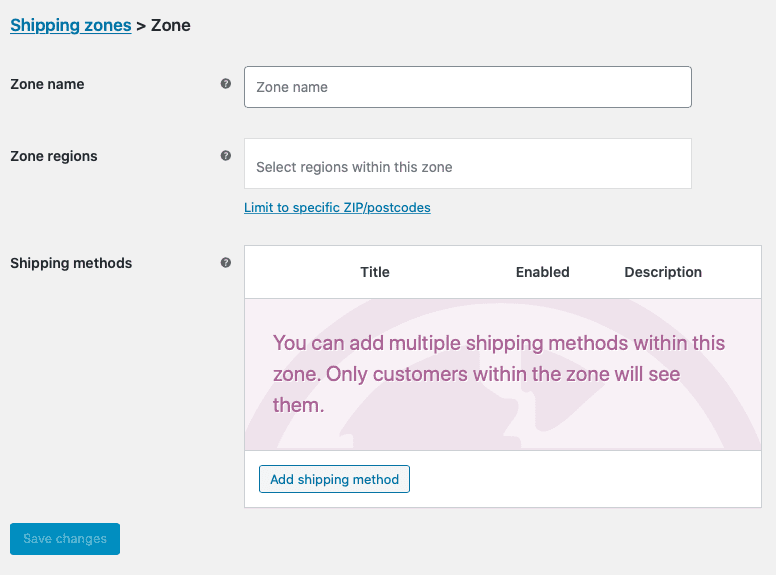

Note that if you don’t fill out any information in the “Locations not covered by your other zones” section, customers will see that shipping isn’t available to their location. Moreover, if you have a certain area that you don’t want to ship to, you can create a shipping zone for that area and then leave the shipping methods blank.
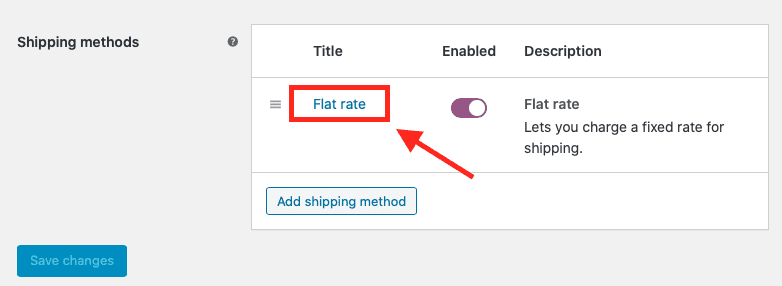
Flat Rates
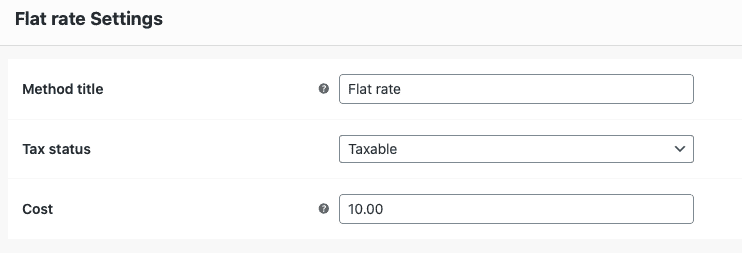
Shipping zones can have their own flat rates, and you can create multiple flat rates per zone. To set the flat rate amount, click “Flat rate” in the “Shipping methods” box under your shipping zone, then fill in the blank sections.
- The “Method title” is what people will see when they check out.
- “Tax status” can be set to “Taxable” or “None.”
- “Cost” of shipping for the whole cart. However, leaving this field blank will disable flat rate pricing.
Charging Additional Shipping Fees
In the “Cost” field, you can enter placeholders so that you can charge per item instead of applying the flat rate to the entire purchase. The placeholder [qty] charges an additional fee for each product in the cart. Fill out the “Cost” field with something like this: 10 + (5 * [qty]). That means you’ll charge your flat rate of $10 plus $5 for each item in the cart.
The placeholder [fee] charges an extra shipping fee based on a percentage of the total. Set a percent, and then set a min_fee or max_fee, which means the fee can’t go below or above a certain amount. For example:
- Your flat rate shipping is $10
- In the “Cost” field, you write: 10 + [fee percent=”5″ max_fee=”10″]
- Shipping will cost your base fee of $10 + 5% of the total cost of purchase, without exceeding $10
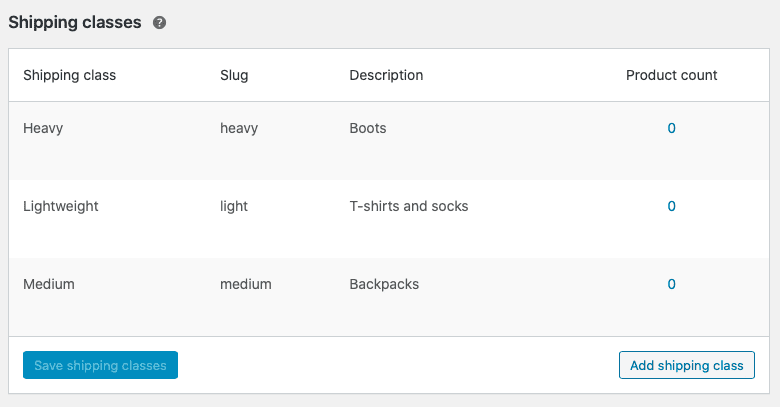
Shipping Classes
Creating WooCommerce shipping classes is helpful if your shop has items of different weights and if your customers usually buy one product at a time. For example:
You can also use Shipping Classes to offer different types of shipping on certain products. For instance, you can create Free Shipping, Regular Shipping, and Rush Shipping classes. Here’s how you’d fill in the costs for each:
- Free Shipping: 0 * [qty]
- Regular Shipping: 5 * [qty] to charge the regular rate of $5 per item
- Rush Shipping: 10 * [qty] to charge the expedited rate of $10 per item
You’ll have to go back into your shipping zones to set flat rate costs per shipping class. Click “Flat rate,” then set each class’ shipping cost. (To make this whole process flow better, set your shipping classes first, before setting up shipping zones.)

There are two “Calculation type” options:
- Per Class: Shipping class determines shipping cost.
- Per Order: The most expensive item in the order determines the shipping cost.
If you use the Per Class calculation type, you’ll want to fill in the “No shipping class cost” field.
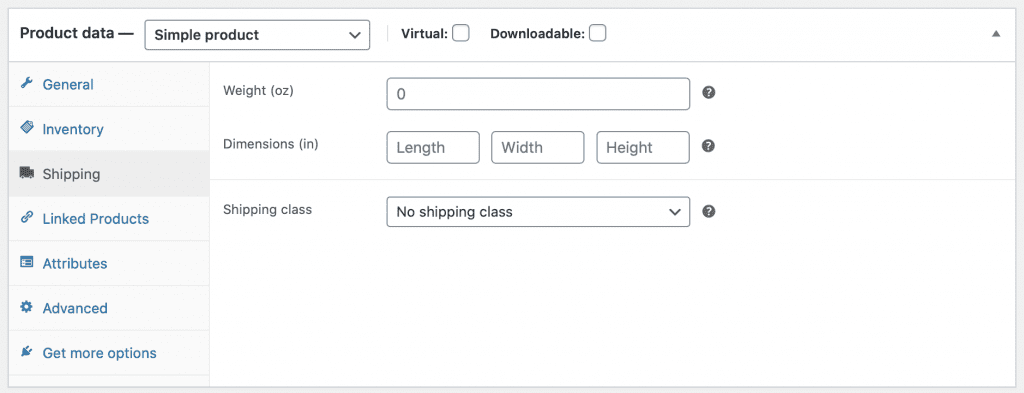
Adding a Product and Setting Shipping Options
When you add a product to your store, click on the “Shipping” field in the “Product data” section underneath the main description box. Next, choose the correct shipping class from the dropdown menu.
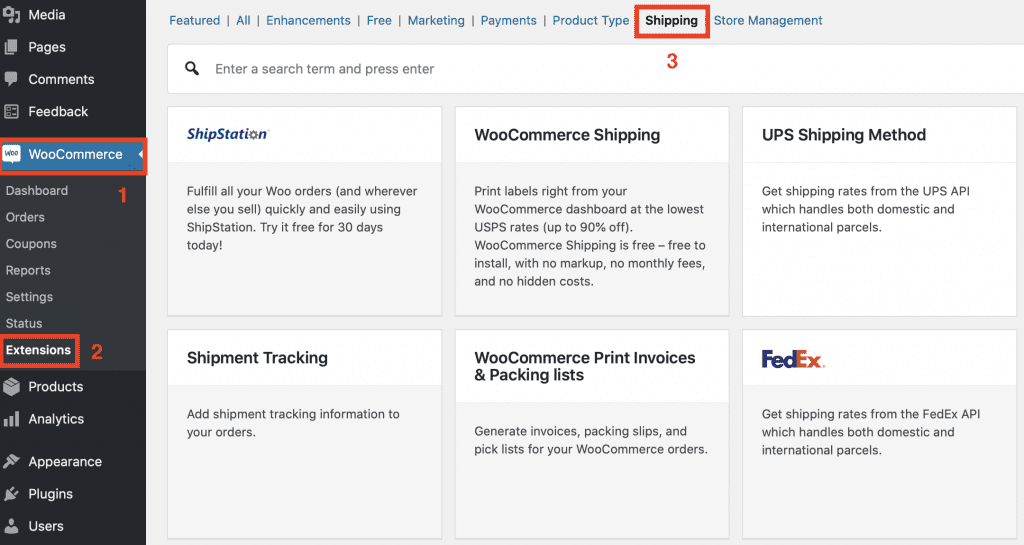
WooCommerce Shipping Extensions
When you select WooCommerce from the left sidebar in WordPress, you can click on Extensions at the bottom of the list. There’s a section for shipping extensions, and this is where you’ll want to go if you’d prefer to calculate real-time shipping costs based on carrier and location.
WooCommerce extensions connect you with carriers around the world, like the Australian Post, FedEx, and the Royal Mail. Furthermore, you can use extensions to integrate with inventory management and fulfillment services or to offer specialty shipping, like buy one, get one, or free gifts.
PluginHive, a trusted name in the WooCommerce ecosystem, offers a range of shipping solutions for modern online businesses. For stores managing complex shipping strategies, the WooCommerce Table Rate Shipping Pro plugin provides advanced rules-based shipping rates based on weight, quantity, and destination.
Regarding carrier-specific needs, PluginHive’s integrations with FedEx and UPS allow store owners to display accurate real-time rates, generate shipping labels, and automate order fulfillment directly from the WooCommerce dashboard. For businesses that rely on multiple carriers, the Multi-Carrier Shipping Plugin provides a unified solution to seamlessly manage services like FedEx, UPS, USPS, and DHL.
To ensure customers stay informed every step of the way, the WooCommerce Shipment Tracking Pro plugin makes it easy to send real-time tracking updates, improving transparency and reducing support requests. These tools make WooCommerce merchants more efficient, scalable, and offer customer-friendly shipping experiences.
Wrapping Up
There’s a lot here; the more products you have, the trickier shipping can get. That comes with the territory of running an online shop and selling physical products — any platform you use, whether it’s Etsy, Shopify, WordPress, or something else, will have a lot of shipping options, sub-options, and sub-sub-options to learn. By rushing through this part of the process, you may pay for shipping out of pocket or turn off customers because your shipping costs are higher than necessary. Above all, take the time to figure out what works best for your company and products. Then, make sure you’re getting everything configured the right way.
Need some ecommerce inspo? We have 19 Examples of Divi eCommerce Websites for you to check out.
Featured Image via Lerbank / shutterstock.com


Very informative post on word press..helpful in providing shipping options in one of the client’s project.