
As is often the case, typing the wrong URL will find you confronted with an error that says the page you’re looking for isn’t there – a classic 404 error. Trying again later may see you finally get to the page you were originally after. However, if the page has been permanently deleted, you’ll instead come across the HTTP error 410 code.
Although it’s logical to confuse error 410 with code 404, they’re not the same. In this article, we’ll discuss the difference between both codes and talk about how you can fix HTTP error 410.
Let’s get to it!
Subscribe To Our Youtube Channel
HTTP Error 404 vs 410: Key Differences
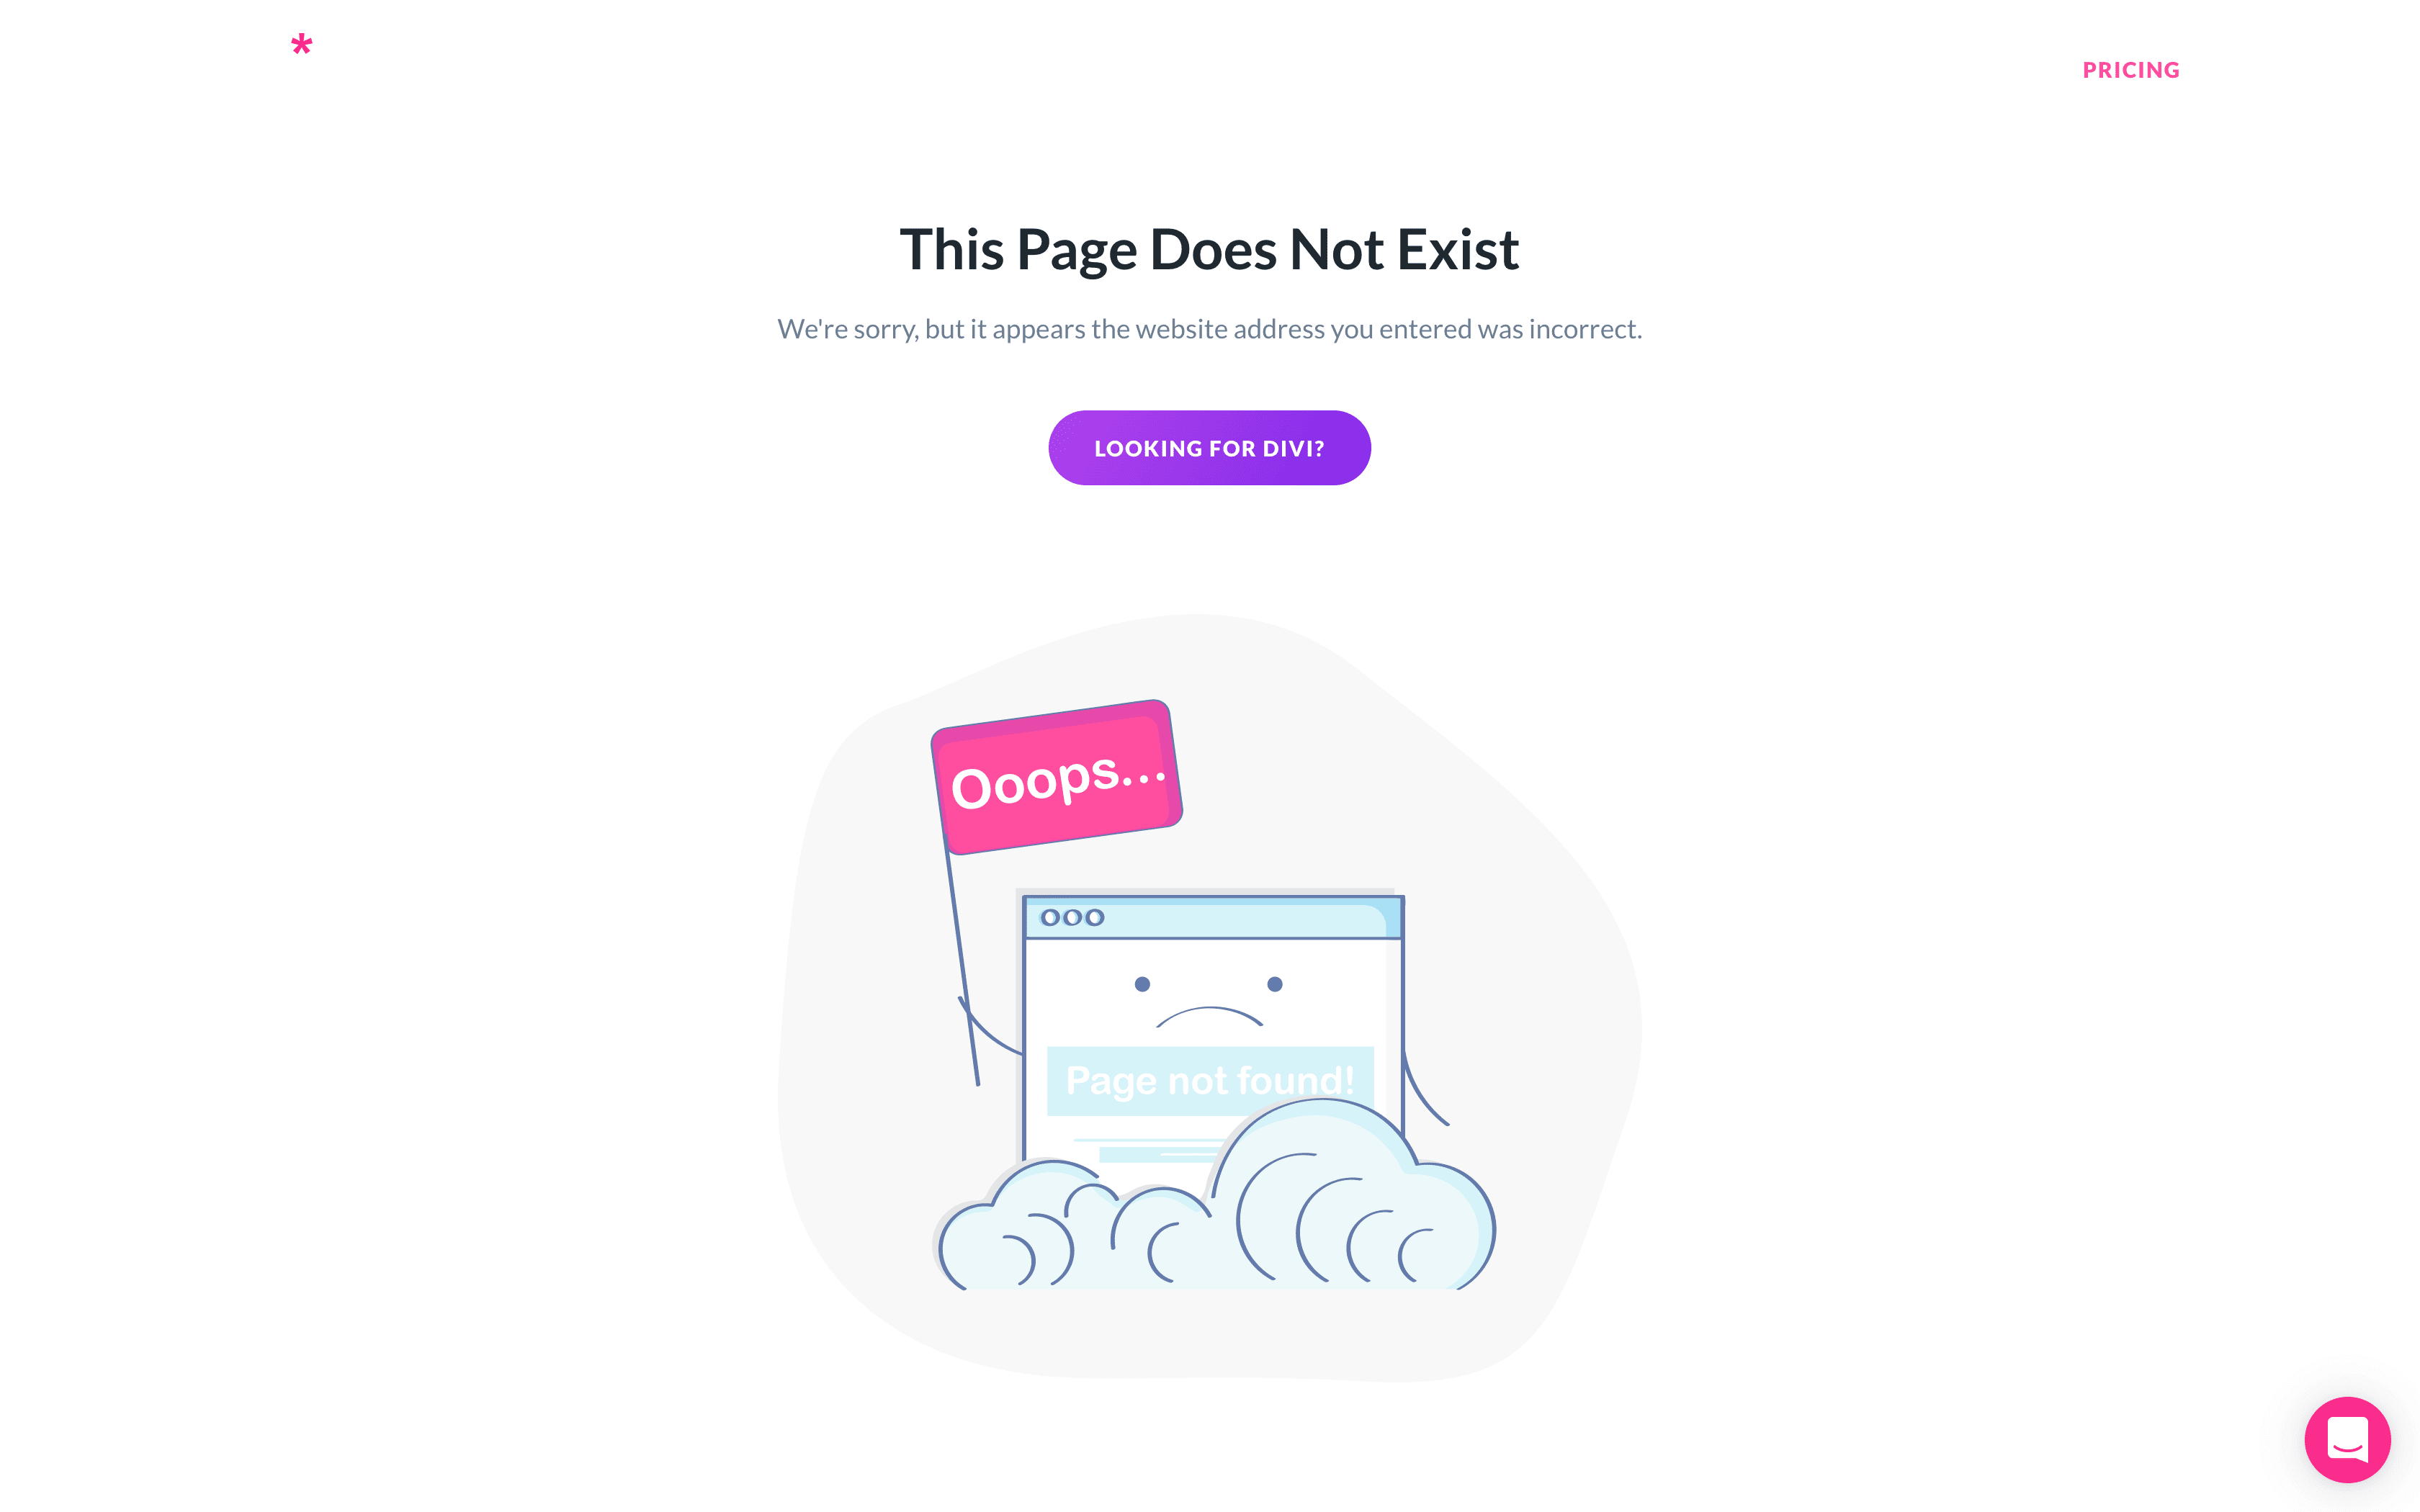
You’re probably intimately familiar with error 404. If you try to visit a page that doesn’t exist or type in the wrong URL, you’ll often end up at a dedicated – and often well-designed – error page:
However, error 404 isn’t a permanent state. For example, it can appear when a page is temporarily down or inaccessible. As such, if you try again later, the page might be working and all will be balanced on the internet once again.
HTTP error 410 or a ‘gone error‘ is different. In a nutshell, it means that the page is gone and is not likely to be there in the future. This might seem like a small difference, but it’s incredibly important when it comes to search engines, backlinks, and crawlers.
When one runs into a 404 error, search engines know the page isn’t gone permanently. In contrast, a 410 error signals that search engines should de-index the link. Likewise, other websites pointing towards the page might check for errors periodically. Using an HTTP error 410 tells them removing the link is acceptable.
Keep in mind, though – 410 codes are only practical if they’re intentional. While you can create 410 redirects for deleted pages, they can also ‘pop up’ on their own due to issues with either the client- or server-side.
How to Fix HTTP Error 410 (3 Methods)
For this tutorial, we’ll assume you didn’t intend to set up 410 redirects on your website. If you didn’t configure any redirects intentionally and visitors are using the correct URLs, the problem should be within your site or server’s configuration – and it’s something you can put right again.
1. Disable Your Site’s Plugins
There are many WordPress plugins that can trigger HTTP error 410 codes on your site. In most cases, they’re plugins that alter your page’s URL structures or enable you to set up redirects. However, 410 errors can also appear due to more common compatibility issues.
The best way to rule out plugins as the cause of the error is to disable them all in one fell swoop. However, before this you’ll want to create a backup of your website to be safe.
Usually, 410 errors don’t prevent you from accessing the WordPress admin. This means you can disable plugins manually from the Plugins tab. If you’re using any security or redirection plugins, start by disabling those and seeing if the error persists.
If you’re out of luck, you’ll need to dig deeper. Select your active plugins so they all have a checkbox, then select Deactivate from the Bulk Actions drop-down menu:
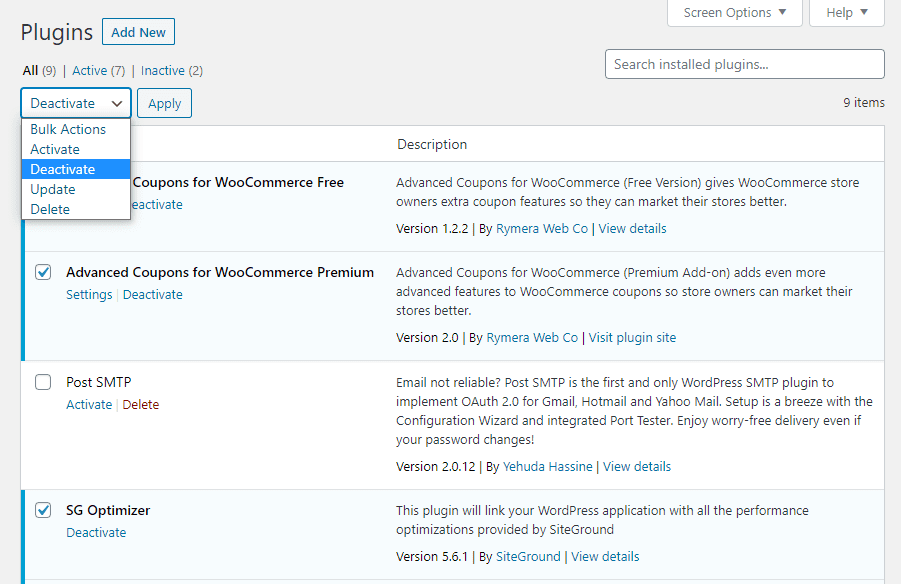
Deactivating all of your plugins simultaneously should impact your website’s functionality dramatically. However, our goal is to quickly diagnose whether one of those deactivated plugins was causing the 410 error. At this point, go ahead and check if the error is still appearing. If it’s gone, you can reactivate each disabled plugins, working your way down the list and testing each one individually. One of them should be the culprit.
Once found, you’ll want to consider whether the plugin is vital to your workflow. If not, you can safely delete it and get back to your regularly scheduled programming. However, if it is vital, you’ll want to search for a new option. You may also consider contacting the developer of the offending plugin to let them know of your troubles, and whether they have a fix.
2. Repair Your Website’s .htaccess File
For the uninitiated, your WordPress .htaccess file enables you to set server configurations such as redirects, access restrictions, and more. If you’ve ever tweaked your .htaccess file, it could inadvertently trigger a 410 error on your website.
The easiest way to open your .htaccess file is to connect to your website’s server via FIle Transfer Protocol (FTP). If you don’t have an FTP client, we recommend you use FileZilla.
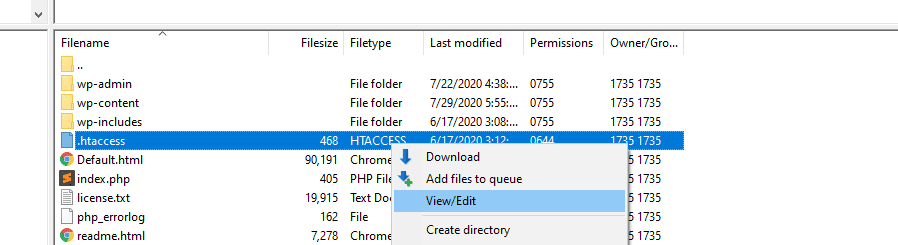
Once you connect to your website, open your WordPress root folder, which is usually called www, public_html, or named after your site:

Look for the .htaccess file in here, then right-click on it and select the View/Edit command:
This will open .htaccess using your default text editor. Before you make any changes, here’s what the file should look like by default:
# BEGIN WordPress

<IfModule mod_rewrite.c>

RewriteEngine On

RewriteBase /

RewriteRule ^index\.php$ - [L]

RewriteCond %{REQUEST_FILENAME} !-f

RewriteCond %{REQUEST_FILENAME} !-d

RewriteRule . /index.php [L]

</IfModule>
Some web hosts or plugins will make changes to this file, so if you see any rules you don’t recognize that start with Redirect 410 followed by an URL, remove it and retest.
However, if your .htaccess file doesn’t have any custom configurations, you can close it and move on. In this case, the culprit lies elsewhere.
3. Re-Install Your WordPress Core Files
If the previous two methods don’t work, there might be an issue with your WordPress core files. In short, these files make WordPress work. In some cases, they can become corrupted due to poor configuration or unadvised changes.
Repairing these core files is relatively simple. WordPress includes a feature that enables you to re-install the latest version of the Content Management System (CMS). Doing so shouldn’t affect your site’s functionality or content in any way, but even so, having a recent backup is always a smart move.
Once you’re ready to roll, go to Dashboard > Updates and look for the message that says You have the latest version of WordPress with the Re-install Now button underneath:

If you don’t see this message, you’ll usually have an update to install. Go ahead and either update or re-install WordPress, then check if the 410 error persists.
If You Still Can’t Fix the HTTP Error 410
At this point, you’ll have tried everything within your power to solve the 410 error. However, before you completely give up, it’s worth contacting the developers of your other plugins and themes, to see if there’s a bug they’re aware of and potentially fixing. It’s a long shot, especially with plugins that won’t be handling URLs, but it’s another potential problem ticked off.
Your final port of call will be to contact your host for a fix. It could be a deeper server-side issue than you’re able to handle, and most hosts will be happy to help you get your site up and running again.
Conclusion
In theory, the HTTP error 410 only pops up when a page is permanently removed. You can use 410 codes to tell users and search engines a page will no longer be around in the future. However, in practice, 410 errors can also pop up unexpectedly.
Usually, you can fix ‘rogue’ 410 errors using one of the following three approaches:
- Disabling your site’s plugins.
- Repairing your website’s .htaccess file.
- Re-install your WordPress core files.
Do you have any questions about how to fix HTTP error 410? Let’s talk about them in the comments section below!
Article thumbnail image by Rikiestu / shutterstock.com


Leave A Reply