
Images and screenshots are a key element in any WordPress blog. In particular, screenshots enable you to highlight key aspects of other pages. However, it can be a hassle to take the perfect browser screenshots and add them to your posts. While you can get the job done depending on your Operating System (OS), taking screenshots consistently is a challenge.
Enter the Browser Screenshots plugin. This lets you screenshot any website, without even leaving the WordPress editor. If your ears pricked up at this, you’ll likely want to keep reading.
Let’s check out how it works!
Subscribe To Our Youtube Channel
An Introduction to the Browser Screenshots Plugin

Browser Screenshots is arguably a niche plugin that deserves a place on your website. It enables you to take dynamic browser screenshots of any page without leaving the WordPress editor. This applies to both the Classic and Block Editors, depending on your preferred option. This is in contrast to OS-native solutions, that require you to open fresh browser windows and optimize your images further, outside of the platform.
If you use the Classic Editor, Browser Screenshots enables you to use a custom shortcode to generate the shots you want. You can add multiple screenshots within any page or post, and the same applies to the Block Editor.
Since the plugin generates screenshots dynamically, it’s perfect for situations where you don’t want to use outdated shots for your content. If you have a page or post that includes a Browser Screenshots shortcode or block, visitors will see a real-time screen grab. This is a tantalizing proposition for certain types of content.
Regardless of which approach you use, the plugin also enables you to customize the resolution of the browser screenshots taken. You can also add alt text and text to your images, as well as custom CSS classes.
However, it’s important to understand that this plugin only takes ‘above-the-fold’ browser screenshots. This means areas where you need to scroll to won’t be shown. How big this area is will depend on the parameters you configure for each browser screenshot, and you’ll learn how to do this later.
Key Features:
- Use shortcodes or blocks to take custom shots of whatever website is in your browser window.
- Add browser screenshots within your content without having to take or upload them manually.
- Customize your browser screenshots’ resolution.
- Add custom CSS classes to the images the plugin generates.
- Add links and alt text to your images.
Price: Free | More Information
How to Use the Browser Screenshots Plugin (2 Approaches)
By now, you already know how the Browser Screenshot plugin works, so let’s discuss how to use it. Shortcodes are a fundamental part of the plugin, so let’s look at this first.
1. Use Shortcodes to Generate Dynamic Browser Screenshots
The Browser Screenshots plugin enables you to use the following custom shortcode to generate dynamic browser shots:
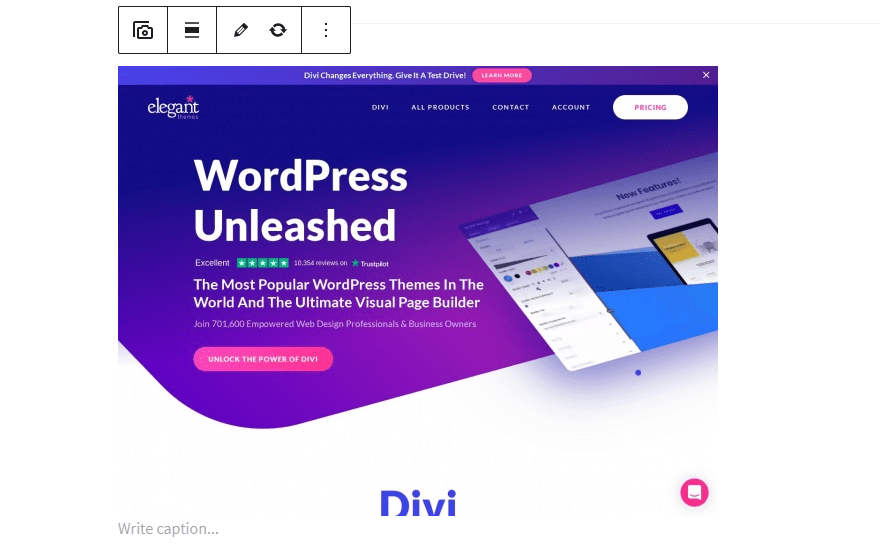
[browser-shot url="elegantthemes.com" width="600" height="400"]
The shortcode includes two basic parameters: width and height. Both parameters use pixel values, and the default resolution the plugin uses to take shots is 600 x 400. Of course, you’ll also want to add the specific URL you want to screenshot to the shortcode too.
Regardless of whether you use the Block Editor or Classic Editor, the shortcode will render a screenshot similar to the following:
However, Browser Screenshots also enables you to set several custom parameters. Besides width and height, those include the following:
- Alt: This parameter enables you to set alt text for your screenshot.
- Link: You can choose what link the image points towards using this parameter (which can differ from where the shot originates from).
- Target: This parameter enables you to control whether image links open in a new window or not.
As an example, here’s what a full shortcode including all the parameters would look like:
[browser-shot url="http://www.google.com" width="700" height="500" alt="Google's homepage" link="http://www.otherwebsite.com"]
You can also use shortcodes to add captions manually:
[browser-shot url="http://www.google.com" width="700" height="500" alt="Google's homepage" link="http://www.otherwebsite.com"]Here's the caption[/browser-shot]
In most cases, the two most important parameters you’ll use are width and height. Using the same values for all the browser screenshots you take often won’t return the best results, so you’ll want to tailor your parameters to suit the content.
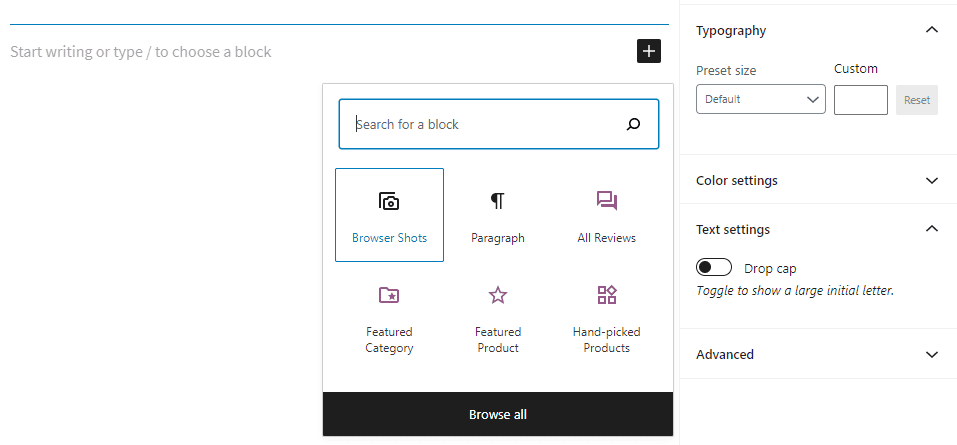
2. Use Blocks to Add Screenshots to Your Website
If you use the Block Editor, the Browser Screenshots plugin will give you access to a new block called Browser Shots:
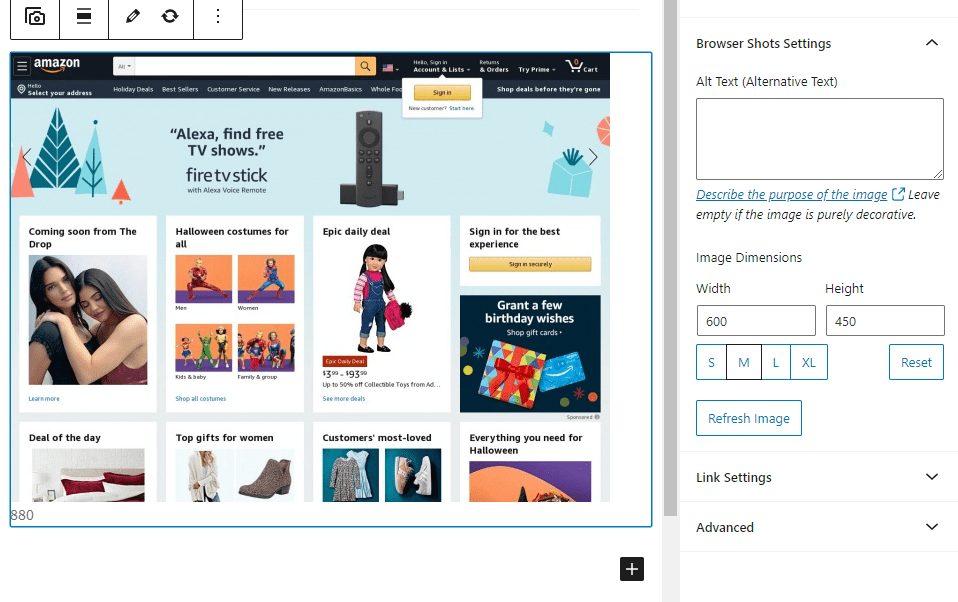
Selecting the Block will prompt the plugin to ask you what website you want to use to generate a screenshot. In this example, we’re using the Amazon US home page:

Once you click on Find Image, the plugin will ‘take’ a screenshot and display it within the Block Editor:
One thing to keep in mind is that the plugin can’t access private pages or log into them for you. For those types of browser screenshots, you’ll have to do the dirty work yourself.
Moving on, to the right of that screenshot you can see the Block details tab. This enables you to modify all of the parameters we discussed earlier without the need to add custom shortcodes.
Modifying the width and height of your browser screenshots is much simpler using the Block Editor. This is because the editor enables you to check out a preview by hitting the Refresh Image button below the height and width parameters:
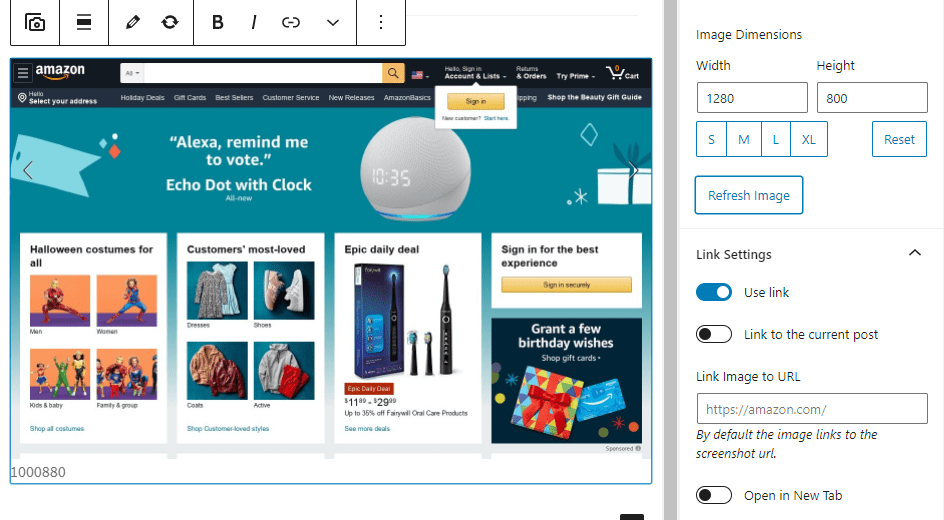
If you compare both examples, you can see how the change in resolution modifies the area that the plugin screenshots for you. Beyond this, you can also add custom links to your screenshots, configure whether they open in a new tab or not, and set custom CSS classes here.
Conclusion
If you regularly include browser screenshots within your blog’s content, the Browser Screenshots plugin can save you a lot of time. It’s a fairly niche plugin, but if you’re among the crowd we mentioned, it’ll make editing posts a whole lot easier.
Using Browser Screenshots, you can add screengrabs of your browser using a simple shortcode or the Block Editor. For shortcodes, the plugin includes several parameters that enable you to customize screenshots, such as width, height, and even alt (for alt text).
Do you have any questions about how to use the Browser Screenshots plugin? Let’s talk about them in the comments section below!
Article thumbnail image by VectorMine / shutterstock.com


Can you tell me how to make the image larger? My target shot is showing small, regardless of the sizes I enter – probably because the website only gives a small textual response. Thanks NEIL
Hi Will,
I’m amazed at how there’s a plugin for anything we want to do online.
Does the plugin slow down the website? On a Mac, taking a screenshot is simple (even though I optimize the image on Photoshop, taking some more seconds to upload it, but I’m ok with that), and I don’t see the need for another plugin on my website. Unless each of my posts had hundreds of browser images, I would consider the plugin.
Thanks for the article.
Thanks for sharing your thoughts, Vasco. I ran a few tests and the plugin doesn’t seem to have a significant impact on performance, although you can see a slight dip in page speed with most plugins and themes.