
The Custom HTML Block lets you add HTML content and edit it without having to view the page or post as HTML. You can embed HTML and even use it to mark up your text and then convert it to a Paragraph Block with styled text if you want. This block is great for those that prefer to work in HTML and it’s one of the best ways to embed certain types of code, such as Google Maps.
In this article, we’ll take a close look at the Custom HTML Block. We’ll see how to add it to your posts and pages, look at its settings and options, see tips on how to use it, and see the frequently asked questions.
Subscribe To Our Youtube Channel
How to Add the Custom HTML Block to your Post or Page
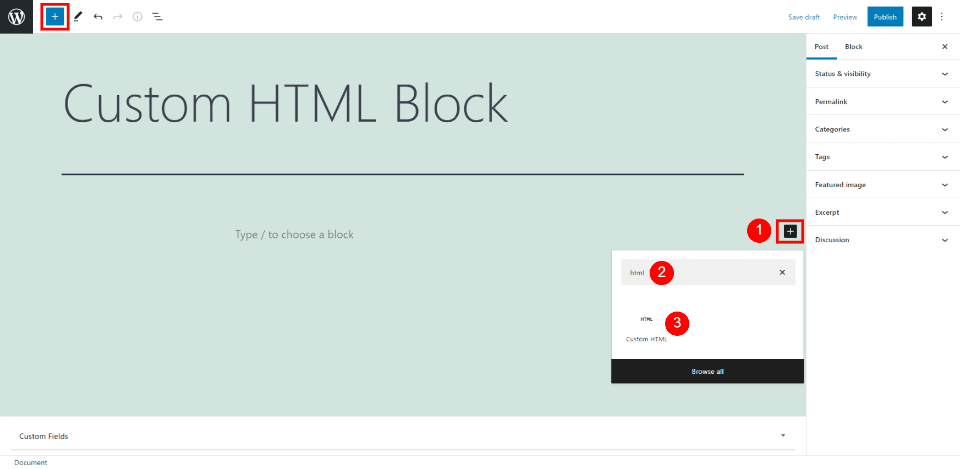
To add the Custom HTML Block to your content, place your cursor where you want the block to appear and select the Inserter tool. A search box will open where you can enter a search term or scroll through your options. Search for html and select the block when it’s displayed in the results.

Alternately, you can type /html where you want the block to appear and hit enter or select it from the options above the block area.
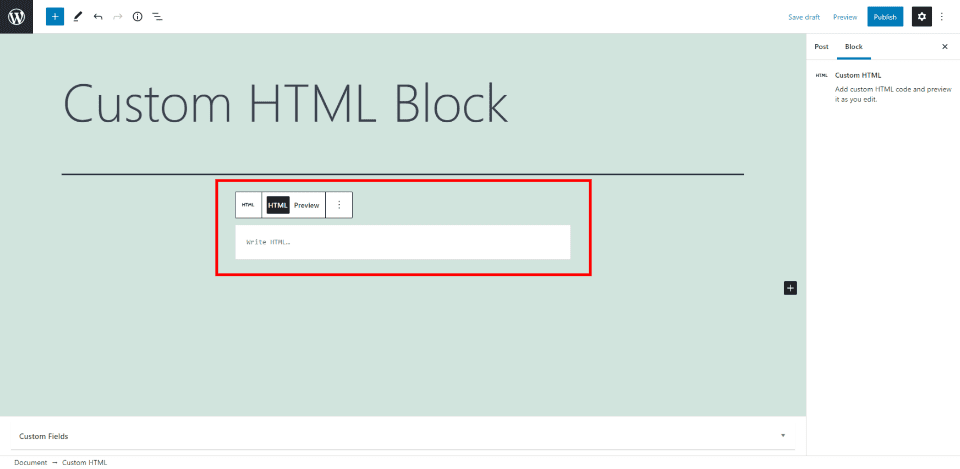
You now have a Custom HTML Block within your content where you can add HTML. We’ll see some examples with code as we go through the settings.
Custom HTML Block Settings and Options
Unlike most blocks, the Custom HTML Block does not include options in the editor sidebar. You’ll find all the options you need in the toolbar.
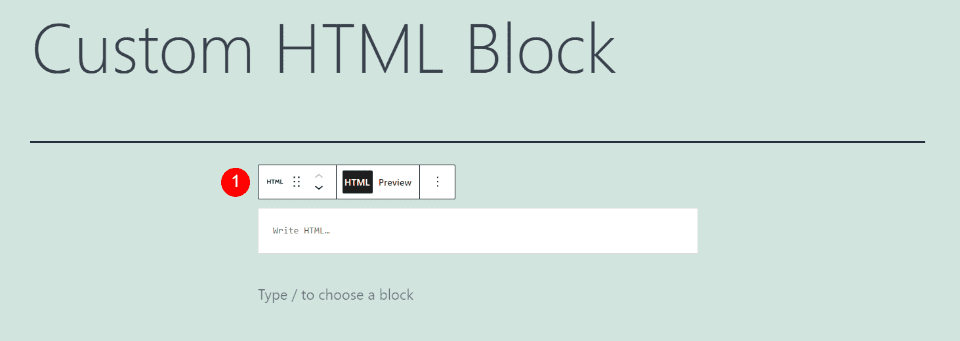
Custom HTML Block Toolbar
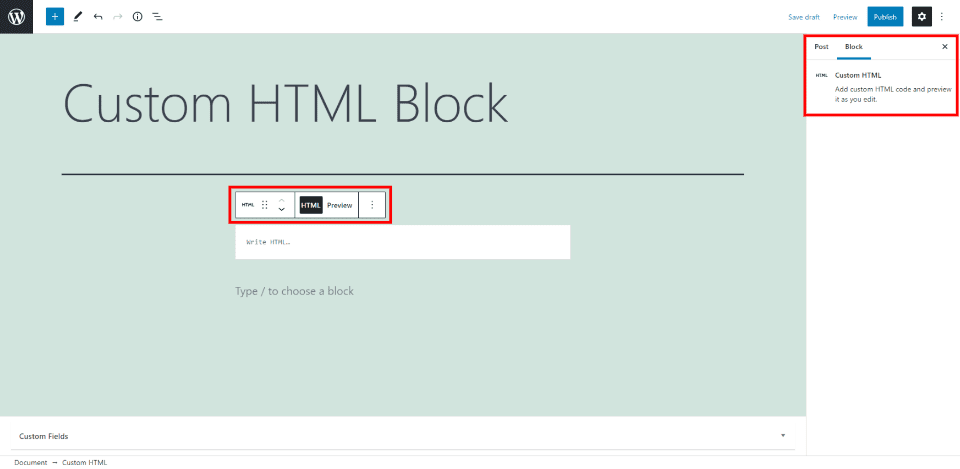
Click anywhere within the block to see its tools. If you don’t see them all, click under the block in a new area, and then the rest of the tools will display when you select the block again.
Each block has its own specific controls where you can select options for the block. A small set of block options above the toolbar allows you to change the block type, convert to blocks, and open the options.
Let’s look at each setting in detail.
Custom HTML Change Block or Style
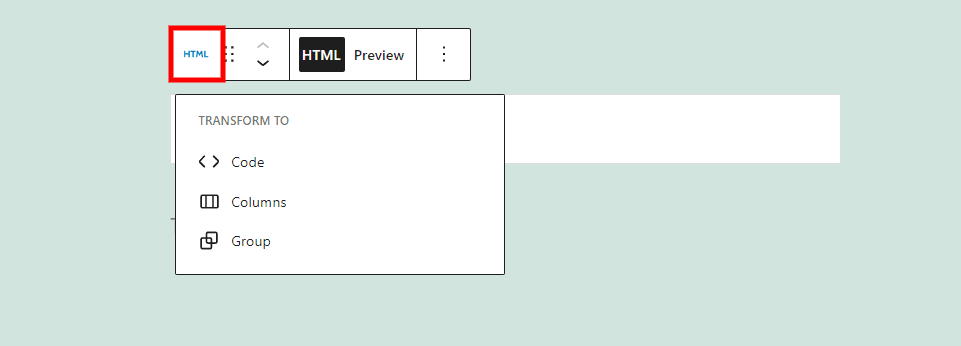
Selecting HTML in the options opens a dropdown box where you can transform the block to other types of blocks. Options include Code, Columns, or Group.
Code – transforms the Custom HTML Block to a Code Block so you can display different types of code.
Columns – places the block within columns.
Group – adds the block to a group so you can adjust them as a single block.
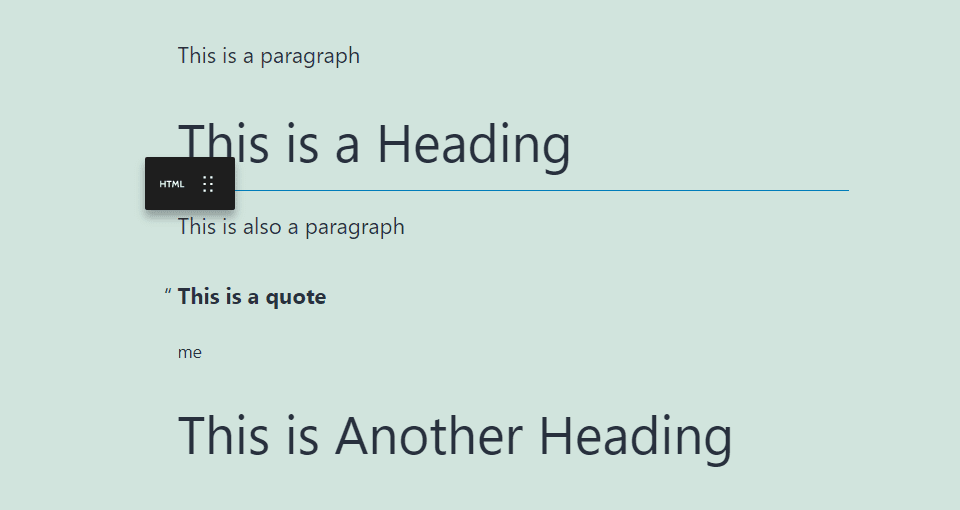
Custom HTML Block Drag Tool
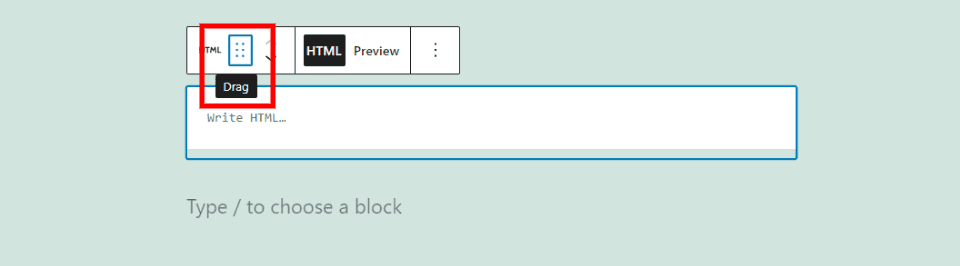
The drag tool includes six dots that you can grab with your mouse to move it.
Then, simply drag the block anywhere you want within your content and drop it. A blue line will appear that indicates where the block will be dropped as you drag the block around.

Once you see the blue line appears where you want the block, let go of the mouse button and your block will be placed in its new location.
Custom HTML Block Move
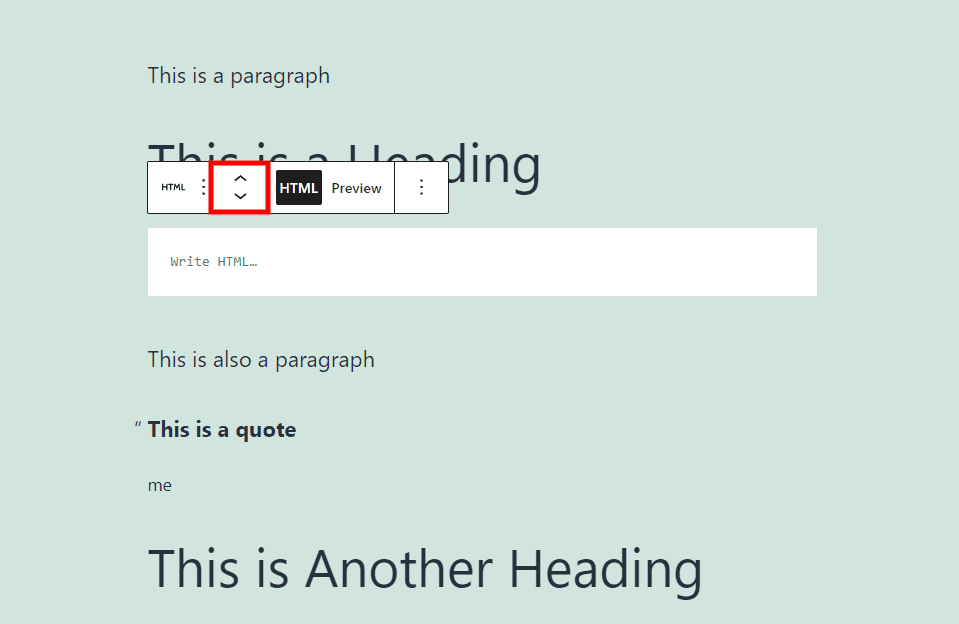
The up and down arrows move the block one content section every time you click them. The screen will scroll as the block automatically moves into its new location. This is an easy way to move the block a section or two.
Custom HTML Block HTML and Preview
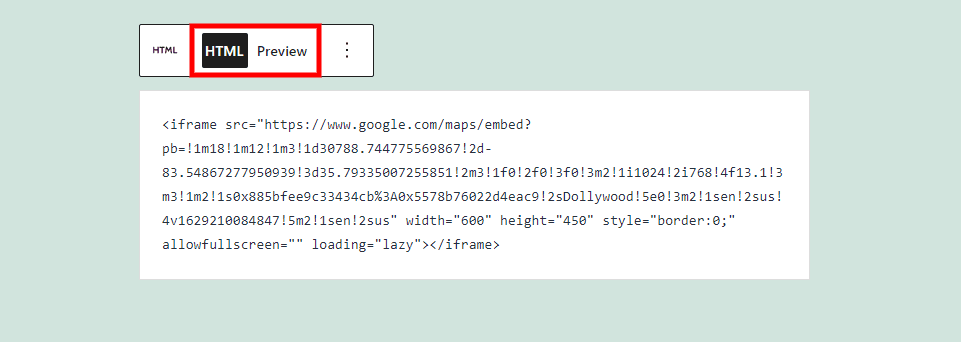
The HTML and Preview buttons let you select how the block works with HTML in the editor. The HTML button is selected by default. This shows the HTML in its code form rather than executing it. This example shows the HTML of a Google Map.
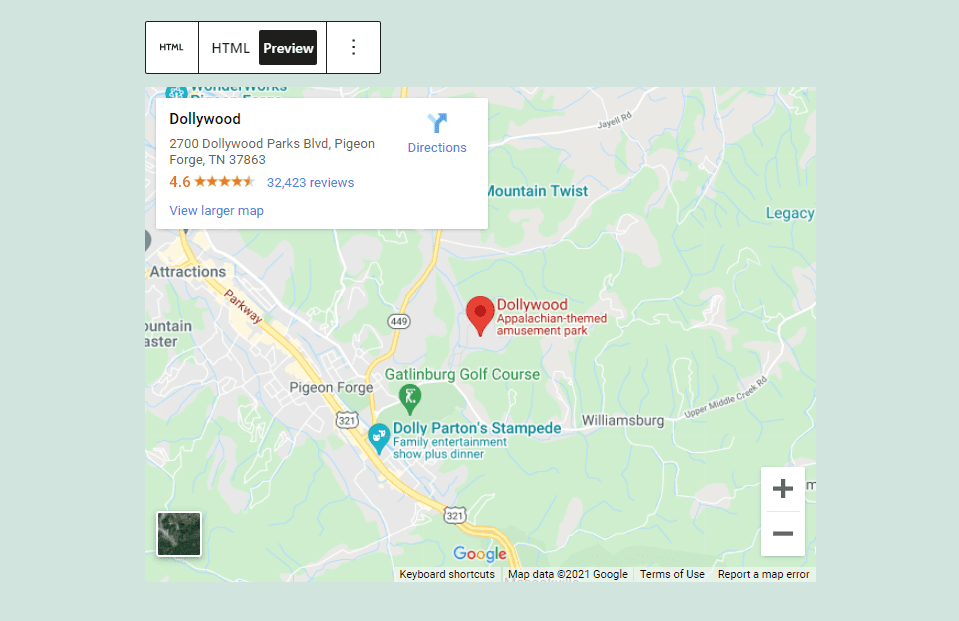
Selecting Preview shows how the HTML will look on the frontend as it’s executed within the browser. It’s easy to switch back and forth between the views to edit the HTML and see how it would look to the end-user. This is an excellent way to make edits and quickly view the results. This example shows an embedded Google Map as it would appear within the content.
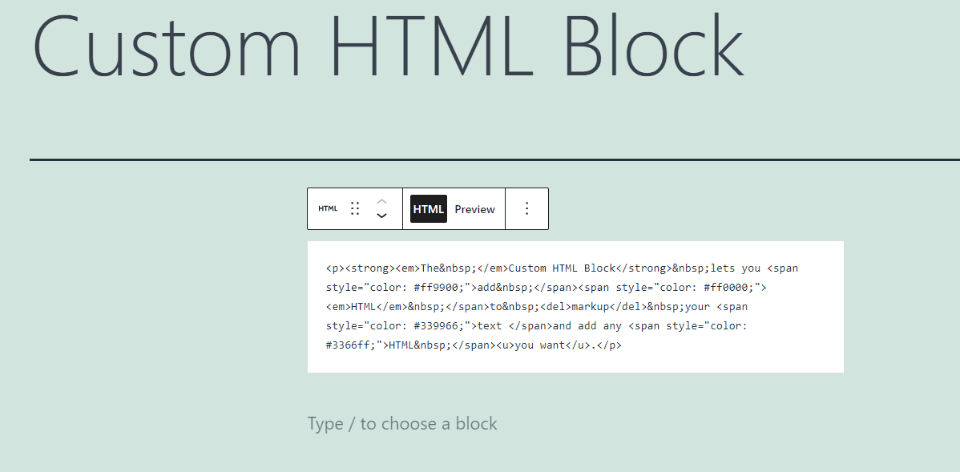
As another example, here’s some HTML to add styling to a line of text. This is the HTML view, where I can create and edit the HTML.

Here’s the Preview mode that shows how it will look on the front end.
Custom HTML Block Options
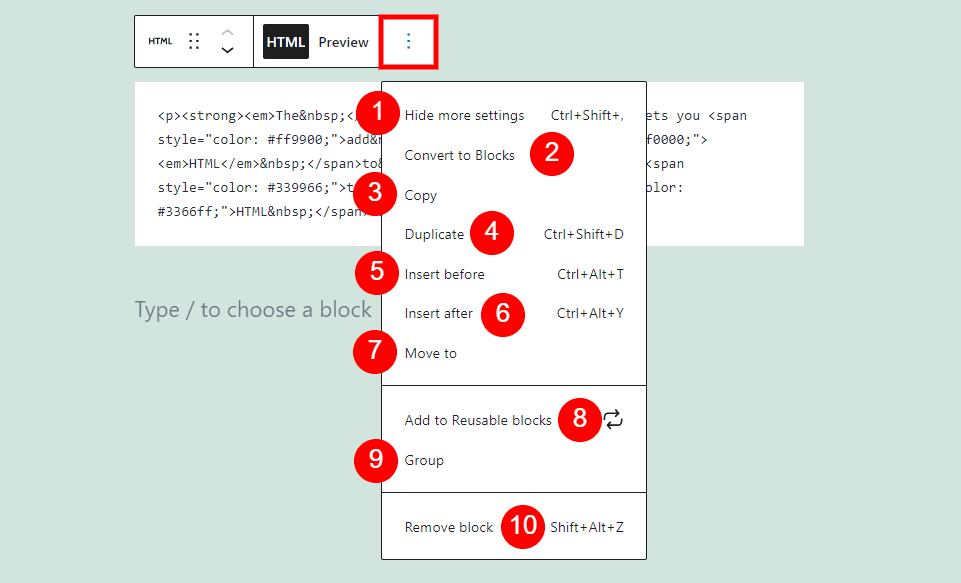
On the far right of the toolbar are three dots in a vertical stack. These three dots open a set of 10 options in three divisions that allow you to hide the settings, convert to blocks, copy, duplicate, insert before or after, move to, add to reusable blocks, group, or remove the block.
Here’s what the Custom HTML Block options can do:
Hide More Settings – this hides the right sidebar, expanding your workspace.
Convert to Blocks – this converts the content to the other appropriate blocks. Text will be converted to Paragraph blocks, images to Image blocks, etc. Embedded code, such as the Google Map code that I used in my example, will remain as a Custom HTML Block. If other HTML within the block can be converted, it will be removed from the block at placed in a different block.
Copy – this copies the block to your clipboard so you can paste it anywhere within the editor.
Duplicate – this places a duplicate of the block under the original.
Insert Before – this adds a block area before the Custom HTML Block so you can place another block.
Insert After – this adds an area after the block where you can place another block.
Move To – this lets you move the block up or down with the arrow keys. You’ll move a blue line. When it reaches the location that you want, hit enter and the block is moved instantly.
Add to Reusable Blocks – the adds the Custom HTML Block to your reusable blocks so you can use it again on any page or post.
Group – this adds the block to a group so you can adjust the blocks as a single unit.
Remove Block – this deletes the block.
Tips and Best Practices for Using the Custom HTML Block Effectively
Use this block to style your text and edit HTML first and then use the Convert to Blocks tool to create paragraphs or other types of content. This gives you more control over the content and is especially helpful if you don’t need to keep the HTML version. You can view the preview as you go. This keeps you from having to change between the visual and code editors in the WordPress settings in the sidebar.
Use this block for embedded maps, ads, videos, etc. This keeps you from having to change to the Code Editor view and add the code into other types of blocks, such as the Paragraph Block.
Using this block rather than the Code Editor version of your pages and posts keeps you from having to work with the page and post tags. This creates a cleaner work environment that’s easier to use.
Whether you’re adding your own HTML or embedding the code from another source, use the Preview feature often to ensure your HTML will execute the way you intend.
Don’t use the script tag in the block. It might be removed and then your code wouldn’t work.
Frequently Asked Questions about the Custom HTML Block
What does the Custom HTML Block do?
It allows you to enter HTML into a field so you can work with it while keeping the page or post in the Visual Editor.
How can the Custom HTML Block be used?
Any HTML with the supported tags can be added. You can use the block for ads, maps, videos, anything with iframes, tables, etc. It’s also an easy way to markup your text and then convert it to a Paragraph Block.
Will it color-code the markup?
No, the markup in the block looks like any text editor.
Does the Custom HTML Block run the HTML?
It runs the HTML as normal on the front end. In the editor, it can run the HTML or show you the code. It’s up to you which you view, and you can select between the two options at any time with a single button click.
No. You can see a list of HTML tags that are supported on the WordPress Supported Code page.
Conclusion
That’s our look at the Custom HTML Block. This block isn’t just for developers. The main advantage of using this block is you don’t have to switch between the visual editor and code editor to work with HTML. This means you can work with the rest of your content showing as normal. You can then work with HTML in the block and preview it at any time. The Custom HTML Block provides an easy way to work with HTML in the block editor.
We want to hear from you. Do you use the Custom HTML Block? Let us know about your experience in the comments.
Featured Image via enterlinedesign / shutterstock.com


Does this work with Classic Editot?