
Displaying code in WordPress pages and posts can be tricky. Just posting the code within the content can have interesting results, especially if WordPress displays it incorrectly or your security locks you out for malicious activity. Fortunately, the WordPress Code Block makes it easy to display code snippets. Knowing how to use this block will help you display code within your content in the best way for both your website and your readers.
In this article, we’ll look at the WordPress Code Block and see what it does. We’ll see how to add it to your posts and pages and look at its settings and options. Hang around to the end to see tips and best practices on how to use it and see the frequently asked questions.
Subscribe To Our Youtube Channel
How to Add the Code Block to your Post or Page
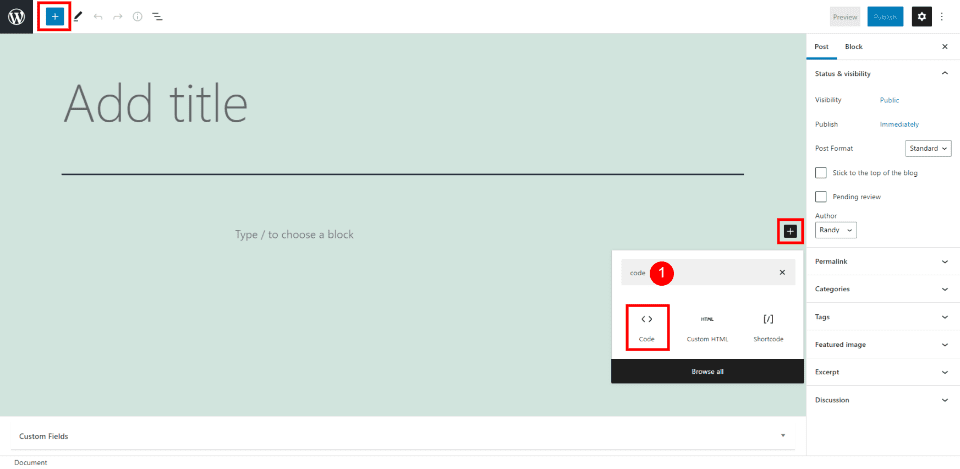
To add the Code Block to your pages and posts, select the block inserter tool next to the content area where you want to place the block, or select the inserter in the top left corner of the page. Enter the name of the block and select it when it appears or scroll through the blocks to see what’s there.
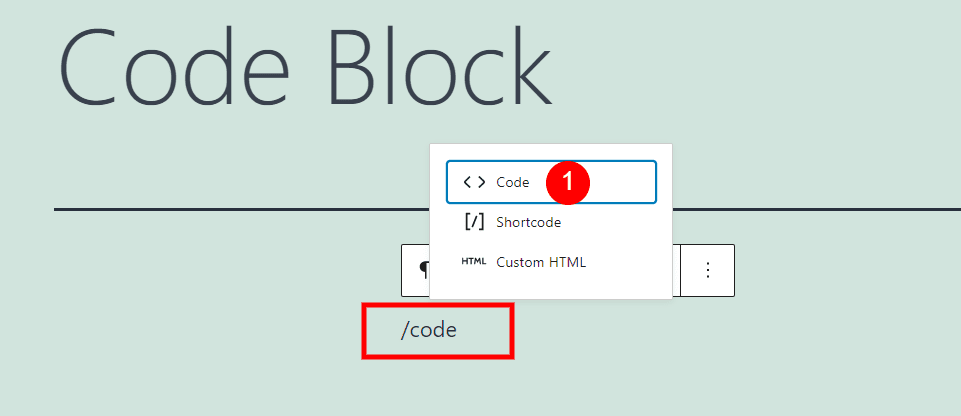
If you prefer, you can type /code in the area where you want the block to appear. Then, just hit enter or select the block from the options that appear.
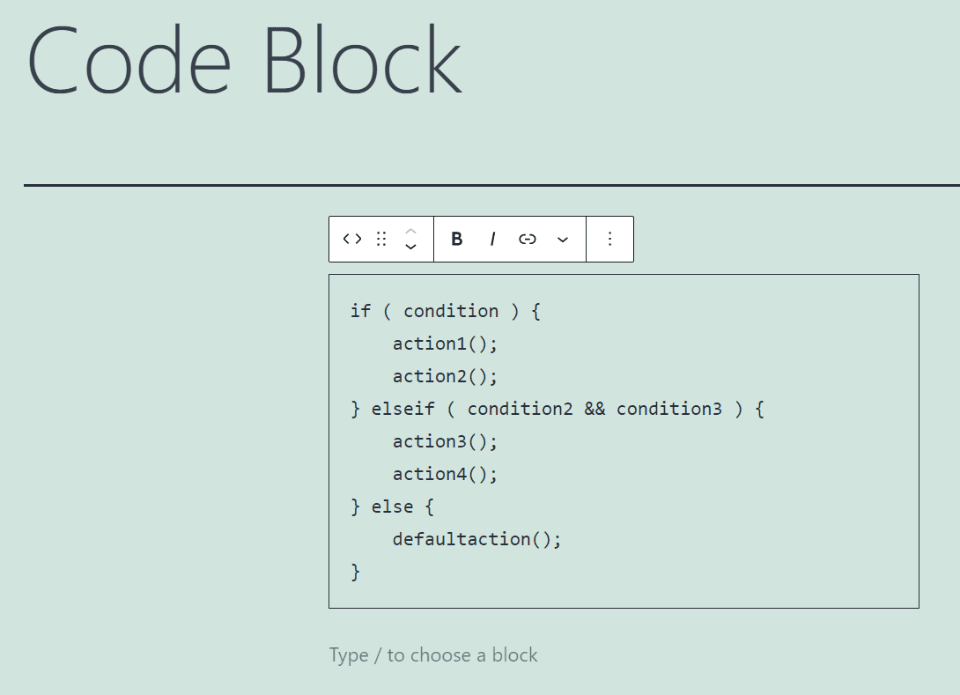
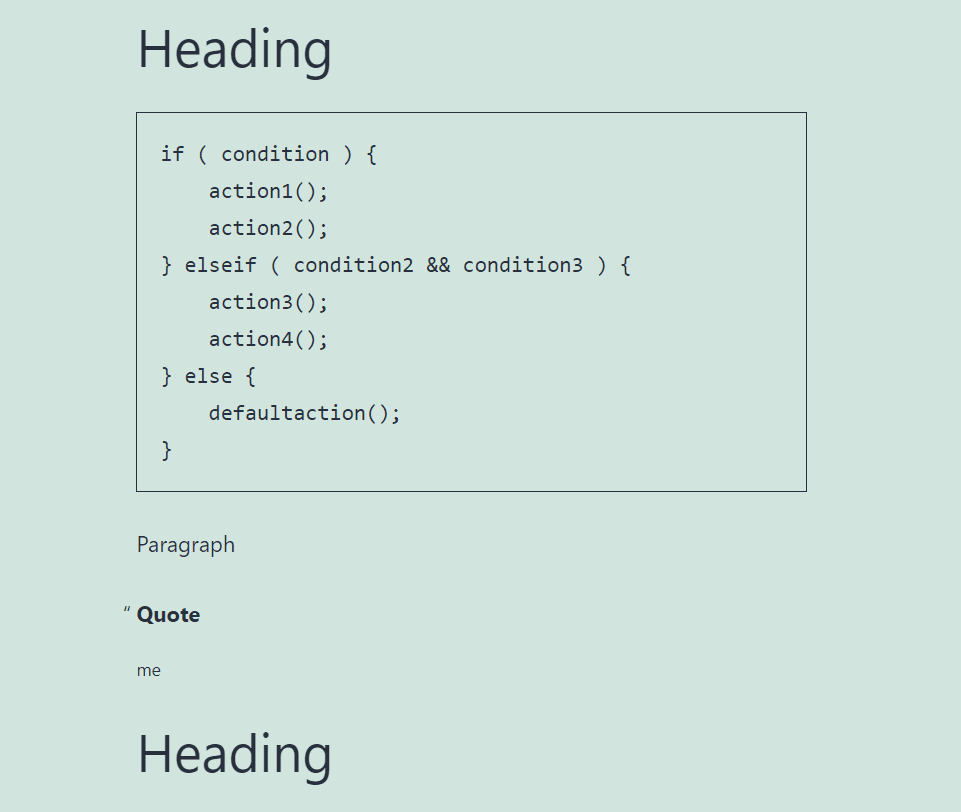
You now have a Code Block within your content where you can add any type of code you want to display. The code is automatically marked with code tags, so it displays properly as code. This helps in providing examples for readers to learn from or use in their own projects. In this example, I’m using the pseudo-code from the WordPress support page (because) lazy.level = advanced.
Code Block Settings and Options
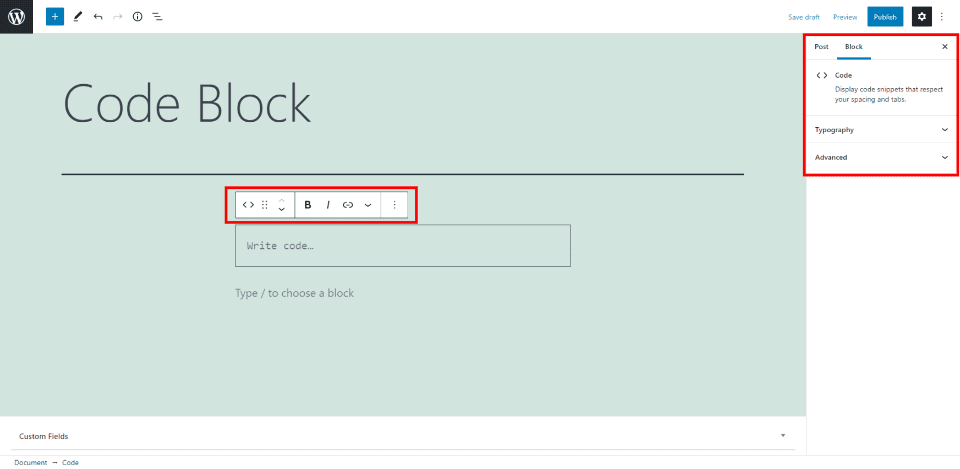
The Code Block has two places where you’ll find settings and options. The first is the Code Toolbar above the block. The second is the options in the right sidebar. We’ll look at both.
Code Block Toolbar
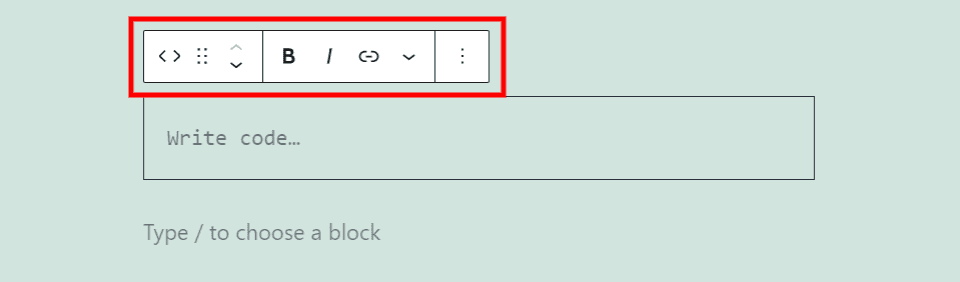
Click anywhere in the block to see its toolbar. If you don’t see all the tools, place your mouse below the block in a new block location and then click on the block. All the settings will appear.
Change Code Block Type or Style
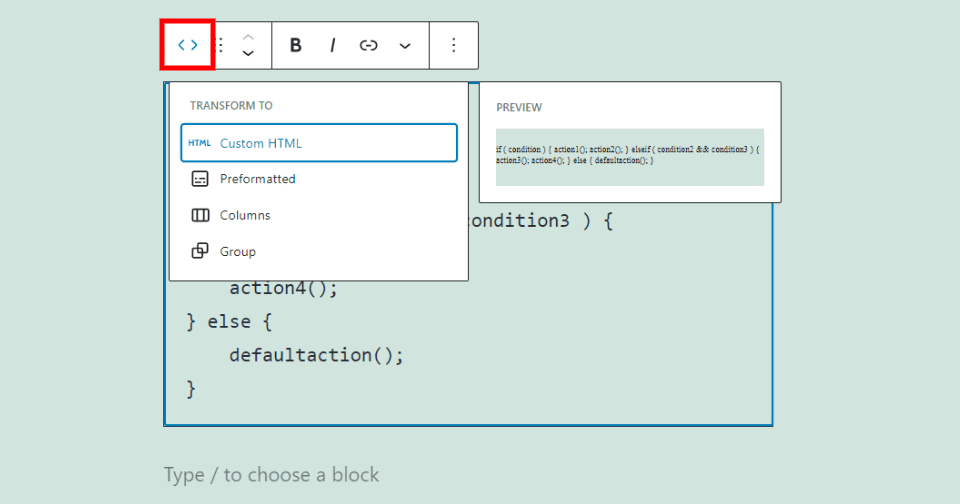
The first setting uses left and right arrows. This changes the block to a Custom HTML Block, Preformatted Block, changes the columns, and lets you create a group so you can adjust the background color, choose borders, and adjust other options. Hovering over them gives you a preview of how each would look. I’m hovering over the Custom HTML option.
Drag
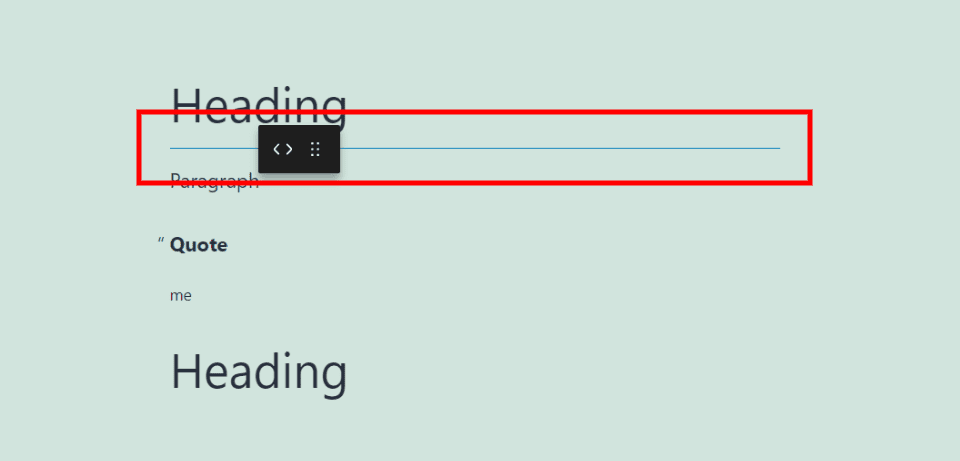
The drag tool includes six dots. Grab these dots to drag the block anywhere you want. A blue line appears where it will be placed at every possible location when you hover over the different areas.
When you drop it, the block will be placed in its new location.
Move
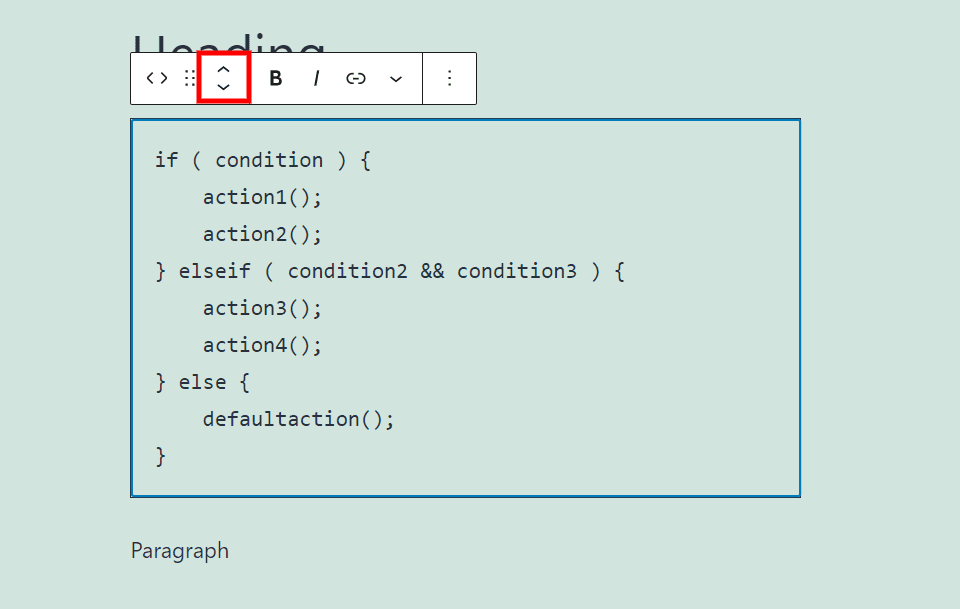
The up and down move arrows move the block up or down one block within the content blocks each time you click them.
Bold and Italic
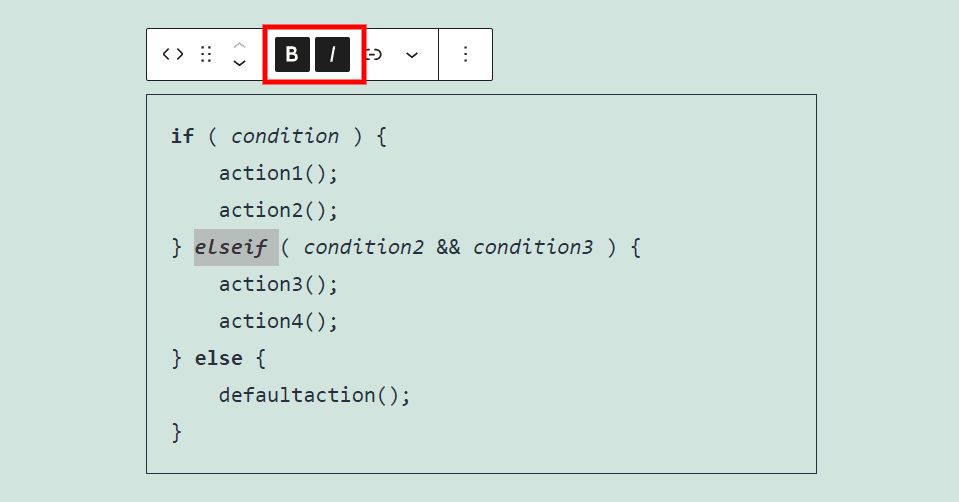
The bold and italic settings apply to the code you’ve highlighted. You can use them together or individually. I’m using both together and independently in this example. The is a good way to draw attention to certain lines or commands in the code.
Link
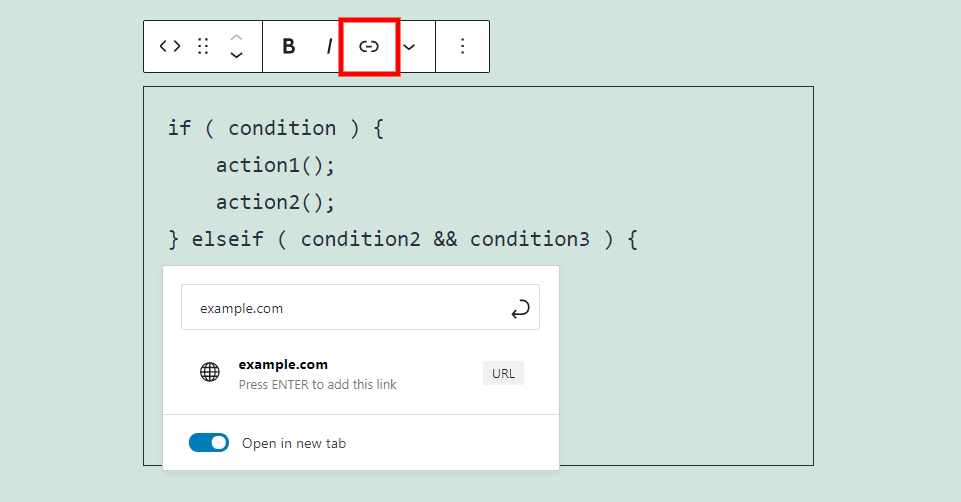
The link lets you make any of the code a clickable link. You can search for or enter the URL for the portion of code you’ve highlighted. This is good if you want to link to tutorials for each of the commands, other examples, where the code came from, etc. You can have the link open in the same tab or a new tab.
More Settings
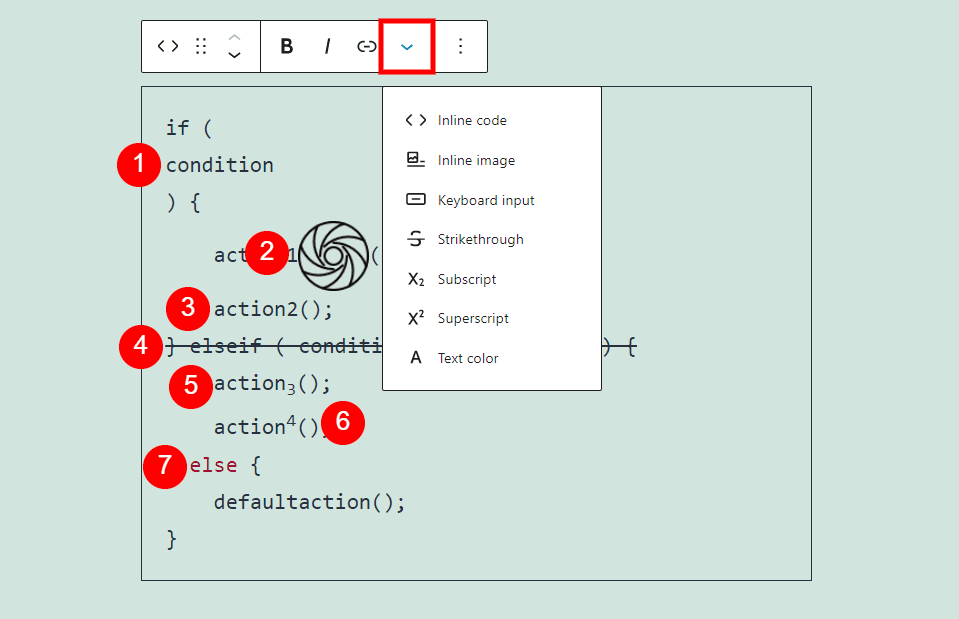
The Code Block’s More Settings opens a dropdown box with several options. I’ve applied each of the options in this example.
Inline Code – shows the text formatted as code. It places the text on a line by itself. Since everything is formatted as code, the font looks the same.
Inline Image – places an image within the text where you’ve placed the mouse. It opens the Media Library where you can select an image. If you click the image, you’ll see a dropdown box where you can change its width.
Keyboard Input – adds keyboard tags to the code you’ve selected. The code is displayed in the browser’s default monospace font.
Strikethrough – adds a line through the code you’ve highlighted.
Subscript – formats the code as a subscript.
Superscript – formats the code as a superscript. You can use subscript and superscript together. This reduces the size of the font and horizontally centers the code.
Text Color – changes the color of the code you’ve highlighted. Select from premade colors, choose a color on the color picker tool, or enter the value as a HEX, RBG, or HSL.
Options
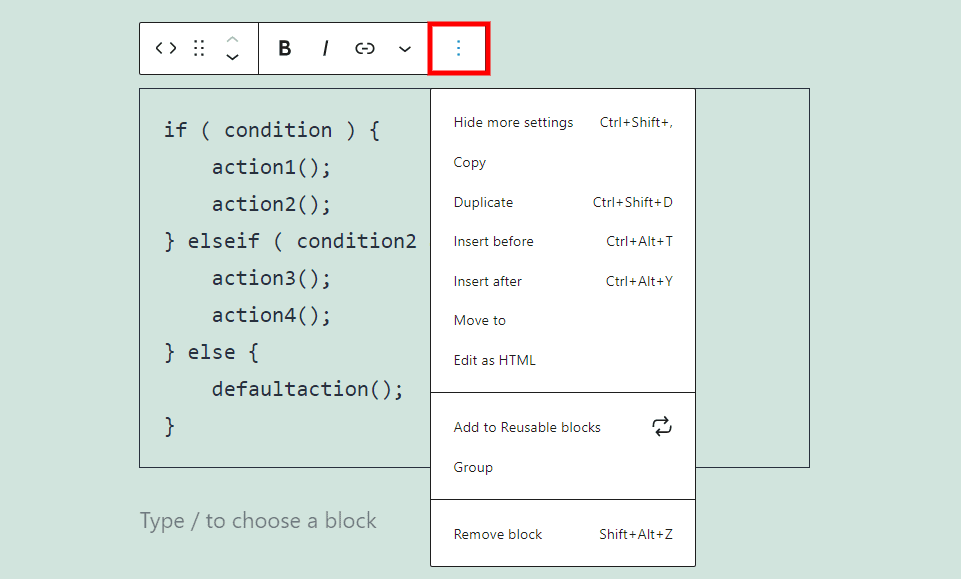
The Code Block options are placed within the three dots on the far right of the toolbar. The options include:
Hide More Settings –hides the right sidebar to give you’re a clean and wide workspace.
Copy – copies the block so you can paste it anywhere within the content area.
Duplicate – duplicate of the block and places it under the original.
Insert Before – adds a content area above the Code Block.
Insert After – adds a content area below the Code Block.
Move To – lets you move the block by placing a blue line that you can move up or down with the arrow keys. When you get the line to the location you want, simply hit Enter.
Edit as HTML – changes to the code editor for the block where you can edit the code as HTML. Select Edit Visually to change the block back to visual mode.
Add to Reusable Blocks – adds the block to your reusable blocks so you can reuse it on any page or post.
Group – adds the block to a group so you can make changes to them as a single unit.
Remove Block – deletes the Code Block.
Code Block Settings
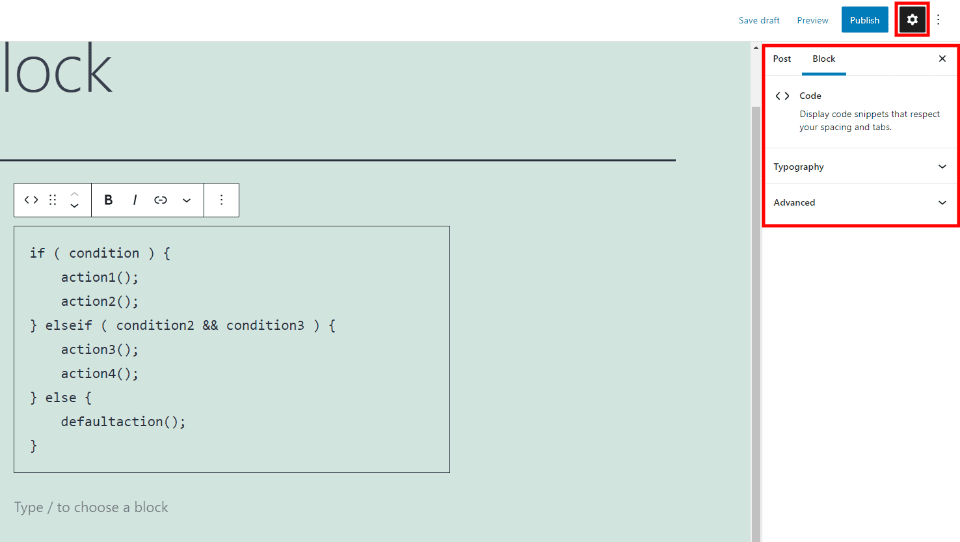
The Code Block settings are placed in the right sidebar. They include Typography and Advanced settings. Selecting the block will display the settings. If the sidebar isn’t showing, click the gear icon in the upper right corner.
Typography
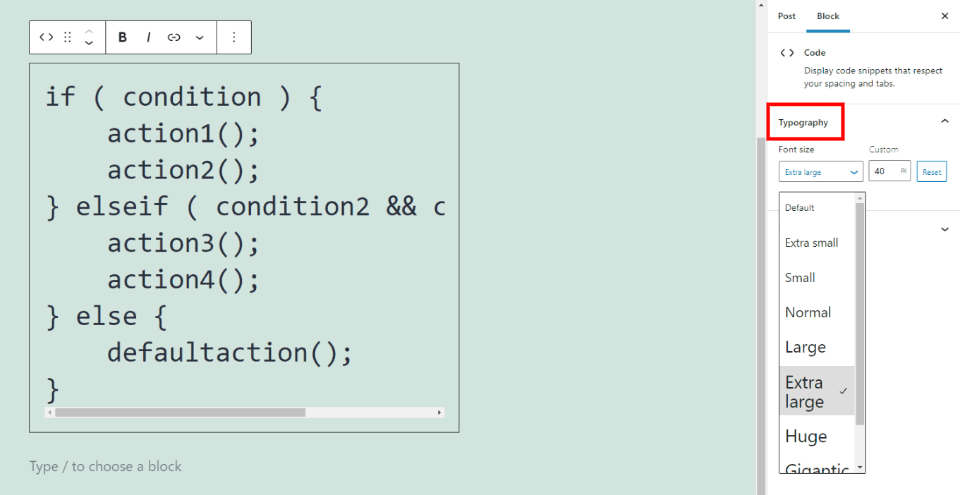
Typography lets you select the size of the font for the entire block. Choose the font size from a dropdown box with 7 sizes or enter a custom size into the field. Click Reset to change it back to the default font size.
Advanced
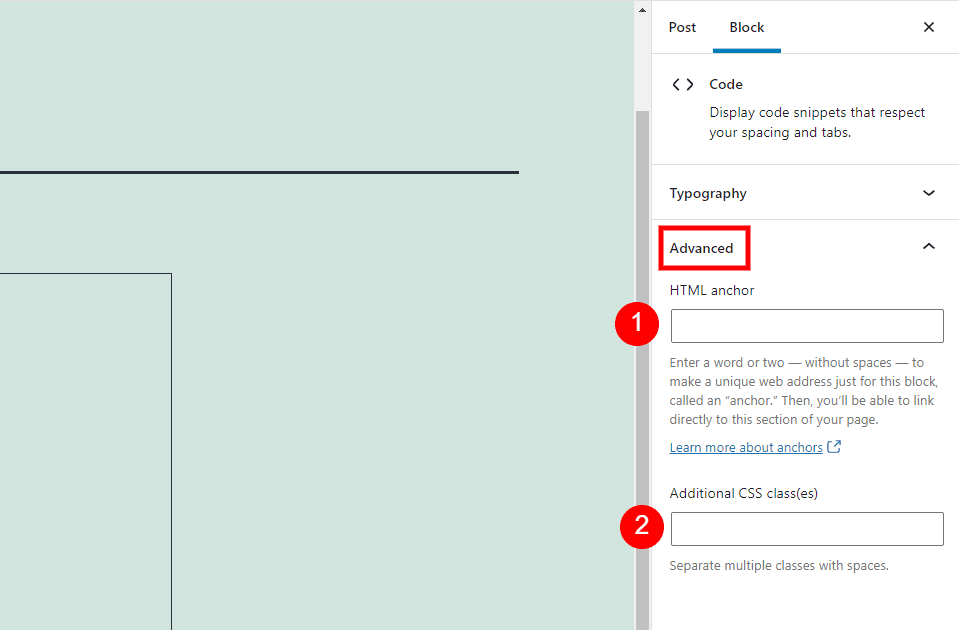
The Advanced settings include an HTML anchor and a field for additional CSS classes. The anchor is a URL just for this block so you can link directly to it. The Additional CSS classes field allows you to add a custom CSS class to style the block.
Tips and Best Practices for Using the Code Block Effectively
Use this block any time you want to display code within your content. The code itself doesn’t have any effect on the block.
Format the code with spaces as you would when creating code with a text editor. Use the bold and italic settings to draw attention to certain snippets within your code.
As with any code, label it well so it’s easy to understand. You can comment the code or add notes within the block, but make sure they’re not within the code elements in case someone wants to copy the code.
Frequently Asked Questions about the Code Block
What is the purpose of the WordPress Code Block?
To display code for others to see and use. It displays the code in a clean layout that keeps your spacing.
Does the Code Block run the code?
No. It displays the formatted code so your readers can see and use it. The code is automatically wrapped with the HTML code tags.
What Kinds of Code can it Display?
It will display any code from any programming or scripting language. The language doesn’t make any difference.
Does it format the Code?
No. It doesn’t work as a code editor, so it doesn’t change the spacing, colors, add numbers, etc. It just displays the code the way you type it.
How is the Code Block different from the HTML Block?
The HTML Block lets you create HTML without having to change to the code editor view of your page. It will run the HTML on the front end. You can preview the results from the back end. You can use the Code Block to display HTML if you don’t want it to execute.
How is it Different from the Preformatted Block?
The Preformatted Block displays text with your spaces in a monospace font. It adds font and background colors for the sidebar options.
Conclusion
That’s our look at the WordPress Code Block. The block is simple and easy to use. Since it doesn’t run the code, the language itself doesn’t matter. This block provides a good way to display any type of code for your readers to copy or learn from.
We want to hear from you. Have you used the WordPress code Block? Let us know what you think about it in the comments.
Featured Image via Danielala / shutterstock.com


Leave A Reply