
Custom Post Formats is a feature that was first introduced back in WordPress version 3.1. Basically, post formats act as a different way of grouping posts, allowing you to define the kind of post content you are publishing. Once posts are grouped by format, you can choose to arrange posts together, style posts differently, or organize posts according to their post format.
WordPress allows you to switch on different post formats from a set list. You don’t have to use all of them, you simply have to pick which formats suit your site best. At the moment, this list consists of:
- Aside: Similar to a quick note. Use these for posts like quick updates or custom status’.
- Gallery: A post containing a gallery of images.
- Image: A single image, rather than a gallery.
- Video: A post that has one, or several, videos. The WordPress codex also points out that a single URL may indicate the source of a video, rather than an embedded video.
- Audio: An audio file or playlist.
- Link: A simple link to an external site.
- Quote: A quoted block of text, usually with attribution to a quote’s author.
- Status: Similar to aside, but much more about a simple one-line status.
- Chat: A full chat transcript.
Obviously, these descriptions are all guidelines, and you can adapt post formats to suit your needs. If you are running a blog, chances are you have a few speciality posts that fit into these categories, which you’d like to look a bit different, or be laid out in a unique way. In this article, we’ll go over how to set up post formats to do just that, and a couple of ideas for getting started with them.
Setting Up Post Formats
Adding post formats to your theme is as simple as adding a function to WordPress with a list of which post formats you want to use. Many themes come pre-loaded with post formats already installed. Still, it’s a good idea to get familiar with how they are set up.
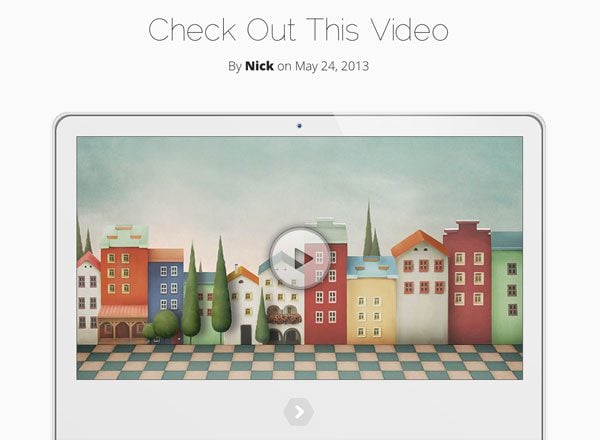
An example of the video post format in the Fable theme
In this tutorial, I’ll be using the Fable theme, which comes with a few post formats included: Gallery, Quote, and Video. For my blog, however, that’s not enough. I’d like to add a few more. The first thing to do is get set up with a child theme of Fable with just a basic style.css file. Using a child theme ensures that future updates to the theme will remain intact, though all of our customizations override the theme’s defaults.
It’s also worth noting that by default, post formats are added to the “Post” post type, but they can also be added to custom post types with another line of code.
For now, let’s just add a few more post formats to our theme. Create a “functions.php” file in your child theme’s directory if you haven’t already, and add this block of code.
function add_post_formats() {
	add_theme_support( 'post-formats', array( 'gallery', 'quote', 'video', 'aside', 'image', 'link' ) );
}

add_action( 'after_setup_theme', 'add_post_formats', 20 );
Here, we are using the add_theme_support function to include our post formats. As I mentioned, Gallery, Quote and Video are already included with our theme. However, we are overriding this function with our own, so we have to make sure to include them if we want to keep them. You can add any post format you want from the list above, so choose the formats that fit your blog the best.
After you activate your child theme, you can visit the WordPress admin and and create a new post. You will see six post formats listed in the right sidebar. Select any of these to change a post to a specific post format, or just leave it at “Standard”. Before we move forward, I’d recommend adding a few dummy posts for each post format you are using with relevant content (A gallery, embedded video, etc.) so that you can see post formats in action.
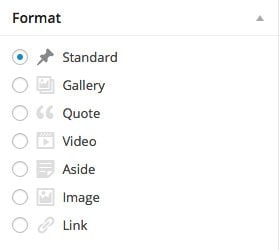
You can choose from a list of post formats in the post editor
Okay, we’ve set up our custom post formats. Now, it’s time to explore what we can do with them.
Styling Post Formats
The easiest way to get started with post formats is to use CSS to style each a little differently. By default, themes using the post_class function, which includes any theme from Elegant Themes, will output a special CSS class for each post that designate what their post format is. The class is structured as .format-(name). So, a video post will have the class:
.format-video
These classes are included on both index pages and individual post pages, and can be used to add unique styling in either location. Let’s start with something simple.
Fable, the theme I’m using, already has a special structure for quote posts where a single quote is bolded and placed inside of quotation marks. But I want to change the background color for all my quote posts as well to highlight them a bit more. To do so, I open up my child theme’s “style.css” file and add:
.format-quote {
	background: #FFAADD !important;
	color: white;
}
This will add a pink background to any post that has been assigned the “quote” post format. It will also change the text color to white. I made sure to add the “!important” flag to override the default settings of the theme.
Of course, this styling applies to posts in all contexts, on single posts, pages and the index page. If I want to make it so that this styling is only applied when a post is listed on the home page, we just need to add a little specificity. This time, I’m only going to apply my pink background when a post is listed on the homepage. I’m also going to remove the title of the post with CSS, so only the post content remains.
.home .format-quote {
	background: #FFAADD !important;
	color: white;
}

.home .format-quote .entry-title {
	display: none;
}

Our full quote with a pink background and no title
CSS can be used to do quite a bit of work to change content based on format. The Fable Theme, for instance, adds special styles to galleries to make them appear in hexagonal panels.
One of the formats that I added to the Fable theme was aside, so there is no unique CSS for this yet. In order to make aside posts look more like a status, I want to remove the default dropcap added by the Fable theme, and add a text effect of my own.
.home .format-aside .entry-content > p:first-child:first-letter {
	display: inline;
	float: none;
	margin: 0;
	font-size: inherit;
}

.home .format-aside .entry-content p {
	font-style: italic;
	font-size: 36px;
	color: #666;
	text-shadow: 2px 2px #E7E1E1;
}
This styles the text to include italics, a larger font size and a text shadow, while removing the dropcap. Again, this will only apply to the homepage, but you can simply remove “.home” to get it to work on individual pages as well.

There is quite a bit that can be done with just CSS to customize post formats. I recommend browsing any themes listed on this site for a little inspiration.
Filtering Content Based on Post Formats
Styling CSS may be all you need to get post formats working for you. But if you’d like a bit more control, you can also edit templates directly to modify their output. Most themes, such as the Fable or Divi theme, are set up to show custom templates based on post format. The crucial piece of code is usually found within the loop of post templates (e.g. index.php or single.php).
get_template_part( 'content', get_post_format() );
You don’t need to add this code, it’s provided by default in Elegant Themes themes, and most professional themes out there.
Get_template_part pulls a template from a specific PHP file, which can be altered based on post format. So if you want a special template for the aside format, you need only to create a content-aside.php file and start editing the loop’s content there.
The Gallery post type in the Fable theme, for instance, arranges images on a grid with support for fancybox pop-ups built right in. This is done in the “content-gallery.php” file.
If you picked the right theme, then a lot of this work will be done for you, but it can be useful to add some extra functionality. For instance, I added the “link” format to the Fable theme in the first step. My link posts are very simple, and contain only a title and a single link.
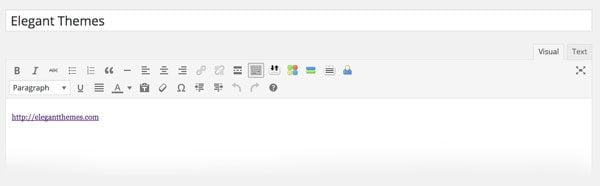
An example link post
What I’d really like to do is pull this URL, and link my title directly to an external page when the post is listed on my homepage, instead of forcing users having to visit a single post, then following the link. That is beyond the scope of just CSS and will require us to use a template.
Getting Our Styles Ready
We’ll need a little bit of custom CSS so that we can call out link posts a bit to make sure users know they are being directed away from the site. I want to make sure that the title of a post has a color that matches the rest of the links on my site, and change the background a bit. I also want to use a link icon before the title.

The first thing to do is to create an images folder in your child theme, then save the link image above in there as “link.png”. Next, we’ll add a bit of CSS that will make sure our content looks unique.
.home .format-link {
	background: #eee !important;
}

.home .format-link .entry-title h2 {
	color: #6ba7a5;
}

.home .format-link .entry-title h2:before {
	display: inline-block;
	content: " ";
	background: url(images/link.png);
	width: 75px;
	height: 56px;
}

.home .format-link .entry-title p {
	text-align: center;
}
Here, we are editing the color of the background and text for link posts. We are then using the :before pseudo-selector to add the link icon just before the title of the post. If it’s not clear what this does yet, that’s okay. We’ll get to that in a bit.
Adding Our Link Grab Function
In order to link our posts directly to an external link, we will need to create a function that grabs the first link from a post’s content, and returns the URL for us to use. Then, we can use that URL in our post format template to link a title directly to an external page.
Open up the “functions.php” file in your child theme folder and add this function:
function get_my_url() {
	if ( ! preg_match( '/<a\s[^>]*?href=[\'"](.+?)[\'"]/is', get_the_content(), $matches ) )
		return false;

	return esc_url_raw( $matches[1] );
}
All this function does is sort through the content of your post and search for an a href= tag. It then pulls out the URL from inside this and returns it back for you. We’ll be using this in the next step.
Setting Up Our Link Template
Next, we’ll need to actually create our template for the link post format. To do so, we have to create a file called “content-link.php” in our child theme’s folder. This will take any posts with the post format “Link” and use this file to render its content, instead of the default template. Right now, this template is blank so it doesn’t do much just yet. Let’s add our code.
<article id="post-<?php the_ID(); ?>" <?php post_class( 'entry' ); ?>>
	<div class="container clearfix">
		<header class="entry-title">
		<?php if ( is_single() ) { ?>
			<h1><?php the_title(); ?></h1>
		<?php } else { ?>
		<?php $myLink = get_my_url(); ?>
			<h2>
				<a href="<?php echo $myLink; ?>"><?php echo the_title(); ?></a>
			</h2>
			<p>This is an external link and will take you to a new page.</p>
		<?php } ?>

			<?php et_fable_post_meta(); ?>
		</header>
	</div> <!-- .container -->

	<?php if ( is_single() ) : ?>
		<?php get_template_part( 'includes/share', get_post_format() ); ?>
	<?php endif; ?>
</article> <!-- .entry-->
There’s a lot going on here, so I’m going to step through this code, bit by bit, so you can see how it is set up.
<article id="post-<?php the_ID(); ?>" <?php post_class( 'entry' ); ?>>
	<div class="container clearfix">
		<header class="entry-title">
This is just some basic code to start off our HTML structure. We are adding the post_class function to get proper classes (including .format-link) along with container and header elements. This is taken directly from the default template, which is the “content.php” file in my main theme folder. You can edit this part to match your theme however you wish.
<?php if ( is_single() ) { ?>
    <h1><?php the_title(); ?></h1>
This section uses the “is_single” conditional tag to check if we are on a single post page or not. If we are, we render the title in an h1 tag, which is the default. Of course, users shouldn’t be visiting this page because we are linking away from it, but it’s a good fallback.
<?php } else { ?>
<?php $myLink = get_my_url(); ?>
<h2>
<a href="<?php echo $myLink; ?>"><?php echo the_title(); ?></a>
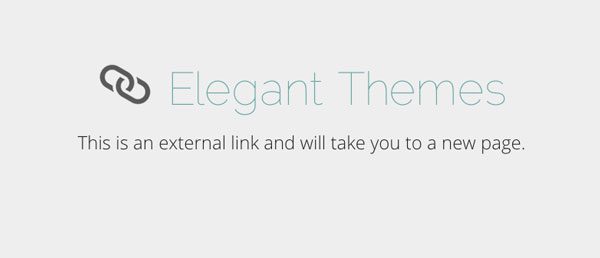
</h2>
<p>This is an external link and will take you to a new page.</p>
<?php } ?>
Here is where the real magic if happening. We are using the get_my_url function we created earlier, to store the first link from our post in the $myLink variable. Then, in an h2 tag, we are echoing out that link in an a element. So, instead of linking to a post, link formats will link to the first external link of the post (in our case, https://www.elegantthemes.com).
Next, we are simply adding the title to be the text of our link. Remember, we added the link icon in our CSS which will be automatically added before each of our titles. Finally, we are adding a bit of text that tells our users that they are about to be directed to a new page.
			<?php et_fable_post_meta(); ?>
		</header>
	</div> <!-- .container -->

	<?php if ( is_single() ) : ?>
		<?php get_template_part( 'includes/share', get_post_format() ); ?>
	<?php endif; ?>
</article> <!-- .entry-->
We are ending our post with the same markup from the default template, to ensure that the post renders like normal on single pages, and all of our HTML elements are closed.
In the end, we end up with a different look for link posts on our homepage.
This is, of course, just the beginning. There is a lot that can be done with post format templates to edit and modify the output of your posts based on post formats, allowing for a full range of content. If you’re interested in finding out more about how this works, I’d recommend diving into the content templates to see how they work or visiting the WordPress codex entry on Post Formats.
Permalinks
The last trick I’ll share with you is how to organize your posts according to post format. WordPress comes with a handy function, get_post_format_link that allows you to link to a page that only includes posts from a specific post format. To use it, simply use this function in any template file.
<?php echo esc_url( get_post_format_link( 'aside' ) ); ?>
This will provide a link to a list of “Aside” posts. Switch out the name of the post format to match which post format you are linking to. This can be useful in navigation, or grouping together posts. If your blog makes heavy use of post formats, it can be a great way to organize content.
Final Thoughts
There is a lot of discussion about post formats right now, and their future is a bit up in the air. But if you’re running a content-driven blog, they can be an extremely useful tool and can add some solid extra functionality to your posts. Elegant Themes themes feature post formats quite a bit, and you can explore almost any of them to get an idea of how it all works. The best way to get started is to simply dive in!


Hi there
Thanks for this tutorial! It helped me to successfully put these post formats to Mesocolumn theme I’m using on my blog!
Once you really understand the flexibility a post format gives you, how they’re different & useful than traditional taxonomies, you love them to death.
Wow, thank you for explaining this so thoroughly. I’m a newbie when it comes to CSS and this really dumbed things down for me. Other sites simply said “edit CSS” to customize the post formats, but you showed me how.
Hi! Jay thank you very much for this helpful post. I want a question to you about this subject. How do it select input post format add php class to functions without javascript?
Is it possible to style the link-format to display the featured image and not to show other post info at all.
I want to use this to insert banners with external links in the posts grid layout. So clicking on these banners will go to the link I want.
You wrote: “By default, themes using the post_class function, which includes any theme from Elegant Themes, will output a special CSS class for each post that designate what their post format is. ”
What would you suggest for a theme that doesn’t use the post_class function?
Hi Jay
Great article. I am an Elegant Themes member. Could you answer a question please?
I am doing a site for a writer who wants to split her blog entries to appear in three separate columns, on her home page, say Bike, Golf, Swim.
I am thinking I can use this function inside each column to get them
and so on.
Will that display in the relevant posts into each column?
Is that the best way to set this up? I was going to do this in Divi?
Many thanks,
Peter
Thanks for the tips
Hello Jay,
You’ve got a nicely written post here that is also super detailed. I’m presenting diving in and experimenting with post formats is certainly making me chuckle!
Do have a very great day!
Always,
Terungwa
Thnk you for sharing a great information..