
When running a WordPress-based business, streamlining your workflow is important. This is doubly the case when managing multiple clients. Anywhere you can save time is a worthwhile endeavor. Too often, each aspect of running a business has its own bit of software and it’s own separate interface. That means separate tools to manage assignments, organization, and invoices. Talk about a headache.
While you still might need separate tools to manage all of these aspects of your business, there are now many WordPress integrations, which means you can check off more tasks from your to-do list from within the WordPress dashboard. Today, we’ll be discussing WordPress invoices and how to add this capability to your workflow using the Sliced Invoices plugin.
About Sliced Invoices
The Sliced Invoices plugin is a full-featured invoicing system that is easy to setup and use and lets you create and send invoices from within WordPress. It also lets users create project quotes to submit to potential clients. Some of the plugin’s general features include the ability to pre-define line items, multiple tax settings, custom email settings, the ability BCC yourself any invoices you send, client reminder emails, cloning, and three customizable templates.

As it relates directly to invoicing, this plugin packs a punch.
Features:
- Add a custom logo to invoices and quotes.
- Import quotes and invoices in bulk in CSV format.
- PayPal Express Checkout support.
- Offline payment support.
- Default due date.
- Reports.
- CSV exporting.
- Multiple currency support.
- Multisite support.
Many other features are included for creating Quotes as well.
Price: Free. Several extensions are available to expand the functionality of the plugin. While a few are free (like Gravity Forms and Better URL) most are premium including Recurring Invoices, Deposit Invoices, and Stripe Payment Gateway.
Setting Up Sliced Invoices
Once you’ve installed and activated the plugin, there are a few settings you need to configure before you get rolling with sending your first invoice. In the Dashboard, click on Sliced Invoices under the Settings submenu. Then click the General Settings tab:
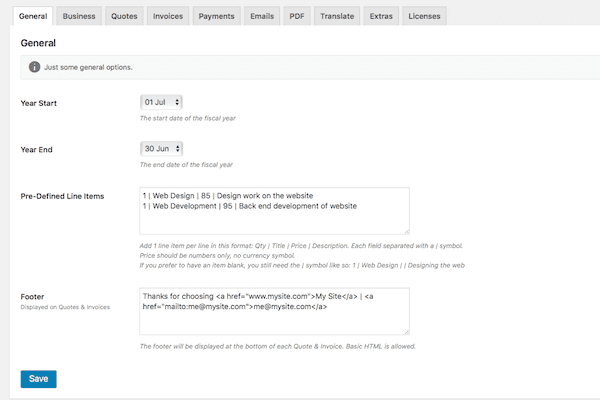
Here, you can configure the basic details about your invoices, including your fiscal year reporting and any pre-defined line items you want to save to use for multiple invoices across multiple clients. In our example here, the line items are broken down by the unit of measurement (hour), the type of work (web design), the dollar value per hour ($85), and a description of what the service entails (Design work on the website).
You can customize the footer message you’d like displayed at the bottom of each invoice here as well. Click Save.
Business Settings
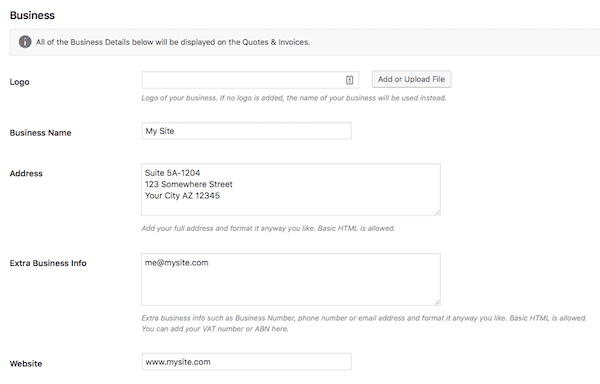
Here, you can upload a custom logo and fill in your company name, address, website address, and any other information you’d like displayed on your invoices. Click Save again before moving onto the next tab.
Invoice Settings
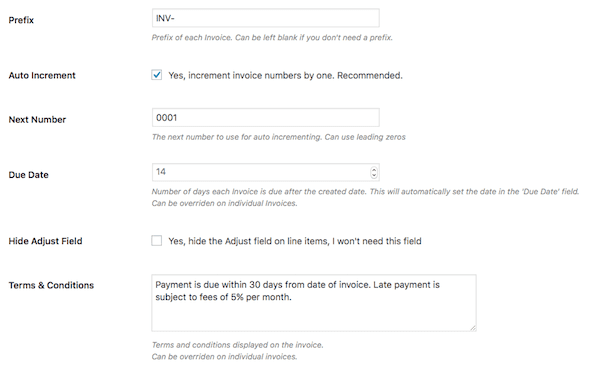
On this screen you can configure the prefix you want assigned to your invoices, whether or not you want them to auto increment, the next number for your invoices, how many days should pass before an invoice is due, and the terms and conditions.
You can also select from one of three templates and insert custom CSS if you wish. Click Save.
Payments Settings
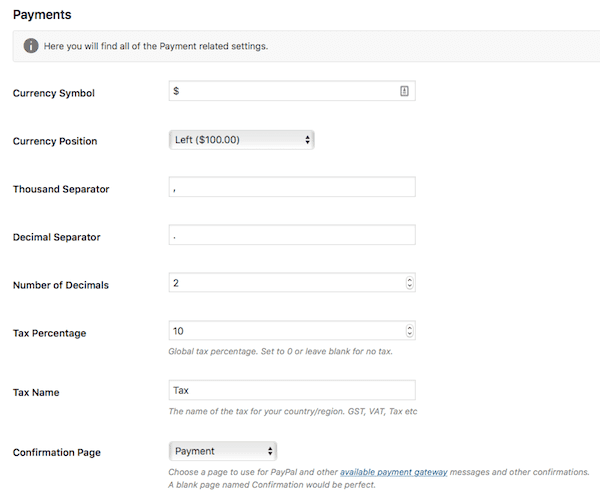
Pick your desired currency, how many decimal places you want to be displayed, the tax percentage, the tax name, and the confirmation page you want displayed.

Next, insert the payment methods you’ll accept. You have the option to include your banking information, a general payment message, PayPal currency, and your PayPal account information. Click Save.
Email Settings
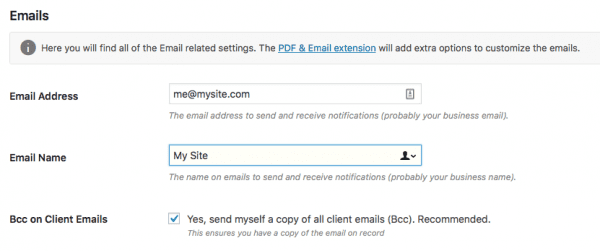
Input your preferred email address and then select if you’d like to receive a BCC on all client emails.
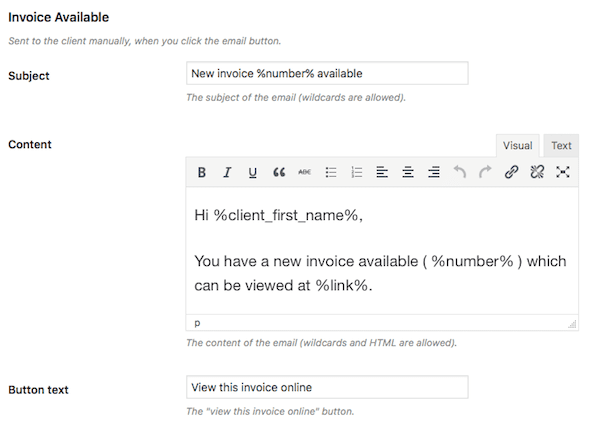
Next, customize the message that will be sent to your clients along with an invoice. You can modify the email subject, content, and button text. There’s a list of “wildcards” at the bottom of this screen that allow you to auto-insert information like the client’s name and the invoice number.
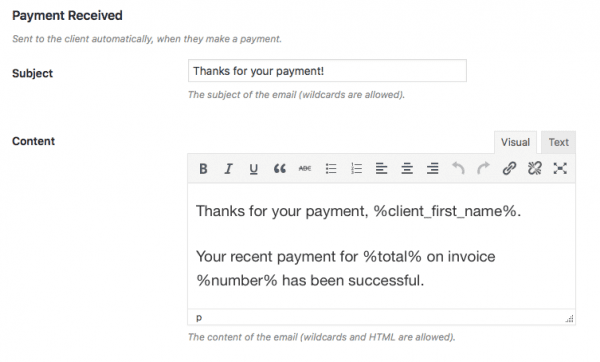
Scrolling further, you can customize the message clients will receive after they send a payment. You can use wildcards again here in the subject and content fields.
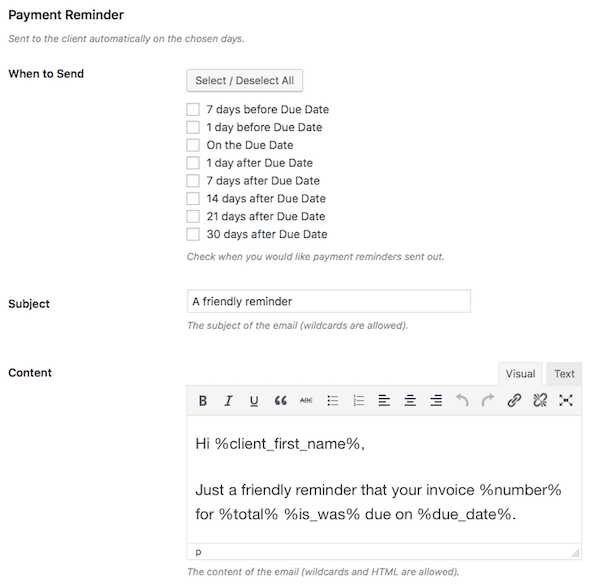
Last for this tab you can set up when a payment reminder should be sent to your clients spanning from on the due date to up to 30 days after the due date. You can also customize the subject line and the content of the email that will be sent to the client along with the reminder. Click Save.
Creating an Invoice
To create your first WordPress invoice, click on Invoices > Add New Invoice in the side menu on the Dashboard:
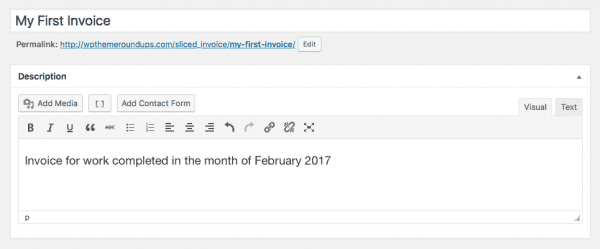
Fill in the details you want to include in your invoice, just as you would with a blog post. In this case, you can add a title and a description.
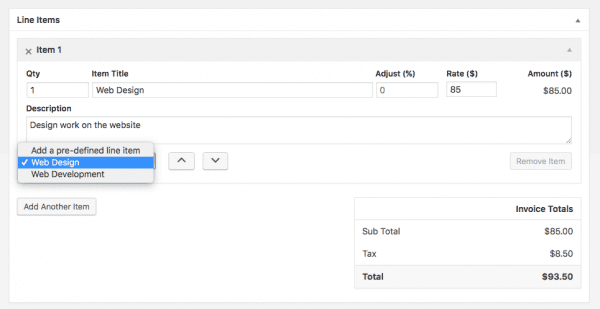
Next, add the line items for your invoice. You can insert the item title and the rate manually or select from the dropdown menu of pre-defined line items. In this case I chose “Web Design” and it automatically filled in the specs for this service. Then you can adjust the quantity to reflect the amount of work actually completed during the billing period.
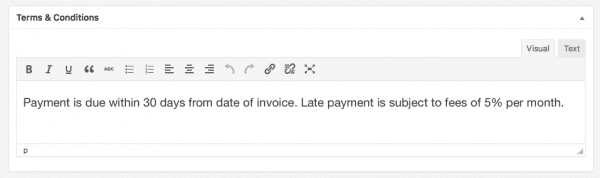
Scroll a bit and insert the terms and conditions you’d like assigned to the invoice.
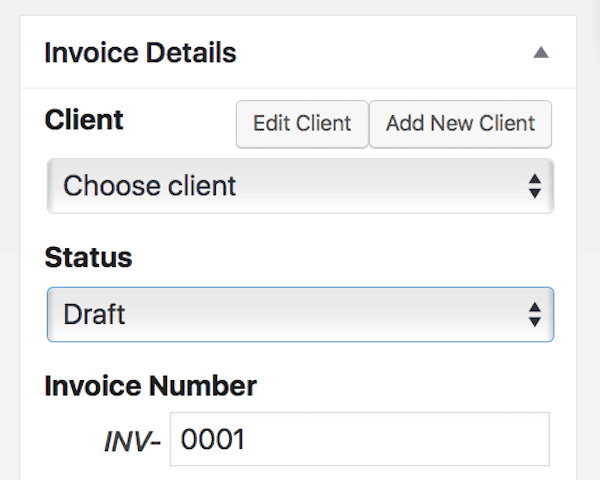
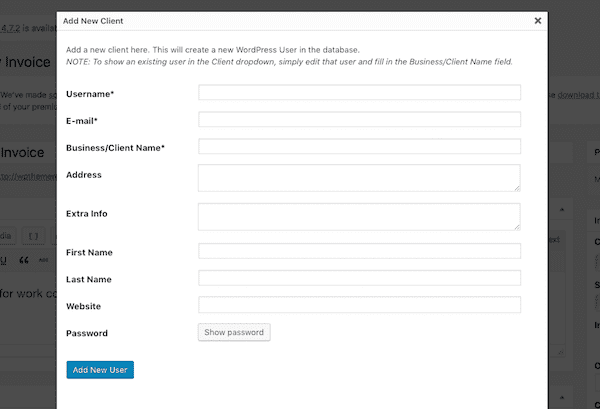
Now, looking to the right hand side of the screen, you have many options to tinker with here. The section is called “Invoice Details” and this area gives you the chance to modify the client this invoice will be sent to, the status of the invoice, and invoice number. Since this is our first invoice, we need to add our first client, too so click the Add New Client button.
A new form should appear that has numerous fields you can fill in. Select a username for your client, insert their email address, name, address, website, and assign a password if you’d like to keep their invoices password protected. When you’re done click Add New User
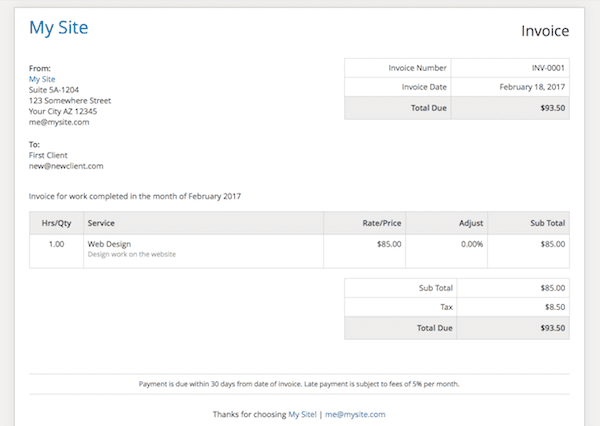
Give everything a once over and if it looks good, click Publish. The finished product should look something like this:
Managing Invoices
Once you’ve created some invoices, you’ll need to manage them. Whether that’s exporting them to your personal files or marking them as paid. To do the latter, you’ll need to access your invoices, click on Invoices on the Dashboard:
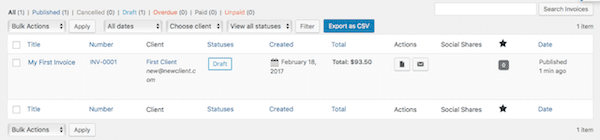
Click on the invoice you want to modify or manage.

Then on the right hand side of the screen, change the invoice status to Cancelled, Overdue, Paid, or Unpaid depending on the circumstances. Be sure to save your changes.
Wrapping Up
While there are other tools for creating WordPress invoices, Sliced Invoices is one of the most intuitive tools I’ve come across that fully incorporates the client and financial management aspects of running a business into the WordPress dashboard.
Have you ever used Sliced Invoices? Do you use a different tool? What was your experience? Feel free to share in the comments below.
Article thumbnail image by Qeorqiy / shutterstock.com


I use Freshbooks but would love to run my own – my hesitation is that the time tracker in the Freshbooks interface creates line item invoices and automates recurring (flat rate) billing. Are any of these features planned or available?
Because of this post I have downloaded Sliced Invoices to my website and also purchased the PDF and recurring payment extensions. This is exactly what I’ve been looking for. Works like a charm and saves me having to remember to do the retainer billing which I seem to forget all too often.
Thanks to Elegant themes for the post and to Sliced Invoices for providing a great solution.
So glad you found it helpful!
Is this compatible with woo commerce + product bundles?
I’m not sure. Best bet would be to test it locally or on your test site.
Is there any way to add extra taxes to the settings? In my country (Spain) freelancers has to include two taxes, one positive (VAT, called IVA) and one negative (called IRPF). The calculations would reflect those taxes (minus irpf % plus vat %)
Thanks
thank you very much for your article, very helpful
Thank you for a very affordable and detailed description. Many questions have disappeared by themselves. There is much to learn.
I hate the woocommerce invoicing system. I integrate with xero, and I have used this for a year. Xero for WooCommerce gives you the ability to set up automatic creation of invoices in Xero for ecommerce sales. After the module is installed and configured, each order placed in your WooCommerce store is securely sent to your Xero account to keep records up to date. As I invoice from places other than woocommerce I like to keep all invoicing in the one spot which xero does for me, as well as keeping track of inventory. There’s no exporting or managing invoices apart from in xero accounts. We use the plugin but you can also integrate with zapier.
That sounds like a great solution. I haven’t used Xero personally but I know a lot of folks who have and enjoy it.
Thanks but paypal does this inside of it’s system already. Why would I link a paypal account to my website when paypal has an integrated solution on their website? Besides that people are scared of things they don’t understand…no one is going to pull out their wallet to pay me via my website when they can just do it on paypal. Counter productive from my view.
Having an invoicing plugin in a website, where personal and possibly financial data gets stored, is putting a big red target on that site, for the hackers to try and steal all the precious info. The furthest I would go is have Woocommerce to sell products and services, while have a payment processor like paypal handle the financially sensitive data.
I’m not even mentioning the sever resources any plugin needs to consume when you activate it. Every 0.01 second of page load counts as far as search engines go.
Using invoicing plugins, or project management plugins, etc… can be very helpful running on a localhost, off line is fine, but having them on a live site, is playing Russian roulette, it’s just a matter of time.
WordPress security is a myth and a joke. From the core (REST API 4.71 anyone?), to themes, plugins TimThumb comes to mind, and even bad server configurations, and unsafe WordPress installation routines, it will be a matter of time. You don’t need to make your site to be further targeted by the bad guys.
Security is a very important concern, which is why Sliced Invoices never stores sensitive payment information on your site. For example Credit Card numbers are passed directly to the gateway (whether it’s PayPal, Stripe, Braintree, 2Checkout, etc.), and never stored on your site.
As Justin asked above, the ability to click and pay directly form the invoice is important.
Now we use PayPal and I have a couple clients that pay in minutes—before I can print it out to file. Awesome.
I’ve freelanced and ran a small business for over 30 years and for me sending the invoice was never the issue, getting paid was the trick.
I like you can style this but if my client can’t click and pay it will not get paid in a timely fashion by many. Unfortunately.
Thank you very much for this. I am going to have a look at it.
ernie
Hi Ernie, you can click and pay directly from the invoice. When you send the invoice to your client they’ll see a big green button right at the top where they can pay immediately.
I’m actually going to in a completely different route with this and suggest a real business solution. Forget using plugins, because in all honesty, it would take too many to facilitate most of the needs a business would have from invoicing to workflows.
If you want a solid business solution, I highly suggest Dubsado. They are a relative newcomer to the business productivity scene but have literally changed the game. It is by far one of the most comprehensive solutions for individuals and small business who use WordPress or any website for business. It offers, invoicing, bookeeping, payment gateways, workflows, and a host of other features that you just can’t get through WordPress plugins.
There are many solutions out there, each with it’s own pros and cons. The benefit of Sliced Invoices is you have full control — it runs on your own website, and you can customize it however you want. There are no monthly fees to use Sliced Invoices. I personally think those are 2 very important advantages… but, in the end, it’s up to you to decide what works best for you.
Very cool. As I see, its specific for our clients. But, what about if I want to implement this on my own website? Or on a sales website for my client?
You can implement it for your own website, or for your clients, or both. It’s up to you.
Nice solution. Does this plugin allow clients view and choose payment gateway to pay?
Yes it does! You can enable multiple gateways and let your clients choose how they pay.