

If you use WordPress regularly, you probably have a good handle on how everything works.
However, a little digging is required to access WordPress’ functionalities in full. You might not realize there are plenty of “hidden” WordPress features – some more hidden than others.
In today’s post, I’m going to uncover 20 of these hidden WordPress features, so that you can get the maximum from the world’s most popular CMS.
This post is primarily targeted at WordPress beginners. If, however, you consider yourself to be a WordPress dab hand, you might still learn something new or at least refresh your memory of commonly underutilized features.
- 1 1. Screen Options
- 2 2. Help
- 3 3. Dashboard Widgets
- 4 4. Sticky Posts
- 5 5. Schedule Posts
- 6 6. Inline Linking
- 7 7. Quick-Embed Media
- 8 8. Formatting Shortcuts
- 9 9. Distraction-Free Writing Mode
- 10 10. Split Post into Multiple Pages
- 11 11. WordPress Image Editor
- 12 12. Default Image Sizes
- 13 13. Add Anything to Menus
- 14 14. Accessibility Mode for Widgets
- 15 15. “Favorite” Plugins and Themes
- 16 16. Close Comments
- 17 17. Default Category
- 18 18. Favicons
- 19 19. Responsive Previews
- 20 20. Hidden Master Options Panel
- 21 Final Thoughts
1. Screen Options
Let’s start with the Screen Options feature – this one is key to unlocking other cool things, as you’ll find out later!
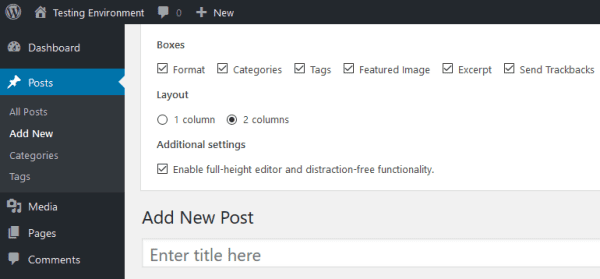
Now, by default, each WordPress screen displays only the most commonly used functionalities. However, in the top-right of many WordPress screens, you’ll see a Screen Options button.
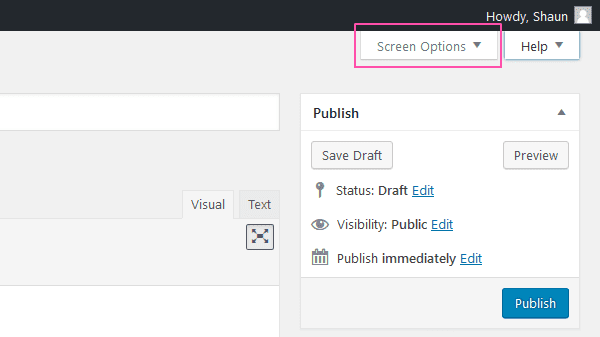
Click this to open a drop-down menu that unlocks all the hidden features the screen has to offer.
2. Help
If you run into any trouble, right next to the screen options you’ll see a Help button. This is visible on every single screen in the WordPress admin.

Clicking it opens another drop-down menu, this time explaining the key parts of a screen. This drop-down also has quick links for jumping straight to the official documentation or the WordPress support forums.
3. Dashboard Widgets
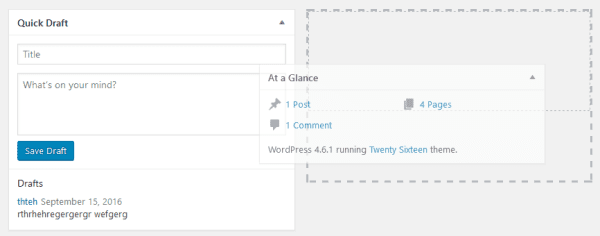
Many people use the term “WordPress dashboard” to refer to the entire WordPress back-end. However, the dashboard is a useful feature in its own right. It’s the screen you’re greeted by whenever you log in.
You can actually add widgets to the dashboard, giving you useful overviews of your site’s performance.
The dashboard comes with several of these widgets by default – including latest WordPress news, quick post, and at-a-glance stats. Many plugins come with a dashboard widget, too – for example, opt-in plugins might give you a snapshot of how many subscribers you received yesterday, as well as total subscribers.
The dashboard utilizes drag-and-drop, meaning you can move these dashboard widgets into one of four columns. You can also hide unwanted widgets via screen options.
4. Sticky Posts
Now let’s turn our attention to a few features found on the WordPress visual editor screen, starting with sticky posts.
If you have a post targeted at first-time visitors, you might want to pin it to the top of your front page. You could also take this approach if a post happens to be your most popular, informative, or biggest earning.
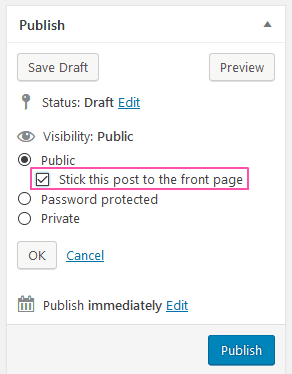
The sticky posts feature is found to the right of the visual editor in the Publish panel.
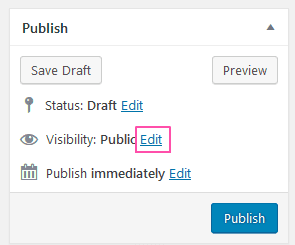
Click the Edit link next to Visibility. Then, simply check the Stick this post to the front page option. This creates a sticky post.
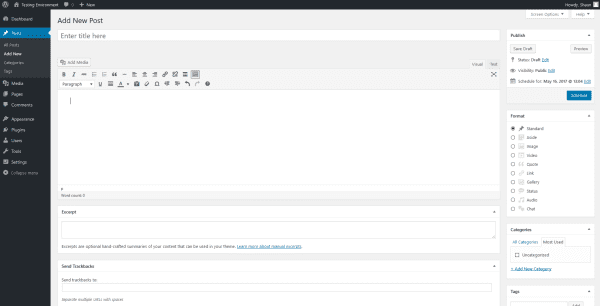
5. Schedule Posts
If you don’t want to publish a post right away, why not schedule it for some time in the future?
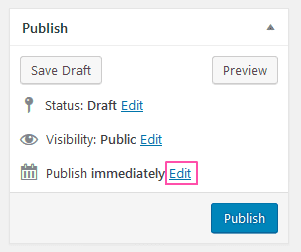
WordPress also supports post scheduling – this is also found in the Publish panel next to the visual editor. This time, though, click the Edit link next to Publish.
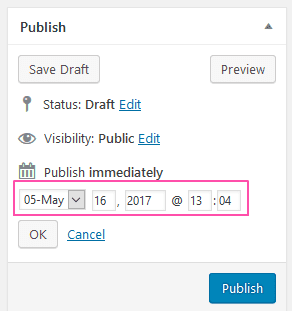
This opens up several date options. Simply specify a date (or time) in the future, hit OK, and WordPress will schedule your post.
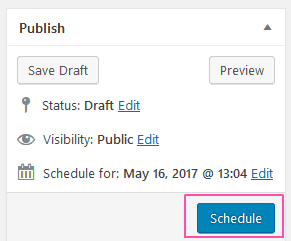
The standard blue Publish button will also switch with a Schedule button.
6. Inline Linking
In old versions of WordPress, creating links required you to highlight text, then hit the Insert/edit link button above the editor.
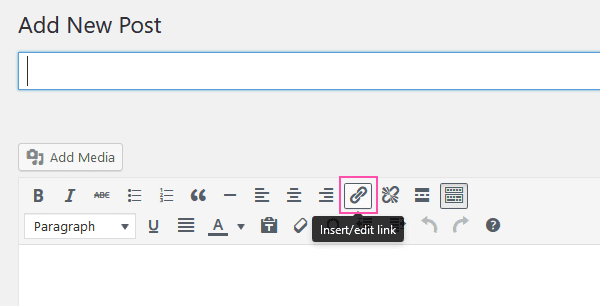
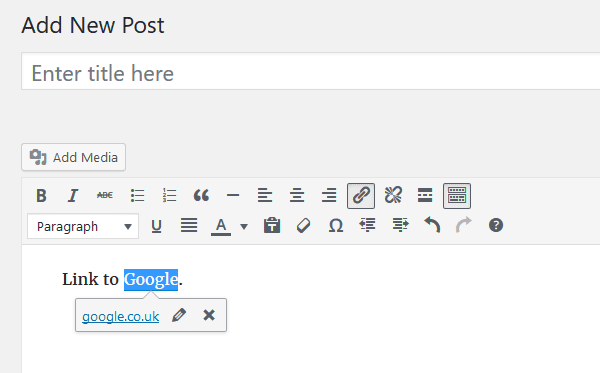
All this changed in WordPress 4.5, however, thanks to the new inline linking feature. Simply copy a URL, then paste it directly onto your text to create a link automatically.
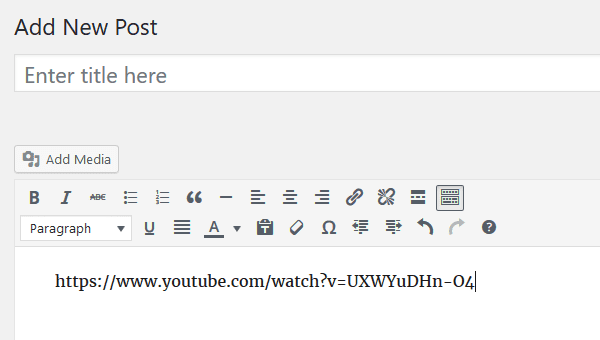
7. Quick-Embed Media
Similarly, you can also embed media into your posts just by pasting a supported URL. This makes it super-easy to add all kinds of media to your content – videos, images, galleries, documents, audio, slideshows, social media posts, etc.
Paste the link…
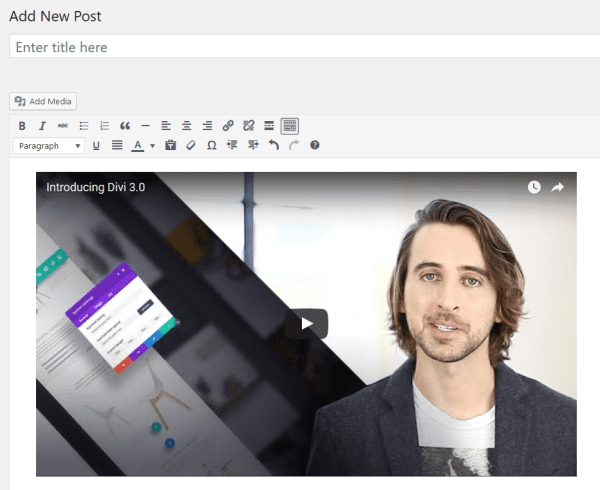
And voilà! The media is embedded.
New media embeds are frequently added in new core updates. To see which websites are currently supported, here is the official list.
8. Formatting Shortcuts
Want to save time formatting your content? WordPress has several formatting shortcuts you can use. Just type them directly into the visual editor and WordPress will auto-format for you. Here is the list of available shortcuts to date:
- # for h1 tags, ## for h2 tags, ### for h3 tags, and so on.
- * or – to start unordered lists.
- or 1) to start ordered lists.
- > for blockquotes.
- — for a horizontal line.
- `..` for code block.
9. Distraction-Free Writing Mode
To the top-right of the WordPress editor, you’ll see a button that enables distraction-free writing mode.
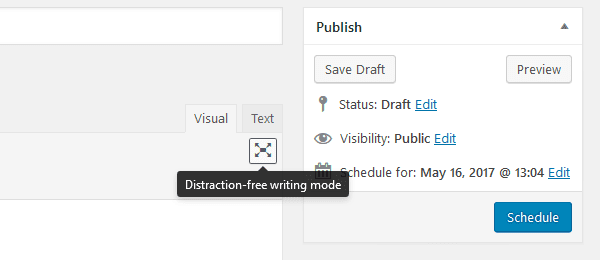
This mode temporarily hides the WordPress sidebar and all of the panels surrounding the text editor, leaving just you and a blank screen. This turns your working screen from this:
Into this:
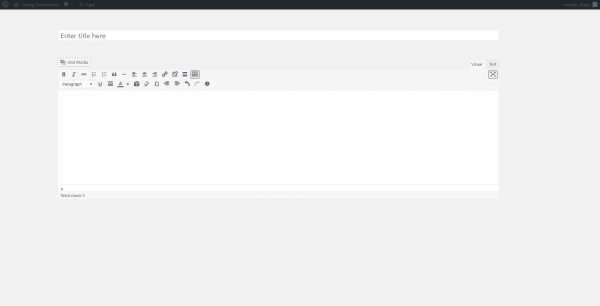
Far more streamlined, right? And, with no distractions on screen, you should enjoy a handy productivity boost.
10. Split Post into Multiple Pages
If your long-form content isn’t being read in full, consider splitting your single post into multiple pages.
Many blog readers are time-short. By breaking up your content, it creates obvious “jumping off points” which the reader can come back to at a more convenient time.
To split a single post into multiple pages, you need to access the text editor – found to the top-right of the visual editor.

Then, add the following HTML tag at the point you want your content splitting:
<!--nextpage-->
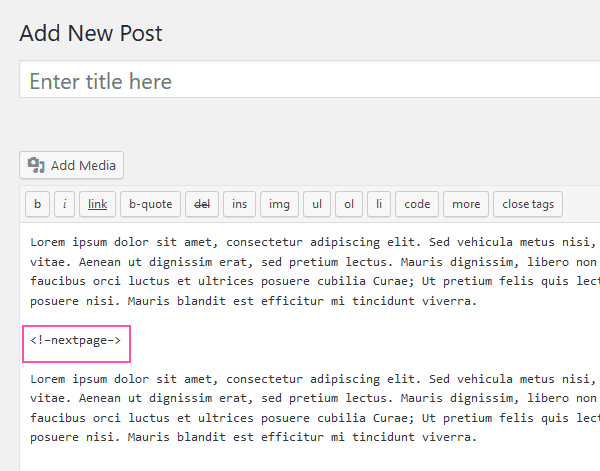
You can do this an unlimited number of times, letting you split your content into as many different pages as you like.
11. WordPress Image Editor
Did you know that WordPress has built-in image editing functionality? Admittedly, it isn’t anywhere near as powerful as software like Photoshop. However, it does give you a quick and easy way to crop, resize, flip, or rotate your images.
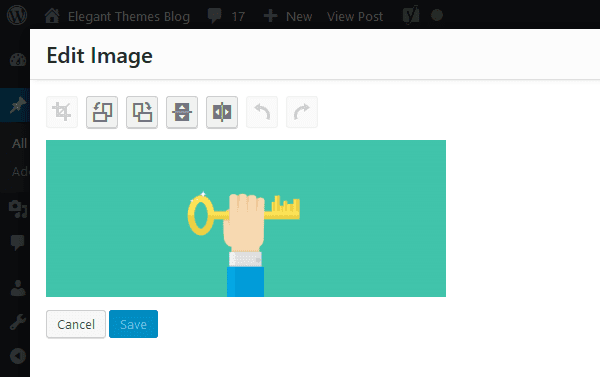
To access this functionality, navigate to Media > Library > select your chosen image > Edit Image.
12. Default Image Sizes
When you add images to your content, WordPress offers four sizing options – thumbnail, medium, large, and full-size. Full-size is self-explanatory, but what determines the size of the other three options?
While WordPress does come with preset image sizes, you can customize the default image dimensions by navigating to Settings > Media. From here, you can configure the maximum dimensions for each sizing option.

Menus have been a staple of WordPress for years now. They aid navigation and can be found by clicking through to Appearance > Menus.
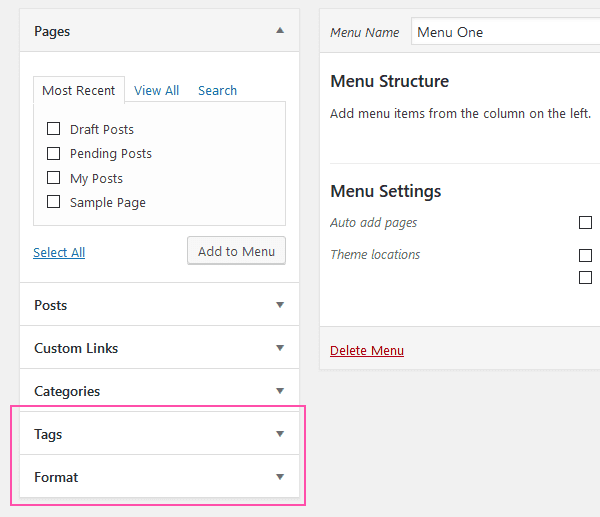
By default, WordPress lets you add posts, pages, external links, and categories to your menus. However, you can also add other menu items – such as tags, for example.
Depending on the theme and plugins you have installed, you might also find specialist menu items, such as custom post types.
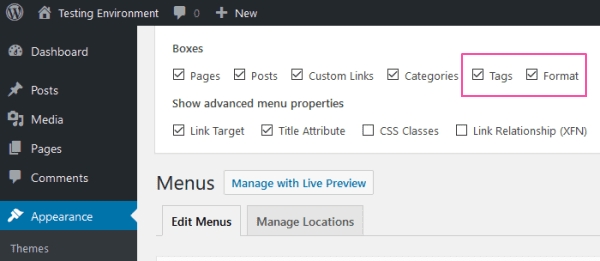
To access this feature, click Appearance > Menus > Screen Options – screen options is in the top-right corner, remember! Then, select the check boxes for the items you want the option of adding to your menus.
You can also access several advanced menu settings from the Screen Options button.
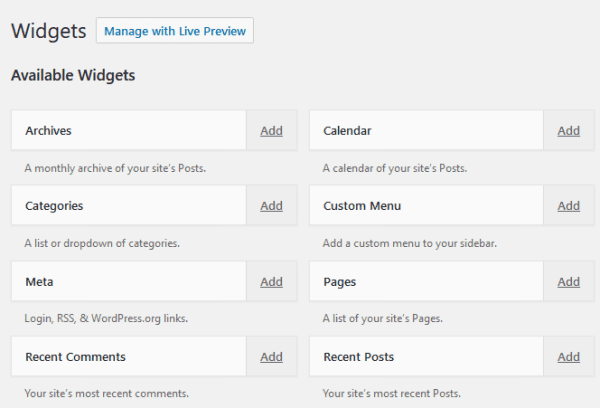
14. Accessibility Mode for Widgets
Widgets let you add lots of cool content to your WordPress sidebars. They’re really easy to place, too, thanks to the core’s intuitive drag-and-drop functionality.
However, not everyone wants to use drag-and-drop. For these people, WordPress ships with what is known as “accessibility mode.”
To use accessibility mode, navigate to Appearance > Widgets > Screen Options > Enter accessibility mode.
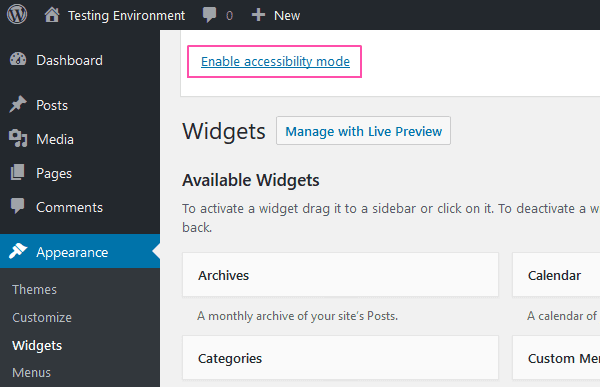
Instead of drag-and-drop, you’ll click to place widgets. This will open up a new screen which lets you configure the widget, as well as assign it to a preferred widget area.
It’s a slightly more cumbersome approach, but if you struggle with drag-and-drop, you’ll be grateful for it.
To re-activate drag-and-drop, click Screen Options again, then Disable accessibility mode.
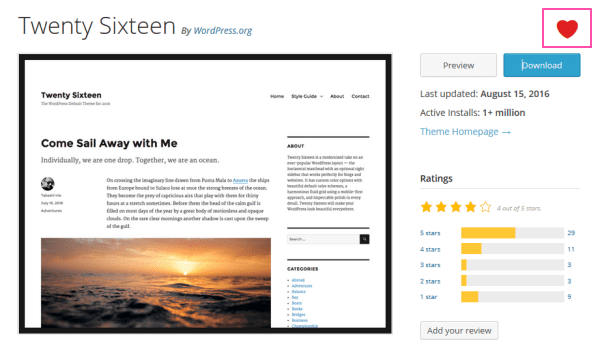
15. “Favorite” Plugins and Themes
This hidden feature relates to the WordPress.org website rather than the core, but it’s useful nevertheless.
If you’ve ever read one of our theme or plugin roundups, you’ll know that there are plenty of excellent options in any given category. If you can’t make up your mind right now, perhaps you want to save your favorites, so that you can come back later and make your decision.
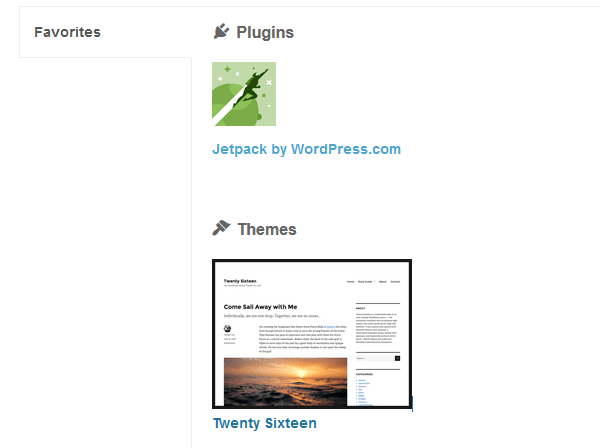
When you’re logged into your WordPress account when browsing the official repository, you have the option to “favorite” any plugin or theme.
Here’s what a favorited plugin looks like:

And here’s a favorited theme:
When you’re finished, you can view all of your favorited items by clicking through to your account page.
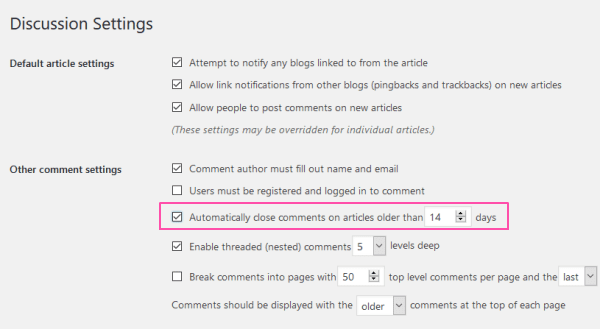
16. Close Comments
If you have a particularly active comments section, managing and responding to comments can eat up big chunks of your day.
While conversations with your audience can be fun, after a certain amount of time you might want to close comments on a particular post. After all, you don’t want to spend forever responding to comments from two-year-old blog posts, otherwise, you’d never get anything done, right?
The solution is simply: close comments on old posts. WordPress can do this automatically for you, too, by navigating to Settings > Discussion. From here, you can configure comments to automatically shut down on posts over a certain age.
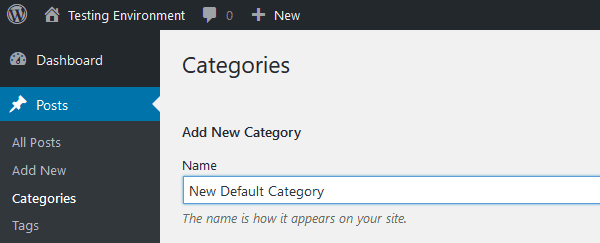
17. Default Category
If you forget to assign a post to a category, WordPress will publish it as “uncategorized” by default. This can make your website look slightly amateurish, in my opinion.
Fortunately, there’s a quick fix: update the default post category. This is really easy to do, too.
First, you need to create a new category – Posts > Categories > Add New Category.
Next, make your way to Settings > Writing.
In the Default Post Category option, you can now pick your newly created category from a drop-down menu.
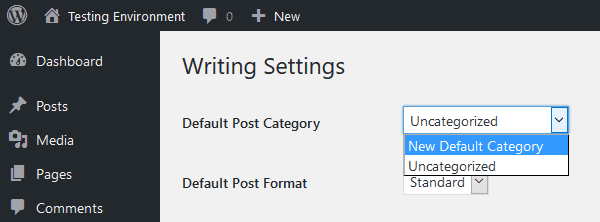
Don’t forget to hit Save Changes before finishing.
18. Favicons
Many internet users – myself included – have a habit of opening up tons of tabs in one browser. When we do this, we depend on the favicon of each website to find the tab we want – it’s the little square symbol found in each tab.
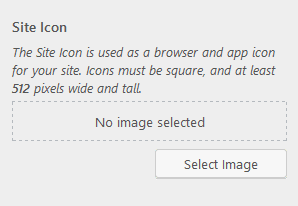
WordPress now makes it super-easy to add favicons to your website. Simply open up the Customizer – Appearance > Customizer – then make your way to the Site Identity tab.
In the Site Icon section, you’ll be able to select an image from your media library to act as your favicon.
19. Responsive Previews
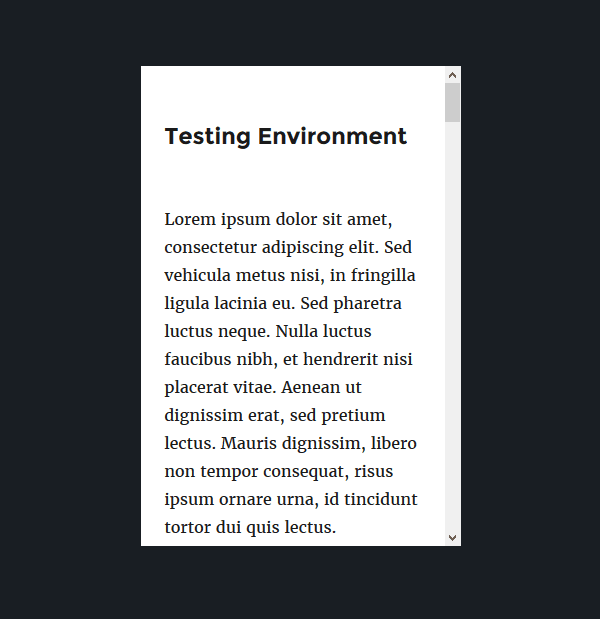
The WordPress Customizer is also a great way to preview your website. In the past, though, you could only preview your website in desktop view.
WordPress 4.5 introduced responsive previews, letting you view your website as it appears on tablets and mobile devices.
To view responsive previews, navigate to Appearance > Customize. At the bottom of the Customizer’s left-hand column, you’ll see three small icons. Click the one you want to open desktop, tablet, or mobile view.
![]()
This lets you test your site’s responsiveness so that you know it displays optimally on all screen sizes.
The final hidden WordPress feature is also the most advanced.
Did you know that there’s a master options panel tucked away in your WordPress admin? In fact, there are no direct links to it, so it’s easy to understand why so many users are oblivious to it.
To access it, navigate to www.yourdomain.com/wp-admin/options.php.
This is where the master settings are housed. As such, you need to tread carefully when accessing this screen – it’s easy to do more harm than good.
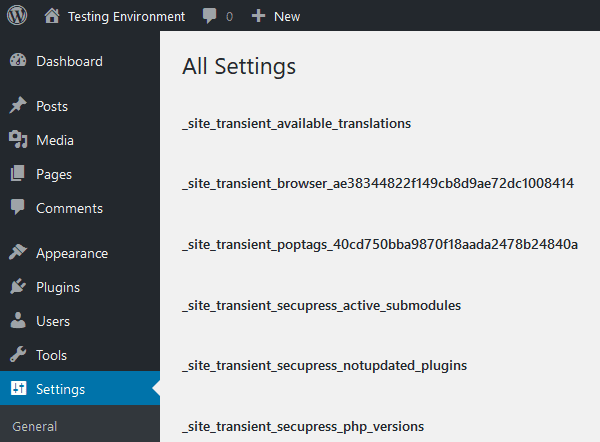
You can configure plenty of WordPress options here – URL, time format, blog name, site description, etc. You can also customize many of the hidden features listed today, including default image sizes, auto-closing blog comments, and default post category.
Final Thoughts
That concludes our rundown of 20 hidden WordPress features. Every core update introduces new features, so expect this list to grow in future!
For now, though, it’s over to you. Have we missed any secret WordPress features that you regularly use? Let us know in the comments below!
Article thumbnail image by Axi / shutterstock.com


I finally got and to style header text. But now there is MORE space between Headers and their following text blocks than there is between end of above top paragraph and beginning of next paragraph! Headers and accompanying text should always be visually closer together than unrelated paragraphs.
If I can’t tweak line spacing in Divi between paragraphs, how can I at least insert an extra line (or “Return”) after text blocks to visually separate text blocks and their headers? I know forces a line break but is there ANY code for adding extra line or equivalent spacing?
Under “8. Formatting Shortcuts” you say one can designate Header levels (# for h1 tags, ## for h2 tags, ### for h3 tags, and so on.)
I’m new to CSS so I don’t understand how to apply these. I get Headline should tag word “Headline” as main header. Should be styled as per Advanced Settings tab. But when I put ” Headline” into Text Module’s text box, my tags show up and text is not styled as a headline in my browser. Shouldn’t I be entering some info into Custom CSS box? What do I put there???
Any change the Split Post option will be available in the divi builder any time soon? I think that would be a great new module.
Great post! A few hidden items I was not aware of. I can’t wait to share with my clients and followers. Thanks!
Thank you for the great post. As a relative WordPress newbie I found at least half of the features interesting. Until last month I have been using drag-n-drop platforms like Squarespace to avoid having to do too much configuration. But the argument for greater control over my site won and I’m moving to Wordpess. Posts like yours are a real boon to people like me who are foundering around a new tool and wishing they had money to pay someone else to do the work. You make it seem almost easy 🙂
Thanks Karen, that is precisely our goal. If there are any other issues you run into please feel free to search our archive for other useful posts. We have hundreds just for people in your position (new to WordPress). You can also request post topics here in the comments 🙂
Very usefull ressource
Especially the shortcodes I didnt know.
But strangely h2 h3 and so on work fine but not h1 (#)
or the code block
May I ask you what is the symbol you use for the code block shortcut?
I use an azerty keyboard and I am not sure of what symbol it is (`..`).
If you know the alt+xxxx code it would be great 🙂
Thanks again for this nice post
I am actually surprised to see the next page pagination, i was totally un aware of that and also auto comment close , thks for the update
Thanks a lot for the tips. I especially like the tip “Distraction-Free Writing Mode”. After some weeks with that function turned on, I boosted my productivity remarkable. I do online marketing for a living, which is why a high productivity is important for me. Thank again Shaun!
Pointless post.
He did say “This post is primarily targeted at WordPress beginners. If, however, …”
Thank you!
Thanks for these Shaun – I’ve been using/developing in WordPress for years and a few of these I didn’t know about!
Most of them i know .. but you shared in a detailed way. Thanks for sharing its really helpful for newbie.
I’m one of those “menu junkies” who will click on EVERYTHING to see what it does. I knew about everything except #20… because there’s not a menu option to click on!
Nice list, though, I use quite a few of these on a regular basis.
Lol Andrea I am exactly the same! I wouldnt use #20 anyway.
Nice article and it is very useful for beginners
I Don’t Know How Do I Say Thank You For This Article..It Was Always Very Difficult For Me to Select Heading Again and Again But Your Trick Made My Work Easy..
Seeing that master panel explains so much. Every once in awhile a plugin or theme will load me into that exact screen and I think for a moment I broke something lol.
Thanks for the post and information!
Very helpful to this WP newbie.
Distraction free editing really isn’t the issue, it’s getting the editor CSS to be more like your front end so you don’t need to preview all the time. I’m not sold on the front end editors yet and still do backend extras. Being able to adjust the editor to match post layout is really an advantage. However going to full page w/o sidebar then doesn’t match.
Sure would be nice if the editor actually got a little better attention..
Thank you for this post! I’m certainly a new user & im trying to learn as I go! I watch many you tube clips. This is probably. Where are you? Dumb question, but I have the 2014 theme. Do I need to update my theme or leave it as is? I love the 6 pictures on the front page of my site. Would that change it?
Thank you for your patience. Do you recommend any videos I could watch to help me progress?
Judy
The favicons and responsive previews are a welcome addition in the recent update. Lots of items in this list that anyone administering WordPress should be familiar with, just from clicking around. Very helpful to have it all in a nice list like this.
this is excellent. thank you!! one tip I’m still looking for is how to tag older posts as “archived” so they no longer appear in the active blogosphere but can be tapped through the archive
Wow! Thanks for this very handy post. #8 the formatting shortcuts, is one I’ve not taken time to explore, I think I should, and #20 the master option is one I didn’t know of till I’ve read this post.
Great informative post!
Outstanding post. 🙂
Appreciate for the post. It’s very helpful – a few tricks mentioned here I was not aware of.
Thank you. I have used WordPress for my site for many years and learned some good things here. Will bookmark for later.
Thanks God, I Knew all of them except number 14 and 20. I do not Hidden Master Options Panel because it is not in wp-admin. I have ever found Accessibility Mode for Widgets feature, but I did not interesting to explore it. I will try it after this.
Thanks – some great tips.
Thanks, a couple of useful ones.
Surprising thing that even after of years or wordpress I keep forgetting that excerpts can be hidden in screen options
For #17, default category – I’ve found it’s often easiest to just change the name and slug of “Uncategorized.” 😀
#8, Formatting Shortcuts – did not know that! Thank you!
I didn’t knew about 5 of them. And 2 are realy awesome!
Adding to #15, you can access your favorited Plugins and Themes when adding them on your dashboard.
On top of the Add New screen there are the options: Featured, Popular, Recommended, Favorites.
If you hit Favorites, it will ask for your WP.org username, fill it in, click Get Favorites, et voila, you will get all your marked Plugins or Themes in one handy screen.
Really useful option.