Webinars – or web-based seminars – are more popular than ever these days, thanks to the host of benefits they offer. They are an excellent way to interact with employees, engage customers, and offer an all-around personalized experience. Furthermore, webinars can be an ideal medium for collaborating with peers or making a sales pitch.
This post will offer an introduction to webinars and why you’d want to run your own. We’ll then give you step-by-step instructions on how to create a webinar using Google+ Hangouts and embed it within your WordPress website.
An Introduction to Webinars (and Why You’d Want to Run One)
A webinar can take many forms, such as a meeting, presentation, or workshop. The main difference between running a webinar and simply posting a video is the interactive component the former offers. Attendees typically view webinars in real time, and there is often the option for them to participate by asking and/or answering questions.
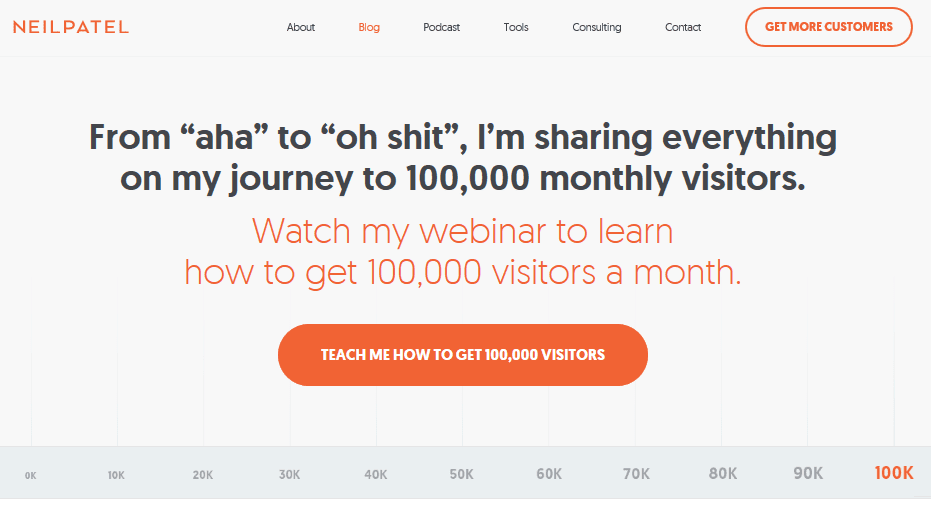
This type of seminar offers an excellent opportunity to add a personal touch to your platform and engage your customers. For example, Neil Patel uses webinars frequently to reach out to visitors of his traffic growing website.
There are lots of great companies that offer webinar software at a wide range of prices, like Easy Webinar and WebinarJam. An annual subscription to one of these services usually comes with a hefty price tag, but the cost is often justifiable for business owners, due to the range of features they offer. However, if you don’t have room in your budget for one of these premium tools, there are several free alternatives out there that don’t skimp on features. Let’s check one of them out.
A Brief Introduction to Google Hangouts On Air – Our Webinar Tool of Choice
One free webinar platform in particular that we recommend is Google Hangouts On Air. It used to be available through Google+, but it recently moved to YouTube Live. The service offers features such as live chat, automatic recording, and DVR. Best of all, it’s completely free, which is perfect if you’re on a tight budget, or just want to try out running a webinar before committing to a premium service.
There are a couple of drawbacks to using this tool, which may prompt you to investigate other options. For example, in order to embed a live stream in your website, you need to sign up for a Google AdSense account. Additionally, the live chat feature doesn’t support embedded players, and if you’re not big on the idea of using YouTube, this can be a deal-breaker.
Key Features:
- Includes a live chat option
- Provides a recording of your webinar
- Enables you to promote your webinar through your YouTube channel
Now that we’re familiar with what the platform has to offer, let’s go over the steps to using it alongside WordPress.
How to Run a Webinar From Your WordPress Website (in 6 Steps)
As mentioned, Google Hangouts On Air has moved recently. As a result, the segue between Google Hangouts On Air and YouTube Live is somewhat confusing. Basically, you use your Google credentials to sign into YouTube Live and go from there.
Step #1: Create a Google Account
If you don’t have a Google account ready, then you can create one for free. Go to the Google Sign Up page and follow the instructions to get your account up and running.

Step #2: Create a New Event in YouTube Live
While signed into Google, go to YouTube Live and click on My channel on the left side menu:

Keep in mind that your name will default to the one associated with your Google account and it cannot be changed. Furthermore, you might want to review YouTube’s terms of service before clicking on Create Channel:
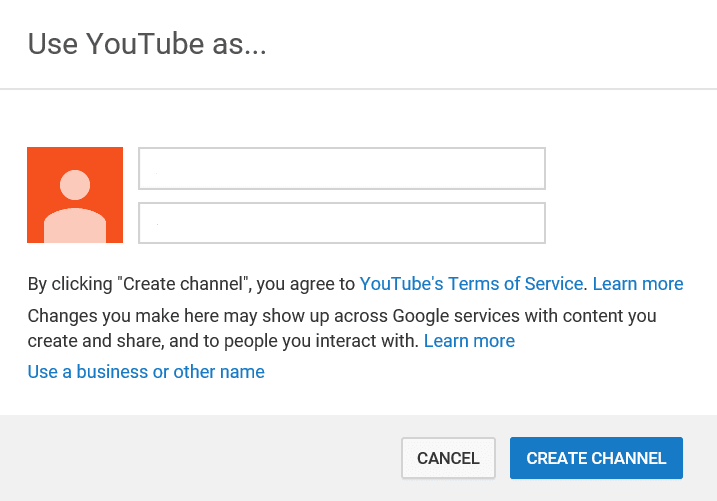
Now that you have your own YouTube channel, you can create an event by selecting Live Streaming on the left menu. Then click on Events and hit the Enable live streaming button:

You will then be asked to enter your country of residence and verify your account via automated voice message or a text. Once you’ve completed the verification process, select Continue:

Now click the Create Live Event button and enter all the requisite details for your webinar on the next screen:
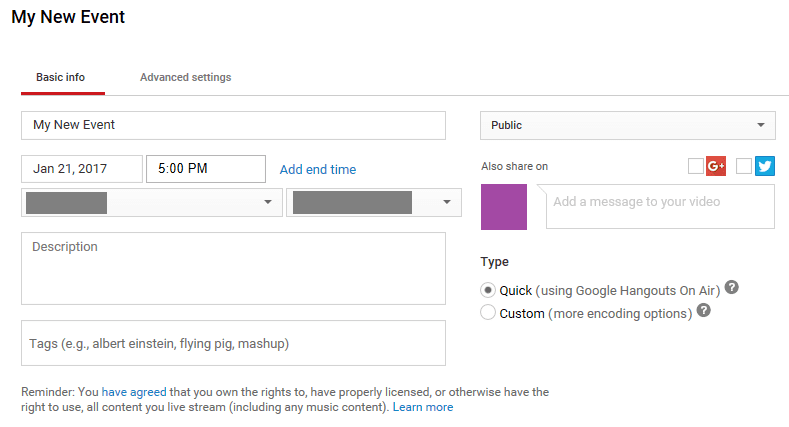
First and foremost, you need to decide on your title, date, and time, and there are some excellent resources to help you do this.
Then, under Type, select Quick for Hangouts On Air. Here you can also change your event from Public to Unlisted or Private. Public is available to anyone, Unlisted can be viewed by anyone with the link, and Private is restricted to people who you invite personally.
Step #3: Customize Your Webinar
Now that you have all of your basic information ready, you can select the Advanced settings tab to further customize your webinar:
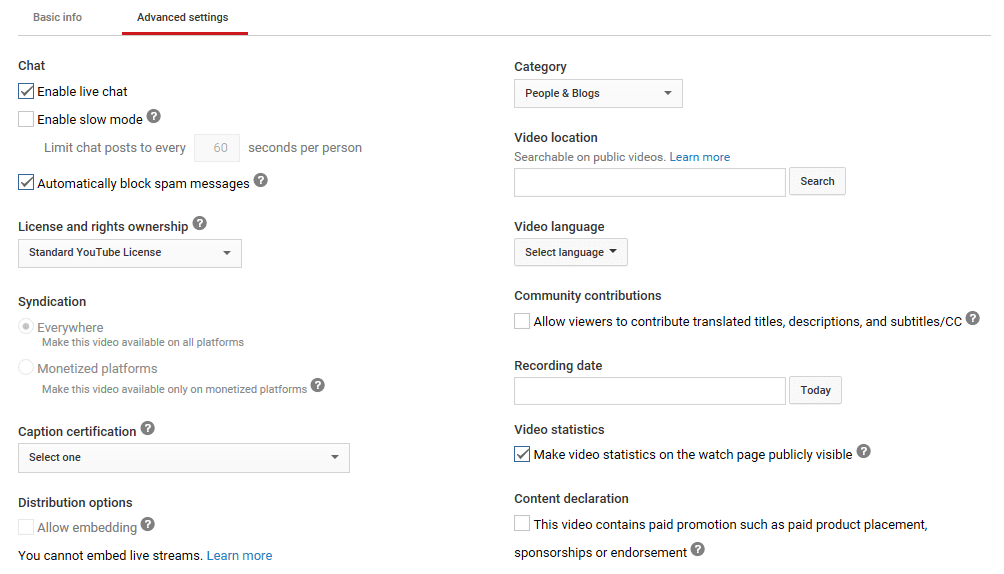
As you can see there are lots of options to decide on, including enabling live chat and assigning license and rights ownership. You can also set the category, language, and location for your webinar here.
One neat feature that you can enable here is to promote your webinar on your YouTube channel as it streams, using the Promotions option. You can also change the settings for your recording, and enable DVR, which will allow viewers to jump back and forth during the stream.
Once you have all your settings in place, remember to hit the Save Changes button. Now it’s time to take the webinar to your website!
Step #4: Embed Your Webinar in Your WordPress Website
As we mentioned earlier, moving a webinar over to your website means that you’ll have to forfeit the live chat functionality. However, there are other ways to enable chat on your site, such as the WP Live Chat Support plugin, or even just using the comments section for the page where you’ll embed your webinar. Neither of these options are as smooth as integrated live chat, but they’ll do the job in a pinch.
Moving on, all you need to do to embed the webinar into your site is grab its link and copy it. Click on View on Watch Page in the upper right-hand corner of the screen and you will be taken to the YouTube page where your webinar will air:

Before your webinar begins, this page will simply display a blank screen with a countdown timer to the date you specified earlier. The URL for this page is the link that we need to copy. Do so now and paste it into the page where you want to embed the webinar.
At this point, you will likely only see a screen with your Google identifier (an avatar if you’ve added one, or just your first initial) and a play button. Clicking this button will prompt the same countdown timer we mentioned earlier to appear. Once the webinar is up and running, the play button will work as it should.
If you’re a Divi user you can add the link to your site using the Video module. Simply paste your URL into the first section under the General Settings tab:

This module also enables you to customize the style of your video by adding an overlay or making changes to the play button.
Step #5: Invite Attendees
Before your webinar can take place, you’ll need to spread the word and find attendees. Sending links with the date and time of your webinar to the members of your mailing list is an excellent first step. You may also want to highlight how your webinar can help your subscribers to entice them into tuning in. Other solid methods include sharing the information using a blog post or your social media accounts.
Furthermore, you may also want to target attendees outside your current readership. To do this, there are plenty of promotional strategies that you can employ, such as creating a dedicated landing page, and using informative popups.
Finally, don’t forget to send reminders to your attendees during the days leading up to the webinar!
Step #6: Broadcast Your Webinar
The only step left now is to actually run your webinar. Even if you’re a natural when it comes to presentations, it’s important that you plan your webinar carefully. After all, you don’t want attendees to leave feeling like they wasted their time. Here are some elements you should consider while planning the event:
- Topic and content. Try to stick to a specific topic and focus on content that translates well to the medium, like slide decks and audio.
- Format. You should decide whether your webinar will stick to a presentation format or if it’ll require audience participation.
- Number of speakers. Having more than one speaker might help jazz things up. Plus, they can back you up when it comes to answering questions.
- Length. Research has shown that webinars should be limited to around an hour at the most, to make sure that you maintain your viewers’ attention.
Furthermore, you should also consider any issues that might arise during the webinar, such as technical difficulties. For that reason, you may want to keep someone on hand to help out in case anything happens. On that note, you should also do a test run before the actual webinar, just to make sure your audio and visuals are working as they should be.
When you’re ready to start, go to your YouTube Live Events page and click on Start Hangout On Air. You’ll be prompted to re-enter your Google credentials before being taken to the broadcasting screen. Now click on Start Broadcast and you’re good to go.
Don’t forget – once your webinar is over, you can share the recording with anyone that missed it. The YouTube Live URL will remain the same and the webinar can be played from your website as long as the link remains embedded. At this point, that webinar can help entice new members to tune in the next time you’re live, so keep promoting it through social media – and any other channels you want – whenever it feels natural to do so.
Conclusion
Webinars can be a great way to communicate with employees, and engage with customers and subscribers. However, the logistics of putting together a webinar from scratch and embedding it in your site can be confusing. Or perhaps you just haven’t tried your hand at running a webinar yet due to budget limitations, in which case, there are plenty of free options you should consider, such as Google Hangouts On Air.
In this article, we’ve outlined the six steps you need to take to run your own webinar using Google Hangouts On Air. Let’s recap them quickly:
- Create a Google account.
- Create a new event in YouTube Live.
- Customize your webinar.
- Embed your webinar in your WordPress website.
- Find and invite your attendees.
- Broadcast your webinar.
Do you have any questions about running a webinar from your WordPress website? Subscribe and let us know in the comments section below!
Article thumbnail image by Kair / shutterstock.com.



Thank you, VERY much, for this article!
1 — I experience difficulty giving the link to people who use mobile devices. Are there different strategies for mobile and non-mobile?
2 — Which link(s) work best for mobile devices, i.e. the Page URL (sent via email), the Permanent Link (sent via email) or the Permanent Link (sent via the Invite People dialogue box)?
3 — What happens to the 11th Participant when all of the (10) Participant seats are taken? Does the 11th Participant join in “Chat Only” mode? Can the 11th Participant replace one of the original 10 Participants?
This blogpost is posted exactly in the right time. Thank you very much. I will follow your steps and we’ll what happens. I’m really excited now!
Have many Thanks for this article. Now I will test it in my Blog to.
Nice article. Have been doing it for a year almost. But have one problem. Which is live chat. It’s hard to find some comments plugin that can sincronize comments in live broadcast. Do you have any recommendations or suggestions about it?
Thanks for this informative article, John. I’ve been hesitant to try webinars, but this free option sounds like a terrific way to test the waters before making a commitment to a paid option – which might not even be needed. All of the paid options I have looked at talk about the time delay with Hang Outs – but I think that Webinar Jam actually is based on Hang Outs. Definitely going to give this a try!
Excellent !! Thanks John for the sharing. I wasn’t thinking about doing a Webinar but your article changed my mind.
Great! Let us know how you get on, Denis. 🙂
Fantastic tutorial John! Thanks so much for posting it. Some of the webinar software out there is expensive, and often times it’s so much better to keep things integrated with your site (traffic is never bad!)
Loving all of your writing, keep them coming!
Thanks for your kind words, Jacob. We aim to please. 🙂
Oh, this is excellent. Very interesting and useful. Thanks for sharing.
No problem, Eugene!
My webinars require screen sharing. I could do this with Google Hangouts but I can’t find a setting for sharing my screen in Youtube Live. I do see this in Google’s Live Streaming checklist: “Before you can start streaming on YouTube, you need to download encoding software, and then set it up.” Is this the step that enables screen sharing?
Hello Hope – this video (https://www.youtube.com/watch?v=dmtQsp_K5YU
) may help you. 🙂
Hi,
thanks for the link but I can’t see any description howto share Your screen. Have You any information for this?
Kind Regards Frank
Interesting post. Thank you, John, for sharing it.
In the past, Google Hangout was known for a delay of up to 1 minute.
Any recent experience with this?
As Gábor replied, it appears to be various delays depending on your location.
About thirty seconds for me (in Hungary).
Even live TV coverages have 20 seconds…
When one of my YouTube accounts reached 1000 subscribers (it was an exciting day), live streaming got activated. Does this method require an account that has reached that level?
Heather,
That might have been whenever they were first introducing it. Often times companies like that will release new features to small groups at a time to test them out before rolling the feature out for everyone. As of right now you can do YouTube live with a brand new account!
No. I have done it from channels with zero subscribers.
Hi Heather,
No, YouTube Live is available for anyone with the aforementioned prerequisites.
GENIUS!! Thank you for this article, a client and I we’re discussing exactly this topic yesterday and viola you publish this awesomeness!
We’ve been using the Elegant Themes crystal ball again, Michael. 😀