
Despite what television and movies tell us, life as a software developer does not include sitting in a dark room, our keyboard illuminated only by the glow of the monitor, the thought of interacting with another human being repulsive. No, life as a software developer is social and collaborative–sometimes to the point of frustration. That’s why we have git and Github.
Git is version-control software that makes collaboration with teammates super simple…once you’ve gotten past the initial learning curve. It can be intimidating, but that’s why I’m here!
What is Git?
Well, it’s not just the way we Southerners shoo varmints off our porches, I’ll tell you that.
Like I said above, Git is version-control software. It was created by Linus Torvalds, the guy who invented Linux. You don’t have to be running Linux to use git–you can use it on Windows and Mac, too.
Git lets you easily keep track of every revision you and your team make during the development of your software. You all share one repository of code that is worked on independently and then merged back together. You also do not need to be connected all the time because the project is both saved locally on each machine and remotely (probably at Github).
Git is special (and pretty much mandatory) because you can to revert back to any previous version of your code, branch off and develop a specific feature without affecting anything or anyone else, and maintain safety from data corruption because of its distributed nature.
It also provides easily implemented encryption and cross OS compatibility, as well as asynchronous, non-linear workflows so that no matter where you are, you can work on some aspect of your project.
Basically, if you’re not using git, you’re coding with one hand tied behind your back.
Required Vocabulary
When you’re first starting to use git, it can be intimidating. Commands and concepts may seem totally foreign if you’ve never used any form of version control in the past. You will pick them up super fast, though.
Repository:
Often referred to as a repo. A repository is the collection of files and folders that you’re using git to track. The repository consists of the entire history of your team’s changes to the project. It’s the big ole box you and your team throw your code into.
Github:
The most popular remote storage solution for git repos. It also allows you to set access permissions for projects, track and submit bugs, accept feature requests, subscribe to repository notifications, and utilize a graphic interface, rather than use the command line. Repos default to public, but paid accounts can have private ones.
Commit:
Think of this as saving your work. When you commit to a repository, it’s like you’re gathering up the files as they exist at that moment and putting them in a time capsule. The commit will only exist on your local machine until it is pushed to a remote repository.
Push:
Pushing is the bread to committing’s butter. Committing throws your files into the timecapsule, and pushing is what launches the capsule into space. Pushing is essentially syncing your commits to the cloud (again, probably Github). You can push multiple commits at once, too. You can work offline, commit lots of work, and then push it all up to Github when you’re back in civilization with that sweet, sweet wifi.
Branch:
You can think of your git repo as a tree. The trunk of the tree, the software that goes live, is called the Master Branch. That’s the one that goes live. The branches of that tree are, well, called branches. These are separate instances of the code that offshoots from the main codebase. You might branch off for a single feature or an experimental patch. By branching, you can preserve the integrity of the software and have a way to revert if you do something totally bonkers. It also allows you to work on your task without stumbling into your team’s way (or they into yours).
Merge:
When a branch is polished up, free of bugs (as far as you can tell, at least), and ready to become part of the primary codebase, it will get merged into the master branch. Merging is just what it sounds like: integrating two branches together. Any new or updated code will become an official part of the codebase. Anyone who branches off from the point of merging will have this code in their branch as well.
Clone:
Cloning a repo is pretty much exactly what it sounds like. It takes the entire online repository and makes an exact copy of it on your local machine. You will need to do this for any number of reasons, not the least of which are starting in the middle of a project with a new team, swapping workstations, or starting over from a corrupted repo.
Fork:
Forking is a lot like cloning, only instead of making a duplicate of an existing repo on your local machine, you get an entirely new repo of that code under your own name. This feature is mainly used for taking an existing codebase and going an entirely new direction with it, which happens a lot in open-source software; developers see a base idea that works, but want to go a different way with it. Forking allows that to happen. You can also play in another developer’s repository like it’s your own personal sandbox. And if you do something that you think they may like, you can make a pull request for it to be merged in.
Pull Request:
A pull request is when you submit a request for the changes you have made (either on a branch or a fork) to be pulled (or merged) into the Master Branch of the repository. This is the big time. This is where the magic happens. If the pull request is approved, you will have officially contributed to the software, and Github will forever show exactly what you did. However, if the pull request is denied for any reason, the denier will be able to give feedback on why the request was turned down and what you can do to get it accepted.
Getting Started and Required Commands
That wasn’t too bad, was it?
Right. Now that you’ve got a clear idea of what git is, it’s time to dig in and get your hands dirty.
I should take this opportunity to note, however, that I am going to assume you’re using the command line to interact with git. Sure there are graphical git clients (and Github even allows you to do pretty much everything through it’s web interface), but for the purposes of this post we’re not going to bother with them. You will do a handful of things outside of the terminal, but the command line is going to be your new BFF. So that’s what we’re going with, too.
How to Install Git
Git (probably) didn’t come installed on your computer, so we have to get it there. Luckily, installing git is super easy, whether you’re on Linux, Mac, or Windows.
For Linux, open the terminal and type sudo apt-get install git-all (if you’re in Ubuntu. If not, there is a list of all the Linux package installation commands for whichever other distro you’re on.)
On Windows, it’s just as simple. You download the installer and run it.
On Mac, you just need to open up the terminal and type git. If git is not installed, you will see this:
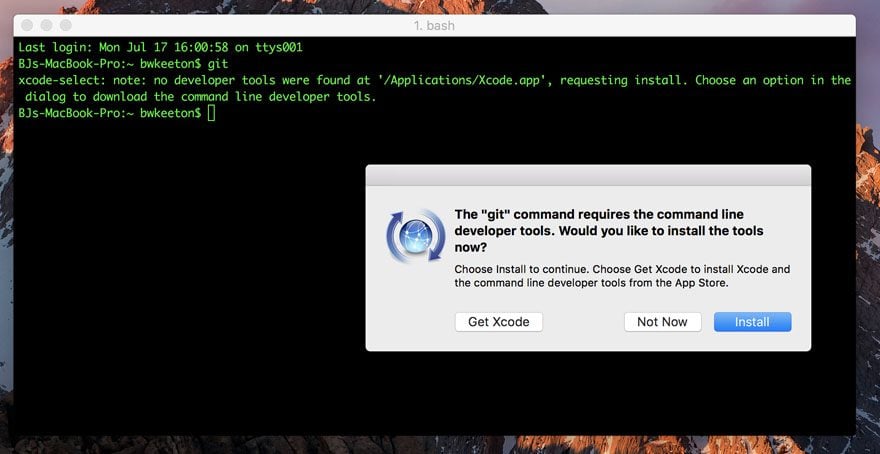
Once you click Install, you’re good to go.
See? Super easy!
Using Git
Here’s where the fun starts. Now that you have git installed, it’s time to…git-r-done! Hah! But it really is time to dig in and learn to start using this amazing little piece of command line wizardry. And what better place to start than Github?
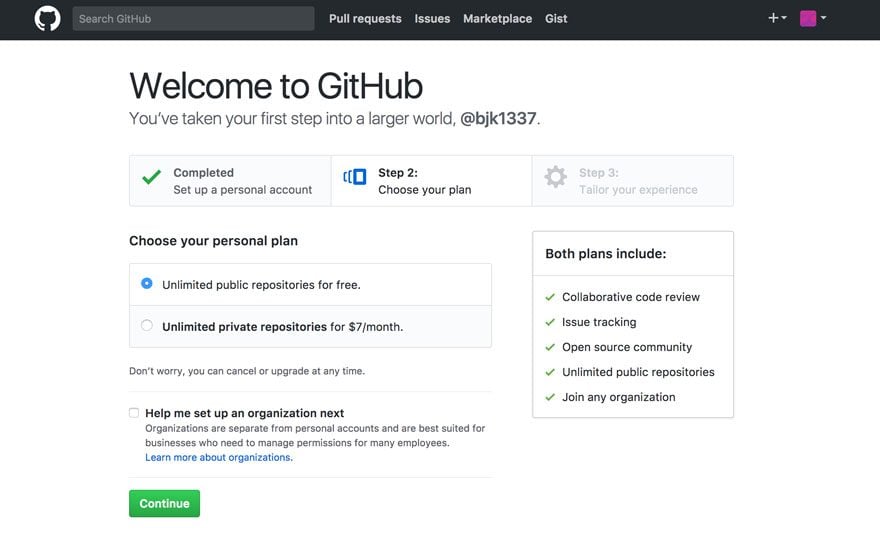
So head on over and register for your new Github account (or login if you have one already, and I’ll be with you in a second).
Github is free for public repositories, and you can have private ones for a price. (FYI: you can get free private repos at Bitbucket, which is a lesser-known-but-awesome place). For the most part, the free option on Github is fine for most people (and it functions like a living resume, too!), but some clients and employers will require privacy and security, so it’s good to have options.
After that, you’re ready to set up your first repository! After you verify your email and all that fun stuff.
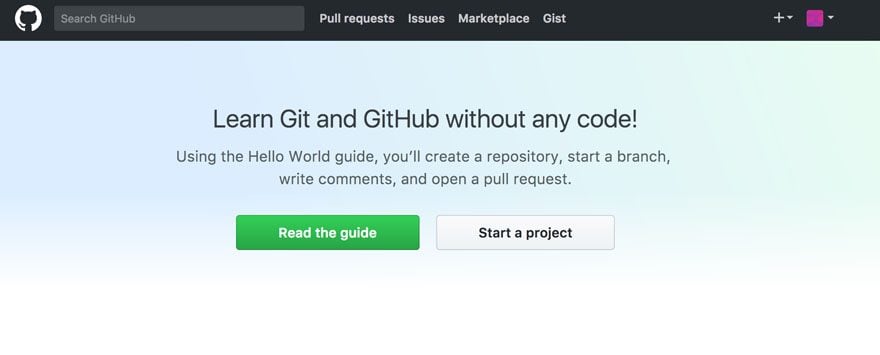
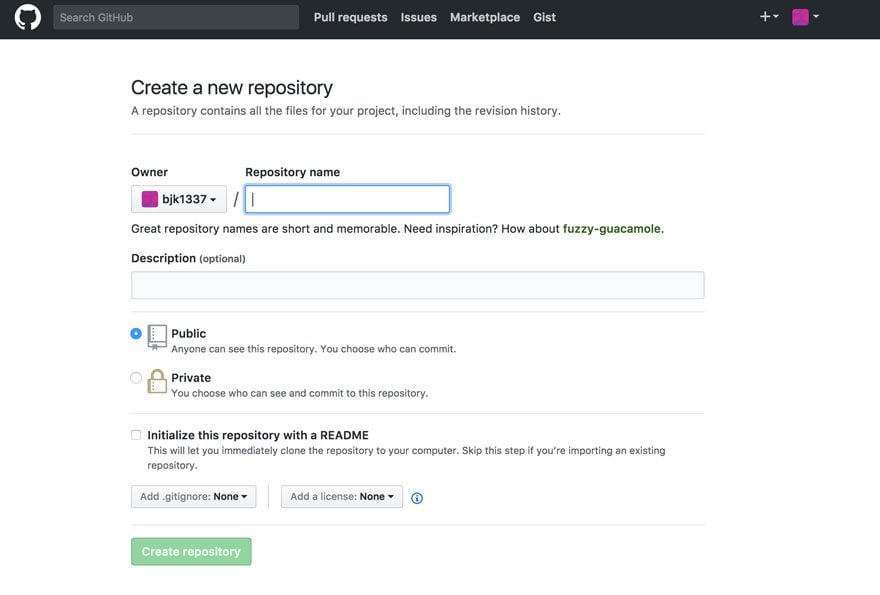
You will want to set up the repository in Github first. You can do it on your computer and then upload it, too, but it is simpler to just do it on the web first.
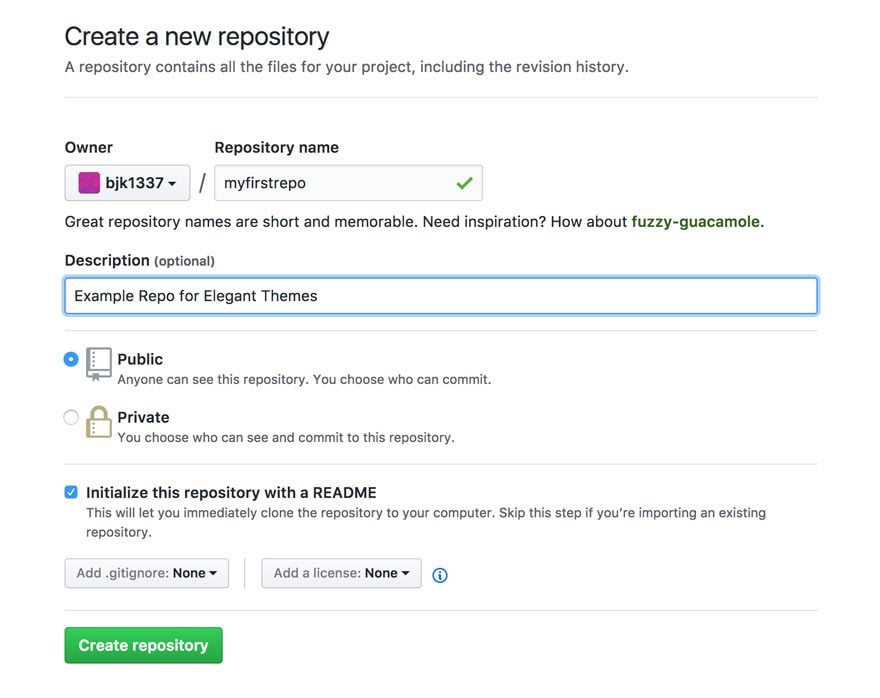
Notice that I am not worrying about a license or .gitignore in this repo. Because this isn’t a real piece of software, I don’t have to worry about those, but in production cases, .gitignore lets you, obviously, ignore files within your repo’s directory. And you can read up on what license your software needs here.
I am, however, initializing the repo with a README file, which you should use to keep the basic documentation for the project. I tend to use them as a tracker for major changes, to-do lists, and different kinds of notes as I am working. But that’s on personal projects. Different team leaders will have different expectations.
Now that the repo exists at Github, it’s time to get it to your local machine via cloning. To the right of your repo, just above the file list, you will see a green button that says “Clone or Download.” Click it and you will see this:
Since we’re cloning, we can ignore everything except the part about Cloning with HTTPS. You won’t have to configure a thing. You will just need to enter your username and password when you push.
First, though, you need to set up where you want your repo to live on your local machine. Open up your terminal. (Windows users, search for and open up a program called Windows Powershell. I also suggest that you right-click and select “Run as Administrator.”)
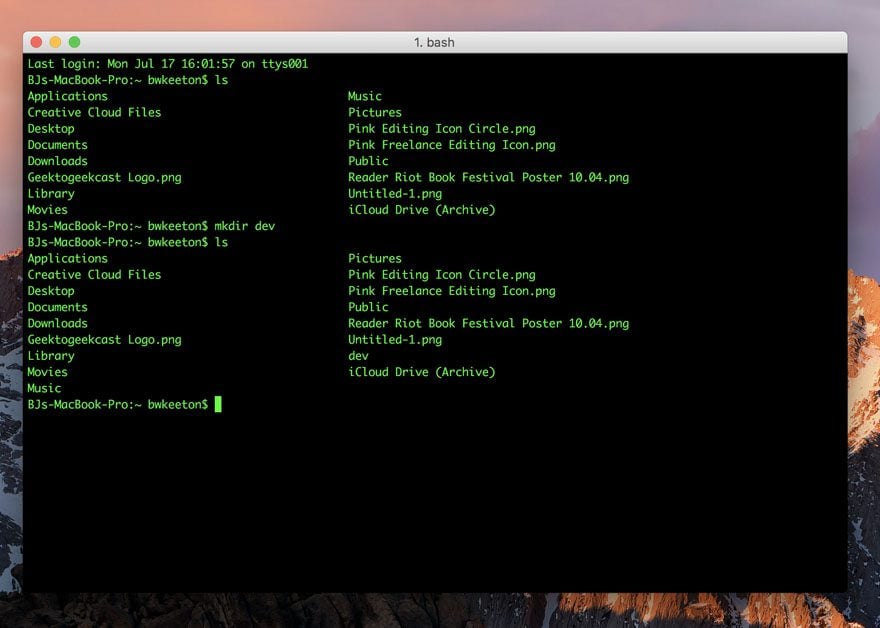
The first command you need to learn is ls. This will list everything in the current directory. To keep things simple, let’s just make our dev folder live in the home directory of the computer. You can use mkdir dev to make a directory named dev. Pretty straightforward, right? If you ls again, you will see the new folder listed.

Then you want to move into your new directory by using cd dev, which is the command for change directory. See, the command line isn’t scary at all! If you need to go back to the previous directory, you just use cd ...
Once you’re inside your new dev folder, it’s time to git this party started. Heh heh heh.
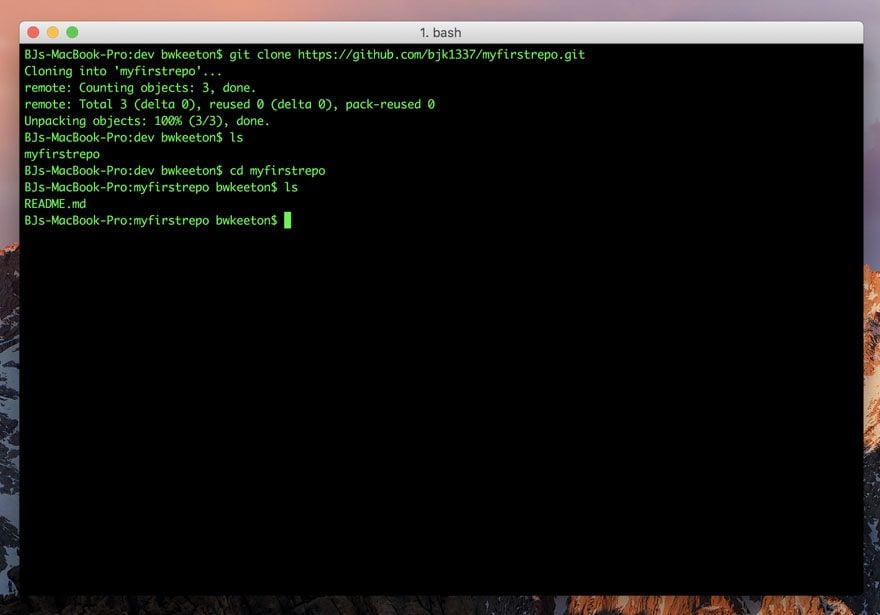
Start by copying the URL that comes up after you click the green “Clone or Download” button on Github. It will look something like this: https://github.com/bjk1337/myfirstrepo.git
Commands to Clone a Git Repository from Github
- git clone https://github.com/bjk1337/myfirstrepo.git
- ls
- cd myfirstrepo – or whatever you named your repo
- ls
After that, your terminal should be something like this, showing your README file that you set up on Github. Congrats! You just used Git for the very first time, and you’re now ready to start developing.
The Nitty Gitty Gritty
Now that you have a repo on your machine, you need to learn to use it. So let’s fast-forward a little bit and say that you’ve been working a while on a cool project and have some files in the directory. It’s time to commit and push them to Github.
Adding and Committing to a Git Repository
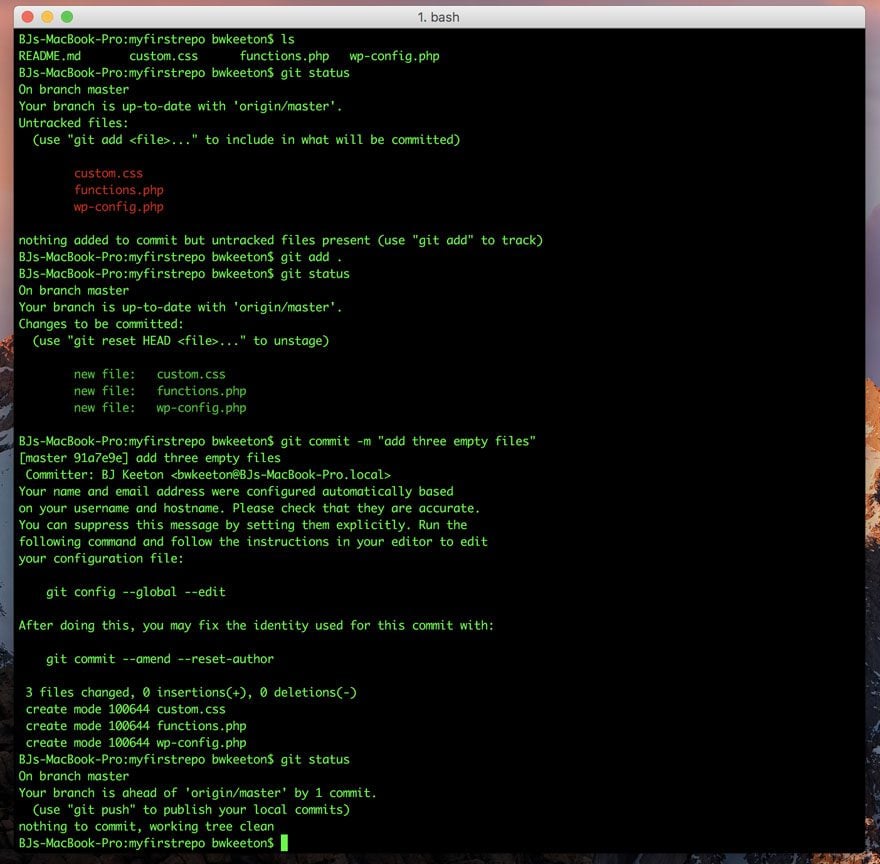
- git status – This command will show you what files have not been added to the list for the next commit. In most terminal apps, the unadded/added files will be red/green, respectively.
- git add . – by adding a . at the end of the command, you’re telling git to include everything in the directory. If you want to add a single file, just use it’s filename. Such as functions.php.
- git status – Depending on if you used the . or the filename, whatever you added should be green now.
- git commit -m “add three empty files” – When you commit these files, you should also leave a quick message to let your teammates (or your future self) know exactly what was in that commit. Standard git conventions say that you should be as concise and specific as possible, and start the message using the present tense of the verb.
Your terminal will have a lot of text in it now, and it should look like this. But now you know what all of it means!
Pushing to a Remote Git Repository like Github
Pushing to a repo is even easier than that.
- git status – You should always check to see how things look and to make sure you’re on the correct branch.
- git push
- Enter your username and password for Github – Be aware, the password field will remain empty, even as you type. It’s okay. Just type it out and hit enter. If you used SSH, you will skip this step.
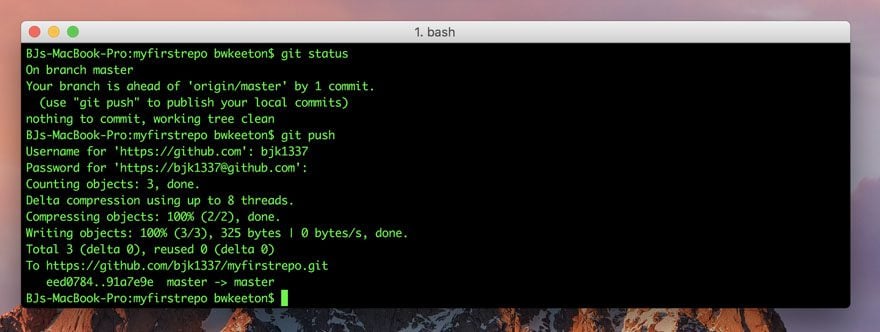
You can go to your Github account and check the repo, and your files will be there, commit messages and all!
Branching and Merging
The final two commands you’ll need to be familiar with deal with branching and merging. Like I said above, working on a branch keeps the main codebase safe, and once your changes are all dandy, you can merge it all back together.
They can be a little tricky, so it may just take some prodding to get them to play nice.
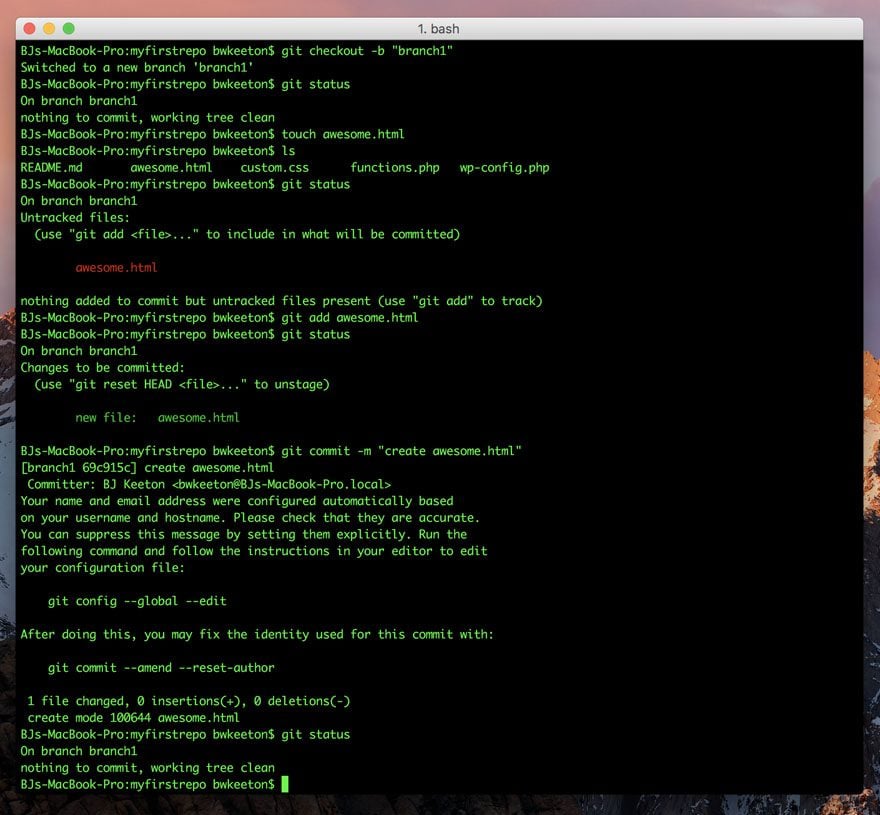
- git checkout -b “branch1” – This command will both create a new branch that you title and swap you over to it as your working branch. It combines both the git checkout and git branch commands into one handy-dandy line of code.
- touch awesome.html – this is just a filler command to create a new html file that I will merge back into the master.
- And like before, you will git status, git add awesome.html, git commit -m “create awesome.html”
- git status again will let you see that everything is as it should be.
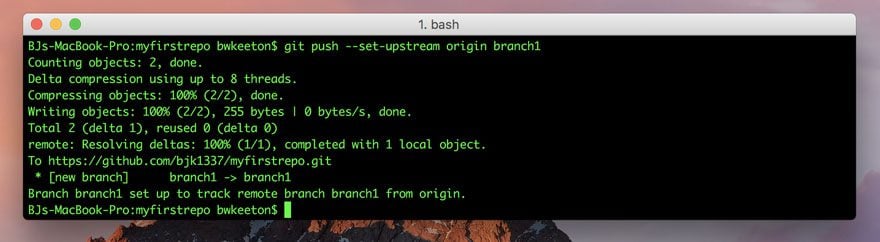
If you try to push it before you merge, you will get a message that you need to set the repo’s origin. Origin is a strange naming convention for what your computer considers the remote repo. So basically, you’re just telling it that, yes, it’s okay to push this branch to Github like it did the master. Here’s a good thread on git origin from Stack Overflow.
With that out of the way, it will tell you that it went to branch1 –> branch1.
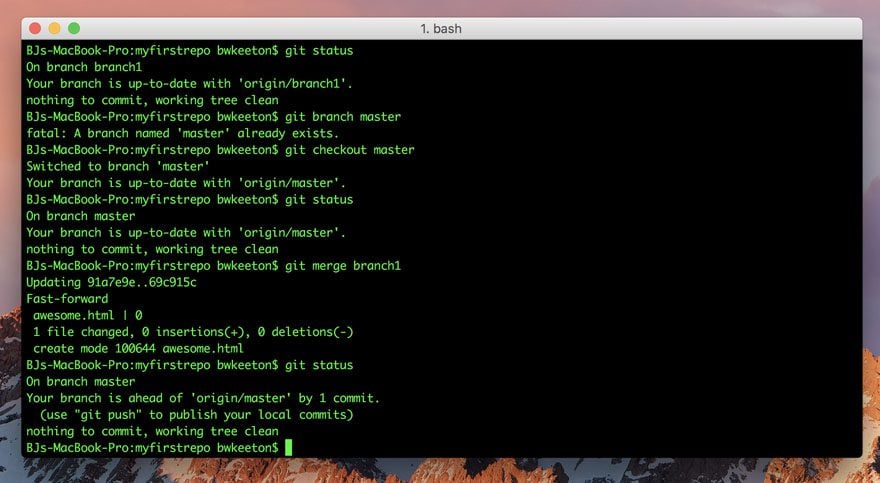
You can switch back to the master branch with git checkout master (there’s no checkout -b this time because you only use that on creation of a new branch, not swapping. I got my commands mixed up in the screenshot below and tried git branch master. It didn’t succeed because master already existed.
- git status – As always.
- git merge branch1 – Since everything in that branch is fine, we can go ahead and merge.
- If we git status again, we will see that we’re ahead of origin/master by 1 commit. That means that we haven’t pushed all the changes we’ve made to Github.
- git push to sync things up!
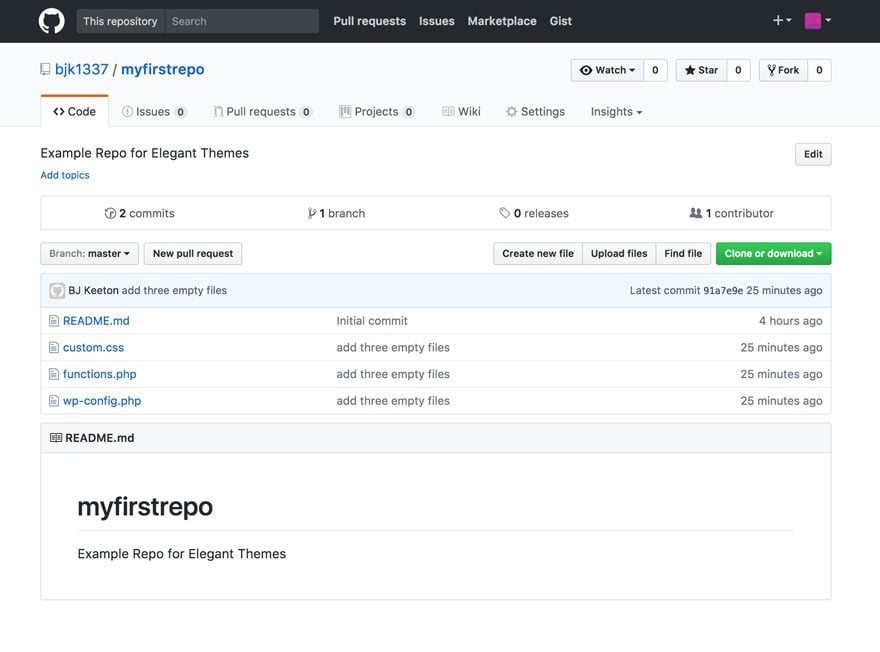
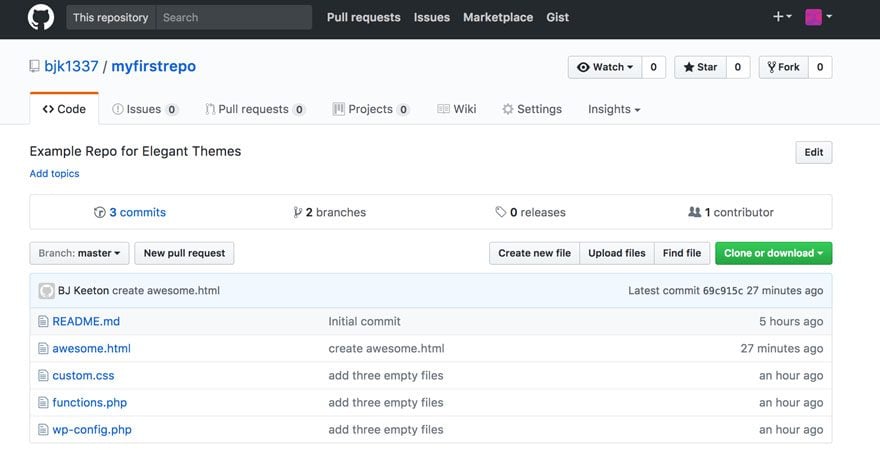
Check your Github account–you will see everything you have done is reflected there. You can see the different commit messages, number of branches and commits that we’ve made, as well as any contributors to the repo and what they did, too.
And that’s it! Congratulations! You just rocked your basic git workflow. You can do way, way, way more intricate stuff than this with git, but this is pretty close to what you’ll probably use on a daily basis when you’re just…gitting started.
Oh, One More Thing!
The Github Repo, myfirstrepo, I’ve used for this article is still live. Feel free to check it out, play with it, fork it, clone it, or whatever you think will get you used to using git. Have fun! (And thanks for bearing with me and all my git puns.)
Article thumbnail image by MchlSkhrv / shutterstock.com


Thank you, I did the tutorial, really impressive!!
Very good!
This is the best GIT guide for beginners that I’ve seen!
D’awwwwwwww. #blush
I really appreciate that, honestly. I mean it. I wanted to write it when I saw the topic because I learned Git the hard way, by myself, and documentation was just terrible. So I am happy to see that it works. 🙂
Great article, thanks. What is your thoughts on storing code in Github vs IDE’s? E.g. Cloud 9, Nitrous etc
I absolutely adore Cloud9 and Nitrous (though I think Nitrous shut down last year, which is sad). I used Cloud9 pretty much exclusively while I was starting out in development because I was bouncing between so many machines and getting bits and pieces of projects finished. Those platforms are fantastic for development if you’re on the move a lot.
The best part, though, is that you’re not limited to either Github or a cloud IDE–you can link up repos to C9 and others as easily as you can a local machine, and the IDE effectively becomes your local environment. 🙂
My poor brain, and yet it whips itself onward. Thank you for distilling that info so humbly and humorously.
You’re more than welcome. I do what I can to make tech info more readable. 🙂 Glad it works!
Thank you so much for this. I needed such an documentation for another Prestashop-Beta project, where updating is only possible with github. I never found out how to do (and had not soo much time to digging deeper into it). Now I have a chance to come back to my previous project and maybe finishing it. Thank you !!
Bitbucket to host private Git Repositories and SourceTree (Git GUI client) is the way to go for designers / plugin hackers. SourceTree’s GUI makes Git significantly easier for non-programmers.
Github looks like a very difficult thing to get your hands into. Was think that it will be just like Wikipedia that also shares knowledge. Anyways good points by Merton but still someone needs to study it.
It can be pretty confounding, honestly. I learned a lot through trial and error, both playing with Bitbucket and Github. I have so many directories and repos across my machines that are full of half-finished Rails apps with dozens of miserably put together commits. It was all a learning process, and there’s no way I could have learned to use Git and Github without getting my hands dirty.
And a lot of people do use it like Wikipedia. There are Github pages where you can blog, and many folks make public repos that use Markdown files to collaborate and put together guides. It’s pretty awesome once you dig in and find that community.
I would also like to know this as well.
Hi B.J. this is a very interesting article for someone new to Git. I’d be extremely interested in how to directly apply Git to WordPress and/or Divi! Thanks!
B.J. great sense of humor and this article was a great introduction to Github.
To the other users asking about how to use it with WordPress & Divi, here is one great piece of Github functionality that wasn’t covered in this article: Github Gists. This functionality is incredibly useful for WordPress and Divi alike. In general, it allows you to take code and display it as you would view it in an editor such as Sublime. This way, you can quickly identify the exact location of the code to edit (for example, in a stylesheet or functions.php where you may be dealing with hundreds of lines of code).
I would also like to know how to apply Git to building with wordpress and divi
One of the big ways is when dealing with files like wp-config.php and functions.php. Setting up a repo for child themes and major site customization is a big help for when something goes wrong so that you can roll it all back.
It helps a lot when you’re working in custom .js files, too, and different stylesheets within Divi. You can also version your Divi Library and the .json files you export so that you can make tweaks and fixes without an absurd number of items in your library or constant downloading, FTPing, and renaming.
You can see a Child Theme repo for Divi that our own Andy Tran put up a couple years ago here: https://github.com/elegantthemes/divi-child-theme-init
Awesome post. I’ve been trying to understand the concept of got amd this just explains a whole lot for me. Thanks again…
I think 2 screenshots need to be swapped – the one showing “Clone or Download” on GitHub, and the one showing the results of running ls (which is the currently next screenshot).
Great article!
Great article, I’ve been meaning to learn Git for awhile now. Just a heads up that some of the links like the BitBucket link and license explanations don’t link properly. Thanks for the great info!
Thanks for letting me know. The links are https://www.bitbucket.com and https://www.choosealicense.com, too.