
You’ve imported a layout that looks great, but it uses its own colors, fonts, and module styles. How do you make it match your site’s design system without rebuilding every section?
That’s where the Divi 5 Inspector comes in. It allows you to open any module, view the active design settings, and replace them with your own Design Variables or Presets. In this tutorial, you’ll learn how to use the Inspector to adopt your existing styles into an imported layout quickly and cleanly.
What Is The Inspector In Divi 5?
Inspect panels allows designers to click any element and instantly view all its properties, including colors, typography, spacing, and effects. Instead of guessing or manually measuring, you get exact values in one organized view.
Divi 5’s Inspector applies this philosophy to WordPress, making it particularly useful when working with imported layouts or pages built before you established a design system. You can quickly identify custom values and replace them with your linked variables and presets.
Right-click any section, row, or module inside the Visual Builder and select Inspect. This opens a panel that reveals all design attributes currently applied to that element, including colors, fonts, backgrounds, media, and presets.
What makes this tool powerful is how it consolidates information. Instead of hunting through multiple tabs and nested panels, you get a clear overview in one place. For example, if you need to view all the colors used within a section, the Inspector displays them instantly and allows you to change them all from that same view.
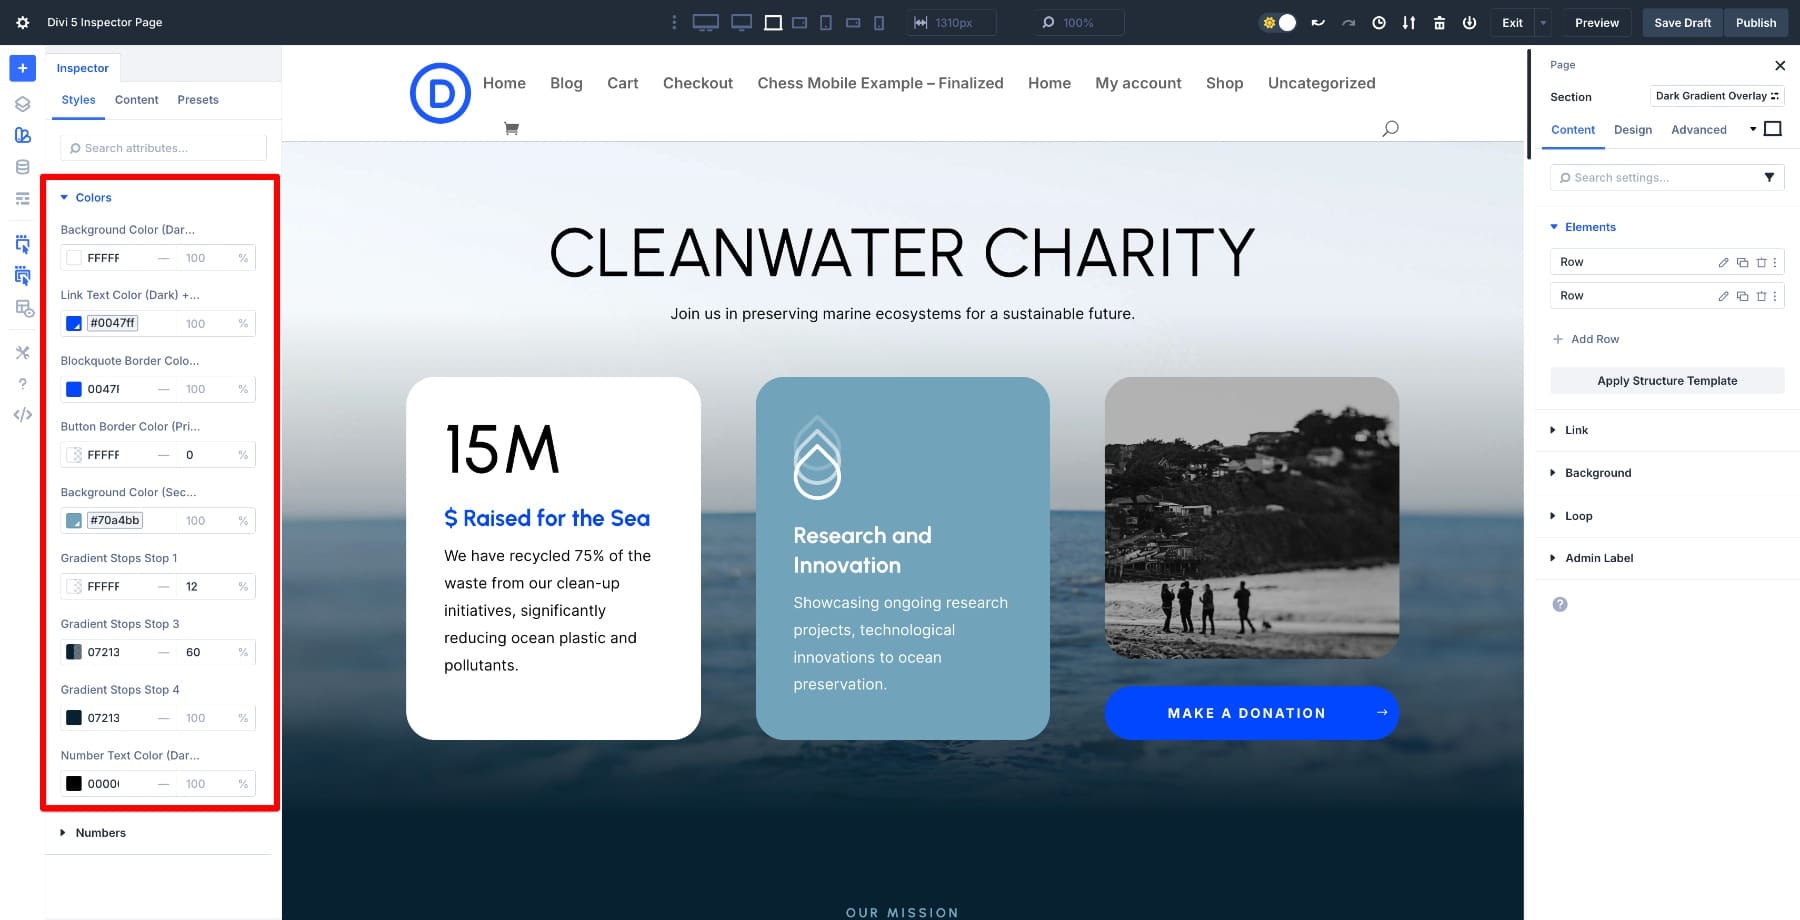
Even better, the Inspector only displays fields that have been modified from Divi’s defaults, so you’re not wading through dozens of unchanged settings. You see exactly what’s been customized and nothing more.
This focused approach means the fields only appear once you’ve changed something or applied a variable or preset. So when you open the Inspector on a fresh module and find it looking sparse, the tool is working as designed. It’s showing you there’s nothing custom to inspect yet.
In essence, the Inspector is your “look under the hood” tool, revealing what has been changed and what’s actively in use, giving you control to transform disconnected design decisions into a unified system. This dramatically speeds up your editing and customization process.
Instead of opening module settings, clicking through multiple tabs, hunting for the right field, and repeating this for every element, see all modified fields in one window and make changes directly from that single panel.
Learn Everything About Divi 5’s Inspector
It’s Part Of An Integrated Design System
The Inspector is even more helpful because it is not a standalone feature. It’s deeply tied to Divi’s larger design system, which includes Design Variables and Option Group Presets.
This connection is what turns the Inspector from a simple inspection tool into a full workflow bridge. You’re not just looking at what’s been customized; you can swap those custom values for linked, reusable ones right from the same panel. That means turning a hard-coded color into your site’s primary variable or applying a preset to make a module follow your global button style.
It’s the kind of integration that enables fast and consistent updating of imported layouts. You can take designs built long before your system existed and make them part of it in minutes without redoing the work.
Next, we’ll open the Inspector, find custom values, and replace them with our Design Variables and Presets to align everything with our global framework. For that, you need the latest version of Divi 5 installed on your WordPress setup.
How To Adopt Design Variables Using The Inspector
Most imported layouts come with static values as styles. Adopting design variables means replacing those static values with your site’s global ones so future changes stay consistent everywhere. To do so, you’ll first create your design framework that includes all your frequently used design styles as variables.
Let’s walk through an example using a color variable. First, we’ll create it and then assign it using the Inspector.
Creating A Color Variable
Open the Variable Manager on the left sidebar and go to the Colors tab.
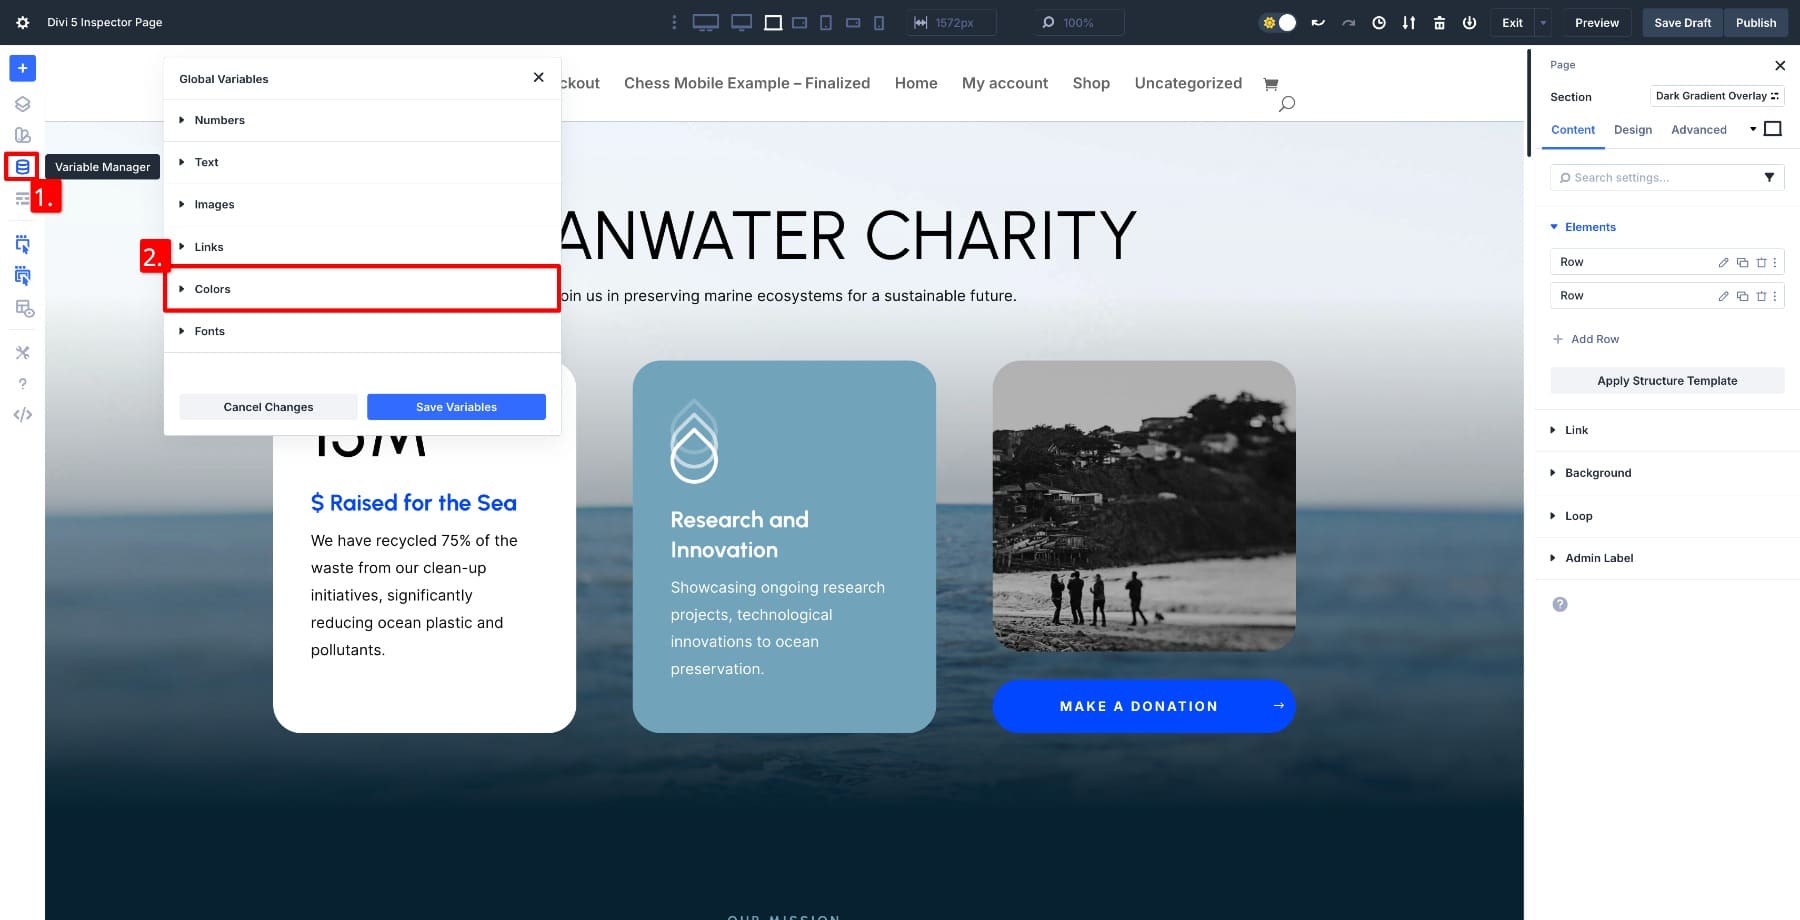
Scroll to click Add Global Color, enter your color’s hex code, give it a name, and save.
Now that the color variable is saved, it’ll be accessible across all color fields. This variable becomes part of your global design system and can be reused across modules.
Applying The Color Variable Using The Inspector
Right-click the module where you want to apply the color and select Inspect. The Inspector will display only the fields that have been modified from their default values.
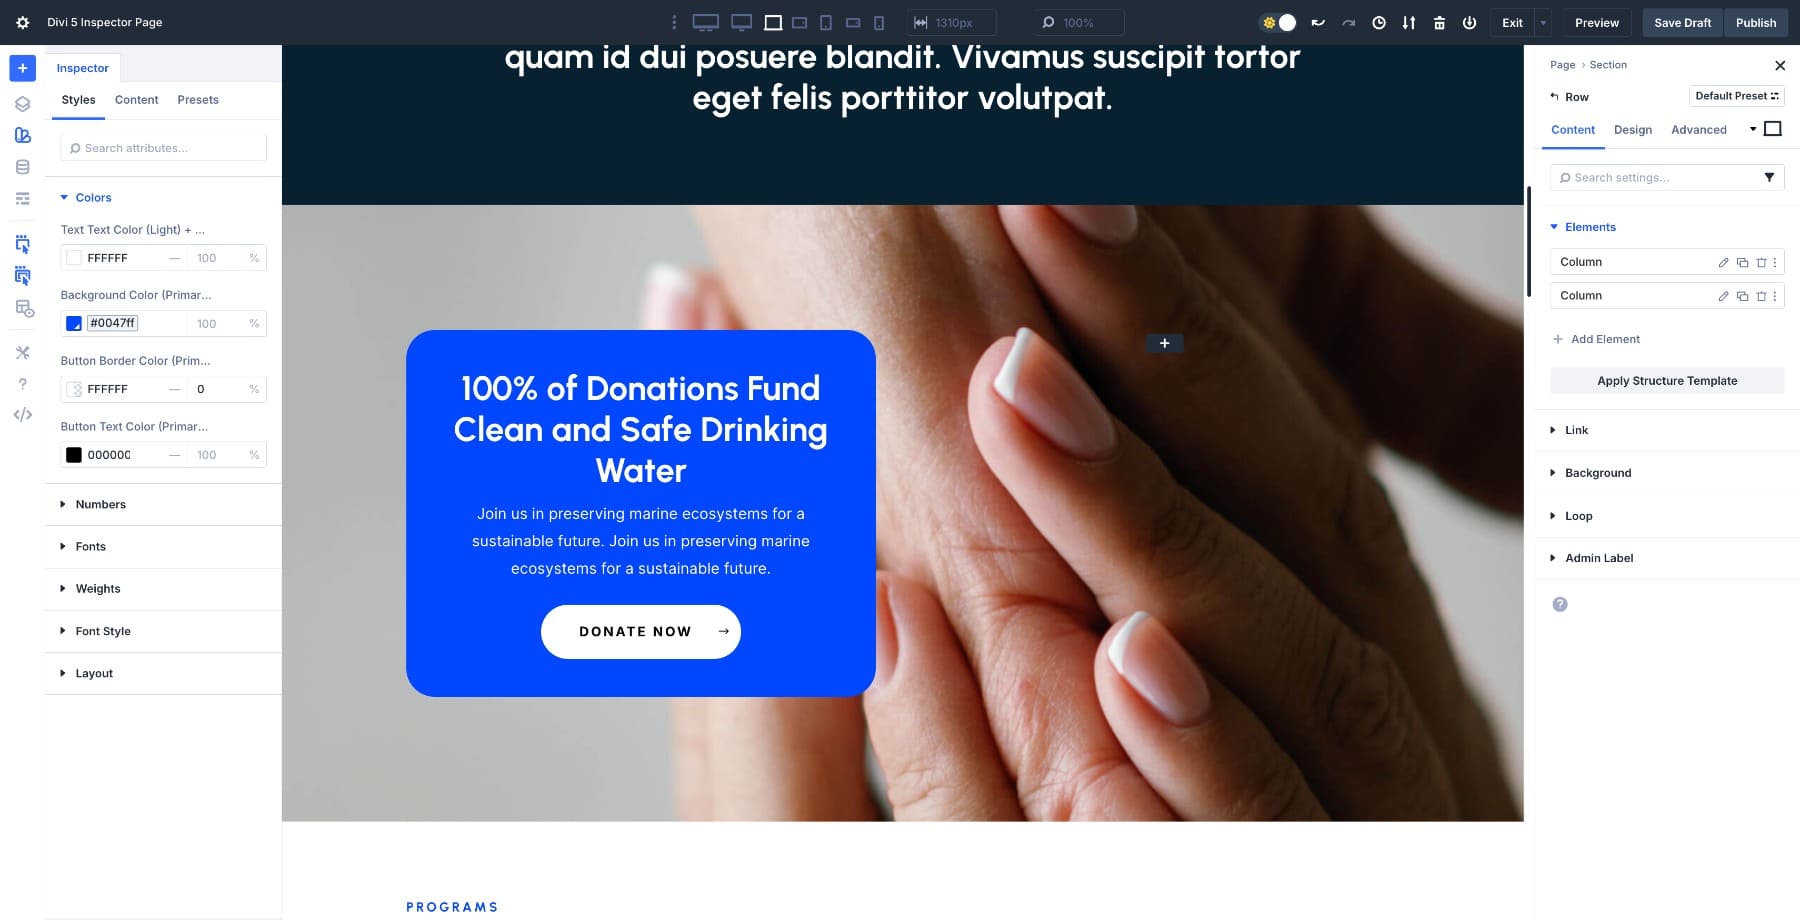
Let’s use our saved variable to change the Background Color of the row’s left column. To do so, hover over the field and locate the Dynamic Content icon.
![]()
Clicking on it opens the list of all saved color variables. Locate your variable and click on it to apply the change. The variable will apply instantly.
Since the column’s background is connected to a design variable, editing makes global changes effortless. Every instance where you used this variable will update when you modify the color variable.
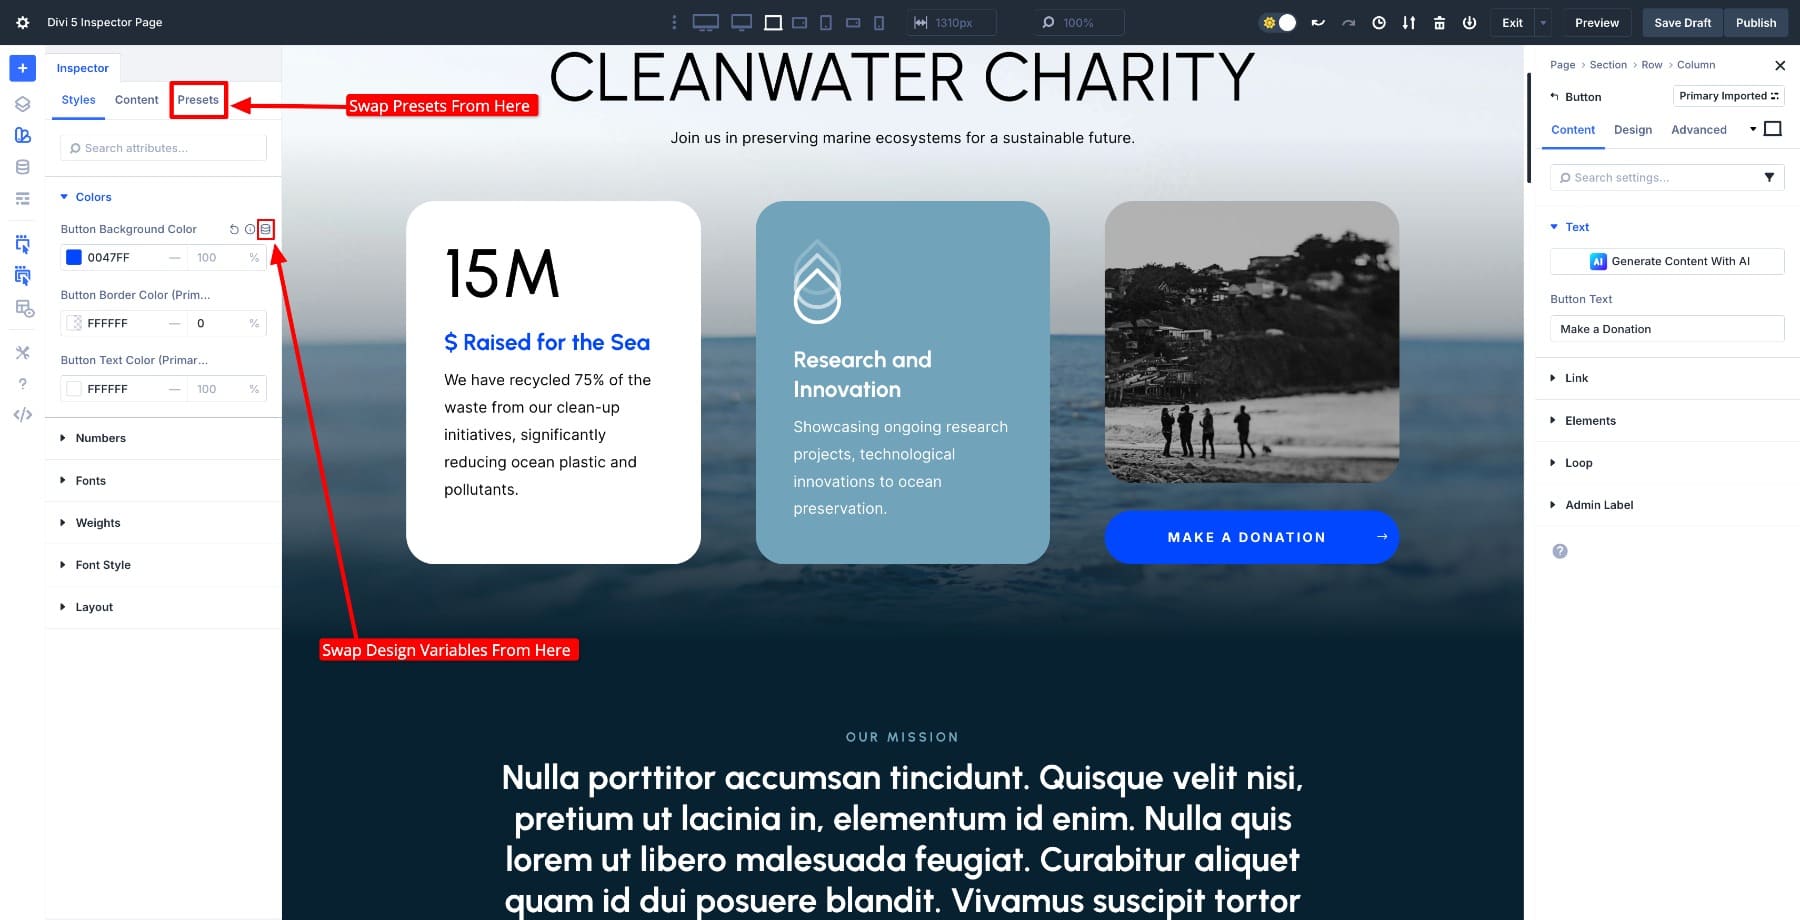
How to Adopt Presets Using The Inspector
Presets work like design templates for your modules. Each preset contains a set of design styles, including colors, fonts, spacing, and borders, that can be reused throughout the site. Once a preset is updated, every module using it automatically reflects the change.
Here’s where the Inspector becomes useful. Even if your layout contains several identical modules, like three Button Modules across a section, the Inspector only lists the preset once. You don’t need to make the exact change three times. Update the preset once, and every instance in that section (and anywhere else it’s used) will update automatically.
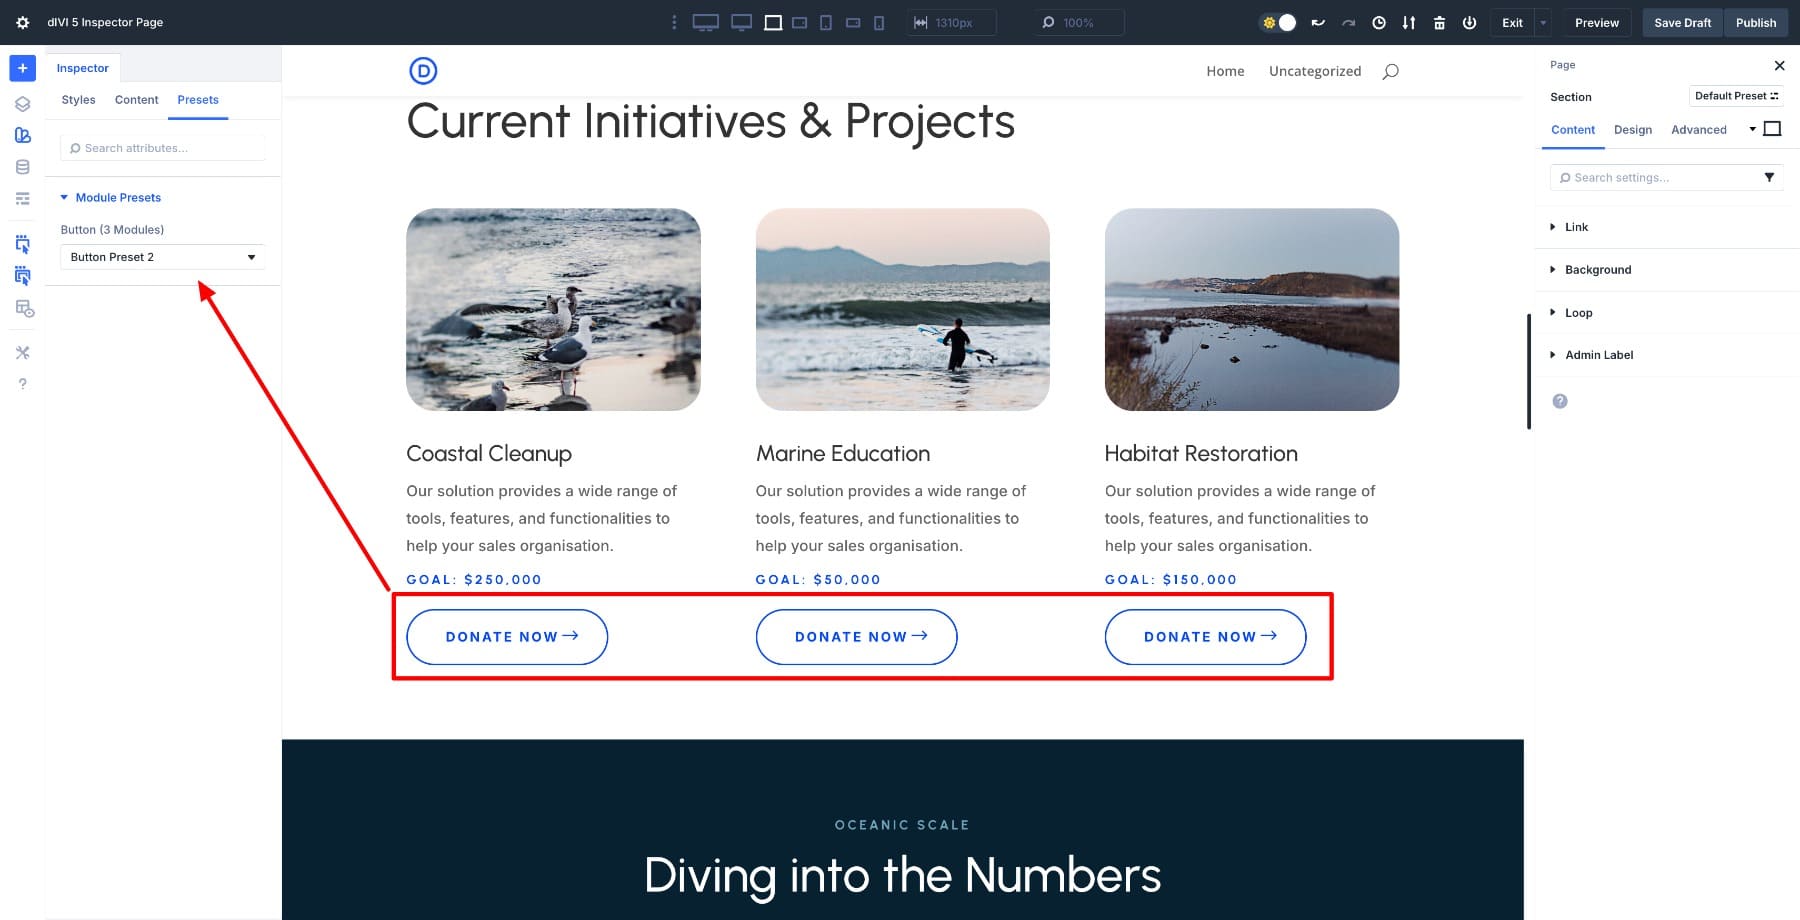
To demonstrate this in action, let’s first create a new preset and assign it to all three buttons with a single click.
Creating A New Preset
First, click the Button and navigate to the Settings panel.
Click the Preset dropdown and select “Create New Preset From Current Styles.” Give it a name, such as Button Preset Current. Let’s add a shadow to our preset and save. Divi will automatically capture all modified fields as part of this new preset, which you can now apply to any other module.
Inspecting the section and switching to the Presets column shows the active presets used in the design. To modify, choose your new preset (Button Preset Current) from the presets dropdown and watch it update live across all three buttons.
Editing A Preset Using Inspector
Another great feature of the Inspector is the ability to edit presets through it. When you switch to the Styles tab and hover over settings, you’ll notice all the instances (defaults and presets) where that setting is used. For example, the blue color (#oo47FF) is used across many presets.
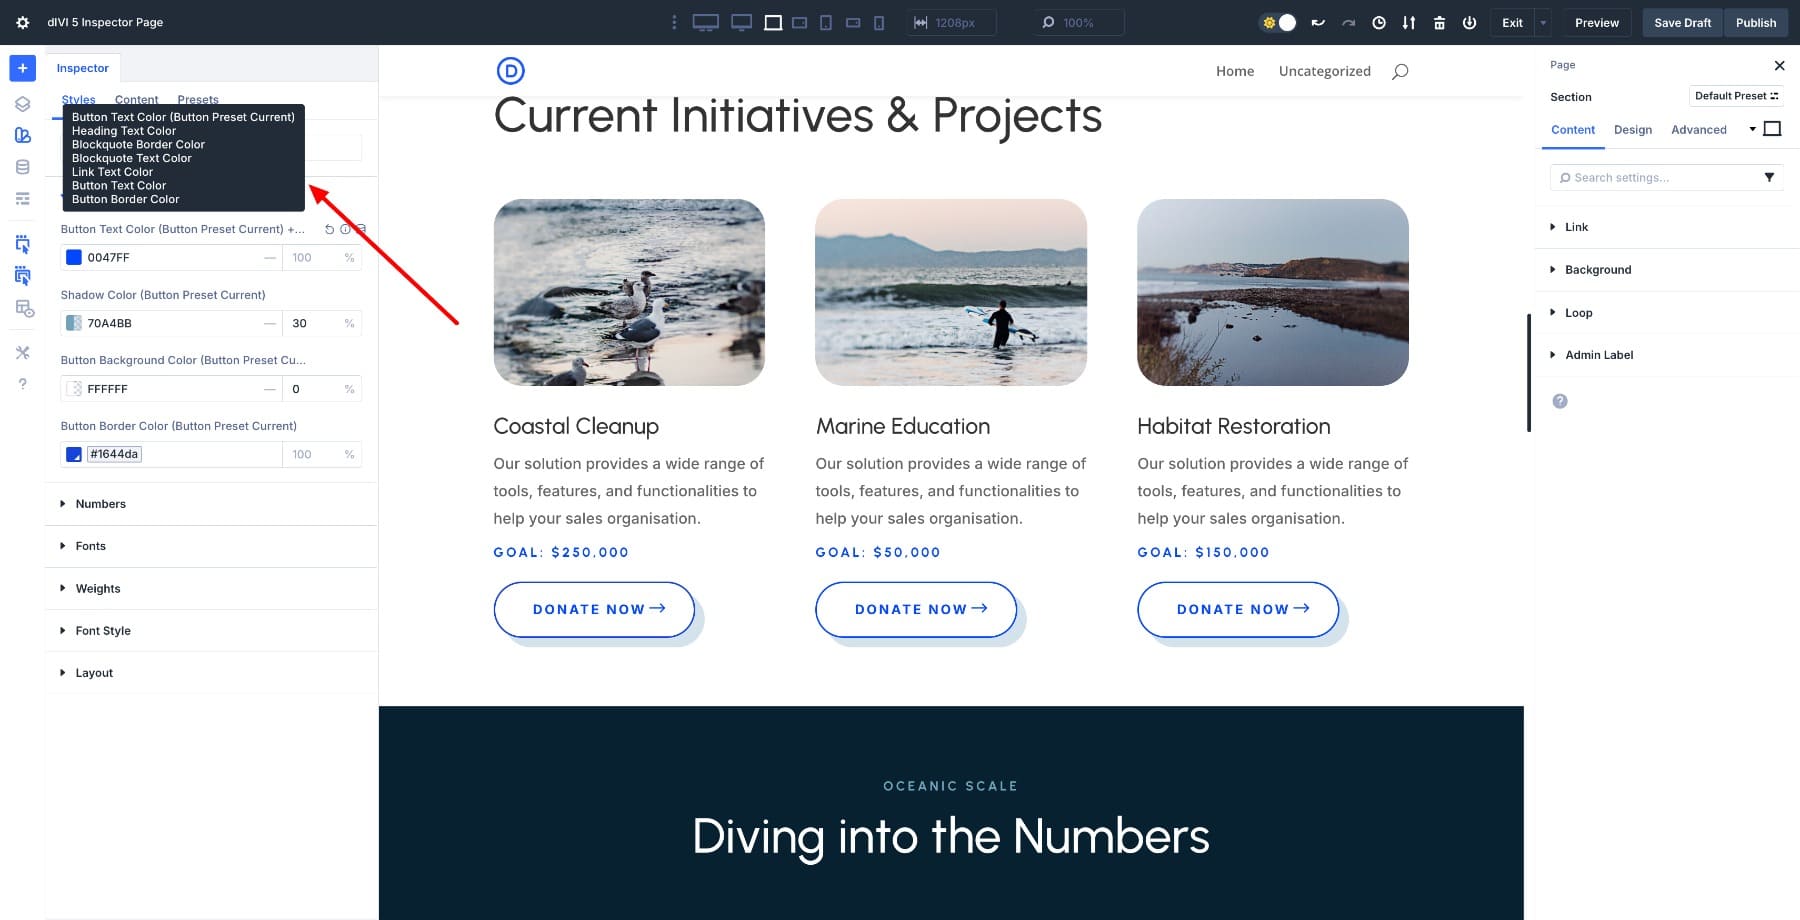
Now, if we change the shadow color from here, other buttons will update as well.
Preset-based design is the fastest way to bring visual consistency across your pages. Combined with the Inspector, they make it easy to identify modules not yet following your presets, apply one instantly, and update your entire site from a single source.
Try The Inspector In Divi 5 Today
The Divi 5 Inspector is more than a design shortcut; it’s the missing link between old layouts and your new design system. By adopting Design Variables and Presets through the Inspector, you turn static, one-off styles into global, reusable assets. What once required opening dozens of modules can now be done from a single panel.
Whether you’re updating colors, typography, or button styles, the Inspector lets you unify your entire layout quickly and confidently, keeping your site consistent and easy to maintain. Download the latest version of Divi 5 beta to access Inspector today!


Leave A Reply