
The Blog Module is Divi’s built-in feed generator that works out of the box. It gives you a fast way to list posts with toggles for titles, images, excerpts, and metadata.
Divi 5’s new Loop Builder takes a different approach. You design the item with any modules, then feed dynamic content into it. Both tools display looped content, yet each shines in different scenarios. Knowing when to use which saves time and prevents frustration. Let’s compare the two.
Subscribe To Our Youtube Channel
Mini Glossary
This is a short set of terms for beginners who are new to the concept of a Loop Builder:
- Custom Post Type (CPT): A custom content type like Products or Courses. It behaves like Posts but can have its own unique fields.
- Custom Field: A field you add to a post, page, or CPT. Examples for a food menu might include price, rating, gluten/allergy declarations, and spiciness levels.
- Repeater Field: A field that stores a list of items inside individual posts. Think about sub-lists that might be valid for a custom piece of content.
- Field Plugins: ACF is the common pick, but Pods, Meta Box, ACPT, and Toolset also work.
If you get lost in some of the details, refer back to this glossary. But we’ll make things simple for you along the way.
Displaying Simple Post & Post Type Feeds With The Blog Module
The Blog Module is built for recognizable blog patterns. It assumes common elements and lets you toggle what shows, keeping setup fast and decisions simple.
Think about how blog posts work in WordPress. Every post shares certain common elements that make it recognizable as blog content. These shared characteristics include:
-
- Post Title
- Featured Image
- Post Content
- URL Slug
- Author
- Categories
- and more
The Blog Module was designed with traditional posts in mind. Titles tell you what the post covers. Featured images add visual draw. Excerpts preview the content. Metadata says who wrote it and when.
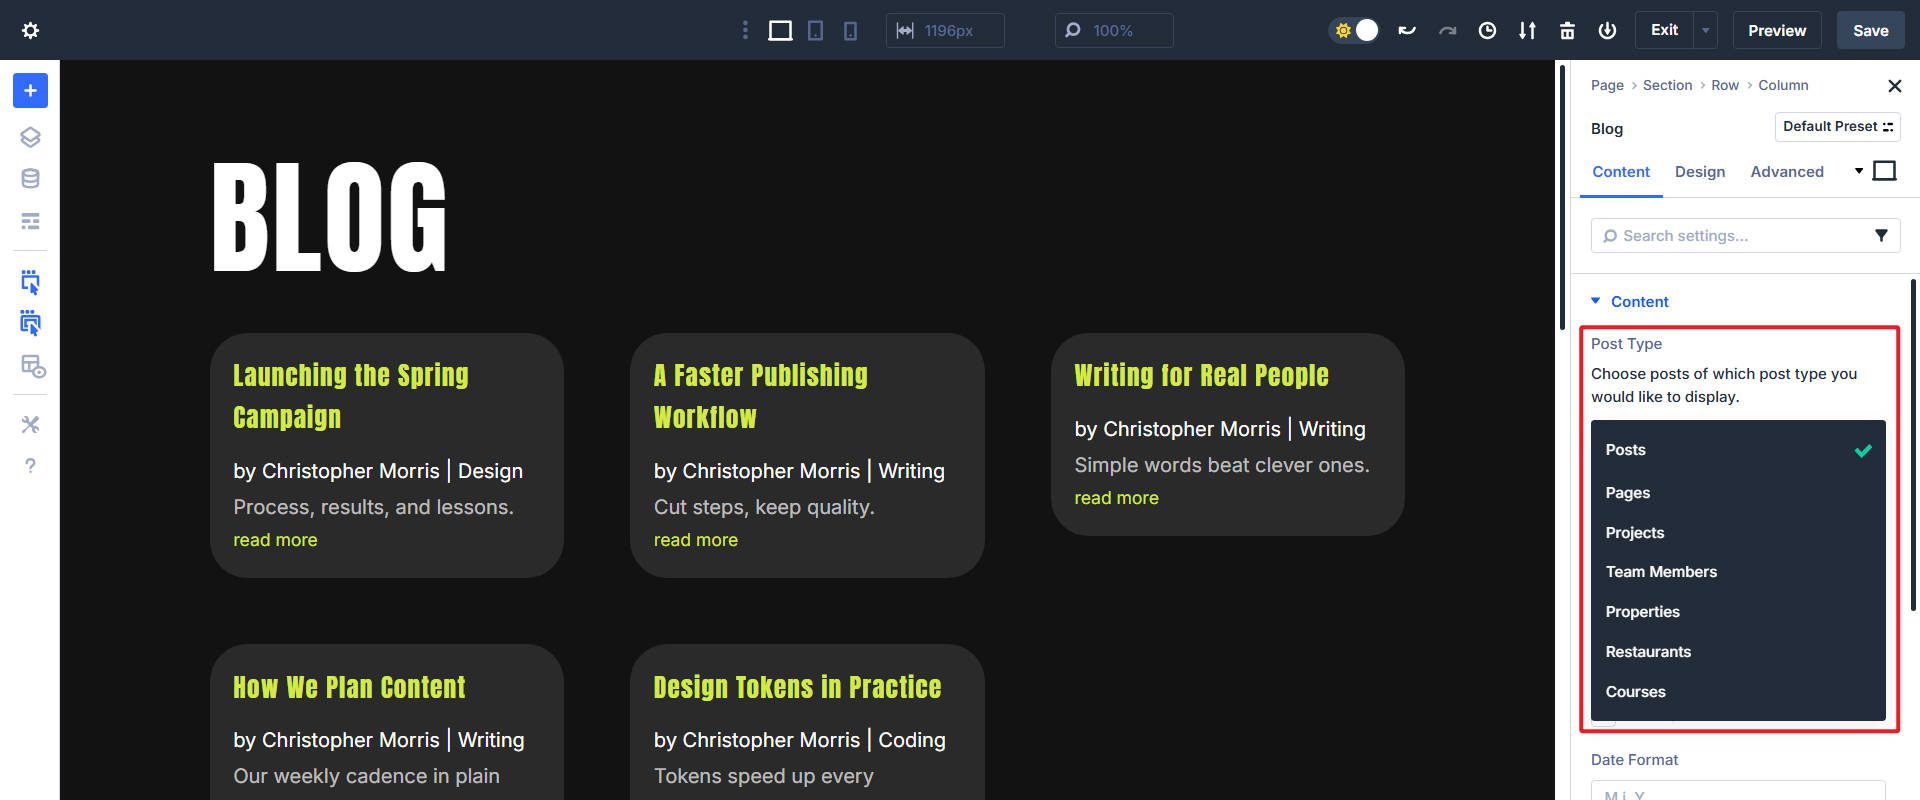
Divi’s Blog Module syncs to these elements automatically. You drop it on the page and pick what to show. The feed appears with no custom query work at all (unless you want to limit what’s being shown, in which case there are built-in querying tools).
The toggle approach makes changes painless. You can hide the author but keep the date, show the image, or skip the excerpt. Small decisions yield quick results.
Custom Post Types: Limited But Functional
The Blog Module can display normal posts and properly register Custom Post Types.
The Blog Module works fine when the CPT mirrors standard post fields. It becomes limiting when you need true custom data. So, a Team Member CPT works when things are kept simple.
- The name maps to the title.
- A headshot/avatar maps to the featured image.
- A bio maps to content.
The Blog Module handles this situation with ease.
Custom Fields
Limitations appear with any fields that default posts don’t share.
Social links, certifications, or years of experience won’t appear in the Blog Module because it was built for the standard fields found on default WordPress blog posts. The module has no toggle for those custom fields.
Custom Layouts
Layout control is also slightly constrained; the module packs elements inside a fixed structure in a fixed order. You can’t reorder the title and image unless you use custom CSS. You can manage the layout of each blog card via flexbox or block, but child items (the cards) don’t have Sizing settings for child flexbox control (like shrink to fit or grow to fill).
The Blog Module is excellent and fast to use for standard card layouts. If you get a bit of a creative bug, you might find yourself looking for something more custom.
Custom Post Types + Custom Fields Using Loop Builder
Divi’s Loop Builder offers you a different approach to displaying dynamic content. Instead of working within the constraints of a single module with predetermined elements, Loop Builder allows you to construct your content display from individual Divi Modules arranged exactly as you envision them.
Using the Loop Builder requires more thought and preparation, but you won’t be limited in the ways you were with the Blog Module. With the Blog Module, you work within existing constraints and make the best of predetermined options. With Loop Builder, you start with a blank canvas and construct exactly what you need using any combination of Divi Modules.
How Loop Builder Works
Loop Builder is not a single module. It is a container with your chosen modules inside it. When the container is set to “Loop,” it repeats itself for each matching result. Inside the container, you can place Image, Heading, Text, and Button modules.
You bind the content of each of those modules to the correct token. Divi’s UI makes this pretty simple. The Image points to the featured image. The Heading points to the title. The Button links to the post URL.
This modular approach gives you structure and spacing control. You can put images above or beside titles. You can also add two text blocks for two custom fields. This way, you can build the card you need, not a card that is pre-configured via a module.
Examples With Custom Post Types And Custom Fields
Let’s make this concrete with a couple of quick scenarios. We’ll keep the pattern and swap the fields. Let’s use the card design from our previous example and see how it can be adapted using custom post types and custom fields.
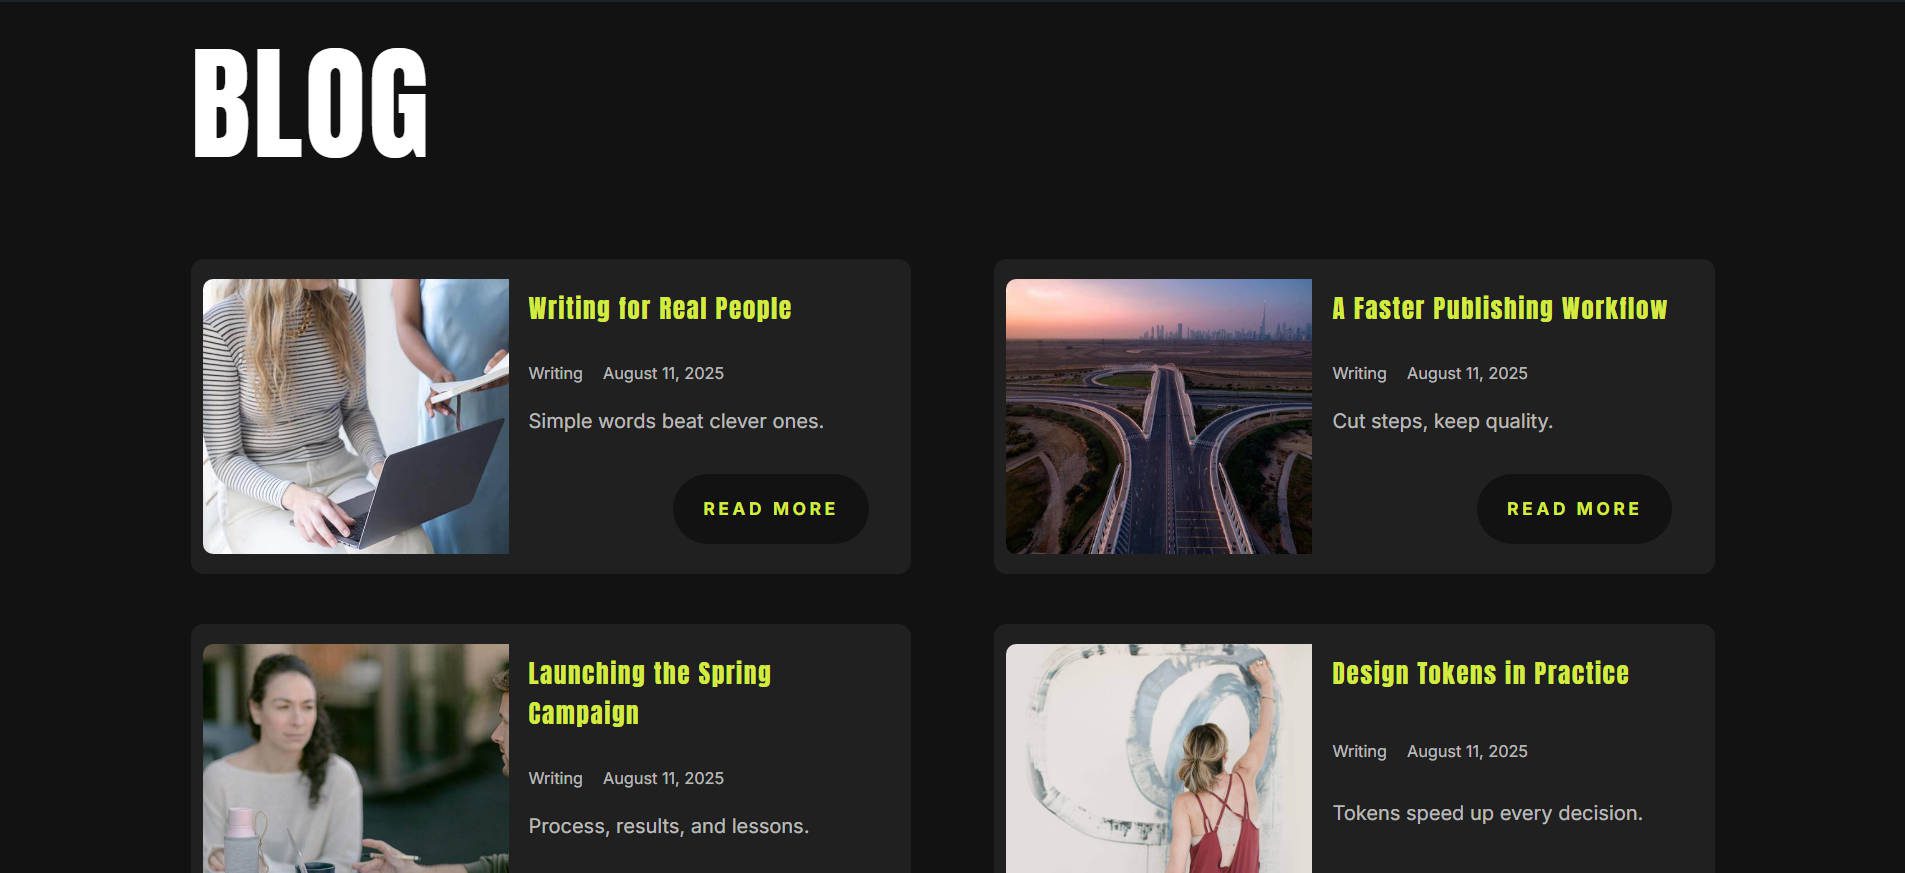
First, build a custom Loop for standard blog posts. Use the stand Posts ‘post type’ with the standard fields for title, category, publish date, and feature image. Map each to the respective module in your design. These use standard post fields but are arranged in a unique layout.
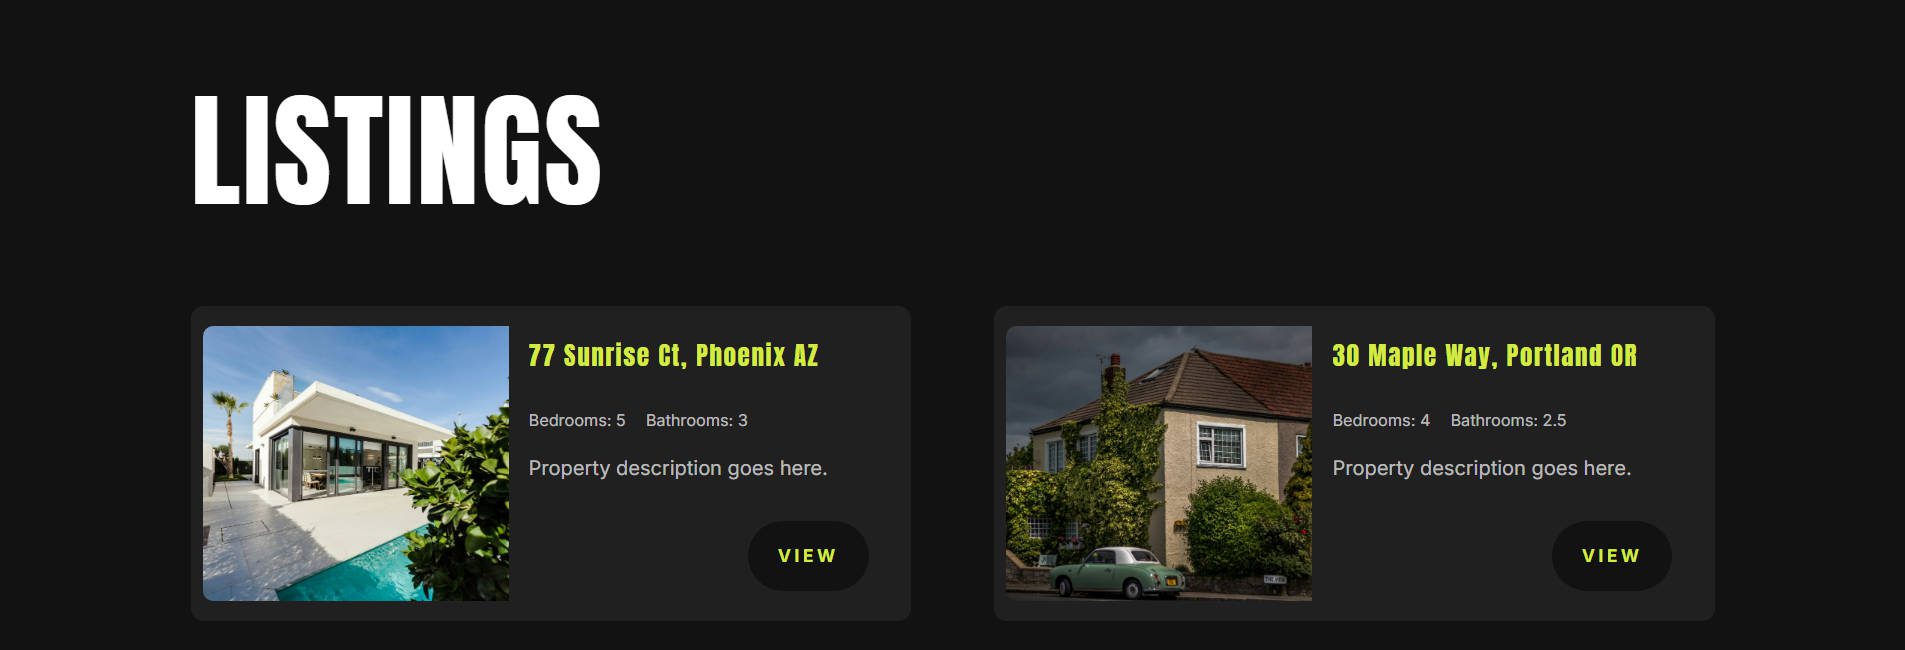
We can do something similar for some simple real estate listings. Using the same card layout, we can populate content from our custom post type with the heading assigned to the property title, Text Modules assigned to bedrooms, bathrooms, and property description, and a Button bound to the property listing URL.
The end result looks like our blog card, but uses the Loop Builder’s ability to assign content from Custom Fields and Custom Post Types.
All this talk of CPTs, how do you make those? Advanced Custom Fields (ACF) is the go-to choice here. Pods, Meta Box, ACPT, and Toolset also create fields that Loop Builder can read. Use what fits your budget, experience, and stack.
A note for real estate websites: You’ll want to use a dedicated plugin that pulls listings from an IDX into WordPress as a CPT. That way, you have fresh data and minimal manual work (no one wants to manually enter properties every morning).
Flexbox For Custom Layouts
Flexbox pairs naturally with the Loop Builder. You can use it at two levels for a clean, responsive structure without custom CSS.
First, style the outer loop container. Select the loop parent container. Turn on Flex layout. Set direction to Row. Enable Wrap if you want multiple flex-rows. Set Gap to control spacing between items. Then, adjust the sizing of the child container where your loop sits using the Sizing options. You can create a responsive and attractive layout for your looped elements between the container Flex controls and the child Flex controls.
Second, style the inner card layout. Select the root container inside the loop item (the Column or Group Module, for instance). In Layout options, set Flex direction to Row if you want some elements side by side. Set the width of the image module to take up about half the space in the container. Let the text area (in this case, a Group container with various modules inside) fill the rest (Grow to Fill in Group Module Sizing options).
You can arrange the various containers or modules however you want. You aren’t locked into a preconfigured layout. Here we put the Title in the left Group and set the right group to Flex Column. This gives us a subtle yet unique change of layout. There really is no shortage of possibilities.
Choosing The Right Tool For Your Project
This is less about raw features and more about finding the right fit. Pick the fastest path that meets the requirement. Switch tools when the need changes. Sometimes the Blog Module will do the trick, but you have a strong pivot with the Loop Builder when it doesn’t.
When The Blog Module Is Ideal
Reach for the Blog Module when content follows standard post patterns. Title, featured image, excerpt, and basic meta are its sweet spot. Basic news sites, company updates, and simple portfolios qualify. Visitors expect a conventional layout, and you may want a reliable solution with minimal setup.
With the Blog Module, you can ship a working feed in minutes. Fewer moving parts also mean fewer chances to break things (or get confused).
Non-technical users who might still be lost on the concept of a “loop” will still heavily rely on the Blog Module. It’s a great tool and should absolutely be used.
When Loop Builder Becomes Essential
Use Loop Builder when you need fields that posts don’t have, or when your card structure doesn’t match a stock pattern. Ecommerce, real estate, and education are typical industries that tend to need more customization. Each needs details that live in custom fields. When you are working with more content or more types of content, layouts tend to need more flexibility.
Use Loop Builder when content relationships get complex. You may need to mix post types in one view and show content from repeaters.
Build Your Own Blog Module Layout With Divi 5
Divi’s Blog Module is still the fastest way to ship a standard feed. The Loop Builder unlocks custom cards, custom fields, and repeaters. The Loop Builder can also be customized and molded into the exact layout and design that you have in mind, while the Blog Module has some limitations there.
The best part about this decision is that you can keep both in your toolkit and choose based on the job. Divi 5 is coming together and is more powerful (and stable) than ever. If you haven’t used it, give it a try on your next website. The Public Beta is just around the corner, and that means existing Divi sites are close to getting the go-ahead to test migrations of existing websites.


Leave A Reply